redhat 8.7 安装oracle 11g-11.2.0.4
- 1、写在前面:这篇文章最后安装失败了。这是一次失败的尝试,仅做记录。结论是RHEL 8不支持Oracle 11g-11.2.0.4 安装,后续再研究怎么跑起来。
- 1、数据库下载和安装文档
- 1.1、查看oracle 11g 适合安装的linux版本
- 1.2、安装文档
- 1.3、license种类解释( XE版 标准本 个人版 企业版)
- 1.4、在安装完oracle后再创建数据库
- 1.5、DBA的文档
- 1.6、Automatic Storage Management Administrator's Guide
- 1.7、数据库备份恢复手册
- 1.8、Overview of Oracle Database Installation
- 1.9、升级手册(升级到11.2)
- 2、安装前准备
- 2.0、硬件要求
- 2.0.1、/dev/shm 大小要求
- 2.0.2、文件描述符大小要求
- 2.0.3、RAM大小
- 2.0.4、SWAP大小
- 2.0.4、/tmp大小
- 2.0.5、磁盘大小
- 2.0.6、显示器分辨率大小
- 2.1、软件要求
- 2.1.1、操作系统要求
- 2.1.2、内核要求
- 2.1.3、依赖包安装
- 2.2、Installation Fixup Scripts
- 2.3、端口范围-Verifying UDP and TCP Kernel Parameters
- 2.4、Installing the cvuqdisk Package for Linux
- 2.5、配置/etc/hosts文件
- 2.6、Disabling Transparent HugePages
- 2.7、创建用户和组
- 2.8、创建安装目录
- 2.9、Checking Resource Limits for the Oracle Software Installation Users
- 2.10、Configuring Kernel Parameters for Linux
- 2.11、Setting the shell profile
- 2.12、 Configuring Oracle Software Owner Environment
- 3、安装
- 3.1、直接使用oracle用户进行ssh登录
- 3.2、执行安装程序
- 3.2.1、runInstaller
- 3.2.2、先决条件检查报错
- 3.2.3、开始安装
- 3.2.4、等待安装完成
- 3.2.4、报错 INFO: //usr/lib64/libaio.so.1: undefined reference to `__stack_chk_fail@GLIBC_2.4'
- 报错
- f
- 安装成功
- 4、为什么不能永远停留在11g
1、写在前面:这篇文章最后安装失败了。这是一次失败的尝试,仅做记录。结论是RHEL 8不支持Oracle 11g-11.2.0.4 安装,后续再研究怎么跑起来。
1、数据库下载和安装文档
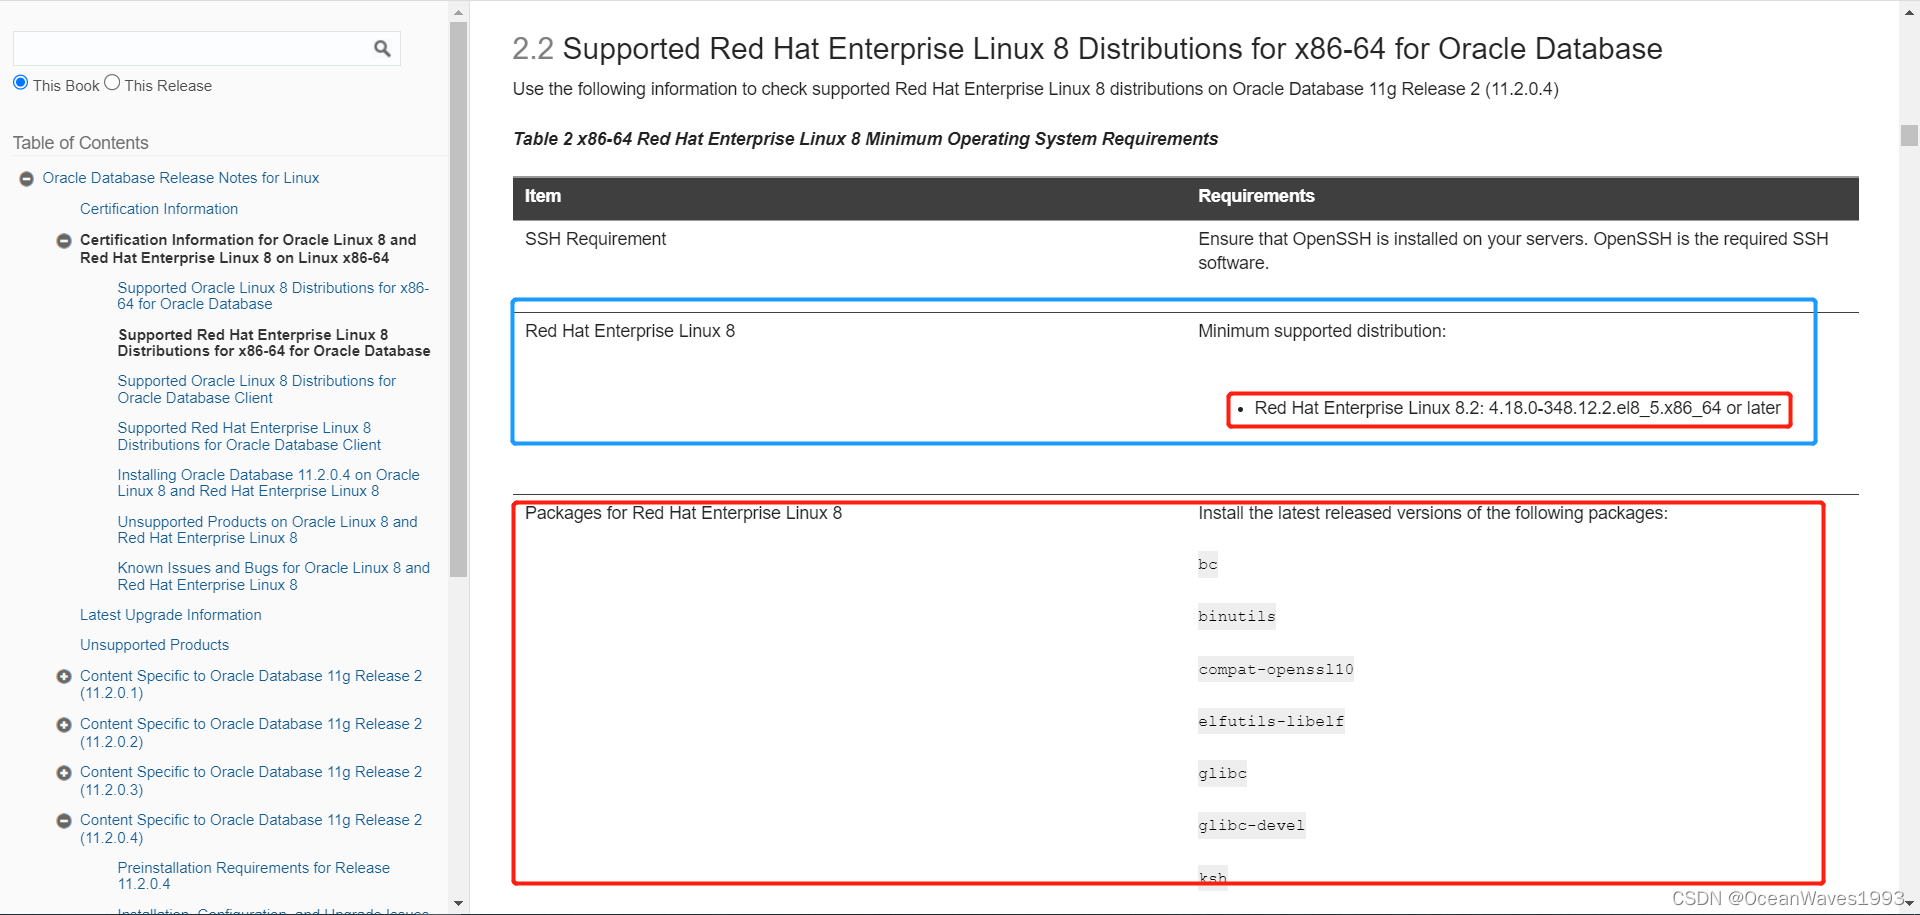
1.1、查看oracle 11g 适合安装的linux版本
https://docs.oracle.com/cd/E11882_01/relnotes.112/e23558/toc.htm#CHDHIFDE
Red Hat Enterprise Linux 7和8 可以安装
redhat 8版本要求:Red Hat Enterprise Linux 8.2: 4.18.0-348.12.2.el8_5.x86_64 or later
1.2、安装文档
https://docs.oracle.com/cd/E11882_01/install.112/e47689/toc.htm
1.3、license种类解释( XE版 标准本 个人版 企业版)
各种不同的oracle版本 XE版 标准本 个人版等
https://docs.oracle.com/cd/E11882_01/license.112/e47877/toc.htm
1.4、在安装完oracle后再创建数据库
查看 Oracle Database 2 Day DBA
https://docs.oracle.com/cd/E11882_01/server.112/e10897/install.htm#ADMQS023
完整文档:https://docs.oracle.com/cd/E11882_01/server.112/e10897/toc.htm
1.5、DBA的文档
https://docs.oracle.com/cd/E11882_01/server.112/e25494/toc.htm
1.6、Automatic Storage Management Administrator’s Guide
https://docs.oracle.com/cd/E11882_01/server.112/e18951/toc.htm
See also Managing Oracle ASM Users with Oracle Enterprise Manager in
Oracle Automatic Storage Management Administrator’s Guide for information about the ASMSNMP user
1.7、数据库备份恢复手册
数据库备份恢复手册: https://docs.oracle.com/cd/E11882_01/backup.112/e10642/toc.htm
1.8、Overview of Oracle Database Installation
安装过程中的各个选项释义:https://docs.oracle.com/cd/E11882_01/install.112/e47689/install_overview.htm#LADBI1042
1.9、升级手册(升级到11.2)
https://docs.oracle.com/cd/E11882_01/server.112/e23633/upgrade.htm#UPGRD003
2、安装前准备
2.0、硬件要求
2.0.1、/dev/shm 大小要求
/dev/shm > MEMORY_MAX_TARGET and MEMORY_TARGET parameters for each Oracle instance on the computer.
2.0.2、文件描述符大小要求
The number of file descriptors for each Oracle instance must be at least 512*PROCESSES. The limit of descriptors for each process must be at least 512.
每个进程需要至少512个。
2.0.3、RAM大小
RAM>2G
2.0.4、SWAP大小

2.0.4、/tmp大小
/tmp > 1G
2.0.5、磁盘大小

2.0.6、显示器分辨率大小
显示器分辨率 > 1024 x 768

2.1、软件要求
2.1.1、操作系统要求
RHEL 7
参考:https://docs.oracle.com/cd/E11882_01/install.112/e47689/pre_install.htm#LADBI1106
2.1.2、内核要求
不用管 ,操作系统满足一般这个可以满足。
https://docs.oracle.com/cd/E11882_01/install.112/e47689/pre_install.htm#LADBI1110
2.1.3、依赖包安装
yum -y install bc binutils compat-openssl10 elfutils-libelf gcc gcc-c++ glibc glibc.i686 glibc-devel glibc-devel.i686 ksh libaio libaio-devel libaio-devel.i686 libcap libXrender libX11 libXau libXi libXi.i686 libXtst libXtst.i686 libgcc libgcc.i686 libnsl libstdc++ libstdc++.i686 libstdc++-devel libstdc++-devel.i686 libxcb libibverbs make policycoreutils policycoreutils-python-utils smartmontools sysstat
参考:https://docs.oracle.com/cd/E11882_01/install.112/e47689/pre_install.htm#LADBI1111
--------------------------------
!!!!!!!!!!重要的事情!!!!!!!!
!!!!!!!!!!重要的事情!!!!!!!!
!!!!!!!!!!重要的事情!!!!!!!!
--------------------------------
注意这些包的版本需满足下面所述,不能高于下面版本。如果在link binaries过程安装出现问题,
先确认是不是安装的这些包的版本不是下述这些版本。
binutils-2.23.52.0.1-12.el7.x86_64
compat-libcap1-1.10-3.el7.x86_64
compat-libstdc++-33-3.2.3-71.el7.i686
compat-libstdc++-33-3.2.3-71.el7.x86_64
gcc-4.8.2-3.el7.x86_64
gcc-c++-4.8.2-3.el7.x86_64
glibc-2.17-36.el7.i686
glibc-2.17-36.el7.x86_64
glibc-devel-2.17-36.el7.i686
glibc-devel-2.17-36.el7.x86_64
ksh
libaio-0.3.109-9.el7.i686
libaio-0.3.109-9.el7.x86_64
libaio-devel-0.3.109-9.el7.i686
libaio-devel-0.3.109-9.el7.x86_64
libgcc-4.8.2-3.el7.i686
libgcc-4.8.2-3.el7.x86_64
libstdc++-4.8.2-3.el7.i686
libstdc++-4.8.2-3.el7.x86_64
libstdc++-devel-4.8.2-3.el7.i686
libstdc++-devel-4.8.2-3.el7.x86_64
libXi-1.7.2-1.el7.i686
libXi-1.7.2-1.el7.x86_64
libXtst-1.2.2-1.el7.i686
libXtst-1.2.2-1.el7.x86_64
make-3.82-19.el7.x86_64
sysstat-10.1.5-1.el7.x86_64
2.2、Installation Fixup Scripts
如果安装过程出现错误,会用到这个功能去自动修复,但是修复完后还是需要手动去确认确实满足了。
参考:https://docs.oracle.com/cd/E11882_01/install.112/e47689/pre_install.htm#LADBI1146
During installation, for certain prerequisite verification failures, click Fix & Check Again to generate a fixup script (runfixup.sh). You can run this script as the root user to complete the required preinstallation steps.
The fixup script:
Checks for and sets kernel parameters to values required for successful installation, including:
Shared memory parameters
Open file descriptor and UDP send/receive parameters
Oracle recommends that you do not modify the contents of the generated fixup script.
Note:

Using fixup scripts does not ensure that all the prerequisites for installing Oracle Database are met. You must still verify that all the preinstallation requirements are met to ensure a successful installation.
2.3、端口范围-Verifying UDP and TCP Kernel Parameters
编辑/etc/sysctl.conf
vi /etc/sysctl.conf
修改这行为: net.ipv4.ip_local_port_range = 9000 65500
如没有这行就添加一行
net.ipv4.ip_local_port_range = 9000 65500
使得修改生效
sysctl -p /etc/sysctl.conf

端口最小值大于9000 是为了防止熟知端口被使用到
最大值尽量大
检查当前端口范围
cat /proc/sys/net/ipv4/ip_local_port_range
参考:https://docs.oracle.com/cd/E11882_01/install.112/e47689/pre_install.htm#LADBI1149
2.4、Installing the cvuqdisk Package for Linux
cluster安装才会使用到,单数据库安装忽略。
这个包在 Oracle Grid Infrastructure安装后的目录oracle_home1/cv/rpm中。
参考:https://docs.oracle.com/cd/E11882_01/install.112/e47689/pre_install.htm#LADBI1151
2.5、配置/etc/hosts文件
确保/etc/hosts 文件中含有这一行
127.0.0.1 localhost localhost.localdomain localhost4 localhost4.localdomain4
使用如下命令查看是否含有
grep 127.0.0.1 /etc/hosts

没有的话就编辑/etc/hosts文件加入这一行
127.0.0.1 localhost localhost.localdomain localhost4 localhost4.localdomain4
参考:https://docs.oracle.com/cd/E11882_01/install.112/e47689/pre_install.htm#LADBI1152
2.6、Disabling Transparent HugePages
To check if Transparent HugePages are enabled run one of the following commands as the root user:
cat /sys/kernel/mm/redhat_transparent_hugepage/enabled
或者
cat /sys/kernel/mm/transparent_hugepage/enabled

博主系统是rhel 8.7 不支持设置为never 就不设置了
参考:https://docs.oracle.com/cd/E11882_01/install.112/e47689/pre_install.htm#LADBI1519
2.7、创建用户和组
groupadd --system oinstall
groupadd --system dba
adduser -m --system -g oinstall -G dba --shell /bin/bash oracle
参考:https://docs.oracle.com/cd/E11882_01/install.112/e47689/pre_install.htm#LADBI1161
2.8、创建安装目录
mkdir -p /opt/oracle/product/11.2.0.1.0/dbhome
mkdir -p /opt/oraInventory
chown -R oracle:dba /opt/oracle/
chown -R oracle:dba /opt/oraInventory
2.9、Checking Resource Limits for the Oracle Software Installation Users
vi /etc/security/limits.conf
添加以下内容
oracle          soft    nproc           2047
oracle          hard    nproc           16384
oracle          soft    nofile          1024
oracle          hard    nofile          65536
oracle          soft    stack           10240
oracle          hard    stack           32768
重启系统让配置生效
2.10、Configuring Kernel Parameters for Linux
vi /etc/sysctl.conf
插入如下内容
# ============================

# Oracle 11g

# ============================

# semaphores: semmsl, semmns, semopm, semmni

kernel.sem = 250 32000 100 128

kernel.shmall = 2097152

kernel.shmmni = 4096

# Replace kernel.shmmax with the half of your memory size in bytes

# if lower than 4 GB minus 1

# 6442450944 is 6 GigaBytes (12 GB of RAM / 2)

kernel.shmmax=6442450944

#

# Max number of network connections. Use sysctl -a | grep ip_local_port_range to check.

net.ipv4.ip_local_port_range = 9000  65500

#

net.core.rmem_default = 262144

net.core.rmem_max = 4194304

net.core.wmem_default = 262144

net.core.wmem_max = 1048576

#

# The maximum allowed value, set to avoid overhead and input/output errors

fs.aio-max-nr = 1048576

# 512 * Processes

fs.file-max = 6815744

fs.suid_dumpable = 1

#

# To allow dba to allocate hugetlbfs pages

# 973 is your oinstall group, you can check this id with the grep oinstall /etc/group command

vm.hugetlb_shm_group = 973
2.11、Setting the shell profile
编辑 /etc/profile
vi /etc/profile
添加以下
if [ $USER = “oracle” ]; then
    if [ $SHELL = “/bin/ksh” ]; then
        ulimit -p 16384
        ulimit -n 65536
    else
        ulimit -u 16384 -n 65536
    fi
fi
使生效
source /etc/profile
2.12、 Configuring Oracle Software Owner Environment
指的是oracle用户
su - oracle
vim  ~/.bashrc
插入以下内容
# Oracle Settings

TMP=/tmp; export TMP

TMPDIR=$TMP; export TMPDIR

# Enter your hostname

ORACLE_HOSTNAME=debian; export ORACLE_HOSTNAME

ORACLE_UNQNAME=ORADB11G; export ORACLE_UNQNAME

ORACLE_BASE=/opt/oracle; export ORACLE_BASE

ORACLE_HOME=$ORACLE_BASE/product/11.2.0.1.0/dbhome_1; export ORACLE_HOME

ORACLE_SID=ORADB11G; export ORACLE_SID

PATH=/usr/sbin:$PATH; export PATH

PATH=$ORACLE_HOME/bin:$PATH; export PATH

LD_LIBRARY_PATH=$ORACLE_HOME/lib:/lib:/usr/lib:/usr/lib64; export LD_LIBRARY_PATH

CLASSPATH=$ORACLE_HOME/jlib:$ORACLE_HOME/rdbms/jlib; export CLASSPATH

umask 022
使生效
source ~/.bashrc
3、安装
3.1、直接使用oracle用户进行ssh登录
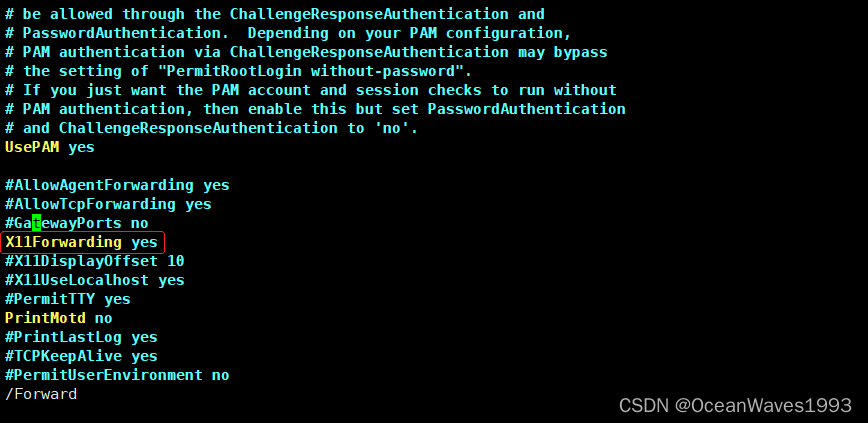
shsell中把ssh连接属性配置成 enable X11Forwarding
vi /etc/ssh/sshd_config
确定有下面这行
3.2、执行安装程序
3.2.1、runInstaller
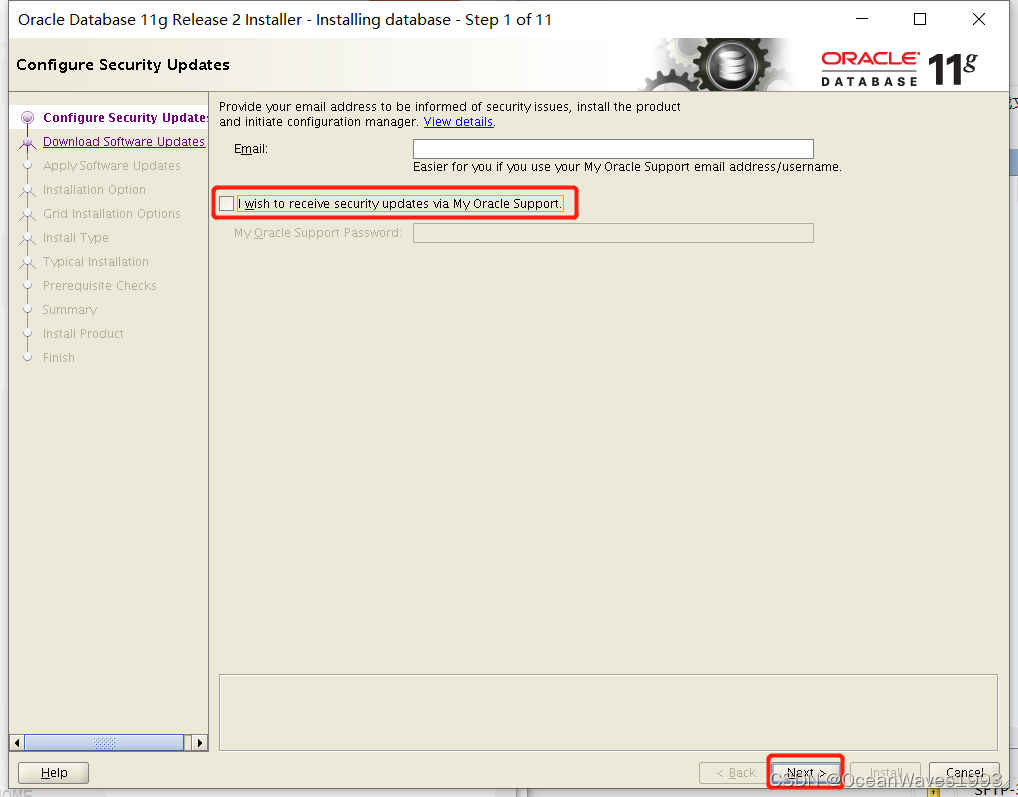
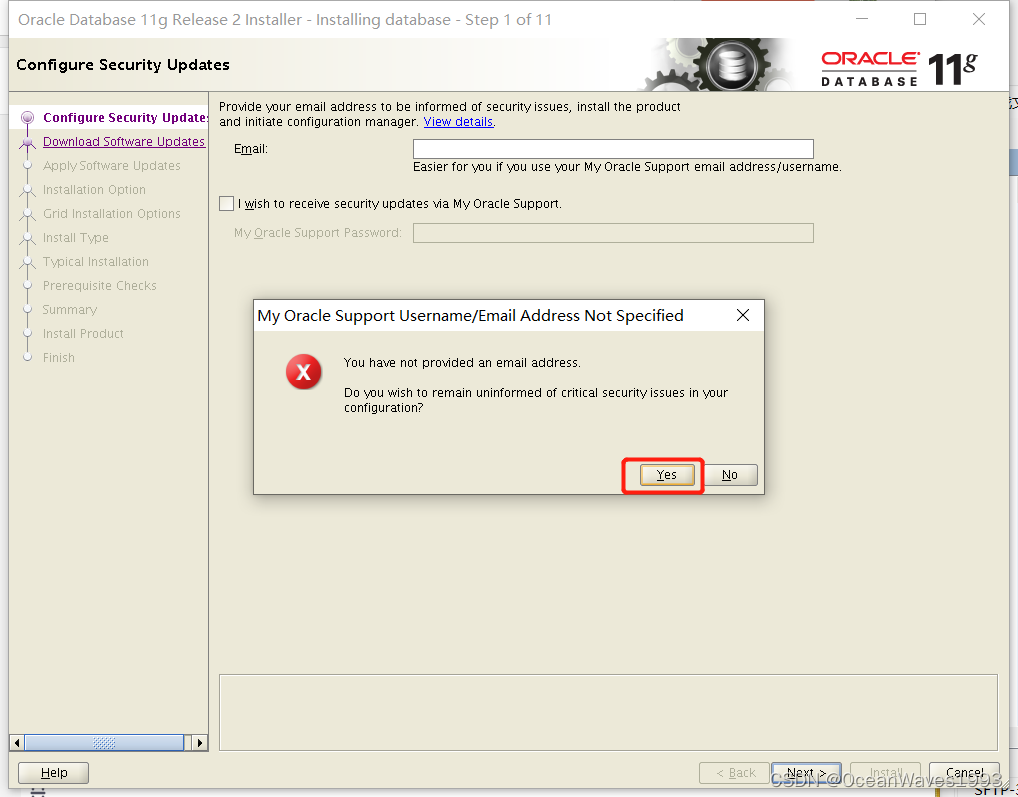
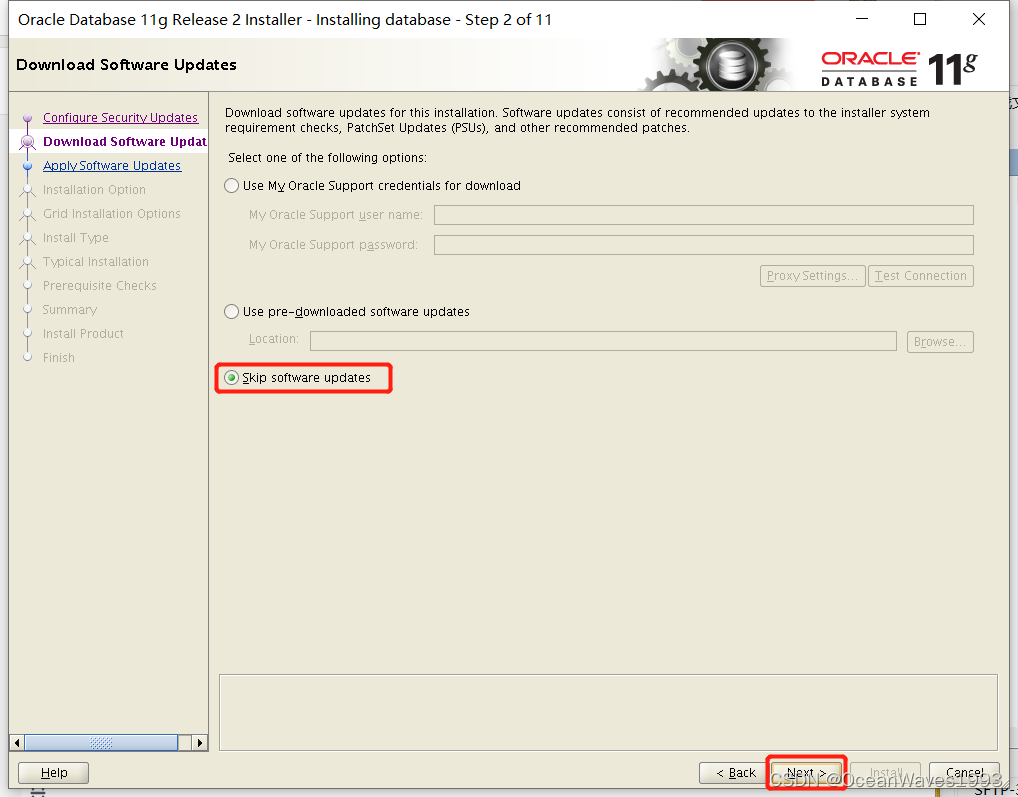
cd /path/to/oracle/database/
./runInstaller
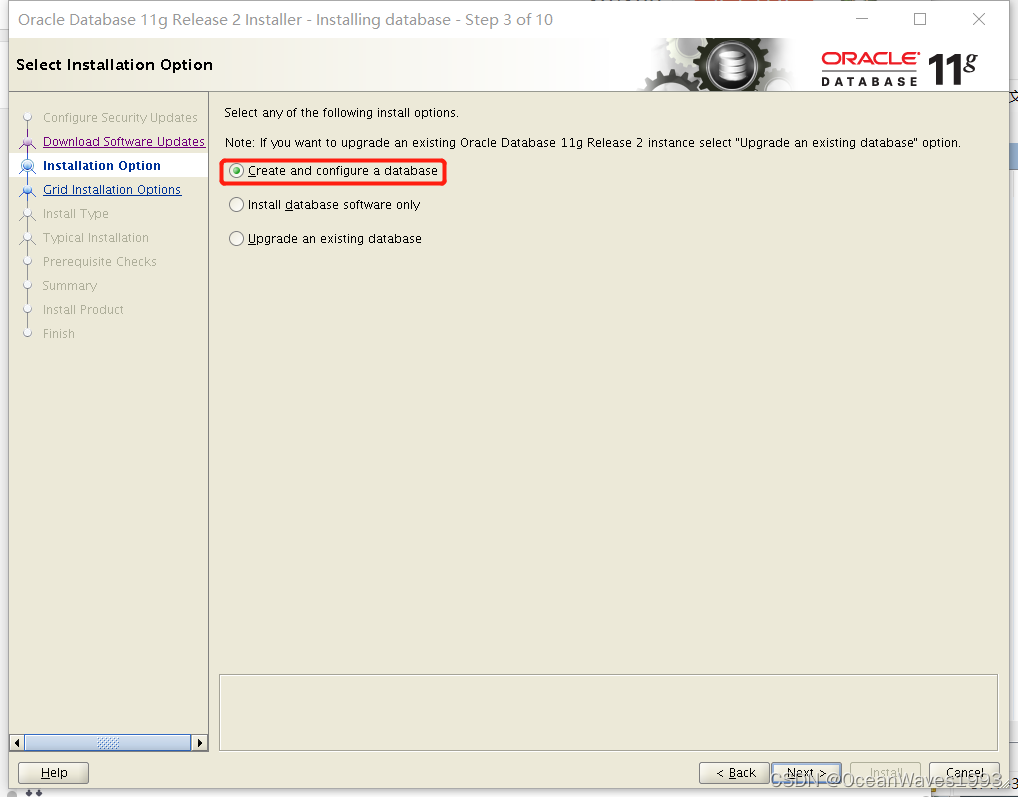
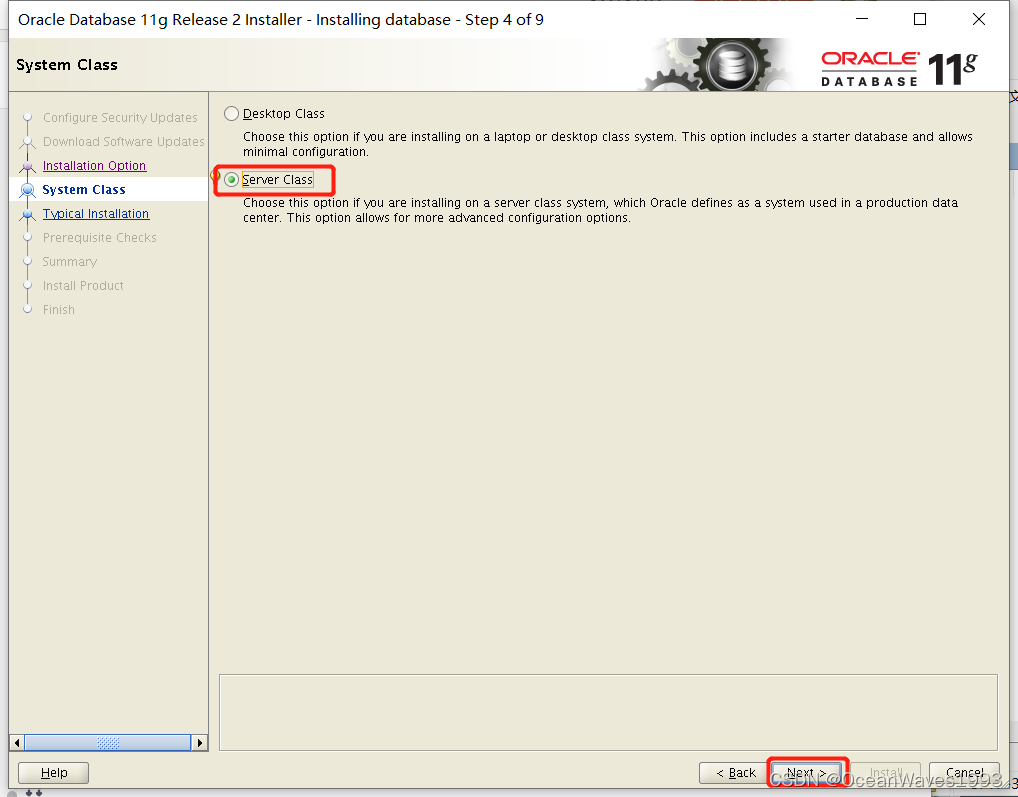
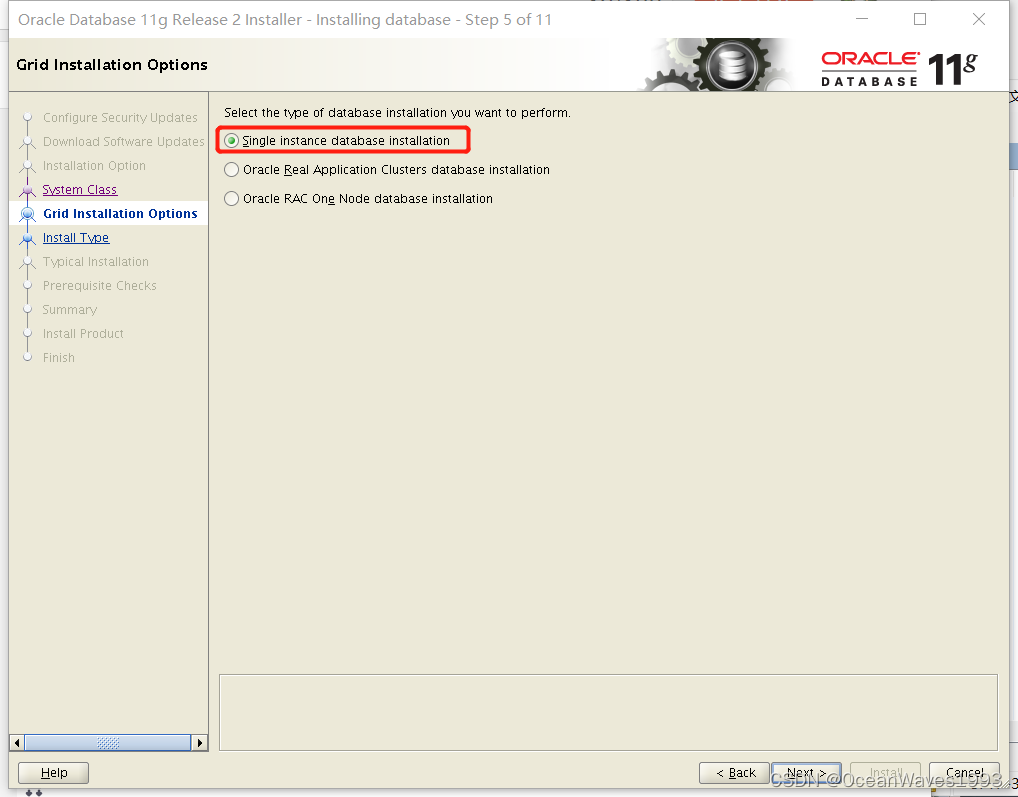
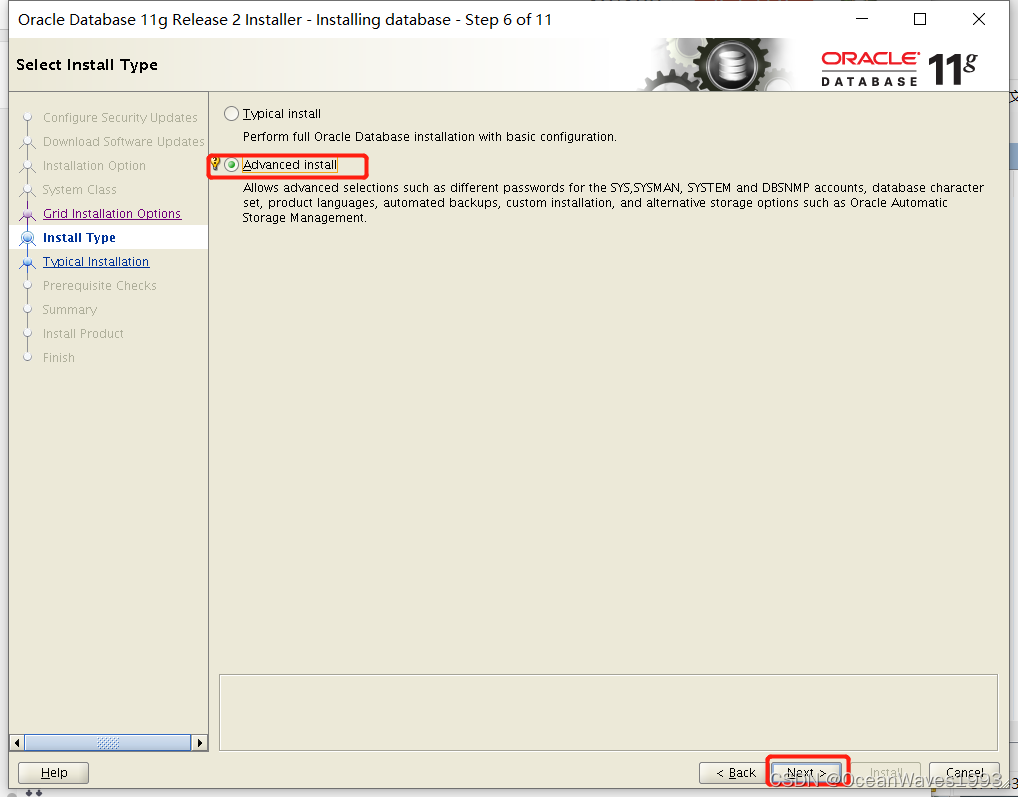
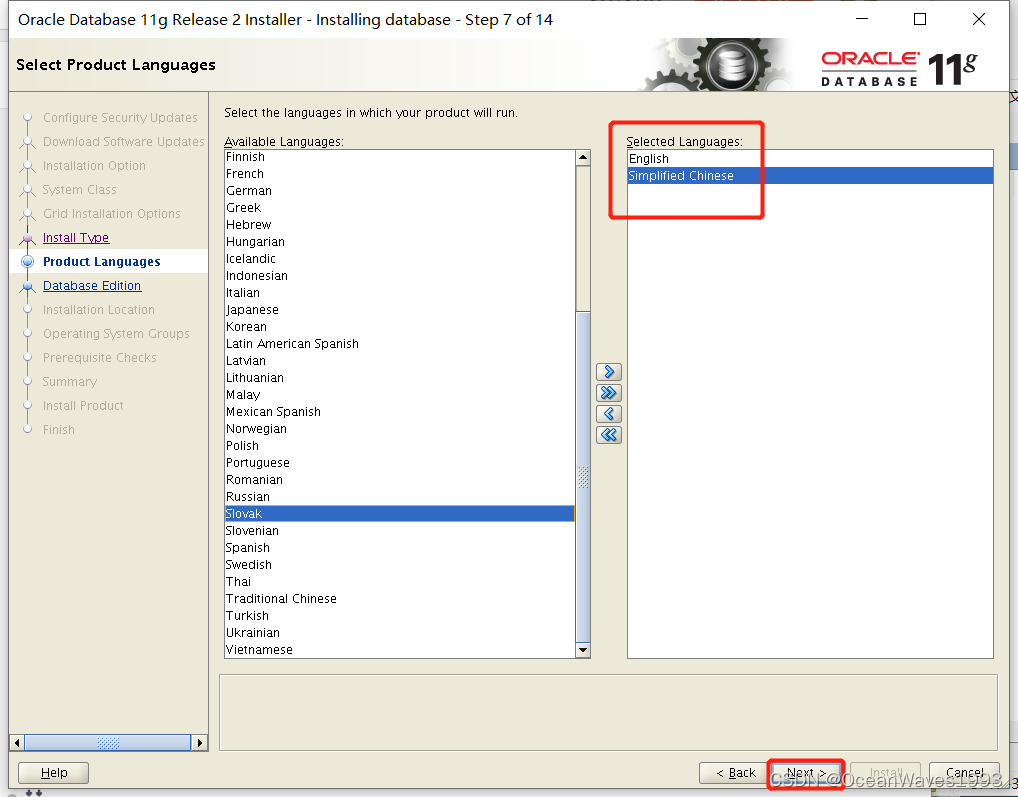
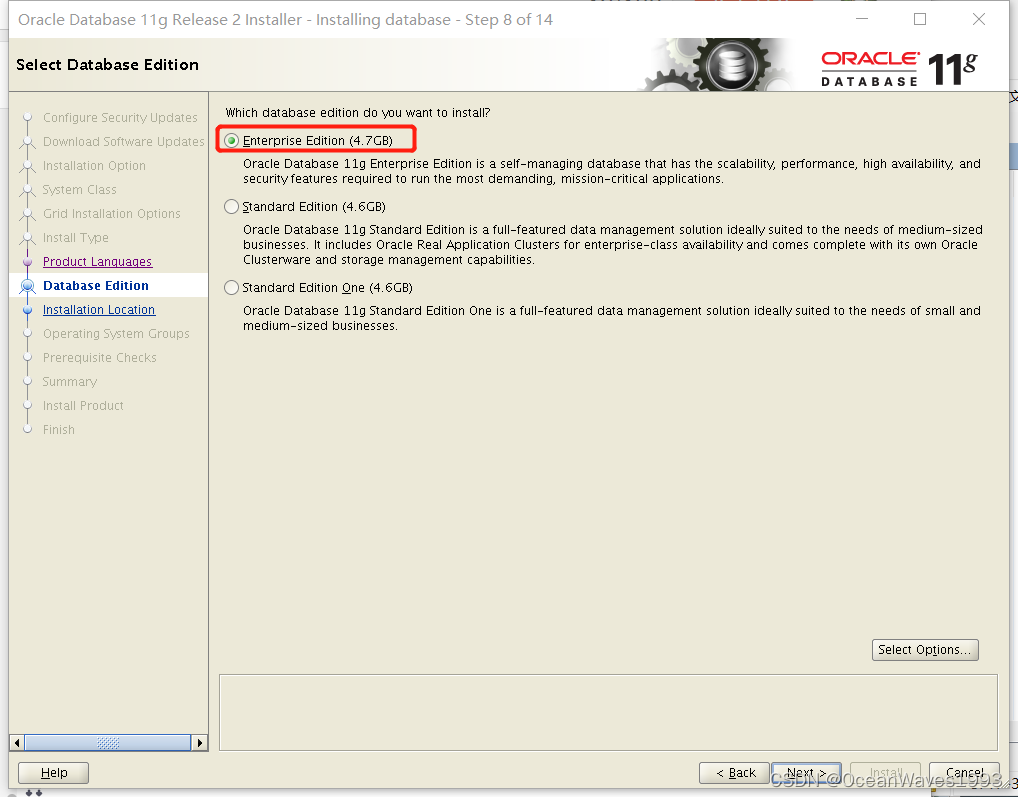
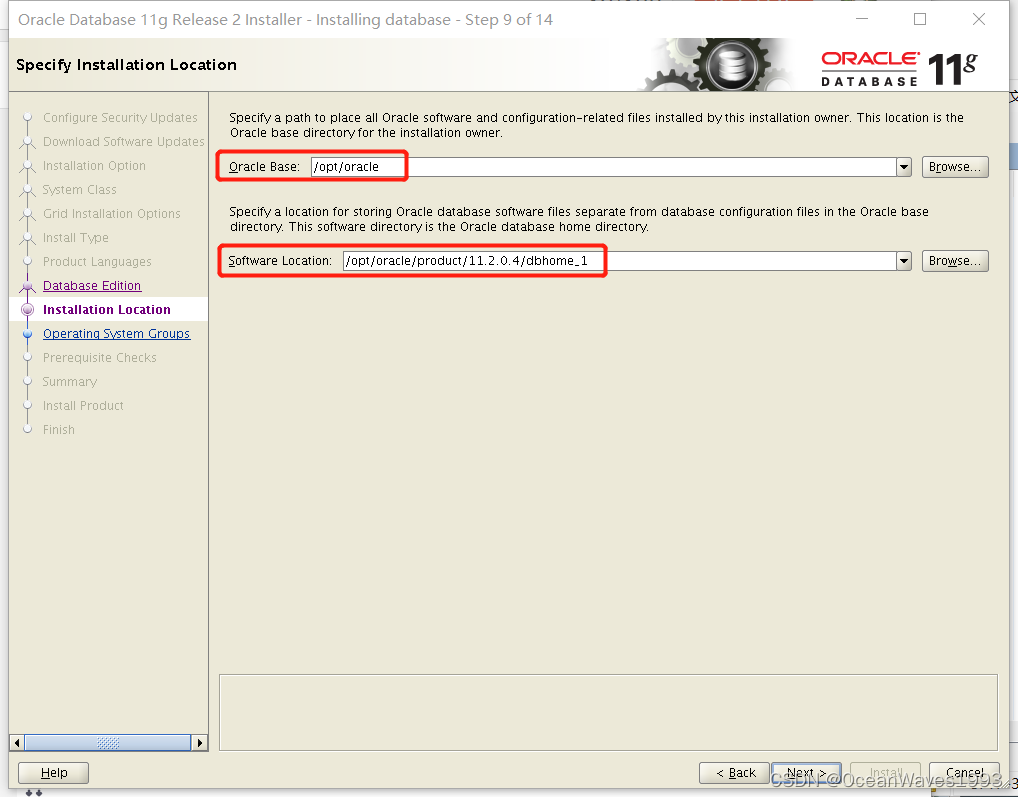
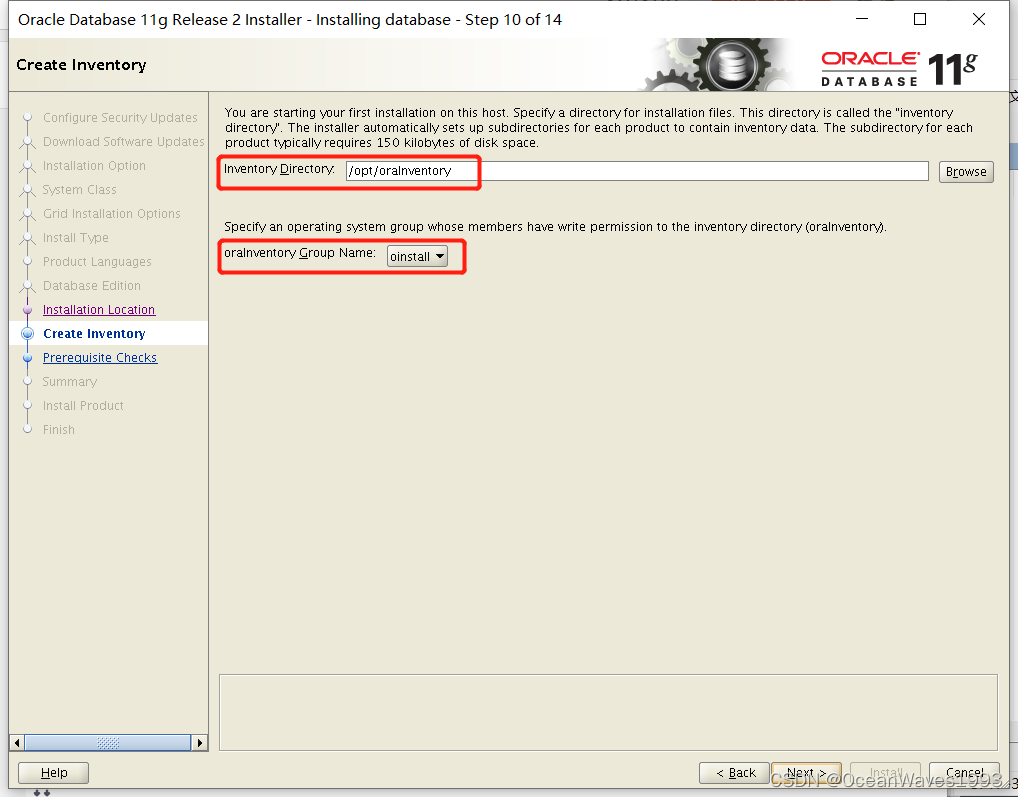
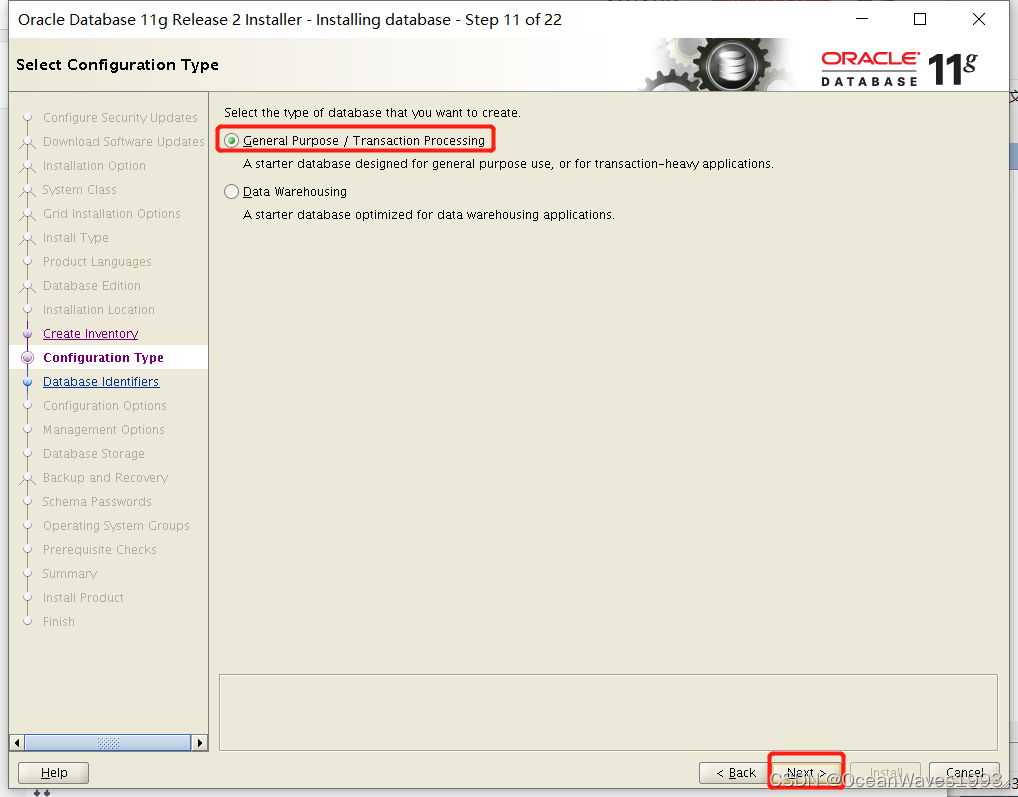
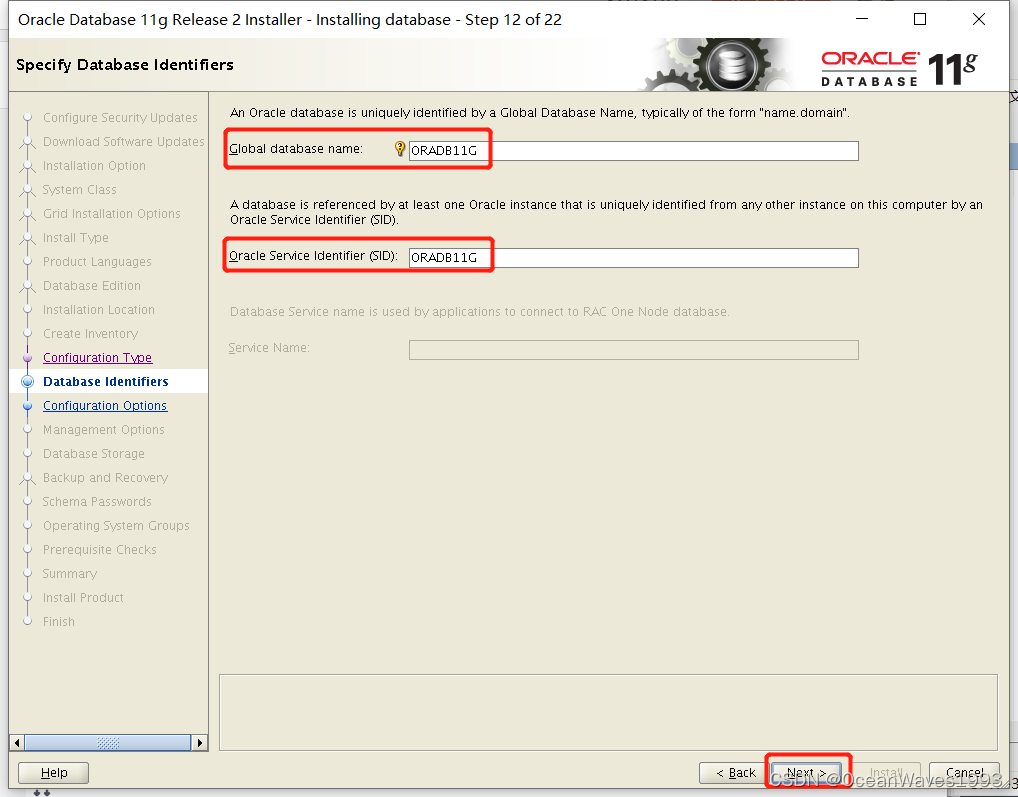
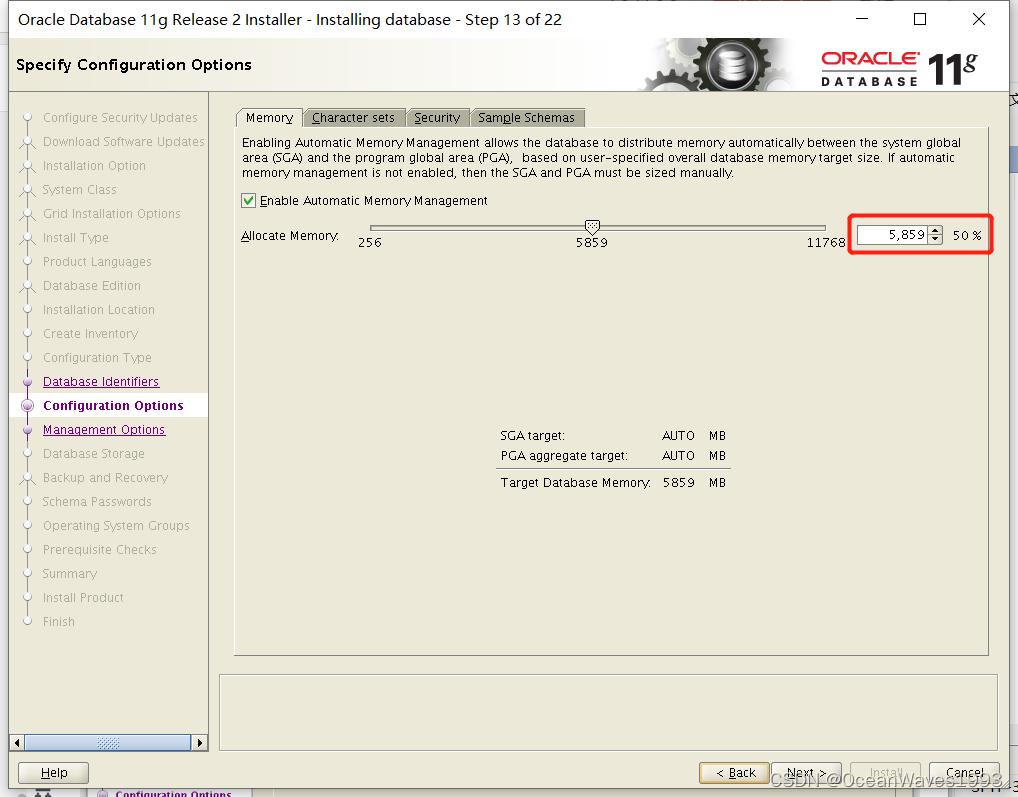
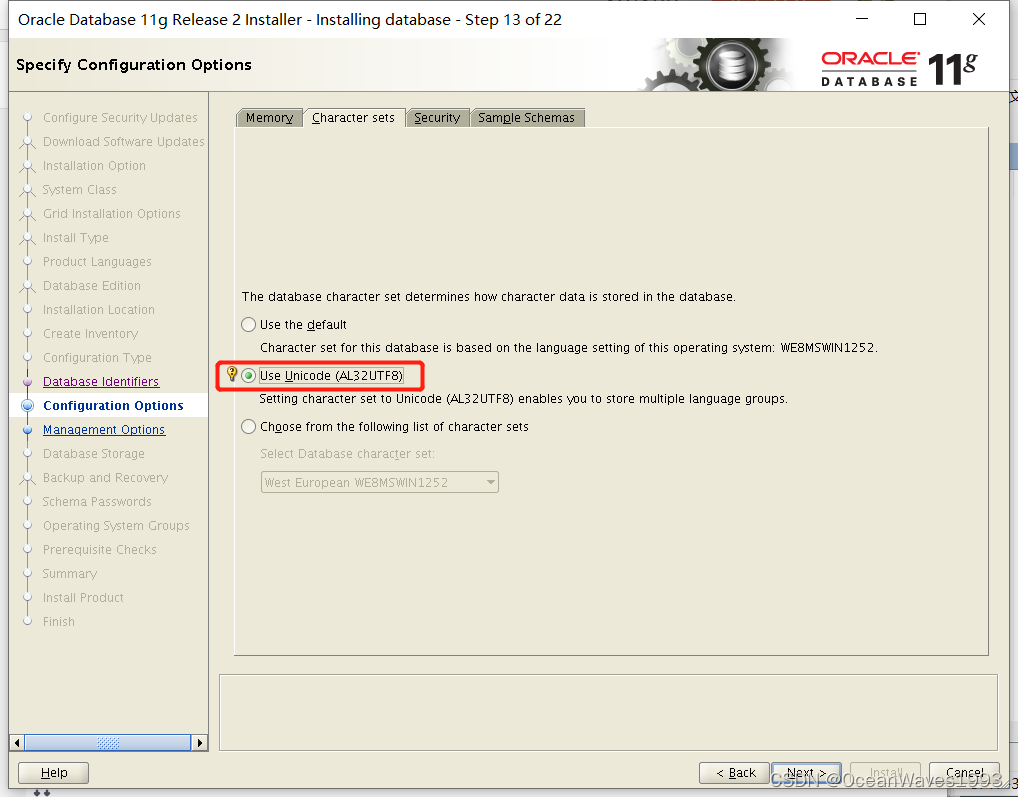
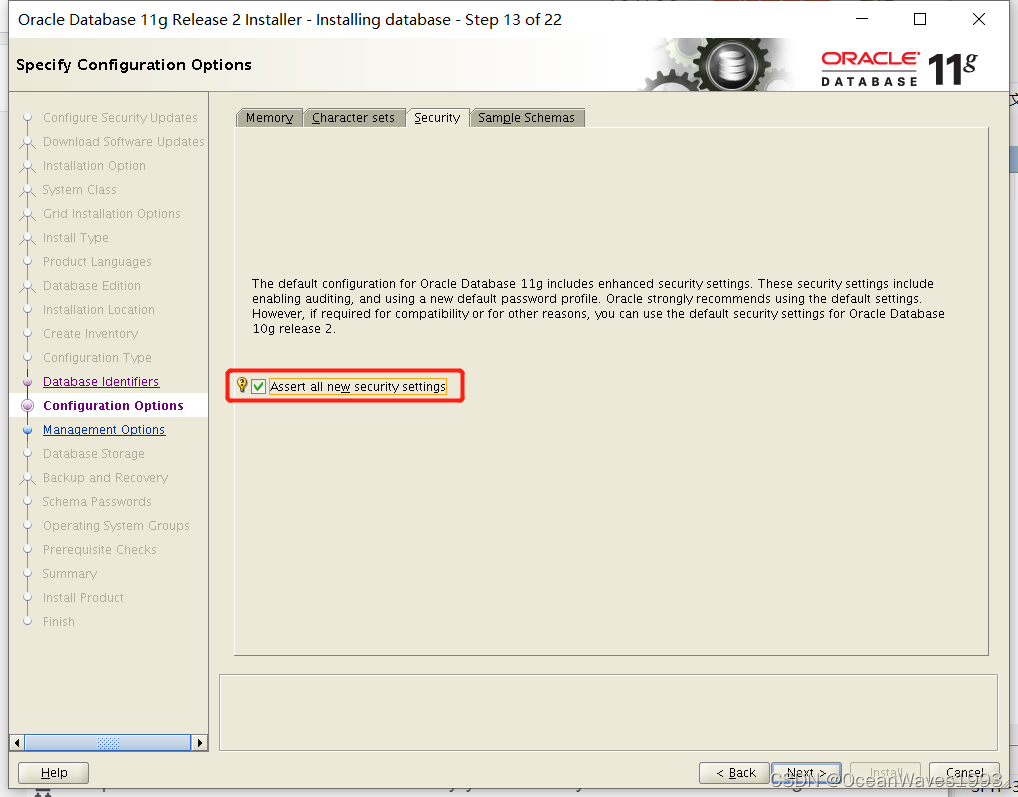
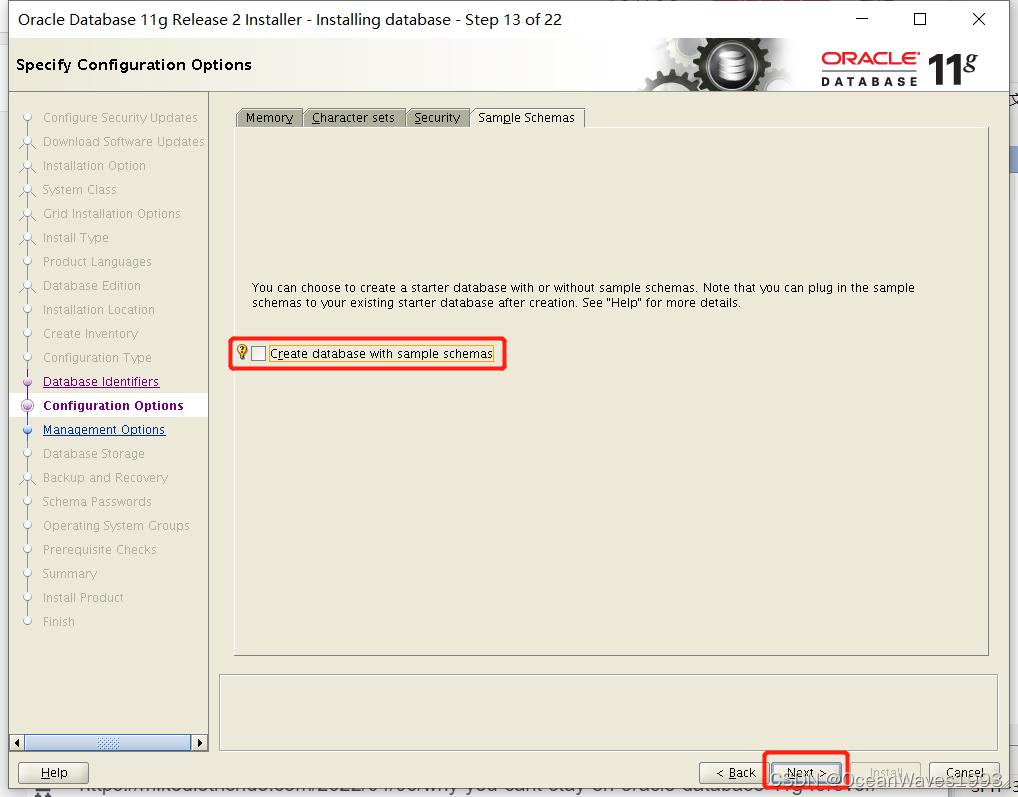
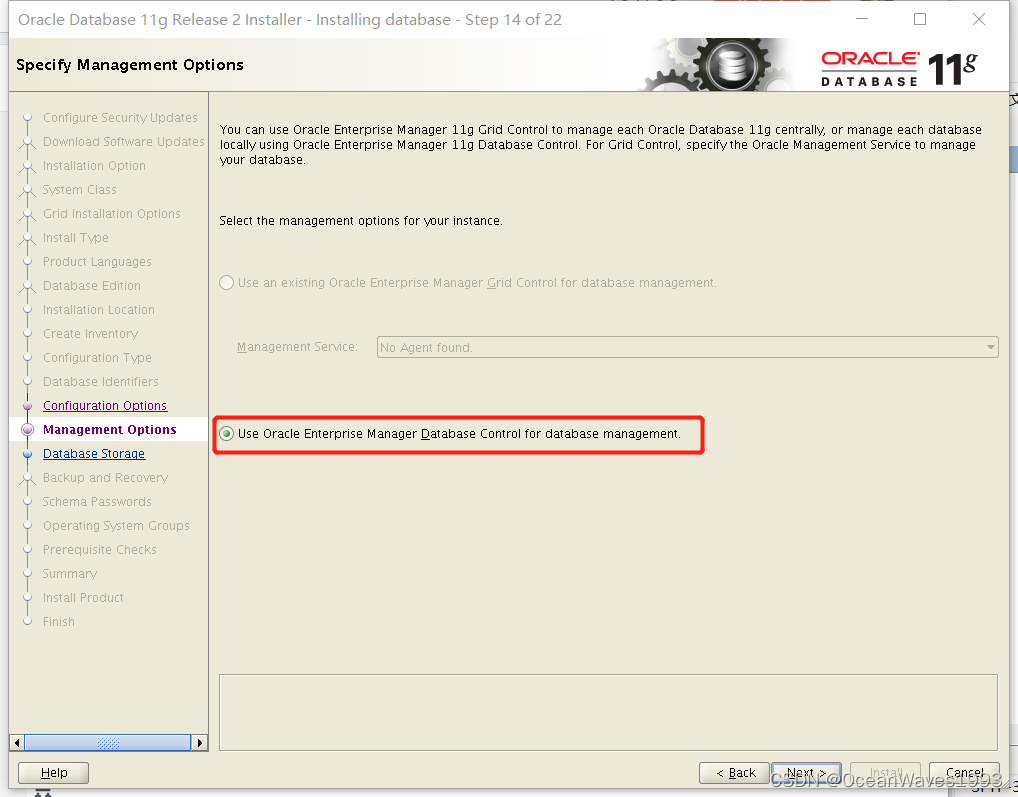
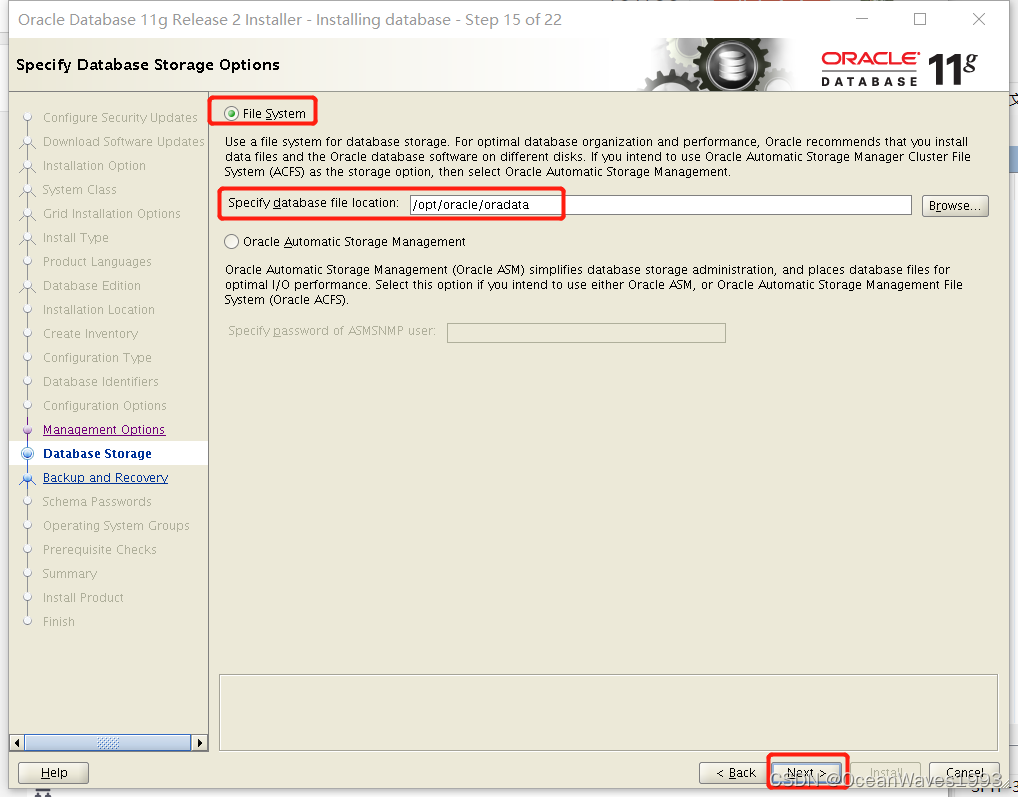
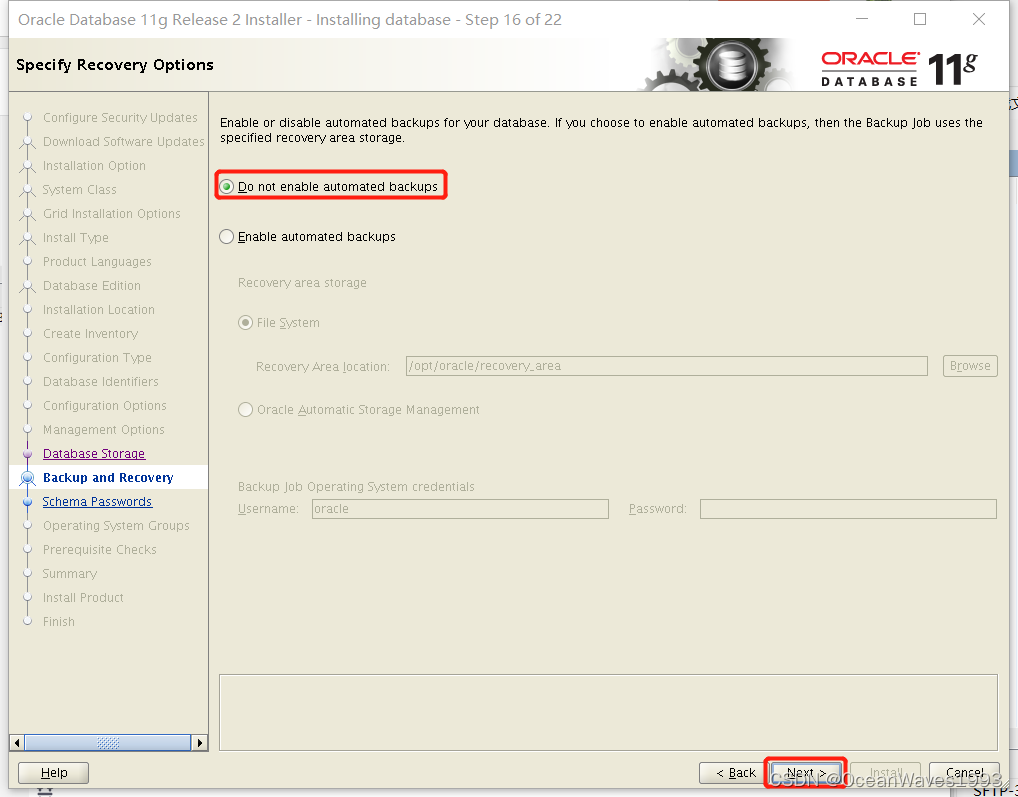
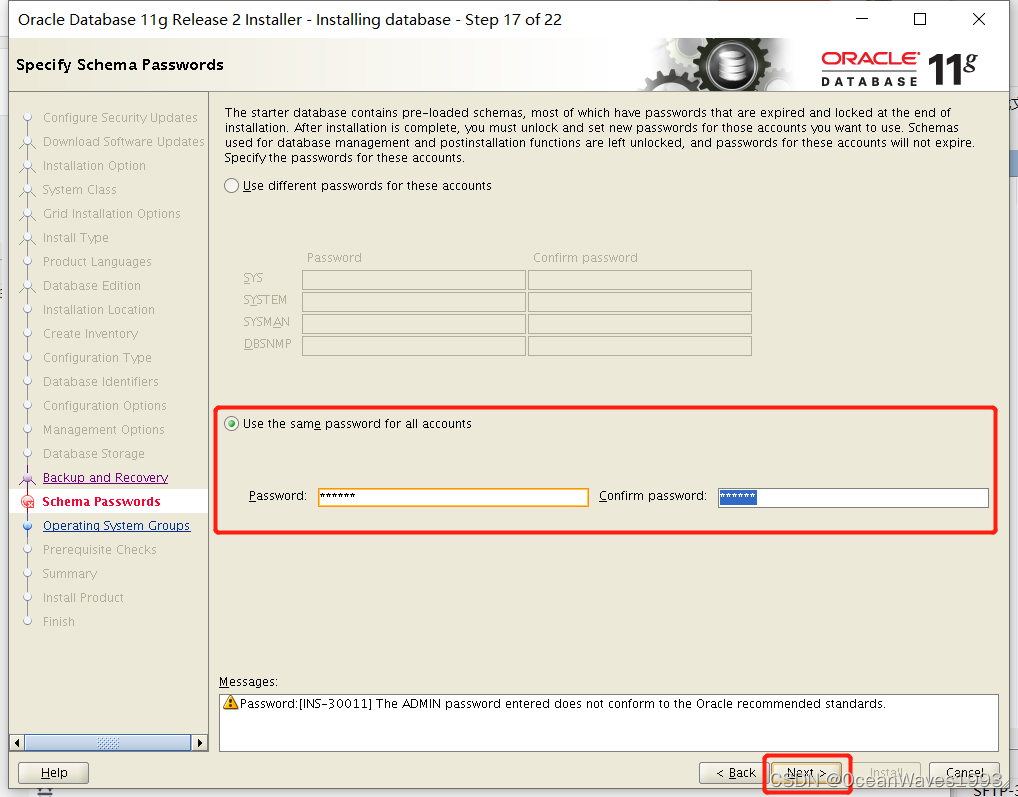
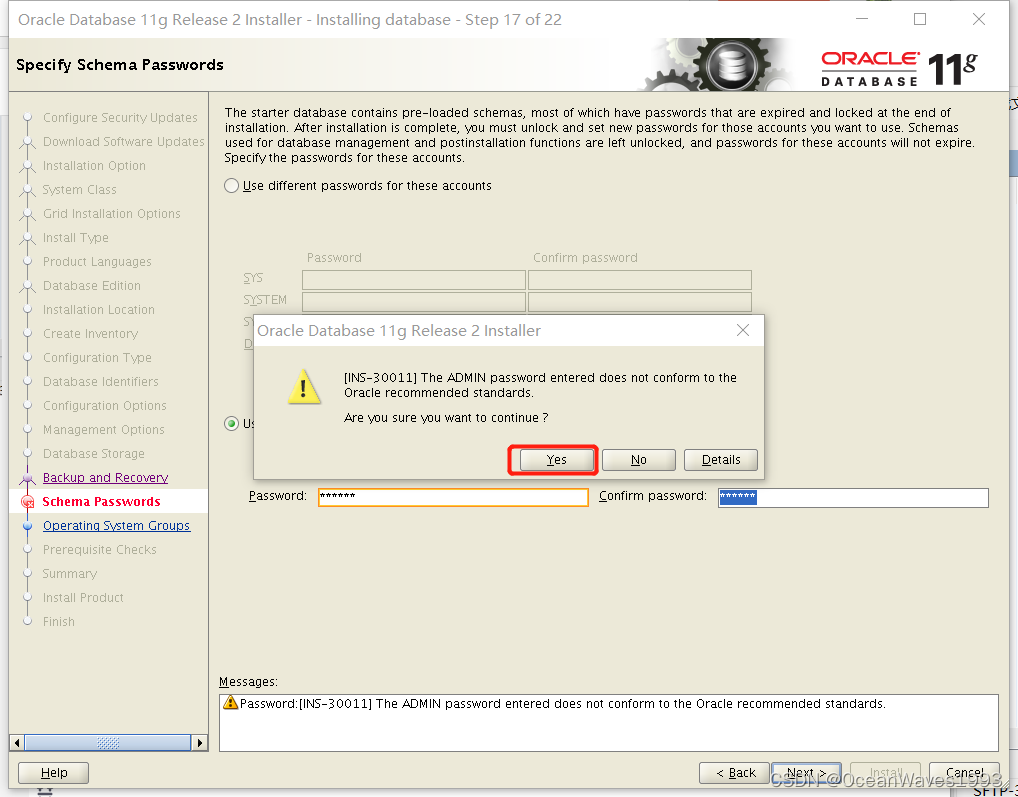
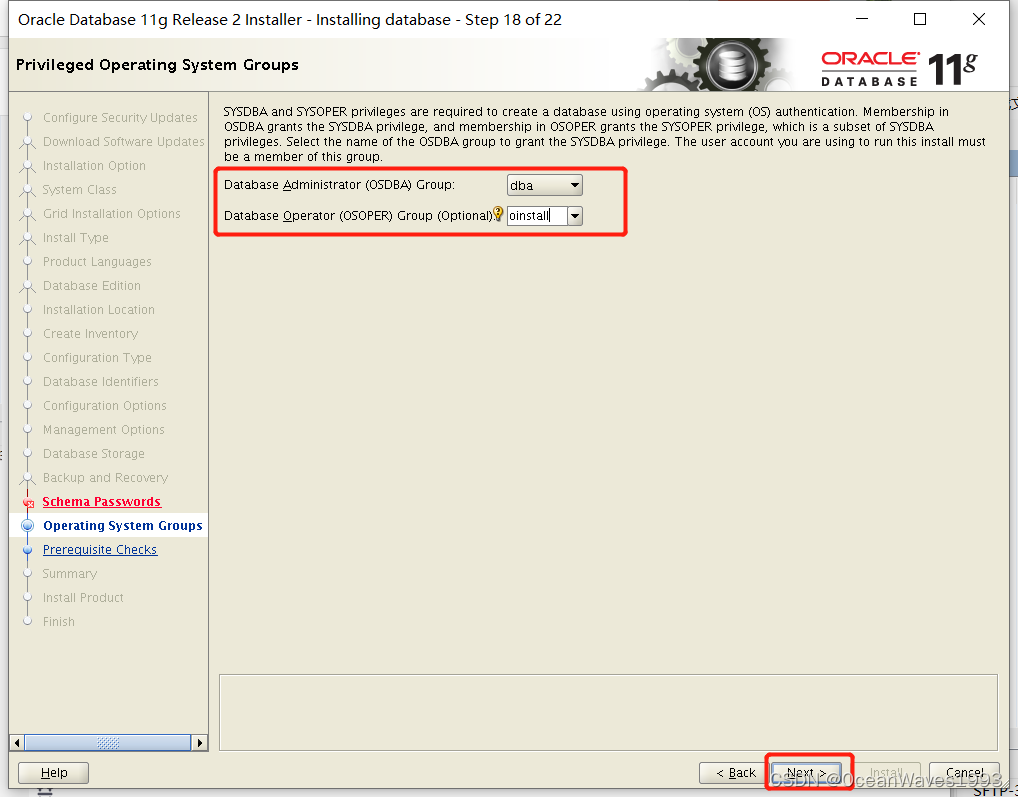
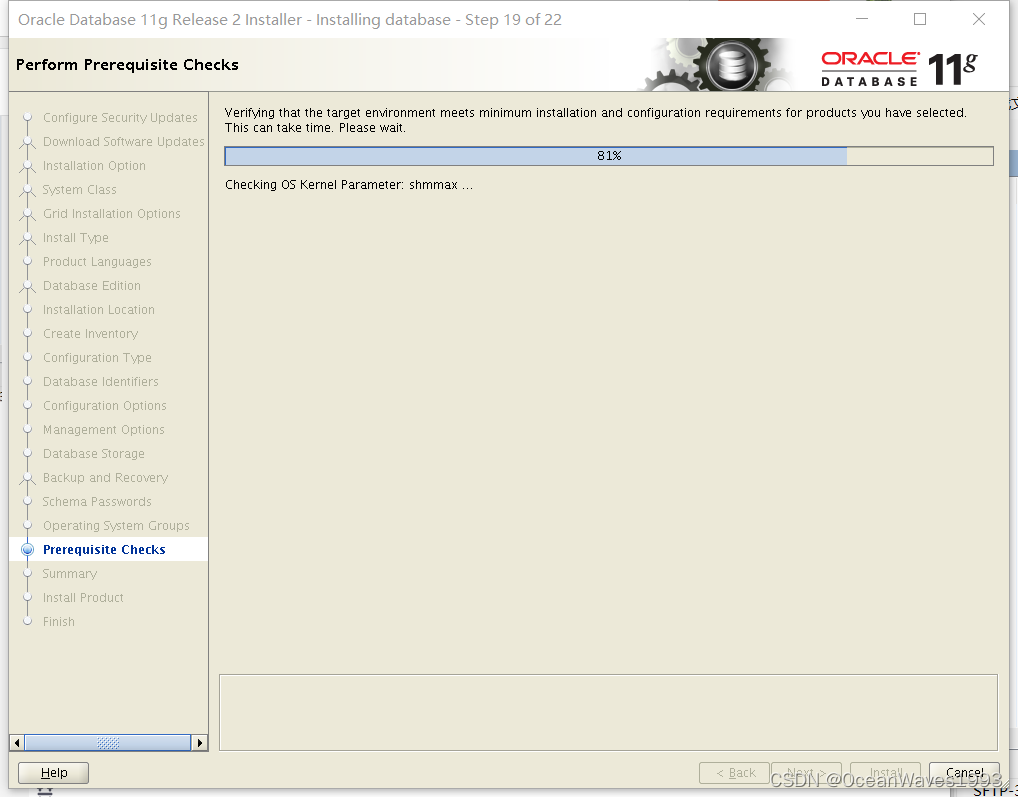
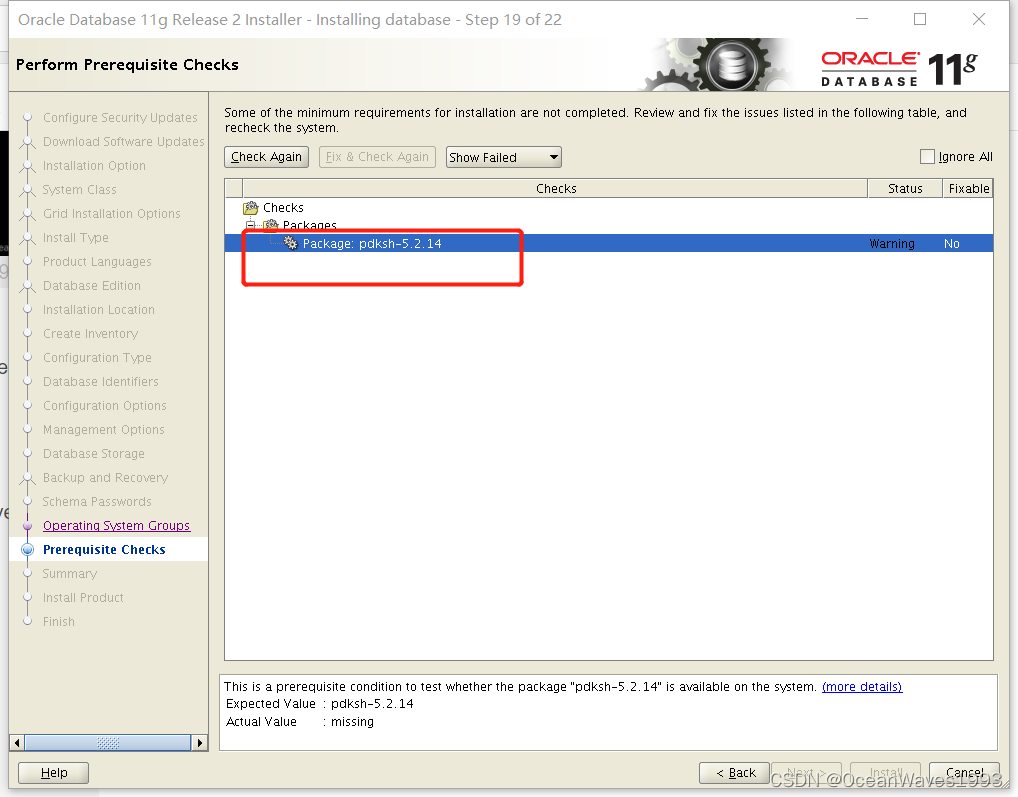
3.2.2、先决条件检查报错
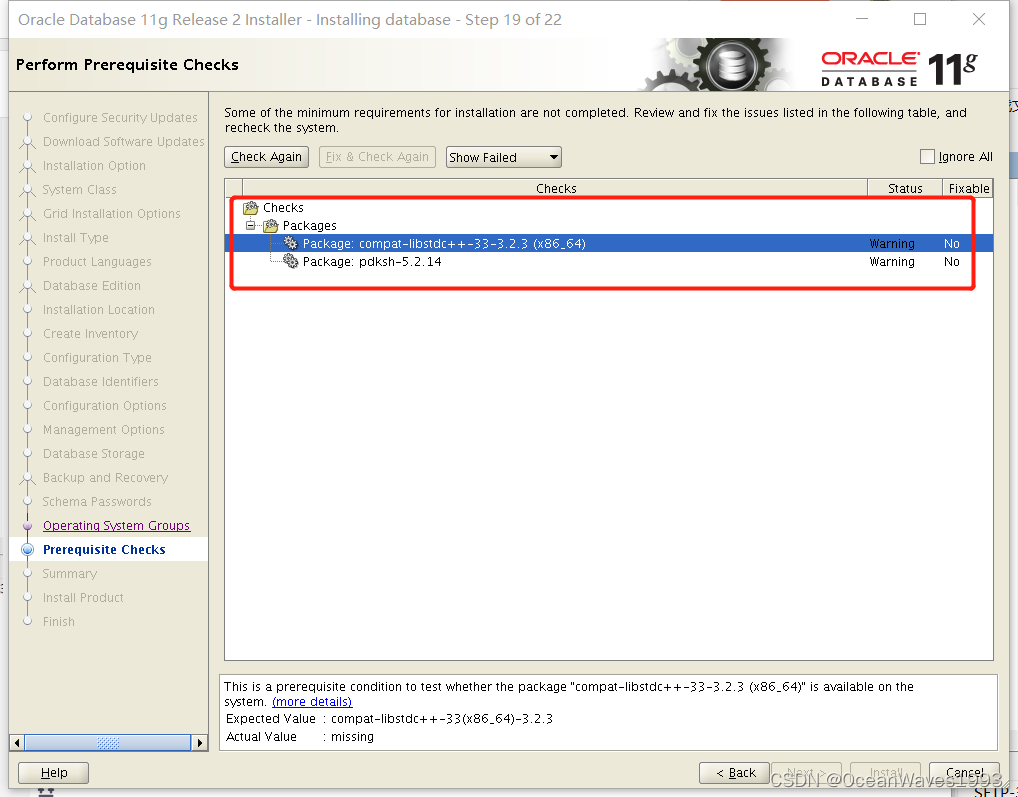
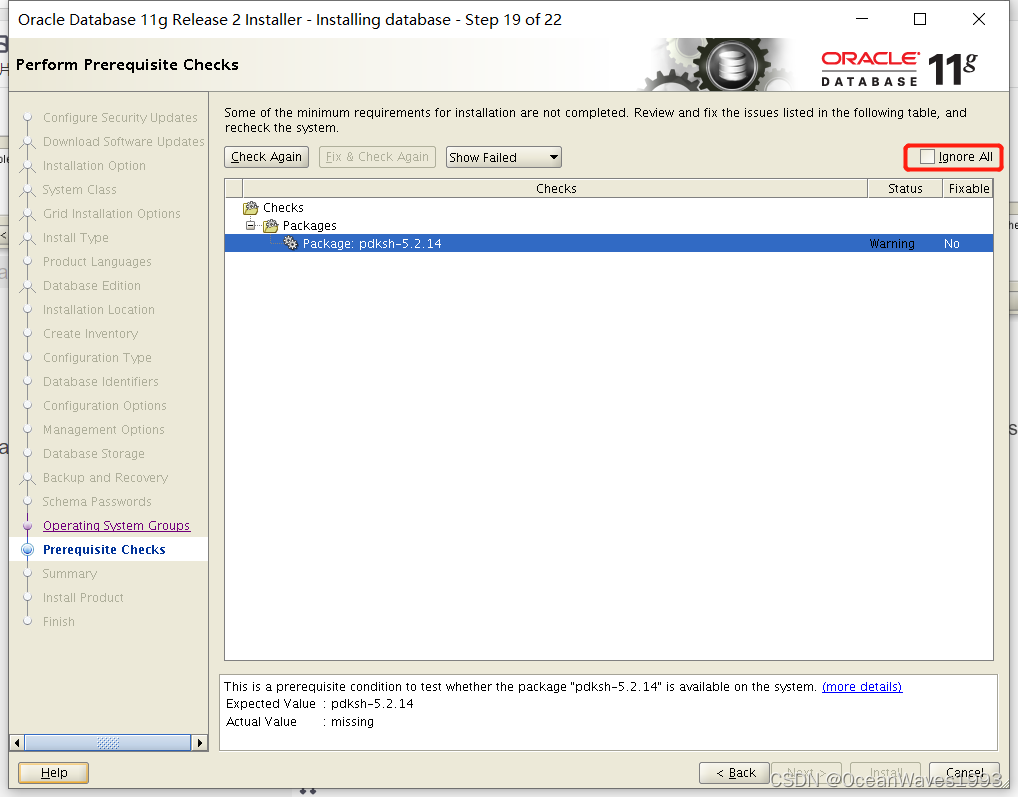
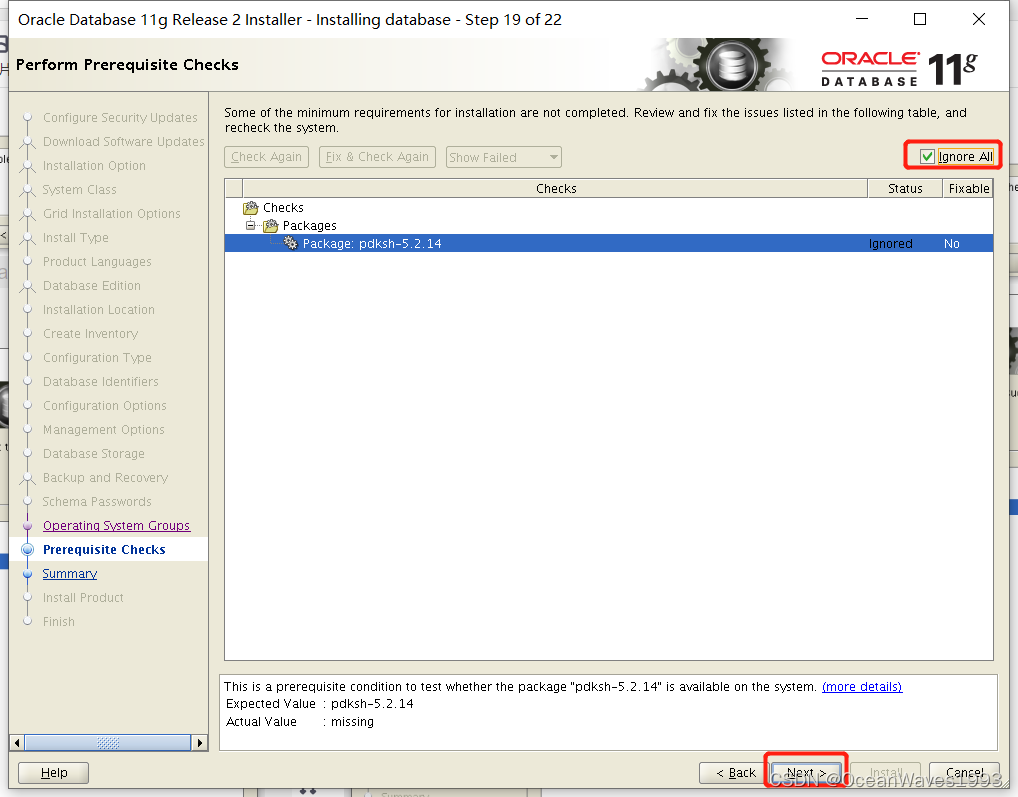
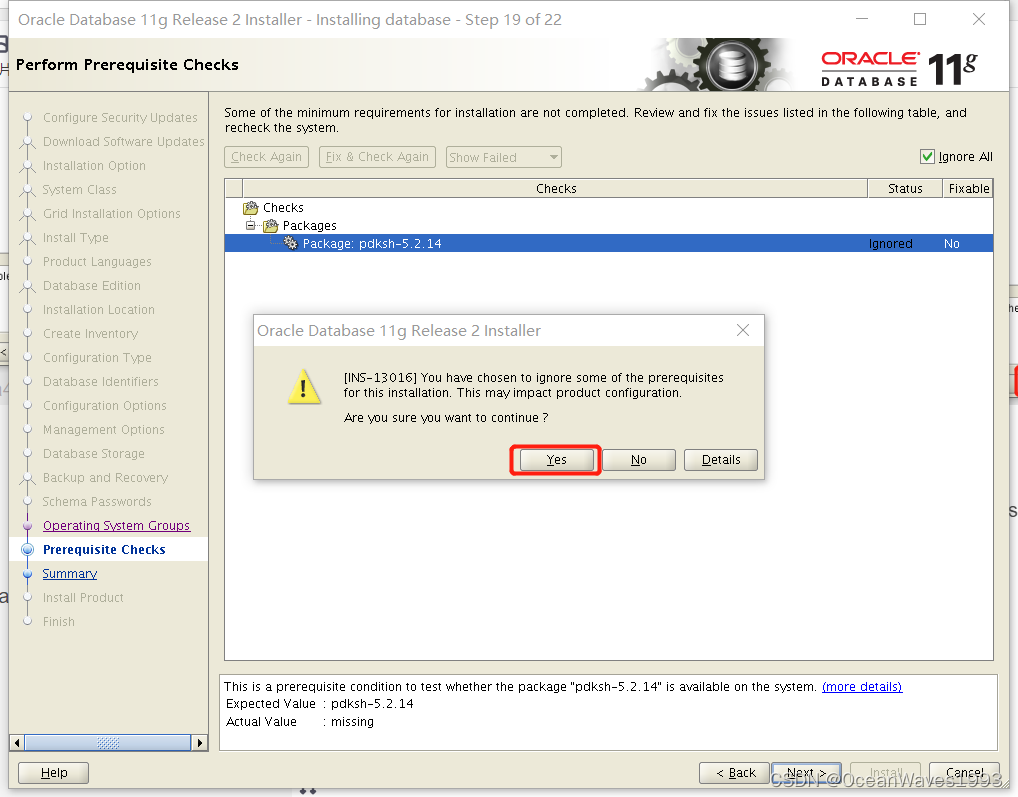
pkksh可以忽略
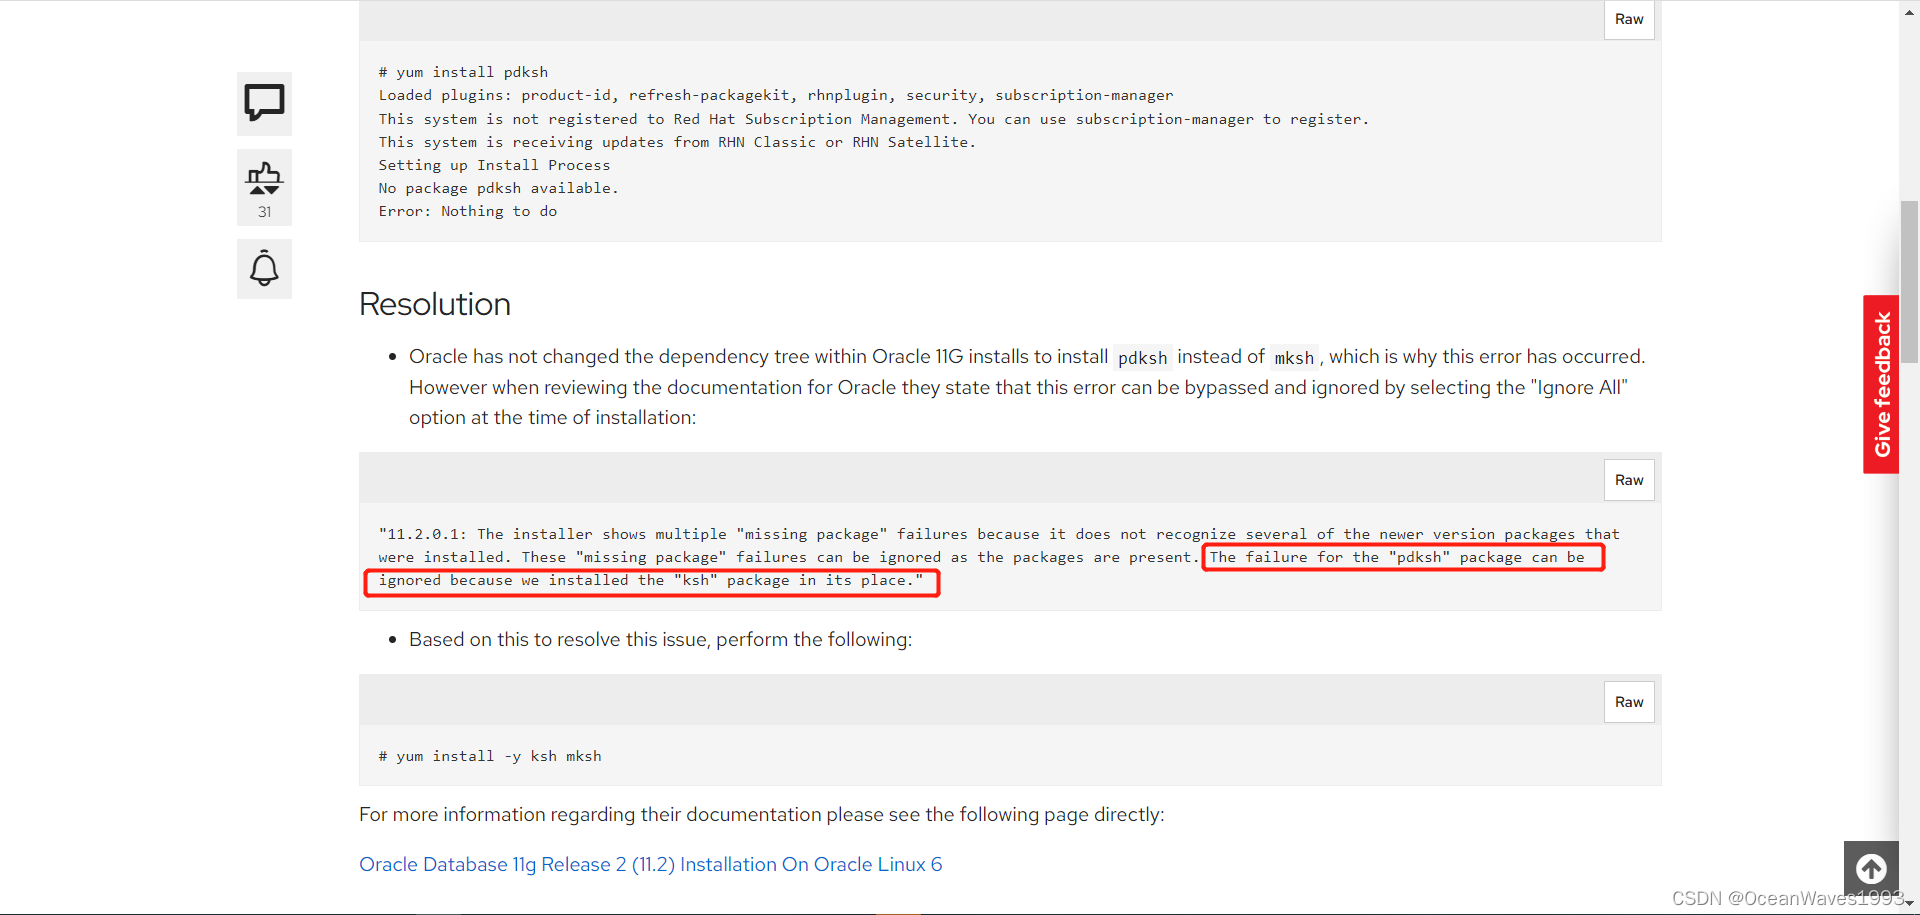
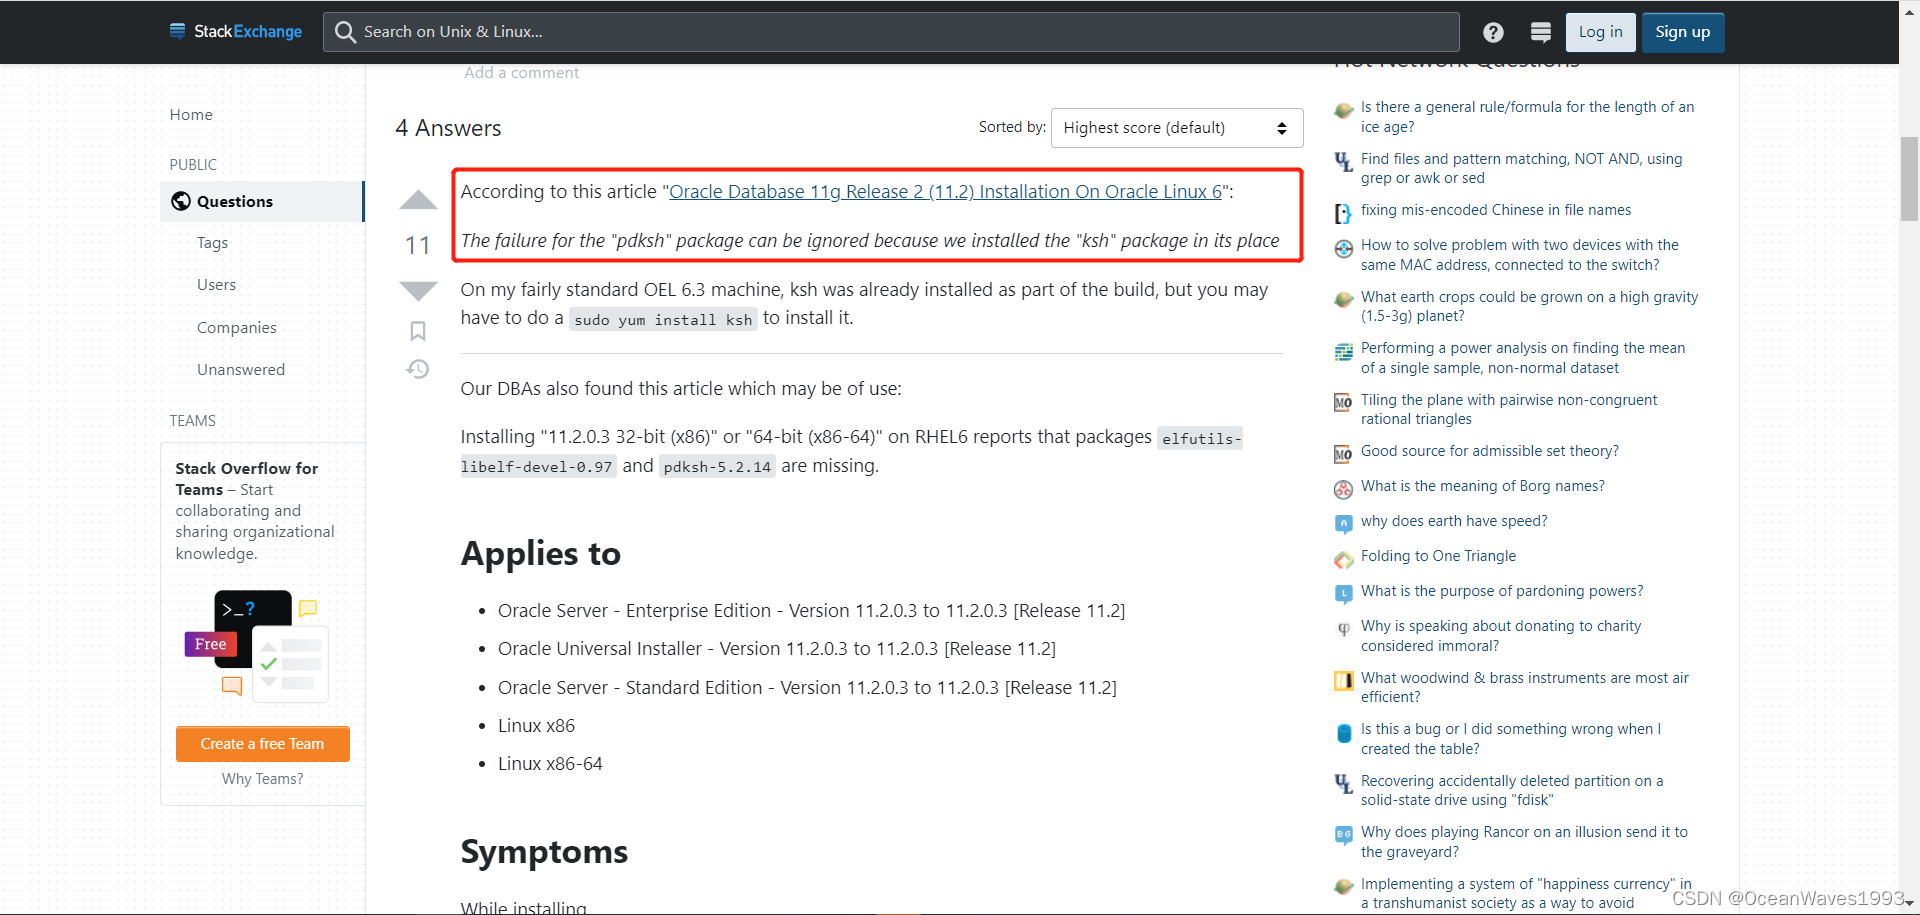
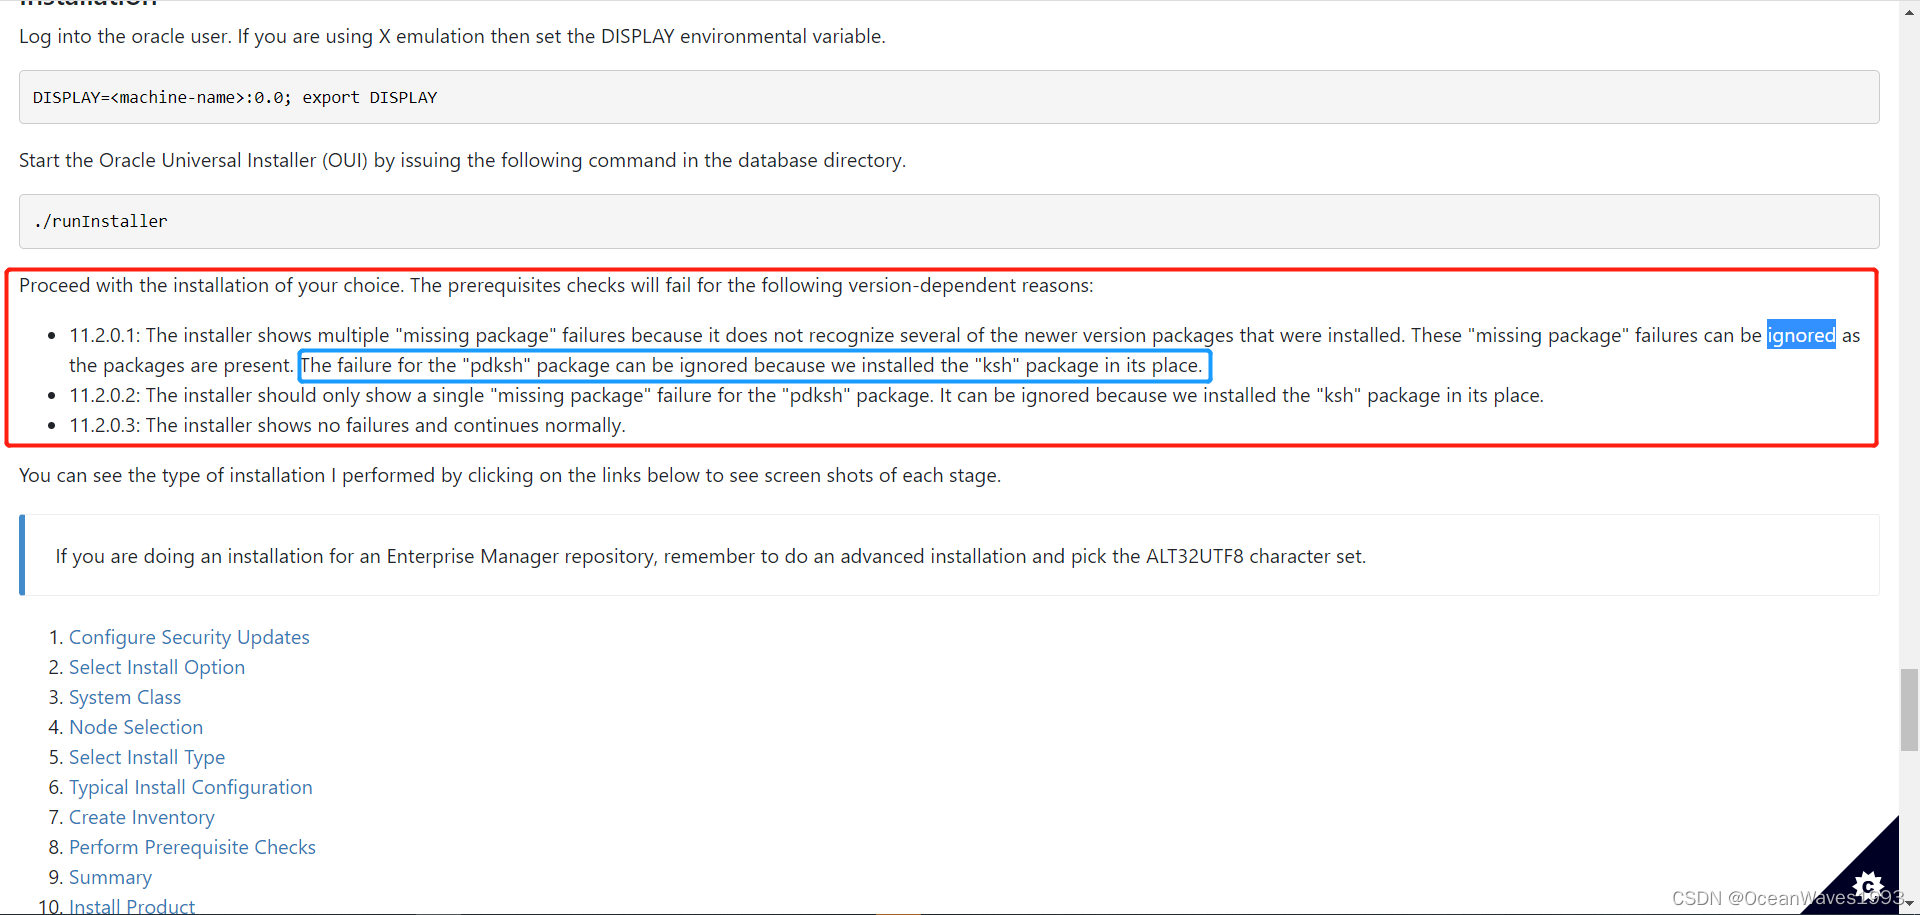
参考:https://unix.stackexchange.com/questions/29554/pdksh-missing-from-rhel-6-and-centos-6
https://oracle-base.com/articles/11g/oracle-db-11gr2-installation-on-oracle-linux-6
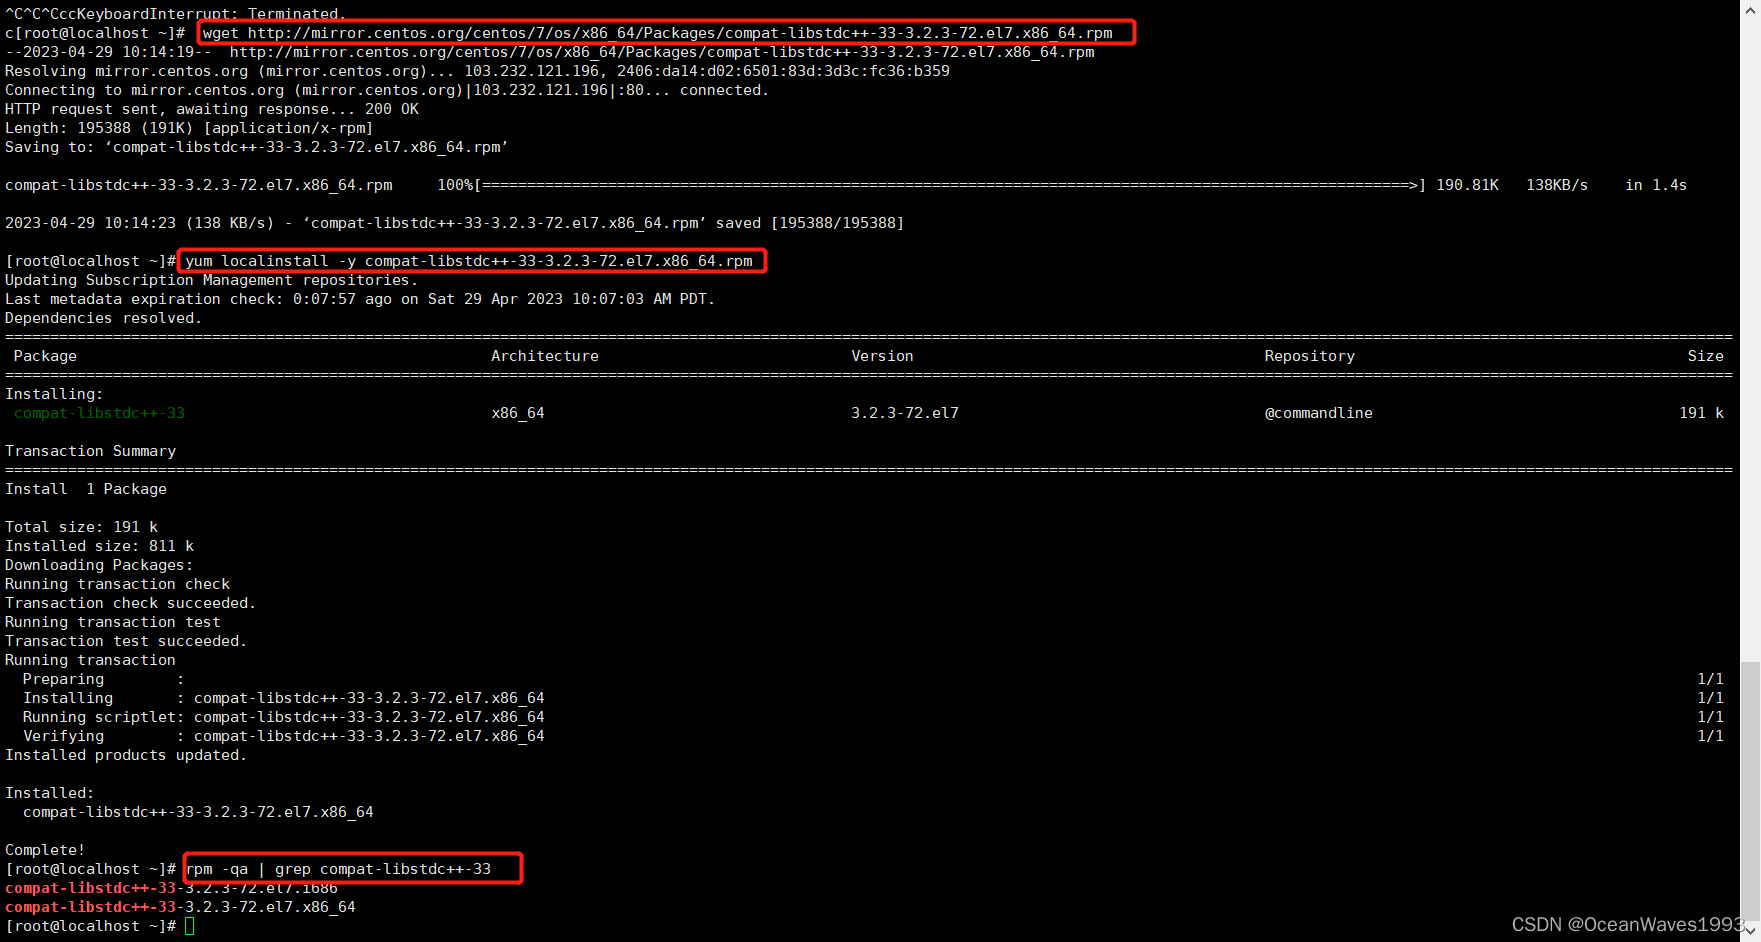
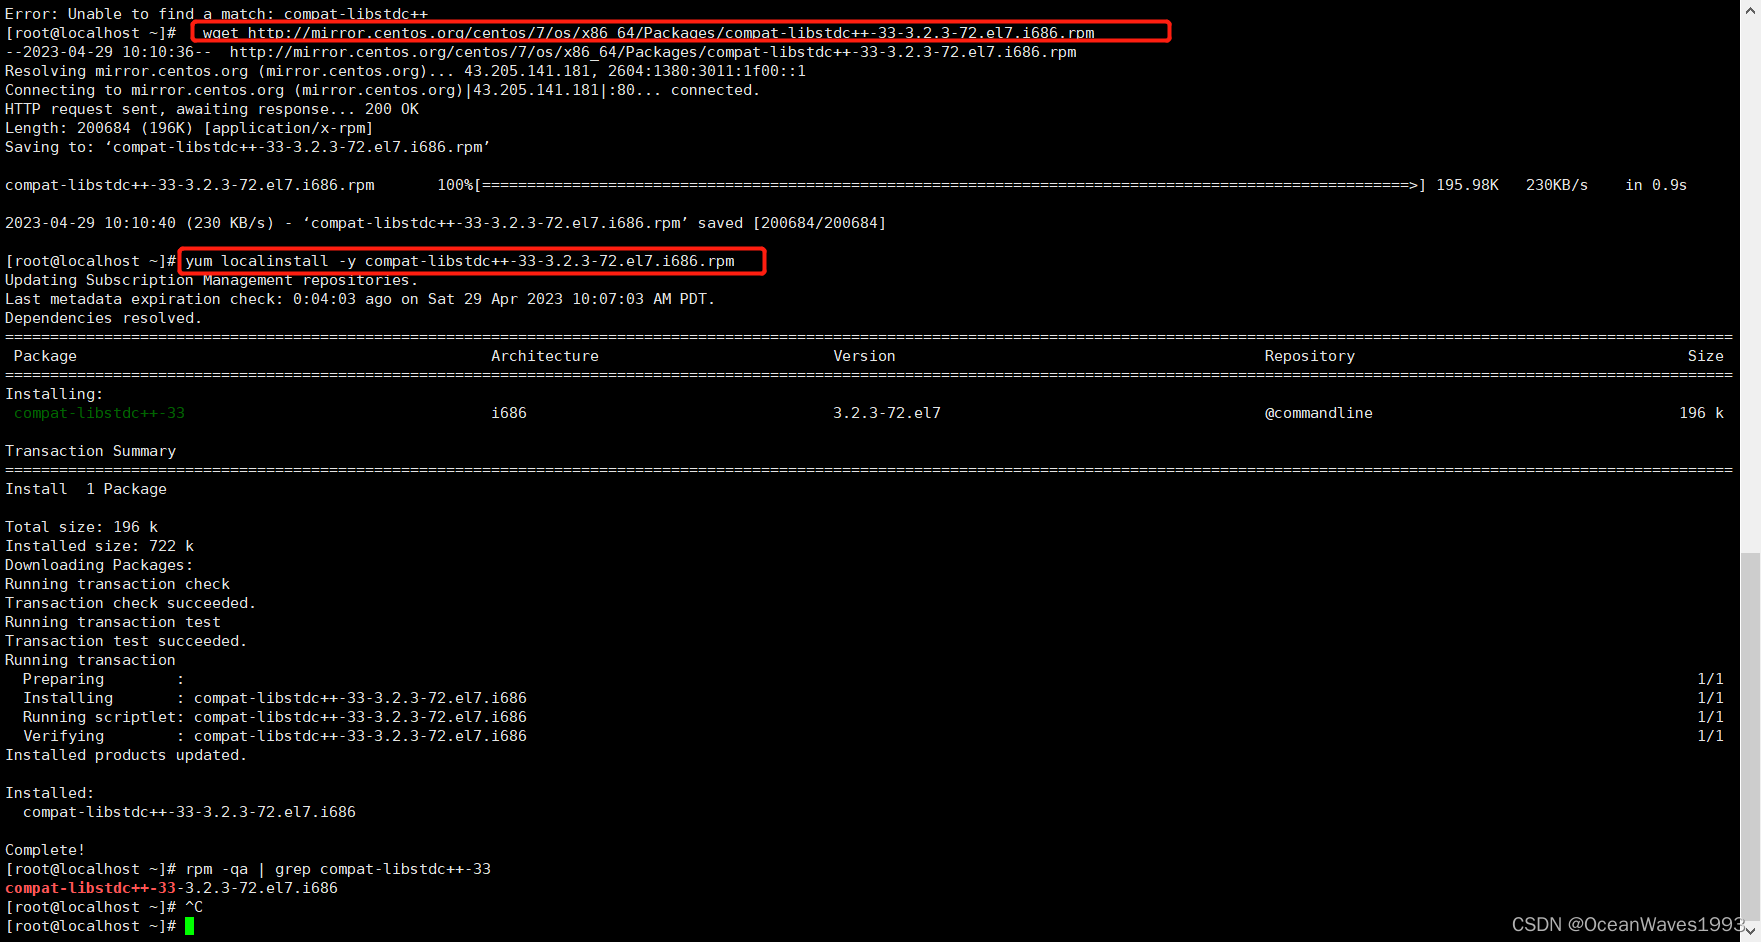
安装compat-libstdc+±33-3.2.3
wget http://mirror.centos.org/centos/7/os/x86_64/Packages/compat-libstdc++-33-3.2.3-72.el7.x86_64.rpm
yum localinstall -y compat-libstdc++-33-3.2.3-72.el7.x86_64.rpm
rpm -qa | grep compat-libstdc++-33
参考:https://www.ibm.com/support/pages/ibm-watson-explorer-how-install-red-hat-enterprise-linux%C2%AE-8
再次检查
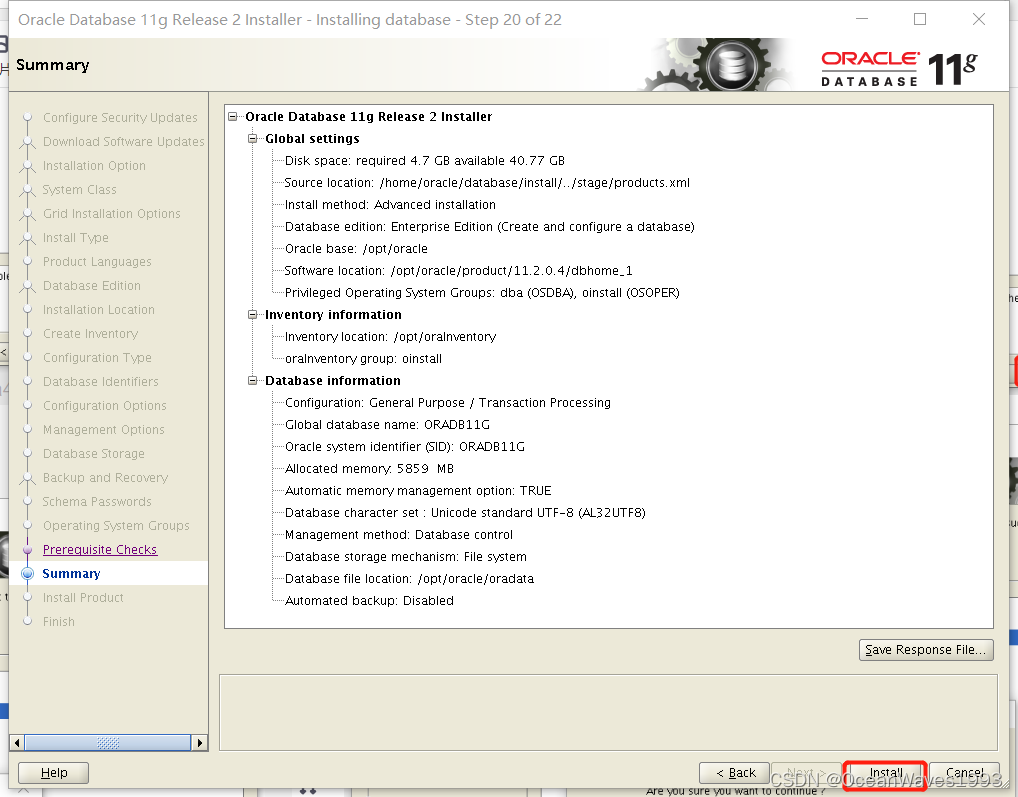
3.2.3、开始安装
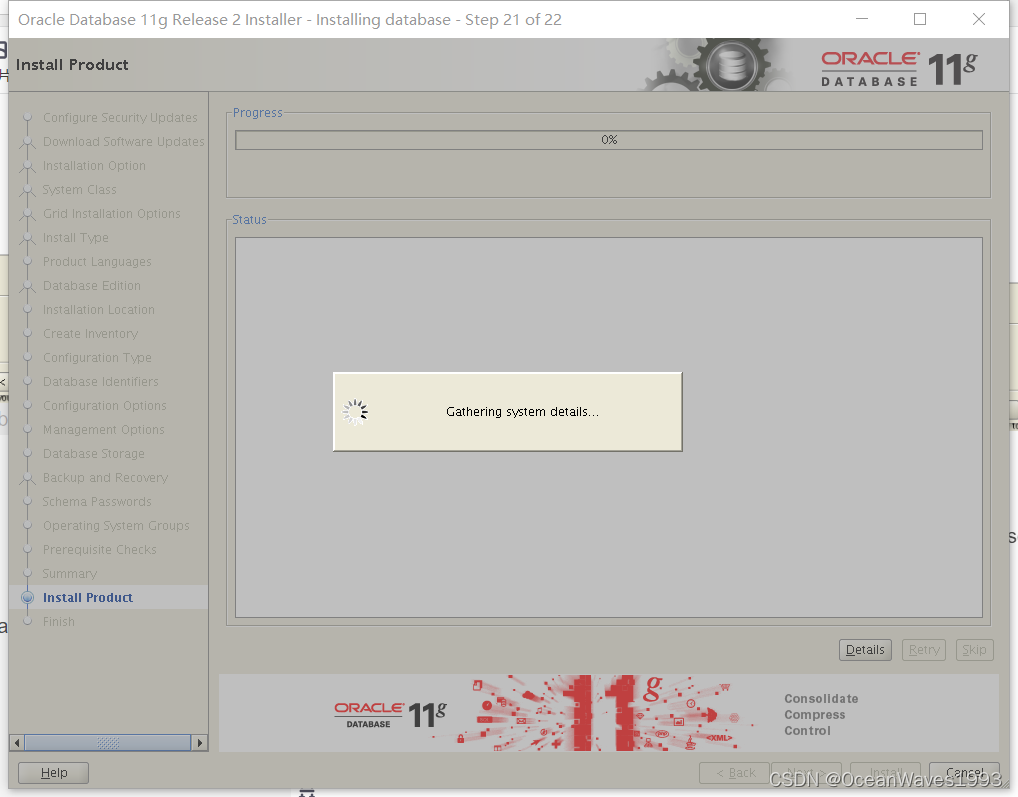
3.2.4、等待安装完成
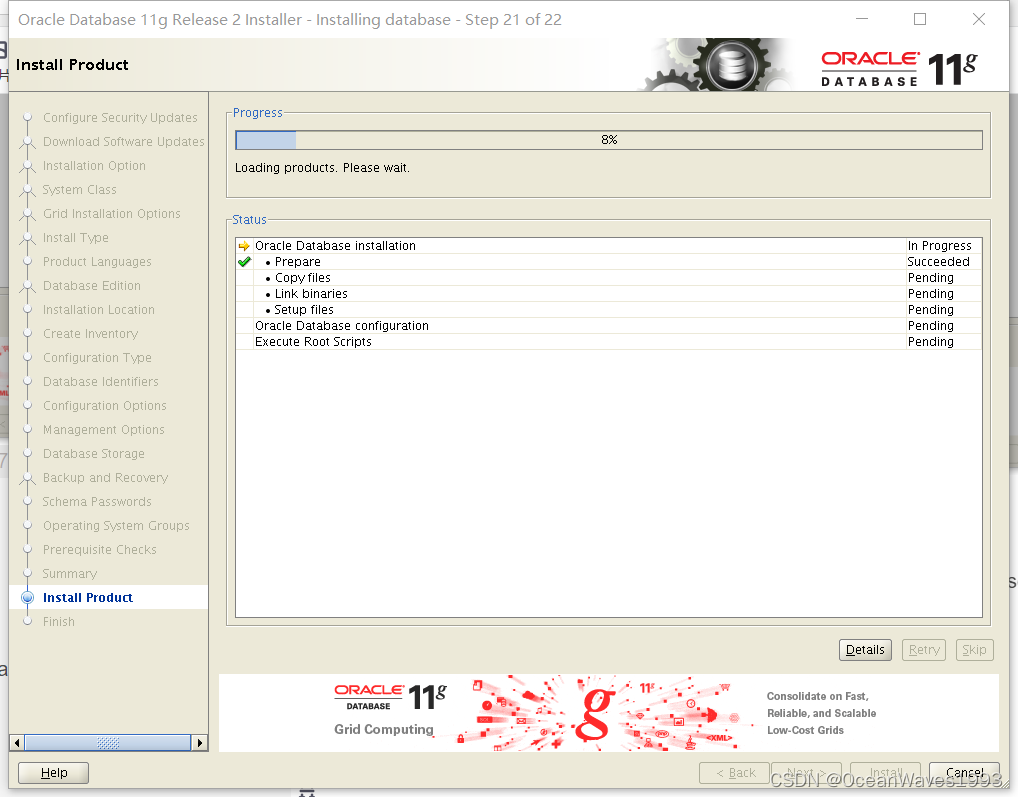
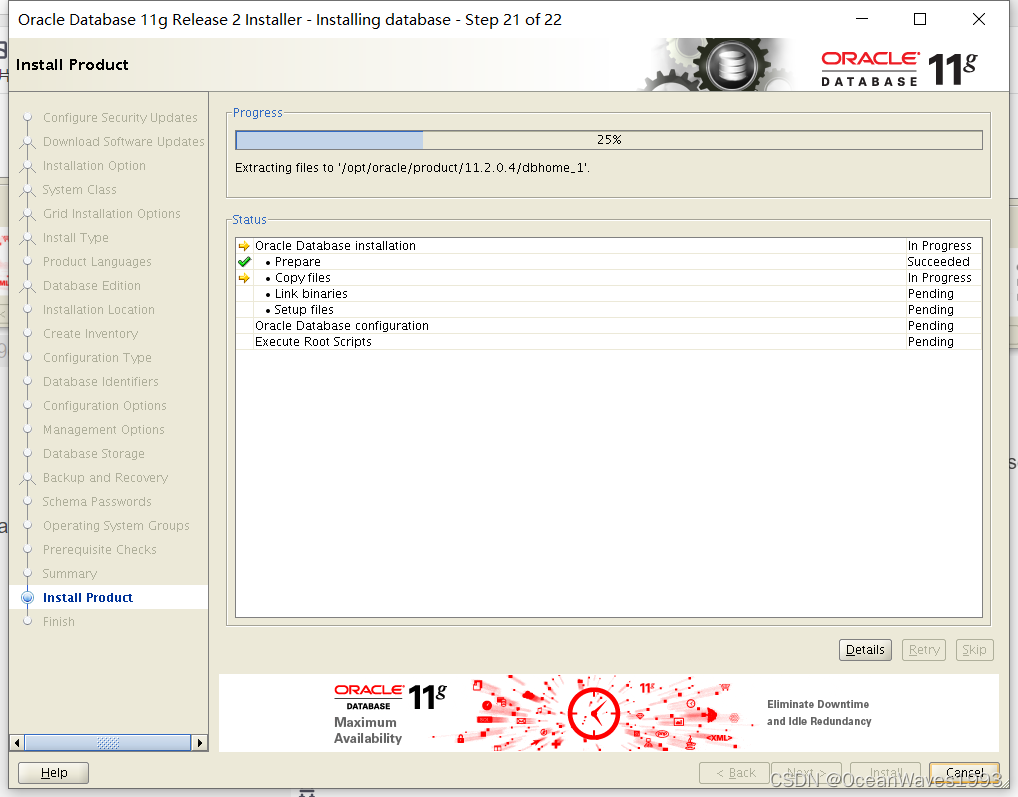
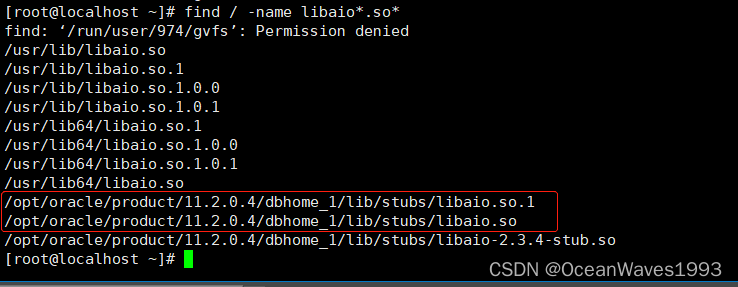
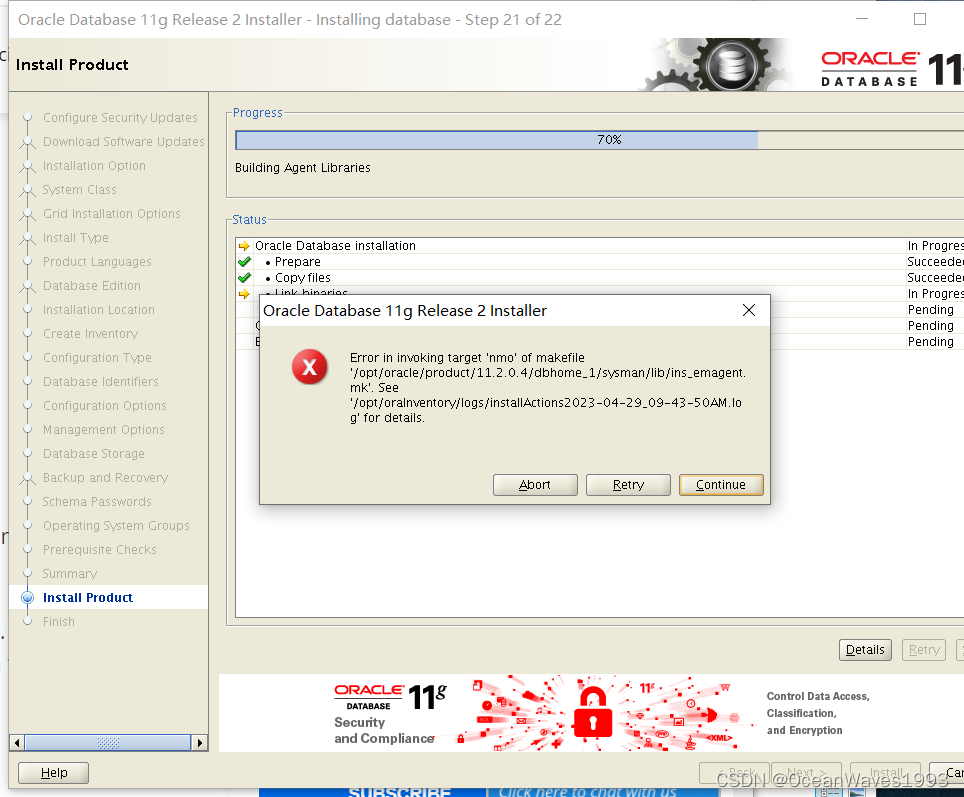
3.2.4、报错 INFO: //usr/lib64/libaio.so.1: undefined reference to `__stack_chk_fail@GLIBC_2.4’
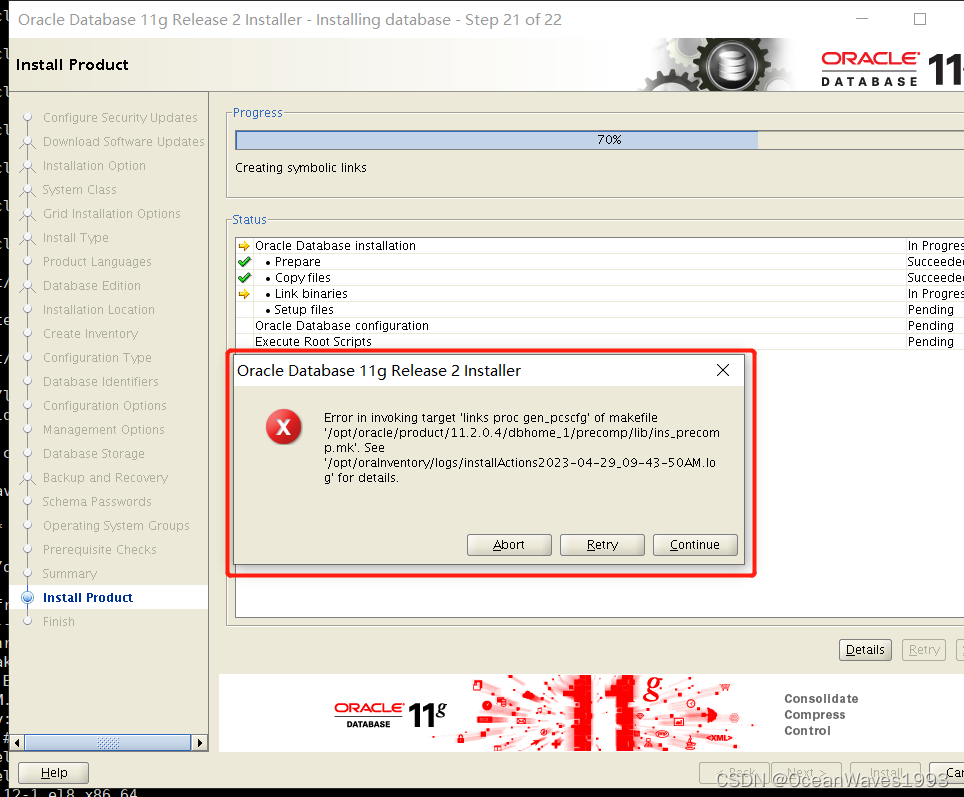
这是因为libaio版本过高,对于oracle11g 的安装, libaio1库版本不能大于0.3.109 。
报错
f
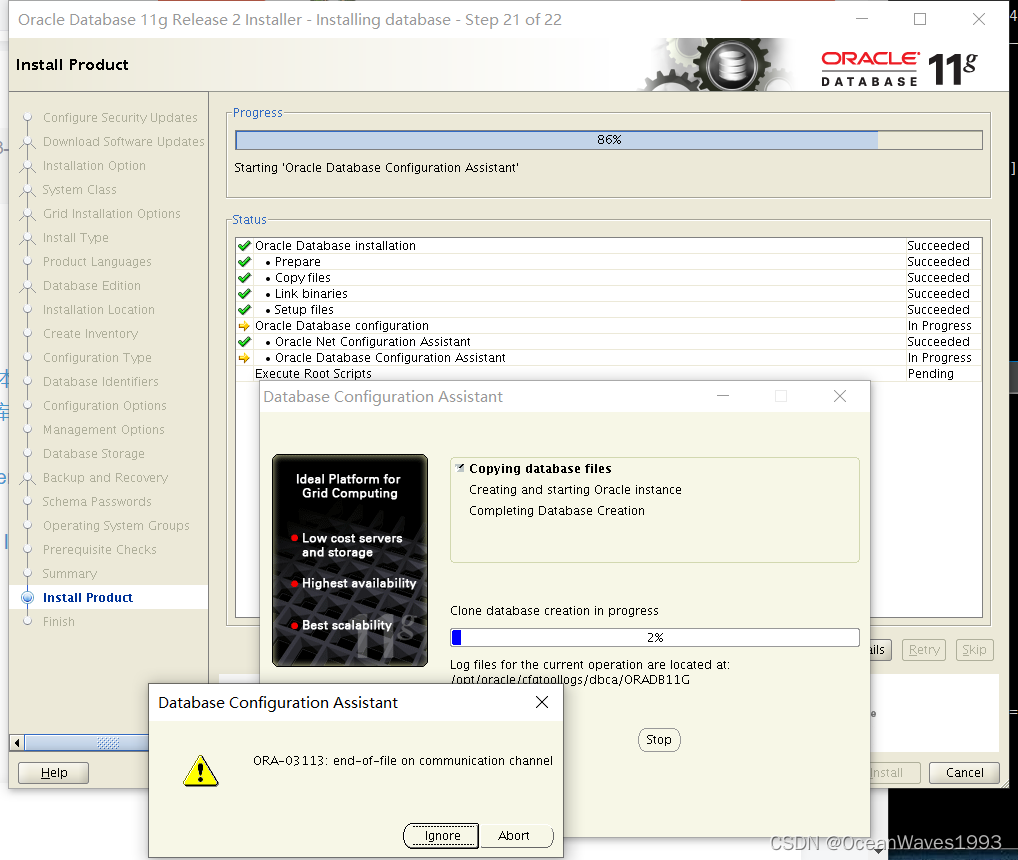
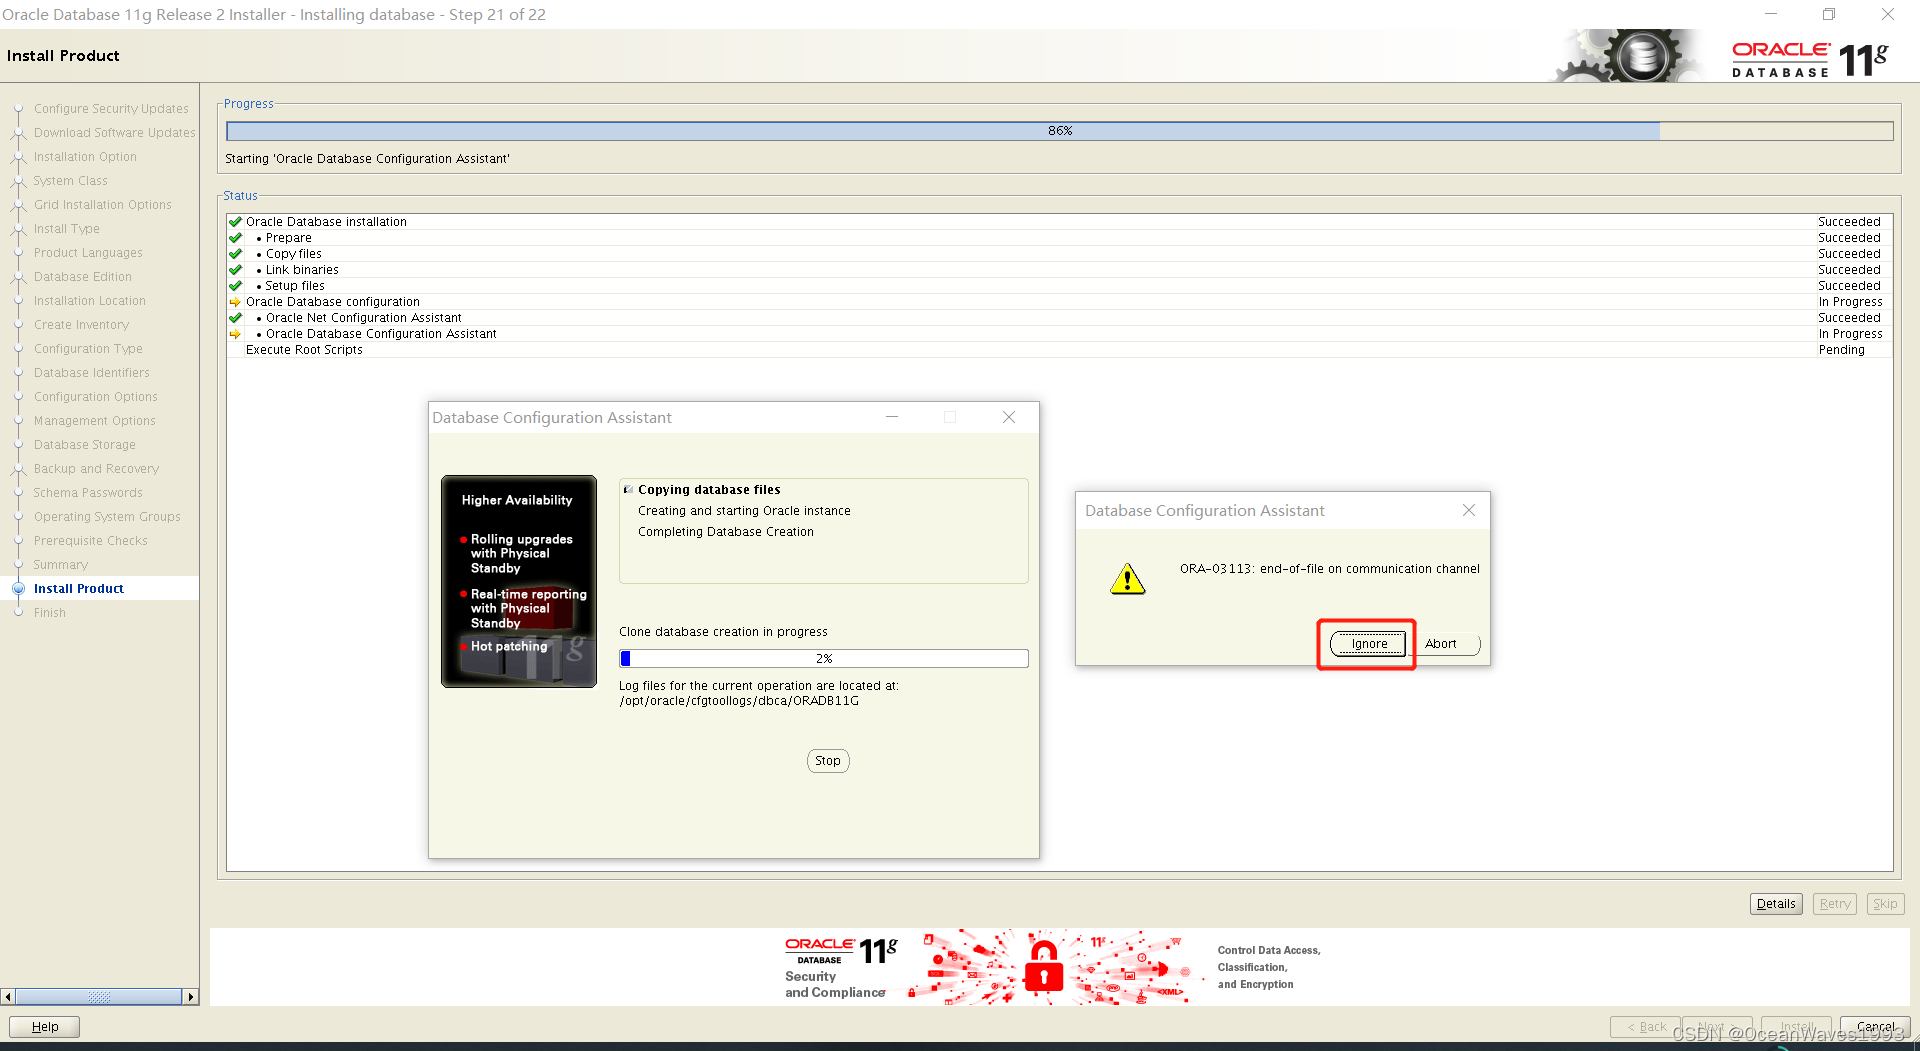
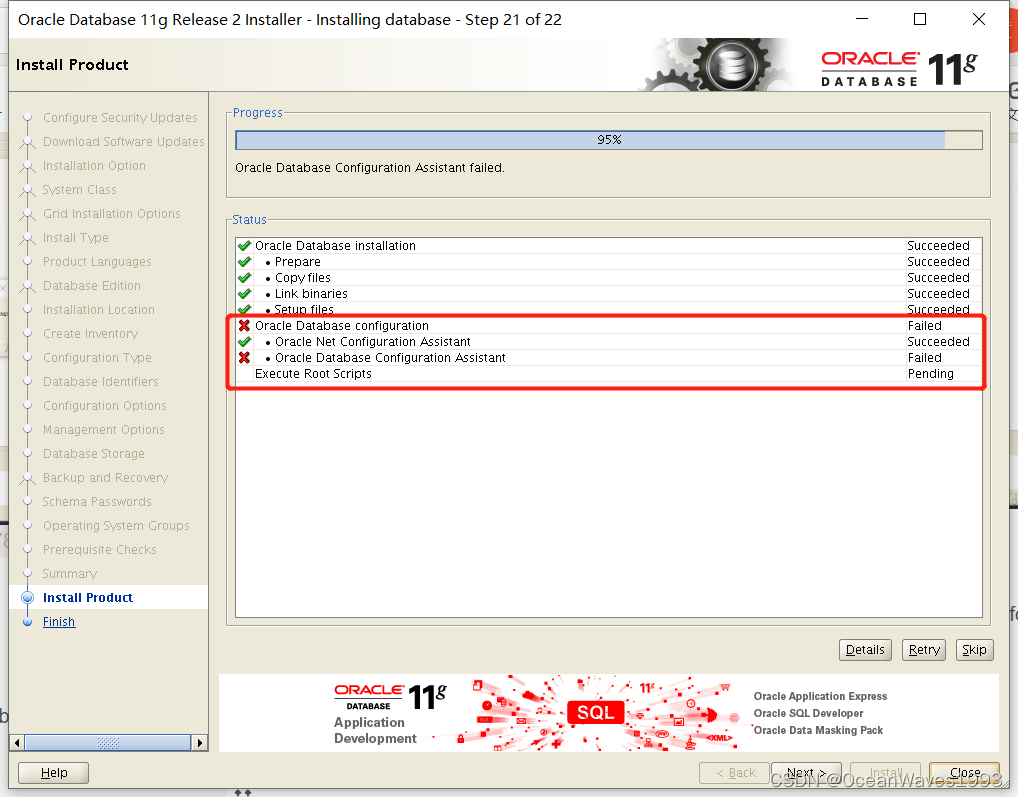
点SKIP
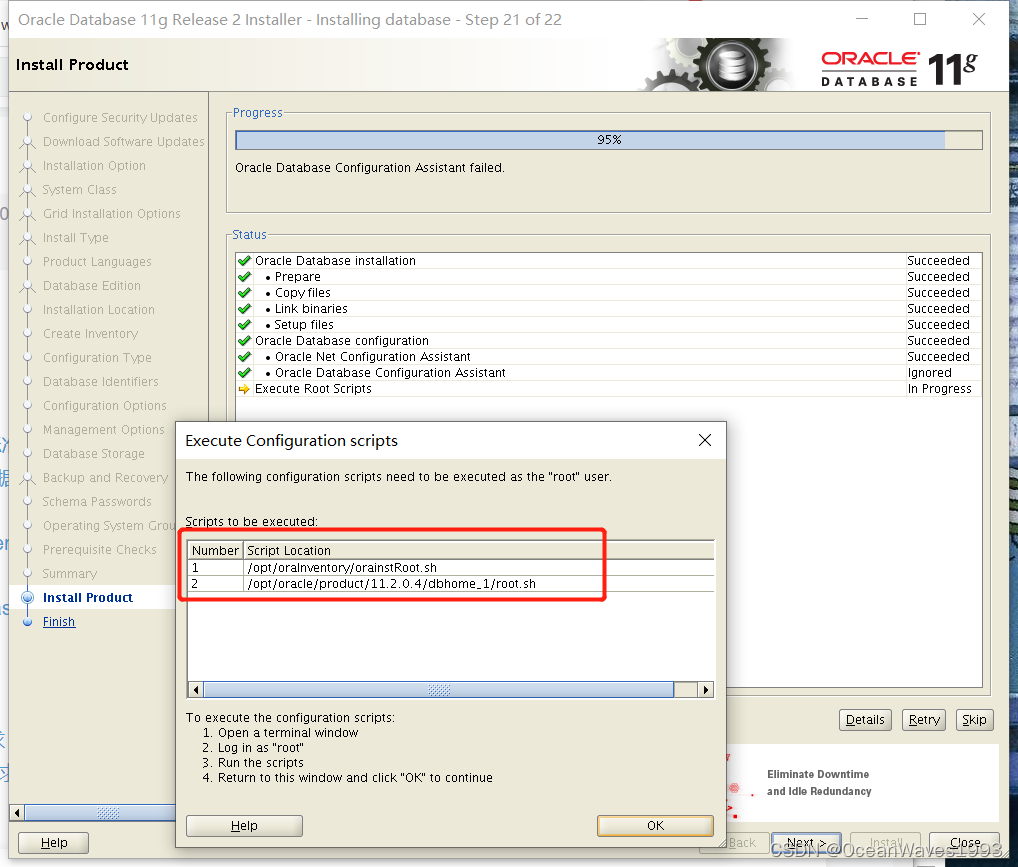
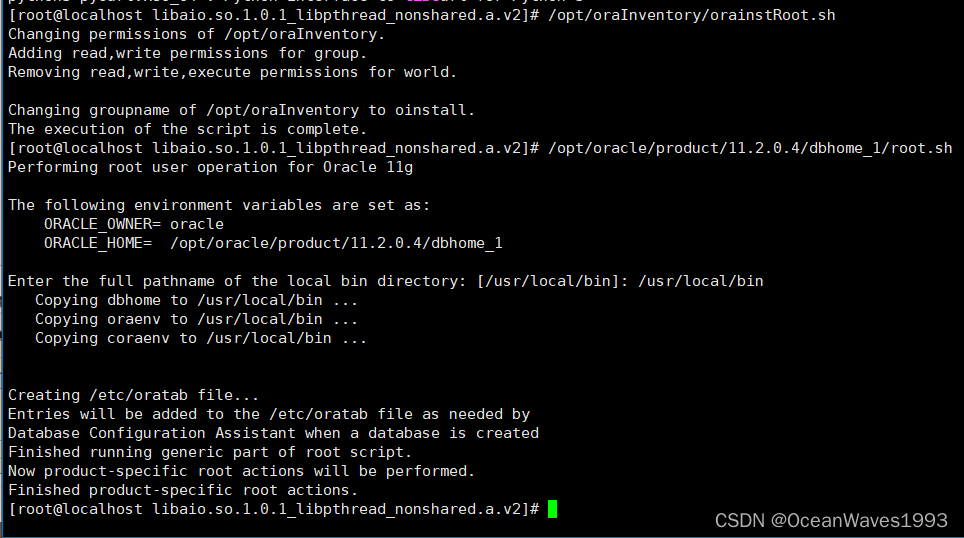
/opt/oraInventory/orainstRoot.sh
/opt/oracle/product/11.2.0.4/dbhome_1/root.sh
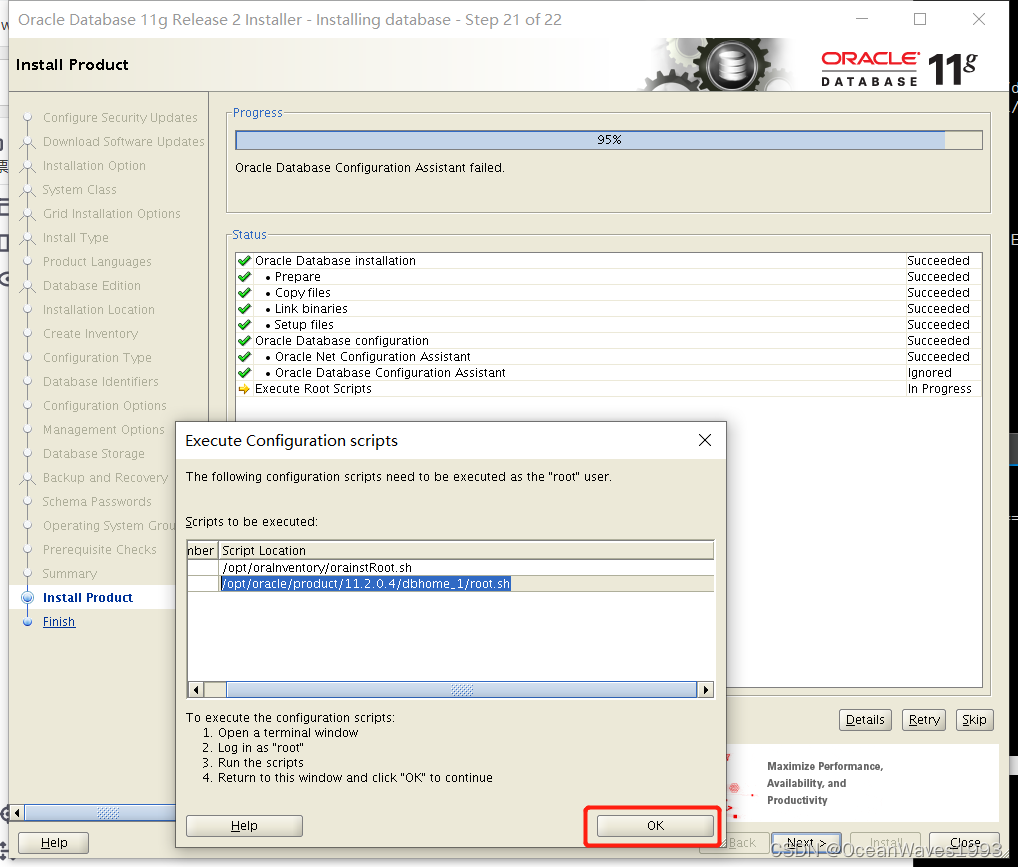
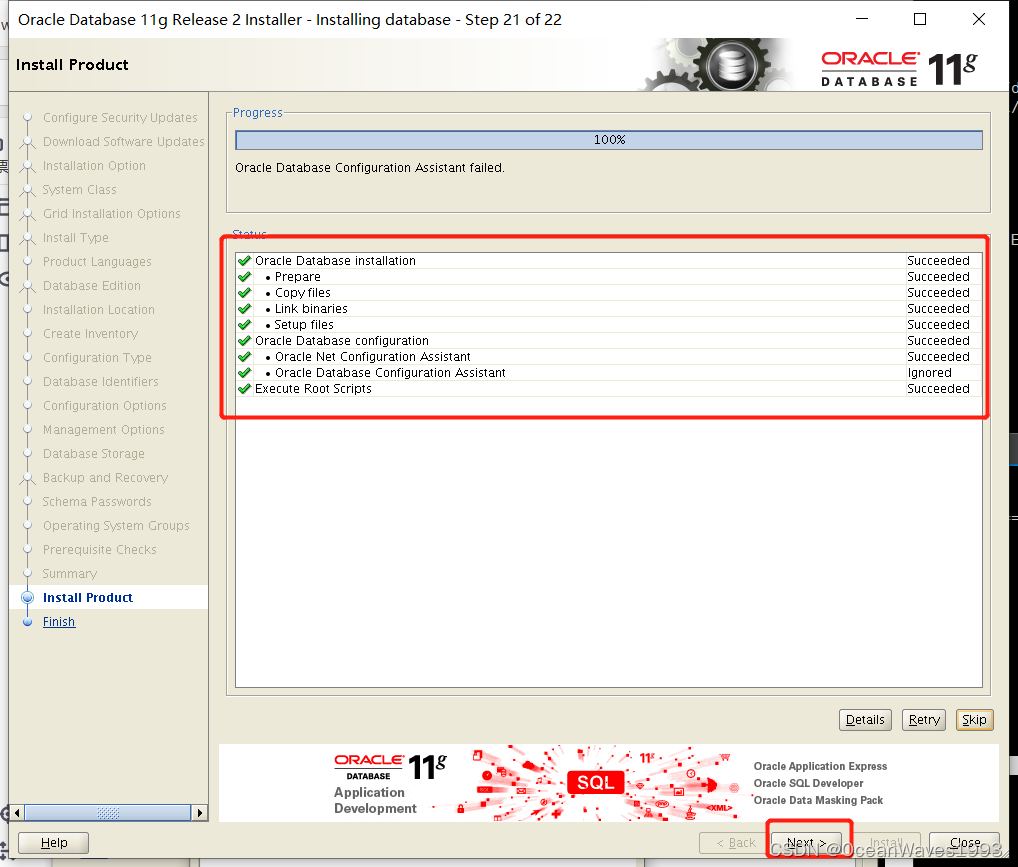
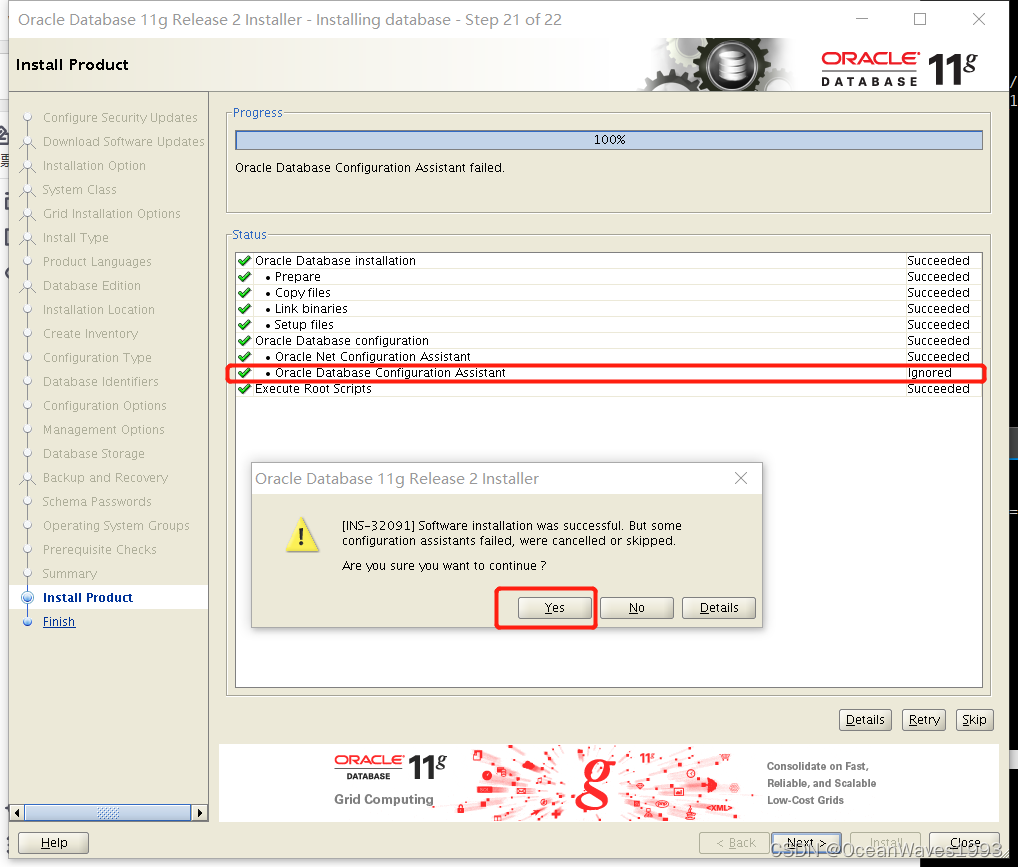
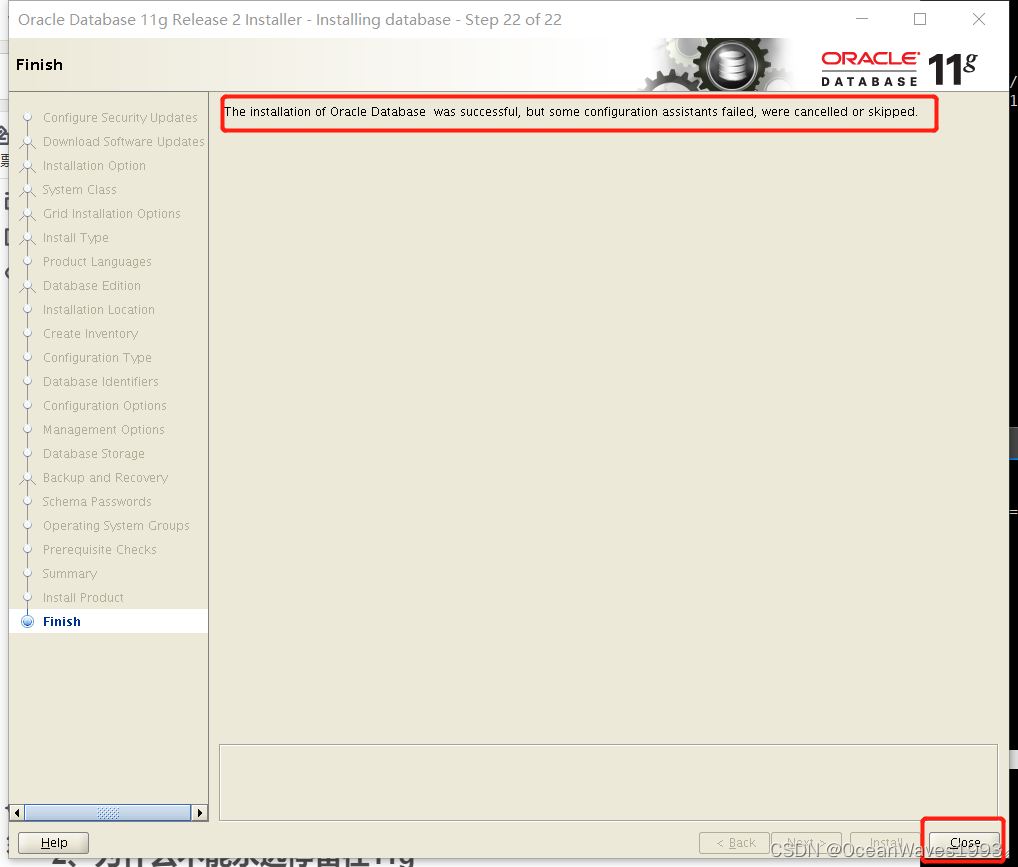
安装成功


4、为什么不能永远停留在11g
https://mikedietrichde.com/2022/04/06/why-you-cant-stay-on-oracle-database-11g-forever/


