三种路由
方法1:装饰器 python C#, java 都可以用这种方式
from flask import Flask
app = Flask(__name__)

@app.route('/hello')
def hello():
	return 'Hello world!'

app.run(debug=True)
方法2: 注册路由 php python
from flask import Flask
app = Flask(__name__)

//@app.route('/hello')
def hello():
	return 'Hello world!'

app.add_url_rule('/hello', view_func=hello)

app.run(debug=True)
方法3:python 特有的规则
from flask.views import View, MethodView
from flask import Flask, render_template, request

app = Flask(__name__)


class MyView(MethodView):
    def get(self):
        return render_template('index.html')

    def post(self):
        username = request.form.get('username')
        password = request.form.get('password')
        if username == "gp" and password == "mypassword":
            return '密码正确'
        else:
            return '密码错误'


app.add_url_rule('/', endpoint='login', view_func=MyView.as_view('login'))


if __name__ == '__main__':
    app.run(host="0.0.0.0", port=5000)
它的过程是通过View的as_view -> MethodView中的dispatch_request -> 具体的get、post等方法。
看一看flask 是如何实现的
class View:
methods: t.Optional[t.List[str]] = None
provide_automatic_options: t.Optional[bool] = None
decorators: t.List[t.Callable] = []
def dispatch_request(self) -> ResponseReturnValue:
raise NotImplementedError()
@classmethod
def as_view(
cls, name: str, *class_args: t.Any, **class_kwargs: t.Any
) -> t.Callable:
def view(*args: t.Any, **kwargs: t.Any) -> ResponseReturnValue:
self = view.view_class(*class_args, **class_kwargs) # type: ignore
return current_app.ensure_sync(self.dispatch_request)(*args, **kwargs)
if cls.decorators:
view.__name__ = name
view.__module__ = cls.__module__
for decorator in cls.decorators:
view = decorator(view)
view.view_class = cls # type: ignore
view.__name__ = name
view.__doc__ = cls.__doc__
view.__module__ = cls.__module__
view.methods = cls.methods # type: ignore
view.provide_automatic_options = cls.provide_automatic_options # type: ignore
return view
实际上flask通过as_view方法,返回一个函数,这个函数就是我们需要绑定的视图函数,实现由类到函数的变化过程。
通过把cls绑定到view函数的view_class属性上面,实现view.view_class(*class_args, **class_kwargs)
来达到传递参数的目的,这正是python魅力之所在。就是用的闭包,或者装饰器了。和第一种方法类型,不过一个显示,一个隐式而已。
配置文件所有的字母必须大写
开发环境和测试环境以及生成环境的参数不同,那么如何区分这三个环境呢,if else 获取不一样的环境? 不是的,应该让三个环境相近,而使用配置文件将他们分开, 然后 设置 git ignore, 各自走各自的配置文件
在项目根路径下设置config.py
DEBUG=True
在面的启动文件
app = Flask(__name__)
# 加载配置项
app.config.from_object("config")
# 读取
app.config["DEBUG"]
注意flask 规定,只能用全大写,否则key error
if __name__的作用
是入口文件,增加了这个判断,能够确保入口文件里面的代码只在入口文件执行。
if __name__ == '__main__':
    app.run(host="0.0.0.0", port=5000)
手动启动很好理解,因为他做了入口。
但是生产环境下是nginx+uwsgi,它是被uwsgi所加载的模块。入口文件变成了uwsgi,此时如果没有 if __name__的判断,会使web服务器启动两遍。一个是uwsgi的,一个是 开发中的python入口文件的,flask的内置服务器。
视图函数的return和普通函数的return有什么区别么?
有,不是一个简单的普通函数的return,是返回了一个response的响应对象。
视图函数,不会只返回类似 helloworld的字符串,
而是返回包含 status code 200,404, 301, content-type http headers,默认text/html
以及return的文本。
它等于
@app.route('/hello')
def hello():
	return 'helloworld'
@app.route('/hello')
def hello():
	return '<html></html>'
@app.route('/hello')
def hello():
	headers = {
		'content-type':'text/plain'
	}
	response = make_response('<html></html>',200)
	response.headers=headers
	return response
最后一个会解析出html 因为他当成 text/plain 普通文本,而不是html文本了。
@app.route('/hello')
def hello():

	return '<html></html>', 301,headers
它等价于这个,flask 还是给返回了response对象。
解决核心对象重复引用
在flask中,将app的核心对象和注册路由写在同一个文件中是非常不好的体验
from flask import Flask
app = Flask(__name__)

@app.route('/hello')
def hello():
	return 'Hello world!'

app.run(debug=True)
只有1,2个路由是没问题的,可是,当有上百个路由的时候,而且开发者10个人同时在开发,大家都修改这一个入口文件,会造成很差的体验。
所以我们需要可以拆分路由,那么如何才能拆分呢?
可以add_url 的方式手动注册,但这种并不优雅。
我认为有两种比较好的
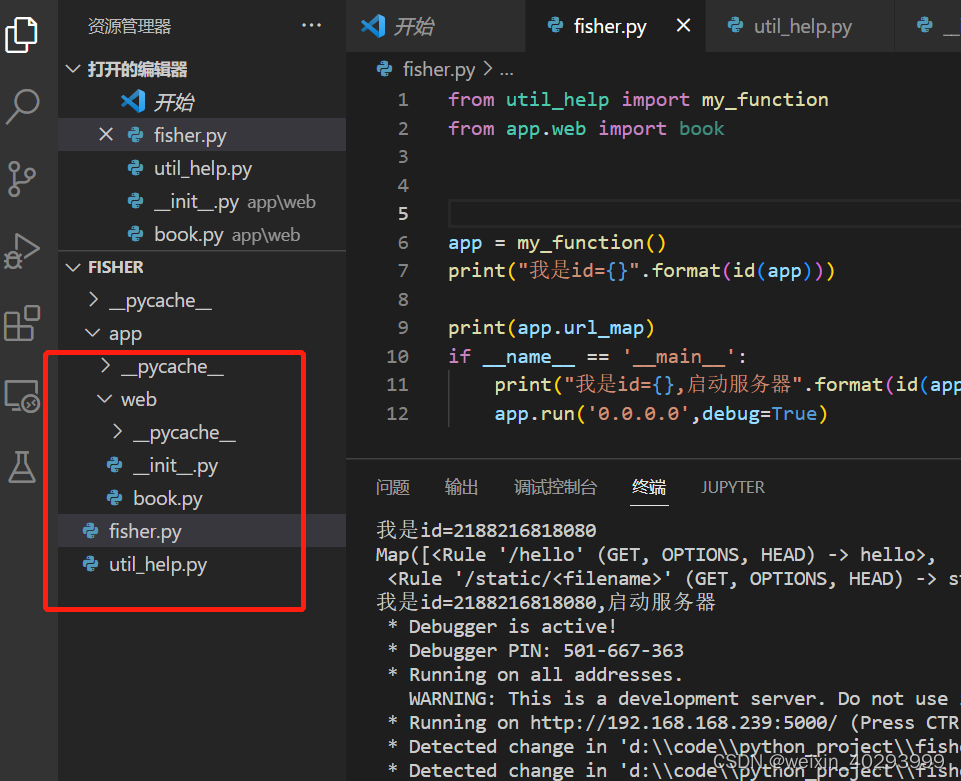
方式1: 保持核心对象app 只有一个,在util_help.py中定义一个函数,
from flask import Flask
def my_function():
    # 定义静态变量
    if not hasattr(my_function, "my_static_variable"):
        my_function.my_static_variable = Flask(__name__)

    return my_function.my_static_variable
谁用到app对象都去这里满拿,因为是定义了静态变量,所以,是独一份的,不会随着包引用构建多次. 注册路由是没问题的.
方式2: 通常情况会出现循环引用,因为入口文件会引入 app.web.book 文件, 而book文件又会去入口文件引入app, 造成两个app, 在book文件中的app对象,注册了路由函数,但不是入口文件的app对象.这个时候,蓝图就起作用了.
Flask的经典错误
working outside application context
AppContext, RequestContext, Flask与Request直接的关系.
应用上下文 对象 Flask
请求上下文 对象 Request
Flask AppContext
Request RequestContext
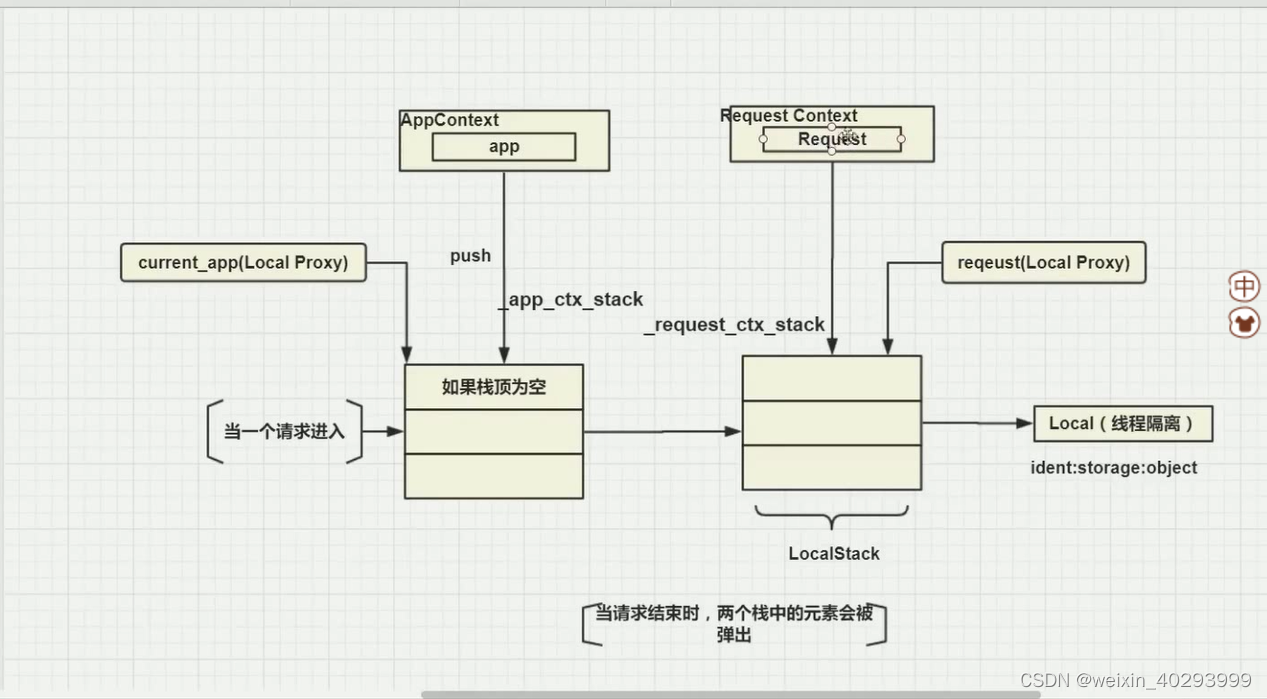
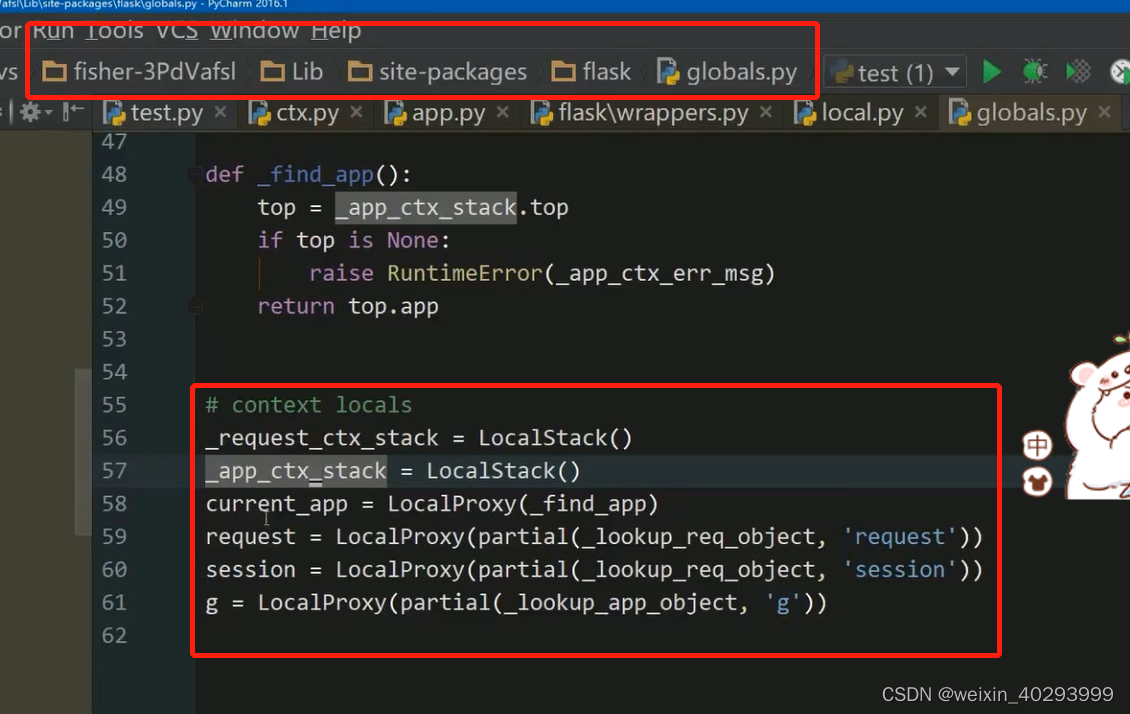
做上下文管理的源码!
用这两句把current_app 推进占
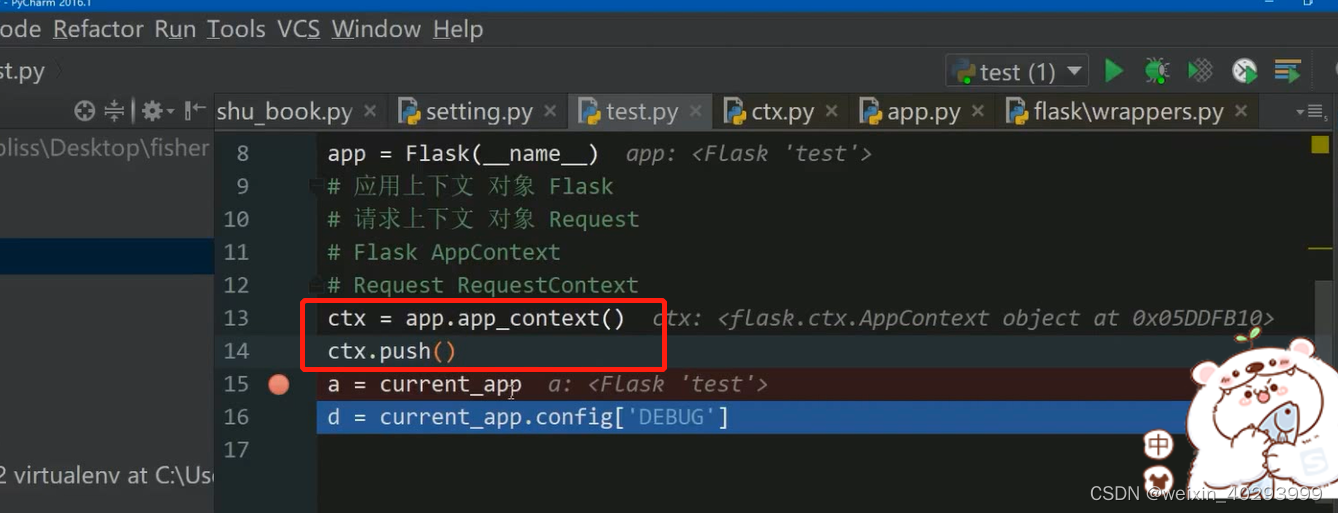
上下文管理的逻辑使用场景:
数据库:
1.连接数据库
2.执行sql
3.释放资源
解决方法1:
try
…
except
…
finall
…
解决方法2:
with 语句, 可以对比 whith open() as f:
…
文件读写:
try:
	f = open(r"D:/t.txt")
	print(f.read())
finally:
	f.close()
with open(r"D:/t.txt") as f:
	print(f.read())
只要实现了__enter__ 和 __exit__方法就是上下文管理器.
class A:
	def __enter__(self):
	    a = 1
	def __exit__(self,exc_type, exc_value, tb):
		if tb:
			print("process exception")
		else:
			print('no exception')
		b = 2
		return True
		# 或者返回 False, 代表异常还需要接着抛出去,
		# True 异常里面出来,外面不抛出异常
		# 什么都不返回 和False 的逻辑一致


with A() as obj_A:
     pass
现在的 obj_A 是 None
as 返回的不是上下文管理器,而是 enter方法返回的值.
with 语句包裹的变量值是有值的, 运行exit之后,就没值了.因为分别执行了 push 和pop,
push 就是把变量放进去, pop 就弹出来了.
