前言:蓝牙聊天App设计全部有三篇文章(一、UI界面设计,二、蓝牙搜索配对连接实现,三、蓝牙连接聊天),这篇文章是一、UI界面设计
课程1:Android Studio小白安装教程,以及第一个Android项目案例“Hello World”的调试运行
课程2:蓝牙聊天App设计1:Android Studio制作蓝牙聊天通讯软件(UI界面设计)
课程3:蓝牙聊天App设计2:Android Studio制作蓝牙聊天通讯软件(蓝牙搜索配对连接)
课程4:蓝牙聊天App设计3:Android Studio制作蓝牙聊天通讯软件(完结,蓝牙连接聊天,结合生活情景进行蓝牙通信的通俗讲解,以及代码功能实现,内容详细,讲解通俗易懂)
本次项目任务效果图
共有两个界面,一个是蓝牙搜索界面,另一个是聊天界面,效果界面分别如下,文末附有工程源码分享
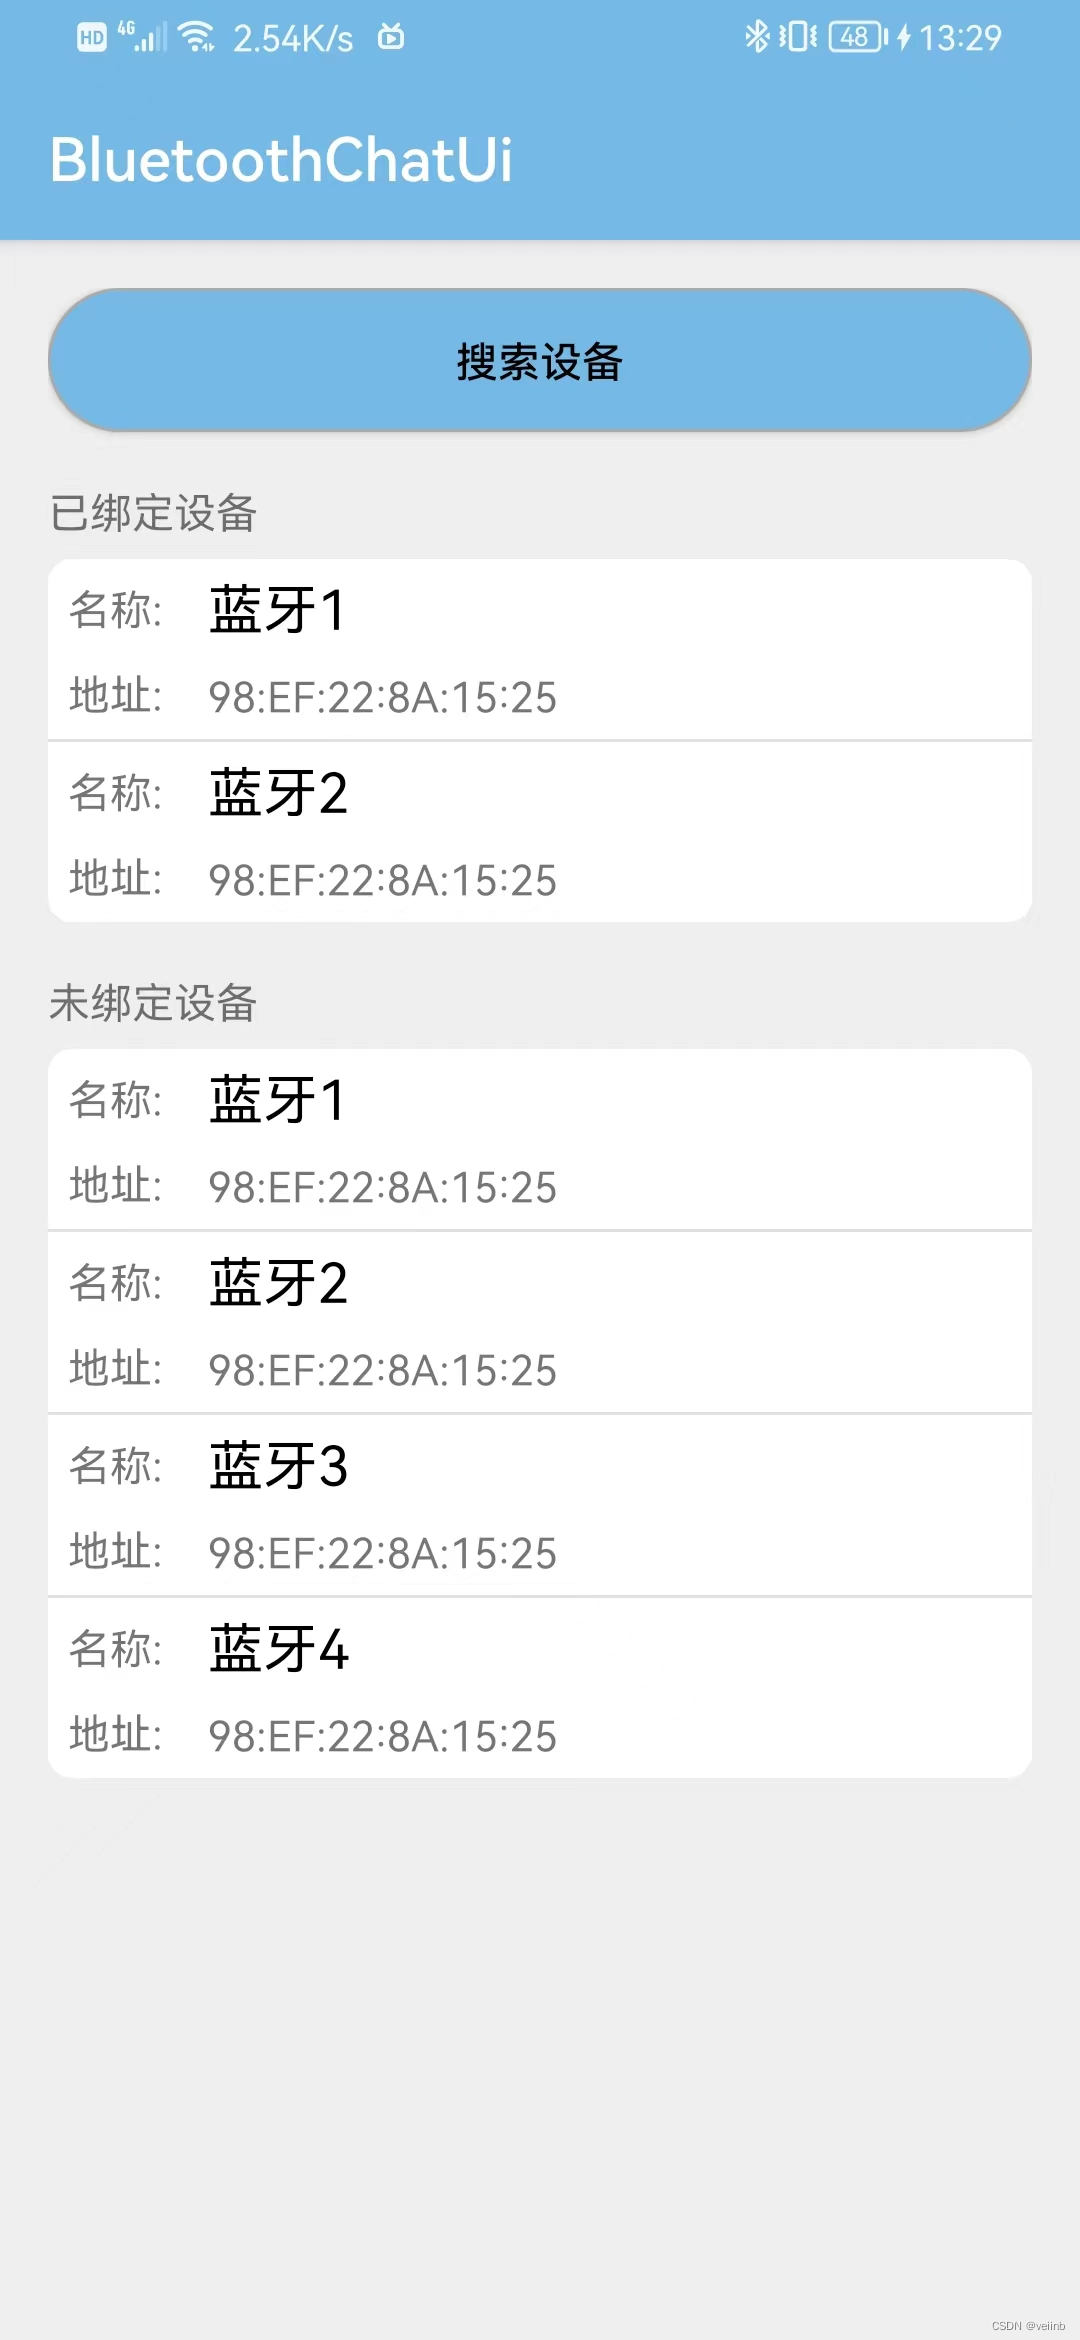
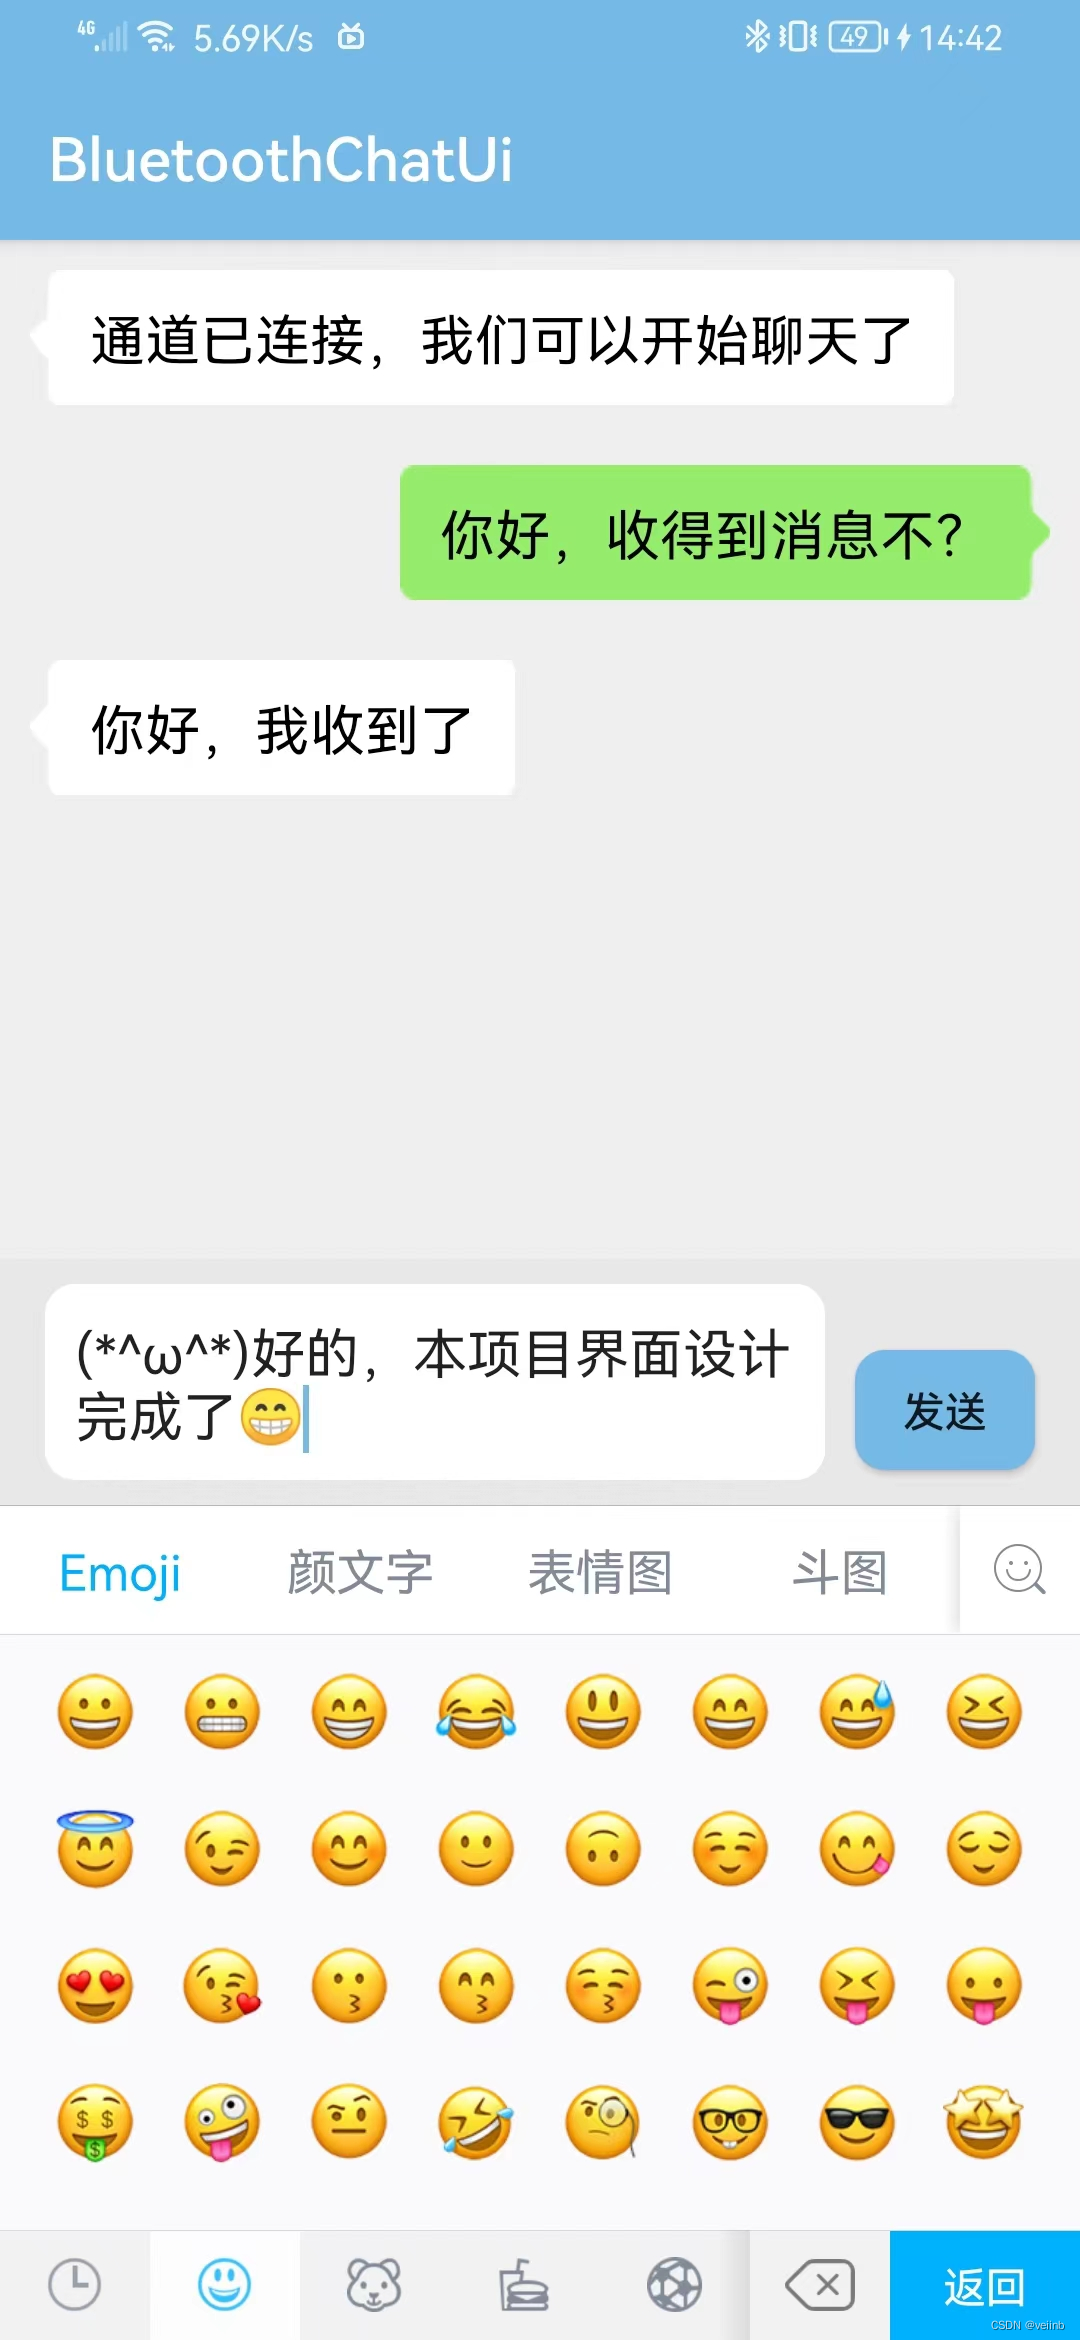
一、创建空项目
创建一个新项目并运行成功第一个程序“Hello World!”
Android Studio小白安装教程,以及第一个Android项目案例“Hello World”的调试运行
二、实现第一个界面(蓝牙搜索界面)
1、新建包“MyClass”,然后在包里添加新类“DeviceClass.java”和“DeviceAdapter.java”,用于存储和显示蓝牙内容
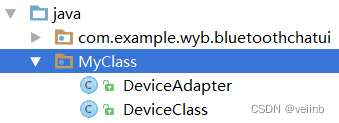
(1)新建包“MyClass”

(2)新建类“DeviceClass.java”且完整代码如下
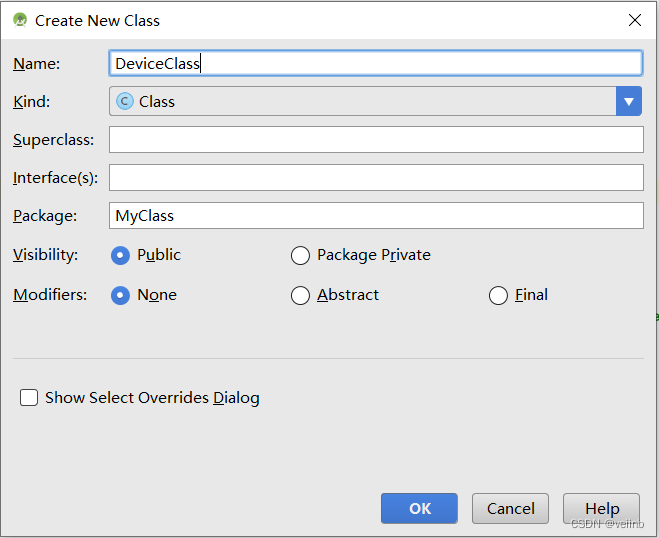
package MyClass;
/**
 * Created by WYB on 2023/4/27.
 */
public class DeviceClass {
    private String bName; //蓝牙名称
    private String bAdress; //蓝牙地址

    public DeviceClass(String bName,String bAdress){
        this.bName = bName;
        this.bAdress = bAdress;
    }
    public String getbName(){
        return bName;
    }
    public String getbAdress(){
        return bAdress;
    }
}
(3)新建类“DeviceAdapter.java”且完整代码如下
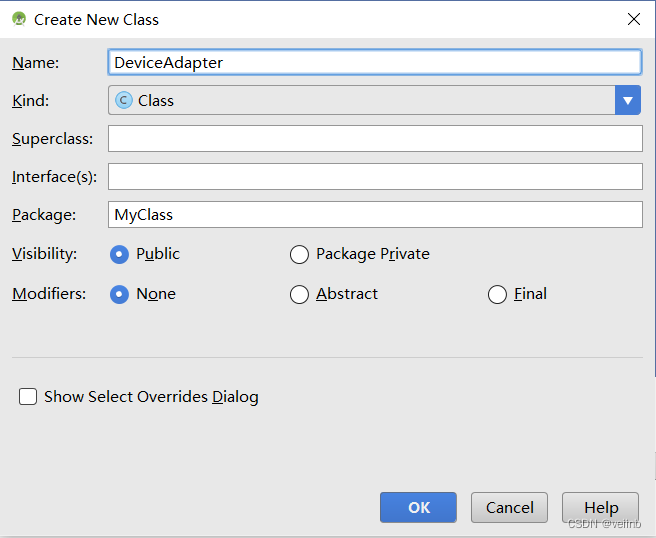
ppackage MyClass;
import android.content.Context;
import android.view.LayoutInflater;
import android.view.View;
import android.view.ViewGroup;
import android.widget.ArrayAdapter;
import android.widget.TextView;
import com.example.wyb.bluetoothchatui.R;
import java.util.List;
/**
 * Created by WYB on 2023/4/27.
 */
public class DeviceAdapter extends ArrayAdapter<DeviceClass> {
    private int resourceId;
    public DeviceAdapter(Context context, int textViewResourceId, List<DeviceClass> objects) {
        super(context, textViewResourceId, objects);
        resourceId = textViewResourceId;
    }
    @Override
    public View getView(int position, View convertView, ViewGroup parent) {
        DeviceClass device = getItem(position);
        View view = convertView;
        if (view == null) {
            view = LayoutInflater.from(getContext()).inflate(resourceId, parent, false);
        }
        TextView textView1 = (TextView) view.findViewById(R.id.textView1);
        TextView textView2 = (TextView) view.findViewById(R.id.textView2);
        textView1.setText(device.getbName());
        textView2.setText(device.getbAdress());
        return view;
    }
}
2、由于原有Button(发送按键)和ListView(蓝牙展示菜单)比较呆板,这里对这两个控件进行自定义样式

(1)新建“button_style.xml”,且完整代码如下:

<?xml version="1.0" encoding="utf-8"?>
<shape xmlns:android="http://schemas.android.com/apk/res/android" >
    <size android:width="60dp" android:height="40dp"/>  //设置长和宽
    <stroke android:width="1dp" android:color="#aaaaaa" ></stroke>  //设置外边框厚度和颜色
    <solid android:color="#75b9e6" />  //设置内色
    <corners android:radius="100dp"/>  //设置圆弧形状的弧度
</shape>
(2)新建“listview_style1.xml”,且完整代码如下:

<?xml version="1.0" encoding="utf-8"?>
<shape xmlns:android ="http://schemas.android.com/apk/res/android" android:shape ="rectangle" >
    <solid android:color="#ffffff" />
    <corners android:bottomRightRadius ="8dp" android:bottomLeftRadius ="8dp" android:topLeftRadius ="8dp" android:topRightRadius ="8dp" />
</shape>
3、界面一设计主要代码
(1)在“layout”中新建“device_item.xml”,且完整代码如下:
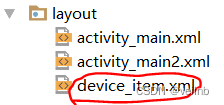
<?xml version="1.0" encoding="utf-8"?>
<LinearLayout xmlns:android="http://schemas.android.com/apk/res/android"
    android:layout_width="match_parent"
    android:layout_height="match_parent"
    android:orientation="horizontal">
    <LinearLayout
        android:layout_width="150px"
        android:layout_height="180px"
        android:orientation="vertical"
        android:padding="20px">
        <TextView
            android:layout_width="wrap_content"
            android:layout_height="80px"
            android:text="名称:"
            android:layout_weight="1" />

        <TextView
            android:layout_width="wrap_content"
            android:layout_height="70px"
            android:text="地址:"
            android:layout_marginTop="20px"
            android:layout_weight="1" />
    </LinearLayout>
    <LinearLayout
        android:layout_width="wrap_content"
        android:layout_height="180px"
        android:orientation="vertical"
        android:padding="10px">
        <TextView
            android:layout_width="wrap_content"
            android:layout_height="95px"
            android:id="@+id/textView1"
            android:layout_weight="1"
            android:textColor="#000"
            android:textSize="55px"/>
        <TextView
            android:layout_width="wrap_content"
            android:layout_height="60px"
            android:id="@+id/textView2"
            android:layout_weight="1" />
    </LinearLayout>
</LinearLayout>
(2)“activity_main.xml”的完整代码如下:
<?xml version="1.0" encoding="utf-8"?>
<LinearLayout xmlns:android="http://schemas.android.com/apk/res/android"
    xmlns:tools="http://schemas.android.com/tools"
    android:id="@+id/activity_main"
    android:layout_width="match_parent"
    android:layout_height="match_parent"
    android:orientation="vertical"
    android:background="#eeeeee"
    tools:context="com.example.wyb.btw3.MainActivity">
    <Button
        android:text="搜索设备"
        android:layout_width="match_parent"
        android:layout_height="wrap_content"
        android:background="@drawable/button_style"
        android:textColor="#000000"
        android:id="@+id/button1" />
    <TextView
        android:text="已绑定设备"
        android:layout_width="match_parent"
        android:layout_height="wrap_content"
        android:layout_marginTop="50px"
        android:id="@+id/textView1" />
    <ListView
        android:background="@drawable/listview_style1"
        android:layout_width="match_parent"
        android:layout_height="wrap_content"
        android:id="@+id/listview2"
        android:layout_marginTop="20px"/>
    <TextView
        android:text="未绑定设备"
        android:layout_width="match_parent"
        android:layout_height="wrap_content"
        android:layout_marginTop="50px"
        android:id="@+id/textView2" />
    <ListView
        android:layout_width="match_parent"
        android:layout_height="wrap_content"
        android:id="@+id/listview1"
        android:background="@drawable/listview_style1"
        android:layout_marginTop="20px"/>
</LinearLayout>
(3)“MainActivity.java”的完整代码如下
package com.example.wyb.bluetoothchatui;
import android.bluetooth.BluetoothDevice;
import android.content.Intent;
import android.support.v7.app.AppCompatActivity;
import android.os.Bundle;
import android.util.Log;
import android.view.View;
import android.widget.AdapterView;
import android.widget.ListView;
import java.util.ArrayList;
import java.util.List;
import MyClass.DeviceAdapter;
import MyClass.DeviceClass;
public class MainActivity extends AppCompatActivity {
    private DeviceAdapter mAdapter1,mAdapter2;
    private List<DeviceClass> mbondDeviceList = new ArrayList<>();//搜索到的所有已绑定设备保存为列表
    private List<DeviceClass> mfindDeviceList = new ArrayList<>();//搜索到的所有未绑定设备保存为列表
    @Override
    protected void onCreate(Bundle savedInstanceState) {
        super.onCreate(savedInstanceState);
        setContentView(R.layout.activity_main);
        Show_listView();//显示搜索内容
    }
    public void Show_listView(){
        DeviceClass bondDevice;
        DeviceClass findDevice;
        //显示已绑定设备
        for(int i=1;i<3;i++){
            bondDevice = new DeviceClass("蓝牙"+i,"98:EF:22:8A:15:25");
            mbondDeviceList.add(bondDevice);
        }
        mAdapter1 = new DeviceAdapter(MainActivity.this, R.layout.device_item, mbondDeviceList);
        ListView listView1 = (ListView)findViewById(R.id.listview1);
        listView1.setAdapter(mAdapter1);
        mAdapter1.notifyDataSetChanged();
        listView1.setOnItemClickListener(toMainActivity2);//设备点击事件,点击设备名称后执行toMainActivity2
        //显示未绑定设备
        for(int i=1;i<5;i++){
            findDevice = new DeviceClass("蓝牙"+i,"98:EF:22:8A:15:25");
            mfindDeviceList.add(findDevice);
        }
        mAdapter2 = new DeviceAdapter(MainActivity.this, R.layout.device_item, mfindDeviceList);
        ListView listView2 = (ListView)findViewById(R.id.listview2);
        listView2.setAdapter(mAdapter2);
        mAdapter2.notifyDataSetChanged();
    }
    //点击设备后执行的函数
    private AdapterView.OnItemClickListener toMainActivity2 =new AdapterView.OnItemClickListener(){
        @Override
        public void onItemClick(AdapterView<?> adapterView, View view, int i, long l){
        	/*//Main2Activity是第二个界面的,运行会出错,为了展现目前的效果,对这里先改为注释
            Intent intent = new Intent(MainActivity.this,Main2Activity.class);
            startActivity(intent);
            */
        }
    };
}
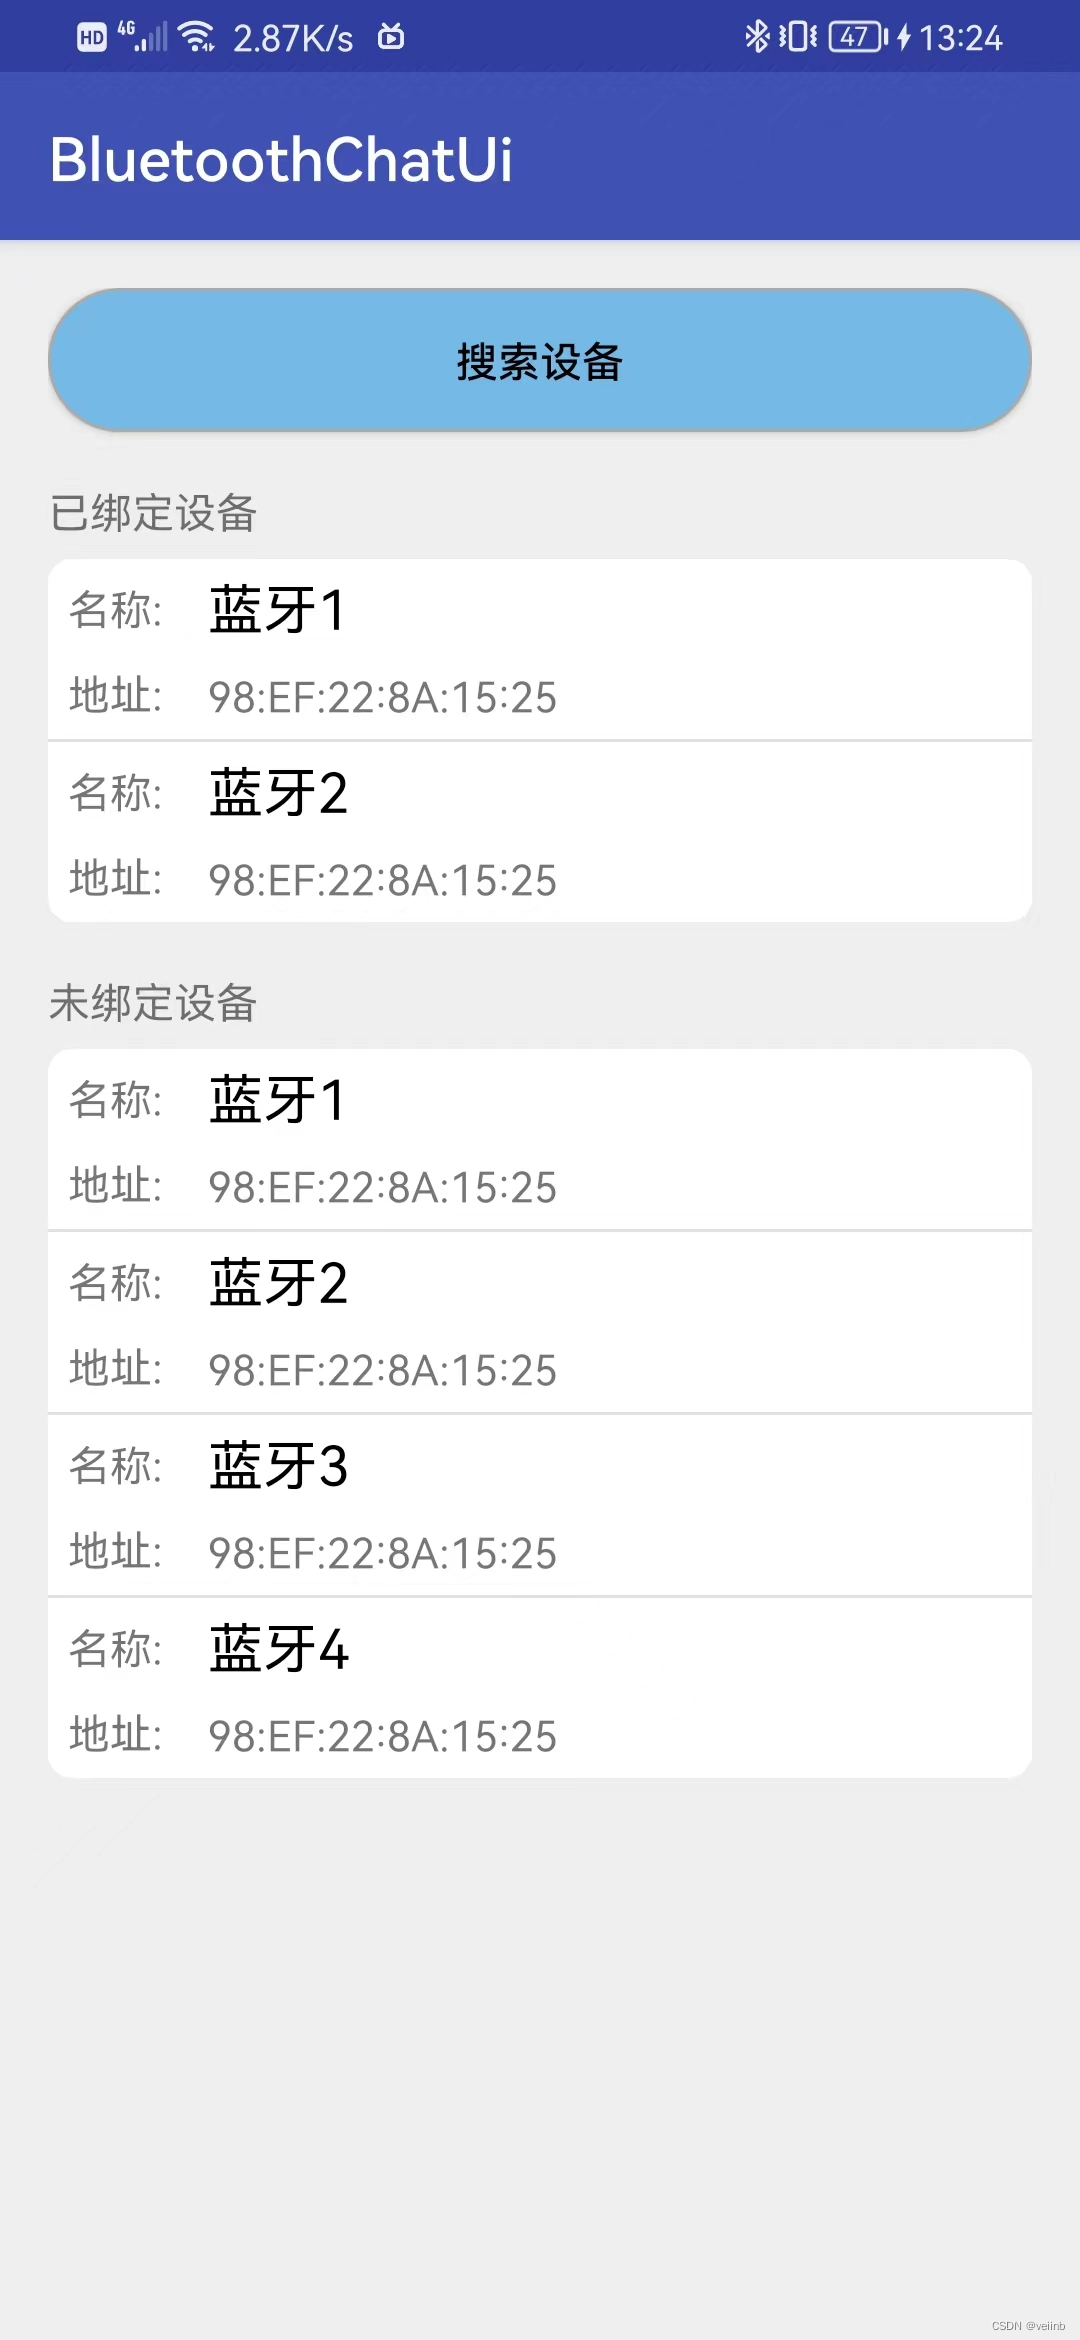
4、运行界面效果如下
5、界面色彩微调
我们可以看到,界面的上方颜色在软件中可能不是很协调,那么如果需要,接下来就对颜色进行修改
(1)打开“colors.xml"文件,并修改为如下代码

<?xml version="1.0" encoding="utf-8"?>
<resources>
    <color name="colorPrimary">#75b9e6</color>
    <color name="colorPrimaryDark">#75b9e6</color>
    <color name="colorAccent">#75b9e6</color>
</resources>
(2)到这里,恭喜你已经完成了第一个界面的设计,

三、实现第二个界面(聊天界面)
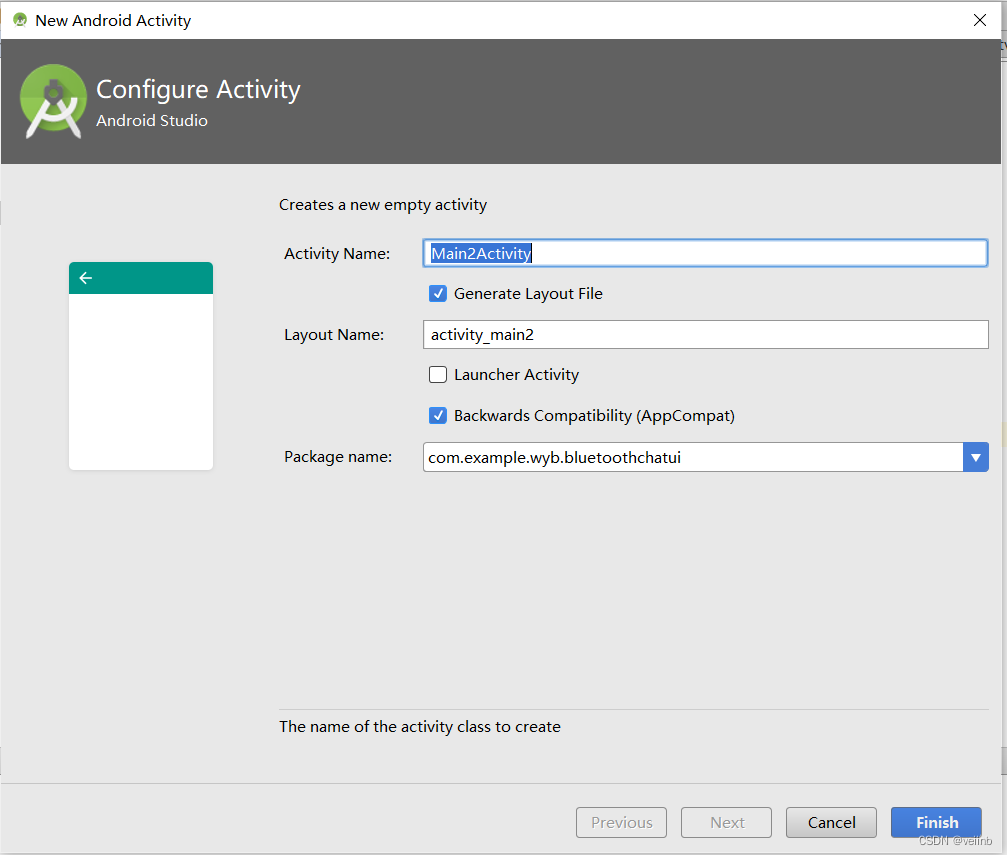
1、新建“Main2Activity”

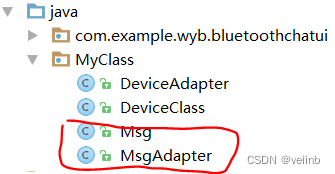
2、添加新类“Msg.java”和“MsgAdapter.java”,用于存储和显示消息内容
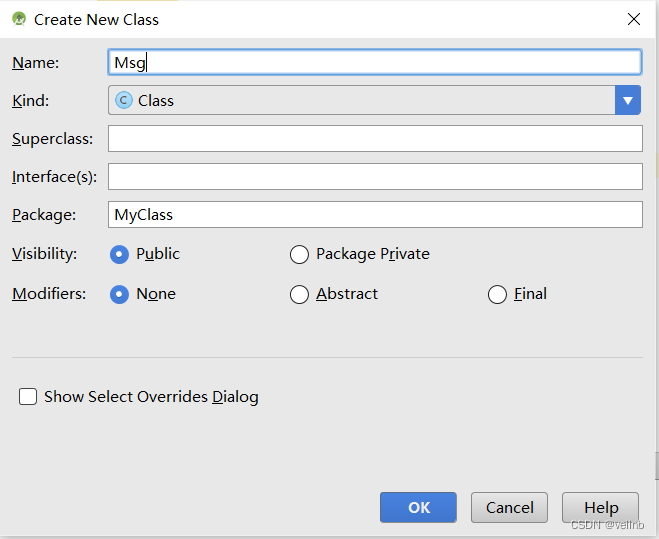
(1)新建“Msg.java”且完整代码如下
package MyClass;
/**
 * Created by WYB on 2023/4/25.
 */
public class Msg {
    public static final int TYPE_RECEIVED = 0;
    public static final int TYPE_SENT = 1;
    private String content;
    private int type;
    public Msg(String content,int type){
        this.content = content;
        this.type = type;
    }
    public String getContent(){
        return content;
    }
    public int getType(){
        return type;
    }
}
(2)新建“MsgAdapter.java”且完整代码如下
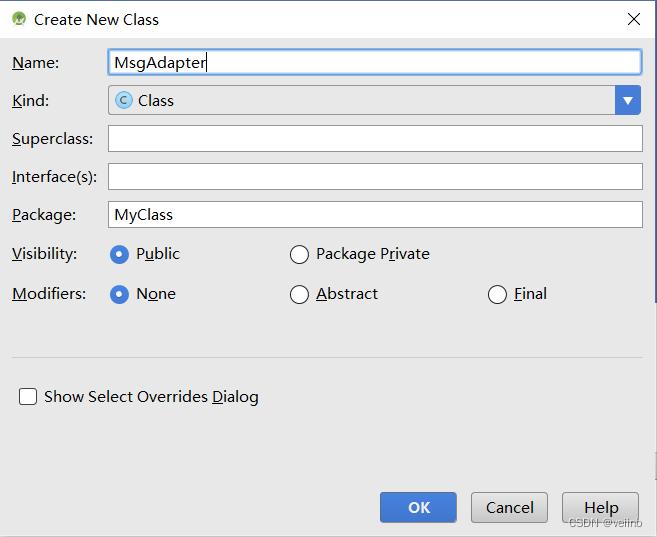
package MyClass;
import android.support.v7.widget.RecyclerView;
import android.view.LayoutInflater;
import android.view.View;
import android.view.ViewGroup;
import android.widget.LinearLayout;
import android.widget.TextView;
import com.example.wyb.bluetoothchatui.R;
import java.util.List;
/**
 * Created by WYB on 2023/4/27.
 */
public class MsgAdapter extends RecyclerView.Adapter<MsgAdapter.ViewHolder>{
    private List<Msg> mMsgList;
    static class ViewHolder extends RecyclerView.ViewHolder{
        LinearLayout leftLayout;
        LinearLayout rightLayout;
        TextView leftMsg;
        TextView rightMsg;
        public ViewHolder(View view){
            super(view);
            leftLayout = (LinearLayout) view.findViewById(R.id.left_layout);
            rightLayout = (LinearLayout) view.findViewById(R.id.right_layout);
            leftMsg = (TextView) view.findViewById(R.id.left_msg);
            rightMsg = (TextView) view.findViewById(R.id.right_msg);
        }
    }
    public MsgAdapter(List<Msg> msgList){
        mMsgList = msgList;
    }
    @Override
    public ViewHolder onCreateViewHolder(ViewGroup parent, int viewType){
        View view = LayoutInflater.from(parent.getContext()).inflate(R.layout.msg_item,parent,false);
        return new ViewHolder(view);
    }
    @Override
    public void onBindViewHolder(ViewHolder holder,int position){
        Msg msg = mMsgList.get(position);
        if(msg.getType() == Msg.TYPE_RECEIVED){
            holder.leftLayout.setVisibility(View.VISIBLE);
            holder.rightLayout.setVisibility(View.GONE);
            holder.leftMsg.setText(msg.getContent());
        }
        else {
            holder.leftLayout.setVisibility(View.GONE);
            holder.rightLayout.setVisibility(View.VISIBLE);
            holder.rightMsg.setText(msg.getContent());
        }
    }
    @Override
    public int getItemCount(){
        return mMsgList.size();
    }
}
3、添加相关依赖
在build.gradle中添加“compile ‘com.android.support:recyclerview-v7:26.+’”依赖,注意版本号与上面一致,然后点击右上角“Sync Now”重新加载资源
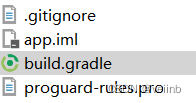
dependencies {
    compile fileTree(dir: 'libs', include: ['*.jar'])
    androidTestCompile('com.android.support.test.espresso:espresso-core:2.2.2', {
        exclude group: 'com.android.support', module: 'support-annotations'
    })
    compile 'com.android.support:appcompat-v7:26.+'
    compile 'com.android.support:recyclerview-v7:26.+'//注意版本号与上面一致
    testCompile 'junit:junit:4.12'
}

4、对发送按键和输入框进行自定义样式,不至于看起来呆板
(1)新建“send_text.xml”且完整代码如下
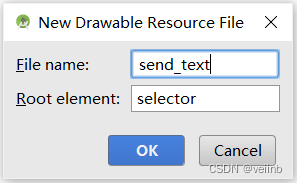
<?xml version="1.0" encoding="utf-8"?>
<shape xmlns:android="http://schemas.android.com/apk/res/android" >
    <solid android:color="#fff" />
    <corners android:radius="10dp"/>  //设置圆弧形状的弧度
</shape>
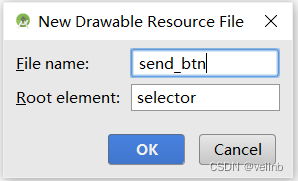
(2)新建“send_btn.xml”且完整代码如下
<?xml version="1.0" encoding="utf-8"?>
<shape xmlns:android="http://schemas.android.com/apk/res/android" >
    <solid android:color="#75b9e6" />
    <corners android:radius="10dp"/>  //设置圆弧形状的弧度
</shape>
5、界面一设计主要代码
(1)“activity_main2”完整代码如下
<?xml version="1.0" encoding="utf-8"?>
<LinearLayout xmlns:android="http://schemas.android.com/apk/res/android"
    xmlns:tools="http://schemas.android.com/tools"
    android:id="@+id/activity_main2"
    android:layout_width="match_parent"
    android:layout_height="match_parent"
    android:background="#eeeeee"
    android:orientation="vertical"
    tools:context="com.example.wyb.bluetoothchatui.Main2Activity">
    <android.support.v7.widget.RecyclerView
        android:id="@+id/msg_recycler_view"
        android:layout_width="match_parent"
        android:layout_height="0dp"
        android:layout_weight="1"/>
    <LinearLayout
        android:layout_width="match_parent"
        android:layout_height="wrap_content"
        android:background="#e8e8e8"
        android:padding="25px">
        <EditText
            android:id="@+id/input_text"
            android:layout_width="match_parent"
            android:layout_height="wrap_content"
            android:layout_weight="1"
            android:background="@drawable/send_text"
            android:layout_marginLeft="20px"
            android:layout_marginRight="20px"
            android:padding="30px"
            android:shadowColor="#75b9e6"
            android:layout_gravity="bottom" />
        <LinearLayout
            android:layout_width="wrap_content"
            android:layout_height="match_parent"
            android:gravity="bottom">
            <Button
                android:text="发送"
                android:layout_width="60dp"
                android:layout_height="40dp"
                android:background="@drawable/send_btn"
                android:layout_gravity="bottom"
                android:layout_marginLeft="10px"
                android:layout_marginRight="20px"
                android:layout_marginBottom="5px"
                android:id="@+id/send" />
        </LinearLayout>
    </LinearLayout>
</LinearLayout>
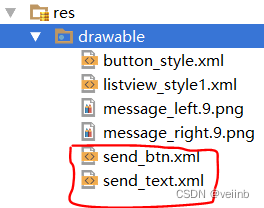
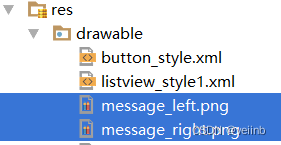
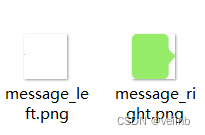
(2)在drawable中添加图片
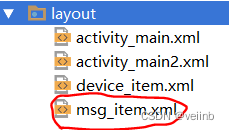
(3)在“layout”中新建“msg_item.xml”且完整代码如下
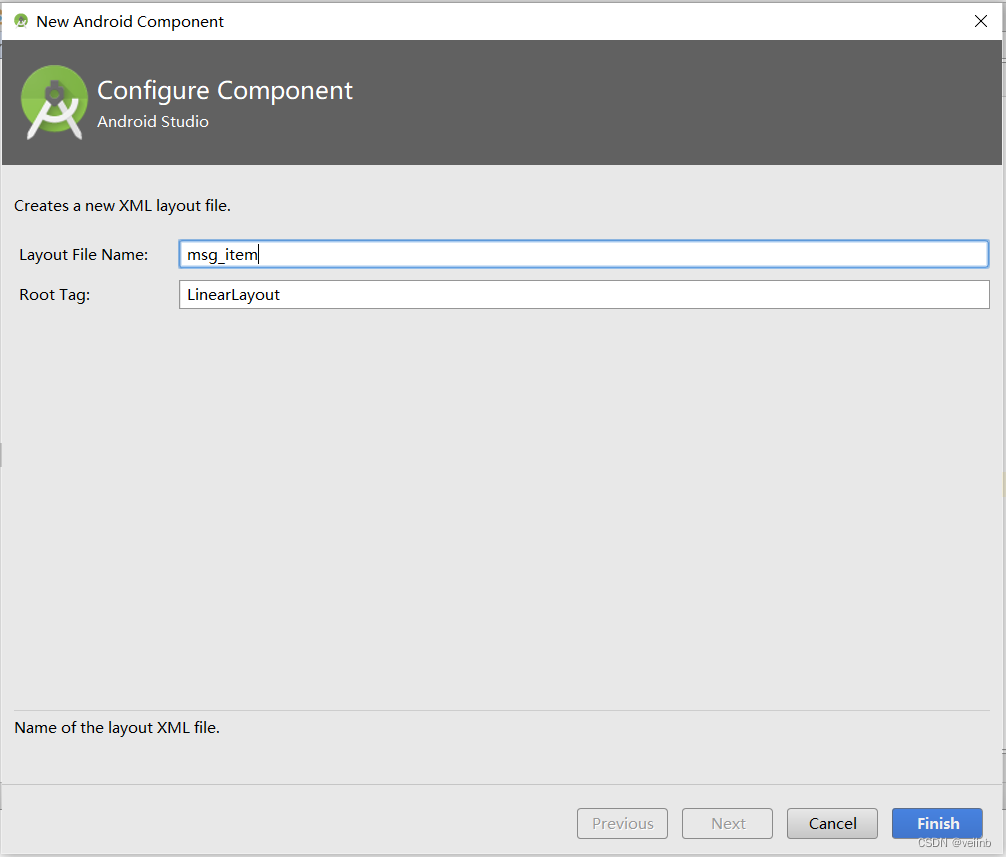
<?xml version="1.0" encoding="utf-8"?>
<LinearLayout xmlns:android="http://schemas.android.com/apk/res/android"
    android:orientation="vertical"
    android:layout_width="match_parent"
    android:layout_height="wrap_content"
    android:padding="10dp">
    <LinearLayout
        android:id="@+id/left_layout"
        android:layout_width="wrap_content"
        android:layout_height="wrap_content"
        android:background="@drawable/message_left"
        android:gravity="center"
        android:orientation="vertical"
        android:padding="0px"
        android:layout_gravity="left">

        <TextView
            android:layout_width="wrap_content"
            android:gravity="left"
            android:layout_height="wrap_content"
            android:layout_gravity="center"
            android:padding="25px"
            android:layout_marginLeft="30px"
            android:layout_marginRight="20px"
            android:textColor="#000"
            android:textSize="55px"
            android:id="@+id/left_msg" />
    </LinearLayout>
    <LinearLayout
        android:id="@+id/right_layout"
        android:background="@drawable/message_right"
        android:layout_width="wrap_content"
        android:layout_height="wrap_content"
        android:orientation="vertical"
        android:gravity="center"
        android:padding="0px"
        android:layout_gravity="right">

        <TextView
            android:layout_width="wrap_content"
            android:gravity="left"
            android:layout_marginRight="30px"
            android:layout_height="wrap_content"
            android:layout_gravity="center"
            android:textColor="#000"
            android:textSize="55px"
            android:padding="25px"
            android:layout_marginLeft="20px"
            android:id="@+id/right_msg" />
    </LinearLayout>
</LinearLayout>
(4)“Main2Activity ”的完整代码如下
package com.example.wyb.bluetoothchatui;
import android.support.v7.app.AppCompatActivity;
import android.os.Bundle;
import android.support.v7.widget.LinearLayoutManager;
import android.support.v7.widget.RecyclerView;
import android.view.View;
import android.widget.Button;
import android.widget.EditText;
import java.util.ArrayList;
import java.util.List;
import MyClass.Msg;
import MyClass.MsgAdapter;
import static com.example.wyb.bluetoothchatui.R.id.send;
public class Main2Activity extends AppCompatActivity {
    private EditText inputText;
    private Button send;
    private RecyclerView msgRecyclerView;
    private MsgAdapter adapter;
    private List<Msg> msgList = new ArrayList<>();//聊天信息列表
    @Override
    protected void onCreate(Bundle savedInstanceState) {
        super.onCreate(savedInstanceState);
        setContentView(R.layout.activity_main2);
        inputText = (EditText) findViewById(R.id.input_text);
        send = (Button) findViewById(R.id.send);
        msgRecyclerView = (RecyclerView) findViewById(R.id.msg_recycler_view);
        //适配器匹配
        LinearLayoutManager layoutManager = new LinearLayoutManager(this);
        msgRecyclerView.setLayoutManager(layoutManager);
        adapter = new MsgAdapter(msgList);
        msgRecyclerView.setAdapter(adapter);
        Show_msgRecyclerView();//聊天信息初始化
        //输入发送内容
        send.setOnClickListener(new View.OnClickListener() {
            @Override
            public void onClick(View view) {
                String content = inputText.getText().toString();
                if(!"".equals(content)){
                    Msg msg = new Msg(content, Msg.TYPE_SENT);
                    msgList.add(msg);
                    adapter.notifyItemInserted(msgList.size()-1);
                    msgRecyclerView.scrollToPosition(msgList.size()-1);
                    inputText.setText("");
                }
            }
        });
    }
    //聊天信息初始化
    public void Show_msgRecyclerView(){
        Msg msg1 = new Msg("通道已连接,我们可以开始聊天了",Msg.TYPE_RECEIVED);
        msgList.add(msg1);
        Msg msg2 = new Msg("你好,收得到消息不?",Msg.TYPE_SENT);
        msgList.add(msg2);
        Msg msg3 = new Msg("你好,我收到了",Msg.TYPE_RECEIVED);
        msgList.add(msg3);
        adapter.notifyDataSetChanged();
    }
}
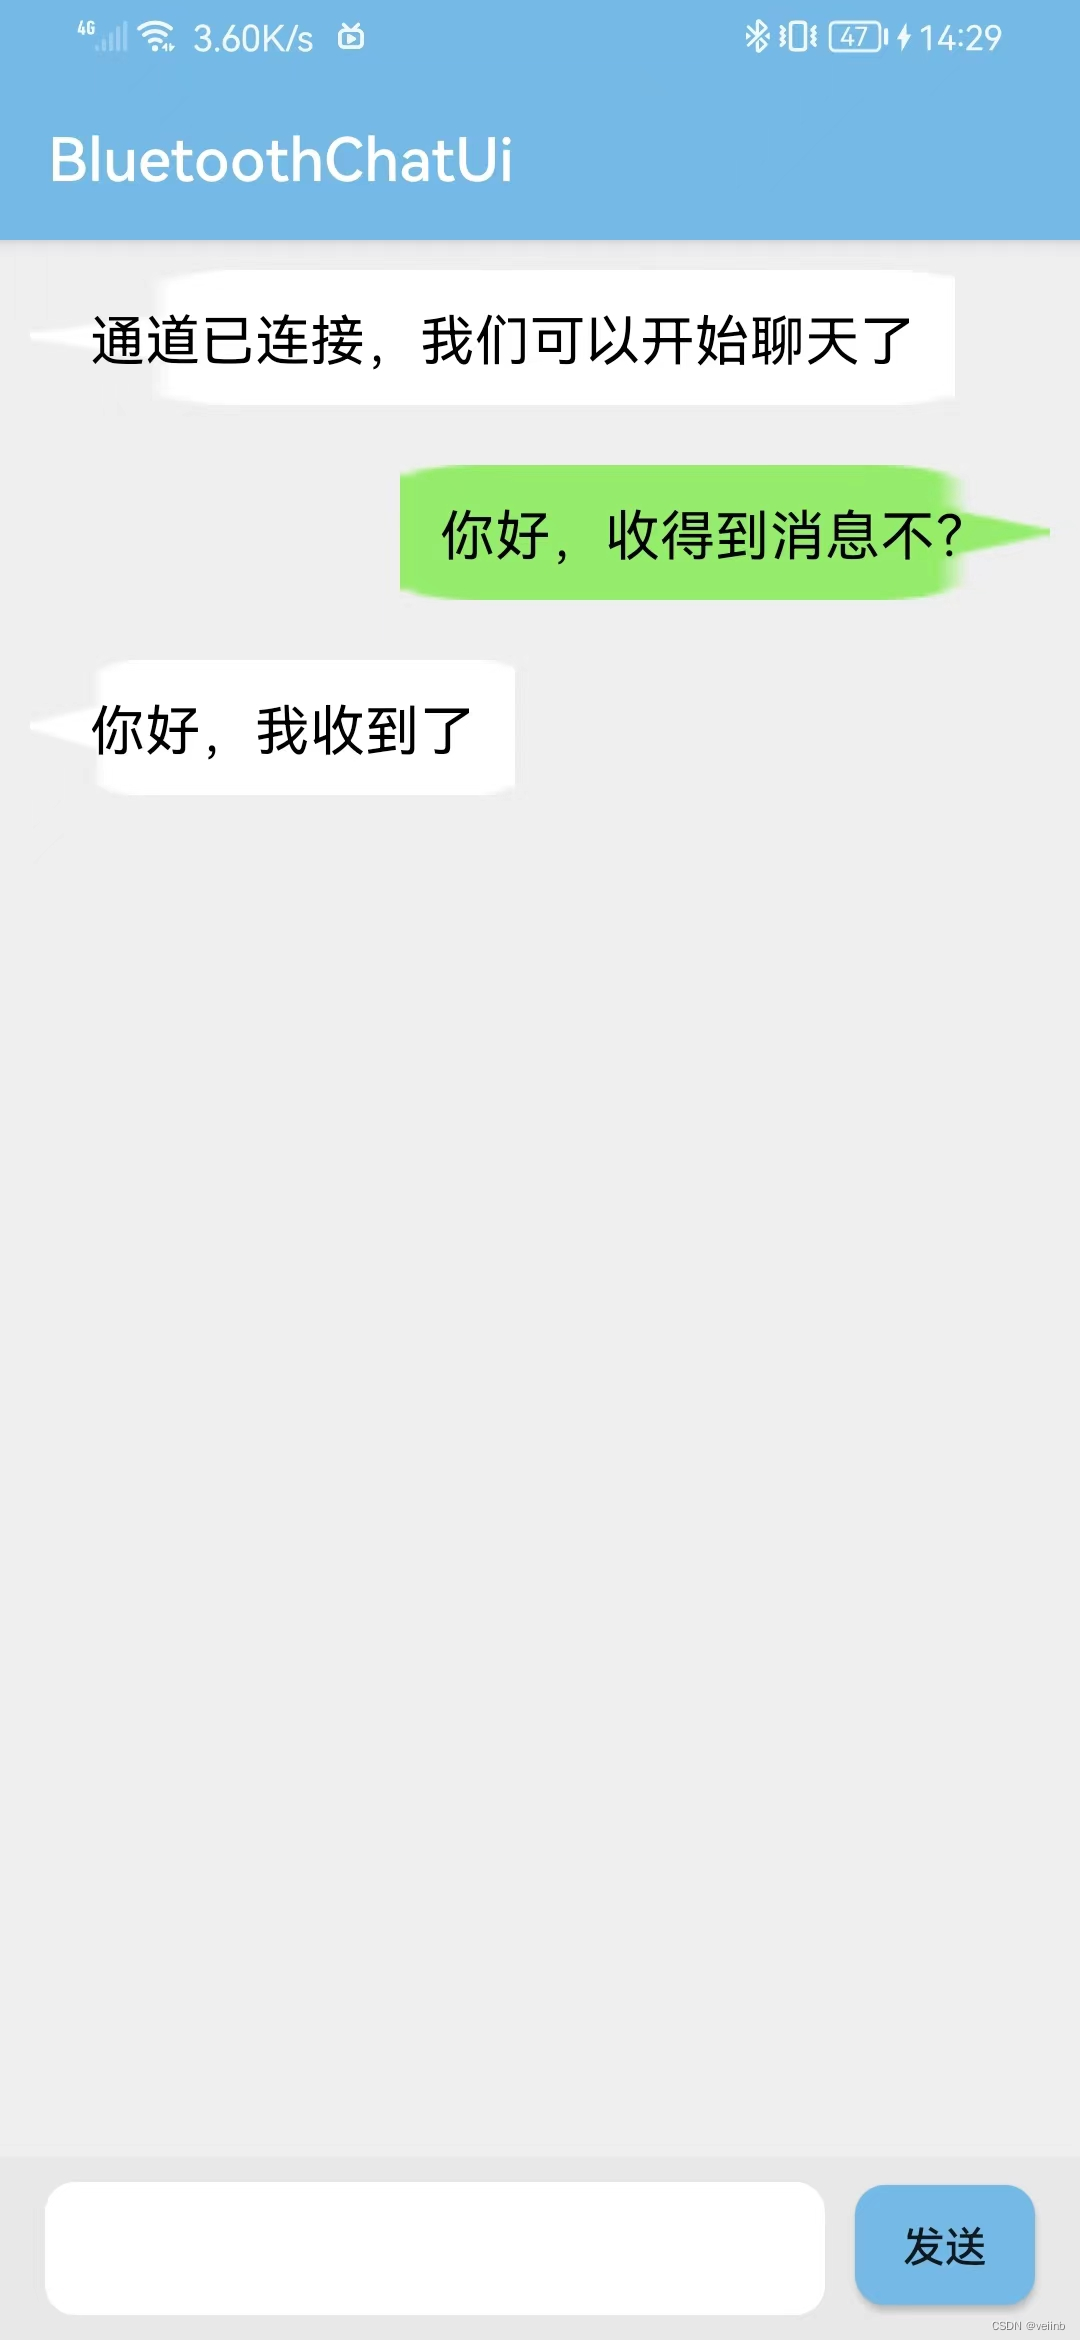
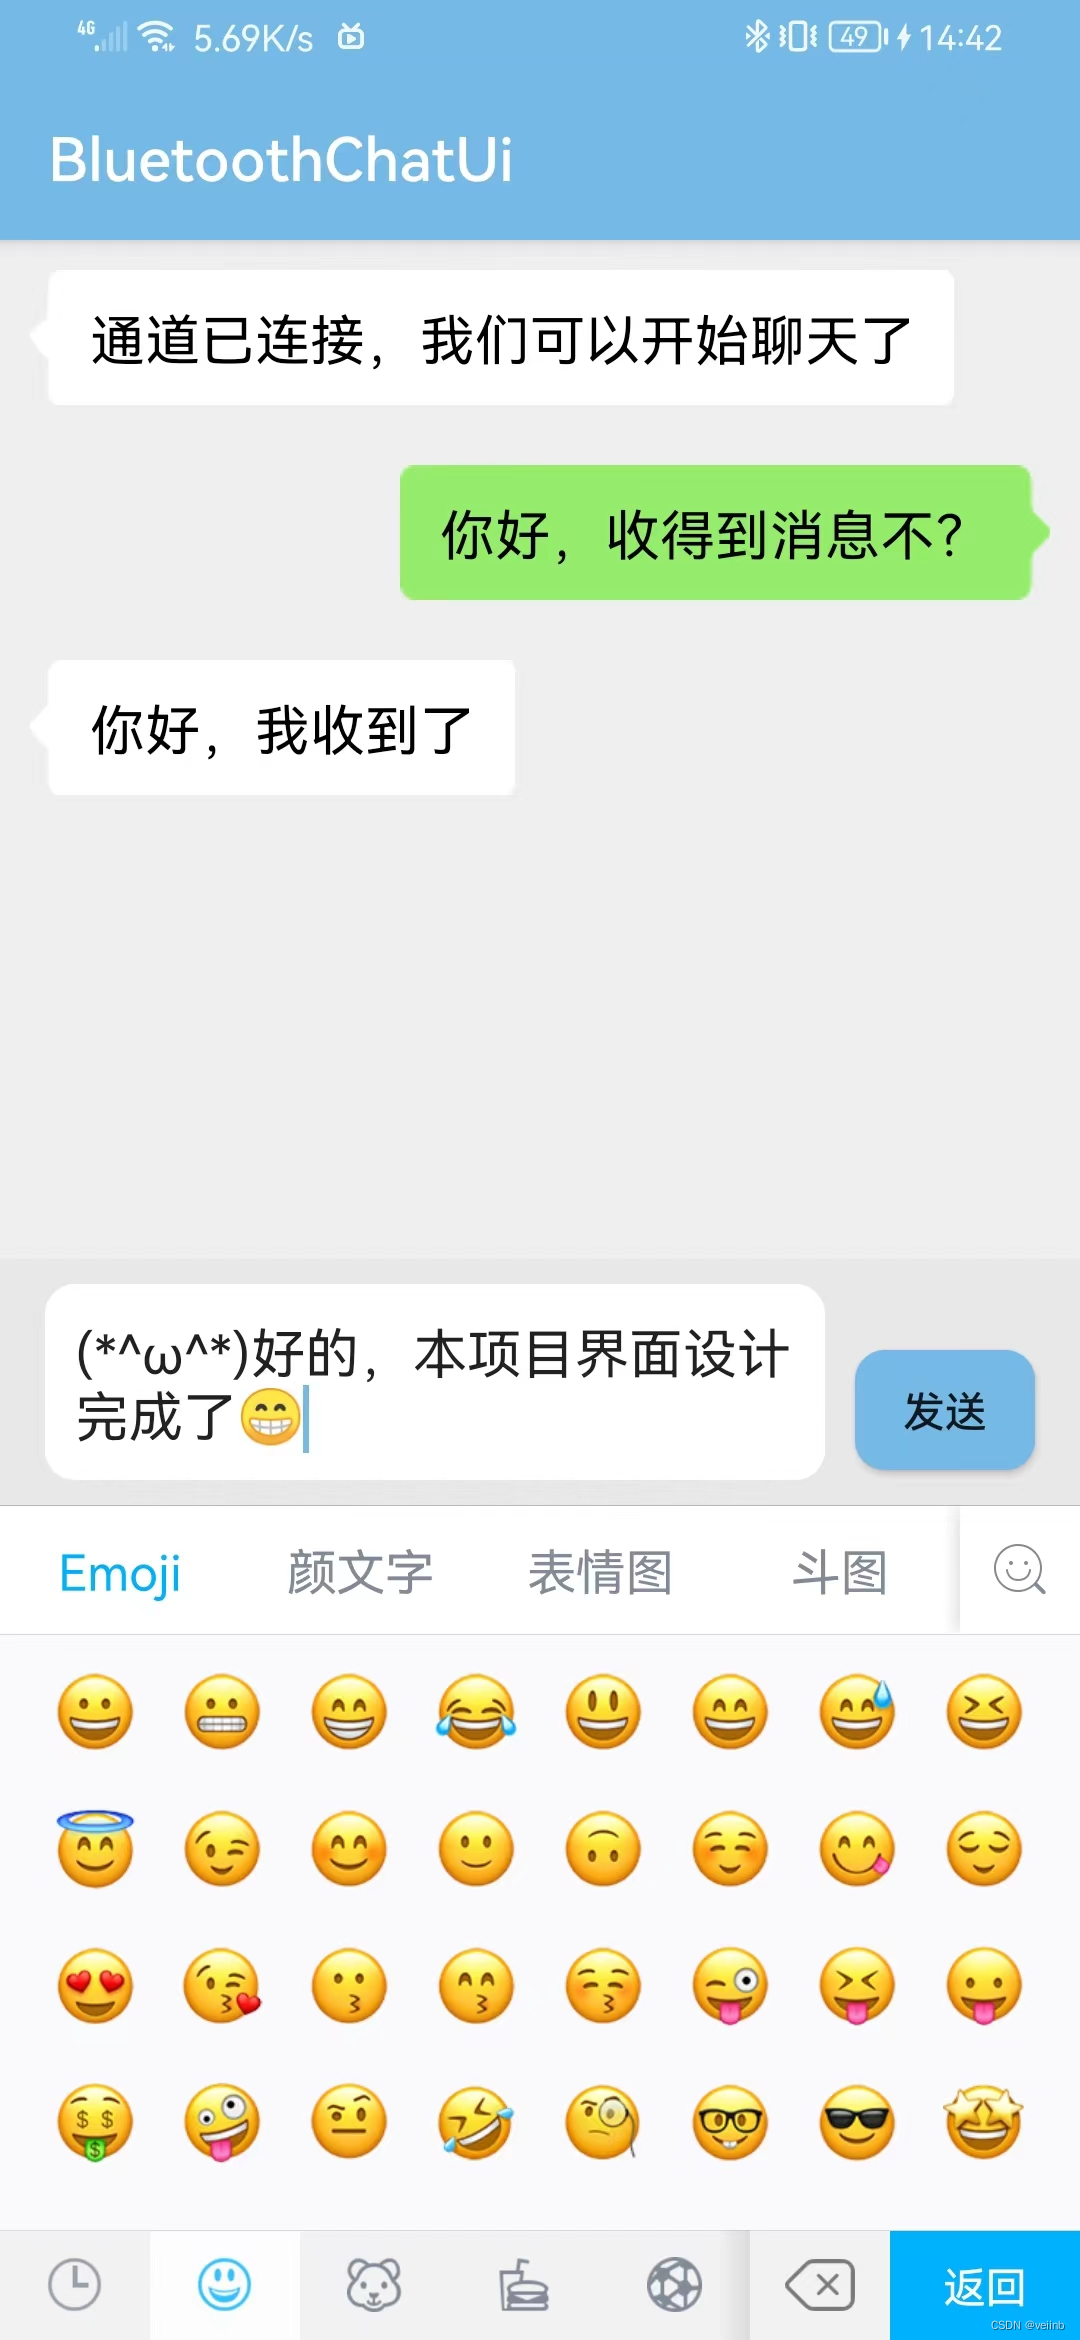
6、运行界面效果如下
7、界面效果微调
我们发现上图的消息框变形拉扯了,不美观,接下来就进行修改完善
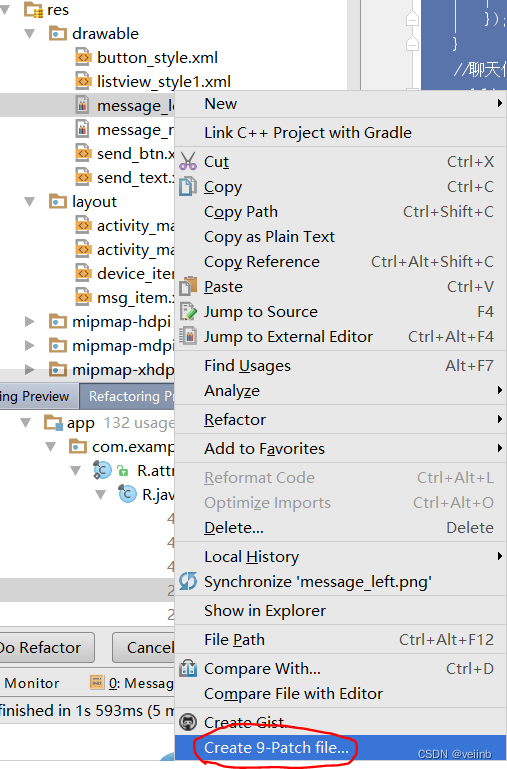
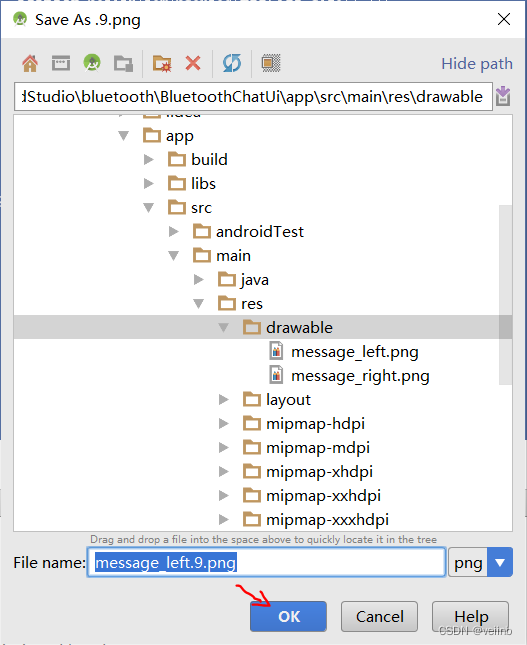
(1)选择图片,打开“Create 9-Patch…”,然后点击“OK”
(2)点击鼠标拖动,画黑线,如果要取消黑线,按住“Shift”按键并点击鼠标拖动。黑线的作用代表这范围内的可以拉长,效果如下
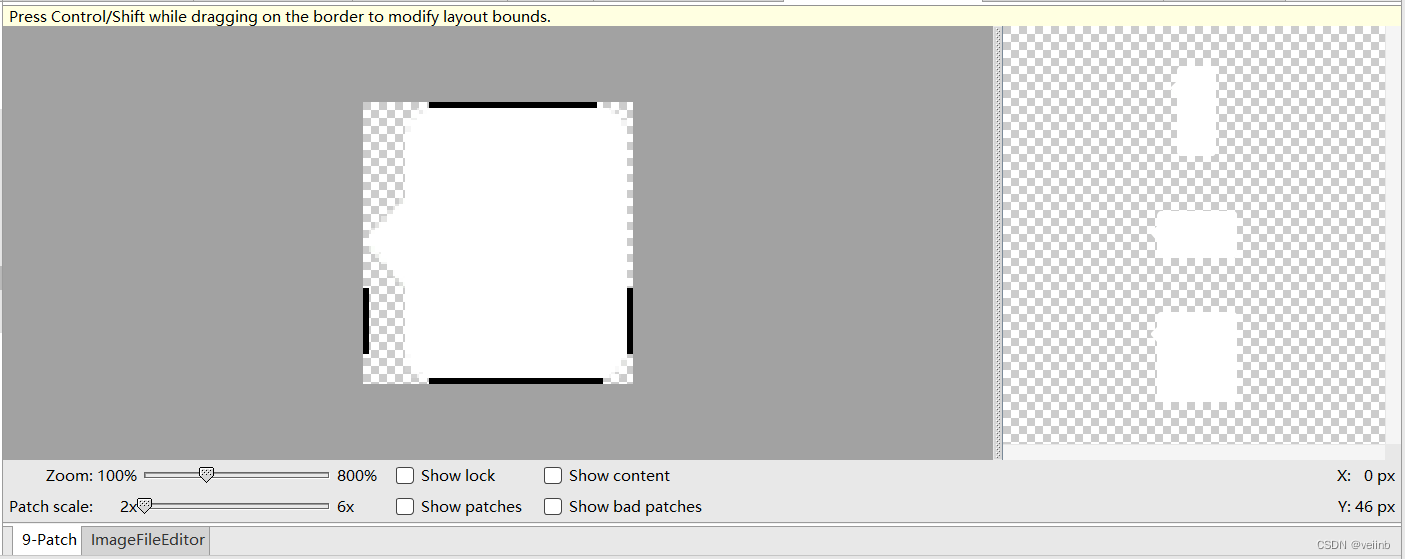
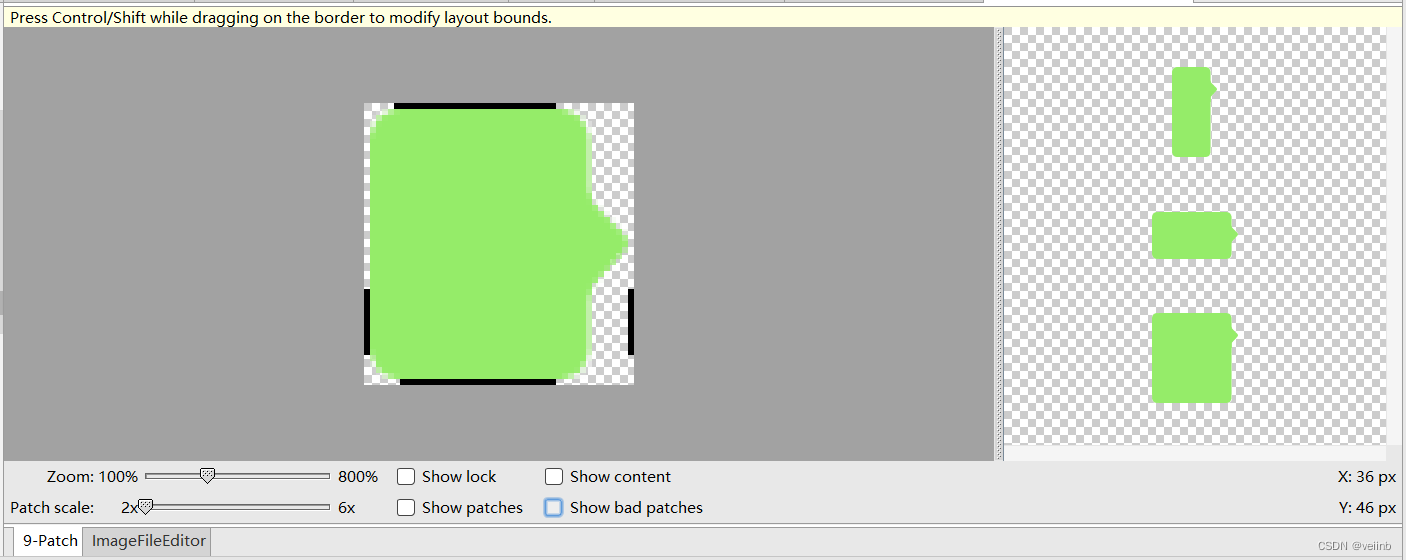
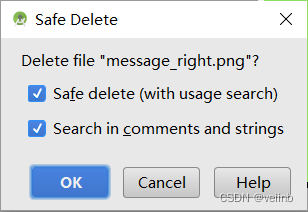
(3)画完黑线后会生成图片“message_left.9.png”和“message_right.9.png”,记得把原来的图片“message_left.png”和“message_right.png”删除,否则运行出错

(4)修改完的效果如下
四、项目效果视频
到这里,本项目就已经完成了,你已经完成了蓝牙聊天软件的界面设计部分,运行效果视频如下
基于Android的蓝牙聊天软件UI效果视频
五、完整项目分享
项目链接:https://pan.baidu.com/s/1SpgNVe72GqEa8b9bixboKg 提取码:2osc
六、蓝牙聊天功能实现
可以看课程蓝牙聊天App设计3:Android Studio制作蓝牙聊天通讯软件(完结,蓝牙连接聊天,结合生活情景进行蓝牙通信的通俗讲解,以及代码功能实现,内容详细,讲解通俗易懂)
