文章搜索页面
6-1:开篇
再上一章中,我们完成了 热搜首页 的开发,虽然经历了 ”千辛万苦“ ,但是对大家来说,应该也是收获满满。
那么在这一章节,我们将会进入新的篇章,来到 文章搜索 页面的开发。那么在 文章搜索 的页面开发中,我们又会经历哪些 奇奇怪怪的 bug ,又将会获得哪些新的收获呢?
让我们一起期待吧!
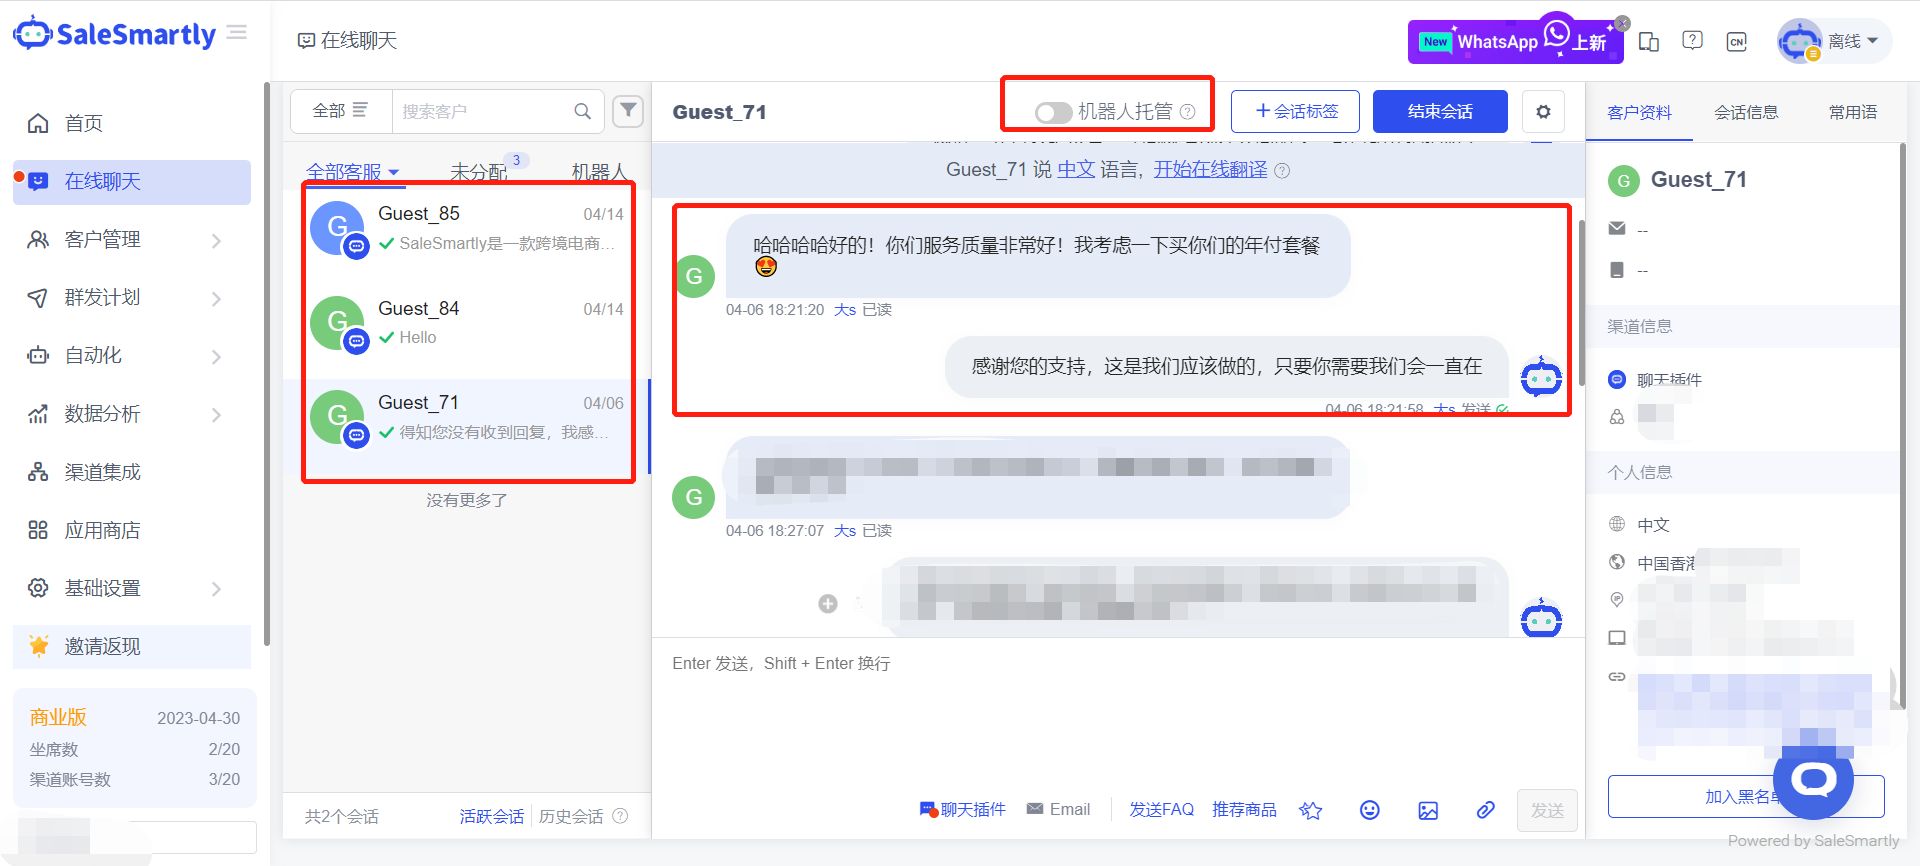
6-2:文章搜索 - 分析文章搜索页面
- 【慕课热搜】
- 展示 8 个热搜内容
- 【搜索历史】
- 按照【从后向前】的顺序,展示搜索历史
- 点击【小垃圾筒】可删除历史记录
- 【搜索结果】
- 不输入内容直接回车,按照当前的
placeholder索引 - 输入内容,按照当前内容索引
item的展示分为三类- 无图片展示
- 单个图片展示
- 三个图片展示
- item 中关键字高亮
- 点击 【叉号】返回【搜索历史】
- 点击【取消】返回【慕课热搜】
- 不输入内容直接回车,按照当前的
6-3:文章搜索 - 使用分包,创建 search-blog 页面
分包
-
什么是分包
分包指:将小程序划分成不同的子包,在构建时打包成不同的分包,用户在使用时按需进行加载
-
分包的好处
- 可以优化小程序首次启动的下载时间
- 在多团队共同开发时可以更好的解耦协作
微信小程序 提供了分包的能力,而 uniapp 也对其进行了支持。
实现分包
-
打开
pages.json,新建subPackages节点"subPackages": [] -
节点中每个对象为一个分包,其中
root:分包包名name:分包别名pages:分包下的页面path:分包下的页面路径style:页面的样式
-
"subPackages": [
    {
      "root": "subpkg",
      "name": "sub-1",
      "pages": [
        {
          "path": "pages/search-blog/search-blog",
          "style": {
            "navigationBarTitleText": "",
            "enablePullDownRefresh": false
          }
        }
      ]
    }
  ]
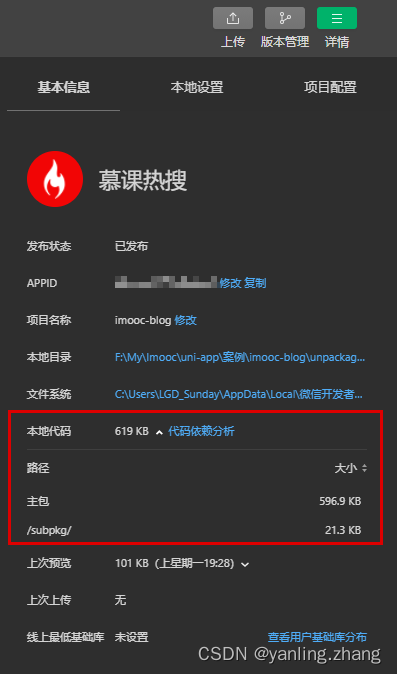
可在详情查看分包数据:
6-4:文章搜索 - 完成跳转,渲染搜索框
页面跳转
<template>
  <view class="hot-container">
    <view class="search-box" @click="onToSearch">
      <!-- 搜索模块 -->
      <my-search placeholderText="uni-app 自定义组件" />
    </view>
  </view>
</template>

<script>
import { getHotTabs, getHotListFromTabType } from 'api/hot';
export default {
  // 定义方法
  methods: {
    ...
    /**
      搜索框点击事件
     */
    onToSearch() {
      uni.navigateTo({
        url: '/subpkg/pages/search-blog/search-blog'
      });
    }
  }
};
</script>
渲染搜索框
<template>
  <view class="search-blog-container">
    <!-- search模块 -->
    <view class="search-bar-box">
      <my-search />
    </view>
  </view>
</template>

<script>
export default {
  data() {
    return {};
  }
};
</script>

<style lang="scss" scoped>
.search-blog-container {
  .search-bar-box {
    background-color: $uni-bg-color;
    padding: $uni-spacing-row-sm;
    position: sticky;
    top: 0px;
    z-index: 9;
  }
}
</style>
6-5:文章搜索 - 为 my-search 组件赋予搜索的能力
my-search
<template>
  <view class="my-search-container">
    <!-- 搜索输入框 -->
    <uni-search-bar
      v-if="isShowInput"
      class="my-search-bar"
      :radius="100"
      @confirm="onSearch"
      @focus="onFocus"
      @blur="onBlur"
      @clear="onClear"
      @cancel="onCancel"
      @input="onInput"
      :bgColor="config.backgroundColor"
      :placeholder="placeholderText"
      :value="value"
    >
      <uni-icons slot="clearIcon" type="clear" color="#999999" />
    </uni-search-bar>
    <!-- 搜索按钮 -->
    <view class="my-search-box" v-else>
      ...
    </view>
  </view>
</template>

<script>
export default {
  name: 'my-search',
  props: {
    // placeholder
    placeholderText: {
      type: String,
      default: '搜索'
    },
    // 配置对象
    config: {
      type: Object,
      default: () => ({
        height: 36,
        backgroundColor: '#ffffff',
        icon: '/static/images/search.png',
        textColor: '#454545',
        border: '1px solid #c9c9c9'
      })
    },
    // 是否显示输入框
    isShowInput: {
      type: Boolean,
      default: false
    },
    // 输入的内容
    // value 名称不可修改,与 $emit('input') 事件对应
    value: {
      type: String
    }
  },
  data() {
    return {};
  },
  methods: {
    /**
     * 点击搜索按钮触发
     */
    onSearch() {
      this.$emit('search', this.value);
    },
    /**
     * 输入框获取焦点触发
     */
    onFocus() {
      this.$emit('focus', this.value);
    },
    /**
     * 输入框失去焦点触发
     */
    onBlur() {
      this.$emit('blur', this.value);
    },
    /**
     * 点击输入框中的清空按钮时
     */
    onClear() {
      this.$emit('clear', this.value);
    },
    /**
     * 点击取消按钮时
     */
    onCancel() {
      this.$emit('cancel', this.value);
    },
    /**
     *  value 改变时触发事件
     */
    onInput(val) {
      // input 的事件名称不可修改,与 props 中的 value 对应
      // 当同时存在:
      // props -> value
      // $emit('input', val)
      // 时,在组件外可以使用 v-model 完成双向数据绑定。
      // 即:用户输入内容时,父组件传递过来的 value 同步发生变化
      // 详细见 vue 中 v-model 指令:https://cn.vuejs.org/v2/guide/components-custom-events.html#%E8%87%AA%E5%AE%9A%E4%B9%89%E7%BB%84%E4%BB%B6%E7%9A%84-v-model
      this.$emit('input', val);
    }
  }
};
</script>

<style lang="scss" scoped>
.my-search-container {
  display: flex;
  align-items: center;
  .my-search-bar {
    width: 100%;
  }
  ...
}
</style>
search-blog.vue
<template>
  <view class="search-blog-container">
    <!-- search模块 -->
    <view class="search-bar-box">
      <my-search
        :placeholderText="defaultText"
        v-model="searchVal"
        :isShowInput="true"
        :config="{
          backgroundColor: '#f1f0f3'
        }"
        @search="onSearchConfirm"
        @focus="onSearchFocus"
        @blur="onSearchBlur"
        @clear="onSearchClear"
        @cancel="onSearchCancel"
      />
    </view>
  </view>
</template>

<script>
export default {
  data() {
    return {
      // 绑定输入框中的内容
      searchVal: '',
      // 默认的placeholderText
      defaultText: '默认的placeholderText'
    };
  },
  methods: {
    /**
     * 搜索内容
     */
    onSearchConfirm(val) {
      console.log('搜索内容:' + this.searchVal);
    },
    // searchbar 获取焦点
    onSearchFocus(val) {
      console.log('searchbar 获取焦点');
    },
    /**
     * searchbar 失去焦点
     */
    onSearchBlur(val) {
      console.log('searchbar 失去焦点');
    },
    /**
     * searchbar 清空内容
     */
    onSearchClear() {
      console.log('searchbar 清空内容');
    },
    /**
     * searchbar 取消按钮
     */
    onSearchCancel(val) {
      console.log('searchbar 取消按钮');
    }
  }
};
</script>

<style lang="scss" scoped>
.search-blog-container {
  .search-bar-box {
    background-color: $uni-bg-color;
    padding: $uni-spacing-row-sm;
  }
}
</style>
因为 uni-search-bar 组件没有提供 文本居左的属性,所以想要让文本居左显示,需要修改 uni-search-bar 的源代码:
.uni-searchbar__box {
  // 处理初始 searchbar 位置
  justify-content: start;
}
6-6:文章搜索 - 显示推荐搜索
api/search.js
import request from '../utils/request';

/**
 * 默认搜索内容
 */
export function getDefaultText() {
  return request({
    url: '/search/default-text'
  });
}
search-blog.vue
  created() {
    this.loadDefaultText();
  },
  methods: {
    /**
     * 获取推荐搜索文本
     */
    async loadDefaultText() {
      const { data: res } = await getDefaultText();
      this.defaultText = res.defaultText;
    }
   }
6-7:文章搜索 - 创建三个业务组件
search-blog.vue
    <!-- 热搜列表 -->
    <view class="search-hot-list-box">
      <!-- 列表 -->
      <search-hot-list />
    </view>
    <!-- 搜索历史 -->
    <view class="search-history-box">
      <search-history />
    </view>
    <!-- 搜索结果 -->
    <view class="search-result-box">
      <search-result-list />
    </view>
6-8:文章搜索 - 控制业务组件的展示效果
<template>
  <view class="search-blog-container">
    ...
    <!-- 热搜列表 -->
    <view class="search-hot-list-box" v-if="showType === HOT_LIST">
      <!-- 列表 -->
      <search-hot-list />
    </view>
    <!-- 搜索历史 -->
    <view class="search-history-box" v-else-if="showType === SEARCH_HISTORY">
      <search-history />
    </view>
    <!-- 搜索结果 -->
    <view class="search-result-box" v-else>
      <search-result-list />
    </view>
  </view>
</template>

<script>
import { getDefaultText } from 'api/search';
// 0: 热搜列表 - 默认
const HOT_LIST = '0';
// 1:搜索历史
const SEARCH_HISTORY = '1';
// 2:搜索结果
const SEARCH_RESULT = '2';
export default {
  data() {
    return {
      HOT_LIST,
      SEARCH_HISTORY,
      SEARCH_RESULT,
      // 默认情况下 || 点击输入框的取消按钮时,显示【热搜列表】
      // 当 searchBar 获取焦点时 || 点击输入框清空按钮时,显示 【搜索历史】
      // 用户点击热搜列表 item || 用户点击搜索历史 || 用户按下搜索键,显示 【搜索结果】
      showType: HOT_LIST,
    };
  },
  methods: {
    ...
    /**
     * 搜索内容
     */
    onSearchConfirm(val) {
      // 用户未输入文本,直接搜索时,使用【推荐搜索文本】
      this.searchVal = val ? val : this.defaultText;
      if (this.searchVal) {
        this.showType = SEARCH_RESULT;
      }
    },
    // searchbar 获取焦点
    onSearchFocus(val) {
      this.showType = SEARCH_HISTORY;
    },
    /**
     * searchbar 失去焦点
     */
    onSearchBlur(val) {},
    /**
     * searchbar 清空内容
     */
    onSearchClear() {
      this.showType = SEARCH_HISTORY;
    },
    /**
     * searchbar 取消按钮
     */
    onSearchCancel(val) {
      this.showType = HOT_LIST;
    }
  }
};
</script>
6-9:热搜列表 - 数据获取
api/search.js
/**
 * 热搜搜索列表
 */
export function getSearchHotList() {
  return request({
    url: '/search/hot-list'
  });
}
search-hot-list.vue
<script>
import { getSearchHotList } from 'api/search';

export default {
  name: 'search-hot-list',
  data() {
    return {
      hotList: []
    };
  },
  created() {
    this.getSearchHotList();
  },
  methods: {
    /**
     * 获取热搜列表数据
     */
    async getSearchHotList() {
      const { data: res } = await getSearchHotList();
      this.hotList = res.list;
      console.log(this.hotList);
    }
  }
};
</script>
6-10:热搜列表 - 数据展示
search-blog.vue
<!-- 热搜列表 -->
    <view class="search-hot-list-box card" v-if="showType === HOT_LIST">
      <!-- 列表 -->
      <search-hot-list />
    </view>
styles/global.scss
// 卡片视图
.card {
  border: 1px solid #f9f9f9;
  border-radius: 5px;
  margin: 12px;
  padding: 12px;
  box-shadow: 2px 2px 5px 1px rgba(143, 143, 143, 0.1);
}
search-hot-list.vue
<template>
  <view class="search-hot-list-container">
    <!-- 标题 -->
    <view class="search-hot-title">慕课热搜 - 全网技术 一网打尽</view>
    <block v-for="(item, index) in hotList" :key="index">
      <view class="search-hot-item" >
        <!-- 序号 -->
        <hot-ranking :ranking="index + 1"></hot-ranking>
        <!-- 文本 -->
        <text class="title line-clamp">{{ item.label }}</text>
        <!-- hot-icon -->
        <image v-if="index <= 2" class="search-hot-icon" src="/static/images/hot-icon.png" />
      </view>
    </block>
  </view>
</template>

<script>
</script>

<style lang="scss" scoped>
.search-hot-list-container {
  .search-hot-title {
    font-weight: bold;
    font-size: $uni-font-size-base;
    color: $uni-text-color-hot;
    padding: 0 12px $uni-spacing-col-lg 12px;
    margin: 0 -12px $uni-spacing-col-lg -12px;
    box-shadow: 2px 2px 5px 1px rgba(143, 143, 143, 0.1);
  }
  .search-hot-item {
    display: flex;
    align-items: center;
    padding: $uni-spacing-col-lg 0;
    .title {
      color: $uni-text-color;
      font-size: $uni-font-size-base;
      margin: 0 $uni-spacing-row-base;
    }
    .search-hot-icon {
      width: 14px;
      height: 14px;
    }
  }
}
</style>
6-11:热搜列表 - 热搜点击处理
search-hot-list.vue
<template>
  ...
      <view class="search-hot-item" @click="onItemClick(item, index)">
        ...
      </view>
  ...
</template>

<script>
...
export default {
  ...
  methods: {
    ...
    /**
     * item 点击事件
     */
    onItemClick(item, index) {
      this.$emit('onSearch', item.label);
    }
  }
};
</script>
search-blog.vue
<template>
  <view class="search-blog-container">
    ...
    <!-- 热搜列表 -->
    <view class="search-hot-list-box card" v-if="showType === HOT_LIST">
      <!-- 列表 -->
      <search-hot-list @onSearch="onSearchConfirm" />
    </view>
    ...
  </view>
</template>

<script>
...
export default {
  ...
  methods: {
    ...
    /**
     * 搜索内容
     */
    onSearchConfirm(val) {
      // 用户未输入文本,直接搜索时,使用【推荐搜索文本】
      this.searchVal = val ? val : this.defaultText;
      if (this.searchVal) {
        this.showType = SEARCH_RESULT;
      }
    },
    ...
  }
};
</script>
...
6-12:搜索历史 - 渲染基本结构
search-history.vue
<template>
  <view class="search-history-container">
    <!-- title 区域 -->
    <view class="search-history-title-box">
      <view class="search-history-title">搜索历史</view>
      <view v-if="!isShowClear">
        <uni-icons type="trash" @click="isShowClear = true" />
      </view>
      <view v-else>
        <text class="txt">全部删除</text>
        <text class="txt" @click="isShowClear = false">完成</text>
      </view>
    </view>
    <!-- 内容区域 -->
    <view class="search-history-box">
      <block v-for="(item, index) in searchData" :key="index">
        <view class="search-history-item">
          <text class="history-txt line-clamp">{{ item }}</text>
          <uni-icons v-show="isShowClear" type="clear" />
        </view>
      </block>
    </view>
  </view>
</template>

<script>
export default {
  name: 'search-history',
  data() {
    return {
      isShowClear: false,
      searchData: ['sunday', 'uniapp', 'vue', '前端']
    };
  }
};
</script>

<style lang="scss" scoped></style>
6-13:搜索历史 - 美化基本样式
search-history.vue
<style lang="scss" scoped>
.search-history-container {
  padding: $uni-spacing-col-lg $uni-spacing-row-lg;
  .search-history-title-box {
    display: flex;
    justify-content: space-between;

    .search-history-title {
      font-size: $uni-font-size-sm;
      color: $uni-text-color;
      padding: $uni-spacing-col-sm $uni-spacing-row-sm;
    }
    .txt {
      color: $uni-text-color-grey;
      font-size: $uni-font-size-sm;
      padding: $uni-spacing-col-sm $uni-spacing-row-sm;
    }
  }
  .search-history-box {
    margin-top: $uni-spacing-col-lg;
    .search-history-item {
      width: 50%;
      box-sizing: border-box;
      display: inline-block;
      padding: $uni-spacing-col-base $uni-spacing-row-base;
      position: relative;
      .history-txt {
        width: 85%;
        display: inline-block;
        color: $uni-text-color;
        font-size: $uni-font-size-base;
      }
    }
    .search-history-item:nth-child(odd):before {
      content: ' ';
      border-left: 1px solid #999;
      display: inline-block;
      height: 10px;
      position: absolute;
      top: 50%;
      transform: translateY(-50%);
      right: 0;
    }
  }
}
</style>
6-14:搜索历史 - 保存历史数据到 searchData
search-history.vue
当 onSearchConfirm 被回调时,将赋值之后的 this.searchVal 保存到 searchData 中。
所以我们需要对代码进行一些修改,把 searchData 从 search-history 中转移到 search-blog 中
search-blog
<template>
  <view class="search-blog-container">
    <!-- search模块 -->
    <view class="search-bar-box">
     ...
    <!-- 搜索历史 -->
    <view class="search-history-box" v-else-if="showType === SEARCH_HISTORY">
      <search-history :searchData="searchData" />
    </view>
    ...
  </view>
</template>

<script>
...
export default {
  data() {
    return {
      ...
      // 搜索历史数据
      searchData: []
    };
  },
  ...
  methods: {
    ...
    /**
     * 搜索内容
     */
    onSearchConfirm(val) {
      // 用户未输入文本,直接搜索时,使用【推荐搜索文本】
      this.searchVal = val ? val : this.defaultText;
      // 保存搜索历史数据
      this.saveSearchData();
      // 切换视图
      ...
    },
    /**
     * 保存搜索历史数据
     */
    saveSearchData() {
      // 1. 如果数据已存在,则删除
      const index = this.searchData.findIndex((item) => item === this.searchVal);
      if (index !== -1) {
        this.searchData.splice(index, 1);
      }
      // 2. 新的搜索内容需要先于旧的搜索内容展示
      this.searchData.unshift(this.searchVal);
    },
  }
};
</script>
search-history
<script>
export default {
  name: 'search-history',
  props: {
    searchData: {
      type: Array,
      required: true
    }
  },
  data() {
    return {
      isShowClear: false
    };
  }
};
</script>
6-15:搜索历史 - 处理 searchData 的删除操作
删除分为两种:
- 删除指定数据
- 删除全部数据
search-history
<template>
  <view class="search-history-container">
    <!-- title 区域 -->
    <view class="search-history-title-box">
      ...
      <view v-else>
        <text class="txt" @click="onClearAll">全部删除</text>
        ...
      </view>
    </view>
    <!-- 内容区域 -->
    <view class="search-history-box">
      <block v-for="(item, index) in searchData" :key="index">
        <view class="search-history-item" @click="onHistoryItemClick(item, index)">
          ...
        </view>
      </block>
    </view>
  </view>
</template>

<script>
export default {
 ...
  methods: {
    onClearAll() {
      uni.showModal({
        title: '提示',
        content: '删除搜索历史记录?',
        showCancel: true,
        success: ({ confirm, cancel }) => {
          if (confirm) {
            // 删除 searchData
            this.$emit('removeAllSearchData');
            // 返回状态
            this.isShowClear = false;
          }
        }
      });
    },
    onHistoryItemClick(item, index) {
      if (this.isShowClear) {
        // 删除指定的 searchData
        this.$emit('removeSearchData', index);
      } else {
        this.$emit('onItemClick', item);
      }
    }
  }
};
</script>
search-history
<template>
  <view class="search-blog-container">
    ...
    <!-- 搜索历史 -->
    <view class="search-history-box" v-else-if="showType === SEARCH_HISTORY">
      <search-history
        :searchData="searchData"
        @removeAllSearchData="onRemoveAllSearchData"
        @removeSearchData="onRemoveSearchData"
        @onItemClick="onSearchConfirm"
      />
    </view>
   ...
  </view>
</template>

<script>
...
export default {
  ...
  methods: {
    ...
    /**
     * 删除数据
     */
    onRemoveSearchData(index) {
      this.searchData.splice(index, 1);
    },
    onRemoveAllSearchData() {
      this.searchData = [];
    },
    ...
  }
};
</script>

...
6-16:搜索历史 - 找出现在的问题
到目前,我们已经完成了 搜索历史 的展示和删除的功能,但是还有一个 数据持久化 的功能未实现。
未实现的功能我们先不着急,我们先回头看一下我们现在的代码。
在现在的代码中,我们在
search-blog中通过searchData保存了所有的搜索历史数据。而在真正的搜索历史页面中,反而是通过
props接收了 父组件传递过来的数据。把 添加、删除搜索历史的功能,都放到了
search-blog页面里进行了实现,反而把 删除的激活 操作放到了search-history组件中。
这样的一系列操作,我们光描述都要花费上 一分钟 的时间,更不用说让别人去读你的代码了。
如果我们在这样的代码基础之上,再去实现 数据持久化 的功能,那么咱们的代码就会的更加复杂,难以理解了。
所以说,我们现在迫切需要做一件事情,那就是:让 search-blog 和 search-history 解耦,让 searchData 和 组件 解耦 !
那么这个事情,我们怎么做呢?
这里请允许我先卖一个关子。
欲知后事如何,请见下一章**《全局状态管理》**
6-17:总结
本章节中,我们完成了 部分 的文章搜索功能。
- 使用 分包 创建了
search-blog页面 - 分析页面得到了 三个组件
- 热搜列表:
search-hot-list - 搜索历史:
search-history - 搜索结果:
search-result-list
- 热搜列表:
- 定义了规则,控制了三个组件的展示规律
- 完成了 热搜列表 的功能
- 在完成 搜索历史 时,遇到了问题:
search-blog和search-history、searchData和 组件 之间 强耦合
想要解决这个问题,那么我们需要用到一个新的东西,叫做 《全局状态管理工具》,那么这个东西怎么用呢?他有什么样的价值呢?
我们下一章再见!

