入门程序:使用SpringBoot开发一个web应用,浏览器发起请求/hello后,给浏览器返回字符串“Hello World ~”
1. 创建springboot工程,并勾选web开发相关依赖
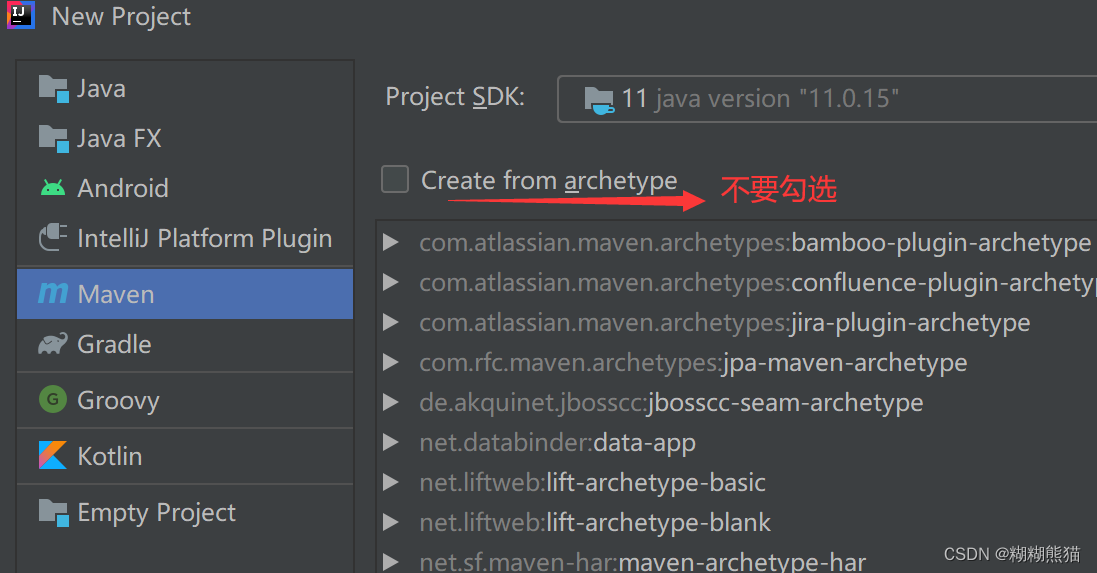
由于我的idea没有Spring Initializr选项,所以我选择使用Maven创建SpringBoot项目
- 选择Maven和JDK版本,点击Next;(此处不选择Maven模板)
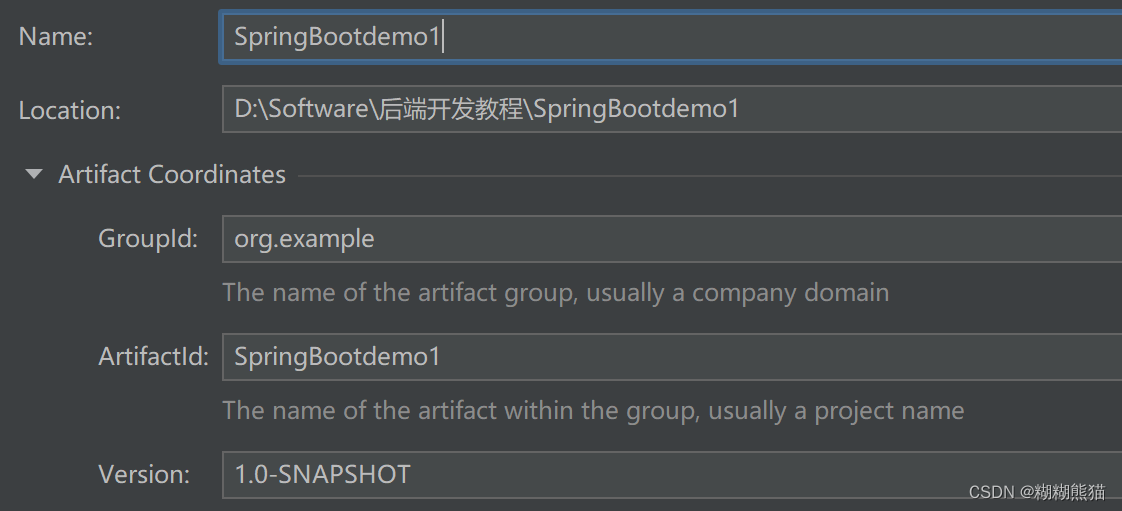
- 修改项目名和指定项目地址
- 此时创建的是一个普通的Maven项目,此时需要在pom.xml中引入SpringBoot需要的jar包 详细可查看SpringBoot 官方文档: Developing Your First Spring Boot Application
- 在pom中引入
    <parent>
        <groupId>org.springframework.boot</groupId>
        <artifactId>spring-boot-starter-parent</artifactId>
        <version>2.2.7.RELEASE</version>
</parent>- 导入依赖
    <dependencies>
        <dependency>
            <groupId>org.springframework.boot</groupId>
            <artifactId>spring-boot-starter-web</artifactId>
        </dependency>
        <dependency>
            <groupId>org.springframework.boot</groupId>
            <artifactId>spring-boot-starter-test</artifactId>
            <scope>test</scope>
        </dependency>
    </dependencies>
2. 定义HelloController类,添加方法hello,并添加注解
- 新建包(包名最好为项目名),并创建启动类
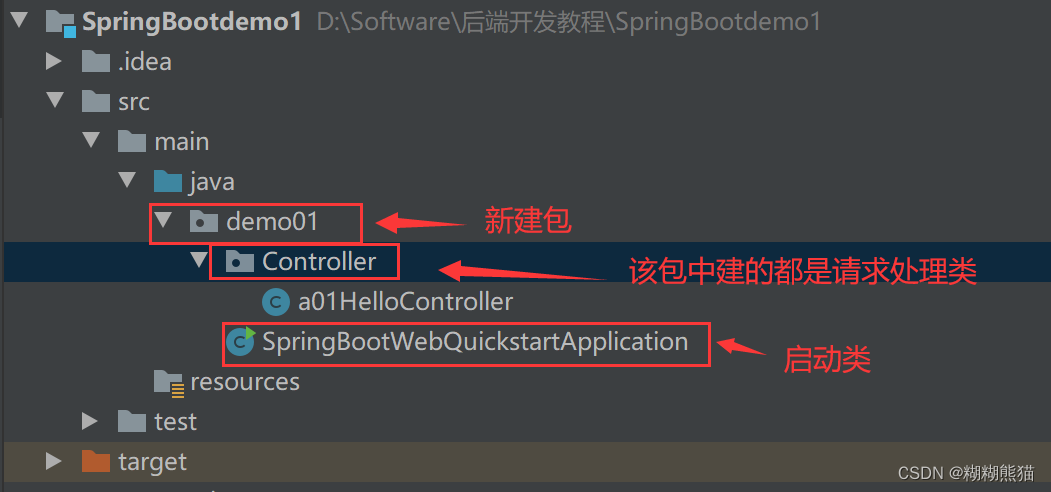
- 编写请求处理类
package demo01.Controller;

import org.springframework.boot.autoconfigure.EnableAutoConfiguration;
import org.springframework.web.bind.annotation.RequestMapping;
import org.springframework.web.bind.annotation.RestController;

@RestController // 代表当前类是请求处理类
@EnableAutoConfiguration  //开启自动配置
public class a01HelloController {

    @RequestMapping("/hello")
    public String hello(){
        return "Hello World!";//当浏览器访问/hello时,会调用hello()方法  且返回给浏览器的信息:Hello World!
    }
}
- 编写启动类
package demo01;

import org.springframework.boot.SpringApplication;
import org.springframework.boot.autoconfigure.SpringBootApplication;

//启动类 -- 启动springboot工程
@SpringBootApplication
public class SpringBootWebQuickstartApplication {
    public static void main(String[] args) {
        SpringApplication.run(SpringBootWebQuickstartApplication.class,args);
    }
}
- 检测是否创建完成 运行启动类的main()方法

创建完成
3. 运行测试
- 访问 localhost:8080/hello

第一个SpringBoot项目运行结束

