在应用程序当中,有时往往需要去获取到一些系统相关的信息,譬如时间、日期、以及其它一些系统相关信息,本章将向大家介绍如何通过 Linux 系统调用或 C 库函数获取系统信息,譬如获取系统时间、日期以及设置系统时间、日期等;除此之外,还会向大家介绍 Linux 系统下的/proc 虚拟文件系统,包括/proc 文件系统是什么以及如何从/proc 文件系统中读取系统、进程有关信息。
除了介绍系统信息内容外,本章还会向大家介绍有关系统资源的使用,譬如系统内存资源的申请与使用等。
一、系统信息
1.1、系统标识 uname
系统调用 uname()用于获取有关当前操作系统内核的名称和信息
#include <sys/utsname.h>
int uname(struct utsname *buf);
函数参数和返回值含义如下:
buf:struct utsname 结构体类型指针,指向一个 struct utsname 结构体类型对象。
返回值:成功返回 0;失败将返回-1,并设置 errno。
struct utsname {
	 char sysname[]; /* 当前操作系统的名称 */
	 char nodename[]; /* 网络上的名称(主机名) */
	 char release[]; /* 操作系统内核版本 */
	 char version[]; /* 操作系统发行版本 */
	 char machine[]; /* 硬件架构类型 */
	 #ifdef _GNU_SOURCE
	 char domainname[];/* 当前域名 */
	 #endif
};
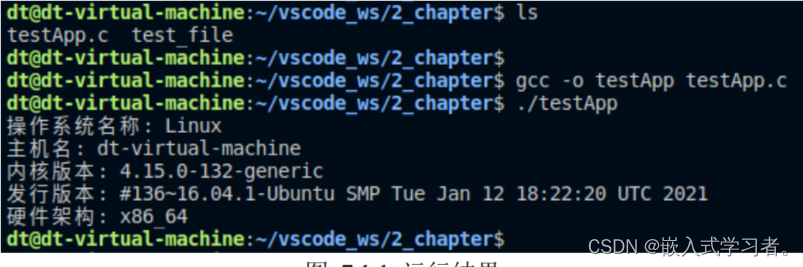
测试
#include <stdio.h>
#include <stdlib.h>
#include <sys/utsname.h>

int main(void)
{
	 struct utsname os_info;
	 int ret;
	 /* 获取信息 */
	 ret = uname(&os_info);
	 if (-1 == ret)
	 {
		 perror("uname error");
		 exit(-1);
	 }
	 /* 打印信息 */
	 printf("操作系统名称: %s\n", os_info.sysname);
	 printf("主机名: %s\n", os_info.nodename);
	 printf("内核版本: %s\n", os_info.release);
	 printf("发行版本: %s\n", os_info.version);
	 printf("硬件架构: %s\n", os_info.machine);
	 exit(0);
}
1.2、sysinfo 函数
sysinfo 系统调用可用于获取一些系统统计信息
#include <sys/sysinfo.h>
int sysinfo(struct sysinfo *info);
函数参数和返回值含义如下:
info:struct sysinfo 结构体类型指针,指向一个 struct sysinfo 结构体类型对象。
返回值:成功返回 0;失败将返回-1,并设置 errno。
struct sysinfo {
	 long uptime; /* 自系统启动之后所经过的时间(以秒为单位) */
	 unsigned long loads[3]; /* 1, 5, and 15 minute load averages */
	 unsigned long totalram; /* 总的可用内存大小 */
	 unsigned long freeram; /* 还未被使用的内存大小 */
	 unsigned long sharedram; /* Amount of shared memory */
	 unsigned long bufferram; /* Memory used by buffers */
	 unsigned long totalswap; /* Total swap space size */
	 unsigned long freeswap; /* swap space still available */
	 unsigned short procs; /* 系统当前进程数量 */
	 unsigned long totalhigh; /* Total high memory size */
	 unsigned long freehigh; /* Available high memory size */
	 unsigned int mem_unit; /* 内存单元大小(以字节为单位) */
	 char _f[20-2*sizeof(long)-sizeof(int)]; /* Padding to 64 bytes */
};
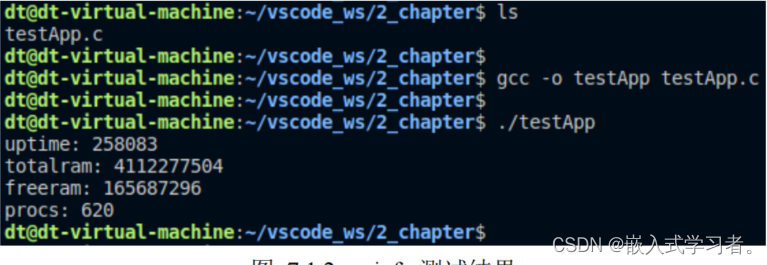
测试
#include <stdio.h>
#include <stdlib.h>
#include <sys/sysinfo.h>
int main(void)
{
	 struct sysinfo sys_info;
	 int ret;
	 /* 获取信息 */
	 ret = sysinfo(&sys_info);
	 if (-1 == ret) {
		 perror("sysinfo error");
		 exit(-1);
	 }
	 /* 打印信息 */
	 printf("uptime: %ld\n", sys_info.uptime);
	 printf("totalram: %lu\n", sys_info.totalram);
	 printf("freeram: %lu\n", sys_info.freeram);
	 printf("procs: %u\n", sys_info.procs);
	 exit(0);
}
1.3、gethostname 函数
#include <unistd.h>
int gethostname(char *name, size_t len);
函数参数和返回值含义如下:
name:指向用于存放主机名字符串的缓冲区。
len:缓冲区长度。
返回值:成功返回 0,;失败将返回-1,并会设置 errno。
1.4、sysconf()函数
sysconf()函数是一个库函数,可在运行时获取系统的一些配置信息,譬如页大小(page size)、主机名的最大长度、进程可以打开的最大文件数、每个用户 ID 的最大并发进程数等。
#include <unistd.h>
long sysconf(int name);
使用示例
#include <stdio.h>
#include <stdlib.h>
#include <unistd.h>

int main(void)
{
	 printf("每个用户的最大并发进程数: %ld\n", sysconf(_SC_CHILD_MAX));
	 printf("系统节拍率: %ld\n", sysconf(_SC_CLK_TCK));
	 printf("系统页大小: %ld\n", sysconf(_SC_PAGESIZE));
	 exit(0);
}
二、时间、日期
1.1、获取时间 time/gettimeofday
(1)time 函数
系统调用 time()用于获取当前时间,以秒为单位,返回得到的值是自 1970-01-01 00:00:00 +0000 (UTC)以来的秒数
#include <time.h>
time_t time(time_t *tloc);
函数参数和返回值含义如下:
tloc:如果 tloc 参数不是 NULL,则返回值也存储在 tloc 指向的内存中。
返回值:成功则返回自 1970-01-01 00:00:00 +0000 (UTC)以来的时间值(以秒为单位);失败则返回-1,并会设置 errno。
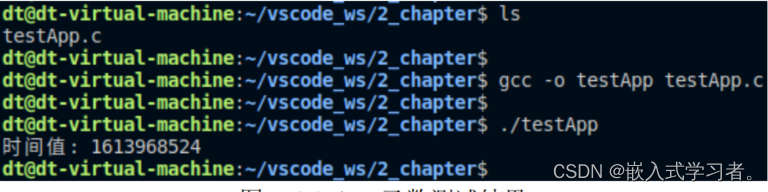
测试
#include <stdio.h>
#include <stdlib.h>
#include <time.h>
int main(void)
{
	 time_t t;
	 t = time(NULL);
	 if (-1 == t) {
		 perror("time error");
		 exit(-1);
	 }
	 printf("时间值: %ld\n", t);
	 exit(0);
}
(2)gettimeofday 函数
time()获取到的时间只能精确到秒,如果想要获取更加精确的时间可以使用系统调用 gettimeofday 来实现,gettimeofday()函数提供微秒级时间精度。
#include <sys/time.h>
int gettimeofday(struct timeval *tv, struct timezone *tz);
测试
#include <stdio.h>
#include <stdlib.h>
#include <sys/time.h>

int main(void)
{
	 struct timeval tval;
	 int ret;
	 ret = gettimeofday(&tval, NULL);
	 if (-1 == ret) {
		 perror("gettimeofday error");
		 exit(-1);
	 }
	 printf("时间值: %ld 秒+%ld 微秒\n", tval.tv_sec, tval.tv_usec);
	 exit(0);
}

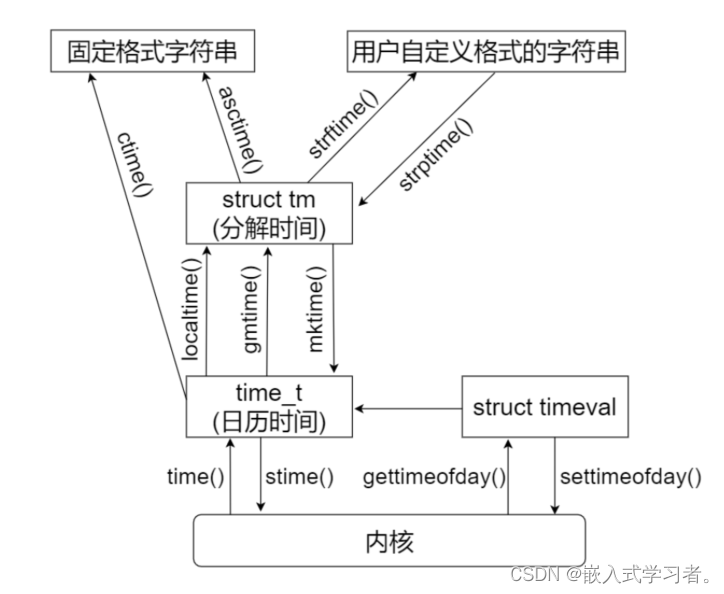
1.2、时间转换函数
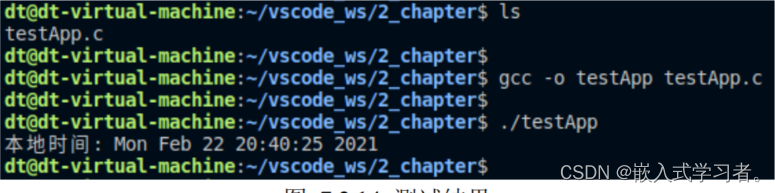
(1)ctime 函数
#include <time.h>
char *ctime(const time_t *timep);
char *ctime_r(const time_t *timep, char *buf);
函数参数和返回值含义如下:
timep:time_t 时间变量指针。
返回值:成功将返回一个 char *类型指针,指向转换后得到的字符串;失败将返回 NULL。
测试
#include <stdio.h>
#include <stdlib.h>
#include <time.h>
int main(void)
{
char tm_str[100] = {0};
time_t tm;
/* 获取时间 */
tm = time(NULL);
if (-1 == tm)
{
perror("time error");
exit(-1);
}
/* 将时间转换为字符串形式 */
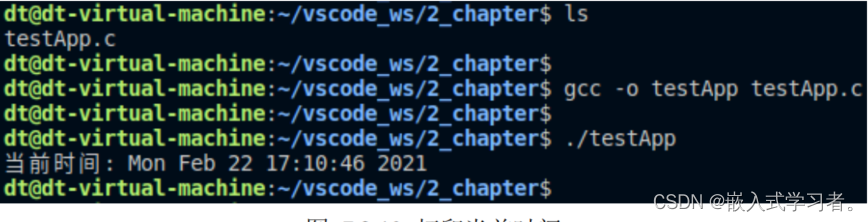
ctime_r(&tm, tm_str);
/* 打印输出 */
printf("当前时间: %s", tm_str);
exit(0);
}
(2)localtime 函数
localtime()函数可以把 time()或 gettimeofday()得到的秒数(time_t 时间或日历时间)变成一个 struct tm结构体所表示的时间,该时间对应的是本地时间。
#include <time.h>
struct tm *localtime(const time_t *timep);
struct tm *localtime_r(const time_t *timep, struct tm *result);
函数参数和返回值含义如下:
timep:需要进行转换的 time_t 时间变量对应的指针,可通过 time()或 gettimeofday()获取得到。
result:是一个 struct tm 结构体类型指针,稍后给大家介绍 struct tm 结构体,参数 result 是可重入函数localtime_r()需要额外提供的参数。
返回值:对于不可重入版本 localtime()来说,成功则返回一个有效的 struct tm 结构体指针,而对于可重入版本 localtime_r()来说,成功执行情况下,返回值将会等于参数 result;失败则返回 NULL。
struct tm {
	 int tm_sec; /* 秒(0-60) */
	 int tm_min; /* 分(0-59) */
	 int tm_hour; /* 时(0-23) */
	 int tm_mday; /* 日(1-31) */
	 int tm_mon; /* 月(0-11) */
	 int tm_year; /* 年(这个值表示的是自 1900 年到现在经过的年数) */
	 int tm_wday; /* 星期(0-6, 星期日 Sunday = 0、星期一=1…) */
	 int tm_yday; /* 一年里的第几天(0-365, 1 Jan = 0) */
	 int tm_isdst; /* 夏令时 */
};
测试
#include <stdio.h>
#include <stdlib.h>
#include <time.h>
int main(void)
{
struct tm t;
time_t sec;
/* 获取时间 */
sec = time(NULL);
if (-1 == sec)
{
perror("time error");
exit(-1);
}
/* 转换得到本地时间 */
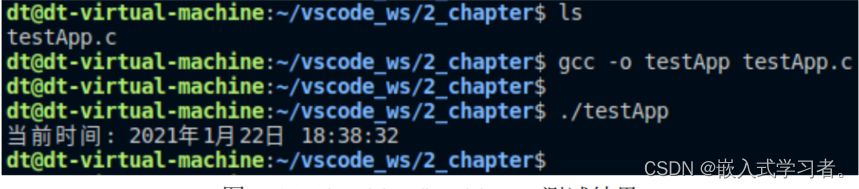
localtime_r(&sec, &t);
/* 打印输出 */
printf("当前时间: %d 年%d 月%d 日 %d:%d:%d\n",t.tm_year + 1900, t.tm_mon, t.tm_mday,t.tm_hour, t.tm_min, t.tm_sec);
exit(0);
}
(3)gmtime 函数
gmtime()函数也可以把 time_t 时间变成一个 struct tm 结构体所表示的时间,与 localtime()所不同的是,gmtime()函数所得到的是 UTC 国际标准时间,并不是计算机的本地时间,这是它们之间的唯一区别。
#include <time.h>
struct tm *gmtime(const time_t *timep);
struct tm *gmtime_r(const time_t *timep, struct tm *result);
gmtime_r()是 gmtime()的可重入版本,同样也是推荐大家使用可重入版本函数 gmtime_r。关于该函数的参数和返回值,这里便不再介绍,与 localtime()是一样的。
测试
#include <stdio.h>
#include <stdlib.h>
#include <time.h>
int main(void)
{
struct tm local_t;
struct tm utc_t;
time_t sec;
/* 获取时间 */
sec = time(NULL);
if (-1 == sec)
{
perror("time error");
exit(-1);
}
/* 转换得到本地时间 */
localtime_r(&sec, &local_t);
/* 转换得到国际标准时间 */
gmtime_r(&sec, &utc_t);
/* 打印输出 */
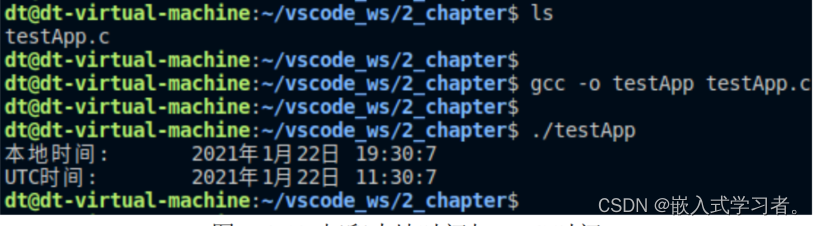
printf("本地时间: %d 年%d 月%d 日 %d:%d:%d\n",local_t.tm_year + 1900, local_t.tm_mon, local_t.tm_mday,local_t.tm_hour, local_t.tm_min, local_t.tm_sec);
printf("UTC 时间: %d 年%d 月%d 日 %d:%d:%d\n",utc_t.tm_year + 1900, utc_t.tm_mon, utc_t.tm_mday,utc_t.tm_hour, utc_t.tm_min, utc_t.tm_sec);
exit(0);
}
(4)mktime 函数
mktime()函数与 localtime()函数相反,mktime()可以将使用 struct tm 结构体表示的分解时间转换为 time_t时间(日历时间),同样这也是一个 C 库函数,其函数原型如下所示:
#include <time.h>
time_t mktime(struct tm *tm);
函数参数和返回值含义如下:
tm:需要进行转换的 struct tm 结构体变量对应的指针。
返回值:成功返回转换得到 time_t 时间值;失败返回-1。
测试
#include <stdio.h>
#include <stdlib.h>
#include <time.h>
int main(void)
{
struct tm local_t;
time_t sec;
/* 获取时间 */
sec = time(NULL);
if (-1 == sec)
{
perror("time error");
exit(-1);
}
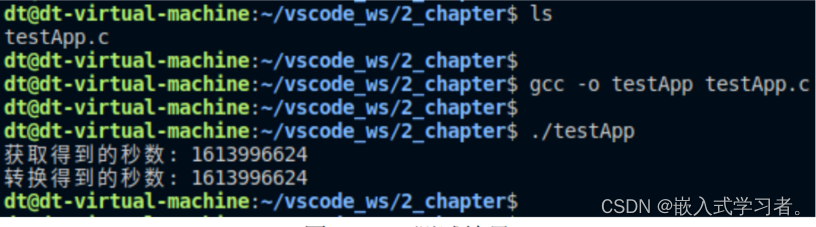
printf("获取得到的秒数: %ld\n", sec);
localtime_r(&sec, &local_t);
printf("转换得到的秒数: %ld\n", mktime(&local_t));
exit(0);
}
(5)asctime 函数
asctime()函数与 ctime()函数的作用一样,也可将时间转换为可打印输出的字符串形式,与 ctime()函数的区别在于,ctime()是将 time_t 时间转换为固定格式字符串、而 asctime()则是将 struct tm 表示的分解时间转换为固定格式的字符串。
#include <time.h>
char *asctime(const struct tm *tm);
char *asctime_r(const struct tm *tm, char *buf);
函数参数和返回值含义如下:
tm:需要进行转换的 struct tm 表示的时间。
buf:可重入版本函数 asctime_r 需要额外提供的参数 buf,指向一个缓冲区,用于存放转换得到的字符串。
返回值:转换失败将返回 NULL;成功将返回一个 char *类型指针,指向转换后得到的时间字符串,对于 asctime_r 函数来说,返回值就等于参数 buf。
测试
#include <stdio.h>
#include <stdlib.h>
#include <time.h>
int main(void)
{
	 struct tm local_t;
	 char tm_str[100] = {0};
	 time_t sec;
	 /* 获取时间 */
	 sec = time(NULL);
	 if (-1 == sec)
	 {
		 perror("time error");
		 exit(-1);
	 }
	 localtime_r(&sec, &local_t);
	 asctime_r(&local_t, tm_str);
	 printf("本地时间: %s", tm_str);
	 exit(0);
}
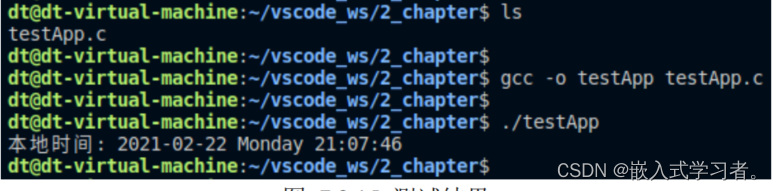
(6)strftime 函数
此函数也可以将一个 struct tm 变量表示的分解时间转换为为格式化字符串,并且在功能上比 asctime()和 ctime()更加强大,它可以根据自己
的喜好自定义时间的显示格式。
#include <time.h>
size_t strftime(char *s, size_t max, const char *format, const struct tm *tm);
函数参数和返回值含义如下:
s:指向一个缓存区的指针,该缓冲区用于存放生成的字符串。
max:字符串的最大字节数。
format:这是一个用字符串表示的字段,包含了普通字符和特殊格式说明符,可以是这两种字符的任意组合。
tm:指向 struct tm 结构体对象的指针。
返回值:如果转换得到的目标字符串不超过最大字节数(也就是 max),则返回放置到 s 数组中的字节数;如果超过了最大字节数,则返回 0。
测试
#include <stdio.h>
#include <stdlib.h>
#include <time.h>
int main(void)
{
	 struct tm local_t;
	 char tm_str[100] = {0};
	 time_t sec;
	 /* 获取时间 */
	 sec = time(NULL);
	 if (-1 == sec) {
		 perror("time error");
		 exit(-1);
	 }
	 localtime_r(&sec, &local_t);
	 strftime(tm_str, sizeof(tm_str), "%Y-%m-%d %A %H:%M:%S", &local_t);
	 printf("本地时间: %s\n", tm_str);
	 exit(0);
}
1.3、设置时间 settimeofday
使用 settimeofday()函数可以设置时间,也就是设置系统的本地时间
#include <sys/time.h>
int settimeofday(const struct timeval *tv, const struct timezone *tz);
三、总结
四、进程时间
进程时间指的是进程从创建后(也就是程序运行后)到目前为止这段时间内使用 CPU 资源的时间总数,出于记录的目的,内核把 CPU 时间(进程时间)分为以下两个部分:
⚫ 用户 CPU 时间:进程在用户空间(用户态)下运行所花费的 CPU 时间。有时也成为虚拟时间(virtualtime)。
⚫ 系统 CPU 时间:进程在内核空间(内核态)下运行所花费的 CPU 时间。这是内核执行系统调用或代表进程执行的其它任务(譬如,服务页错误)所花费的时间。一般来说,进程时间指的是用户 CPU 时间和系统 CPU 时间的总和,也就是总的 CPU 时间。
Tips:进程时间不等于程序的整个生命周期所消耗的时间,如果进程一直处于休眠状态(进程被挂起、不会得到系统调度),那么它并不会使用 CPU 资源,所以休眠的这段时间并不计算在进程时间中。
1、times 函数
#include <sys/times.h>
clock_t times(struct tms *buf);
函数参数和返回值含义如下:
buf:times()会将当前进程时间信息存在一个 struct tms 结构体数据中。
返回值:返回值类型为 clock_t(实质是 long 类型),调用成功情况下,将返回从过去任意的一个时间点(譬如系统启动时间)所经过的时钟滴答数(其实就是系统节拍数),将(节拍数 / 节拍率)便可得到秒数,返回值可能会超过 clock_t 所能表示的范围(溢出);调用失败返回-1,并设置 errno。
struct tms 结构体内容如下所示:
struct tms {
 clock_t tms_utime; /* user time, 进程的用户 CPU 时间, tms_utime 个系统节拍数 */
 clock_t tms_stime; /* system time, 进程的系统 CPU 时间, tms_stime 个系统节拍数 */
 clock_t tms_cutime; /* user time of children, 已死掉子进程的 tms_utime + tms_cutime 时间总和 */
 clock_t tms_cstime; /* system time of children, 已死掉子进程的 tms_stime + tms_cstime 时间总和 */
};
测试
#include <stdio.h>
#include <stdlib.h>
#include <sys/times.h>
#include <unistd.h>

int main(int argc, char *argv[])
{
	 struct tms t_buf_start;
	 struct tms t_buf_end;
	 clock_t t_start;
	 clock_t t_end;
	 long tck;
	 int i, j;
	 /* 获取系统的节拍率 */
	 tck = sysconf(_SC_CLK_TCK);
	 /* 开始时间 */
	 t_start = times(&t_buf_start);
	 if (-1 == t_start)
	 {
		 perror("times error");
		 exit(-1);
	 }
	 /* *****需要进行测试的代码段***** */
	 for (i = 0; i < 20000; i++)
		 for (j = 0; j < 20000; j++)
		 	;
	 sleep(1); //休眠挂起
	 /* *************end************** */
	 /* 结束时间 */
	 t_end = times(&t_buf_end);
	 if (-1 == t_end)
	 {
		 perror("times error");
		 exit(-1);
	 }
	 /* 打印时间 */
	 printf("时间总和: %f 秒\n", (t_end - t_start) / (double)tck);
	 printf("用户 CPU 时间: %f 秒\n", (t_buf_end.tms_utime - t_buf_start.tms_utime) / (double)tck);
	 printf("系统 CPU 时间: %f 秒\n", (t_buf_end.tms_stime - t_buf_start.tms_stime) / (double)tck);
	 exit(0);
}

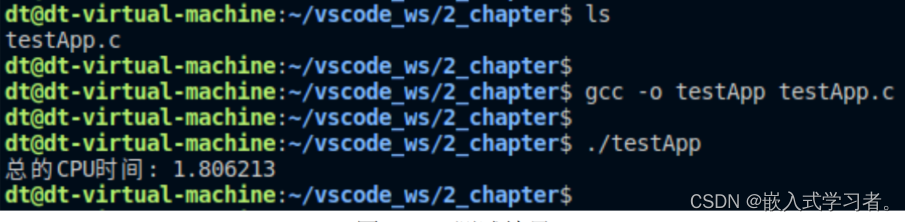
2、clock 函数
库函数 clock()提供了一个更为简单的方式用于进程时间,它的返回值描述了进程使用的总的 CPU 时间
#include <time.h>
clock_t clock(void);
返回值:返回值是到目前为止程序的进程时间,为 clock_t 类型,注意 clock()的返回值并不是系统节拍数,如果想要获得秒数,请除以 CLOCKS_PER_SEC(这是一个宏)。如果返回的进程时间不可用或其值无法表示,则该返回值是-1。
测试
#include <stdio.h>
#include <stdlib.h>
#include <time.h>

int main(int argc, char *argv[])
{
	 clock_t t_start;
	 clock_t t_end;
	 int i, j;
	 /* 开始时间 */
	 t_start = clock();
	 if (-1 == t_start)
		 exit(-1);
	 /* *****需要进行测试的代码段***** */
	 for (i = 0; i < 20000; i++)
		 for (j = 0; j < 20000; j++)
			 ;
	 /* *************end************** */
	 /* 结束时间 */
	 t_end = clock();
	 if (-1 == t_end)
		 exit(-1);
	  /* 打印时间 */
	 printf("总的 CPU 时间: %f\n", (t_end - t_start) / (double)CLOCKS_PER_SEC);
	 exit(0);
}
五、产生随机数
1、srand 函数
#include <stdlib.h>
void srand(unsigned int seed);
seed:指定一个随机数中,int 类型的数据,一般尝尝将当前时间作为随机数种子赋值给参数 seed,譬如 time(NULL),因为每次启动应用程序时间上是一样的,所以就能够使得程序中设置的随机数种子在每次启动程序时是不一样的。
常用的用法 srand(time(NULL));
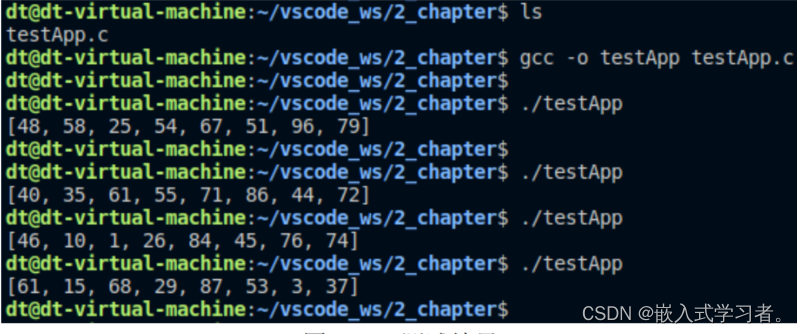
测试
#include <stdio.h>
#include <stdlib.h>
#include <time.h>
int main(int argc, char *argv[])
{
	 int random_number_arr[8];
	 int count;
	 /* 设置随机数种子 */
	 srand(time(NULL));
	 /* 生成伪随机数 */
	 for (count = 0; count < 8; count++)
		 random_number_arr[count] = rand() % 100;
	 /* 打印随机数数组 */
	 printf("[");
	 for (count = 0; count < 8; count++)
	 {
		 printf("%d", random_number_arr[count]);
		 if (count != 8 - 1)
			 printf(", ");
	 }
	 printf("]\n");
	 exit(0);
}
六、休眠
1、秒级休眠: sleep
#include <unistd.h>
unsigned int sleep(unsigned int seconds);
函数参数和返回值含义如下:
seconds:休眠时长,以秒为单位。
返回值:如果休眠时长为参数 seconds 所指定的秒数,则返回 0;若被信号中断则返回剩余的秒数。
2、微秒级休眠: usleep
#include <unistd.h>
int usleep(useconds_t usec);
3、高精度休眠: nanosleep
#include <time.h>
int nanosleep(const struct timespec *req, struct timespec *rem);
函数参数与返回值含义如下:
req:一个 struct timespec 结构体指针,指向一个 struct timespec 变量,用于设置休眠时间长度,可精确到纳秒级别。
rem:也是一个 struct timespec 结构体指针,指向一个 struct timespec 变量,也可设置 NULL。
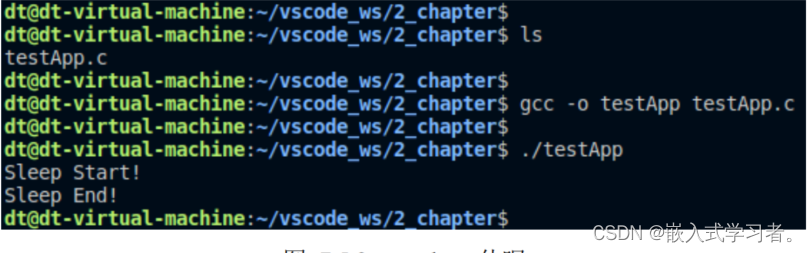
测试
#include <stdio.h>
#include <stdlib.h>
#include <time.h>
int main(void)
{
	 struct timespec request_t;
	 puts("Sleep Start!");
	 /* 让程序休眠 3 秒钟 */
	 request_t.tv_sec = 3;
	 request_t.tv_nsec = 0;
	 nanosleep(&request_t, NULL);
	 puts("Sleep End!");
	 exit(0);
}
七、申请堆内存
#include <stdlib.h>
void *malloc(size_t size);
#include <stdlib.h>
void free(void *ptr);
测试
#include <stdio.h>
#include <stdlib.h>
#include <string.h>
#define MALLOC_MEM_SIZE (1 * 1024 * 1024)
int main(int argc, char *argv[])
{
	 char *base = NULL;
	 /* 申请堆内存 */
	 base = (char *)malloc(MALLOC_MEM_SIZE);
	 if (NULL == base) {
		 printf("malloc error\n");
		 exit(-1);
	 }
	 /* 初始化申请到的堆内存 */
	 memset(base, 0x0, MALLOC_MEM_SIZE);
	 /* 使用内存 */
	 /* ...... */
	 /* 释放内存 */
	 free(base);
	 exit(0);
}