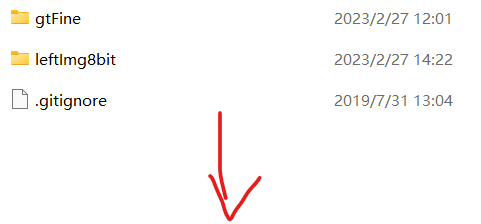
1:首先下载cityscape数据集,包含两个大文件夹,具体的数据集介绍参考此链接。cityscape数据集解析
看一下gtFine子文件夹,另一个也是同理:
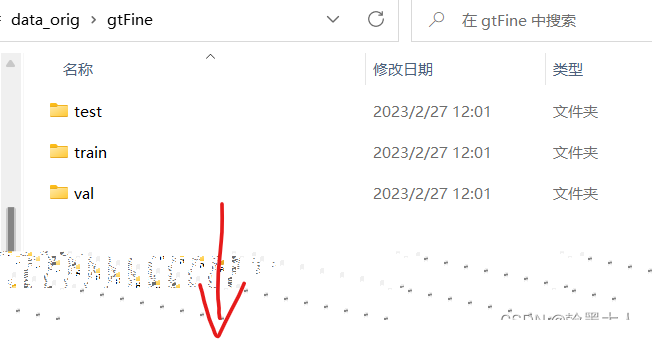
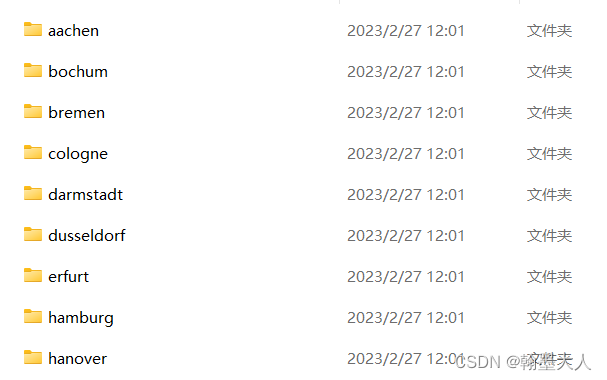
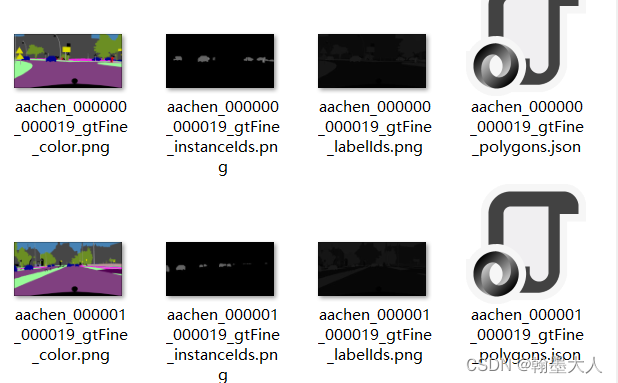
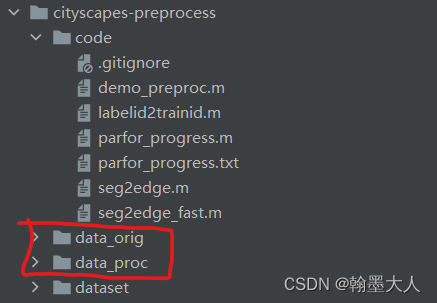
2:将下载好的数据集放到data_orig中,还有一个文件夹data_proc放的处理过后的数据。
3:然后就是处理的代码:
% --------------------------------------------------------
% Copyright (c) Zhiding Yu
% Licensed under The MIT License [see LICENSE for details]
%
% Intro:
% This script is used to:
% 1. Generate the .bin edge labels that can be read by CASENet for training
% 2. Create caffe filelists for the generated data
% --------------------------------------------------------
function demo_preproc()

clc; clear; close all;

%% Setup Directories
dataRoot = '../data_orig';
genDataRoot = '../data_proc';
suffixImage = '_leftImg8bit.png';
suffixColor = '_gtFine_color.png';
suffixLabelIds = '_gtFine_labelIds.png';
suffixInstIds = '_gtFine_instanceIds.png';
suffixTrainIds = '_gtFine_trainIds.png';
suffixPolygons = '_gtFine_polygons.json';
suffixEdge = '_gtFine_edge.bin';

%% Setup Parameters
numCls = 19; %19个类别
radius = 2; %半径为2

%% Setup Parallel Pool,初始化Matlab并行计算环境
numWorker = 4; % Number of matlab workers for parallel computing
matlabVer = version('-release');%matlab发行版本
if( str2double(matlabVer(1:4)) > 2013 || (str2double(matlabVer(1:4)) == 2013 && strcmp(matlabVer(5), 'b')) )
    delete(gcp('nocreate'));
    parpool('local', numWorker);
else
    if(matlabpool('size')>0) %#ok<*DPOOL>
        matlabpool close
    end
    matlabpool open 8
end

%% Generate Output Directory
if(exist(genDataRoot, 'file')==0)%exist name 以数字形式返回 name 的类型,0表示不存在或找不到
    mkdir(genDataRoot);
end

%% Generate Preprocessed Dataset
setList = {'train', 'val', 'test'}; %1x3
for idxSet = 1:length(setList) % 1:3
    setName = setList{idxSet}; % setName='train'
    fidList = fopen([genDataRoot '/' setName '.txt'], 'w'); %打开要写入的文件
    cityList = dir([dataRoot '/leftImg8bit/' setName]);  %列出文件夹内容
    for idxCity = 3:length(cityList) %train文件夹下所有图片的个数,从3开始因为前两个为.和..,猜测是前一页的目录
        cityName = cityList(idxCity, 1).name;%3行第一列,name参数下对应的城市
        if(exist([genDataRoot '/leftImg8bit/' setName '/' cityName], 'file')==0)%如果不存在leftImg8bit/train/cityname
            mkdir([genDataRoot '/leftImg8bit/' setName '/' cityName]);%创建一个leftImg8bit文件夹下以城市名命名的文件夹
        end
        if(exist([genDataRoot '/gtFine/' setName '/' cityName], 'file')==0)%gt也是同理
            mkdir([genDataRoot '/gtFine/' setName '/' cityName]);%创建一个gtFine文件夹下以城市名命名的文件夹
        end
        fileList = dir([dataRoot '/leftImg8bit/' setName '/' cityName '/*.png']);%leftImg8bit/train/cityname/下所有的图片

        % Generate and write data
        display(['Set: ' setName ', City: ' cityName])%当语句或表达式不以分号结束时,MATLAB® 会调用 display(X)。如果您希望看到中间结果,请不要在语句或表达式结尾使用终止分号。
        parfor_progress(length(fileList)); %显示进度条
        parfor idxFile = 1:length(fileList)%并行for循环
            fileName = fileList(idxFile).name(1:end-length(suffixImage));%dataRoot文件夹,end 也表示数组的最后一个索引。例如,X(end) 是 X 的最后一个元素
            % Copy image,将 source 复制到 destination
            copyfile([dataRoot '/leftImg8bit/' setName '/' cityName '/' fileName suffixImage], [genDataRoot '/leftImg8bit/' setName '/' cityName '/' fileName suffixImage]);
            % Copy gt files
            copyfile([dataRoot '/gtFine/' setName '/' cityName '/' fileName suffixColor], [genDataRoot '/gtFine/' setName '/' cityName '/' fileName suffixColor]);
            copyfile([dataRoot '/gtFine/' setName '/' cityName '/' fileName suffixInstIds], [genDataRoot '/gtFine/' setName '/' cityName '/' fileName suffixInstIds]);
            copyfile([dataRoot '/gtFine/' setName '/' cityName '/' fileName suffixLabelIds], [genDataRoot '/gtFine/' setName '/' cityName '/' fileName suffixLabelIds]);
            copyfile([dataRoot '/gtFine/' setName '/' cityName '/' fileName suffixPolygons], [genDataRoot '/gtFine/' setName '/' cityName '/' fileName suffixPolygons]);
            if(~strcmp(setName, 'test'))
                % Transform label id map to train id map and write
                labelIdMap = imread([dataRoot '/gtFine/' setName '/' cityName '/' fileName suffixLabelIds]);
                trainIdMap = labelid2trainid(labelIdMap);
                imwrite(trainIdMap, [genDataRoot '/gtFine/' setName '/' cityName '/' fileName suffixTrainIds], 'png');
                % Transform color map to edge map and write
                edgeMapBin = seg2edge(labelIdMap, radius, [2 3]', 'regular'); % Avoid generating edges on "rectification border" (labelId==2) and "out of roi" (labelId==3)
                [height, width, ~] = size(trainIdMap);
                edgeMapCat = zeros(height, width, 'uint32');
                for idxCls = 1:numCls
                    segMap = trainIdMap == idxCls-1;
                    if(sum(segMap(:))~=0)
                        idxEdge = seg2edge_fast(segMap, edgeMapBin, radius, [], 'regular'); % Fast seg2edge by only considering binary edge pixels
                        edgeMapCat(idxEdge) = edgeMapCat(idxEdge) + 2^(idxCls-1);
                    end
                end
                fidEdge = fopen([genDataRoot '/gtFine/' setName '/' cityName '/' fileName suffixEdge], 'w');
                fwrite(fidEdge, edgeMapCat', 'uint32'); % Important! Transpose input matrix to become row major
                fclose(fidEdge);
            end
            parfor_progress();
        end
        parfor_progress(0);

		% Write file lists
        for idxFile = 1:length(fileList)
        	fileName = fileList(idxFile, 1).name(1:end-length(suffixImage));
        	if(~strcmp(setName, 'test'))
        		fprintf(fidList, ['/leftImg8bit/' setName '/' cityName '/' fileName suffixImage ' /gtFine/' setName '/' cityName '/' fileName suffixEdge '\n']);
        	else
        		fprintf(fidList, ['/leftImg8bit/' setName '/' cityName '/' fileName suffixImage '\n']);
        	end
        end
    end
    fclose(fidList);
end
3.1:首先设置的目录。包括根目录,生成文件夹位置,gt对应的四个文件,在连接中都有介绍,以及最后生成的suffixEdge,是.bin格式。
3.2:设置参数,总类别是19,半径为2,半径参数不知道干啥先放一放。
3.3:Setup Parallel Pool,初始化Matlab并行计算环境。
3.4:如果genDataRoot不存在,创建一个目录。exit输出为0,表示不存在,输出为1表示存在。
3.5:接着就是代码的主体部分。
3.5.1:列表包含三个参数,分别是{‘train’, ‘val’, ‘test’}。
3.5.2:length(setList)=3,for循环首先idxset=1。
3.5.3:setName=Train
3.5.6:打开genDataRoot文件,并写入,但是本来是不存在这个文件的,所以要先自动创建一个train.txt文件。

3.5.7:接着列出dataRoot ‘/leftImg8bit/’ train文件夹下的内容。
文件夹中:
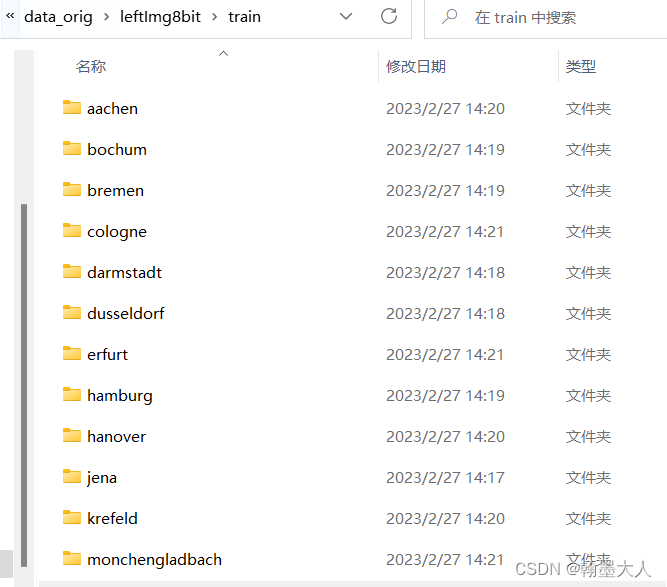
在matlab中:包含有name等参数。
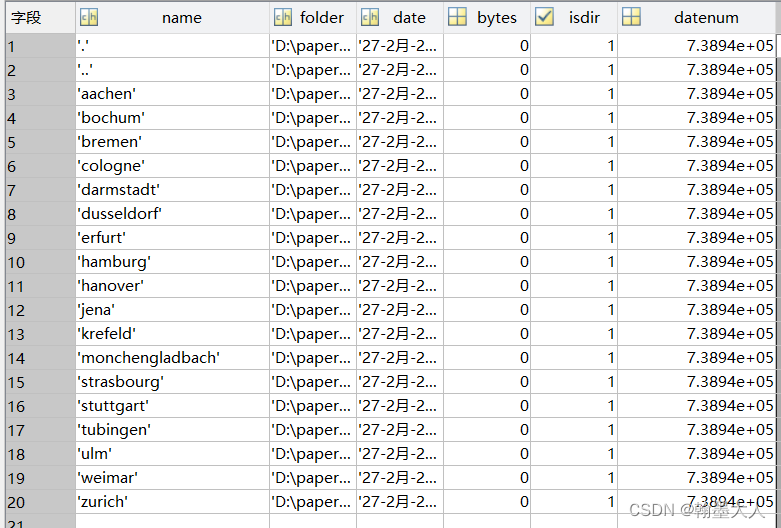
3.5.8:接着for循环,从3到length(cityList)即3-20,为什么从3开始,因为表格中的1,2并不是文件夹,猜测可能是表示前一页的意思。
3.5.9:cityName = cityList(idxCity, 1).name;获得cityList即上述列表,第三行第一列,name属性下的名称,即城市名aachen。
3.5.10:判断genDataRoot ‘/leftImg8bit/’ train’/’ aachen文件夹是否存在,不存在则自动创建。
3.5.11:判断genDataRoot ‘/leftImg8bit/’ gtFine’/’ aachen文件夹是否存在,不存在则自动创建。
3.5.12:fileList = dir([dataRoot ‘/leftImg8bit/’ train ‘/’ aachen’/*.png’])获得aachen城市文件夹下所有的图片。
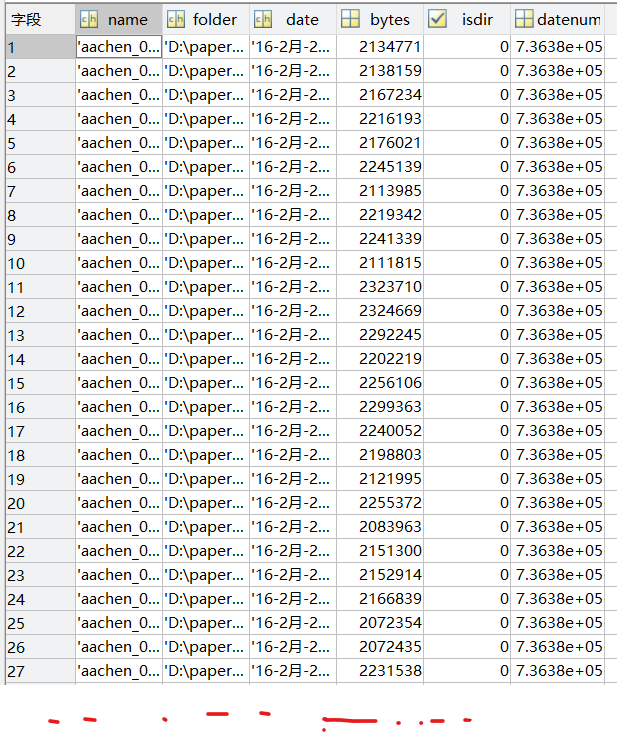
3.5.13:display([‘Set: ’ setName ‘, City: ’ cityName])%当语句或表达式不以分号结束时,MATLAB® 会调用 display(X)。如果您希望看到中间结果,请不要在语句或表达式结尾使用终止分号。parfor_progress(length(fileList)); %显示进度条。
在命令行窗口显示train数据,aachen城市。如下:

3.5.14:fileName = fileList(idxFile).name(1:end-length(suffixImage))
当idxFile=1是,在上表中字段为1,name对应的值为:aachen_000000_000019_leftImg8bit.png
内部的(1:end-length(suffixImage))指的是取第一个到第end-length(suffixImage)个字符,首先suffixImage为_leftImg8bit.png,end代表aachen_000000_000019_leftImg8bit.png总长度,减去_leftImg8bit.png长度就是aachen_000000_000019长度,即取filename=aachen_000000_000019。

3.5.15:将[dataRoot ‘/gtFine/’ train’/’ aachen ‘/’ aachen_000000_000019 _leftImg8bit.png], 复制到[genDataRoot ‘/gtFine/’ train’/’ aachen’/’ aachen_000000_000019 _leftImg8bit.png]),即将dataRoot 的图片复制到genDataRoot。
3.5.16:同上。将dataRoot 中gt的四个文件全部复制到genDataRoot 中。并行处理,174次同时处理。
copyfile([dataRoot ‘/gtFine/’ setName ‘/’ cityName ‘/’ fileName suffixColor], [genDataRoot ‘/gtFine/’ setName ‘/’ cityName ‘/’ fileName suffixColor]);
copyfile([dataRoot ‘/gtFine/’ setName ‘/’ cityName ‘/’ fileName suffixInstIds], [genDataRoot ‘/gtFine/’ setName ‘/’ cityName ‘/’ fileName suffixInstIds]);
copyfile([dataRoot ‘/gtFine/’ setName ‘/’ cityName ‘/’ fileName suffixLabelIds], [genDataRoot ‘/gtFine/’ setName ‘/’ cityName ‘/’ fileName suffixLabelIds]);
copyfile([dataRoot ‘/gtFine/’ setName ‘/’ cityName ‘/’ fileName suffixPolygons], [genDataRoot ‘/gtFine/’ setName ‘/’ cityName ‘/’ fileName suffixPolygons]);
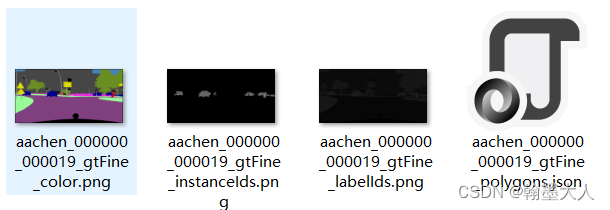
3.5.17:if(~strcmp(setName, ‘test’)),如果setName等于test,第一次setName等于train,所以这个for循环会直接跳过。
加入我们执行完第一次for循环,现在setName等于test:
labelIdMap = imread([dataRoot ‘/gtFine/’ setName ‘/’ cityName ‘/’ fileName suffixLabelIds]);
首先找到labelIdMap 的图:
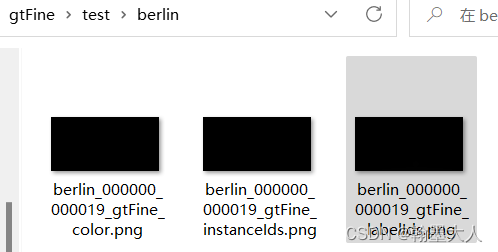
意义:

3.5.18:将labelid转换为trainid:调用了一个新的函数labelid2trainid
trainIdMap = labelid2trainid(labelIdMap);
function [trainId] = labelid2trainid(labelId)
[height, width, chn] = size(labelId);
if(chn>1)
    display('Warning! Input label has multiple channels!')
    labelId = labelId(:, :, 1);
end
trainId = 255.*ones(height, width, 'uint8');
map = [7 0; 8 1; 11 2; 12 3; 13 4; 17 5; 19 6; 20 7; 21 8; 22 9; 23 10; 24 11; 25 12; 26 13; 27 14; 28 15; 31 16; 32 17; 33 18];
numCls = size(map, 1);
for idxCls = 1:numCls
    idxLabel = labelId == map(idxCls, 1);
    trainId(idxLabel) = map(idxCls, 2);
end
3.5.18.1:label通道为1,接着生成一个宽为w高为h,用255填充的矩阵。
3.5.18.2:map = [7 0; 8 1; 11 2; 12 3; 13 4; 17 5; 19 6; 20 7; 21 8; 22 9; 23 10; 24 11; 25 12; 26 13; 27 14; 28 15; 31 16; 32 17; 33 18];
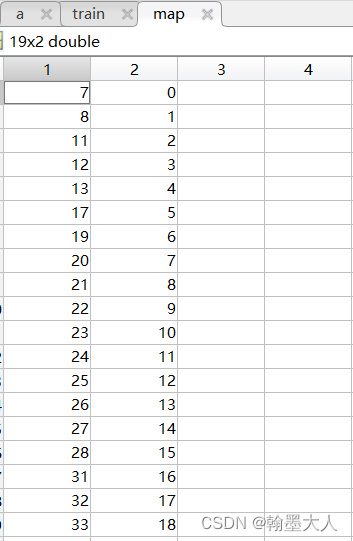
map意思是类别的映射,本来是33类(加上0空,是34个像素),将其映射为我们关注的19类。我们看原始的ID是0-33,trainId是0-18,不感兴趣的用255,即白色代替掉了。
                     name |  id | trainId |       category | categoryId | hasInstances | ignoreInEval|        color

    --------------------------------------------------------------------------------------------------

                unlabeled |   0 |     255 |           void |          0 |            0 |            1 |         (0, 0, 0)

              ego vehicle |   1 |     255 |           void |          0 |            0 |            1 |         (0, 0, 0)

     rectification border |   2 |     255 |           void |          0 |            0 |            1 |         (0, 0, 0)

               out of roi |   3 |     255 |           void |          0 |            0 |            1 |         (0, 0, 0)

                   static |   4 |     255 |           void |          0 |            0 |            1 |         (0, 0, 0)

                  dynamic |   5 |     255 |           void |          0 |            0 |            1 |      (111, 74, 0)

                   ground |   6 |     255 |           void |          0 |            0 |            1 |       (81, 0, 81)

                     road |   7 |       0 |           flat |          1 |            0 |            0 |    (128, 64, 128)

                 sidewalk |   8 |       1 |           flat |          1 |            0 |            0 |    (244, 35, 232)

                  parking |   9 |     255 |           flat |          1 |            0 |            1 |   (250, 170, 160)

               rail track |  10 |     255 |           flat |          1 |            0 |            1 |   (230, 150, 140)

                 building |  11 |       2 |   construction |          2 |            0 |            0 |      (70, 70, 70)

                     wall |  12 |       3 |   construction |          2 |            0 |            0 |   (102, 102, 156)

                    fence |  13 |       4 |   construction |          2 |            0 |            0 |   (190, 153, 153)

               guard rail |  14 |     255 |   construction |          2 |            0 |            1 |   (180, 165, 180)

                   bridge |  15 |     255 |   construction |          2 |            0 |            1 |   (150, 100, 100)

                   tunnel |  16 |     255 |   construction |          2 |            0 |            1 |    (150, 120, 90)

                     pole |  17 |       5 |         object |          3 |            0 |            0 |   (153, 153, 153)

                polegroup |  18 |     255 |         object |          3 |            0 |            1 |   (153, 153, 153)

            traffic light |  19 |       6 |         object |          3 |            0 |            0 |    (250, 170, 30)

             traffic sign |  20 |       7 |         object |          3 |            0 |            0 |     (220, 220, 0)

               vegetation |  21 |       8 |         nature |          4 |            0 |            0 |    (107, 142, 35)

                  terrain |  22 |       9 |         nature |          4 |            0 |            0 |   (152, 251, 152)

                      sky |  23 |      10 |            sky |          5 |            0 |            0 |    (70, 130, 180)

                   person |  24 |      11 |          human |          6 |            1 |            0 |     (220, 20, 60)

                    rider |  25 |      12 |          human |          6 |            1 |            0 |       (255, 0, 0)

                      car |  26 |      13 |        vehicle |          7 |            1 |            0 |       (0, 0, 142)

                    truck |  27 |      14 |        vehicle |          7 |            1 |            0 |        (0, 0, 70)

                      bus |  28 |      15 |        vehicle |          7 |            1 |            0 |      (0, 60, 100)

                  caravan |  29 |     255 |        vehicle |          7 |            1 |            1 |        (0, 0, 90)

                  trailer |  30 |     255 |        vehicle |          7 |            1 |            1 |       (0, 0, 110)

                    train |  31 |      16 |        vehicle |          7 |            1 |            0 |      (0, 80, 100)

               motorcycle |  32 |      17 |        vehicle |          7 |            1 |            0 |       (0, 0, 230)

                  bicycle |  33 |      18 |        vehicle |          7 |            1 |            0 |     (119, 11, 32)

            license plate |  -1 |      -1 |        vehicle |          7 |            0 |            1 |       (0, 0, 142)
3.5.18.3:接着执行一个for循环:
for idxCls = 1:numCls
idxLabel = labelId == map(idxCls, 1);
trainId(idxLabel) = map(idxCls, 2);
end
首先idxCls=1,map(1,1)=7,labelid是图片的GT,进行一个逻辑运算,将GT中像素为7的赋值为True(1),不为7的赋值为False(0),即idxLabel 是一个1024x2048的矩阵由0,和1填充。
接着map(1,2)为映射的像素0,将 trainId(idxLabel),idxLabel 中true的地方对应于trainId设置为255,False对应的地方设置为0.类似于将一个掩膜覆盖在上面。
同理执行19次。执行完毕。
3.5.18.4:
trainIdMap就是生成的trainid里面有像素0-18,-1,255。
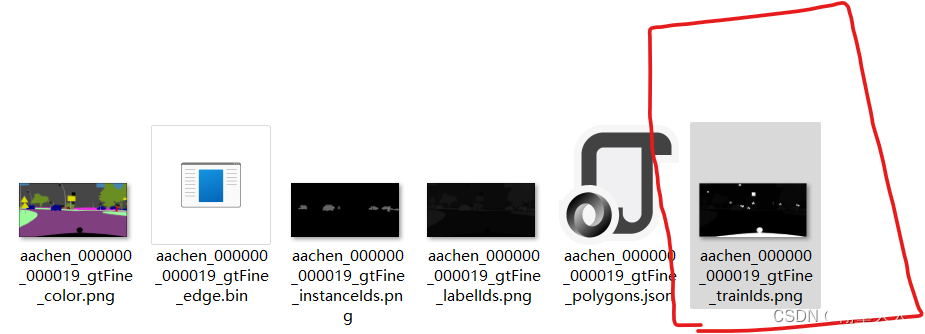
3.5.19:将图片写入到_gtFine_trainIds.png,其中suffixTrainIds = ‘_gtFine_trainIds.png’。
imwrite(trainIdMap, [genDataRoot ‘/gtFine/’ setName ‘/’ cityName ‘/’ fileName suffixTrainIds], ‘png’),图片中包含白色区域是因为:因为实际上这5000张精细标注的图片有34类(0-33),但训练时可能只想关心其中19类(0~18)。所以需要做一个映射来将34类中感兴趣的类别映射到19类中,其它不感兴趣的类别就直接设成255,所以这也是为什么xxx_trainIds.png中有白色像素的原因,因为那些白色像素的类别不是我们感兴趣的,变成255白色了。
出自
3.5.20:生成分割的bin图:
edgeMapBin = seg2edge(labelIdMap, radius, [2 3]', ‘regular’);这里用到了新的函数seg2edge。
% This function takes an input segment and produces binary boundaries.
% Multi-channel input segments are supported by the function.
function [idxEdge] = seg2edge(seg, radius, labelIgnore, edge_type)%labelIdMap, radius=2, [2 3]', 'regular'
% Get dimensions
[height, width, chn] = size(seg);
if(~isempty(labelIgnore))
    if(chn~=size(labelIgnore, 2))
        error('Channel dimension not matching ignored label dimension!')
    end
end

% Set the considered neighborhood
radius_search = max(ceil(radius), 1);
[X, Y] = meshgrid(1:width, 1:height);
[x, y] = meshgrid(-radius_search:radius_search, -radius_search:radius_search);

% Columnize everything
X = X(:); Y = Y(:);
x = x(:); y = y(:);
if(chn == 1)
    seg = seg(:);
else
    seg = reshape(seg, [height*width chn]);
end

% Build circular neighborhood
idxNeigh = sqrt(x.^2 + y.^2) <= radius;
x = x(idxNeigh); y = y(idxNeigh);
numPxlImg = length(X);
numPxlNeigh = length(x);

% Compute Gaussian weight
idxEdge = false(numPxlImg, 1);
for i = 1:numPxlNeigh
    XNeigh = X+x(i);
    YNeigh = Y+y(i);
    idxValid = find( XNeigh >= 1 & XNeigh <= width & YNeigh >=1 & YNeigh <= height );

    XCenter = X(idxValid);
    YCenter = Y(idxValid);
    XNeigh = XNeigh(idxValid);
    YNeigh = YNeigh(idxValid);
    LCenter = seg(sub2ind([height width], YCenter, XCenter), :);
    LNeigh = seg(sub2ind([height width], YNeigh, XNeigh), :);

    if(strcmp(edge_type, 'regular'))
        idxDiff = find(any(LCenter~=LNeigh, 2));
    elseif(strcmp(edge_type, 'inner'))
        idxDiff = find(any(LCenter~=LNeigh, 2) & any(LCenter~=0, 2) & all(LNeigh==0, 2) );
    elseif(strcmp(edge_type, 'outer'))
        idxDiff = find(any(LCenter~=LNeigh, 2) & all(LCenter==0, 2) & any(LNeigh~=0, 2) );
    else
        error('Wrong edge type input!');
    end

    LCenterEdge = LCenter(idxDiff, :);
    LNeighEdge = LNeigh(idxDiff, :);
    idxIgnore2 = false(length(idxDiff), 1);
    for j = 1:size(labelIgnore, 1)
        idxIgnore2 = idxIgnore2 | ( all(bsxfun(@eq, LCenterEdge, labelIgnore(j, :)), 2) | all(bsxfun(@eq, LNeighEdge, labelIgnore(j, :)), 2) );
    end

    idxDiffGT = idxDiff(~idxIgnore2);
    idxEdge(idxValid(idxDiffGT)) = true;
end
idxEdge = reshape(idxEdge, [height, width]);
3.5.20.1:首先获得labelIdMap的大小,注意是labelIdMap不是trainid,像素值为0-33,-1.
接着判断labelIgnore是否为非空,确实为非空。如果channe通道不等于3就报错。
3.5.20.2:设定一个需要考虑像素的区域。
% Set the considered neighborhood
radius_search = max(ceil(radius), 1);
[X, Y] = meshgrid(1:width, 1:height);
[x, y] = meshgrid(-radius_search:radius_search, -radius_search:radius_search);
其中ceil(radius)朝正无穷大四舍五入,ceil(2)就为2,max(2,1)为2,即搜索半径为2。
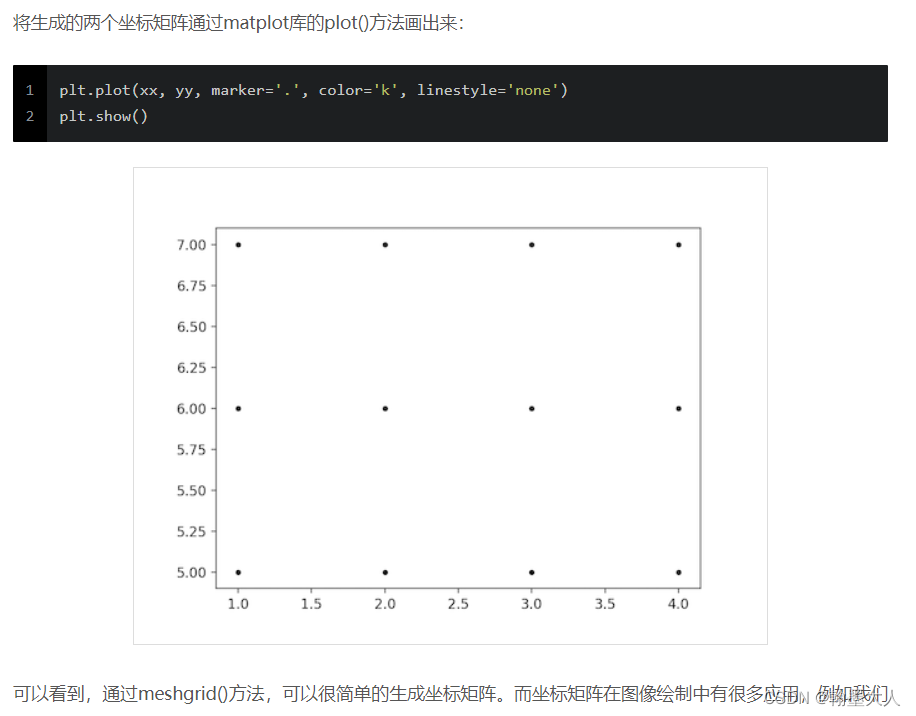
然后生成一个网格:
借用一张图:添加链接描述

举个例子
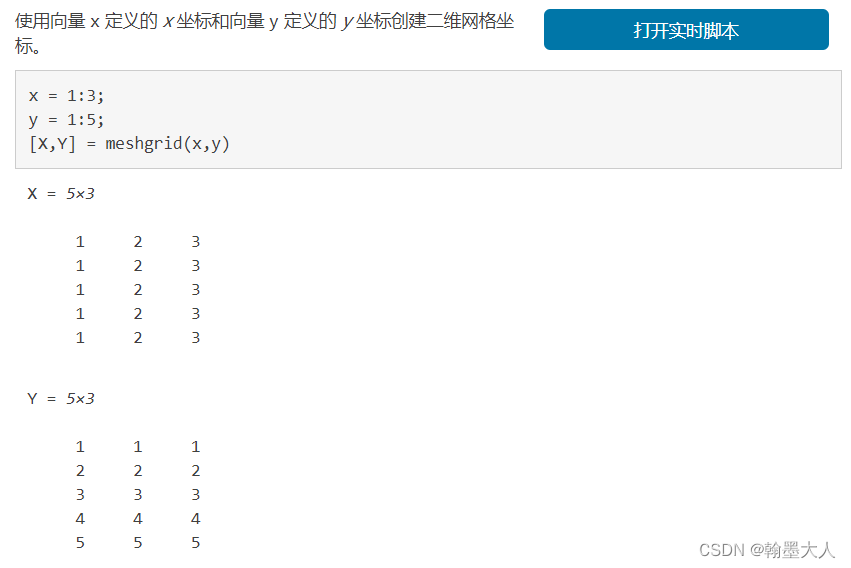
即X,Y就是两个1024x2048的网格。
同理小x,小y就是两个-2到2,长度为5x5大小的网格。
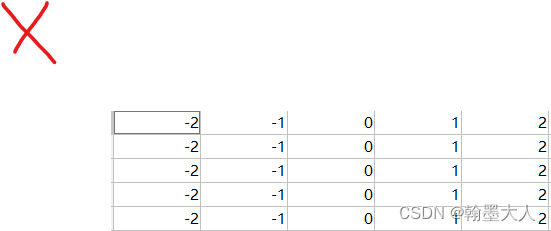
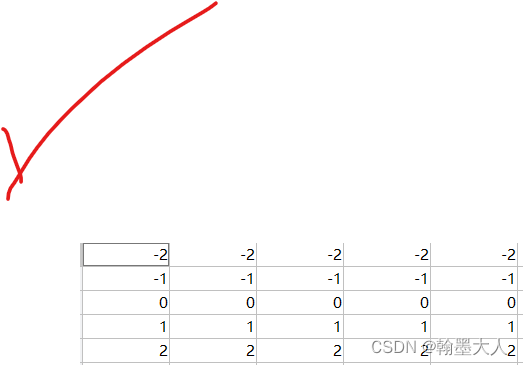
3.5.20.3:列化:
% Columnize everything
X = X(😃; Y = Y(😃;
x = x(😃; y = y(😃;
以小x小y为例:


3.5.20.4:
if(chn == 1)
seg = seg(😃;
else
seg = reshape(seg, [heightwidth chn]);
end
如果通道为1,将seg转换为列向量。

如果通道不为1,将seg转换为(hw,c)的格式,h*w行,3列。
3.5.20.5:
idxNeigh = sqrt(x.^2 + y.^2) <= radius;
x = x(idxNeigh); y = y(idxNeigh);
numPxlImg = length(X);
numPxlNeigh = length(x);
对小x和小y平方相加再开方。设一个中间变量s=sqrt(x.^2 + y.^2):

比较s和半径2,符合小于等于为true(1),否则为false(0)。

用生成的逻辑矩阵取x和y里面的数值,1对应的值保留,0对应的值去掉。

接着获取X和x的长度,X长1204x2048,小x长13。
3.5.20.6:
idxEdge = false(numPxlImg, 1);
生成一个numPxlImg行,1列的0矩阵。
3.5.20.7:
for i = 1:numPxlNeigh执行for循环,从1到13.
3.5.20.8:
XNeigh = X+x(i);
YNeigh = Y+y(i);
idxValid = find( XNeigh >= 1 & XNeigh <= width & YNeigh >=1 & YNeigh <= height );
其中x(1)=-2,XNeigh = X+x(i);表示GT中每一个X像素都加-2。Y同理。
XNeigh 变为:-1,-1,…0,0,0…2046,2046,2046…
YNeigh 变为:-1,0,1,…1022,-1,0,1…1022…
比较XNeigh 与1的大小,生成一个逻辑矩阵:[0000000000,000000,111111111111…]
比较XNeigh <= 2048,生成一个逻辑矩阵:[111111111,111111,1111111111,1111111…]
则 XNeigh >= 1 & XNeigh <= width = [0000000000,000000,111111111111…]#(遇0则0,都1才1)
同理:
YNeigh >=1,生成一个逻辑矩阵:[001111111111,00111111111,0011111111…]
YNeigh <= height,生成一个逻辑矩阵:[11111111111111111111111111111111111]
YNeigh >=1 & YNeigh <= height = [[001111111111,00111111111,0011111111…]]
XNeigh >= 1 & XNeigh <= width & YNeigh >=1 & YNeigh <= height = [0000000000,000000,001111111,001111111,001111111]
find函数查找非零元素的索引和值。
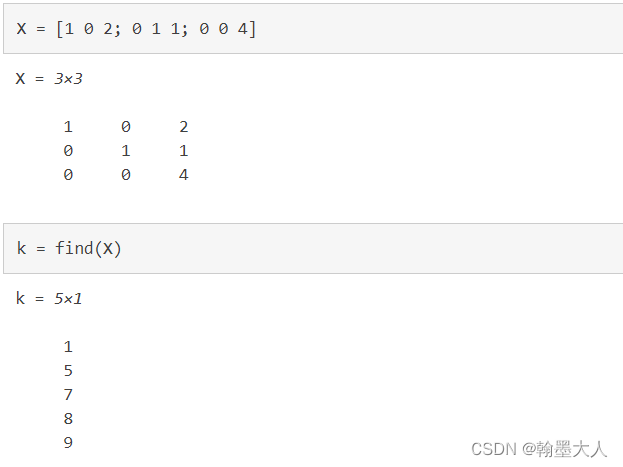
find( XNeigh >= 1 & XNeigh <= width & YNeigh >=1 & YNeigh <= height );根据他们与的结果可以知道前2048+2位都是0。
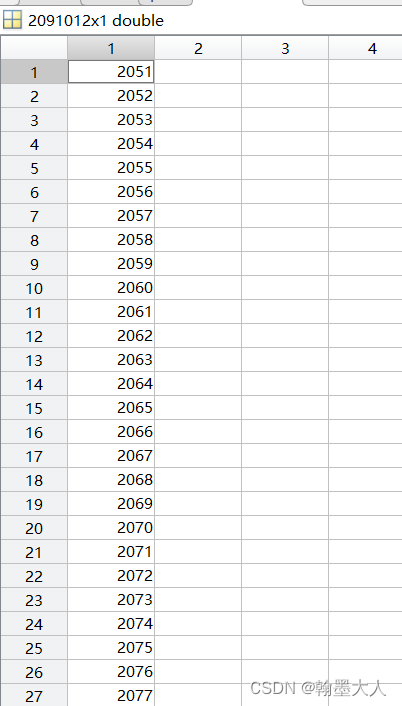
3.5.20.9:
XCenter = X(idxValid);
YCenter = Y(idxValid);
XNeigh = XNeigh(idxValid);
YNeigh = YNeigh(idxValid);
XCenter根据idxValid查找X的值,从2050位开始即(3,3,3,3,3,3,3, 4,4,4,4,4,4,4,4,4,…2048,2048,2048,2048)
YCenter 根据idxValid查找Y的值,从2050位开始即(3,4,5,6,1024, 3,4,5,6,1024…)
XNeigh 根据idxValid查找XNeigh的值,从2050位开始即(111111,22222,333333,…)
YNeigh 根据idxValid查找YNeigh的值,从2050位开始即(1234,1022…1234,1022…)
3.5.20.10:
sub2ind([height width], YCenter, XCenter)
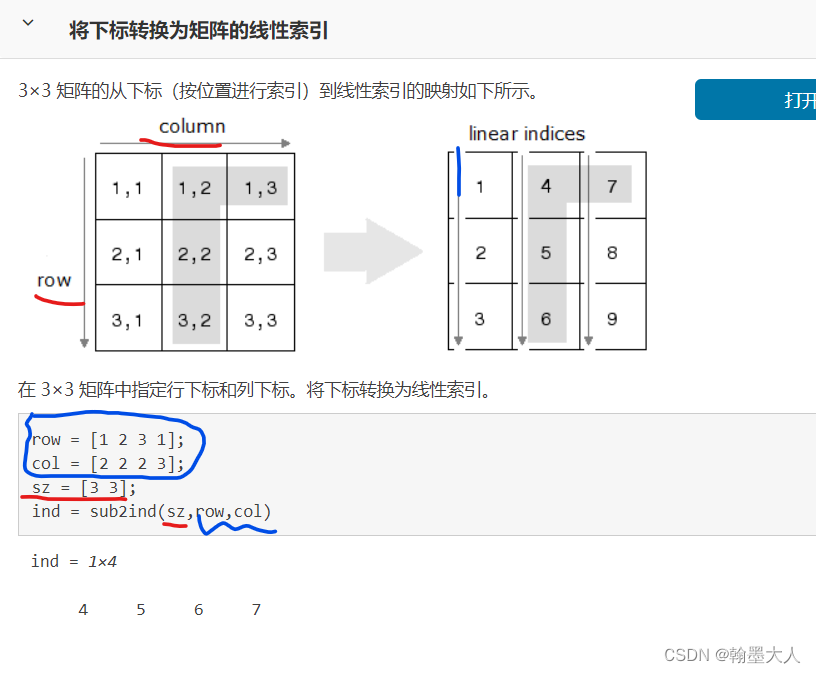
矩阵的大小是1024x2048,列和行分别是 YCenter, XCenter,我们根据[YCenter, XCenter]组成的坐标(3,3),(3,4),…(3,2048)…(1024,2048)在矩阵中查找索引。根据索引从上到下查找规则,索引为(2051,2052,…)
LNeigh = seg(sub2ind([height width], YNeigh, XNeigh), 😃;同理。对三个通道,每个通道进行取值。
3.5.20.11:比较字符串,edge_type = ‘regular’。
if(strcmp(edge_type, ‘regular’))
idxDiff = find(any(LCenter~=LNeigh, 2));
elseif(strcmp(edge_type, ‘inner’))
idxDiff = find(any(LCenter~=LNeigh, 2) & any(LCenter~=0, 2) & all(LNeigh0, 2) );
elseif(strcmp(edge_type, ‘outer’))
idxDiff = find(any(LCenter~=LNeigh, 2) & all(LCenter0, 2) & any(LNeigh~=0, 2) );
else
error(‘Wrong edge type input!’);
end
首先LCenter=LNeigh,比较LCenter和LNeigh不等则为true(1),否则就为false(0)。any对LCenter=LNeigh第二维即通道维度测试,其中是否有非零元素。
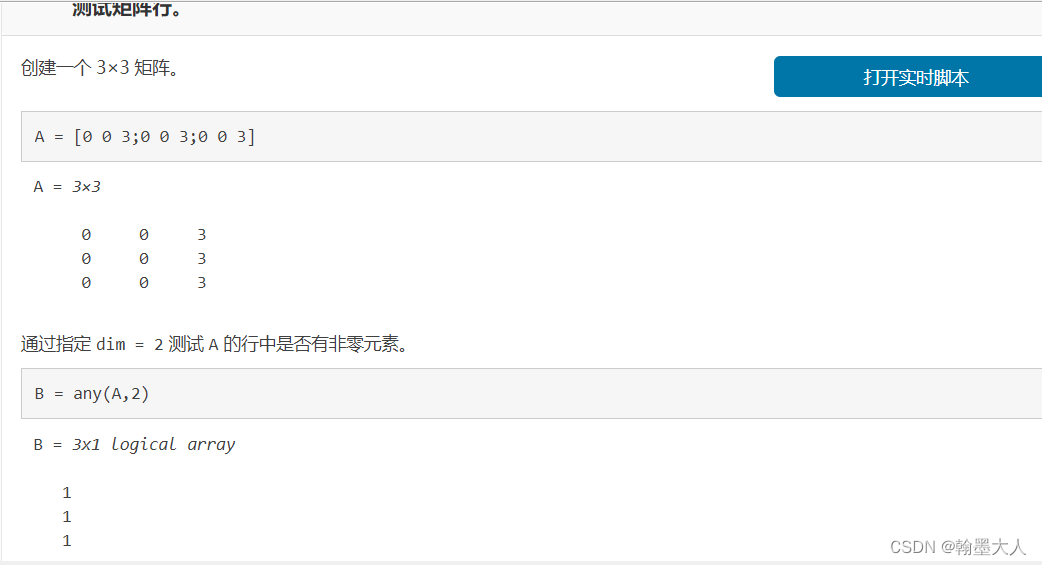
接着通过find函数,查找1位置对应的索引。

3.5.20.12:
LCenterEdge = LCenter(idxDiff, 😃;
LNeighEdge = LNeigh(idxDiff, 😃;
idxIgnore2 = false(length(idxDiff), 1);
根据索引去查找LCenter和LNeigh,保留通道维度。接着生成length(idxDiff)长,宽度为1的0矩阵。
3.5.20.13:
labelIgnore = [2,3]第一个维度为2。
对于@eq,@的用法可以参考:添加链接描述
@使eq变为一个函数句柄,使其可以传参,返回逻辑数组。 labelIgnore(j, :)=[2,3]。下面一行看不懂。
for j = 1:size(labelIgnore, 1)
idxIgnore2 = idxIgnore2 | ( all(bsxfun(@eq, LCenterEdge, labelIgnore(j, 😃), 2) | all(bsxfun(@eq, LNeighEdge, labelIgnore(j, 😃), 2) );
end
for j = 1:size(labelIgnore, 1)%1
    idxIgnore2 = idxIgnore2 | ( all(bsxfun(@eq, LCenterEdge, labelIgnore(j, :)), 2) | all(bsxfun(@eq, LNeighEdge, labelIgnore(j, :)), 2) );
end
3.5.20.14:
找到idxDiff中,不等于idxIgnore2的数值,然后在idxValid中找到对应值,在idxEdge中找到对应值。将idxEdge reshape为(h,w)格式。
idxDiffGT = idxDiff(~idxIgnore2);
idxEdge(idxValid(idxDiffGT)) = true;
end
idxEdge = reshape(idxEdge, [height, width]);
未完待续。。。
