一、在已安装的虚拟机上面进行修改(以CentOS 7为例)
①修改主机名
查看自己主机名,命令
hostname第一种修改主机名方法,命令
vi /etc/hostname第二种修改主机名方法,命令
hostnamectl set -hostname 自定义主机名可以更改为:
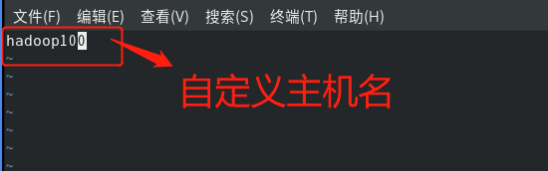
更改完主机名以后一定要重启虚拟机,命令
reboot -h now②修改虚拟机的IP地址,命令
vi /etc/sysconfig/network-scripts/ifcfg-ens33进入之后如图进行更改
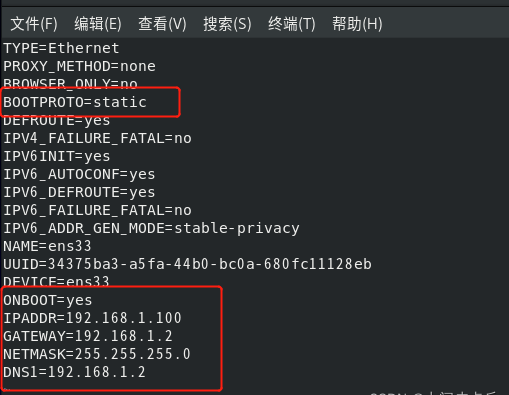
1.修改为静态获取ip
BOOTPROTO=”static”
2.添加IP地址
IPADDR=192.168.1.100
3.添加网关
GATEWAY=192.168.1.2
4.添加子网掩码
NETMASK=255.255.255.0
5.添加域名解析器
DNS1=192.168.1.2
③修改IP地址和主机映射
vi /etc/hosts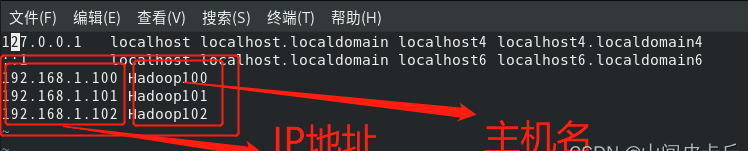
修改过后,重启网络,命令
nework restart④修改虚拟机网络配置,打开
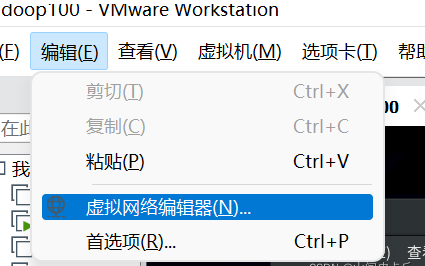
打开之后选择管理员运行
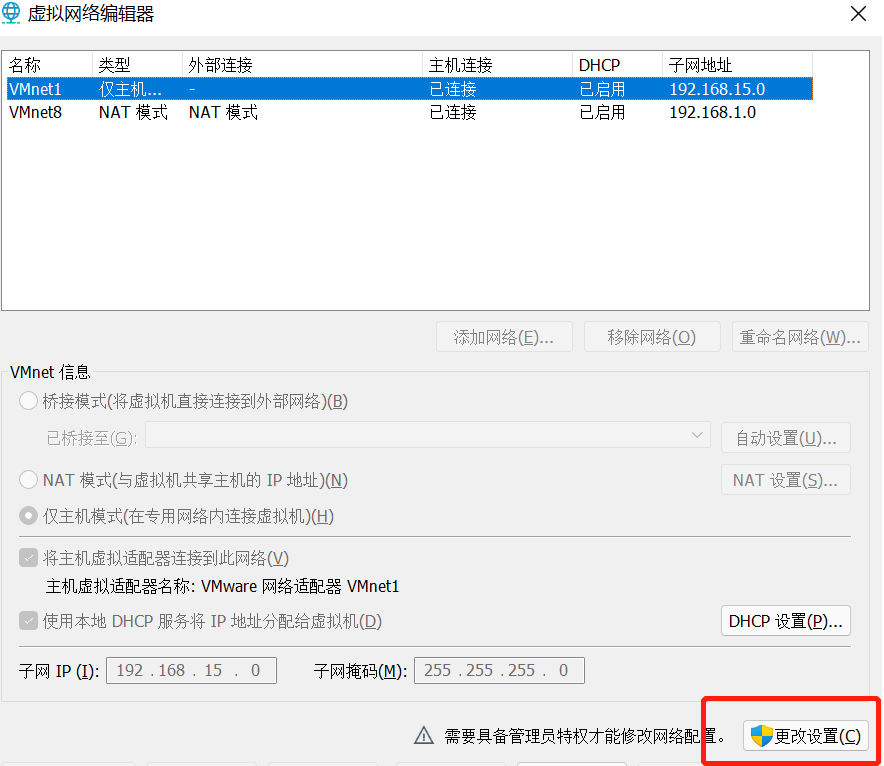
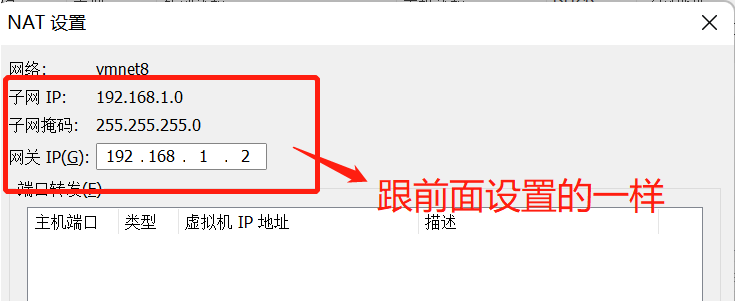
然后选择NAT模式,选中如图 ,打开NAT设置
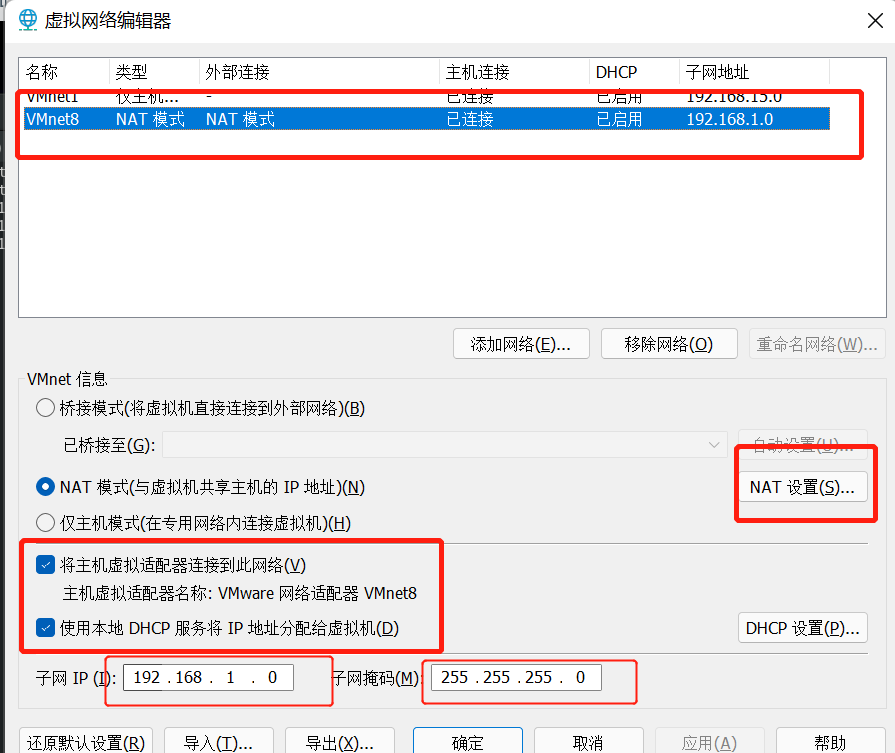
按照下图进行更改
⑤修改Windows网络配置
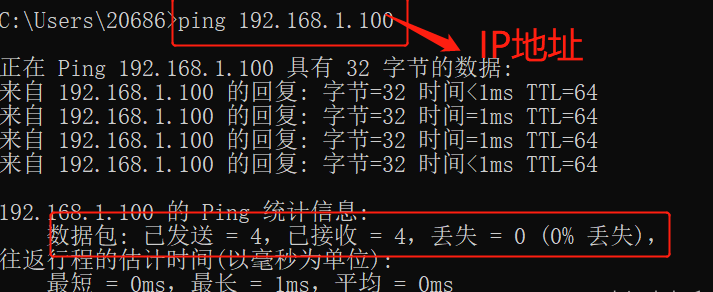
win+R打开运行面板,输入cmd进入终端面板
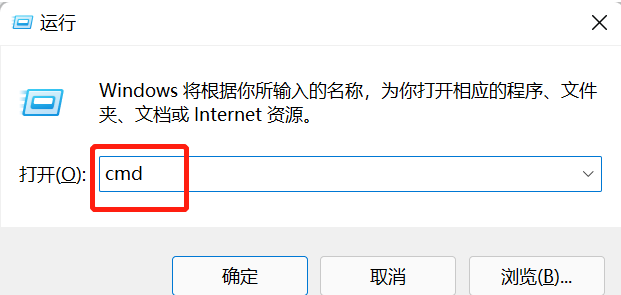
在终端面板输入ping 192.168.1.100,出现(0%丢失)则配置成功
若没有出现(0%丢失),而显示超时,可能有两种情况:
(1)虚拟机中的IP出现错误
1.查看虚拟机当前的ip地址,命令
ifconfig -a
ip addr
如果IP错误,则修改IP
vi /etc/sysconfig/network-scripts/ifcfg-ens33(2)出现active (running),则是虚拟机中防火墙没有关闭
1.防火墙状态的查看,命令
systemctl status firewalld2.关闭防火墙,命令
systemctl stop firewalld3.设置开机防火墙不启动,命令
systemctl disable firewalld