下面的教程是在linux系统上运行的,如果想在windows系统上运行,可以看官方链接或中文教程https://bbs.huaweicloud.com/blogs/335706,官方链接中有完整的VS的带.sln的项目。
ONNXRUNTUIME
- OPENCV不支持某些算子(挤压层在opencv 中不支持)
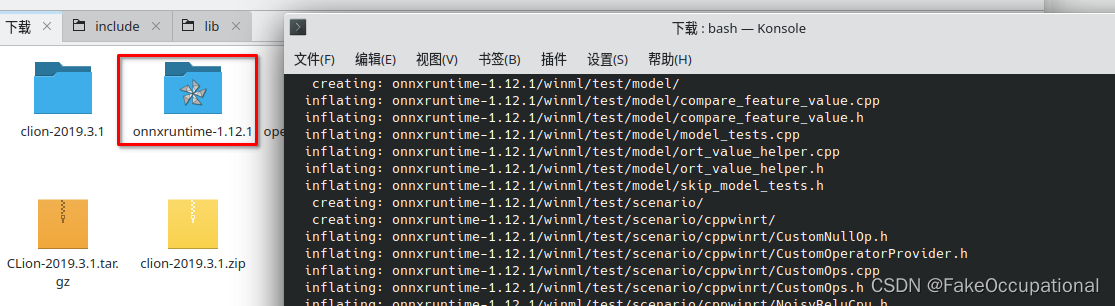
安装 github.com/microsoft/onnxruntime
配置
cmake_minimum_required(VERSION 3.15)
project(aaa)
set(CMAKE_CXX_STANDARD 14)

option(ONNXRUNTIME_ROOTDIR "/home/dell/CLionProjects/onnxruntime-linux-x64-1.12.1")
find_package(OpenCV REQUIRED)
set(SOURCE_FILES main.cpp)
include_directories(${OpenCV_INCLUDE_DIRS})
include_directories("/home/dell/下载/onnxruntime-1.12.1/include/onnxruntime/core/session/")


add_executable(aaa main.cpp)
target_link_libraries(aaa ${OpenCV_LIBS})
target_link_libraries(aaa "/home/dell/CLionProjects/onnxruntime-linux-x64-1.12.1/lib/libonnxruntime.so")
安装ONNXRUNTIME
- https://github.com/microsoft/onnxruntime/releases/
新版本(1.13)弃用函数GetInputName 到 GetInputNameAllocator,所以可以使用1.12版本
session->GetInputName(i, allocator));
自己build
-
https://github.com/microsoft/onnxruntime/archive/refs/tags/v1.12.1.zip

 -
- cd onnxruntime-1.12.1/ -
git init # 如果报错 git submodule sync --recursive fatal: 不是 git 仓库(或者任何父目录):.git -
./build.sh --config RelWithDebInfo --build_wheel --update --build
运行一个实力
//PP-HumanSeg-opencv-onnxrun-main
#define _CRT_SECURE_NO_WARNINGS
#include <iostream>
#include <fstream>
#include <string>
#include <opencv2/imgproc.hpp>
#include <opencv2/highgui.hpp>
#include <onnxruntime_cxx_api.h>
//#include <cuda_provider_factory.h> ///如果使用cuda加速,需要取消注释
#define _CRT_SECURE_NO_WARNINGS
#include <iostream>
#include <fstream>
#include <string>
#include <opencv2/imgproc.hpp>
#include <opencv2/highgui.hpp>
//#include <cuda_provider_factory.h> ///如果使用cuda加速,需要取消注释
#include <onnxruntime_cxx_api.h>
using namespace cv;
using namespace std;
using namespace Ort;
class pphuman_seg
{
public:
pphuman_seg();
Mat inference(Mat cv_image);
private:
void preprocess(Mat srcimg);
int inpWidth;
int inpHeight;
vector<float> input_image_;
const float conf_threshold = 0.5;
Env env = Env(ORT_LOGGING_LEVEL_ERROR, "pphuman-seg");
Ort::Session *ort_session = nullptr;
SessionOptions sessionOptions = SessionOptions();
vector<char*> input_names;
vector<char*> output_names;
vector<vector<int64_t>> input_node_dims; // >=1 outputs
vector<vector<int64_t>> output_node_dims; // >=1 outputs
};
pphuman_seg::pphuman_seg()
{
string model_path = "/home/dell/CLionProjects/aaa/model_float32.onnx";
//std::wstring widestr = std::wstring(model_path.begin(), model_path.end()); windows写法
///OrtStatus* status = OrtSessionOptionsAppendExecutionProvider_CUDA(sessionOptions, 0); ///如果使用cuda加速,需要取消注释
sessionOptions.SetGraphOptimizationLevel(ORT_ENABLE_BASIC);
//ort_session = new Session(env, widestr.c_str(), sessionOptions); windows写法
ort_session = new Session(env, model_path.c_str(), sessionOptions); linux写法
size_t numInputNodes = ort_session->GetInputCount();
size_t numOutputNodes = ort_session->GetOutputCount();
AllocatorWithDefaultOptions allocator;
for (int i = 0; i < numInputNodes; i++)
{
input_names.push_back(ort_session->GetInputName(i, allocator));
Ort::TypeInfo input_type_info = ort_session->GetInputTypeInfo(i);
auto input_tensor_info = input_type_info.GetTensorTypeAndShapeInfo();
auto input_dims = input_tensor_info.GetShape();
input_node_dims.push_back(input_dims);
}
for (int i = 0; i < numOutputNodes; i++)
{
output_names.push_back(ort_session->GetOutputName(i, allocator));
Ort::TypeInfo output_type_info = ort_session->GetOutputTypeInfo(i);
auto output_tensor_info = output_type_info.GetTensorTypeAndShapeInfo();
auto output_dims = output_tensor_info.GetShape();
output_node_dims.push_back(output_dims);
}
this->inpHeight = input_node_dims[0][2];
this->inpWidth = input_node_dims[0][3];
}
void pphuman_seg::preprocess(Mat srcimg)
{
Mat dstimg;
resize(srcimg, dstimg, Size(this->inpWidth, this->inpHeight), INTER_LINEAR);
int row = dstimg.rows;
int col = dstimg.cols;
this->input_image_.resize(row * col * dstimg.channels());
for (int c = 0; c < 3; c++)
{
for (int i = 0; i < row; i++)
{
for (int j = 0; j < col; j++)
{
float pix = dstimg.ptr<uchar>(i)[j * 3 + c];
this->input_image_[c * row * col + i * col + j] = (pix / 255.0 - 0.5) / 0.5;
}
}
}
}
Mat pphuman_seg::inference(Mat srcimg)
{
this->preprocess(srcimg);
array<int64_t, 4> input_shape_{1, 3, this->inpHeight, this->inpWidth};
auto allocator_info = MemoryInfo::CreateCpu(OrtDeviceAllocator, OrtMemTypeCPU);
Value input_tensor_ = Value::CreateTensor<float>(allocator_info, input_image_.data(), input_image_.size(), input_shape_.data(), input_shape_.size());
vector<Value> ort_outputs = ort_session->Run(RunOptions{ nullptr }, input_names.data(), &input_tensor_, 1, output_names.data(), output_names.size()); // 开始推理
// post process.
Value &mask_pred = ort_outputs.at(0);
const int out_h = this->output_node_dims[0][1];
const int out_w = this->output_node_dims[0][2];
float *mask_ptr = mask_pred.GetTensorMutableData<float>();
Mat segmentation_map;
Mat mask_out(out_h, out_w, CV_32FC2, mask_ptr);
resize(mask_out, segmentation_map, Size(srcimg.cols, srcimg.rows));
Mat dstimg = srcimg.clone();
for (int h = 0; h < srcimg.rows; h++)
{
for (int w = 0; w < srcimg.cols; w++)
{
float pix = segmentation_map.ptr<float>(h)[w * 2];
if (pix > this->conf_threshold)
{
float b = (float)srcimg.at<Vec3b>(h, w)[0];
dstimg.at<Vec3b>(h, w)[0] = uchar(b * 0.5 + 1);
float g = (float)srcimg.at<Vec3b>(h, w)[1];
dstimg.at<Vec3b>(h, w)[1] = uchar(g * 0.5 + 1);
float r = (float)srcimg.at<Vec3b>(h, w)[2];
dstimg.at<Vec3b>(h, w)[2] = uchar(r * 0.5 + 1);
}
}
}
for (int h = 0; h < srcimg.rows; h++)
{
for (int w = 0; w < srcimg.cols; w++)
{
float pix = segmentation_map.ptr<float>(h)[w * 2 + 1];
if (pix > this->conf_threshold)
{
float b = (float)dstimg.at<Vec3b>(h, w)[0];
dstimg.at<Vec3b>(h, w)[0] = uchar(b * 0.5 + 1);
float g = (float)dstimg.at<Vec3b>(h, w)[1] + 255.0;
dstimg.at<Vec3b>(h, w)[1] = uchar(g * 0.5 + 1);
float r = (float)dstimg.at<Vec3b>(h, w)[2];
dstimg.at<Vec3b>(h, w)[2] = uchar(r * 0.5 + 1);
}
}
}
return dstimg;
}
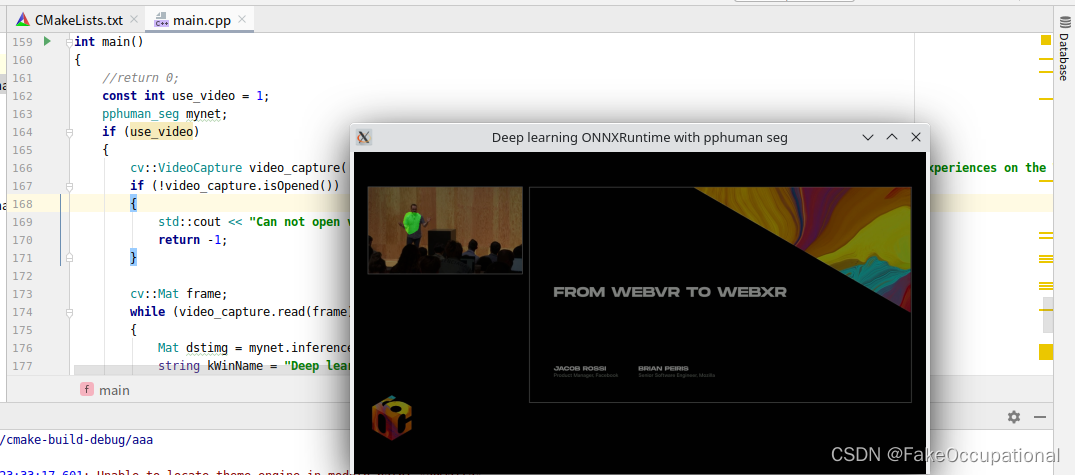
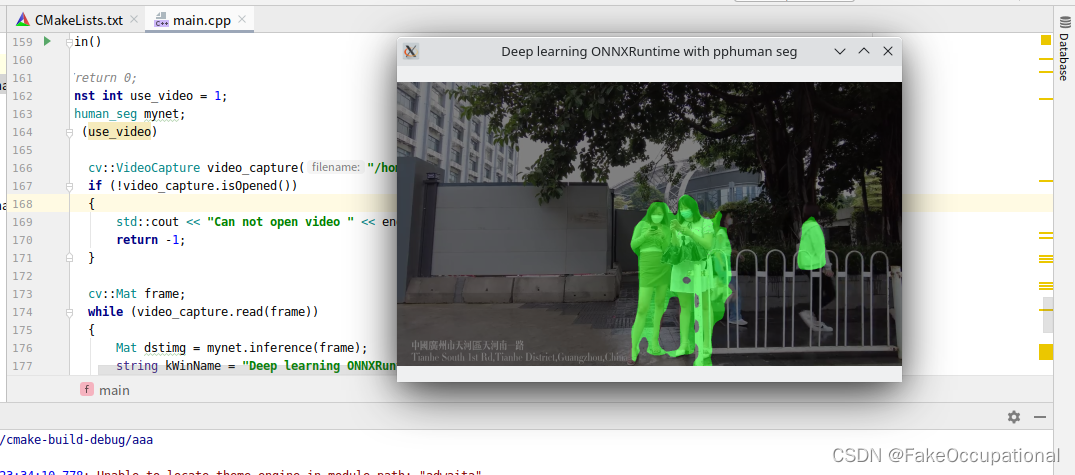
int main()
{
//return 0;
const int use_video = 1;
pphuman_seg mynet;
if (use_video)
{
cv::VideoCapture video_capture("/home/dell/CLionProjects/a.mp4"); ///也可以是视频文件
if (!video_capture.isOpened())
{
std::cout << "Can not open video " << endl;
return -1;
}
cv::Mat frame;
while (video_capture.read(frame))
{
Mat dstimg = mynet.inference(frame);
string kWinName = "Deep learning ONNXRuntime with pphuman seg";
namedWindow(kWinName, WINDOW_NORMAL);
imshow(kWinName, dstimg);
waitKey(1);
}
destroyAllWindows();
}
else
{
string imgpath = "testimgs/1.jpg";
Mat srcimg = imread(imgpath);
Mat dstimg = mynet.inference(srcimg);
namedWindow("srcimg", WINDOW_NORMAL);
imshow("srcimg", srcimg);
static const string kWinName = "Deep learning ONNXRuntime with pphuman seg";
namedWindow(kWinName, WINDOW_NORMAL);
imshow(kWinName, dstimg);
waitKey(0);
destroyAllWindows();
}
}
CG
-
https://stackoverflow.com/questions/69633595/load-onnx-model-in-opencv-dnn
-
如果您使用的是 tf2 并且您的权重为 .h5 形式,我有一个更好的解决方案。 您可以从 .h5 生成 .pb,然后在 C++ 程序中轻松使用
-
Opencv loads models of dynamic input typesOpencv 加载动态输入类型的模型 https://github.com/opencv/opencv/issues/19347
-
https://blog.csdn.net/Fenplan/article/details/116742180
-
https://github.com/hpc203/yolov5-v6.1-opencv-onnxrun
-
https://github.com/leimao/ONNX-Runtime-Inference/tree/main/src
-
https://leimao.github.io/blog/ONNX-Runtime-CPP-Inference/
-
https://onnxruntime.ai/docs/get-started/with-cpp.html
-
https://github.com/microsoft/onnxruntime-inference-examples/tree/main/c_cxx
-
https://blog.csdn.net/Fenplan/article/details/116742180
-
https://github.com/itsnine/yolov5-onnxruntime/blob/master/CMakeLists.txt
-
https://github.com/hpc203/bytetrack-opencv-onnxruntime/blob/main/onnxruntime/cpp/CMakeLists.txt
-
https://github.com/fei176/smoke_monitoring/blob/main/CMakeLists.txt
-
https://github.com/qianqing13579/DetectorSamples/blob/master/CMakeLists.txt
https://github.com/hpc203/u2net-onnxruntime/blob/main/main.cpp
https://github.com/lcskrishna/onnx-parser -
git clone --recursive https://github.com/Microsoft/onnxruntime
-
cd onnxruntime
-
https://www.zhihu.com/answer/2877937918
-
https://github.com/hpc203/yolov5-v6.1-opencv-onnxrun
-
https://github.com/hpc203/yolov7-opencv-onnxrun-cpp-py
-
1.1 https://github.com/hpc203/PP-HumanSeg-opencv-onnxrun
-
1.2https://github.com/WoodsGao/opencv_onnx_deploy
-
1.5https://github.com/EdVince/PSGAN-NCNN
-
3.0 https://github.com/qianqing13579/DetectorSamples
-
2.2 https://github.com/xun-xh/yolov5-onnx-pyqt-exe
-
5.5https://github.com/iwatake2222/InferenceHelper
-
5.9采用TensorRT的C++接口进行ONNX模型转TRT,并进行Inference推理。https://github.com/MAhaitao999/ONNX_TRT_CPP
-
6/0Deploy an ONNX model to TensorRT usingOpenCV for I/O https://github.com/FauxShow/trt_cpp_opencv
-
9 YOLOv7 right in your browser with onnxruntime-web https://github.com/Hyuto/yolov7-onnxruntime-web
-
Detect text in an image with OpenCV https://github.com/Qengineering/OpenCV_OCR_Detect_Text
-
添加链接描述
-
https://blog.csdn.net/juebai123/article/details/86545556/
-
推理部署资料整理
https://zhuanlan.zhihu.com/p/414317269 -
http://onnx.ai/sklearn-onnx/tutorial_1_simple.html
-
https://blog.csdn.net/wsp_1138886114/article/details/123271871
-
格灵深瞳
中文简体:本项目将不再频繁更新,更优的部署体验请尝试zapPaddlePaddle/FastDeploy : zap一款简单易用的推理部署工具箱。覆盖业界主流优质预训练模型并提供开箱即用的开发体验,包括图像分类、目标检测、图像分割、人脸检测、人体关键点识别、文字识别等多任务,满足开发者多场景,多硬件、多平台的快速部署需求,并同时支持 C++ 和 Python 两种语言。lite.ai.toolkit 中的核心模型未来将会以contrib的方式集成到zapPaddlePaddle/FastDeploy 中。欢迎同学们使用 handpoint_rightzapPaddlePaddle/FastDeploy.
似乎 opencv 不支持具有动态输入形状的 onnx 模型,请查看此链接。尝试构建最新版本的 opencv。另外,请检查此链接 .已经提到对Yunet使用固定的输入形状。如果以前的建议不起作用,请使用以下方法。
如果您使用的是 tf2 并且您的权重是 .h5 形式,您将能够处理 onnx 麻烦 .您可以从 .h5 生成 .pb,然后在 C++ 中轻松使用 program.to 目标生成 .pb,使用以下代码:
之后,通过使用OpenCV,您将能够导入您的模型,然后享受!

opencv_sample-master
-
https://github.com/iwatake2222/opencv_sample/blob/master/dnn_face/face_detection.cpp
-
【全网最小的Yolov5实现,364Kb纯C-哔哩哔哩】 https://b23.tv/2IvAN8J
-
https://www.zhihu.com/answer/2880316516
-
https://github.com/blueloveth/pocketpy
-
https://www.zhihu.com/answer/2788934753搞台淘汰安卓手机安装 Linux Deploy 就能平替
-
C++调用Python,C++调用Python视觉算法模型,C++传递Mat格式的图片数据到
-
https://github.com/Qihoo360/safe-rules
-
GPU-Puzzles: 玩游戏学CUDA https://zhuanlan.zhihu.com/p/597684060
-
全球最好用的3D打印免费测试网站详细讲解
https://github.com/dlunion/tensorRTIntegrate
- https://github.com/ttanzhiqiang/onnx_tensorrt_project
cmake_minimum_required(VERSION 3.15)
project(onnx)
set(CMAKE_CXX_STANDARD 14)

MESSAGE(STATUS "Project: onnx")
find_package(OpenCV REQUIRED)
set(SOURCE_FILES main.cpp)
include_directories(${OpenCV_INCLUDE_DIRS})
include_directories("/home/dell/CLionProjects/onnxruntime-linux-x64-1.12.1/include")# https://blog.csdn.net/sinat_31608641/article/details/121736503

add_executable(onnx main.cpp)
target_link_libraries(onnx ${OpenCV_LIBS})
link_directories("/home/dell/CLionProjects/onnxruntime-linux-x64-1.12.1/lib")
- https://www.w3cschool.cn/doc_cmake_3_6/cmake_3_6-command-target_link_libraries.html
- https://www.cnblogs.com/stonemjl/articles/12668208.html


![[项目设计]高并发内存池](https://img-blog.csdnimg.cn/557d0057e0334814b2169465941b7076.png)