目录
创建主角
3:主角移动和摄像机跟随
4:实现敌人角色
5:子弹,死亡,机器人
6:粒子与音效
这次我们来使用Unity ECS系统制作一个俯视角度的射击游戏。虽然现在网上有不少ECS的资料和项目,但是制作时又和实际游戏需求有较大差距。在制作这个小游戏的过程中我遇到了很多ECS特有的问题,也给出了还可以的解决方案,相信能通过实例让大家了解到ECS的优缺点是什么。
(文章不会再解释Unity DOTS的一些基本概念,感兴趣的朋友可以查阅文档了解)。
本游戏具体玩法如下:
1:完全使用键盘控制,WASD键控制角色方向移动,j 键控制射击。(这样做主要为了简化游戏输入逻辑)
2:玩家有手枪和霰弹枪两种武器形态,按Q切换。
3:当敌人低于一定量,会在玩家一定距离周围生成敌人。敌人会朝玩家移动并射击玩家。
4:玩家和敌人都有生命值,中弹后生命减少,减为0的时候死亡
这里放下Unity和相关Package版本,以免误导后来者:
Unity 版本:Unity2020.3.3f1,Universal Render Pipeline
Hybrid Renderer: Version 0.11.0-preview.44
Unity Physics: Version 0.6.0-preview.3
Jobs: Version 0.8.0-preview.23
Entities: 0.17.0-preview.41
创建主角
先简单搭建场景,再创建主角。
首先建一个平面,扔上贴图,再建个圆圆胖胖的主角,添加物理组件Physics Shape 和Physics Body:

Physic Shape的碰撞框同样可以在场景中进行编辑,你也可以点击Fit to Enabled Meshs来直接适配:

以及实体转换组件,Convert To Entity:

我们需要其中主角能被敌人的子弹打中并获取碰撞事件,所以点击Collision Response,选择Raise Trigger Event ( 开启触发器事件),并点击PhysicBody的Motion Type,选择Kinematic :

3:主角移动和摄像机跟随
首先为主角创建一个Component,包含初始速度:
using Unity.Entities;
[GenerateAuthoringComponent]
public struct Character :IComponentData
{
public float speed;
}
将组件挂到主角身上,speed设为10,再单独创建一个System,控制主角移动:
using Unity.Entities;
using Unity.Jobs;
using Unity.Transforms;
using Unity.Mathematics;
using UnityEngine;
public class CharacterSystem : SystemBase
{
protected override void OnUpdate()
{
float deltaTime = Time.DeltaTime;
float3 input;
string h = "Horizontal";
string v = "Vertical";
Entities.
WithoutBurst().
WithName("Player").
ForEach((ref Translation translation, ref Rotation rotation, in Character character) =>
{
input.x = Input.GetAxis(h);
input.y = 0;
input.z = Input.GetAxis(v);
var dir = character.speed * deltaTime * input;
dir.y = 0;
//令角色前方和移动方向一致
if (math.length(input) > 0.1f)
{
//Debug.Log("Dir " + dir);
rotation.Value = quaternion.LookRotation(math.normalize(dir), math.up());
}
translation.Value += dir;
}).Run();
}
}
相机不支持转换为Entity,所以我们还是用老办法做一个跟随脚本,通过查找包含CharacterComponent的Entity,获取其Translation,得到主角位置,进行跟随,代码如下:
using UnityEngine;
using Unity.Entities;
using Unity.Mathematics;
using Unity.Transforms;
using Unity.Collections;
public class CameraController : MonoBehaviour
{
[SerializeField] private Vector3 offset;//相机相对于玩家的位置
private Vector3 pos;
public float speed;
private EntityManager _manager;
private float3 tempPos;
public Entity targetEntity;
void Start()
{
_manager = World.DefaultGameObjectInjectionWorld.EntityManager;
//定义一个查询 :查询实体必须包含Character组件和Translation组件
var queryDescription = new EntityQueryDesc
{
None = new ComponentType[] { },
All = new ComponentType[] { ComponentType.ReadOnly<Character>(), ComponentType.ReadOnly<Translation>() }
};
EntityQuery players = _manager.CreateEntityQuery(queryDescription);
//场景中只有主角有Character组件,所以直接获取引用
if (players.CalculateEntityCount() != 0)
{
NativeArray<Entity> temp = new NativeArray<Entity>(1, Allocator.Temp);
temp = players.ToEntityArray(Allocator.Temp);
targetEntity = temp[0];
temp.Dispose();
}
players.Dispose();
}
void Update()
{
if (targetEntity != Entity.Null)
{
if (_manager.HasComponent<Translation>(targetEntity))
{
tempPos = _manager.GetComponentData<Translation>(targetEntity).Value;
}
}
transform.position = Vector3.Lerp(transform.position, (Vector3)tempPos + offset, speed * Time.deltaTime);//调整相机与玩家之间的距离
}
}
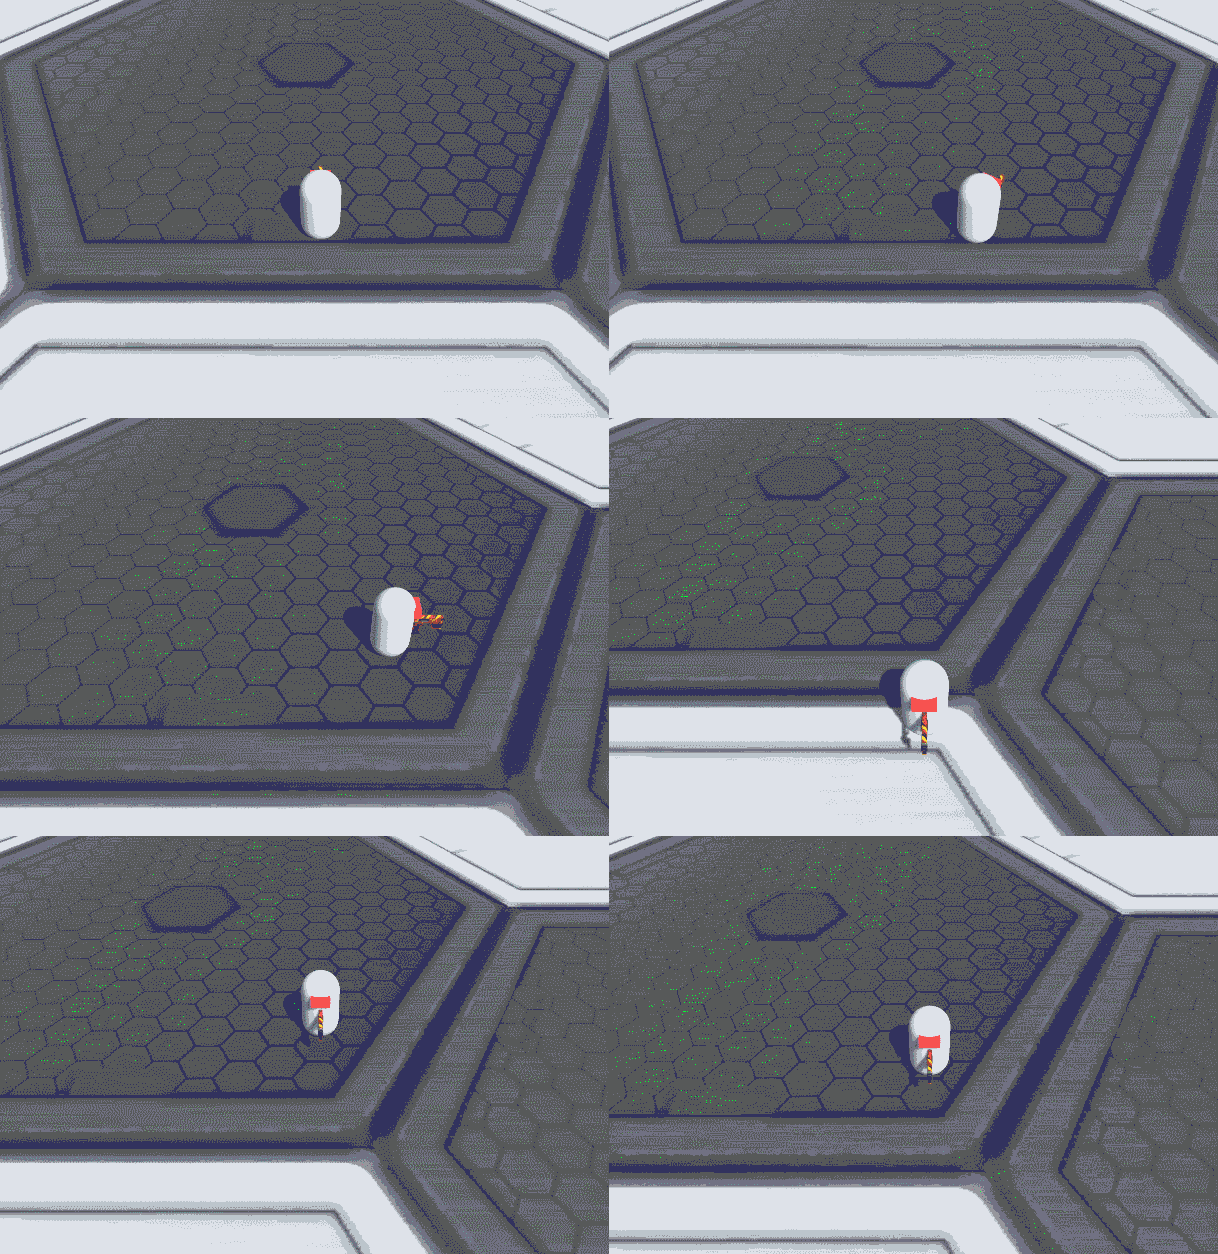
最后给主角手里整把枪,OK,现在主角已经能跑了:
4:实现敌人角色
敌人造型和玩家基本一致,由于玩家需要随时找到并攻击玩家角色,所以需要在定义它的Componnet 中存一个玩家Entity的引用:
using Unity.Entities;
[GenerateAuthoringComponent]
public struct Enemy : IComponentData
{
public float speed;
//追踪目标
public Entity targetEntity;
}
首先我们需要在主角身旁一定范围外生成这些这些敌人,方便起见,我们可以在场景中创建一个管理类,存一个已经转换成实体的的敌人预制体,每次生成的时候直接按照这个模版生成即可,代码如下:
using UnityEngine;
using Unity.Entities;
using Unity.Mathematics;
using Unity.Transforms;
public class FPSGameManager : MonoBehaviour
{
public static FPSGameManager instance;
public GameObject enemyprefab;
private EntityManager _manager;
//blobAssetStore是一个提供缓存的类,缓存能让你对象创建时更快。
private BlobAssetStore _blobAssetStore;
private GameObjectConversionSettings _settings;
public Entity enemyEntity;
void Start()
{
instance = this;
_manager = World.DefaultGameObjectInjectionWorld.EntityManager;
_blobAssetStore = new BlobAssetStore();
_settings = GameObjectConversionSettings.FromWorld(World.DefaultGameObjectInjectionWorld, _blobAssetStore);
enemyEntity = GameObjectConversionUtility.ConvertGameObjectHierarchy(enemyprefab, _settings);
Translation translation = new Translation
{
Value = float3.zero
};
_manager.SetComponentData(test, translation);
}
private void OnDestroy()
{
_blobAssetStore.Dispose();
}
}
EnemySystem负责控制敌人追踪主角,并在敌人数量少于一定量时生成新的敌人:
using Unity.Entities;
using Unity.Jobs;
using Unity.Transforms;
using Unity.Mathematics;
using UnityEngine;
public class EnemySystem : SystemBase
{
EndSimulationEntityCommandBufferSystem endSimulationEcbSystem;
//保存筛选出来的敌人的对象
private EntityQuery query;
private uint seed = 1;
protected override void OnCreate()
{
base.OnCreate();
endSimulationEcbSystem = World.GetOrCreateSystem<EndSimulationEntityCommandBufferSystem>();
}
protected override void OnUpdate()
{
Unity.Mathematics.Random random = new Unity.Mathematics.Random(seed++);
float deltaTime = Time.DeltaTime;
EntityCommandBuffer ecb = endSimulationEcbSystem.CreateCommandBuffer();
Entity template = FPSGameManager.instance.enemyEntity;
//对所有敌人操作
Entities.
WithStoreEntityQueryInField(ref query).
ForEach((Entity entity, ref Translation translation, ref Rotation rotation, ref Enemy enemy) =>
{
if (HasComponent<LocalToWorld>(enemy.targetEntity))
{
//追踪主角
LocalToWorld targetl2w = GetComponent<LocalToWorld>(enemy.targetEntity);
float3 targetPos = targetl2w.Position;
translation.Value = Vector3.MoveTowards(translation.Value, targetPos, enemy.speed * deltaTime);
var targetDir = targetPos - translation.Value;
quaternion temp1 = quaternion.LookRotation(targetDir, math.up());
rotation.Value = temp1;
}
}).Run();
//敌人数量少于6,在主角周围新生成6个敌人
if (query.CalculateEntityCount() < 6)
{
Entity characterEntity = GetSingletonEntity<Character>();
float3 characterPos=float3.zero;
if (characterEntity!=Entity.Null)
{
if (HasComponent<Translation>(characterEntity))
{
Translation translation = GetComponent<Translation>(characterEntity);
characterPos = translation.Value;
}
}
for (int i = 0; i < 6; i++)
{
Entity temp = ecb.Instantiate(template);
#region 随机位置生成敌人
//略。。。详见工程
#endregion
Translation translation = new Translation
{
Value=new float3(x,characterPos.y,z)
};
//这里可能有疑问为何预制体组件已经有enemy的数据了,这里为何要重新赋值?
//这是因为场景中的主角预制体要在场景运行后才能转换为Entity,并且转换时间不确定,所以等待其生成后重新赋值
Enemy enemy = new Enemy
{
speed=5f ,
targetEntity=characterEntity
};
ecb.SetComponent(temp, translation);
ecb.SetComponent(temp, enemy);
}
}
}
}
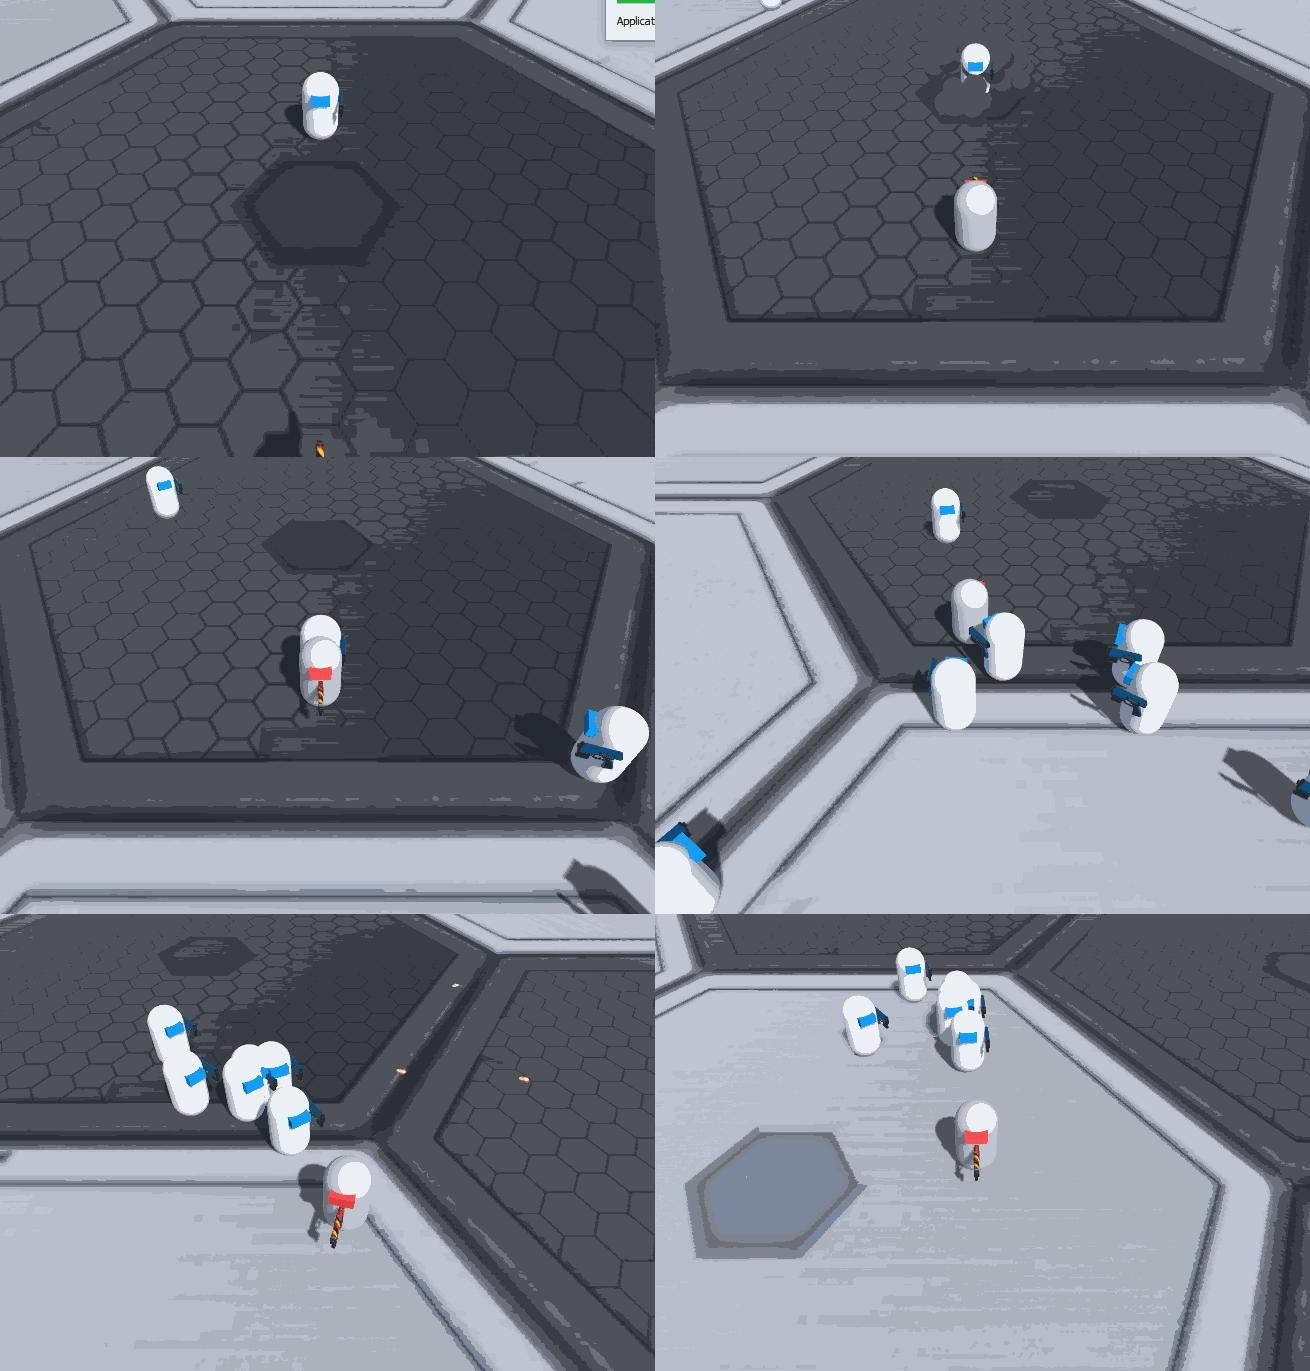
点击运行,敌人也生成出来并开始工作了:
5:子弹,死亡,机器人
接下来我们要定义武器和子弹。虽然Convert to Entity会把面板的物体的子物体也转换为Entity,并在Entity Debugger中可以看到,但目前GameObject 方便的父子关系还不能在Unity ECS中使用,所以我们需要先记录枪口的位置。
首先定义武器:
using Unity.Entities;
//手枪,霰弹枪,自动模式
public enum WeaponType
{
gun,
shotgun,
gunAutoshot
}
[GenerateAuthoringComponent]
public struct Weapon : IComponentData
{
//枪口位置
public Entity gunPoint;
//武器类型
public WeaponType weaponType;
//是否允许切换武器
public bool canSwitch;
//开枪间隔
public float firingInterval;
//用来记录每次开枪的时间
public float shotTime;
}
接着定义子弹组件,制作子弹预制体的流程和上文一样,这里就不赘述了:
using Unity.Entities;
[GenerateAuthoringComponent]
public struct Bullet: IComponentData
{
public float flySpeed;
}
再定义一个作删除标签功能的组件:DeleteTag,为了尽量避免频繁的结构性变化(增删组件等),我们需要在可以被删除的物体的预制件上添加这个组件,并将其lifeTime设置为1 :
using Unity.Entities;
[GenerateAuthoringComponent]
public struct DeleteTag :IComponentData
{
public float lifeTime;
}
这样的话,我们就可以定下规则,当物体身上DeleteTag组件的lifeTime<=0时,系统会将其删除:
using Unity.Entities;
using Unity.Jobs;
public class DeleteSystem : SystemBase
{
EndSimulationEntityCommandBufferSystem endSimulationEcbSystem;
protected override void OnCreate()
{
base.OnCreate();
endSimulationEcbSystem = World.GetOrCreateSystem<EndSimulationEntityCommandBufferSystem>();
}
protected override void OnUpdate()
{
// 请求一个ECS并且转换成可并行的
var ecb = endSimulationEcbSystem.CreateCommandBuffer().AsParallelWriter();
Entities
.ForEach((Entity entity, int entityInQueryIndex, in DeleteTag deleteTag) =>
{
if (deleteTag.lifeTime <=0f)
{
ecb.DestroyEntity(entityInQueryIndex, entity);
}
}).ScheduleParallel();
// 保证ECB system依赖当前这个Job
endSimulationEcbSystem.AddJobHandleForProducer(this.Dependency);
}
}
子弹的生命会不断减少,所以BulletSystem中需要自行对lifeTime 做减法:
using Unity.Entities;
using Unity.Jobs;
using Unity.Transforms;
using Unity.Mathematics;
public class BulletSystem : SystemBase
{
EndSimulationEntityCommandBufferSystem endSimulationEcbSystem;
protected override void OnCreate()
{
base.OnCreate();
endSimulationEcbSystem = World.GetOrCreateSystem<EndSimulationEntityCommandBufferSystem>();
}
protected override void OnUpdate()
{
float deltaTime = Time.DeltaTime;
var ecb = endSimulationEcbSystem.CreateCommandBuffer();
Entities.
ForEach(( ref Translation translation, ref DeleteTag deleteTag, in Rotation rot, in Bullet bullet) =>
{
//子弹向前飞行
translation.Value += bullet.flySpeed * deltaTime * math.forward(rot.Value);
//生命不断减少
deleteTag.lifeTime-= deltaTime;
}).Run();
}
}
WeaponSystem,不同枪械的子弹生命周期也不同,手枪子弹为1s,霰弹枪0.5f:
using Unity.Entities;
using Unity.Jobs;
using Unity.Transforms;
using Unity.Mathematics;
using UnityEngine;
public class WeaponSystem : SystemBase
{
EndSimulationEntityCommandBufferSystem endSimulationEcbSystem;
protected override void OnCreate()
{
base.OnCreate();
endSimulationEcbSystem = World.GetOrCreateSystem<EndSimulationEntityCommandBufferSystem>();
}
protected override void OnUpdate()
{
float deltaTime = Time.DeltaTime;
float time = UnityEngine.Time.time;
EntityCommandBuffer ecb = endSimulationEcbSystem.CreateCommandBuffer();
Entities.
WithoutBurst().
ForEach((ref Weapon weapon, in Rotation rotation) =>
{
if (weapon.weaponType == WeaponType.gunAutoshot)
{
if (weapon.shotTime == -1f)
{
weapon.shotTime = time;
}
// Debug.Log("当前时间" + time);
if (time - weapon.shotTime >= weapon.firingInterval)
{
weapon.shotTime = time;
float3 pos = new float3();
LocalToWorld gunPointL2w = new LocalToWorld();
if (HasComponent<LocalToWorld>(weapon.gunPoint))
{
gunPointL2w = GetComponent<LocalToWorld>(weapon.gunPoint);
Entity tempBullet = ecb.Instantiate(FPSGameManager.instance.bulletEntity);
Translation translation = new Translation
{
Value = gunPointL2w.Position
};
Rotation rot = new Rotation
{
Value = rotation.Value
};
Bullet bullet = new Bullet
{
lifetime = 2,
flySpeed = 20,
};
ecb.SetComponent(tempBullet, translation);
ecb.SetComponent(tempBullet, rot);
ecb.SetComponent(tempBullet, bullet);
FPSGameManager.instance.PlayShoot();
}
}
return;
}
if (weapon.canSwitch)
{
//武器切换逻辑,按Q修改武器类型,详见工程
}
#region 开枪
if (Input.GetKeyDown(KeyCode.J))
{
float3 pos = new float3();
LocalToWorld gunPointL2w = new LocalToWorld();
if (HasComponent<LocalToWorld>(weapon.gunPoint))
{
gunPointL2w = GetComponent<LocalToWorld>(weapon.gunPoint);
pos = gunPointL2w.Position;
}
switch (weapon.weaponType)
{
case WeaponType.gun:
#region 手枪
Entity tempBullet = ecb.Instantiate(FPSGameManager.instance.bulletEntity);
//=====初始化手枪组件并赋给Entity,和上文初始化子弹逻辑相同,略========
//播放射击音效
FPSGameManager.instance.PlayShoot();
#endregion
break;
case WeaponType.shotgun:
#region 霰弹枪
// ====初始化子弹的translation2和bullet组件,略======
for (int i = -5; i < 5; i++)
{
Entity tempBullet2 = ecb.Instantiate(FPSGameManager.instance.bulletEntity);
#region 传统写法
//Quaternion q = rotation.Value;
//Quaternion tempRot = Quaternion.Euler(0, q.eulerAngles.y + i * 7, 0);
#endregion
//使用Unity.Mathematics库写法,这里默认按照弧度旋转
quaternion temp = math.mul( quaternion.EulerXYZ(0, i *0.1f, 0), rotation.Value) ;
Rotation rotation2 = new Rotation
{
Value = temp
};
ecb.SetComponent(tempBullet2, translation2);
ecb.SetComponent(tempBullet2, rotation2);
ecb.SetComponent(tempBullet2, bullet1);
}
FPSGameManager.instance.PlayShoot();
#endregion
break;
default:
break;
}
}
#endregion
}).Run();
}
}
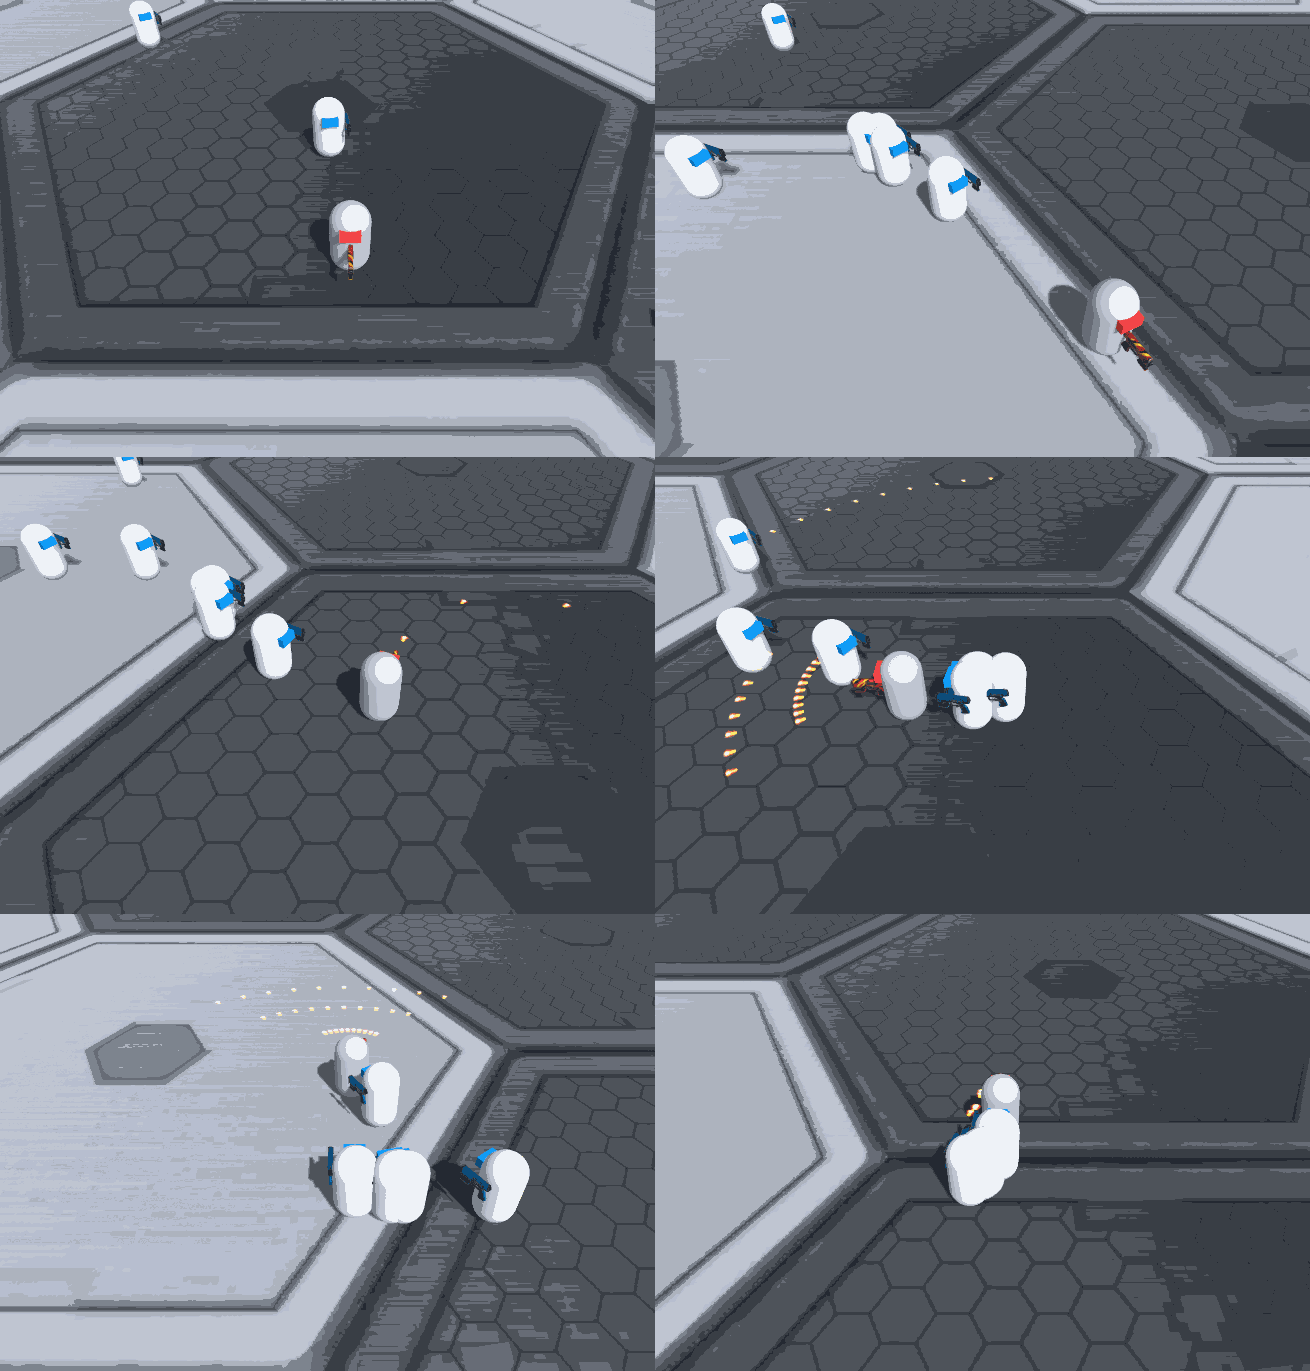
在主角和敌人身上分别挂上Weapon组件,主角便可以使用两种武器了,敌人也能自动发射子弹了:
接下来就要用到ECS中新版的物理组件了,我们先在组件中设置子弹和敌人的碰撞层级,保证同类物体不会触发碰撞事件,只有子弹和敌人碰撞会触发事件:

这里搜索资料后发现比较简单的做法是去定义一个Job继承ITriggerEventsJob接口,去接收事件,但由于Job中是并行处理数据,遇到了新的问题,由于代码比较长,上部分伪代码来说明:
[BurstCompile]
private struct TriggerJob :ITriggerEventsJob
{
#region 传递进来的各类group数据
#endregion
public void Execute(TriggerEvent triggerEvent)
{
//triggerEvent包含两个碰撞实体,需要我们自行判断他们属于哪个ComponentGroup
if (EnemyGroup.HasComponent(triggerEvent.EntityA))
{
//敌人与主角碰撞效果
if (!BulletGroup.HasComponent(triggerEvent.EntityB) && BeatBackGroup.HasComponent(triggerEvent.EntityB))
{
#region 击退
#endregion
return;
}
isbehit[0] = true;
#region 删除子弹
#endregion
#region 子弹击退敌人效果
#endregion
#region 扣血并生成爆炸粒子实体
#endregion
}
if (EnemyGroup.HasComponent(triggerEvent.EntityB)){}
}
}
}
图中代码的意思大概是这样:当接收到世界中发生的碰撞事件后,首先Job会判断碰撞物属于哪个ComponentGroup,如果Enemy,扣一滴血;包含Bullet,则直接销毁子弹实体,但实际上写完运行确遇到了这样的问题:
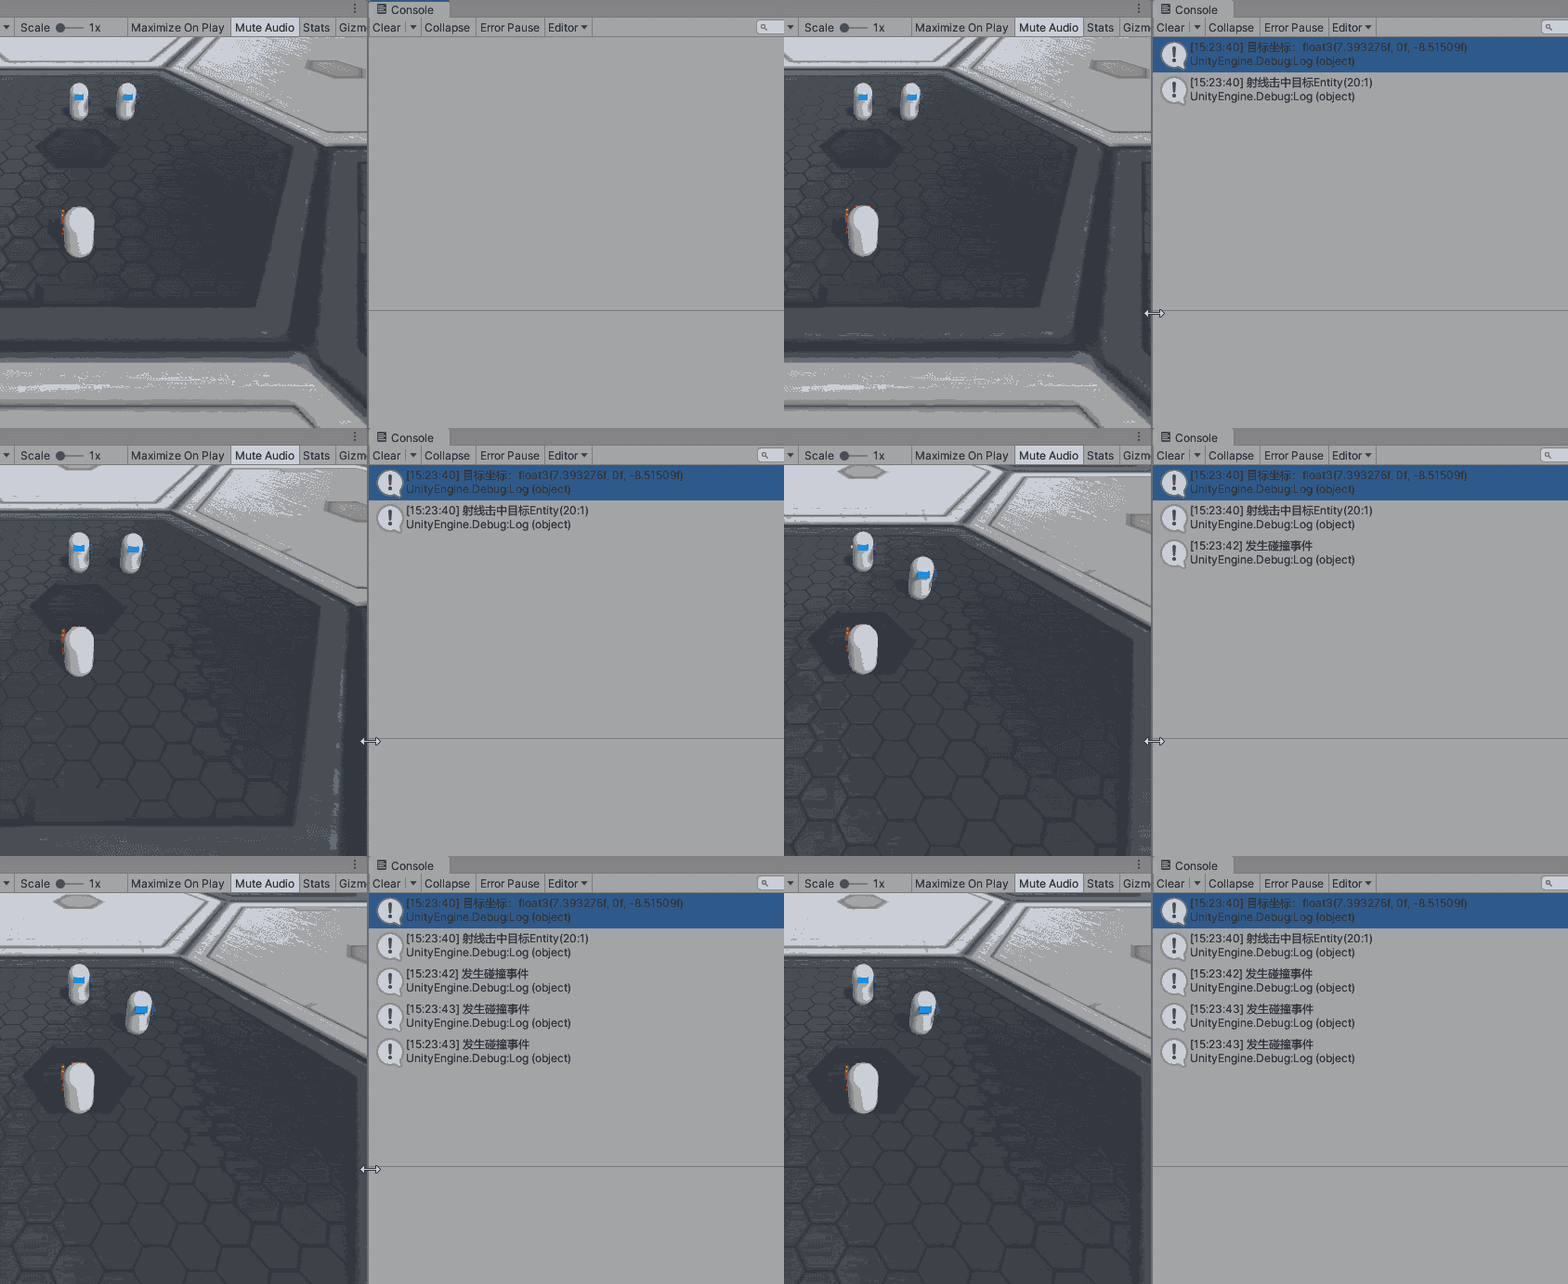
删除子弹实体的操作并非立即执行,同时删除子弹实体的操作和TriggerJob也是并行的(不在同一线程,两者先后顺序不确定),所以可能会出现图中的状况(箭头长度代表时间长度):

为了解决这个问题,我首先的思路是为子弹增加一个bool值记录它的状态,如果接触到敌人,再次触发碰撞事件时会直接返回,代码如下:
if (EnemyGroup.HasComponent(triggerEvent.EntityA))
{
//A是敌人,自然EntityB是子弹
if (BulletGroup[triggerEvent.EntityB].isDestory)
{
Debug.Log("子弹已被删除");
return;
}
Bullet a = BulletGroup[triggerEvent.EntityB];
a.isDestory = true;
BulletGroup[triggerEvent.EntityB] = a;
}
结果连续触发碰撞事件时,直接报错The entity does not exist,bullet Group 中并不包含这个引发碰撞的子弹:
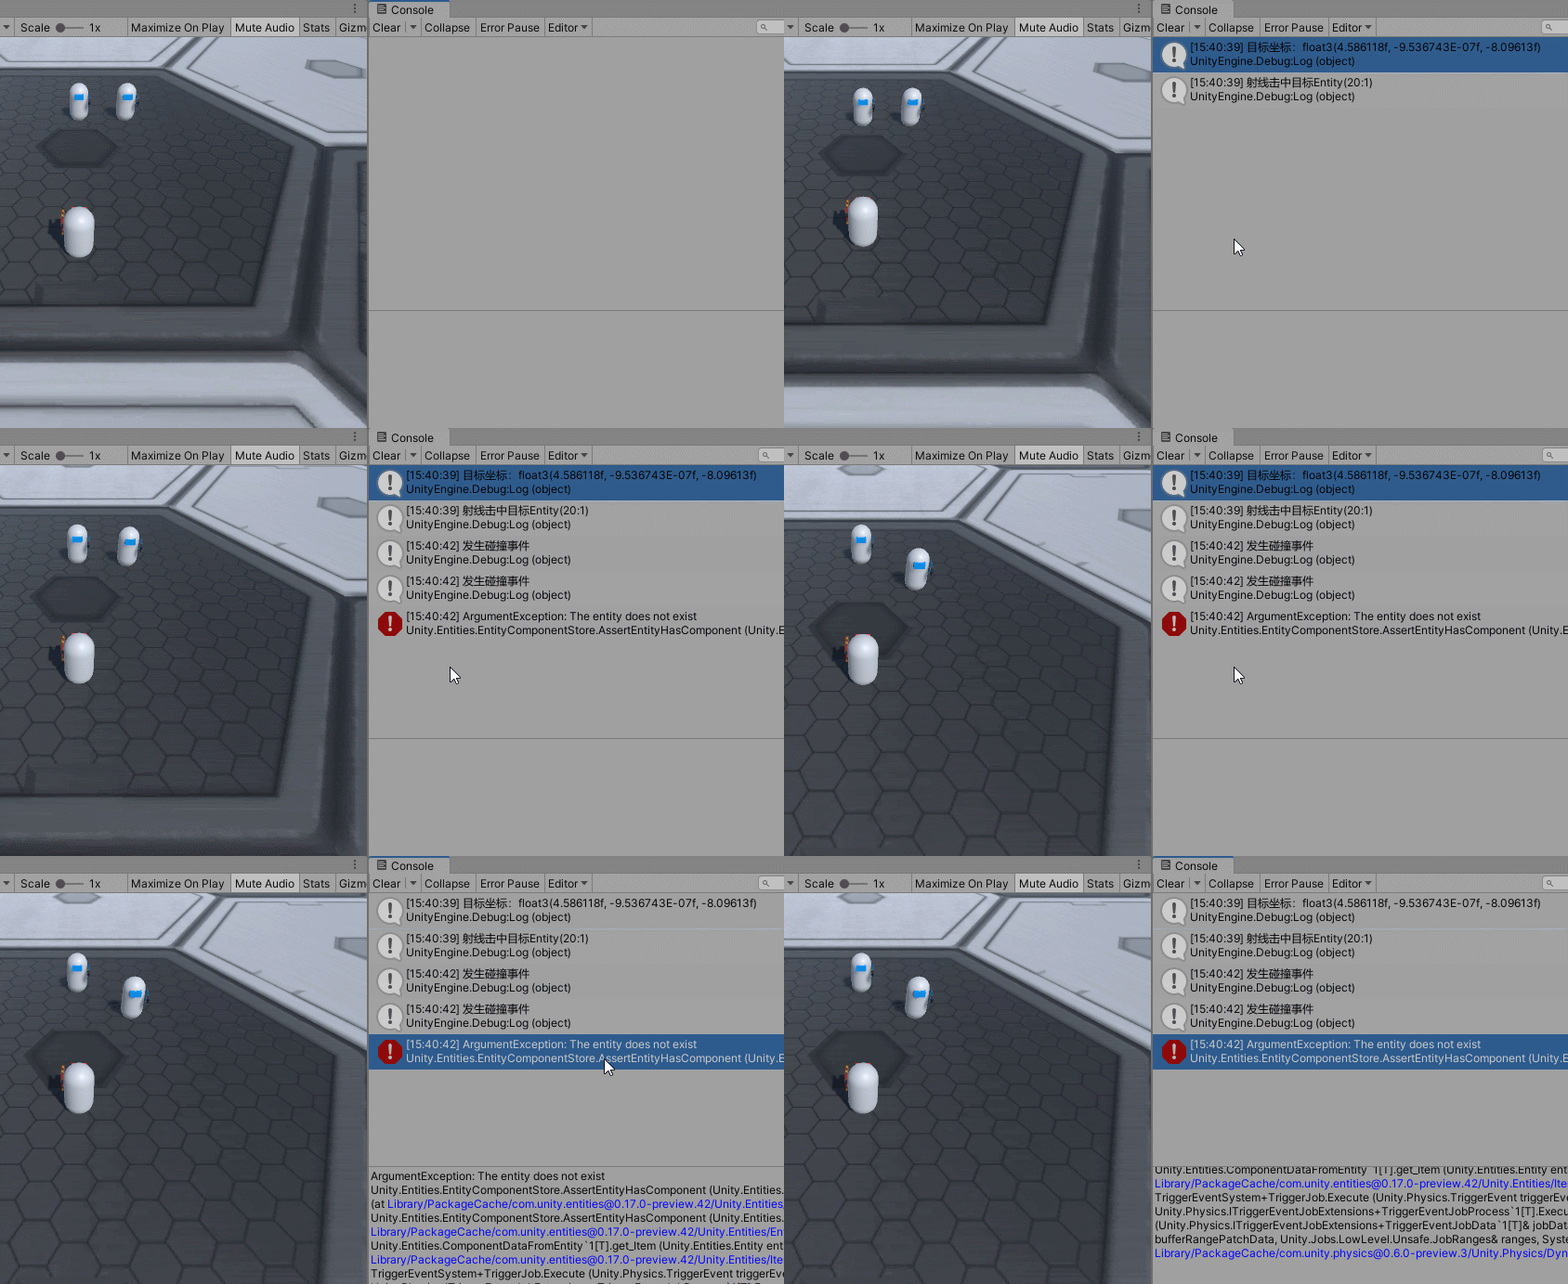
造成这个的原因也比较好猜,当我们执行删除子弹实体的代码时,子弹实体并不会立即删除,而是要等到EntityCommandBufferSystem回放命令时统一调度,所以已经子弹可能已经被系统标记为空,自然不在BulletGroup中了,自然也找不到该实体。
解决问题思路还有很多,我们当然可以在代码中修改Collision Filter,或是关闭子弹的碰撞事件来达成效果。。但实际上这两种操作都非常麻烦,目前Dots还没有这么的自由。
在尝试过上述做法后,我所想到的一个简单的思路:在发生碰撞时,将子弹挪到一个看不见位置去,这样就不会造成多次触发碰撞事件;
同时每个子弹都有自己的生命周期,所以也可能发生子弹生命到了,被标记删除,但又刚好触发碰撞的情况。为了避免这样的冲突,我们需要在每个Group中都对子弹进行HasComponent判定,子弹删除代码如下:
if (EnemyGroup.HasComponent(triggerEvent.EntityA))
{
//A是敌人,自然EntityB是子弹
if (TranslationGroup.HasComponent(triggerEvent.EntityB))
{
Translation temp = TranslationGroup[triggerEvent.EntityB];
//将子弹移到天上去
temp.Value = new float3(0, 100, 0);
TranslationGroup[triggerEvent.EntityB] = temp;
if (DeleteGroup.HasComponent(triggerEvent.EntityB))
{
DeleteTag temp1 = DeleteGroup[triggerEvent.EntityB];
temp1.lifeTime = 0f;
DeleteGroup[triggerEvent.EntityB] = temp1;
}
}
}
最后再做个敌人被击退的效果,给敌人添加BeatBack组件,每次被子弹击中时,敌人都会获得一个持续衰减的速度,被连续击中时,获得的加速度也会逐渐衰减:
using Unity.Entities;
using Unity.Transforms;
[GenerateAuthoringComponent]
public struct BeatBack : IComponentData
{
public float velocity;
public float curVelocity;
public Rotation rotation;
public float timer;
}
BeatBackSystem :
using Unity.Entities;
using Unity.Jobs;
using Unity.Transforms;
using Unity.Mathematics;
public class BeatBackSystem : SystemBase
{
protected override void OnUpdate()
{
float deltaTime = Time.DeltaTime;
Entities.
ForEach((ref BeatBack beatBack,ref Translation translation ) =>
{
if (beatBack.velocity <0.1f)
{
beatBack.velocity = 0;
beatBack.timer = 0;
beatBack.curVelocity = 0;
return;
}
float temp = beatBack.velocity;
beatBack.timer += 2*deltaTime;
temp = math.lerp(beatBack.velocity, 0,beatBack.timer);
if (temp < 0.1f)
{
beatBack.velocity = 0;
}
beatBack.curVelocity = temp;
translation.Value += beatBack.velocity * deltaTime * math.forward(beatBack.rotation.Value);
}).Run();
}
}
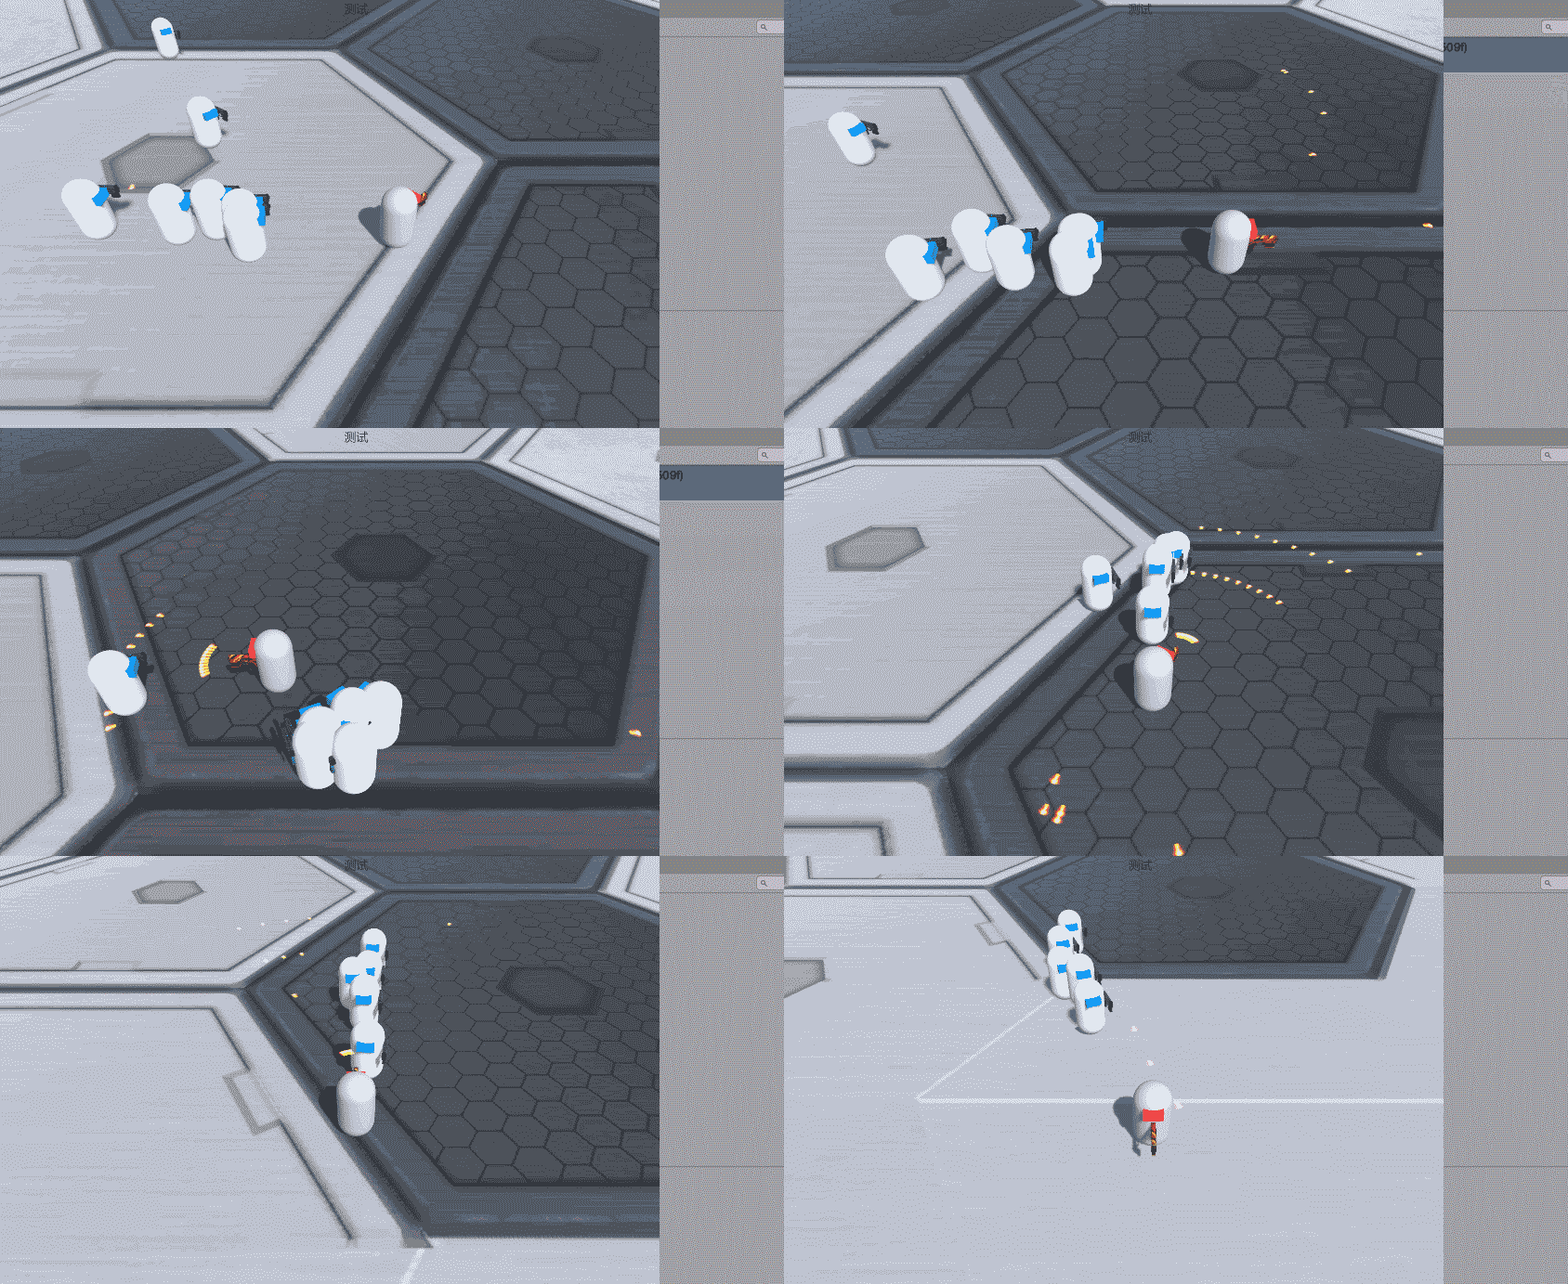
完整TriggerEventSystem代码如下:
using Unity.Entities;
using Unity.Jobs;
using Unity.Transforms;
using Unity.Mathematics;
using Unity.Collections;
using Unity.Physics.Systems;
using Unity.Physics;
using Unity.Burst;
[UpdateInGroup(typeof(FixedStepSimulationSystemGroup))]
public class TriggerEventSystem : SystemBase
{
private BuildPhysicsWorld buildPhysicsWorld;
private StepPhysicsWorld stepPhysicsWorld;
EndSimulationEntityCommandBufferSystem endSimulationEcbSystem;
protected override void OnCreate()
{
buildPhysicsWorld = World.GetOrCreateSystem<BuildPhysicsWorld>();
stepPhysicsWorld = World.GetOrCreateSystem<StepPhysicsWorld>();
endSimulationEcbSystem = World.GetOrCreateSystem<EndSimulationEntityCommandBufferSystem>();
}
protected override void OnUpdate()
{
var ecb = endSimulationEcbSystem.CreateCommandBuffer();
//传入两个bool值,用来判断是否播放被击中或者被击杀的音效
NativeArray<bool> isbehit = new NativeArray<bool>(2, Allocator.TempJob);
TriggerJob triggerJob = new TriggerJob
{
PhysicVelocityGroup = GetComponentDataFromEntity<PhysicsVelocity>(),
EnemyGroup = GetComponentDataFromEntity<Enemy>(),
BeatBackGroup = GetComponentDataFromEntity<BeatBack>(),
RotationGroup = GetComponentDataFromEntity<Rotation>(),
HpGroup = GetComponentDataFromEntity<Hp>(),
BulletGroup = GetComponentDataFromEntity<Bullet>(),
DeleteGroup = GetComponentDataFromEntity<DeleteTag>(),
TranslationGroup = GetComponentDataFromEntity<Translation>(),
ecb = ecb,
PhysicsColliderGroup = GetComponentDataFromEntity<PhysicsCollider>(),
CharacterGroup = GetComponentDataFromEntity<Character>(),
boom = FPSGameManager.instance.boomEntity,
isbehit = isbehit,
};
Dependency = triggerJob.Schedule(stepPhysicsWorld.Simulation, ref buildPhysicsWorld.PhysicsWorld,this.Dependency );
Dependency.Complete();
if (isbehit[0])
{
isbehit[0] = false;
FPSGameManager.instance.PlayBehit();
}
if (isbehit[1])
{
isbehit[1] = false;
FPSGameManager.instance.PlayBoom();
}
isbehit.Dispose();
}
[BurstCompile]
private struct TriggerJob :ITriggerEventsJob
{
public ComponentDataFromEntity<PhysicsVelocity> PhysicVelocityGroup;
//初始化数据略
public void Execute(TriggerEvent triggerEvent)
{
if (EnemyGroup.HasComponent(triggerEvent.EntityA))
{
//敌人与主角碰撞效果
if (!BulletGroup.HasComponent(triggerEvent.EntityB) && BeatBackGroup.HasComponent(triggerEvent.EntityB))
{
#region 击退
BeatBack beatBack1 = BeatBackGroup[triggerEvent.EntityB];
if (beatBack1.curVelocity > 0.1f)
{
beatBack1.velocity += (5f - beatBack1.curVelocity) * 0.1f;
}
else
{
beatBack1.velocity = 5f;
}
if (RotationGroup.HasComponent(triggerEvent.EntityB))
{
Rotation rotation = RotationGroup[triggerEvent.EntityB];
beatBack1.rotation = rotation;
}
BeatBackGroup[triggerEvent.EntityB] = beatBack1;
#endregion
return;
}
isbehit[0] = true;
#region 删除子弹
float3 boomPos = float3.zero;
if (TranslationGroup.HasComponent(triggerEvent.EntityB))
{
Translation temp = TranslationGroup[triggerEvent.EntityB];
boomPos = temp.Value;
temp.Value = new float3(0, 100, 0);
TranslationGroup[triggerEvent.EntityB] = temp;
if (DeleteGroup.HasComponent(triggerEvent.EntityB))
{
DeleteTag temp1 = DeleteGroup[triggerEvent.EntityB];
temp1.lifeTime = 0f;
DeleteGroup[triggerEvent.EntityB] = temp1;
}
}
#endregion
#region 子弹击退敌人效果
//略
#endregion
#region 扣血并生成爆炸粒子实体
if (HpGroup.HasComponent(triggerEvent.EntityA))
{
Hp hp = HpGroup[triggerEvent.EntityA];
hp.HpValue--;
HpGroup[triggerEvent.EntityA] = hp;
if (hp.HpValue == 0)
{
//播放死亡音效
isbehit[1] = true;
Entity boomEntity = ecb.Instantiate(boom);
Translation translation = new Translation
{
Value = boomPos
};
ecb.SetComponent(boomEntity, translation);
}
}
#endregion
}
if (EnemyGroup.HasComponent(triggerEvent.EntityB))
{
//与A逻辑相同,略
}
}
}
}
6:粒子与音效
目前Particle System 也能正常的转换为Entity ,但和physic shape等组件一样,它们还并没有那么方便使用,所以这里采用了和子弹组件一样的策略,写了一个粒子生命周期的组件,在单独的系统去处理,也不过多赘述了。
至于声音,没必要转换为实体,正常使用就好了~
工程地址:
https://github.com/ydwj/Unity-ECS-FpsGame
ps:工程里面下的商店的免费素材有点大~





![[附源码]计算机毕业设计JAVA教室用电控制系统](https://img-blog.csdnimg.cn/8209c6560dcb43228ec450fc2f0cc79b.png)
