文章目录
- 1 Socket
- 1.1 Socket 类型
- 1.2 构造 Socket
- 1.3 常用属性
- 1.4 常用方法
- 2 TCP 通信
- 2.1 服务端配置
- 2.2 客户端配置
- 2.3 进行通信
- 2.4 多设备通信
- 3 区分消息
1 Socket
Socket 是 C# 提供的网络通信类(其它语言也有对应的 Socket 类),是支持 TCP/IP 网络通信的基本操作单位。
- 类名:
Socket - 命名空间:
System.Net.Sockets
一个套接字对象包含以下关键信息:
- 本机的 IP 地址和端口。
- 对方主机的 IP 地址和端口。
- 双方通信的协议信息。
一个 Sccket 对象表示一个本地或者远程套接字信息,可被视为一个数据通道,连接与客户端和服务端,数据的发送和接受均通过这个通道进行。
一般长连接游戏会使用 Socket 套接字作为通信方案。
1.1 Socket 类型
Socket 套接字有 3 种不同的类型:
-
流套接字
主要用于实现 TCP 通信,提供面向连接、可靠的、有序的、数据无差错且无重复的数据传输服务。
-
数据报套接字
主要用于实现 UDP 通信,提供无连接的通信服务,数据包长度不能大于 32KB,不提供正确性检查,不保证顺序,可能出现重发、丢失等情况。
-
原始套接字(不常用)
主要用于实现 IP 数据包通信,用于直接访问协议的较低层,常用于侦听和分析数据包。
1.2 构造 Socket
public Socket(AddressFamily addressFamily, SocketType socketType, ProtocolType protocolType);
-
参数 1:AddressFamily
网络寻址 枚举类型,决定寻址方案。
- InterNetwork:IPv4 寻址(常用)
- InterNetwork6:IPv6 寻址(常用)
- UNIX:UNIX 本地到主机地址
- ImpLink:ARPANETIMP 地址
- Ipx:IPX 或 SPX 地址
- Iso:ISO 协议的地址
- Osi:OSI 协议的地址
- NetBios:NetBios 地址
- Atm:本机 ATM 服务地址
-
参数 2:SocketType
套接字枚举类型,决定使用的套接字类型。
- Dgram:支持数据报,最大长度固定的无连接、不可靠的消息(常用,主要用于 UDP 通信)
- Stream:支持可靠、双向、基于连接的字节流(常用,主要用于 TCP 通信)
- Raw:支持对基础传输协议的访问
- Rdm:支持无连接、面向消息、以可靠方式发送的消息
- Seqpacket:提供排序字节流的面向连接且可靠的双向传输
-
参数 3:ProtocolType
协议类型枚举类型,决定套接字使用的通信协议。
- TCP:TCP 传输控制协议(常用)
- UDP:UDP 用户数据报协议(常用)
- IP:IP 网际协议
- Icmp:Icmp 网际消息控制协议
- Igmp:Igmp 网际组管理协议
- Ggp:网关到网关协议
- IPv4:Internet 协议版本 4
- Pup:PARC 通用数据包协议
- Idp:Internet 数据报协议
- Raw:原始 IP 数据包协议
- Ipx:Internet 数据包交换协议
- Spx:顺序包交换协议
- IcmpV6:用于 IPv6 的 Internet 控制消息协议
参数 2、3 的常用搭配:
- SocketType.Dgram + ProtocolType.Udp = UDP 协议通信(常用)
- SocketType.Stream + ProtocolType.Tcp = TCP 协议通信(常用)
- SocketType.Raw + ProtocolType.Icmp = Internet 控制报文协议
- SocketType.Raw + ProtocolType.Raw = 简单 IP 包通信
// TCP 流套接字
Socket socketTcp = new Socket(AddressFamily.InterNetwork, SocketType.Stream, ProtocolType.Tcp);

// UDP 数据报套接字
Socket socketUdp = new Socket(AddressFamily.InterNetwork, SocketType.Dgram, ProtocolType.Udp);
1.3 常用属性
// 1.套接字的连接状态
if (socketTcp.Connected)
{ }

// 2.获取套接字的类型
print(socketTcp.SocketType);

// 3.获取套接字的协议类型
print(socketTcp.ProtocolType);

// 4.获取套接字的寻址方案
print(socketTcp.AddressFamily);

// 5.从网络中获取准备读取的数据数据量
print(socketTcp.Available);

// 6.获取本机 EndPoint 对象(IPEndPoint 继承 EndPoint)
// socketTcp.LocalEndPoint as IPEndPoint

// 7.获取远程 EndPoint 对象
// socketTcp.RemoteEndPoint as IPEndPoint
1.4 常用方法
- 主要用于服务端
// 1-1: 绑定IP和端口
IPEndPoint ipPoint = new IPEndPoint(IPAddress.Parse("127.0.0.1"), 8080);
socketTcp.Bind(ipPoint);

// 1-2: 设置客户端连接的最大数量
socketTcp.Listen(10);

// 1-3: 等待客户端连入
socketTcp.Accept();
- 主要用于客户端
// 2-1: 连接远程服务端
socketTcp.Connect(IPAddress.Parse("118.12.123.11"), 8080);
- 客户端服务端都会用
// 3-1: 同步发送和接收数据
// socketTcp.Send(...);
// socketTcp.Receive(...);

// 3-2: 异步发送和接收数据
// socketTcp.SendAsync(...);
// socketTcp.ReceiveAsync(...);

// 3-3: 释放连接并关闭 Socket,先于 Close 调用
socketTcp.Shutdown(SocketShutdown.Both);

// 3-4: 关闭连接,释放所有Socket关联资源
socketTcp.Close();
2 TCP 通信
2.1 服务端配置
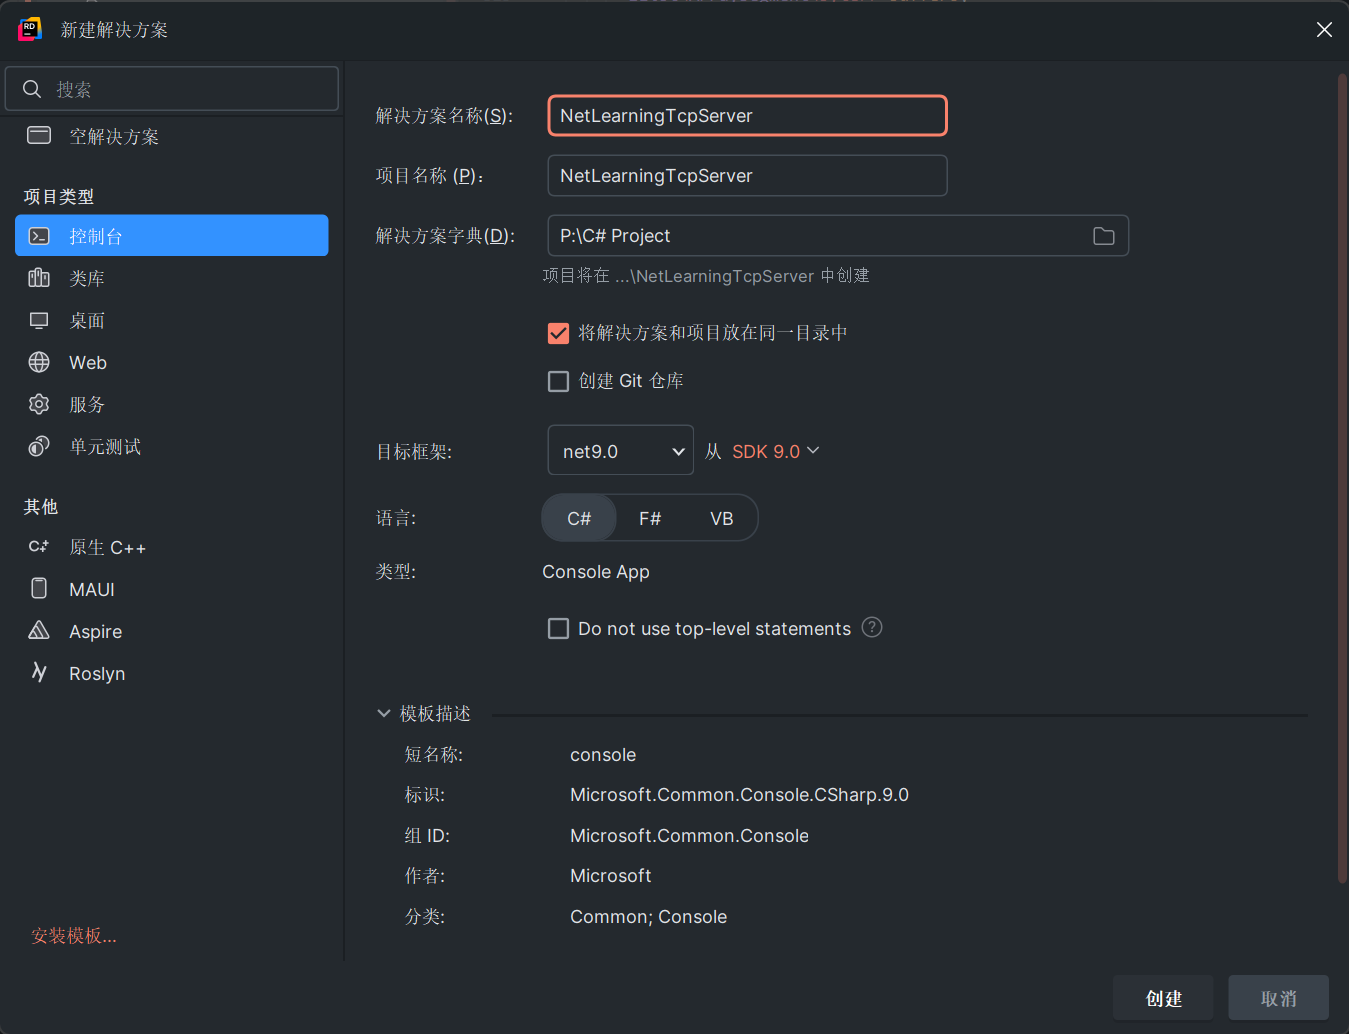
以 Rider IDE 为例,创建控制台程序。
- 创建 TCP 套接字
// 创建一个TCP套接字
var socketTcp = new Socket(AddressFamily.InterNetwork, SocketType.Stream, ProtocolType.Tcp);
try
{
    // 创建一个IP地址和端口号的终结点
    var ipPoint = new IPEndPoint(IPAddress.Parse("127.0.0.1"), 8080); // 填写服务器本机的 IP 地址和端口号
    // 绑定套接字到指定的终结点
    socketTcp.Bind(ipPoint);
}
catch (Exception e)
{
    // 如果绑定失败,输出错误信息
    Console.WriteLine("绑定报错:" + e);
    return;
}
- 连接客户端
// 开始监听连接
socketTcp.Listen(1024);
Console.WriteLine("服务器已启动,等待客户端连接");

// 接受客户端连接
var socketClient = socketTcp.Accept(); // Accept() 会同步等待连接
Console.WriteLine("客户端已连接");
- 发送消息并等待回复
// 向客户端发送消息
socketClient.Send(Encoding.UTF8.GetBytes("你好,客户端!"));

// 接收客户端发送的消息
var result = new byte[1024];
var receiveLength = socketClient.Receive(result);
- 输出接受内容并中断连接
// 输出客户端发送的消息
Console.WriteLine($"客户端 {socketClient.RemoteEndPoint} 发送的消息:" + Encoding.UTF8.GetString(result, 0, receiveLength));

// 关闭套接字
socketClient.Shutdown(SocketShutdown.Both);
socketClient.Close();

Console.WriteLine("按任意键退出");
Console.ReadKey();
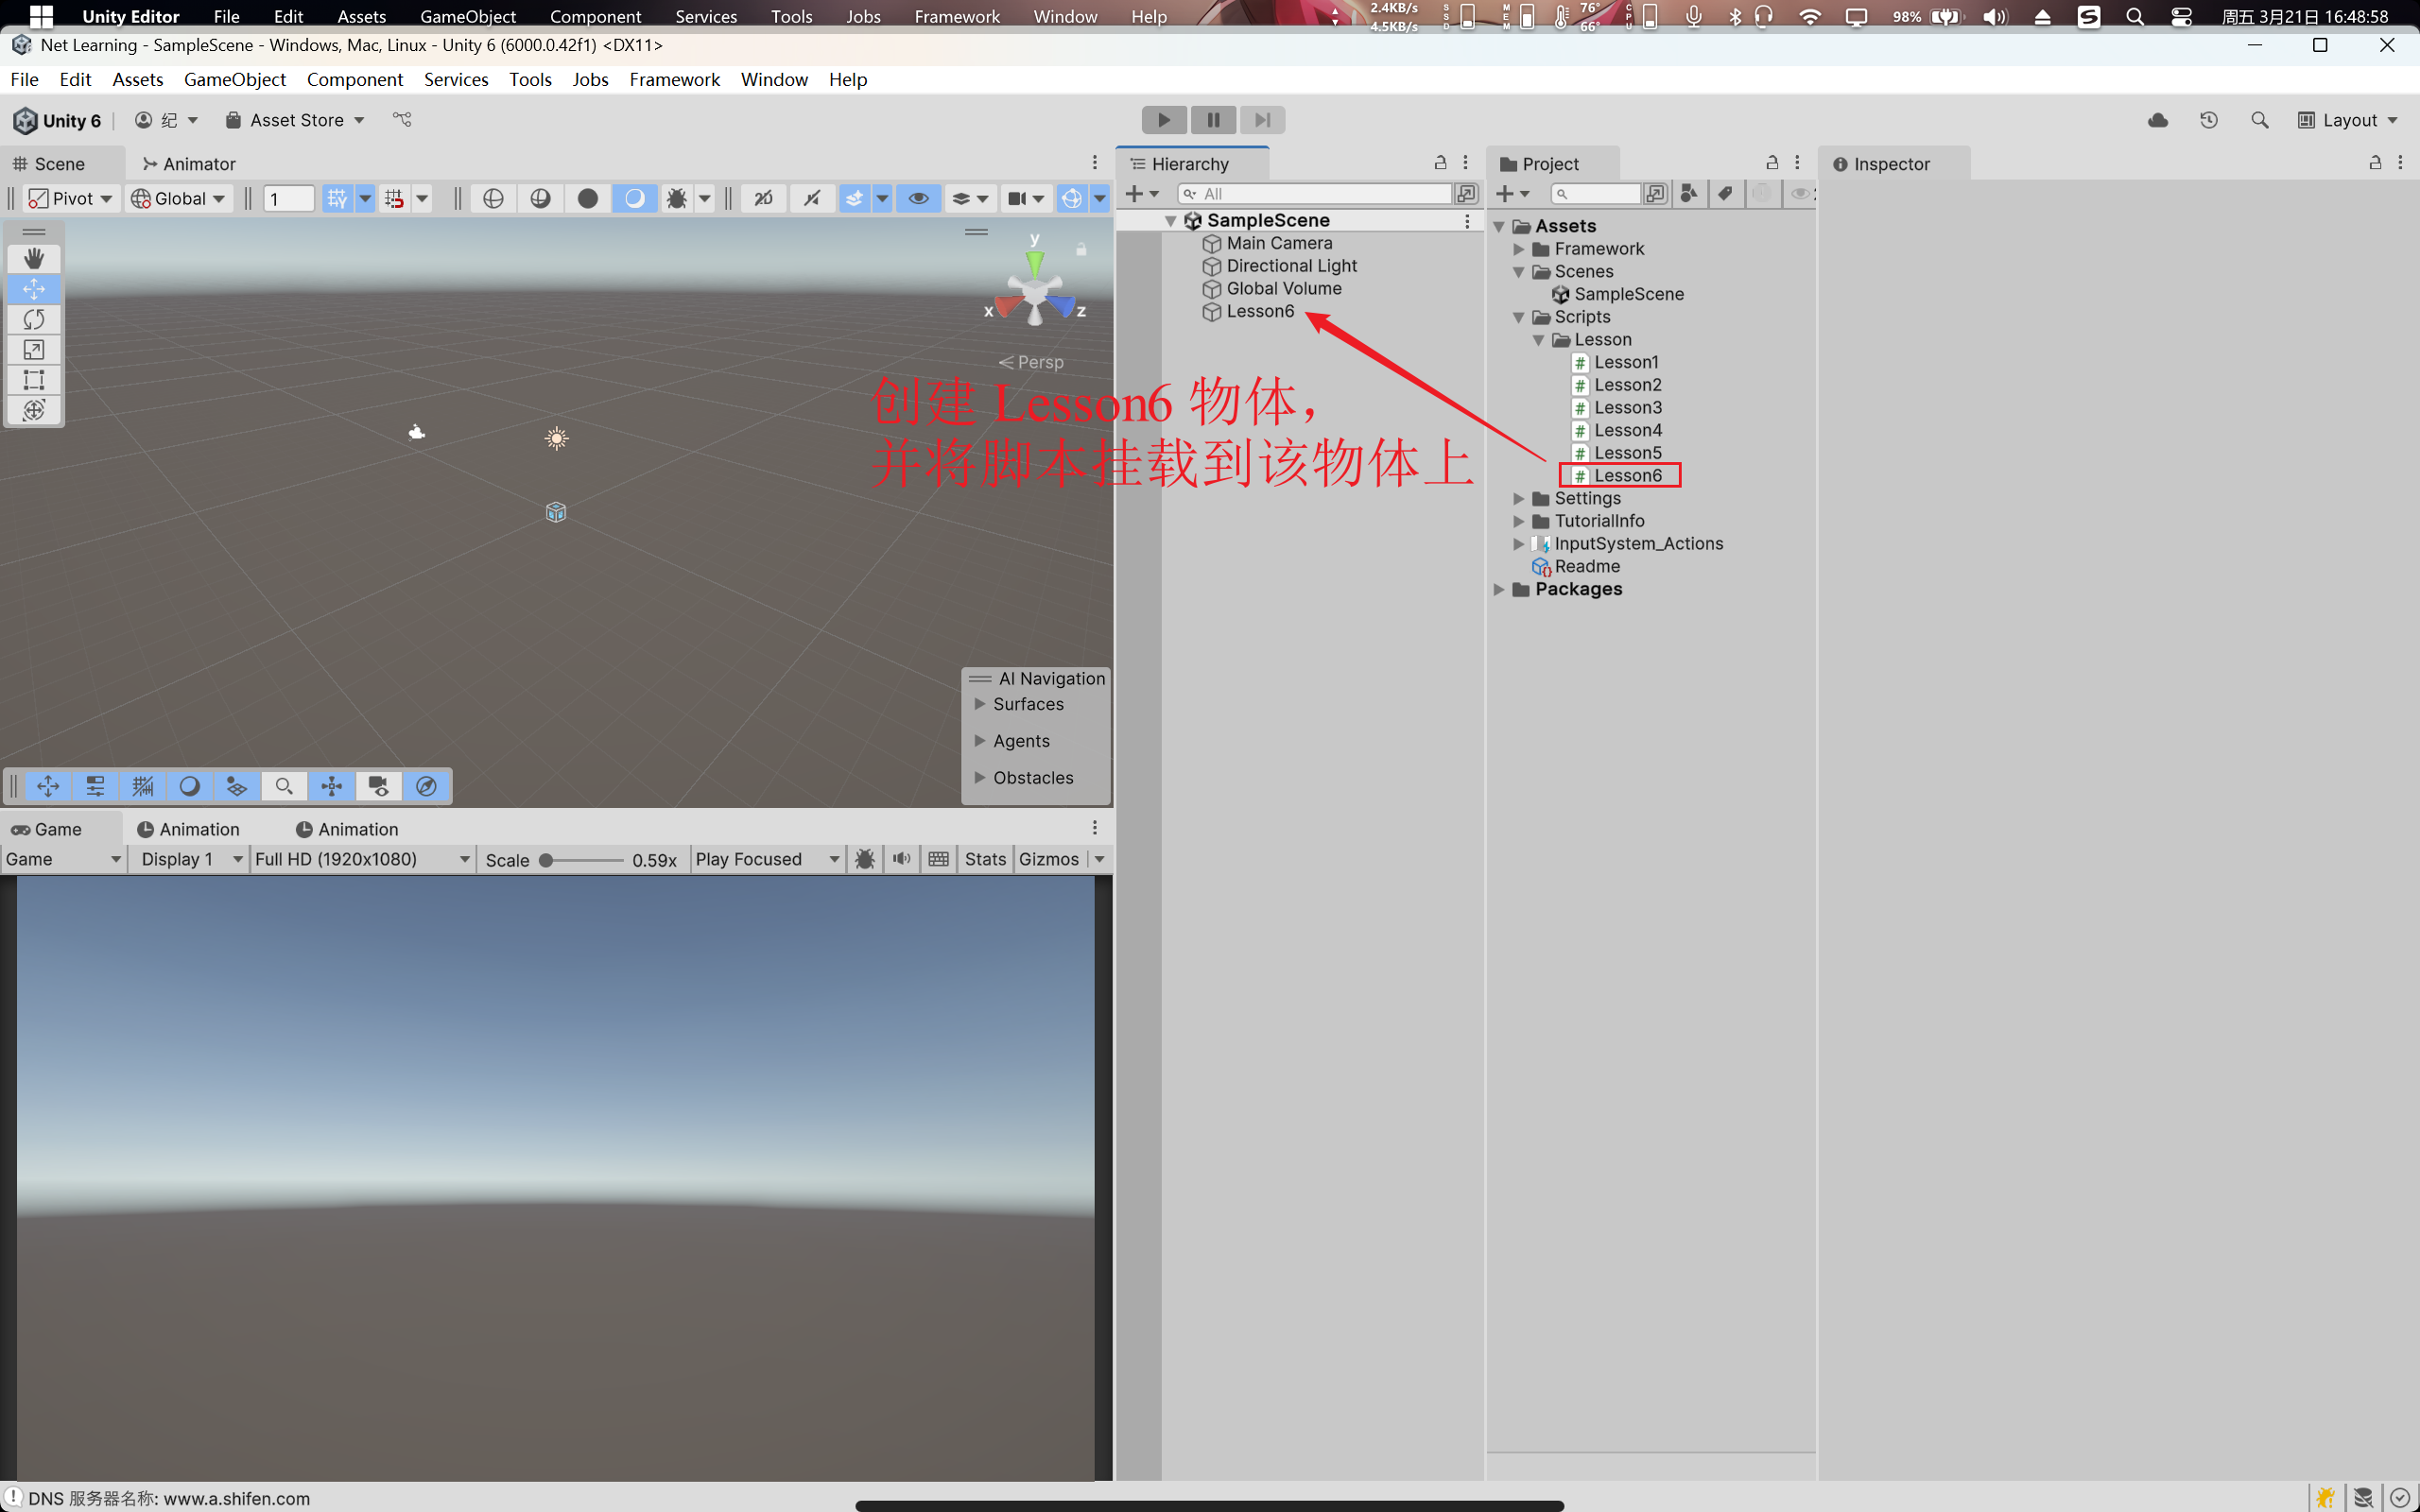
2.2 客户端配置
进入 Unity,创建脚本并挂载到场景上。
using System;
using System.Net.Sockets;
using System.Text;

public class Lesson6 : MonoBehaviour
{
    private void Start()
    {
        ... // 编写代码
    }
}
- 与服务器建立连接
var socket = new Socket(AddressFamily.InterNetwork, SocketType.Stream, ProtocolType.Tcp);

try // 使用 try 块包裹防止连接失败报错
{
    socket.Connect("127.0.0.1", 8080); // 填写服务器的 ip 地址和端口号
}
catch (SocketException e) // 网络通信异常
{
    if (e.ErrorCode == 10061) // 10061 错误码表示服务器拒绝连接
    {
        Debug.Log("服务器拒绝连接");
    }
    else
    {
        Debug.Log("连接失败");
    }

    return;
}
- 接受与发送消息
var receiveBytes = new byte[1024];
var receiveLength = socket.Receive(receiveBytes); // 接收一条消息后才继续工作
print("接收到数据:" + System.Text.Encoding.UTF8.GetString(receiveBytes, 0, receiveLength));

socket.Send(Encoding.UTF8.GetBytes("Hello World!"));
- 断开连接
socket.Shutdown(SocketShutdown.Both);
socket.Close();
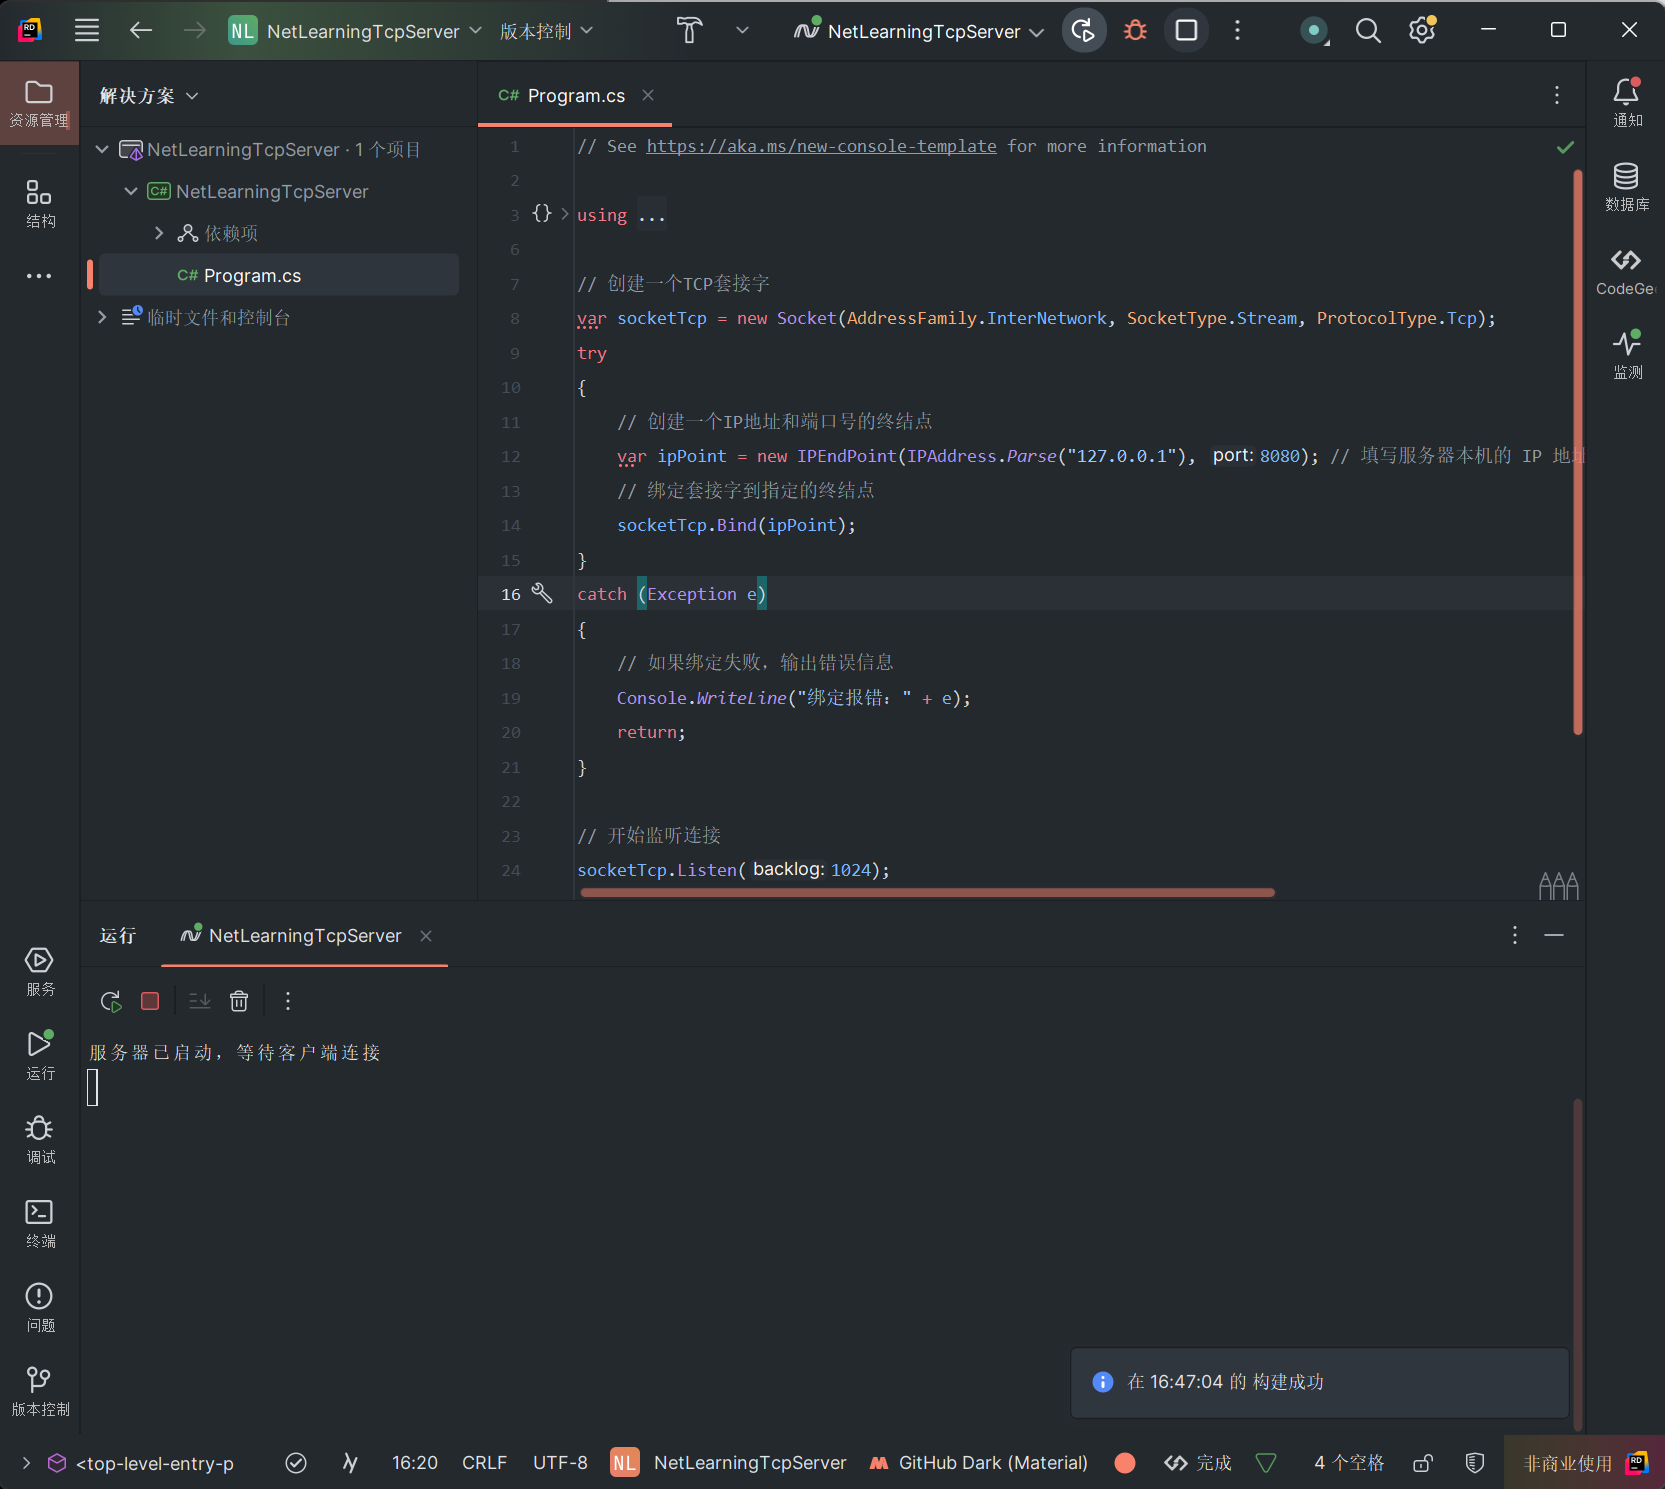
2.3 进行通信
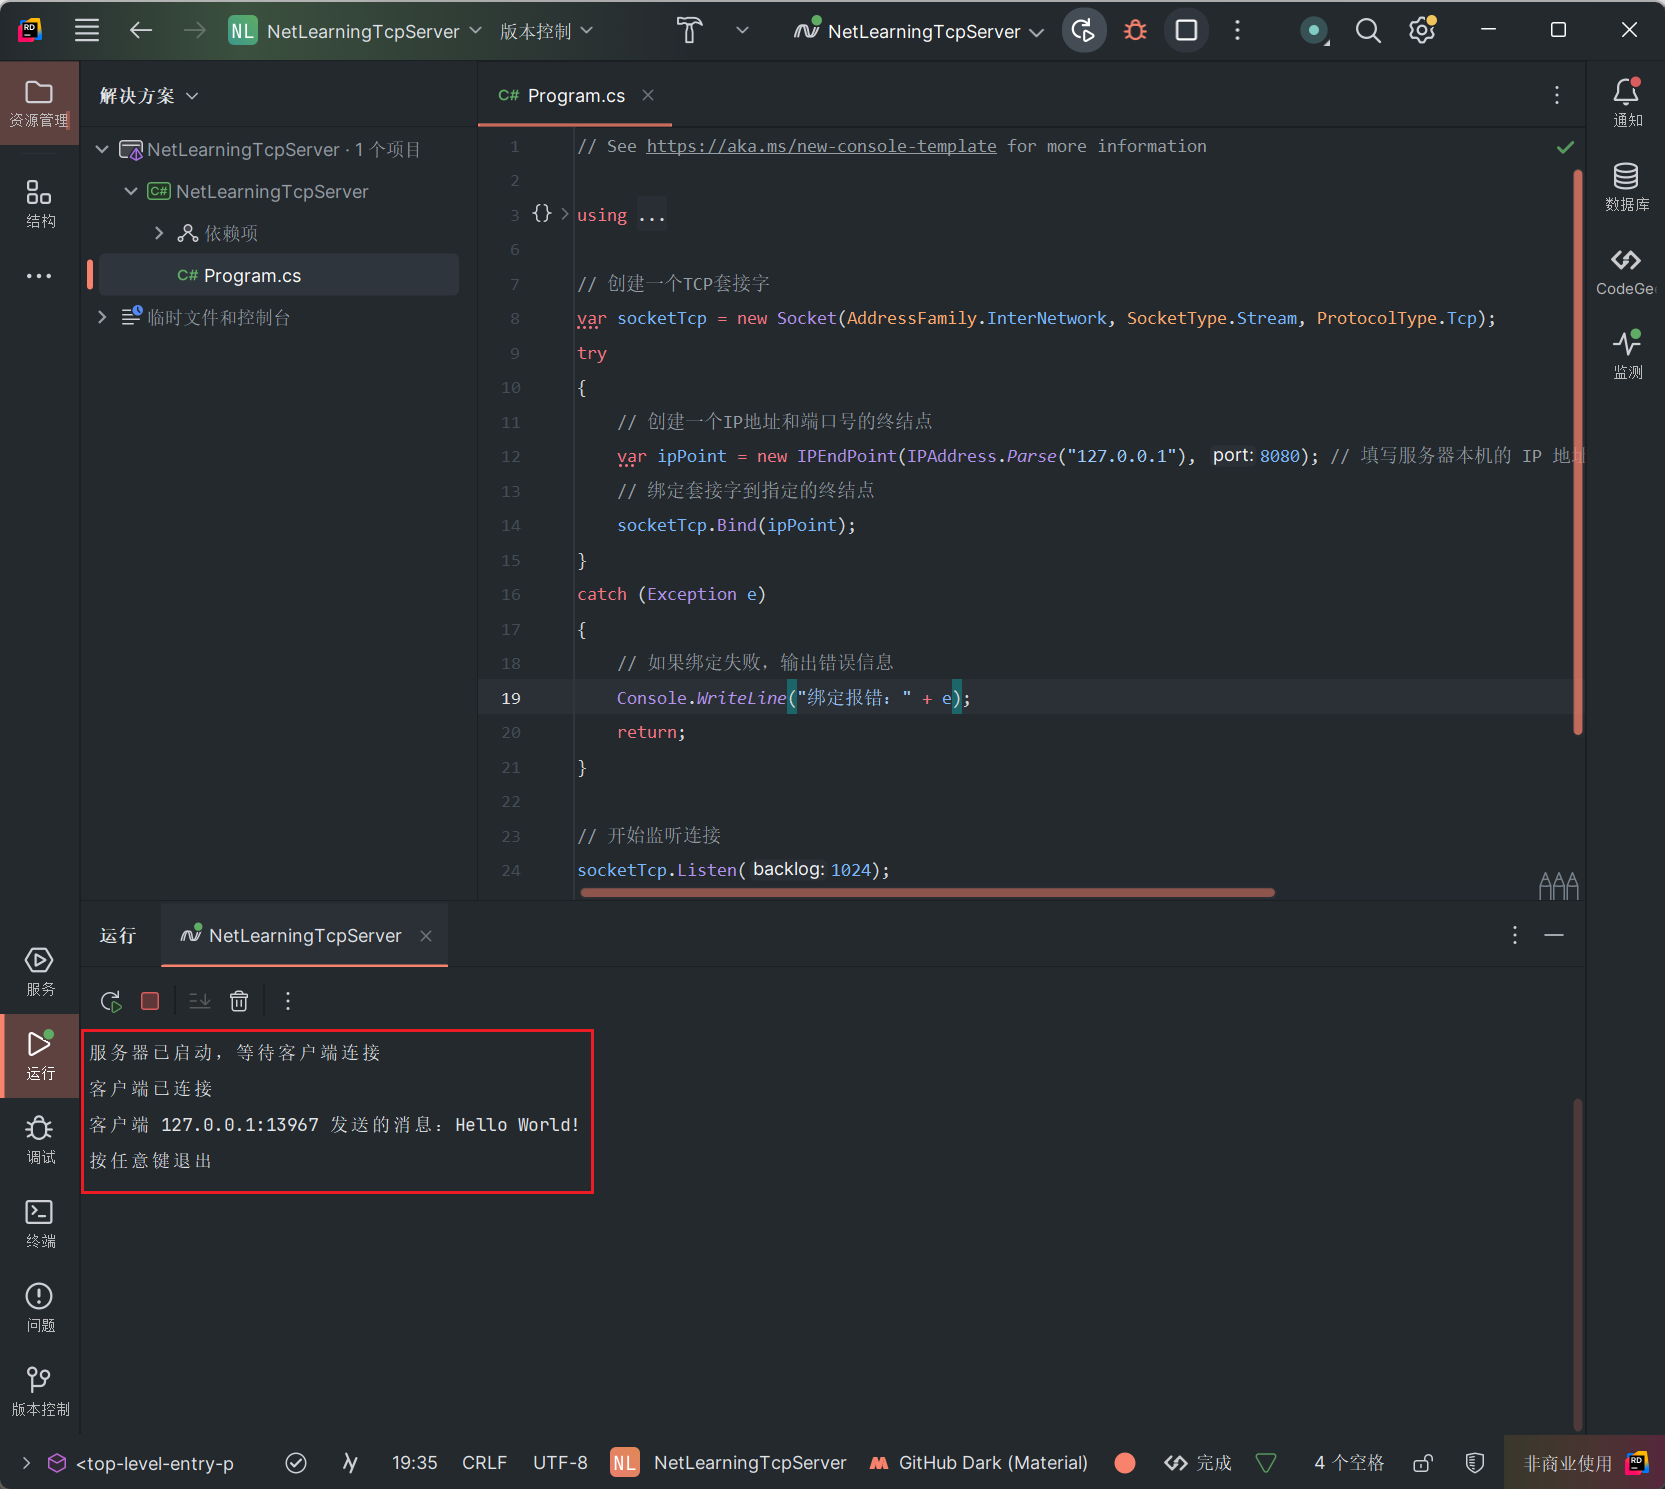
首先运行服务器。
进入 Unity,点击运行,可看到通信结果。
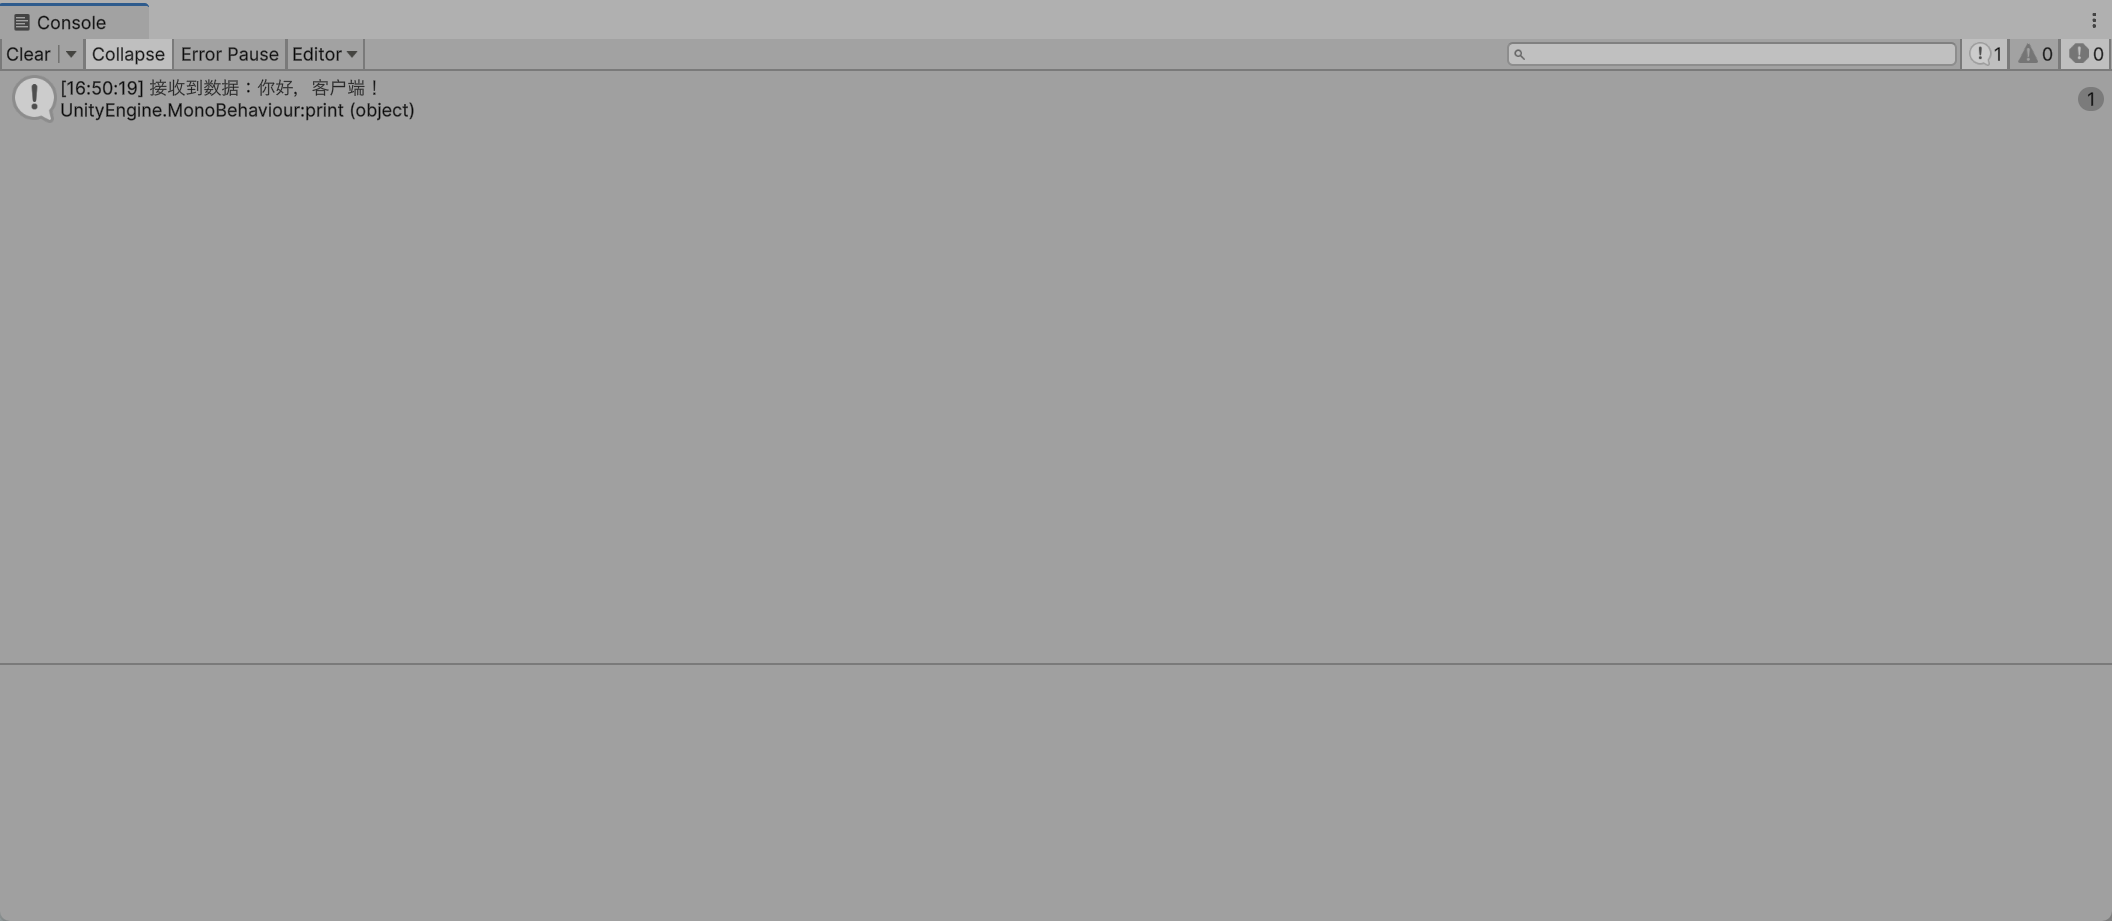
服务器端输出结果如下:
2.4 多设备通信
Socket.Accept() 方法会阻塞当前线程,直至接收到设备通信为止。因此,上述方法只能与一台指定设备进行通信。
为实现多设备通信,需创建新线程监听客户端的连接。
class Program
{
    // TCP 套接字
    private static Socket _SocketTcp = new Socket(AddressFamily.InterNetwork, SocketType.Stream, ProtocolType.Tcp);

    // 客户端套接字列表
    private static List<Socket> _ClientSockets = new List<Socket>();

    // 运行标志
    private static bool _Running = false;

    ...
}
Main 函数的处理步骤包括以下 4 步:
- 绑定 IP 和端口,开始监听
var ipAddress = IPAddress.Parse("127.0.0.1");
var port = 8080;
var endPoint = new IPEndPoint(ipAddress, port);
_SocketTcp.Bind(endPoint);
_SocketTcp.Listen(1024);
_Running = true;
- 启动线程等待客户端连接
var acceptThread = new Thread(AcceptClientThread);
acceptThread.Start();
- 启动线程接收客户端消息
var receiveThread = new Thread(ReceiveMessageThread);
receiveThread.Start();
-
主线程处理用户输入
这里规定,输入“exit”退出服务器,输入“send”向所有客户端发送消息。
while (true)
{
    var input = Console.ReadLine();
    if (input == "exit") // 输入命令关闭服务器
    {
        _Running = false;
        for (int i = 0; i < _ClientSockets.Count; i++)
        {
            _ClientSockets[i].Shutdown(SocketShutdown.Both);
            _ClientSockets[i].Close();
        }
        _ClientSockets.Clear();
        break;
    }
    else if (input == "send") // 输入命令向所有客户端发送消息
    {
        for (int i = 0; i < _ClientSockets.Count; i++)
        {
            _ClientSockets[i].Send("Hello, client!"u8.ToArray());
            Console.WriteLine("Send Hello");
        }
    }
}
连接客户端 AcceptClientThread、接受消息 ReceiveMessage 的线程工作如下:
private static void AcceptClientThread()
{
    while (_Running)
    {
        var clientSocket = _SocketTcp.Accept();
        _ClientSockets.Add(clientSocket);
        clientSocket.Send("Welcome to the server!"u8.ToArray()); // 由于客户端规定为接收一条消息后才继续工作,因此这里需要发送一条消息
    }
}

// 接收客户端消息的线程
private static void ReceiveMessageThread()
{
    var buffer = new byte[1024 * 1024];
    int receiveLength;
    Socket clientSocket;

    while (_Running)
    {
        for (int i = 0; i < _ClientSockets.Count; i++)
        {
            clientSocket = _ClientSockets[i];

            // 判断是否有可接收的消息
            if (clientSocket.Available > 0)
            {
                receiveLength = clientSocket.Receive(buffer);

                // 使用线程池处理接收到的消息,而不是立即处理
                // 防止用户等待时间过长
                ThreadPool.QueueUserWorkItem(ReceiveMessage, (clientSocket, Encoding.UTF8.GetString(buffer, 0, receiveLength)));
            }
        }
    }
}
在 ReceiveMessage 中,使用线程池处理接收到的消息,而不是立即处理,防止用户等待时间过长。接收消息后的工作通过 ReceiveMessage 方法定义:
// 处理接收到的消息
private static void ReceiveMessage(object? state)
{
    if (state == null) return;

    (Socket socket, string str) info = ((Socket socket, string str)) state;
    Console.WriteLine($"Receive message from client {info.socket}: {info.str}");
}
3 区分消息
数据对象序列化后是长度不同的字节数组,将它们发送出去后,对方如何区分是什么消息?如何选择对应的数据类进行反序列化?
解决方案
为发送的信息添加标识 ID。
例如,选用 int 类型作为消息 ID 类型,前 4 个字节为消息 ID,后面的字节为数据类的内容。每次收到消息时,先把前 4 个字节取出来解析为消息 ID,再根据 ID 进行消息反序列化。
实践
-
定义消息接口。
public interface INetMessage { int MessageId { get; } int BytesLength { get; } byte[] ToBytes(); int FromBytes(byte[] bytes, int index); } -
创建消息类型
public class PlayerMessage : INetMessage
{
    public int    PlayerId;
    public string Name;
    public int    Atk;
    public int    Lev;

    public int MessageId { get => 1001; }

    public int BytesLength
    {
        get => this.GetBytesLength(MessageId) + // 消息长度
               this.GetBytesLength(PlayerId) +
               this.GetBytesLength(Name) +
               this.GetBytesLength(Atk) +
               this.GetBytesLength(Lev);
    }

    public byte[] ToBytes()
    {
        var bytes = new byte[BytesLength];
        var index = 0;
        index = this.Write(bytes, index, MessageId);
        index = this.Write(bytes, index, PlayerId);
        index = this.Write(bytes, index, Name);
        index = this.Write(bytes, index, Atk);
        index = this.Write(bytes, index, Lev);
        return bytes;
    }

    public int FromBytes(byte[] bytes, int index)
    {
        // 反序列化不需要解析 Id,在此之前应解析 Id 从而使用该方法
        index = this.Read(bytes, index, ref PlayerId);
        index = this.Read(bytes, index, ref Name);
        index = this.Read(bytes, index, ref Atk);
        index = this.Read(bytes, index, ref Lev);
        return index;
    }

    public override string ToString()
    {
        return $"PlayerMessage: {PlayerId}, {Name}, {Atk}, {Lev}";
    }
}
其中的
GetBytesLength、Write和Read方法均由拓展类提供:public static class ByteLengthExtension { public static int GetBytesLength(this INetMessage message, int value) { return sizeof(int); } public static int GetBytesLength(this INetMessage message, string value) { return sizeof(int) + Encoding.UTF8.GetByteCount(value); } public static int GetBytesLength(this INetMessage message, bool value) { return sizeof(bool); } public static int GetBytesLength(this INetMessage message, float value) { return sizeof(float); } } public static class INetMessageExtension { public static int Write(this INetMessage message, byte[] bytes, int index, int value) { BitConverter.GetBytes(value).CopyTo(bytes, index); return index + sizeof(int); } public static int Read(this INetMessage message, byte[] bytes, int index, ref int value) { value = BitConverter.ToInt32(bytes, index); return index + sizeof(int); } public static int Write(this INetMessage message, byte[] bytes, int index, string value) { var strBytes = Encoding.UTF8.GetBytes(value); BitConverter.GetBytes(strBytes.Length).CopyTo(bytes, index); index += sizeof(int); strBytes.CopyTo(bytes, index); return index + strBytes.Length; } public static int Read(this INetMessage message, byte[] bytes, int index, ref string value) { int length = BitConverter.ToInt32(bytes, index); index += sizeof(int); value = Encoding.UTF8.GetString(bytes, index, length); return index + length; } public static int Write(this INetMessage message, byte[] bytes, int index, bool value) { BitConverter.GetBytes(value).CopyTo(bytes, index); return index + sizeof(bool); } public static int Read(this INetMessage message, byte[] bytes, int index, ref bool value) { value = BitConverter.ToBoolean(bytes, index); return index + sizeof(bool); } public static int Write(this INetMessage message, byte[] bytes, int index, float value) { BitConverter.GetBytes(value).CopyTo(bytes, index); return index + sizeof(float); } public static int Read(this INetMessage message, byte[] bytes, int index, ref float value) { value = BitConverter.ToSingle(bytes, index); return index + sizeof(float); } public static int Write(this INetMessage message, byte[] bytes, int index, INetMessage value) { value.ToBytes().CopyTo(bytes, index); return index + value.BytesLength; } public static int Read(this INetMessage message, byte[] bytes, int index, ref INetMessage value) { value.FromBytes(bytes, index); return index + value.BytesLength; } } -
创建消息类型 PlayerMessage
public class PlayerMessage : INetMessage { public int PlayerId; public string Name; public int Atk; public int Lev; public int MessageId { get => 1001; } public int BytesLength { get => this.GetBytesLength(MessageId) + // 消息长度 this.GetBytesLength(PlayerId) + this.GetBytesLength(Name) + this.GetBytesLength(Atk) + this.GetBytesLength(Lev); } public byte[] ToBytes() { var bytes = new byte[BytesLength]; var index = 0; index = this.Write(bytes, index, MessageId); index = this.Write(bytes, index, PlayerId); index = this.Write(bytes, index, Name); index = this.Write(bytes, index, Atk); index = this.Write(bytes, index, Lev); return bytes; } public int FromBytes(byte[] bytes, int index) { // 反序列化不需要解析 Id,在此之前应解析 Id 从而使用该方法 index = this.Read(bytes, index, ref PlayerId); index = this.Read(bytes, index, ref Name); index = this.Read(bytes, index, ref Atk); index = this.Read(bytes, index, ref Lev); return index; } public override string ToString() { return $"PlayerMessage: {PlayerId}, {Name}, {Atk}, {Lev}"; } } -
进行通信。
客户端:
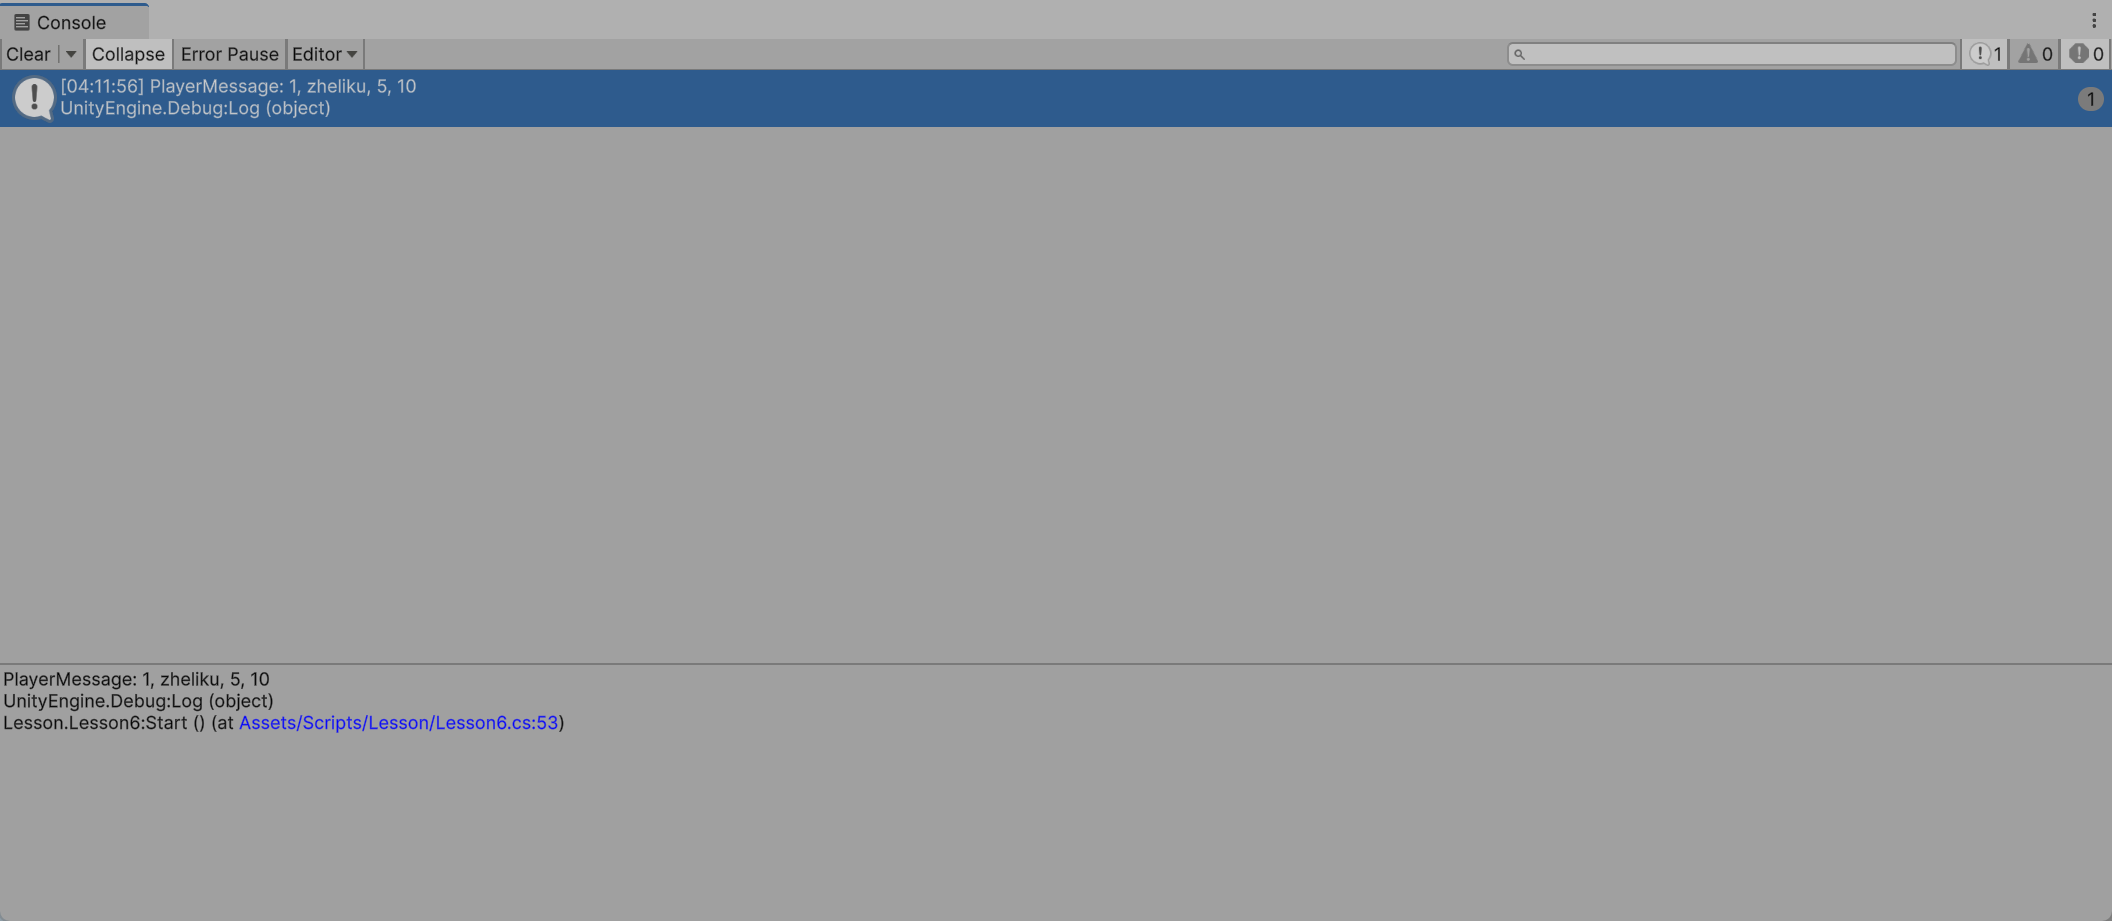
public class Lesson6 : MonoBehaviour
{
    private void Start()
    {
        // 创建一个 Socket 对象,指定地址族、套接字类型和协议类型
        var socket = new Socket(AddressFamily.InterNetwork, SocketType.Stream, ProtocolType.Tcp);

        try // 使用 try 块包裹防止连接失败报错
        {
            socket.Connect("127.0.0.1", 8080); // 填写服务器的 ip 地址和端口号
        }
        catch (SocketException e) // 网络通信异常
        {
            if (e.ErrorCode == 10061) // 10061 错误码表示服务器拒绝连接
            {
                Debug.Log("服务器拒绝连接");
            }
            else
            {
                Debug.Log("连接失败");
            }

            return;
        }

        var receiveBytes = new byte[1024];
        var receiveLength = socket.Receive(receiveBytes); // 接收一条消息后才继续工作

        // 解析 Id
        var id = BitConverter.ToInt32(receiveBytes, 0);
        switch (id)
        {
            case 1001:
                var playerMsg = new PlayerMessage();
                playerMsg.FromBytes(receiveBytes, sizeof(int));
                Debug.Log(playerMsg);
                break;
        }

        // print("接收到数据:" + System.Text.Encoding.UTF8.GetString(receiveBytes, 0, receiveLength));

        socket.Send(Encoding.UTF8.GetBytes("Hello World!"));

        socket.Shutdown(SocketShutdown.Both);
        socket.Close();
    }
}
服务端:
// See https://aka.ms/new-console-template for more information

using System.Net;
using System.Net.Sockets;
using System.Text;
using Exercise;

// 创建一个TCP套接字
var socketTcp = new Socket(AddressFamily.InterNetwork, SocketType.Stream, ProtocolType.Tcp);
try
{
    // 创建一个IP地址和端口号的终结点
    var ipPoint = new IPEndPoint(IPAddress.Parse("127.0.0.1"), 8080); // 填写服务器本机的 IP 地址和端口号
    // 绑定套接字到指定的终结点
    socketTcp.Bind(ipPoint);
}
catch (Exception e)
{
    // 如果绑定失败,输出错误信息
    Console.WriteLine("绑定报错:" + e);
    return;
}

// 开始监听连接
socketTcp.Listen(1024);
Console.WriteLine("服务器已启动,等待客户端连接");

// 接受客户端连接
var socketClient = socketTcp.Accept();
Console.WriteLine("客户端已连接");

// 向客户端发送消息
// socketClient.Send(Encoding.UTF8.GetBytes("你好,客户端!"));
var playerMsg = new PlayerMessage()
{
    PlayerId = 1,
    Name = "zheliku",
    Atk = 5,
    Lev = 10,
};
socketClient.Send(playerMsg.ToBytes());

// 接收客户端发送的消息
var result = new byte[1024];
var receiveLength = socketClient.Receive(result);

// 输出客户端发送的消息
Console.WriteLine($"客户端 {socketClient.RemoteEndPoint} 发送的消息:" + Encoding.UTF8.GetString(result, 0, receiveLength));

// 关闭套接字
socketClient.Shutdown(SocketShutdown.Both);
socketClient.Close();

Console.WriteLine("按任意键退出");
Console.ReadKey();
先运行服务器,后运行 Unity,可看到通信成功:


![[网鼎杯 2020 白虎组]PicDown1 [反弹shell] [敏感文件路径] [文件描述符]](https://i-blog.csdnimg.cn/direct/ffeda0df28c940a2a277e03f9b196e42.png)


