JS的DOM操作和事件监听综合练习 (具备三种功能的轮播图案例)

news2024/11/26 2:56:04

下面是是对dom操作的一个综合练习

下面代码是html的基本骨架(没有任何的功能):

<!DOCTYPE html>  

<html lang="en">  

<head>  

    <meta charset="UTF-8">  

    <meta name="viewport" content="width=device-width, initial-scale=1.0">  

    <title>图片自动切换(轮播图效果)</title>  

    <style>  

        body, html {  

            margin: 0;  

            padding: 0;

            width: 100%;

            height: 100%;  

        }  

        .carousel-container {  

            position: relative;  

            width: 25%;  

            height: 40%; /* 根据需要设置高度 */

            border: 4px red solid;

            background-color: gray;

        }  

        .carousel-image {  

            width: 100%;  

            height: 100%;  

        }  

    </style>  

</head>  

<body>  

    <div class="carousel-container">  

        <img src="./img_src/p1.jpg" class="carousel-image" id="img1">  

    </div>

    <div class="change-image">

        <p class="button"  id="p1">第1张</p>

        <p class="button"  id="p2">第2张</p>

        <p class="button"  id="p3">第3张</p>

        <p class="button"  id="p4">第4张</p>  

    </div>

    <script>    

    </script>

</body>  

</html>

运行截图:

                                        

第一种功能是让4张图片实现自动轮播

一共可以有两种方式可以实现让它自动轮播的效果:

第一种:

<!DOCTYPE html>  

<html lang="en">  

<head>  

    <meta charset="UTF-8">  

    <meta name="viewport" content="width=device-width, initial-scale=1.0">  

    <title>图片自动切换(轮播图效果)</title>  

    <style>  

        body, html {  

            margin: 0;  

            padding: 0;

            width: 100%;

            height: 100%;  

        }  

        .carousel-container {  

            position: relative;  

            width: 25%;  

            height: 40%; /* 根据需要设置高度 */

            border: 4px red solid;

            background-color: gray;

        }  

        .carousel-container .carousel-image {  

            position: absolute;  

            top: 0;  

            left: 0;  

            width: 100%;  

            height: 100%;  

            opacity: 1; /* 不透明度0-1 */  

        }  

    </style>  

</head>  

<body>  

    <div class="carousel-container">  

        <img src="./img_src/p1.jpg" class="carousel-image" id="img1">  

    </div>

    <div  class="clear_ele change-image">

        <p class="button"  id="p1">第1张</p>

        <p class="button"  id="p2">第2张</p>

        <p class="button"  id="p3">第3张</p>

        <p class="button"  id="p4">第4张</p>  

    </div>

    <script>  

        // 【实现自动轮播】

        const imgElement = document.getElementById("img1");

        var i = 1;

        // 修改img标签的图片路径

        function showNextImage1() {    

            if(i>4){

                i = 1;

            }else{              

                imgElement.src = `./img_src/p${i}.jpg`;

                i =  i + 1;

            }

        }    

// 每1秒切换一次图片 (无限循环)

        setInterval(showNextImage1, 1500);   

    </script>  

</body>  

</html>

第二种(把上面红色代码替换就行):

//【实现自动轮播】直接改整个父节点下节点(innerHTML实现)

         const divElement = document.getElementsByClassName("carousel-container")[0];

        var i = 1;

        function showNextImage2() {          

            if(i>4){

                i = 1;

            }else{    

                divElement.innerHTML = `<img src="./img_src/p${i}.jpg" class="carousel-image active" id="img1">`

                i =  i + 1;

            }    

        } 

运行截图(因作者个人技术原因,上传不去录屏,用截图代替):


第二种功能是实现四个按钮切换图片,以下为该功能代码:

<!DOCTYPE html>  

<html lang="en">  

<head>  

    <meta charset="UTF-8">  

    <meta name="viewport" content="width=device-width, initial-scale=1.0">  

    <title>图片自动切换(轮播图效果)</title>  

    <style>  

        body, html {  

            margin: 0;  

            padding: 0;

            width: 100%;

            height: 100%;  

        }  

        .carousel-container {  

            position: relative;  

            width: 25%;  

            height: 40%; /* 根据需要设置高度 */

            border: 4px red solid;

            background-color: gray;

        }  

        .carousel-container .carousel-image {  

            position: absolute;  

            top: 0;  

            left: 0;  

            width: 100%;  

            height: 100%;  

            opacity: 1; /* 不透明度0-1 */  

        }  

        .change-image{

            width: 15%;  

            height: 3%;  

            /* border: 1px purple solid; */

            position: absolute;

            top: 30%;

            left: 5%;

        }

        .change-image .button{        

            width: 60px;  

            height: 30px;

            color: white;

            text-align: center;

            background-color: red;

            border-radius: 10px;

            margin-left: 9px;

            float: left;

        }

        .clear_ele::after{

            content: "";  /* 这个伪元素的内容属性必须有 */

            display: block;

            /* border: 6px purple dashed; */

            clear: both;

        }

    </style>  

</head>  

<body>  

    <div class="carousel-container">  

        <img src="./img_src/p1.jpg" class="carousel-image" id="img1">  

    </div>

    <div  class="clear_ele change-image">

        <p class="button"  id="p1">第1张</p>

        <p class="button"  id="p2">第2张</p>

        <p class="button"  id="p3">第3张</p>

        <p class="button"  id="p4">第4张</p>  

    </div>

    <script>  

        // 【实现自动轮播】

        const imgElement = document.getElementById("img1");

        var i = 1;      

        // 修改img标签的图片路径

        function showNextImage1() {    

            if(i>4){

                i = 1;

            }else{              

                imgElement.src = `./img_src/p${i}.jpg`;

                i =  i + 1;

            }

        }  

        // 每1秒切换一次图片 (无限循环)

        setInterval(showNextImage1, 1500);  

        // 【实现四个按钮切换图片】

        const p = document.getElementsByTagName("p");

        p[0].addEventListener("click",

            function(){

                i = 1;

                imgElement.src = `./img_src/p${i}.jpg`;

            }

        )

        p[1].addEventListener("click",

            function(){

                i = 2;

                imgElement.src = `./img_src/p${i}.jpg`;

            }

        )

        p[2].addEventListener("click",

            function(){

                i = 3;

                imgElement.src = `./img_src/p${i}.jpg`;

            }

        )

        p[3].addEventListener("click",

            function(){

                i = 4;

                imgElement.src = `./img_src/p${i}.jpg`;

            }

        )

    </script>  

</body>  

</html>

运行结果(点想看的张数可直接跳转到第几张):

        ​​​​​​​        ​​​​​​​        ​​​​​​​        

第三种功能是实现回车键控制轮播,以下为该功能代码:

<!DOCTYPE html>  

<html lang="en">  

<head>  

    <meta charset="UTF-8">  

    <meta name="viewport" content="width=device-width, initial-scale=1.0">  

    <title>图片自动切换(轮播图效果)</title>  

    <style>  

        body, html {  

            margin: 0;  

            padding: 0;

            width: 100%;

            height: 100%;  

        }  

        .carousel-container {  

            position: relative;  

            width: 25%;  

            height: 40%; /* 根据需要设置高度 */

            border: 4px red solid;

            background-color: gray;

        }  

        .carousel-container .carousel-image {  

            position: absolute;  

            top: 0;  

            left: 0;  

            width: 100%;  

            height: 100%;  

            opacity: 1; /* 不透明度0-1 */  

        }  

        .change-image{

            width: 15%;  

            height: 3%;  

            /* border: 1px purple solid; */

            position: absolute;

            top: 30%;

            left: 5%;

        }

        .change-image .button{        

            width: 60px;  

            height: 30px;

            color: white;

            text-align: center;

            background-color: red;

            border-radius: 10px;

            margin-left: 9px;

            float: left;

        }

       #output {  

            color: white;

            background-color: red;

            text-align: center;

            width: 15%;  

            height: 3%;

            margin-top: 1%;      

            position: relative;

            left: 5%;  

            border-radius: 10px;

        }

        .clear_ele::after{

            content: "";  /* 这个伪元素的内容属性必须有 */

            display: block;

            /* border: 6px purple dashed; */

            clear: both;

        }

    </style>  

</head>  

<body>  

    <div class="carousel-container">  

        <img src="./img_src/p1.jpg" class="carousel-image" id="img1">  

    </div>

    <div  class="clear_ele change-image">

        <p class="button"  id="p1">第1张</p>

        <p class="button"  id="p2">第2张</p>

        <p class="button"  id="p3">第3张</p>

        <p class="button"  id="p4">第4张</p>  

    </div>

    <div id="output">图片轮播关闭......(按Enter键开启轮播)</div>

    <script>  

        // 【实现自动轮播】

        const imgElement = document.getElementById("img1");

        var i = 1;

        var scroll_img = false;

        function showNextImage1() {    

            if(scroll_img){

                if(i>4){

                    i = 1;

                }else{              

                    imgElement.src = `./img_src/p${i}.jpg`;

                    i =  i + 1;

                }

            }

        }  

        // 每1秒切换一次图片 (无限循环)

        setInterval(showNextImage1, 1500);  


        // 【实现四个按钮切换图片】

        const p = document.getElementsByTagName("p");

        p[0].addEventListener("click",

            function(){

                i = 1;

                imgElement.src = `./img_src/p${i}.jpg`;

            }

        )

        p[1].addEventListener("click",

            function(){

                i = 2;

                imgElement.src = `./img_src/p${i}.jpg`;

            }

        )

        p[2].addEventListener("click",

            function(){

                i = 3;

                imgElement.src = `./img_src/p${i}.jpg`;

            }

        )

        p[3].addEventListener("click",

            function(){

                i = 4;

                imgElement.src = `./img_src/p${i}.jpg`;

            }

        )


    // 【实现回车键控制轮播是否开启】   

   // 获取显示按键信息的元素

    const outputDiv = document.getElementById('output');   

 // 监听整个文档的keydown事件 

    document.addEventListener('keydown',

        function(event) {        

// 获取按键的代码(包括数字键和特殊键,如箭头键、功能键等)      

            const keyCode = event.key; 

            if(keyCode==="Enter"){

                scroll_img = !scroll_img;      

            }

            //将提示信息添加到输出区域  

            if (scroll_img) {

                outputDiv.textContent = "图片轮播开启......(按Enter键关闭轮播)";

                outputDiv.style.backgroundColor = "green";

            } else {

                outputDiv.textContent = "图片轮播关闭......(按Enter键开启轮播)";

                outputDiv.style.backgroundColor = "red";

            }

        }

    );

    </script>  

</body>  

</html>

运行结果(未按回车键版):

        ​​​​​​​        ​​​​​​​        ​​​​​​​        ​​​​​​​         

运行结果(已按回车键版):


(注:若有疑问,可发评论,作者看到会回复) 

本文来自互联网用户投稿,该文观点仅代表作者本人,不代表本站立场。本站仅提供信息存储空间服务,不拥有所有权,不承担相关法律责任。如若转载,请注明出处:http://www.coloradmin.cn/o/2247602.html

如若内容造成侵权/违法违规/事实不符,请联系多彩编程网进行投诉反馈,一经查实,立即删除!

相关文章

GitHub 开源项目 Puter :云端互联操作系统

每天面对着各种云盘和在线应用&#xff0c;我们常常会遇到这样的困扰。 文件分散在不同平台很难统一管理&#xff0c;付费订阅的软件越来越多&#xff0c;更不用说那些烦人的存储空间限制了。 最近在 GitHub 上发现的一个开源项目 Puter 彻底改变了我的在线办公方式。 让人惊…

鸿蒙进阶篇-状态管理之@Provide与@Consume

大家好&#xff0c;这里是鸿蒙开天组&#xff0c;今天我们来学习一下状态管理中的Provide与Consume。 一、概述 嘿&#xff01;大家还记得这张图吗&#xff1f;不记得也要记得哦&#xff0c;因为这张图里的东西&#xff0c;既是高频必考面试题&#xff0c;也是实际开发中&…

Python 使用 OpenCV 将 MP4 转换为 GIF图

以下是使用 Python 和 OpenCV 将 MP4 转换为 GIF 的示例代码&#xff1a; python import cv2 import imageiodef mp4_to_gif(mp4_path, gif_path, fps10, start_timeNone, end_timeNone):"""将MP4视频转换为GIF动图。:param mp4_path: 输入MP4视频的路径。:pa…

五天SpringCloud计划——DAY1之mybatis-plus的使用

一、引言 咱也不知道为啥SpringCloud课程会先教mybatis-plus的使用&#xff0c;但是教都教了&#xff0c;就学了吧&#xff0c;学完之后觉得mybatis-plus中的一些方法还是很好用了&#xff0c;本文作为我学习mybatis-plus的总结提升&#xff0c;希望大家看完之后也可以熟悉myba…

TCP为什么需要三次握手?两次握手或四次握手可以吗?

&#xff08;1&#xff09;三次握手可以保证双方具有接收和发送的能力 第一次握手服务端可以确认客户端的发送能力和服务端的接收能力是正常的&#xff1b;第二次握手客户端可以确认客户端和服务端的收发能力是正常的&#xff0c;但是服务端无法确认客户端的接收能力是正常的&…

Python 获取微博用户信息及作品(完整版)

在当今的社交媒体时代&#xff0c;微博作为一个热门的社交平台&#xff0c;蕴含着海量的用户信息和丰富多样的内容。今天&#xff0c;我将带大家深入了解一段 Python 代码&#xff0c;它能够帮助我们获取微博用户的基本信息以及下载其微博中的相关素材&#xff0c;比如图片等。…

vue面试题——描述一下vue

目录 1 vue是什么2 Vue的核心特性2.1 数据驱动&#xff08;MVVM&#xff09;2.2 组件化2.3 指令系统 3 Vue跟传统开发的区别 1 vue是什么 简单点说&#xff0c;vue就是一个用于创建用户界面的JavaScript框架&#xff0c;同时也是一个创建单页面应用的Web应用框架&#xff0c;Vu…

Large Spatial Model:End-to-end Unposed Images to Semantic 3D 论文解读

目录 一、概述 二、相关工作 1、SfM和可微神经表示 2、端到端的Image-to-3D 三、LSM 1、密集几何预测 2、2D信息特征提取 3、点特征融合 4、可微渲染 5、损失函数 四、实验 一、概述 该论文提出一种大型空间模型&#xff08;Larget Spatial Model,LSM&#xff09;…

A045-基于spring boot的个人博客系统的设计与实现

&#x1f64a;作者简介&#xff1a;在校研究生&#xff0c;拥有计算机专业的研究生开发团队&#xff0c;分享技术代码帮助学生学习&#xff0c;独立完成自己的网站项目。 代码可以查看文章末尾⬇️联系方式获取&#xff0c;记得注明来意哦~&#x1f339; 赠送计算机毕业设计600…

VMware17安装之VMware Workstation Pro 16升级到17详细教程

VMware17安装之VMware Workstation Pro 16升级到17详细教程 一、下载安装包二、开始安装三、升级成功 当前使用的是VMware Workstation 16 Pro版本&#xff0c;想用最新的17&#xff0c;但是又不想卸载原来的&#xff0c;所以想尝试下看看能不能直接升级&#xff0c;最终升级成…

nature communications论文 解读

题目《Transfer learning with graph neural networks for improved molecular property prediction in the multi-fidelity setting》 这篇文章主要讨论了如何在多保真数据环境&#xff08;multi-fidelity setting&#xff09;下&#xff0c;利用图神经网络&#xff08;GNNs&…

接口上传视频和oss直传视频到阿里云组件

接口视频上传 <template><div class"component-upload-video"><el-uploadclass"avatar-uploader":action"uploadImgUrl":on-progress"uploadVideoProcess":on-success"handleUploadSuccess":limit"lim…

深度学习图像视觉 RKNN Toolkit2 部署 RK3588S边缘端 过程全记录

深度学习图像视觉 RKNN Toolkit2 部署 RK3588S边缘端 过程全记录 认识RKNN Toolkit2 工程文件学习路线&#xff1a; Anaconda Miniconda安装.condarc 文件配置镜像源自定义conda虚拟环境路径创建Conda虚拟环境 本地训练环境本地转换环境安装 RKNN-Toolkit2&#xff1a;添加 lin…

07-SpringCloud-Gateway新一代网关

一、概述 1、Gateway介绍 官网&#xff1a;https://spring.io/projects/spring-cloud-gateway Spring Cloud Gateway组件的核心是一系列的过滤器&#xff0c;通过这些过滤器可以将客户端发送的请求转发(路由)到对应的微服务。 Spring Cloud Gateway是加在整个微服务最前沿的防…

美创科技入选2024数字政府解决方案提供商TOP100!

11月19日&#xff0c;国内专业咨询机构DBC德本咨询发布“2024数字政府解决方案提供商TOP100”榜单。美创科技凭借在政府数据安全领域多年的项目经验、技术优势与创新能力&#xff0c;入选收录。 作为专业数据安全产品与服务提供商&#xff0c;美创科技一直致力于为政府、金融、…

Java编程,配置mongoUri连接mongodb时,需对特殊字符进行转义

一、背景 java程序连接mongo有两种方式&#xff1a; 用户名和密码方式uri方式 1、用户名和密码 以用户数据库为例&#xff0c;注意看它的密码 spring:data:mongodb:host: 192.168.10.17database: db_user_serviceport: 3717username: user_servicepassword: user_service3…

MySQL底层概述—1.InnoDB内存结构

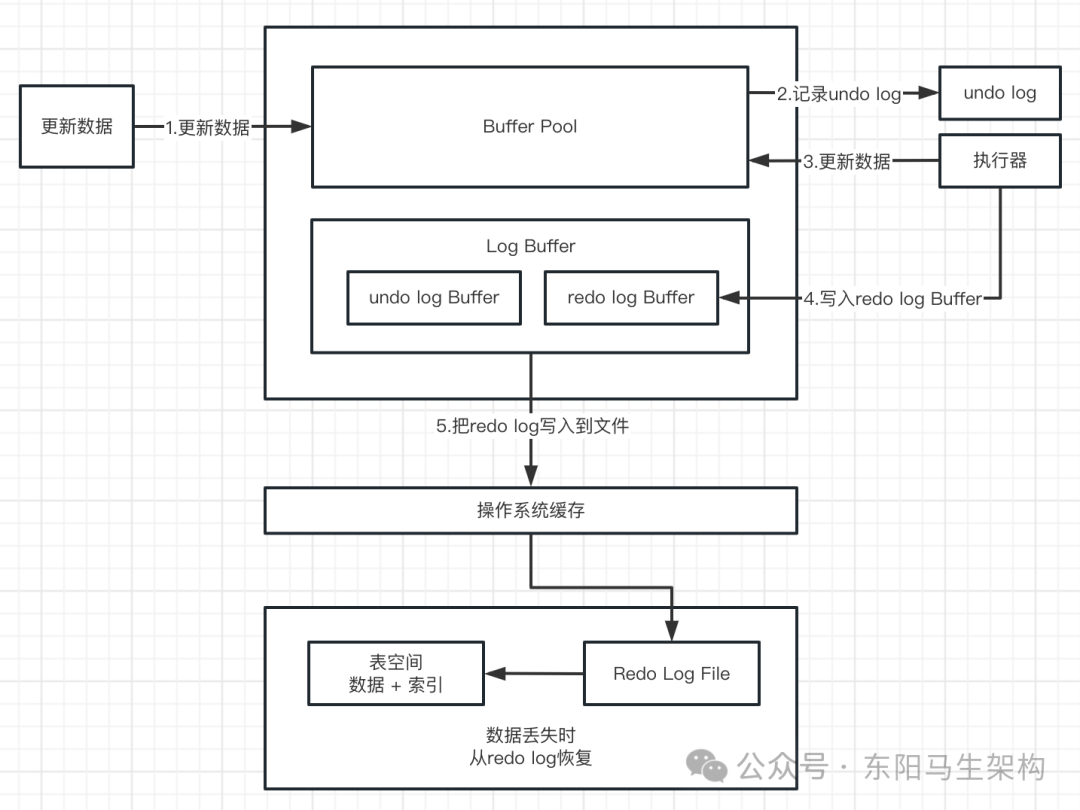
大纲 1.InnoDB引擎架构 2.Buffer Pool 3.Page管理机制之Page页分类 4.Page管理机制之Page页管理 5.Change Buffer 6.Log Buffer 1.InnoDB引擎架构 (1)InnoDB引擎架构图 (2)InnoDB内存结构 (1)InnoDB引擎架构图 下面是InnoDB引擎架构图&#xff0c;主要分为内存结构和磁…

【Github】如何使用Git将本地项目上传到Github

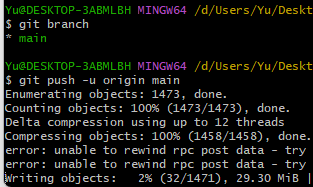
【Github】如何使用Git将本地项目上传到Github 写在最前面1. 注册Github账号2. 安装Git工具配置用户名和邮箱仅为当前项目配置&#xff08;可选&#xff09; 3. 创建Github仓库4. 获取仓库地址5. 本地操作&#xff08;1&#xff09;进入项目文件夹&#xff08;2&#xff09;克隆…

大事件管理系统项目总结(上)

文章目录 大事件管理系统项目总结&#xff08;上&#xff09;Pinia - 配置仓库统一管理Vue3路由配置Vue3导航拦截 大事件管理系统项目总结&#xff08;上&#xff09; Pinia - 配置仓库统一管理 使用pinia多层文件夹嵌套时&#xff0c;导入某个文件的路径会很长&#xff0c;容…

鸿蒙征文|鸿蒙心路旅程:始于杭研所集训营,升华于横店

始于杭研所 在2024年7月&#xff0c;我踏上了一段全新的旅程&#xff0c;前往风景如画的杭州&#xff0c;参加华为杭研所举办的鲲鹏&昇腾集训营。这是一个专门为开发者设计的培训项目&#xff0c;中途深入学习HarmonyOS相关技术。对于我这样一个对技术充满热情的学生来说&…