- 定义:凸包是包围点云的最小凸多面体,所有点都在该多面体的内部或表面上。
- 优点:能够精确地包围点云,并且不存在额外的空白区域。
- 缺点:计算复杂度高,尤其是在高密度点云中,生成凸包的过程较慢。
下面,我将介绍两种常用的凸包算法的 Python 实现:
- Graham 扫描算法
- Andrew’s Monotone Chain 算法
生成测试数据
为了方便理解,我们现已二维数据进行测试
import numpy as np
mean = [0, 0]
cov = [[3, 1], [1, 2]]
points = np.random.multivariate_normal(mean, cov, 300)
plt.plot(points[:,0], points[:,1], 'o')

Graham 扫描算法
Graham 扫描算法的基本步骤如下:
- 找到所有点中 y 坐标最小的点(如果有多个,则选择 x 坐标最小的)。
- 将剩余的点按与起始点的极角进行排序。
- 遍历排序后的点,使用栈维护当前的凸包顶点,判断转向方向以决定是否需要弹出栈顶点。
def graham_scan(points):
    # 找到 y 最小的点,若有多个则取 x 最小的
    start = min(points, key=lambda p: (p[1], p[0]))

    def polar_angle(p):
        return math.atan2(p[1] - start[1], p[0] - start[0])

    # 按极角排序,如果极角相同,离起点近的排前面
    sorted_points = sorted(points, key=lambda p: (polar_angle(p), (p[0] - start[0])**2 + (p[1] - start[1])**2))

    # 初始化栈
    stack = []
    for point in sorted_points:
        while len(stack) >= 2:
            o = stack[-2]
            a = stack[-1]
            b = point
            cross = (a[0] - o[0])*(b[1] - o[1]) - (a[1] - o[1])*(b[0] - o[0])
            if cross > 0:
                break
            stack.pop()
        stack.append(point)

    return stack
hull = np.array(graham_scan(points))
print("凸包顶点:", hull)
plt.plot(points[:,0], points[:,1], 'o')
plt.plot(hull[:,0], hull[:,1], 's')
代码解释:
- 寻找起始点:使用
min函数找到 y 坐标最小的点。如果存在多个点 y 坐标相同,则选择 x 坐标最小的。 - 极角排序:根据每个点相对于起始点的极角进行排序。如果两个点的极角相同,则按照与起始点的距离从近到远排序。
- 构建凸包:使用栈来维护当前的凸包顶点。对于每个点,检查它与栈顶两个点的转向方向。如果不是左转(即凸包的定义),则弹出栈顶点,直到满足凸包的条件。
- 输出结果:最终栈中的点即为凸包的顶点。
输出结果:
凸包顶点: [[-1.51703261 -3.63377384] [ 4.51410791 -0.65295975] [ 4.10717132 1.7159215 ] [ 3.7692037 2.85400883] [ 0.08295138 3.84684229] [-1.25805766 3.39871686] [-2.56864639 1.63912747] [-4.09232528 -0.68889519] [-4.57389002 -1.96169353] [-3.7899005 -3.00607501]]
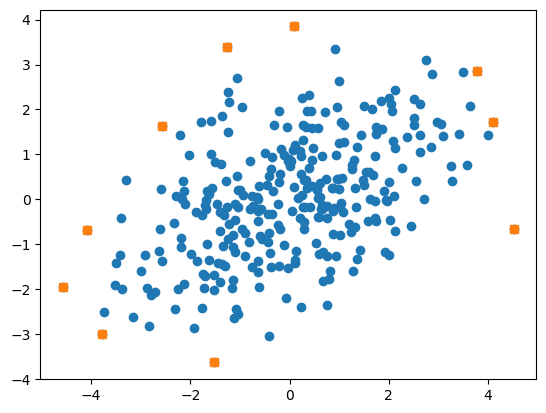
Andrew’s Monotone Chain 算法
Andrew’s Monotone Chain 算法是一种更高效的凸包算法,其时间复杂度为 O(n log n)。该算法首先将所有点按 x 坐标排序,然后分别构建下凸包和上凸包,最后合并两者。
def monotone_chain(points):
    # 确保输入是 NumPy 数组
    points = np.asarray(points)

    # 如果点集少于3个点,凸包即为所有点
    if len(points) <= 1:
        return points

    # 按 x 坐标排序,若 x 相同则按 y 坐标排序
    sorted_idx = np.lexsort((points[:,1], points[:,0]))
    sorted_points = points[sorted_idx]

    # 构建下凸包
    lower = []
    for p in sorted_points:
        while len(lower) >= 2:
            o, a = lower[-2], lower[-1]
            cross = (a[0] - o[0]) * (p[1] - o[1]) - (a[1] - o[1]) * (p[0] - o[0])
            if cross > 0:
                break
            lower.pop()
        lower.append(tuple(p))

    # 构建上凸包
    upper = []
    for p in reversed(sorted_points):
        while len(upper) >= 2:
            o, a = upper[-2], upper[-1]
            cross = (a[0] - o[0]) * (p[1] - o[1]) - (a[1] - o[1]) * (p[0] - o[0])
            if cross > 0:
                break
            upper.pop()
        upper.append(tuple(p))

    # 去除最后一个点(重复的起点)
    convex_hull = lower[:-1] + upper[:-1]

    # 转换为 NumPy 数组
    return np.array(convex_hull)


hull = monotone_chain(points)
print("凸包顶点:", hull)
plt.plot(points[:,0], points[:,1], 'o')
plt.plot(hull[:,0], hull[:,1], 's')
代码解释:
- 排序:首先将所有点按 x 坐标排序,若 x 坐标相同则按 y 坐标排序。
- 构建下凸包:
- 遍历排序后的点。
- 使用栈维护当前的下凸包顶点。
- 对于每个新点,检查是否保持左转,如果不是,则弹出栈顶点。
- 构建上凸包:
- 遍历排序后的点的逆序(从右到左)。
- 类似地,使用栈维护当前的上凸包顶点。
- 合并结果:将下凸包和上凸包合并,注意去除重复的起点和终点。
- 输出结果:最终的
convex_hull列表即为凸包的顶点。
输出结果
凸包顶点: [[-4.57389002 -1.96169353]
 [-3.7899005  -3.00607501]
 [-1.51703261 -3.63377384]
 [ 4.51410791 -0.65295975]
 [ 4.10717132  1.7159215 ]
 [ 3.7692037   2.85400883]
 [ 0.08295138  3.84684229]
 [-1.25805766  3.39871686]
 [-2.56864639  1.63912747]
 [-4.09232528 -0.68889519]]

Open3d实现代码
在三维点云处理中,我们在使用算法一般会利用别人高效实现的方式,这里使用open3d库实现凸包算法
import open3d as o3d
file_path = './data/5.txt'

point_cloud_data = np.loadtxt(file_path)

points = point_cloud_data[:, :3]
colors = point_cloud_data[:, 3:] / 255.0  # Open3D expects colors in [0, 1] range

pcd = o3d.geometry.PointCloud()
pcd.points = o3d.utility.Vector3dVector(points)
pcd.colors = o3d.utility.Vector3dVector(colors)

hull, _ = pcd.compute_convex_hull()
hull_ls = o3d.geometry.LineSet.create_from_triangle_mesh(hull)
hull_ls.paint_uniform_color([1, 0, 0])  # 红色
o3d.visualization.draw_geometries([pcd, hull_ls])
可视化结果:
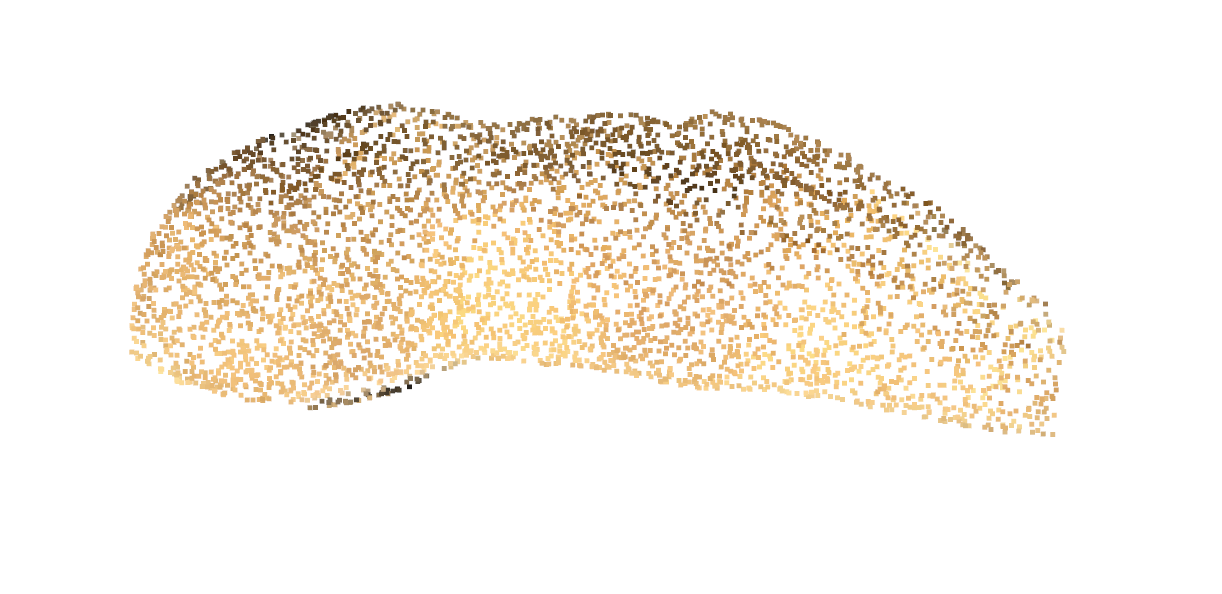
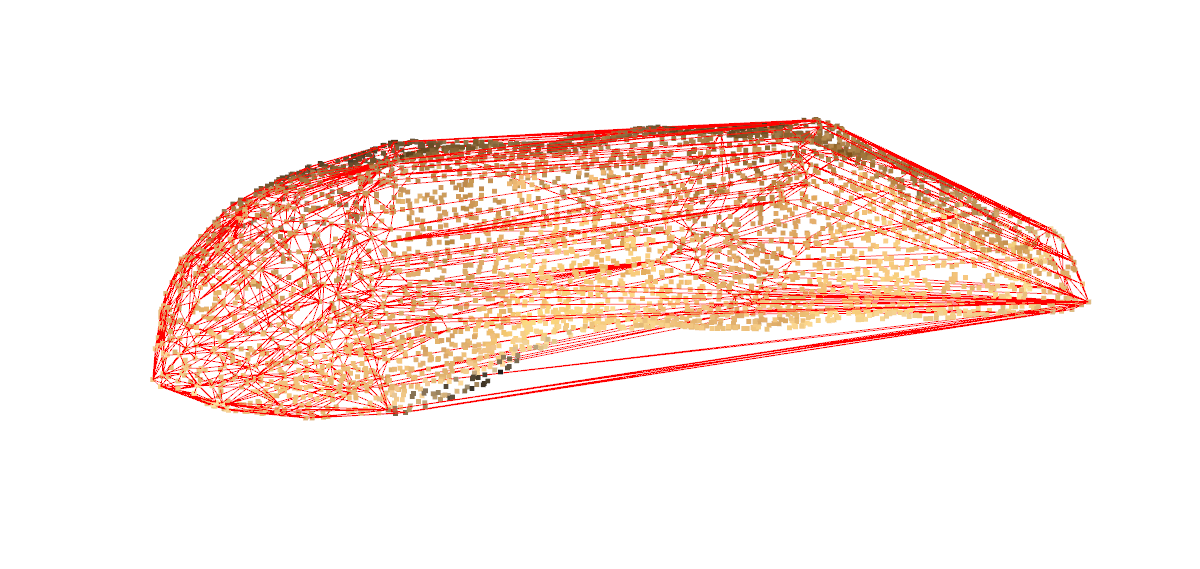



![[c++进阶(八)]STL容器适配器之queue](https://i-blog.csdnimg.cn/direct/b763d72ac06f416c81bc95a6c936a188.png)


![[PTA]7-3 乘法口诀数列](https://i-blog.csdnimg.cn/direct/7b0f6d6abc0b4fe28f17db15976a7adb.png)
