前言:
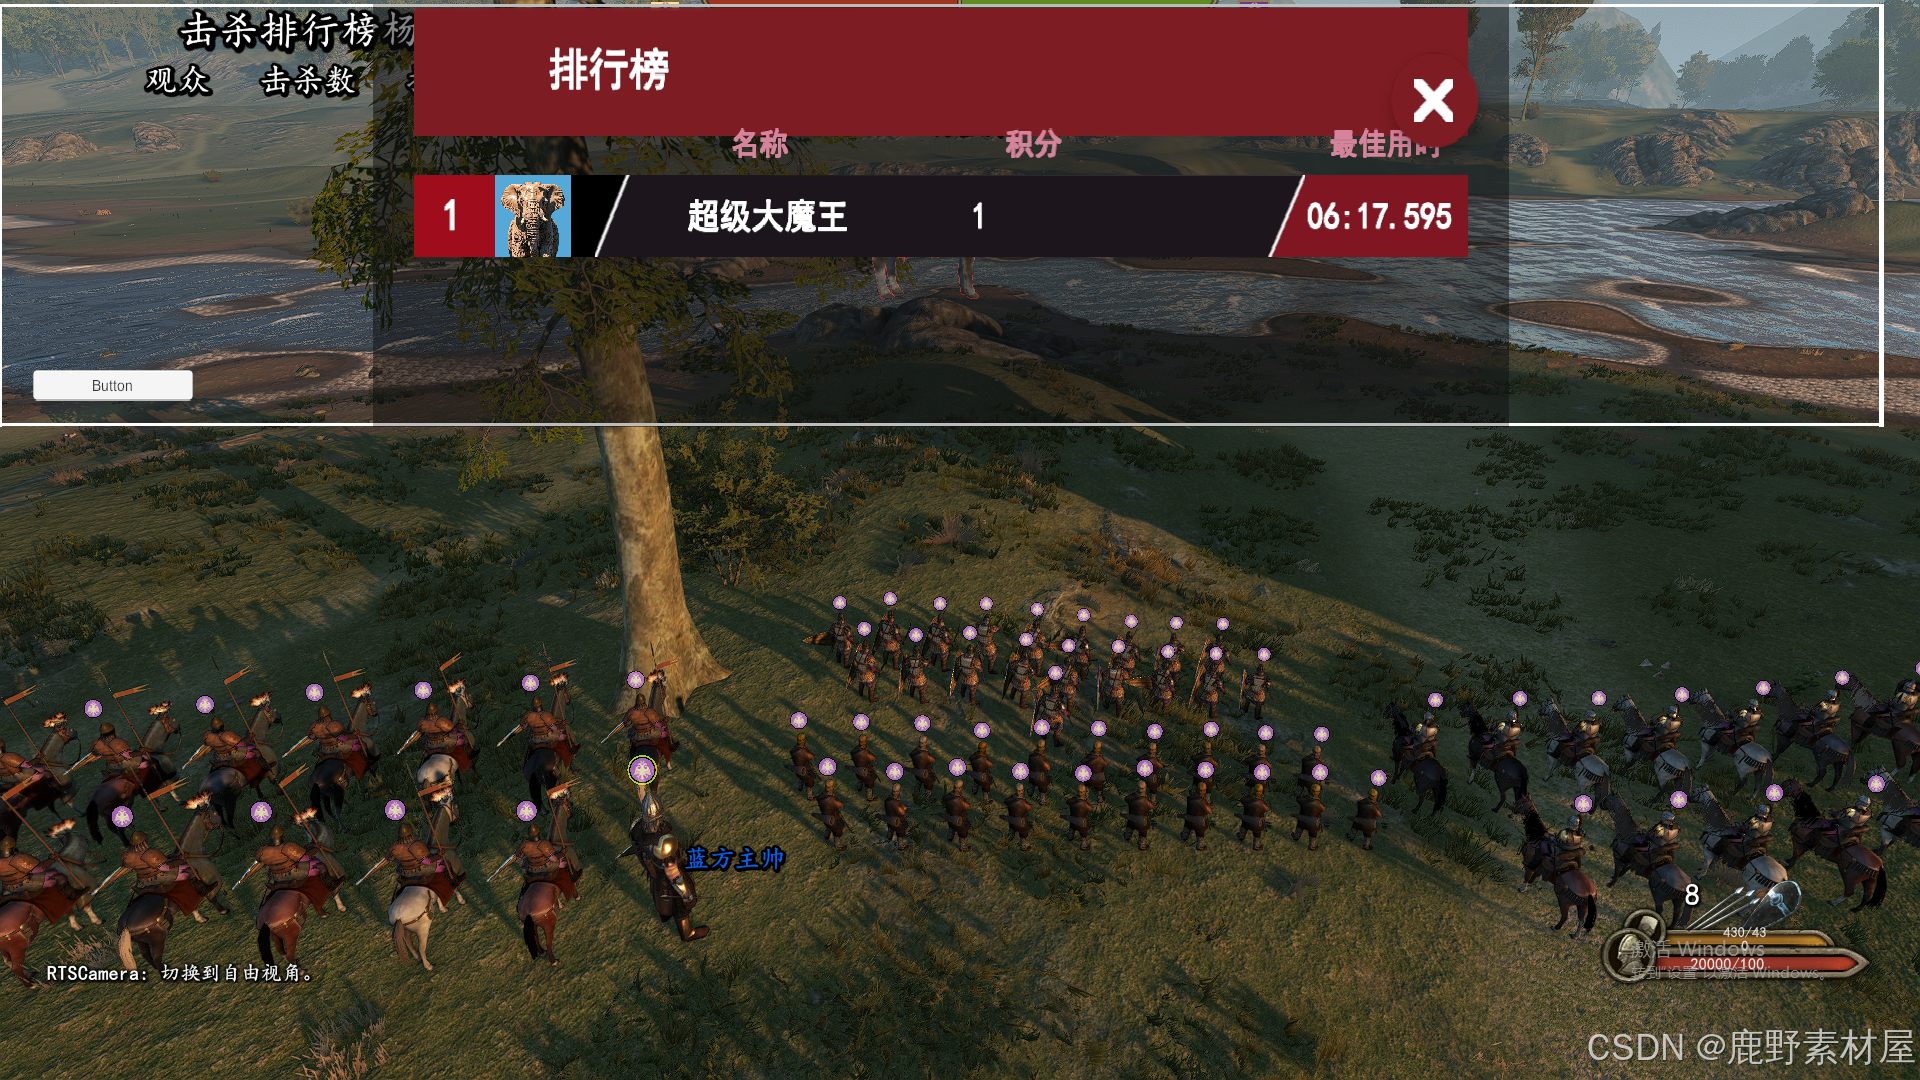
由于最近在做游戏魔改,很多功能在游戏里面没法实现(没错,说的就是排行榜),所以准备用Unity3D开发一个类似于桌面精灵的功能部件,实现效果如下:
PS:有需要定制的老板请私信联系
要实现这个效果,需要分两步:
1,背景透明
2,程序始终在前面
一,背景透明实现核心代码
using System;
using System.Runtime.InteropServices;
using UnityEngine;

public class TransparentWindow : MonoBehaviour
{
    [SerializeField]
    private Material m_Material;

    private struct MARGINS
    {
        public int cxLeftWidth;
        public int cxRightWidth;
        public int cyTopHeight;
        public int cyBottomHeight;
    }

    // Define function signatures to import from Windows APIs

    [DllImport("user32.dll")]
    private static extern IntPtr GetActiveWindow();

    [DllImport("user32.dll")]
    private static extern int SetWindowLong(IntPtr hWnd, int nIndex, uint dwNewLong);

    [DllImport("Dwmapi.dll")]
    private static extern uint DwmExtendFrameIntoClientArea(IntPtr hWnd, ref MARGINS margins);


    // Definitions of window styles
    const int GWL_STYLE = -16;
    const uint WS_POPUP = 0x80000000;
    const uint WS_VISIBLE = 0x10000000;

    void Start()
    {
        //return;
#if !UNITY_EDITOR
        var margins = new MARGINS() { cxLeftWidth = -1 };

        // Get a handle to the window
        var hwnd = GetActiveWindow();

        // Set properties of the window
        // See: https://msdn.microsoft.com/en-us/library/windows/desktop/ms633591%28v=vs.85%29.aspx
        SetWindowLong(hwnd, GWL_STYLE, WS_POPUP | WS_VISIBLE);

        // Extend the window into the client area
        //See: https://msdn.microsoft.com/en-us/library/windows/desktop/aa969512%28v=vs.85%29.aspx
        DwmExtendFrameIntoClientArea(hwnd, ref margins);
#endif

    }

    // Pass the output of the camera to the custom material
    // for chroma replacement
    void OnRenderImage(RenderTexture from, RenderTexture to)
    {
        Graphics.Blit(from, to, m_Material);
    }


}
shader代码如下:
Shader "Custom/ChromakeyTransparent" {
    Properties{
        _MainTex("Base (RGB)", 2D) = "white" {}
        _TransparentColourKey("Transparent Colour Key", Color) = (0,0,0,1)
        _TransparencyTolerance("Transparency Tolerance", Float) = 0.01
    }

    SubShader{
        Pass{
            Tags{ "RenderType" = "Opaque" }
            LOD 200

            CGPROGRAM

            #pragma vertex vert
            #pragma fragment frag
            #include "UnityCG.cginc"

            struct a2v
            {
                float4 pos : POSITION;
                float2 uv : TEXCOORD0;
            };

            struct v2f
            {
                float4 pos : SV_POSITION;
                float2 uv : TEXCOORD0;
            };

            v2f vert(a2v input)
            {
                v2f output;
                output.pos = UnityObjectToClipPos(input.pos);
                output.uv = input.uv;
                return output;
            }

            sampler2D _MainTex;
            float3 _TransparentColourKey;
            float _TransparencyTolerance;

            float4 frag(v2f input) : SV_Target
            {
                // What is the colour that *would* be rendered here?
                float4 colour = tex2D(_MainTex, input.uv);

                // Calculate the different in each component from the chosen transparency colour
                float deltaR = abs(colour.r - _TransparentColourKey.r);
                float deltaG = abs(colour.g - _TransparentColourKey.g);
                float deltaB = abs(colour.b - _TransparentColourKey.b);

                // If colour is within tolerance, write a transparent pixel
                if (deltaR < _TransparencyTolerance && deltaG < _TransparencyTolerance && deltaB < _TransparencyTolerance)
                {
                    return float4(0.0f, 0.0f, 0.0f, 0.0f);
                }

                // Otherwise, return the regular colour
                return colour;
            }
            ENDCG
        }
    }
}
将脚本绑定在摄像机上,并用该shader创建材质A,放到脚本下。
摄像机渲染模式改为只渲染颜色,颜色和材质A一样。
二,程序始终在前面核心代码
using System;
using System.Diagnostics;
using System.Runtime.InteropServices;

public class C
{
    public delegate bool WNDENUMPROC(IntPtr hwnd, uint lParam);
    [DllImport("user32.dll", SetLastError = true)]
    public static extern bool EnumWindows(WNDENUMPROC lpEnumFunc, uint lParam);

    [DllImport("user32.dll", SetLastError = true)]
    public static extern IntPtr GetParent(IntPtr hWnd);
    [DllImport("user32.dll")]
    public static extern uint GetWindowThreadProcessId(IntPtr hWnd, ref uint lpdwProcessId);

    [DllImport("kernel32.dll")]
    public static extern void SetLastError(uint dwErrCode);

    public static IntPtr GetProcessWnd()
    {
        IntPtr ptrWnd = IntPtr.Zero;
        uint pid = (uint)Process.GetCurrentProcess().Id;  // 当前进程 ID

        bool bResult = EnumWindows(new WNDENUMPROC(delegate (IntPtr hwnd, uint lParam)
        {
            uint id = 0;
            if (GetParent(hwnd) == IntPtr.Zero)
            {
                GetWindowThreadProcessId(hwnd, ref id);
                if (id == lParam)    // 找到进程对应的主窗口句柄
                {
                    ptrWnd = hwnd;   // 把句柄缓存起来
                    SetLastError(0);    // 设置无错误
                    return false;   // 返回 false 以终止枚举窗口
                }
            }

            return true;

        }), pid);

        return (!bResult && Marshal.GetLastWin32Error() == 0) ? ptrWnd : IntPtr.Zero;
    }
}
[DllImport("User32.dll")]
extern static bool SetForegroundWindow(IntPtr hWnd);
[DllImport("User32.dll")]
extern static bool ShowWindow(IntPtr hWnd, short State);
[DllImport("user32.dll ")]
public static extern bool SetWindowPos(IntPtr hWnd, IntPtr hWndInsertAfter, int X, int Y, int cx, int cy, uint uFlags);
static readonly IntPtr HWND_TOPMOST = new IntPtr(-1);
const UInt32 SWP_NOSIZE = 0x0001;
const UInt32 SWP_NOMOVE = 0x0002;
IntPtr hWnd;
//public float Wait = 0;//延迟执行
//public float Rate = 1;//更新频率
public bool KeepForeground = true;//保持最前
/// <summary>
/// 激活窗口
/// </summary>
void Active()
{
if (KeepForeground)
{
ShowWindow(hWnd, 1);
SetForegroundWindow(hWnd);
SetWindowPos(hWnd, HWND_TOPMOST, 0, 0, 0, 0, SWP_NOSIZE | SWP_NOMOVE);
}
} hWnd = C.GetProcessWnd();
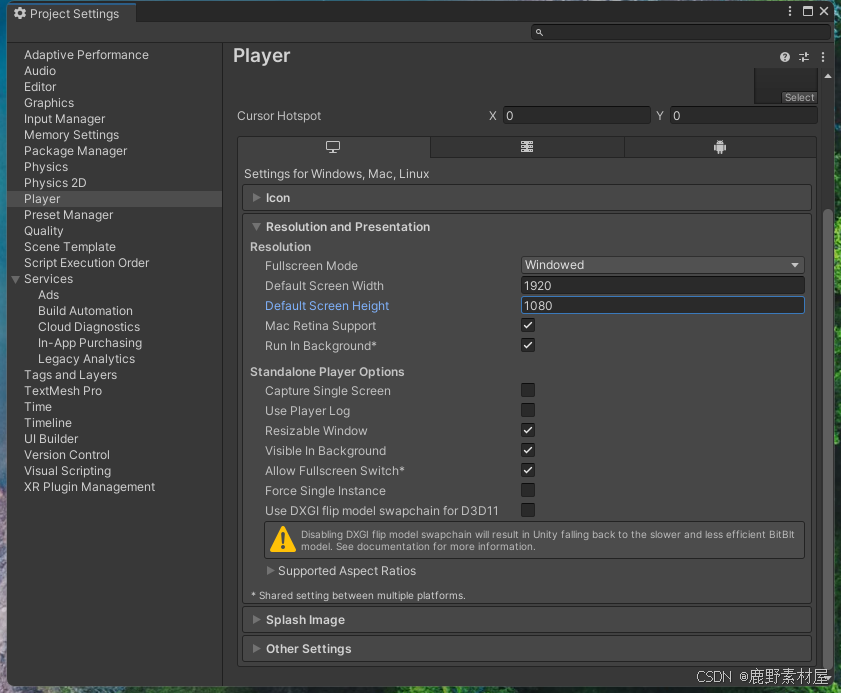
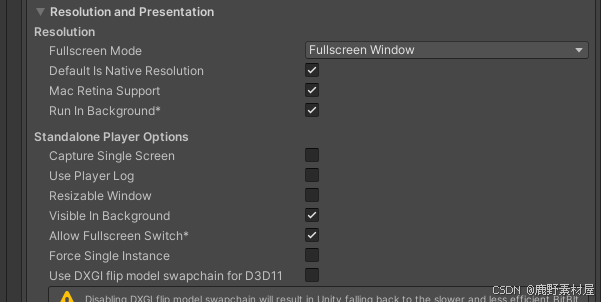
Active();三,打包设置如下
四,优化扩展
步骤和道理同上
using System;
using System.Runtime.InteropServices;
using UnityEngine;

public class TransparentWindow : MonoBehaviour
{
    [SerializeField] private Material m_Material;

    private struct MARGINS
    {
        public int cxLeftWidth;
        public int cxRightWidth;
        public int cyTopHeight;
        public int cyBottomHeight;
    }

    [DllImport("user32.dll")]
    private static extern IntPtr GetActiveWindow();

    [DllImport("user32.dll")]
    private static extern int SetWindowLong(IntPtr hWnd, int nIndex, uint dwNewLong);

    [DllImport("Dwmapi.dll")]
    private static extern uint DwmExtendFrameIntoClientArea(IntPtr hWnd, ref MARGINS margins);

    [DllImport("user32.dll", EntryPoint = "SetWindowPos")]
    private static extern int SetWindowPos(IntPtr hwnd, IntPtr hwndInsertAfter, int x, int y, int cx, int cy,
        int uFlags);

    [DllImport("user32.dll")]
    static extern bool ShowWindowAsync(IntPtr hWnd, int nCmdShow);

    [DllImport("user32.dll", EntryPoint = "SetLayeredWindowAttributes")]
    static extern int SetLayeredWindowAttributes(IntPtr hwnd, int crKey, byte bAlpha, int dwFlags);

    [DllImport("User32.dll")]
    private static extern bool SetForegroundWindow(IntPtr hWnd);

    const int GWL_STYLE = -16;
    const int GWL_EXSTYLE = -20;
    const uint WS_POPUP = 0x80000000;
    const uint WS_VISIBLE = 0x10000000;

    const uint WS_EX_TOPMOST = 0x00000008;
    const uint WS_EX_LAYERED = 0x00080000;
    const uint WS_EX_TRANSPARENT = 0x00000020;

    const int SWP_FRAMECHANGED = 0x0020;
    const int SWP_SHOWWINDOW = 0x0040;
    const int LWA_ALPHA = 2;

    private IntPtr HWND_TOPMOST = new IntPtr(-1);

    private IntPtr _hwnd;

    void Start()
    {
//#if !UNITY_EDITOR
    MARGINS margins = new MARGINS() { cxLeftWidth = -1 };
    _hwnd = GetActiveWindow();
    int fWidth = Screen.width;
    int fHeight = Screen.height;
        SetWindowLong(_hwnd, GWL_STYLE, WS_POPUP | WS_VISIBLE);
        SetWindowLong(_hwnd, GWL_EXSTYLE, WS_EX_TOPMOST | WS_EX_LAYERED | WS_EX_TRANSPARENT);//若想鼠标穿透,则将这个注释恢复即可
        DwmExtendFrameIntoClientArea(_hwnd, ref margins);
        SetWindowPos(_hwnd, HWND_TOPMOST, 0, 0, fWidth, fHeight, SWP_FRAMECHANGED | SWP_SHOWWINDOW);
        ShowWindowAsync(_hwnd, 3); //Forces window to show in case of unresponsive app    // SW_SHOWMAXIMIZED(3)
//#endif
    }

    void OnRenderImage(RenderTexture from, RenderTexture to)
    {
        Graphics.Blit(from, to, m_Material);
    }
}
Shader "Custom/MakeTransparent" {
  Properties {
    _MainTex ("Base (RGB)", 2D) = "white" {}
    _TransparentColorKey ("Transparent Color Key", Color) = (0,1,0,1)
    _TransparencyMargin ("Transparency Margin", Float) = 0.01
  }
  SubShader {
    Pass {
      Tags { "RenderType"="Opaque" }
      LOD 200

      CGPROGRAM

      #pragma vertex VertexShaderFunction
      #pragma fragment PixelShaderFunction

      #include "UnityCG.cginc"

      struct VertexData
      {
        float4 position : POSITION;
        float2 uv : TEXCOORD0;
      };

      struct VertexToPixelData
      {
        float4 position : SV_POSITION;
        float2 uv : TEXCOORD0;
      };

      VertexToPixelData VertexShaderFunction(VertexData input)
      {
        VertexToPixelData output;
        output.position = UnityObjectToClipPos (input.position);
        output.uv = input.uv;
        return output;
      }

      sampler2D _MainTex;
      float3 _TransparentColorKey;
      float _TransparencyMargin;

      float4 PixelShaderFunction(VertexToPixelData input) : SV_Target
      {
        float4 color = tex2D(_MainTex, input.uv);

        float deltaR = abs(color.r - _TransparentColorKey.r);
        float deltaG = abs(color.g - _TransparentColorKey.g);
        float deltaB = abs(color.b - _TransparentColorKey.b);

        if (deltaR < _TransparencyMargin && deltaG < _TransparencyMargin && deltaB < _TransparencyMargin)
        {
          return float4(0.0f, 0.0f, 0.0f, 0.0f);
        }

        return color;
      }
      ENDCG
    }
  }
}


![【树形dp】P2014 [CTSC1997] 选课 题解](https://i-blog.csdnimg.cn/direct/16655590b3d24cf3900d1d0c24ff97b2.png#pic_center)