1/ 排雷避坑
🥝 中文乱码问题
print(requests.get(url=url,headers=headers).text)

出现中文乱码
原因分析:
<meta charset="gbk" />
解决方法:
法一:
response = requests.get(url=url,headers=headers)
response.encoding = response.apparent_encoding # 自动转码, 防止中文乱码
print(response.text)
法二:
print(requests.get(url=url,headers=headers).content.decode('gbk'))
2/ 数据来源
css解析

for li in lis:
    href = li.css('a::attr(href)').get()
    title = li.css('b::text').get()

    print(href, title)


删掉标题为空的那一张图

获取图片url
有的网站,保存的数据是裂开的图片,可能是因为这个参数:

3/ 正则处理
处理图片url和标题的时候用了re模块
电脑壁纸
通过匹配非数字字符并在遇到数字时截断字符串
title1 = selector1.css('.photo .photo-pic img::attr(title)').get()
modified_title = re.split(r'\d', title1, 1)[0].strip()
re.split(r'\d', title, 1)将 title 字符串按第一个数字进行分割。返回的列表的第一个元素就是数字前面的部分。strip() 去掉字符串首尾的空白字符。
url图片路径替换,因为从点开图片到达的那个页面无法得到的图片路径还是html页面,不是https://····.jpg,所以替换成另一个可以获取到的页面。
https://sj.zol.com.cn/bizhi/detail_{num1}_{num2}.html
正则替换修改为
https://app.zol.com.cn/bizhi/detail_{num1}.html
例如 https://sj.zol.com.cn/bizhi/detail_12901_139948.html 转换为 https://app.zol.com.cn/bizhi/detail_12901.html .
# https://sj.zol.com.cn/bizhi/detail_12901_139948.html
url = "https://sj.zol.com.cn/bizhi/detail_12901_139948.html"
pattern = r'https://sj\.zol\.com\.cn/bizhi/detail_(\d+)_\d+\.html'
replacement = r'https://app.zol.com.cn/bizhi/detail_\1.html'
new_url = re.sub(pattern, replacement, url)
print(url,new_url)
4/ 电脑壁纸
🥝 单线程单页
适用于当页面和第一页
# python单线程爬取高清4k壁纸图片
import os
import re
import requests
import parsel
url = 'https://pic.netbian.com/4kmeinv/' # 请求地址
# 模拟伪装
headers = {'user-agent': 'Mozilla/5.0 (Windows NT 10.0; Win64; x64) AppleWebKit/537.36 (KHTML, like Gecko) Chrome/98.0.4758.139 Safari/537.36'}
# response = requests.get(url=url,headers=headers)
# response.encoding = response.apparent_encoding # 自动转码, 防止中文乱码
# print(response.text)
html_data = requests.get(url=url,headers=headers).content.decode('gbk')
# print(html_data)
selector = parsel.Selector(html_data)
lis = selector.css('.slist li')
for li in lis:
    #href = li.css('a::attr(href)').get()
    title = li.css('b::text').get()
    if title:
        href = 'https://pic.netbian.com' + li.css('a::attr(href)').get()
        response = requests.get(url=href, headers=headers)
        #print(href, title)
        # 这里只是获取页面
        # img_content = requests.get(url=href, headers=headers).content
        # 不可行, 都是同一张图 https://pic.netbian.com/uploads/allimg/230813/221347-16919360273e05.jpg
        href = 'https://pic.netbian.com' + li.css('a::attr(href)').get()
        response1 = requests.get(url=href, headers=headers).content.decode('gbk')
        selector1 = parsel.Selector(response1)
        # 若要标题乱码,此处可不解码
        # response1 = requests.get(url=href, headers=headers)
        # selector1 = parsel.Selector(response1.text)

        # img_url = selector1.css('.slist li img::attr(src)').get()
        # 这一步错了, 要去href页面找img_url, 这是在原来的url页面找了
        img_url = 'https://pic.netbian.com' + selector1.css('.photo .photo-pic img::attr(src)').get()
        img_content = requests.get(url=img_url,headers=headers).content
        # 顺便更新一下title, 因为原来的是半截的, 不全
        title1 = selector1.css('.photo .photo-pic img::attr(title)').get()
        modified_title = re.split(r'\d', title1, 1)[0].strip()
        with open('img\\'+modified_title+'.jpg',mode='wb') as f:
            f.write(img_content)
            #print(href, title)
            print('正在保存:', modified_title, img_url)
🥝 单线程多page
适用于从第二页开始的多页
# python单线程爬取高清4k壁纸图片
import os
import re
import time
import requests
import parsel
# url的规律
# https://pic.netbian.com/new/index.html
# https://pic.netbian.com/new/index_1.html
# https://pic.netbian.com/new/index_2.html
# ...
start_time = time.time()
for page in range(2,10):
    print(f'--------- 正在爬取第{page}的内容 ----------')
    url = f'https://pic.netbian.com/4kmeinv/index_{page}.html'  # 请求地址
    # 模拟伪装
    headers = {
        'user-agent': 'Mozilla/5.0 (Windows NT 10.0; Win64; x64) AppleWebKit/537.36 (KHTML, like Gecko) Chrome/98.0.4758.139 Safari/537.36'}
    # response = requests.get(url=url,headers=headers)
    # response.encoding = response.apparent_encoding # 自动转码, 防止中文乱码
    # print(response.text)
    html_data = requests.get(url=url, headers=headers).content.decode('gbk')
    # print(html_data)
    selector = parsel.Selector(html_data)
    lis = selector.css('.slist li')
    for li in lis:
        # href = li.css('a::attr(href)').get()
        title = li.css('b::text').get()
        if title:
            href = 'https://pic.netbian.com' + li.css('a::attr(href)').get()
            response = requests.get(url=href, headers=headers)
            # print(href, title)
            # 这里只是获取页面
            # img_content = requests.get(url=href, headers=headers).content
            # 不可行, 都是同一张图 https://pic.netbian.com/uploads/allimg/230813/221347-16919360273e05.jpg
            href = 'https://pic.netbian.com' + li.css('a::attr(href)').get()
            response1 = requests.get(url=href, headers=headers).content.decode('gbk')
            selector1 = parsel.Selector(response1)
            # 若要标题乱码,此处可不解码
            # response1 = requests.get(url=href, headers=headers)
            # selector1 = parsel.Selector(response1.text)

            # img_url = selector1.css('.slist li img::attr(src)').get()
            # 这一步错了, 要去href页面找img_url, 这是在原来的url页面找了
            img_url = 'https://pic.netbian.com' + selector1.css('.photo .photo-pic img::attr(src)').get()
            img_content = requests.get(url=img_url, headers=headers).content
            # 顺便更新一下title, 因为原来的是半截的, 不全
            title1 = selector1.css('.photo .photo-pic img::attr(title)').get()
            modified_title = re.split(r'\d', title1, 1)[0].strip()
            with open('img\\' + modified_title + '.jpg', mode='wb') as f:
                f.write(img_content)
                # print(href, title)
                print('正在保存:', modified_title, img_url)

stop_time = time.time()
print(f'耗时:{int(stop_time)-int(start_time)}秒')
运行效果:


🥝 多线程多页
# python多线程爬取高清4k壁纸图片
import os
import re
import time
import requests
import parsel
import concurrent.futures

def get_img(url):
    # 模拟伪装
    headers = {
        'user-agent': 'Mozilla/5.0 (Windows NT 10.0; Win64; x64) AppleWebKit/537.36 (KHTML, like Gecko) Chrome/98.0.4758.139 Safari/537.36'}
    # response = requests.get(url=url,headers=headers)
    # response.encoding = response.apparent_encoding # 自动转码, 防止中文乱码
    # print(response.text)
    html_data = requests.get(url=url, headers=headers).content.decode('gbk')
    # print(html_data)
    selector = parsel.Selector(html_data)
    lis = selector.css('.slist li')
    for li in lis:
        # href = li.css('a::attr(href)').get()
        title = li.css('b::text').get()
        if title:
            href = 'https://pic.netbian.com' + li.css('a::attr(href)').get()
            response = requests.get(url=href, headers=headers)
            # print(href, title)
            # 这里只是获取页面
            # img_content = requests.get(url=href, headers=headers).content
            # 不可行, 都是同一张图 https://pic.netbian.com/uploads/allimg/230813/221347-16919360273e05.jpg
            href = 'https://pic.netbian.com' + li.css('a::attr(href)').get()
            response1 = requests.get(url=href, headers=headers).content.decode('gbk')
            selector1 = parsel.Selector(response1)
            # 若要标题乱码,此处可不解码
            # response1 = requests.get(url=href, headers=headers)
            # selector1 = parsel.Selector(response1.text)

            # img_url = selector1.css('.slist li img::attr(src)').get()
            # 这一步错了, 要去href页面找img_url, 这是在原来的url页面找了
            img_url = 'https://pic.netbian.com' + selector1.css('.photo .photo-pic img::attr(src)').get()
            img_content = requests.get(url=img_url, headers=headers).content
            # 顺便更新一下title, 因为原来的是半截的, 不全
            title1 = selector1.css('.photo .photo-pic img::attr(title)').get()
            modified_title = re.split(r'\d', title1, 1)[0].strip()
            img_folder = 'img1\\'
            if not os.path.exists(img_folder):
                os.makedirs(img_folder)
            with open(img_folder + modified_title + '.jpg', mode='wb') as f:
                f.write(img_content)
                # print(href, title)
                print('正在保存:', modified_title, img_url)
def main(url):
    get_img(url)

start_time = time.time()
executor = concurrent.futures.ThreadPoolExecutor(max_workers=5)
for page in range(2, 12):
    print(f'--------- 正在爬取第{page}的内容 ----------')
    url = f'https://pic.netbian.com/4kmeinv/index_{page}.html'  # 请求地址
    executor.submit(main, url)
executor.shutdown()
stop_time = time.time()
print(f'耗时:{int(stop_time) - int(start_time)}秒')
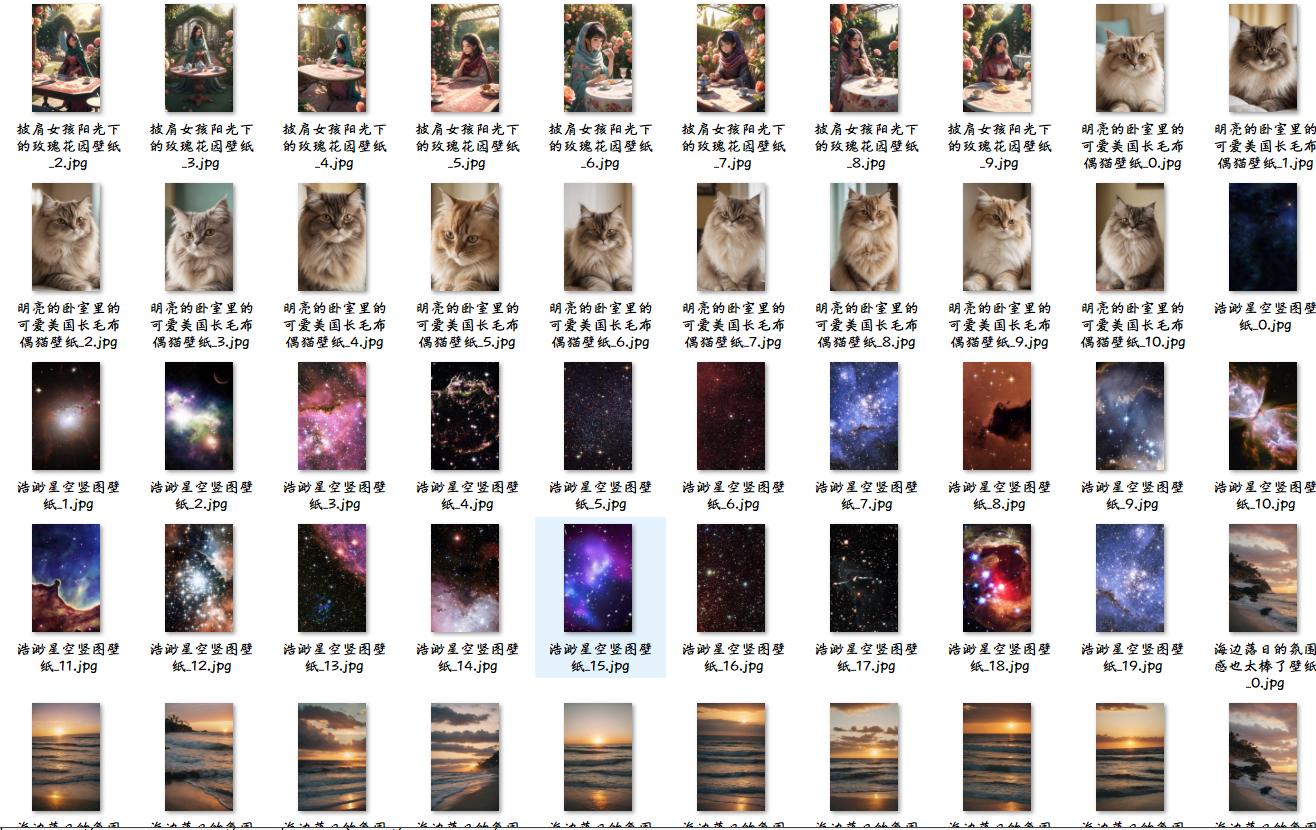
5/ 手机壁纸
类似地,另一个网站,图片集合多页,点开之后里面有多张图片
先试图获取外部的,再获取里面的,然后2个一起
🥝 单线程单页0
import os
import re
import requests
import parsel
url = 'https://sj.zol.com.cn/bizhi/5/' # 请求地址
# 模拟伪装
headers = {'user-agent': 'Mozilla/5.0 (Windows NT 10.0; Win64; x64) AppleWebKit/537.36 (KHTML, like Gecko) Chrome/98.0.4758.139 Safari/537.36'}
# response = requests.get(url=url,headers=headers)
# response.encoding = response.apparent_encoding # 自动转码, 防止中文乱码
# print(response.text)
response = requests.get(url=url,headers=headers)
#print(response.text)
selector = parsel.Selector(response.text)
lis = selector.css('.pic-list2 li')
#img_name=1
for li in lis:
    #href = li.css('a::attr(href)').get()
    title = li.css('.pic img::attr(title)').get()
    #href = li.css('.pic img::attr(src)').get()
    #print(title, href)
    if title:
        #href = 'https://sj.zol.com.cn' +li.css('a::attr(href)').get()
        # https://sj.zol.com.cn/bizhi/detail_12901_139948.html
        # https://app.zol.com.cn/bizhi/detail_12901_139948.html#p1
        #href = 'https://app.zol.com.cn' + li.css('a::attr(href)').get() + '#p1'
        href=li.css('img::attr(src)').get()
        #print(href, title)
        #href = 'https://app.zol.com.cn' + li.css('a::attr(href)').get() + '#p1'
        #response1 = requests.get(url=href, headers=headers).content.decode('utf-8')
        #selector1 = parsel.Selector(response1)
        #img_url=selector1.css('.gallery li img::attr(src)').get()
        #print(img_url)
        # 这里只是获取页面
        img_content = requests.get(url=href, headers=headers).content
        # 不可行, 都是同一张图 https://pic.netbian.com/uploads/allimg/230813/221347-16919360273e05.jpg
        # https://sj.zol.com.cn/bizhi/detail_12901_139948.html
        # https://app.zol.com.cn/bizhi/detail_12901_139948.html#p1
        #href= selector1.css('.photo-list-box li::attr(href)').get()
        #href = 'https://app.zol.com.cn' +  + '#p1'
        #response2 = requests.get(url=href, headers=headers)
        #selector2 = parsel.Selector(response2.text)
        #print(href)
        # 若要标题乱码,此处可不解码
        # response1 = requests.get(url=href, headers=headers)
        # selector1 = parsel.Selector(response1.text)

        # img_url = selector1.css('.slist li img::attr(src)').get()
        # 这一步错了, 要去href页面找img_url, 这是在原来的url页面找了
        #img_url = selector1.css('.gallery img::attr(src)').get()
        #img_content = requests.get(url=img_url, headers=headers).content
        #print(img_url)
        # 顺便更新一下title, 因为原来的是半截的, 不全
        # title1 = selector1.css('.photo .photo-pic img::attr(title)').get()
        img_folder = 'img3\\'
        if not os.path.exists(img_folder):
            os.makedirs(img_folder)
        with open(img_folder + title + '.jpg', mode='wb') as f:
            f.write(img_content)
            # print(href, title)
            print('正在保存:', title, href)
        #img_name += 1
🥝 单线程单页1
# 下载子页面全部
import os
import requests
import parsel

url = 'https://app.zol.com.cn/bizhi/detail_12901.html' # 请求地址
# 模拟伪装
headers = {'user-agent': 'Mozilla/5.0 (Windows NT 10.0; Win64; x64) AppleWebKit/537.36 (KHTML, like Gecko) Chrome/98.0.4758.139 Safari/537.36'}
response = requests.get(url=url,headers=headers)
selector = parsel.Selector(response.text)
lis = selector.css('.album-list li')
i = 0
for li in lis:
    # Get all img elements within the current li
    img_tags = li.css('img::attr(src)').getall()  # This gets all the img src attributes

    for href in img_tags:  # Iterate over all img src attributes
        img_content = requests.get(url=href, headers=headers).content
        img_folder = 'img4\\'
        if not os.path.exists(img_folder):
            os.makedirs(img_folder)

        with open(img_folder + str(i) + '.jpg', mode='wb') as f:
            f.write(img_content)
            # print(href, i)
            print('正在保存:', i, href)

        i += 1  # Increment i for each image saved
🥝 单线程单页
import os
import re
import requests
import parsel

url = 'https://sj.zol.com.cn/bizhi/5/' # 请求地址
# 模拟伪装
headers = {'user-agent': 'Mozilla/5.0 (Windows NT 10.0; Win64; x64) AppleWebKit/537.36 (KHTML, like Gecko) Chrome/98.0.4758.139 Safari/537.36'}
response = requests.get(url=url,headers=headers)
#print(response.text)
selector = parsel.Selector(response.text)
#lis = selector.css('.pic-list2 li')
# 筛除包含的底部 3个 猜你喜欢
lis=selector.css('.pic-list2 .photo-list-padding')
for li in lis:
    #href = li.css('a::attr(href)').get()
    title = li.css('.pic img::attr(title)').get()
    href = li.css('a::attr(href)').get()
    #print(title, href)
    # https://sj.zol.com.cn/bizhi/detail_12901_139948.html
    #url = "https://sj.zol.com.cn/bizhi/detail_12901_139948.html"
    pattern = r'/bizhi/detail_(\d+)_\d+\.html'
    replacement = r'https://app.zol.com.cn/bizhi/detail_\1.html'
    new_url = re.sub(pattern, replacement, href)
    #print(href, new_url)
    #url = 'https://app.zol.com.cn/bizhi/detail_12901.html'  # 请求地址
    # 模拟伪装
    headers = {
        'user-agent': 'Mozilla/5.0 (Windows NT 10.0; Win64; x64) AppleWebKit/537.36 (KHTML, like Gecko) Chrome/98.0.4758.139 Safari/537.36'}
    response = requests.get(url=new_url, headers=headers)
    selector = parsel.Selector(response.text)
    lis1 = selector.css('.album-list li')
    i = 0
    for li1 in lis1:
        # Get all img elements within the current li
        img_tags = li1.css('img::attr(src)').getall()  # This gets all the img src attributes

        for href in img_tags:  # Iterate over all img src attributes
            img_content = requests.get(url=href, headers=headers).content
            img_folder = 'img5\\'
            if not os.path.exists(img_folder):
                os.makedirs(img_folder)

            with open(img_folder + title+'_'+str(i) + '.jpg', mode='wb') as f:
                f.write(img_content)
                # print(href, i)
                print('正在保存:',title+'_'+str(i), href)

            i += 1  # Increment i for each image saved
🥝 单线程多页
import os
import re
import requests
import parsel

for page in range(1,3):
    print(f'--------- 正在爬取第{page}的内容 ----------')
    if page==1:
        url = 'https://sj.zol.com.cn/bizhi/5/'  # 请求地址
    else:
        url = f'https://sj.zol.com.cn/bizhi/5/{page}.html'  # 请求地址
    # 模拟伪装
    headers = {
        'user-agent': 'Mozilla/5.0 (Windows NT 10.0; Win64; x64) AppleWebKit/537.36 (KHTML, like Gecko) Chrome/98.0.4758.139 Safari/537.36'}
    response = requests.get(url=url, headers=headers)
    # print(response.text)
    selector = parsel.Selector(response.text)
    # lis = selector.css('.pic-list2 li')
    # 筛除包含的底部 3个 猜你喜欢
    lis = selector.css('.pic-list2 .photo-list-padding')
    for li in lis:
        # href = li.css('a::attr(href)').get()
        title = li.css('.pic img::attr(title)').get()
        href = li.css('a::attr(href)').get()
        # print(title, href)
        # https://sj.zol.com.cn/bizhi/detail_12901_139948.html
        # url = "https://sj.zol.com.cn/bizhi/detail_12901_139948.html"
        pattern = r'/bizhi/detail_(\d+)_\d+\.html'
        replacement = r'https://app.zol.com.cn/bizhi/detail_\1.html'
        new_url = re.sub(pattern, replacement, href)
        # print(href, new_url)
        # url = 'https://app.zol.com.cn/bizhi/detail_12901.html'  # 请求地址
        # 模拟伪装
        headers = {
            'user-agent': 'Mozilla/5.0 (Windows NT 10.0; Win64; x64) AppleWebKit/537.36 (KHTML, like Gecko) Chrome/98.0.4758.139 Safari/537.36'}
        response = requests.get(url=new_url, headers=headers)
        selector = parsel.Selector(response.text)
        lis1 = selector.css('.album-list li')
        i = 0
        for li1 in lis1:
            # Get all img elements within the current li
            img_tags = li1.css('img::attr(src)').getall()  # This gets all the img src attributes

            for href in img_tags:  # Iterate over all img src attributes
                img_content = requests.get(url=href, headers=headers).content
                img_folder = 'img6\\'
                if not os.path.exists(img_folder):
                    os.makedirs(img_folder)

                with open(img_folder + title + '_' + str(i) + '.jpg', mode='wb') as f:
                    f.write(img_content)
                    # print(href, i)
                    print('正在保存:', title + '_' + str(i), href)

                i += 1  # Increment i for each image saved
🥝 多线程多页
import os
import re
import time
import requests
import parsel
import concurrent.futures

def get_imgs(url):
    # 模拟伪装
    headers = {
        'user-agent': 'Mozilla/5.0 (Windows NT 10.0; Win64; x64) AppleWebKit/537.36 (KHTML, like Gecko) Chrome/98.0.4758.139 Safari/537.36'}
    response = requests.get(url=url, headers=headers)
    # print(response.text)
    selector = parsel.Selector(response.text)
    # lis = selector.css('.pic-list2 li')
    # 筛除包含的底部 3个 猜你喜欢
    lis = selector.css('.pic-list2 .photo-list-padding')
    for li in lis:
        # href = li.css('a::attr(href)').get()
        title = li.css('.pic img::attr(title)').get()
        href = li.css('a::attr(href)').get()
        # print(title, href)
        # https://sj.zol.com.cn/bizhi/detail_12901_139948.html
        # url = "https://sj.zol.com.cn/bizhi/detail_12901_139948.html"
        pattern = r'/bizhi/detail_(\d+)_\d+\.html'
        replacement = r'https://app.zol.com.cn/bizhi/detail_\1.html'
        new_url = re.sub(pattern, replacement, href)
        # print(href, new_url)
        # url = 'https://app.zol.com.cn/bizhi/detail_12901.html'  # 请求地址
        # 模拟伪装
        headers = {
            'user-agent': 'Mozilla/5.0 (Windows NT 10.0; Win64; x64) AppleWebKit/537.36 (KHTML, like Gecko) Chrome/98.0.4758.139 Safari/537.36'}
        response = requests.get(url=new_url, headers=headers)
        selector = parsel.Selector(response.text)
        lis1 = selector.css('.album-list li')
        i = 0
        for li1 in lis1:
            # Get all img elements within the current li
            img_tags = li1.css('img::attr(src)').getall()  # This gets all the img src attributes

            for href in img_tags:  # Iterate over all img src attributes
                img_content = requests.get(url=href, headers=headers).content
                img_folder = 'img7\\'
                if not os.path.exists(img_folder):
                    os.makedirs(img_folder)

                with open(img_folder + title + '_' + str(i) + '.jpg', mode='wb') as f:
                    f.write(img_content)
                    # print(href, i)
                    print('正在保存:', title + '_' + str(i), href)

                i += 1  # Increment i for each image saved

def main(url):
    get_imgs(url)

start_time = time.time()
executor = concurrent.futures.ThreadPoolExecutor(max_workers=4)
for page in range(1, 9):
    #print(f'--------- 正在爬取第{page}的内容 ----------')
    if page == 1:
        url = 'https://sj.zol.com.cn/bizhi/5/'  # 请求地址
    else:
        url = f'https://sj.zol.com.cn/bizhi/5/{page}.html'  # 请求地址
    executor.submit(main, url)
executor.shutdown()
stop_time = time.time()
print(f'耗时:{int(stop_time) - int(start_time)}秒')