linux搭建深度学习平台(Ubuntu)
/home/guangyao/anaconda3 我服务器的anaconda地址
~/anaconda3
1 首先就是打开浏览器,我实验室的是火狐,搜索anaconda下载,找到下载目录,cd进去,
2安装 bash xxxxx.sh
安装的时候有一个You can undo this by running conda init --reverse SHELL 输入 yes
3 更新环境变量
source ~/.bashrc
4 创建虚拟环境
conda create -n python39 python=3.9
可以查看有哪些虚拟环境
conda info --envs
5 激活虚拟环境
conda activate python39
6 查看服务器的CUDA
nvidia-smi

7 在linux里添加conda环境变量
export PATH=$PATH:/home/user/anaconda3/bin
user是你的用户名
改好之后,按键盘左上角的Esc键,退出vim编辑。 输出:wq(保存并退出),更新环境
source ~/.bashrc
检测conda命令是否可用
conda -V
初始化
conda init               初始化
conda activate python39  激活python3.9环境
8 根据cuda版本去官网找对应的pytorch
conda install pytorch==2.3.0 torchvision==0.18.0 torchaudio==2.3.0 pytorch-cuda=12.1 -c pytorch -c nvidia
9 验证
python
import torch
torch.cuda.is_available()        显示True就是成功了
Pycharm远程连接服务器跑代码
1设置Connection

.

.

server name随机起一个就行
 .
.

Host:服务器的IP地址;User name:用户名;Password:密码;port端口默认22。

填好之后Test Connection测试连接情况,连接成功后选择下面的Apply,然后点击ok
2 回到刚才的页面配置Mapping

3 实现代码自动上传

.

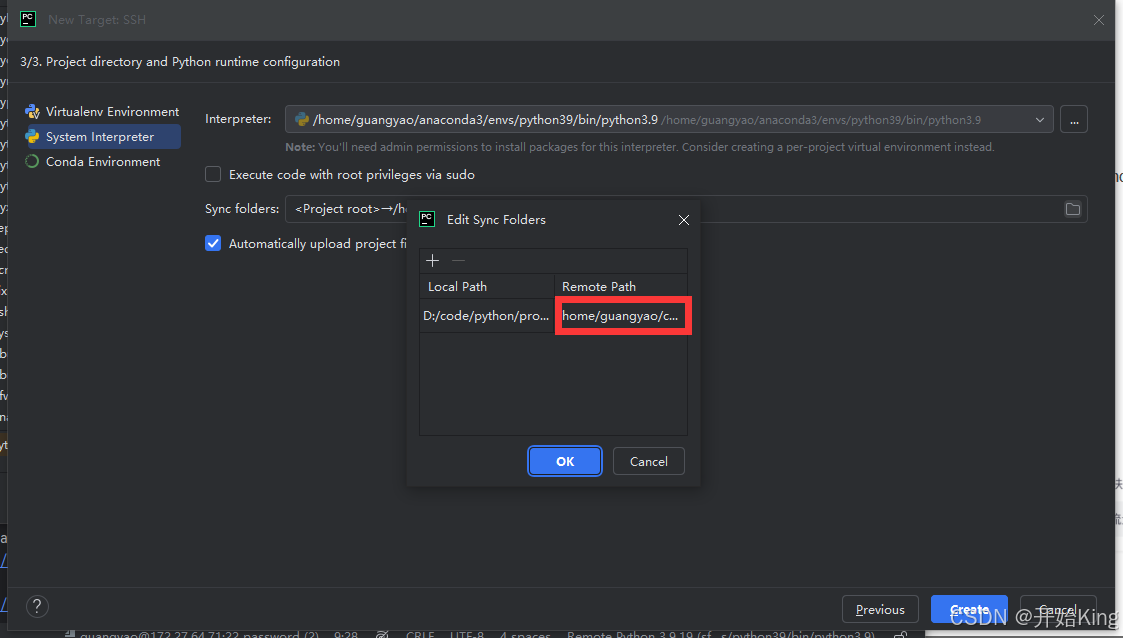
4 设置Python Interpreter
File->Settings

.
 .
.
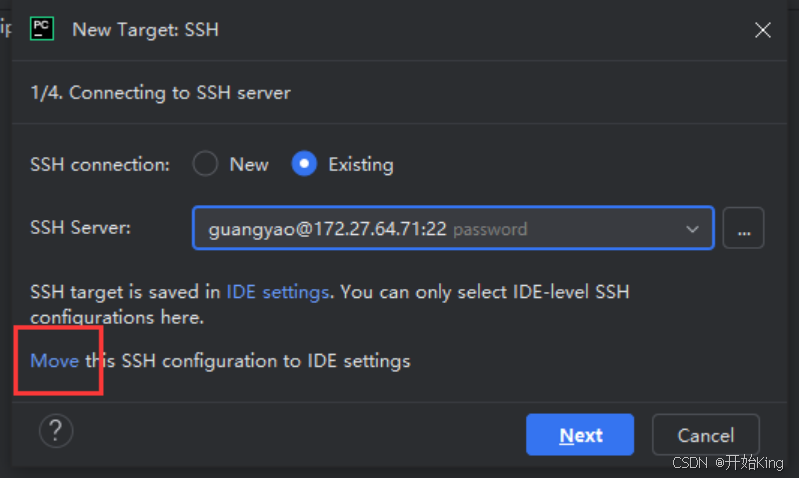
点move然后next,next

在system interpreter里找到你的python解释器,比如我的是conda创建的虚拟环境就在home/juangyao/anaconda3/envs/python39
然后还有一个地方需要修改
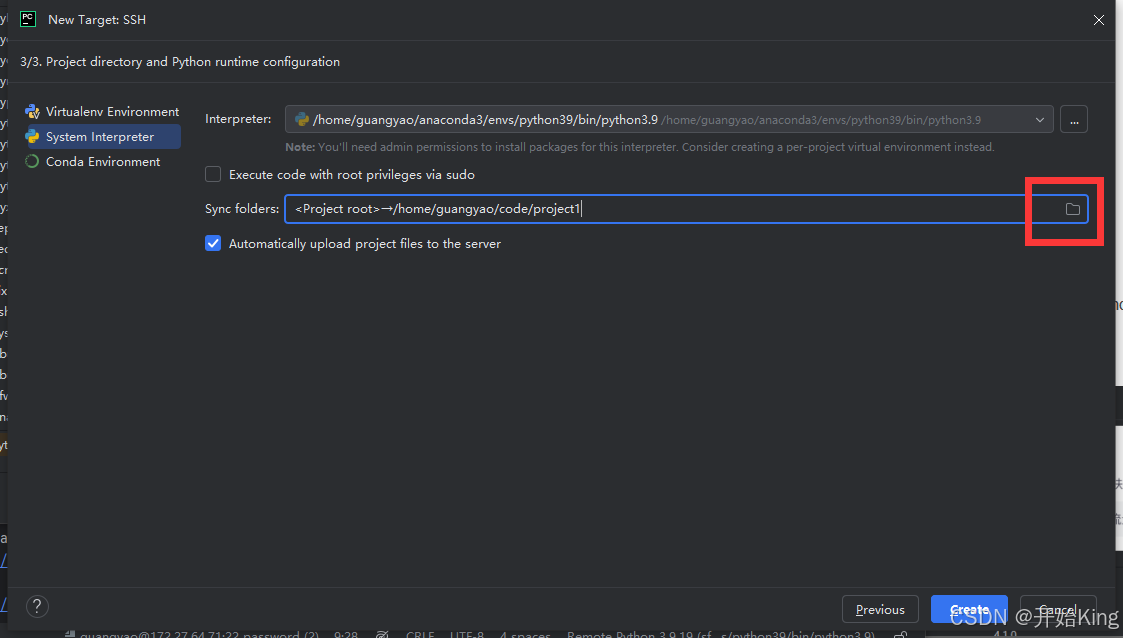
修改remote path,改成刚才mapping的地址
然后就可以看到我们之前在服务器下载的第三方库

然后上传代码

最后点击run运行
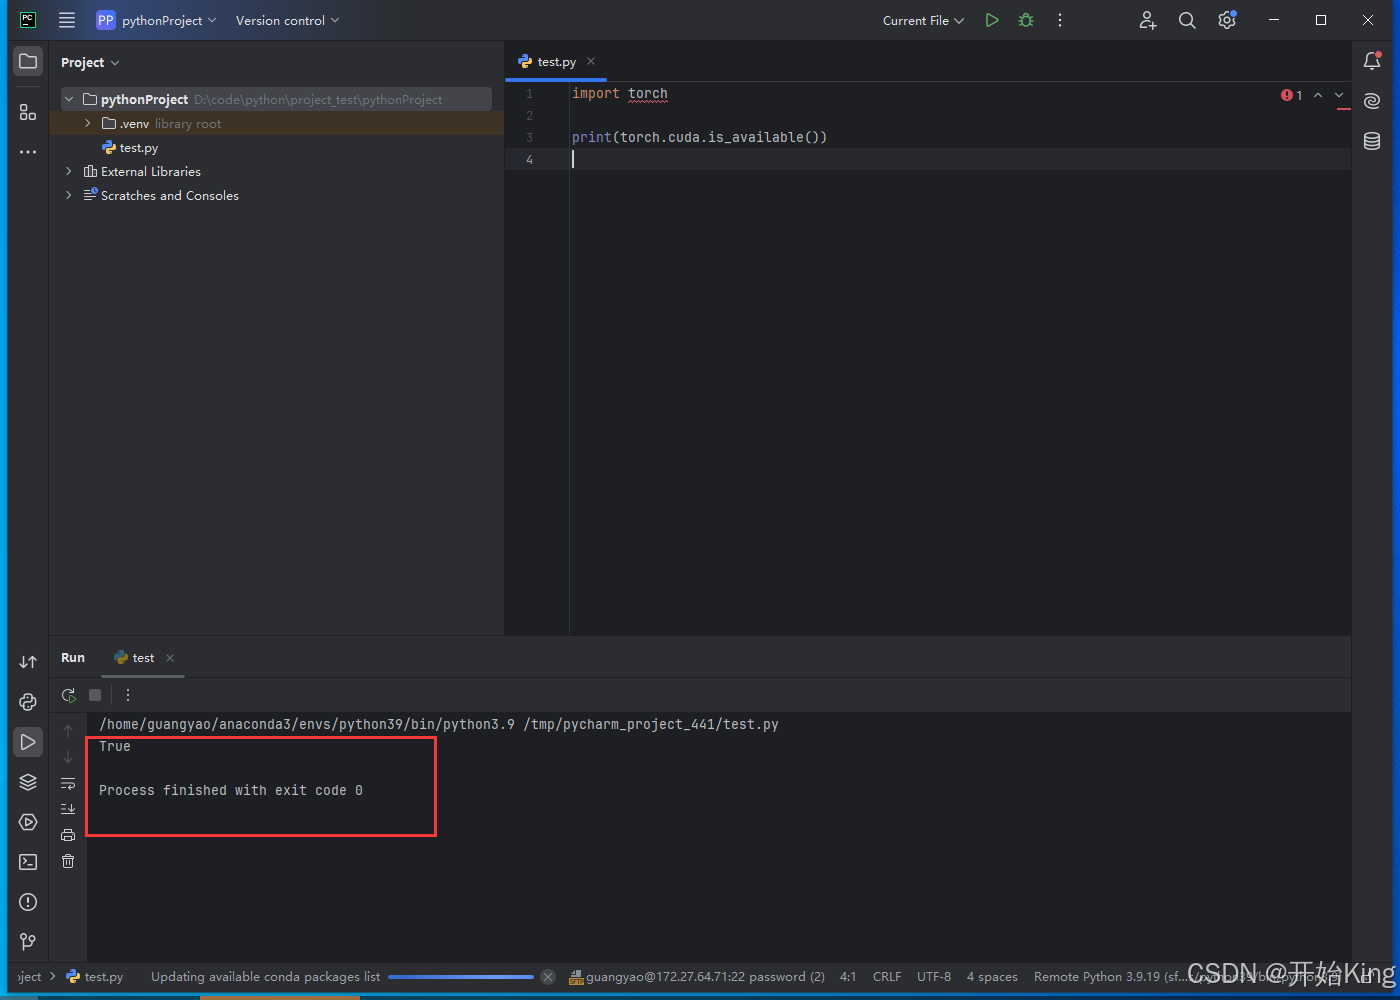
成功


![[数据集][目标检测]电动车入梯进电梯电单车入梯检测数据集VOC+YOLO格式7106张3类别](https://i-blog.csdnimg.cn/direct/301c5442440f4a5ebe61e81688f42d17.png)