目录
1. 首页 layout 架子 [element-plus 菜单]
1.1 基本架子拆解
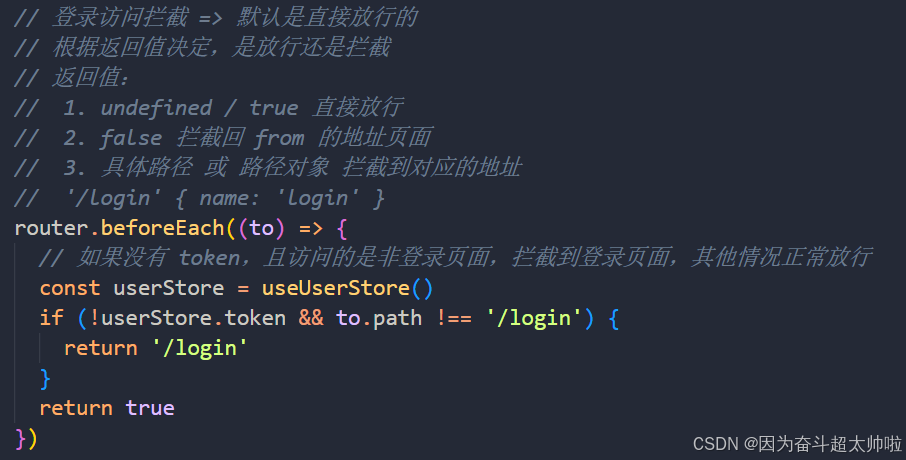
2. 登录访问拦截
2.1 需求
2.2 vue3 和 vue2 中的 Vue-Router 区别
3. 用户基本信息获取&渲染
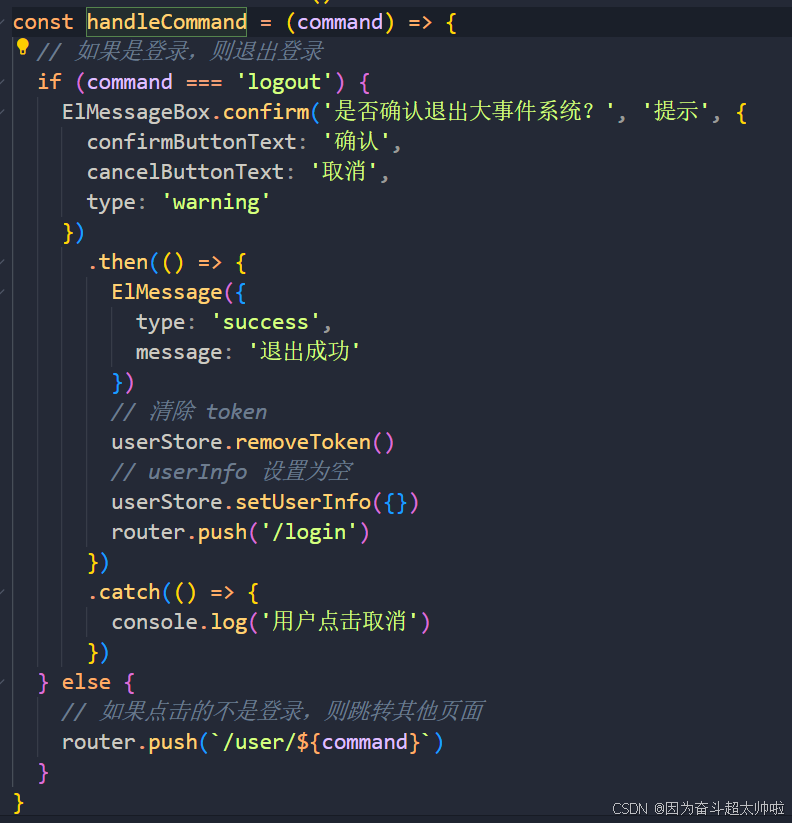
4. 退出功能 [element-plus 确认框]
5. 文章分类页面 - [element-plus 表格]
5.1 基本架子 - PageContainer
6. 文章分类渲染
6.1 封装API - 请求获取表格数据
6.2 el-table 表格动态渲染
6.3 el-table 表格 loading 效果
7. 文章分类添加编辑 [element-plus 弹层]
7.1 点击显示弹层
7.2 封装弹层组件 ChannelEdit
7.3 准备弹层表单
7.4 确认提交
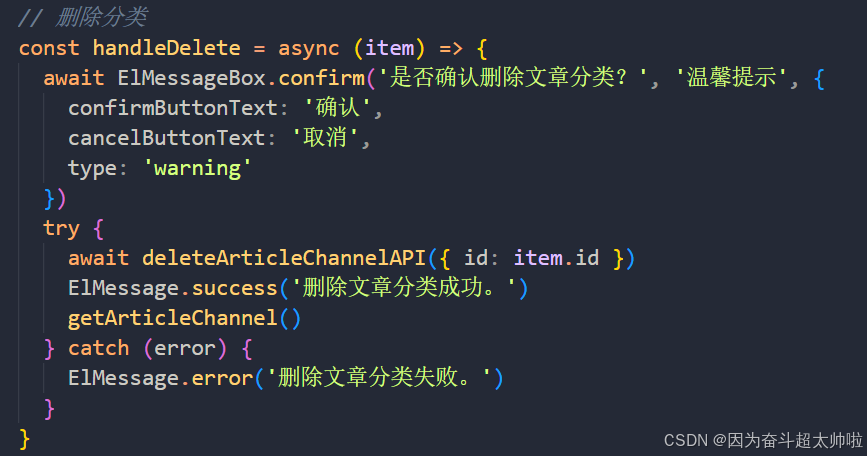
7.5 文章分类删除
1. 首页 layout 架子 [element-plus 菜单]

1.1 基本架子拆解
架子组件列表
el-container
-
el-aside 左侧
-
el-menu 左侧边栏菜单
-
-
el-container 右侧
-
el-header 右侧头部
-
el-dropdown
-
-
el-main 右侧主体
-
router-view
-
-
<template>
  <!--
    el-menu 整个菜单组件
    :default-active="$route.path" 配置默认高亮的菜单项
    router 路由选项开启,el-menu-item 的 index 就是点击跳转的路径
  -->
  <el-container class="layout-container">
    <!-- 侧边栏 -->
    <el-aside width="200px">
      <div class="el-aside__logo"></div>
      <el-menu
        active-text-color="#ffd04b"
        background-color="#232323"
        :default-active="$route.path"
        text-color="#fff"
        router
      >
        <el-menu-item index="/article/channel">
          <el-icon>
            <Management />
          </el-icon>
          <span>文章分类</span>
        </el-menu-item>
        <el-menu-item index="/article/manage">
          <el-icon>
            <Promotion />
          </el-icon>
          <span>文章管理</span>
        </el-menu-item>
        <el-sub-menu index="/user">
          <!-- 多级菜单的标题-具名插槽 title -->
          <template #title>
            <el-icon>
              <UserFilled />
            </el-icon>
            <span>个人中心</span>
          </template>
          <!-- 展开的内容-默认插槽 -->
          <el-menu-item index="/user/profile">
            <el-icon>
              <User />
            </el-icon>
            <span>基本资料</span>
          </el-menu-item>
          <el-menu-item index="/user/avatar">
            <el-icon>
              <Crop />
            </el-icon>
            <span>更换头像</span>
          </el-menu-item>
          <el-menu-item index="/user/password">
            <el-icon>
              <EditPen />
            </el-icon>
            <span>重置密码</span>
          </el-menu-item>
        </el-sub-menu>
      </el-menu>
    </el-aside>
    <!-- 侧边栏 -->
    <el-container>
      <el-header>
        <div>
          黑马程序员:<strong>{{
            userStore.userInfo.nickname || userStore.userInfo.username
          }}</strong>
        </div>
        <el-dropdown placement="bottom-end" @command="handleCommand">
          <span class="el-dropdown__box">
            <el-avatar :src="userStore.userInfo.user_pic || avatar" />
            <el-icon>
              <CaretBottom />
            </el-icon>
          </span>
          <template #dropdown>
            <el-dropdown-menu>
              <el-dropdown-item command="profile" :icon="User"
                >基本资料</el-dropdown-item
              >
              <el-dropdown-item command="avatar" :icon="Crop"
                >更换头像</el-dropdown-item
              >
              <el-dropdown-item command="password" :icon="EditPen"
                >重置密码</el-dropdown-item
              >
              <el-dropdown-item command="logout" :icon="SwitchButton"
                >退出登录</el-dropdown-item
              >
            </el-dropdown-menu>
          </template>
        </el-dropdown>
      </el-header>
      <el-main>
        <router-view></router-view>
      </el-main>
    </el-container>
  </el-container>
</template>
2. 登录访问拦截
2.1 需求
- 只有登录页,可以未授权的时候访问,其他所有页面,都需要先登录再访问
2.2 vue3 和 vue2 中的 Vue-Router 区别
① router 和 route 在组件内的使用
- vue 2.0
- this.$router ——全局路由对象
- this.route ——当前正在跳转的路由对象
- vue 3.0
-
import { useRouter, useRoute } from 'vue-router'
-
const router = useRouter()
-
const route = useRoute()
-
② 路由前置守卫
- vue 2.0
const router = new VueRouter({ ... })

router.beforeEach((to, from, next) => {
  // ...
})
每个守卫方法接收三个参数:
to: Route: 即将要进入的目标 路由对象from: Route: 当前导航正要离开的路由next: Function: 一定要调用该方法来 resolve 这个钩子。执行效果依赖next方法的调用参数。-
next(): 放行路由跳转 -
next(false):拦截路由跳转
-
- vue 3.0
const router = createRouter({ ... })

router.beforeEach((to, from) => {
  // ...
  // 返回 false 以取消导航
  return false
})
每个守卫方法接收两个参数:
to: 即将要进入的目标 用一种标准化的方式from: 当前导航正要离开的路由 用一种标准化的方式- 返回值如下:
- false 拦截回 from 的地址页面
-
undefined / true 直接放行
-
具体路径 或 路径对象 拦截到对应的地址 '/login' { name: 'login' }
③ 文档
- vue2.0:导航守卫 | Vue Router导航守卫 | Vue Router
- vue3.0:导航守卫 | Vue Router导航守卫 | Vue Router
3. 用户基本信息获取&渲染
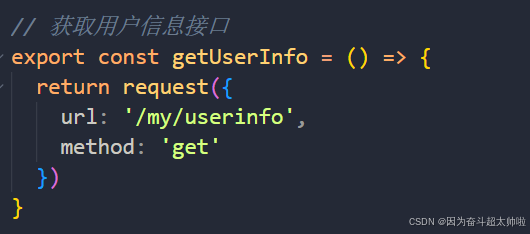
① api/user/user.js 封装接口
② stores/modules/user.js 定义数据
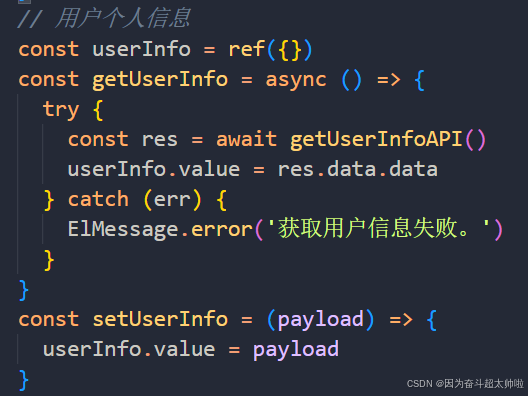
③ layout/LayoutContainer 页面中调用

④ 动态渲染
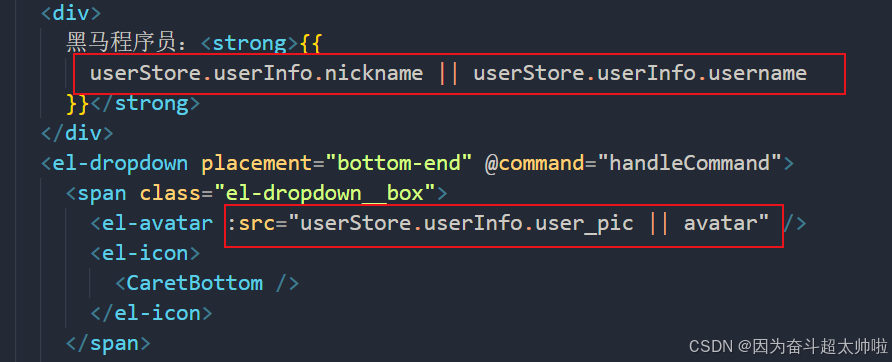
4. 退出功能 [element-plus 确认框]
① 注册点击事件
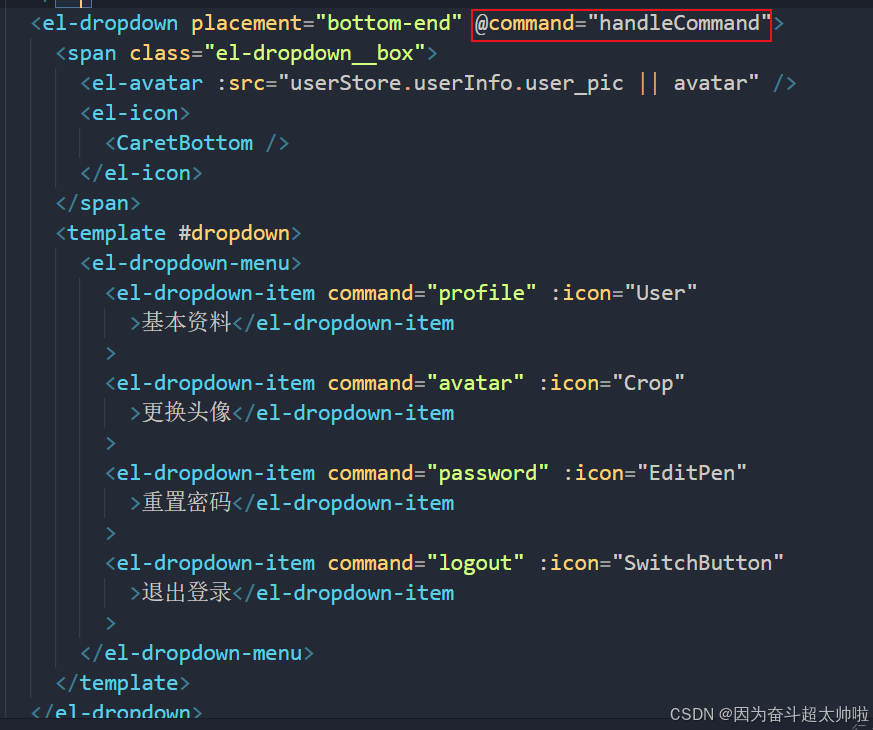
② 添加退出功能
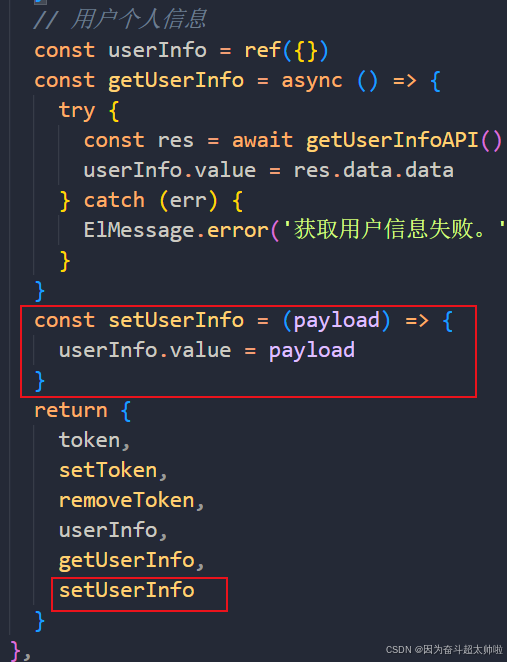
③ pinia user.js 模块 提供 setUserInfo 方法
5. 文章分类页面 - [element-plus 表格]
5.1 基本架子 - PageContainer
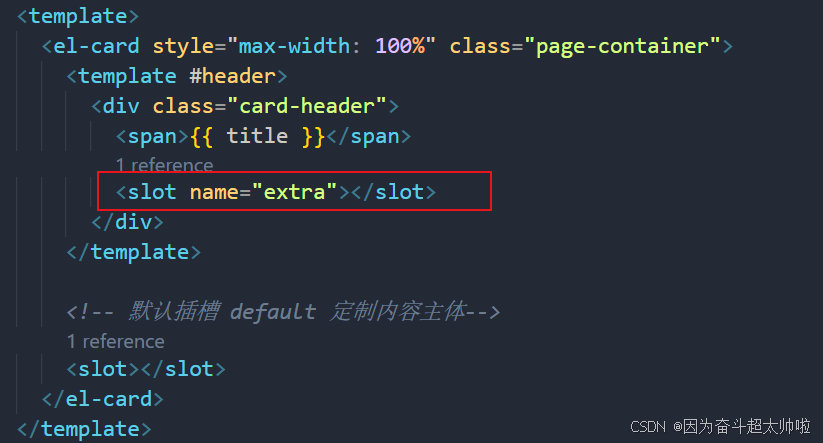
① 基本结构样式,用到了 el-card 组件
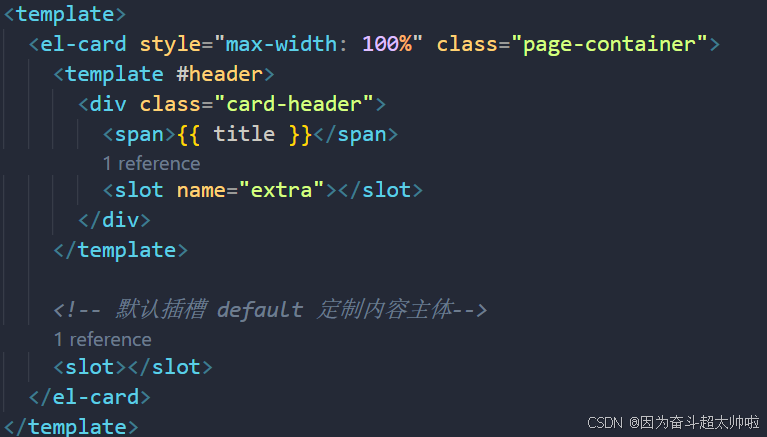
② 考虑到多个页面复用,封装成组件
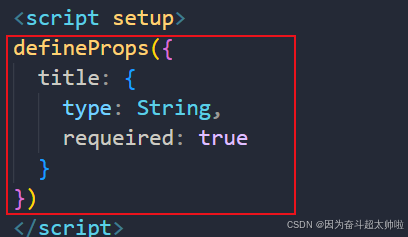
- props 定制标题
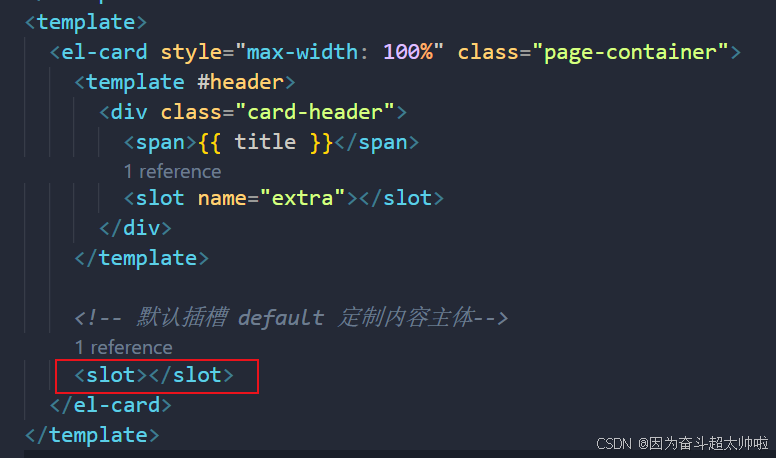
- 默认插槽 default 定制内容主体
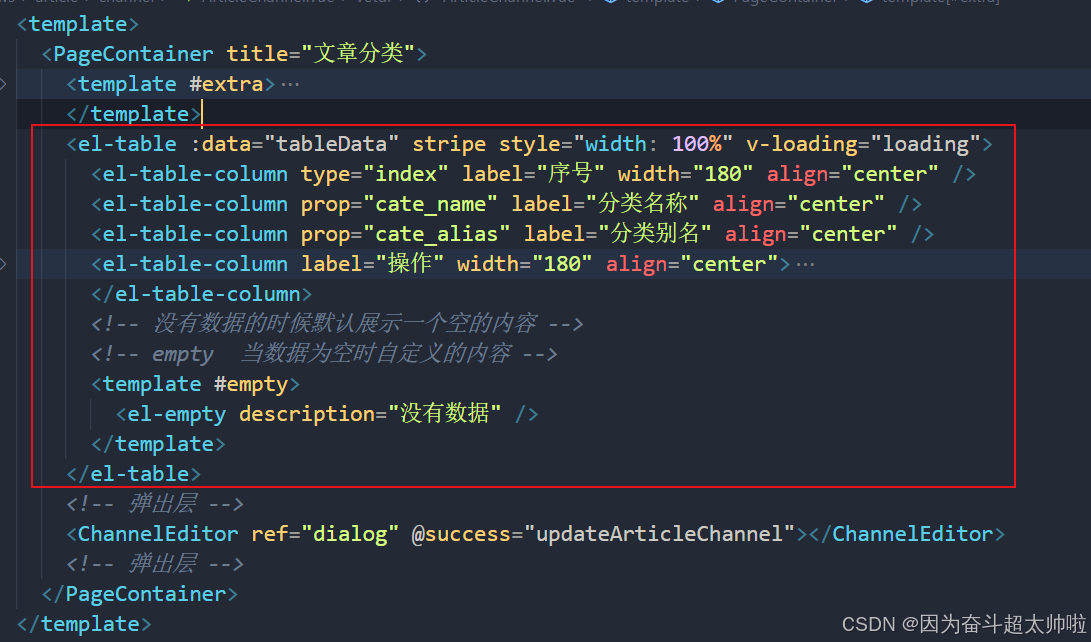
- 具名插槽 extra 定制头部右侧额外的按钮

③ 页面中直接使用测试
- 文章分类测试
- 文章管理测试

6. 文章分类渲染
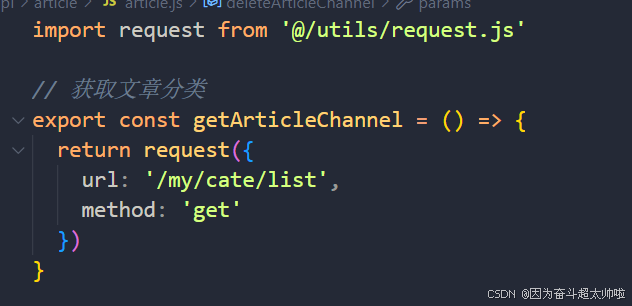
6.1 封装API - 请求获取表格数据
① 新建 api/article/article.js 封装获取频道列表的接口
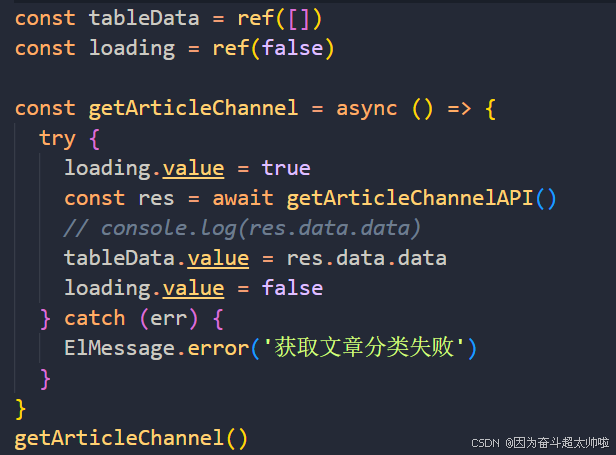
② 页面中调用接口,获取数据存储
6.2 el-table 表格动态渲染
 <el-table :data="tableData" stripe style="width: 100%" v-loading="loading">
      <el-table-column type="index" label="序号" width="180" align="center" />
      <el-table-column prop="cate_name" label="分类名称" align="center" />
      <el-table-column prop="cate_alias" label="分类别名" align="center" />
      <el-table-column label="操作" width="180" align="center">
        <template #default="scope">
          <div
            style="display: flex; align-items: center; justify-content: center"
          >
            <el-button
              type="primary"
              circle
              plain
              size="small"
              :icon="Edit"
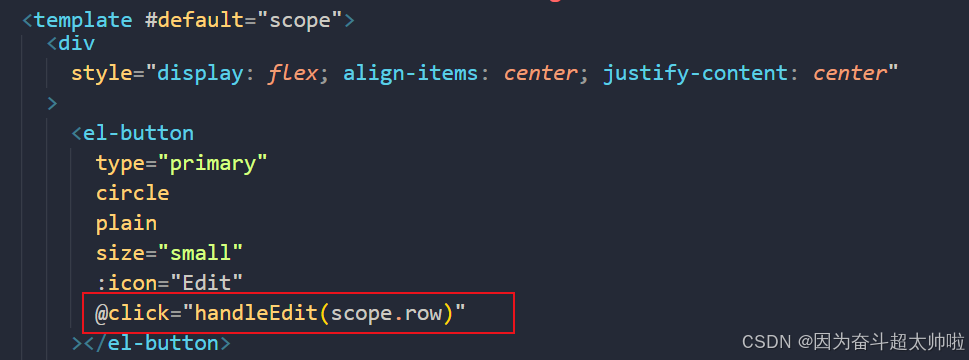
              @click="handleEdit(scope.row)"
            ></el-button>
            <el-button
              size="small"
              type="danger"
              circle
              plain
              :icon="Delete"
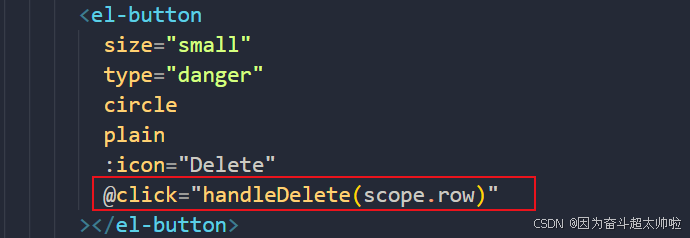
              @click="handleDelete(scope.row)"
            ></el-button>
          </div>
        </template>
      </el-table-column>
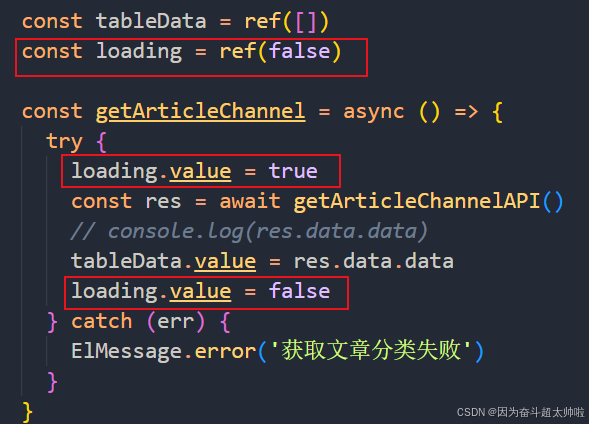
6.3 el-table 表格 loading 效果
① 定义变量,v-loading绑定

② 发送请求前开启,请求结束关闭
7. 文章分类添加编辑 [element-plus 弹层]
7.1 点击显示弹层
① 准备弹层
const dialogVisible = ref(false)

<el-dialog v-model="dialogVisible" title="添加弹层" width="30%">
  <div>我是内容部分</div>
  <template #footer>
    <span class="dialog-footer">
      <el-button @click="dialogVisible = false">取消</el-button>
      <el-button type="primary"> 确认 </el-button>
    </span>
  </template>
</el-dialog>
② 点击事件
<template #extra>
    <el-button type="primary" @click="onAddChannel">添加分类</el-button>
</template>

const onAddChannel = () => {
  dialogVisible.value = true
}
7.2 封装弹层组件 ChannelEdit
添加 和 编辑,可以共用一个弹层,所以可以将弹层封装成一个组件
组件对外暴露一个方法 open, 基于 open 的参数,初始化表单数据,并判断区分是添加 还是 编辑
- open({}) 如果传递进来的是一个空对象,那么就是添加操作
-
opne({id, cate_name, ...}) 如果传递进来的不是一个空对象,那么就是编辑操作,并且需要渲染表单
-
open 调用后可以打开弹窗
具体实现:
① 封装组件 article/components/ChannelEdit.vue
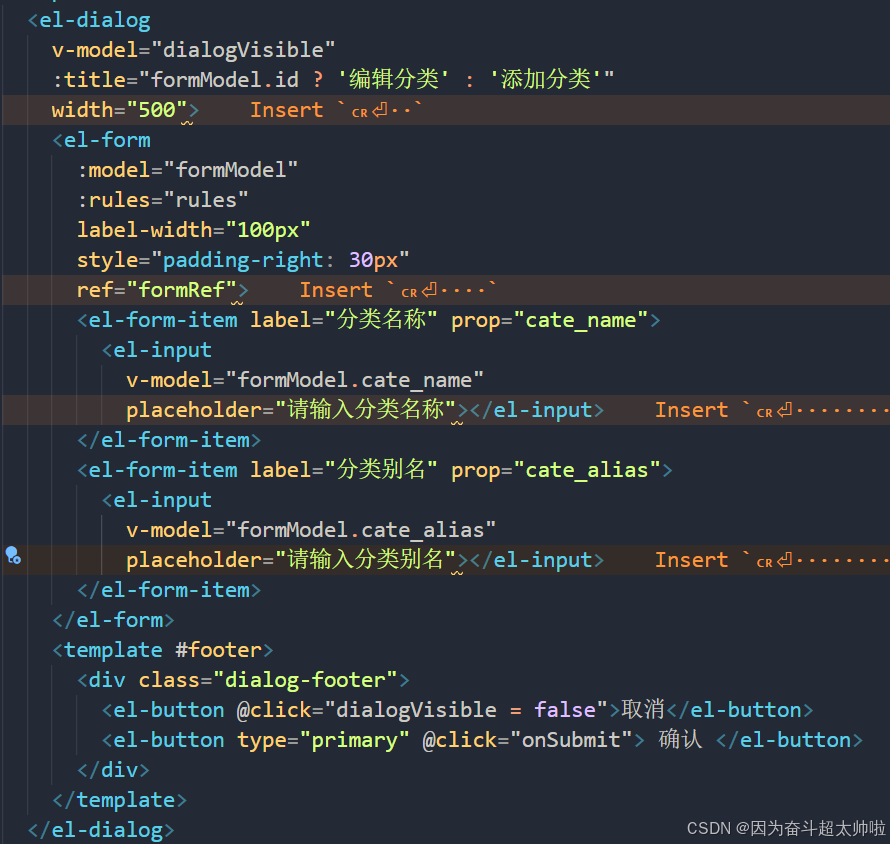
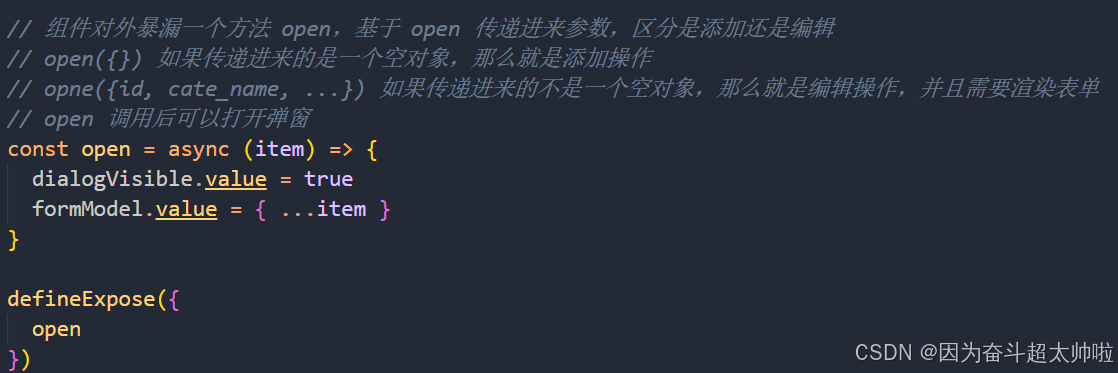
② 通过 ref 绑定


③ 点击调用方法显示弹窗


7.3 准备弹层表单
① 准备数据 和 校验规则
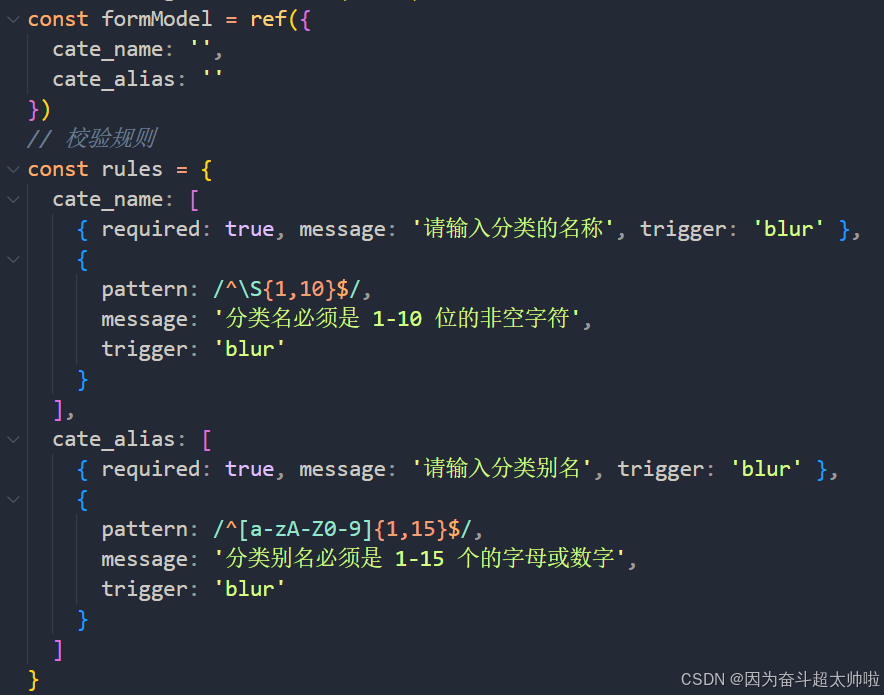
② 准备表单
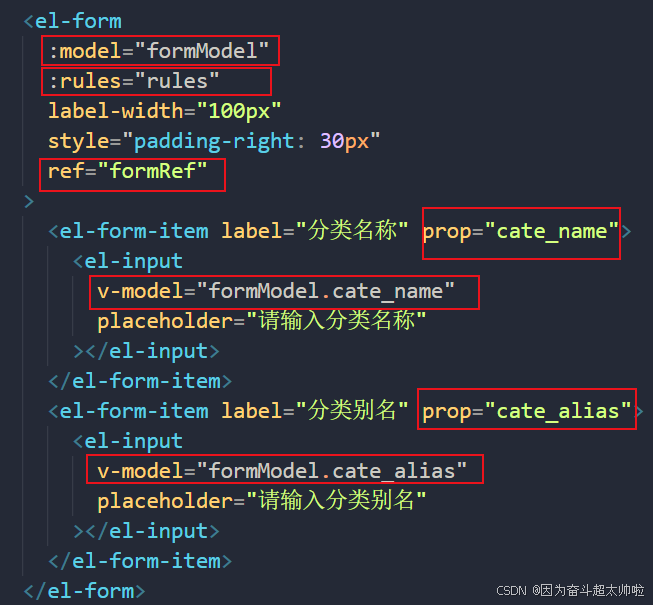
③ 编辑需要回显,表单数据需要初始化

④ 基于传过来的表单数据,进行标题控制,有 id 的是编辑

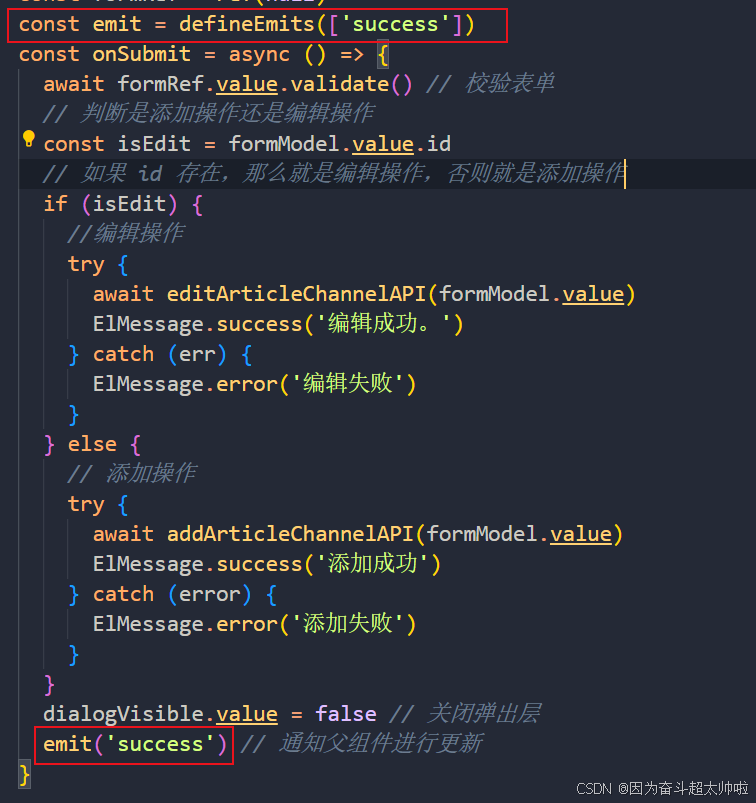
7.4 确认提交
① api/article/article.js 封装请求 API
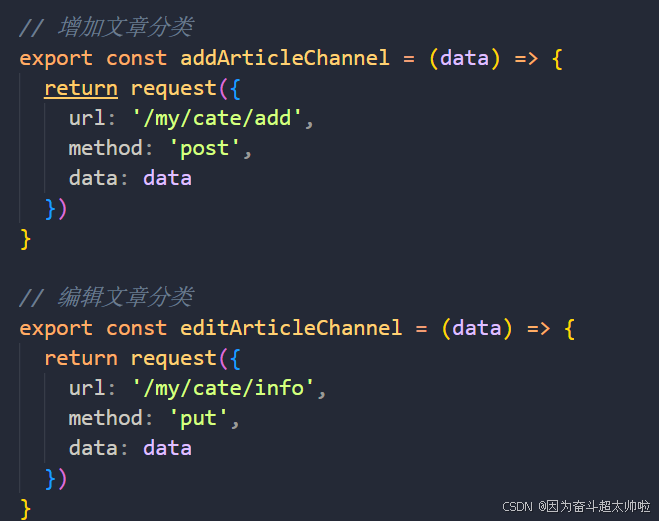
② 页面中校验,判断,提交请求
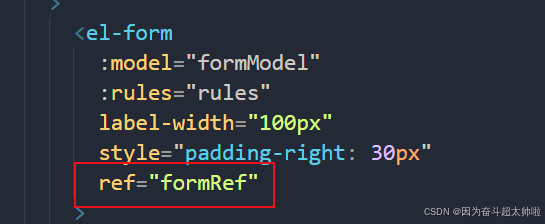

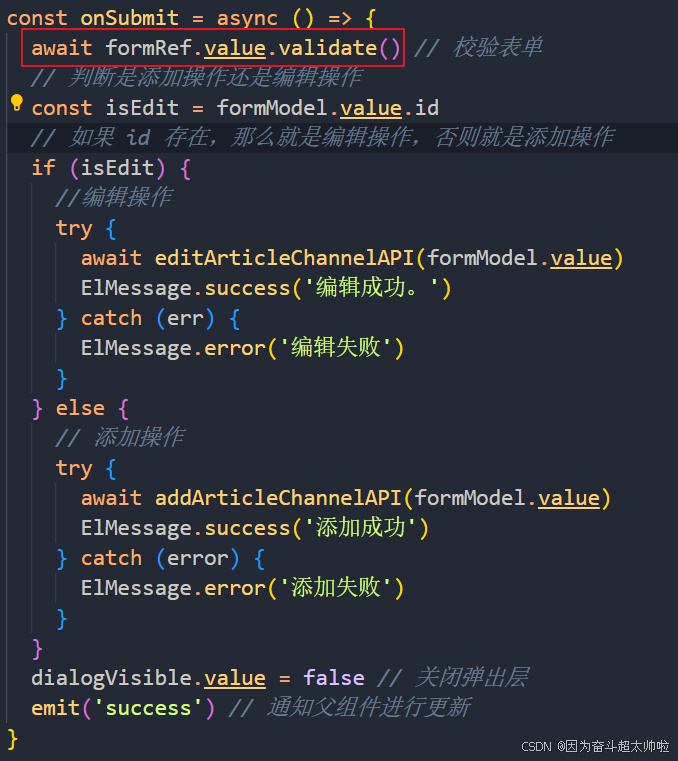
④ 父组件监听 success 事件,进行调用回显


7.5 文章分类删除
① api/article.js 封装接口 api
② 页面中添加确认框,调用接口进行提示
