目录
目标
一、python接口下实现yolov5模型在开发板上的部署
1.1 在rknntoolkit2环境下模拟实现yolov5模型在RK3588开发板上的推理测试
1.2 在rknntoolkit2环境下实现模型在RK3588开发板上的连板推理测试(模型运行在NPU上)
1.3 在rknntoolkitlite2环境下完成模型在RK3588开发板上的部署及推理测试工作
1.3.1 rknntoolkit2环境下直接加载RKNN模型进行连板推理(模型运行时环境是在RK3588开发板上)
1.3.2 rknntoolkitlite2环境(该环境在RK3588开发板的系统上)下模型部署在RK3588开发板上并在开发板上完成推理测试
1.4 引入摄像头部分的程序
1.4.1 引入MIPI摄像头实时监测【注:RGB格式是MIPI摄像头采集到的数据格式之一】
1.4.2 使用USB摄像头实时监测【注:BGR格式是USB摄像头采集到的数据格式之一】
1.4.3 给定视频情况下的实时监测(test_rknn_lite_video.py)
1.5 帧率优化
1.5.1 设置多核心工作模式
1.5.2 定频
1.6 帧率进一步优化
1.6.1 python版本的多线程帧率优化(给定测试视频文件)
1.6.2 python版本的多线程帧率优化(usb摄像头实时监测)
1.6.3 python版本的多线程帧率优化(mipi 摄像头实时监测)
1.6.4 C++ 版本的多线程帧率优化(给定视频文件实时监测)
1.6.5 C++ 版本的多线程帧率优化(USB摄像头实时监测)
1.6.5 C++ 版本的多线程帧率优化(mipi摄像头实时监测)
作者使用:
宿主机所需:
Ubuntu20.04虚拟系统、虚拟系统安装好adb、虚拟系统上配置好rknntoolkit2(版本为2.0.0)环境
RK3588开发板上所需:
Ubuntu22.04系统、RKNNtoolkitlite2环境(2.0.0)、rknn_server(2.0.0)
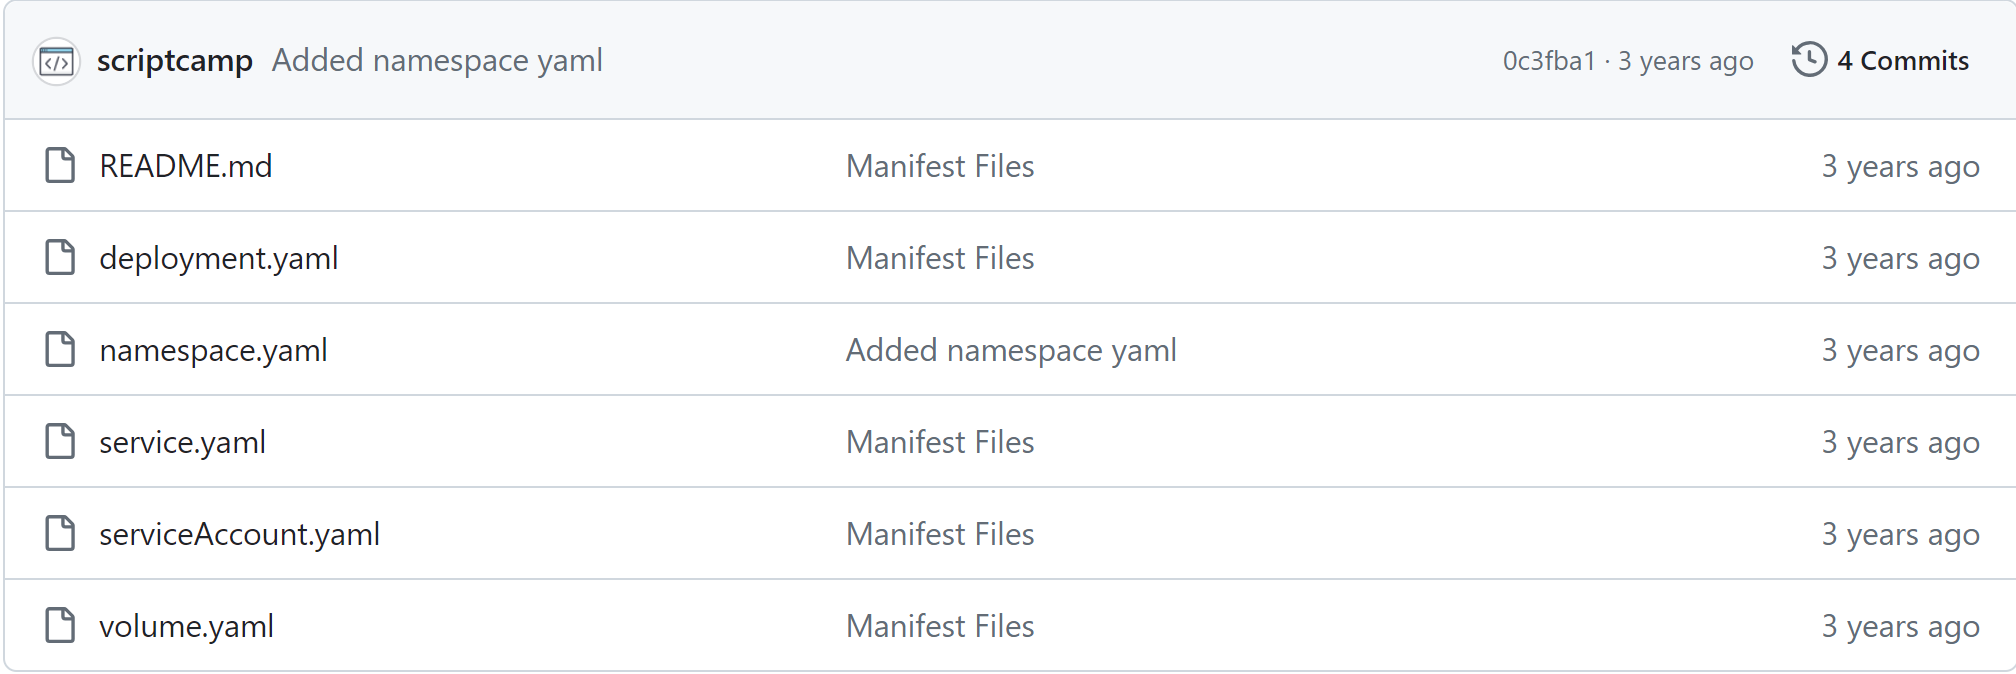
该博文所用到的资料如下图所示:![]()

目标
利用python接口和C接口将 yolov5 模型部署在RK3588开发板上,完成实时目标分类。
一、python接口下实现yolov5模型在开发板上的部署
1.1 在rknntoolkit2环境下模拟实现yolov5模型在RK3588开发板上的推理测试
在Ubuntu20.04虚拟系统的pycharm中,创建项目文件夹yolov5_to_rk3588_learning, 将百度网盘给的资料中的 /04_RKNN Toolkit2 yolov5例程/yolov5/ 目录下的所有内容拷贝到创建的项目文件夹中,拷贝结束后如下图所示:
打开test.py程序,如下所示:
# test.py
import os
import urllib
import traceback
import time
import sys
import numpy as np
import cv2
from rknn.api import RKNN

ONNX_MODEL = 'yolov5s.onnx'
RKNN_MODEL = 'yolov5s.rknn'
IMG_PATH = './bus.jpg'
DATASET = './dataset.txt'

QUANTIZE_ON = True

OBJ_THRESH = 0.25
NMS_THRESH = 0.45
IMG_SIZE = 640

CLASSES = ("person", "bicycle", "car", "motorbike ", "aeroplane ", "bus ", "train", "truck ", "boat", "traffic light",
           "fire hydrant", "stop sign ", "parking meter", "bench", "bird", "cat", "dog ", "horse ", "sheep", "cow", "elephant",
           "bear", "zebra ", "giraffe", "backpack", "umbrella", "handbag", "tie", "suitcase", "frisbee", "skis", "snowboard", "sports ball", "kite",
           "baseball bat", "baseball glove", "skateboard", "surfboard", "tennis racket", "bottle", "wine glass", "cup", "fork", "knife ",
           "spoon", "bowl", "banana", "apple", "sandwich", "orange", "broccoli", "carrot", "hot dog", "pizza ", "donut", "cake", "chair", "sofa",
           "pottedplant", "bed", "diningtable", "toilet ", "tvmonitor", "laptop	", "mouse	", "remote ", "keyboard ", "cell phone", "microwave ",
           "oven ", "toaster", "sink", "refrigerator ", "book", "clock", "vase", "scissors ", "teddy bear ", "hair drier", "toothbrush ")


def sigmoid(x):
    return 1 / (1 + np.exp(-x))


def xywh2xyxy(x):
    # Convert [x, y, w, h] to [x1, y1, x2, y2]
    y = np.copy(x)
    y[:, 0] = x[:, 0] - x[:, 2] / 2  # top left x
    y[:, 1] = x[:, 1] - x[:, 3] / 2  # top left y
    y[:, 2] = x[:, 0] + x[:, 2] / 2  # bottom right x
    y[:, 3] = x[:, 1] + x[:, 3] / 2  # bottom right y
    return y


def process(input, mask, anchors):

    anchors = [anchors[i] for i in mask]
    grid_h, grid_w = map(int, input.shape[0:2])

    box_confidence = sigmoid(input[..., 4])
    box_confidence = np.expand_dims(box_confidence, axis=-1)

    box_class_probs = sigmoid(input[..., 5:])

    box_xy = sigmoid(input[..., :2])*2 - 0.5

    col = np.tile(np.arange(0, grid_w), grid_w).reshape(-1, grid_w)
    row = np.tile(np.arange(0, grid_h).reshape(-1, 1), grid_h)
    col = col.reshape(grid_h, grid_w, 1, 1).repeat(3, axis=-2)
    row = row.reshape(grid_h, grid_w, 1, 1).repeat(3, axis=-2)
    grid = np.concatenate((col, row), axis=-1)
    box_xy += grid
    box_xy *= int(IMG_SIZE/grid_h)

    box_wh = pow(sigmoid(input[..., 2:4])*2, 2)
    box_wh = box_wh * anchors

    box = np.concatenate((box_xy, box_wh), axis=-1)

    return box, box_confidence, box_class_probs


def filter_boxes(boxes, box_confidences, box_class_probs):
    """Filter boxes with box threshold. It's a bit different with origin yolov5 post process!

    # Arguments
        boxes: ndarray, boxes of objects.
        box_confidences: ndarray, confidences of objects.
        box_class_probs: ndarray, class_probs of objects.

    # Returns
        boxes: ndarray, filtered boxes.
        classes: ndarray, classes for boxes.
        scores: ndarray, scores for boxes.
    """
    boxes = boxes.reshape(-1, 4)
    box_confidences = box_confidences.reshape(-1)
    box_class_probs = box_class_probs.reshape(-1, box_class_probs.shape[-1])

    _box_pos = np.where(box_confidences >= OBJ_THRESH)
    boxes = boxes[_box_pos]
    box_confidences = box_confidences[_box_pos]
    box_class_probs = box_class_probs[_box_pos]

    class_max_score = np.max(box_class_probs, axis=-1)
    classes = np.argmax(box_class_probs, axis=-1)
    _class_pos = np.where(class_max_score >= OBJ_THRESH)

    boxes = boxes[_class_pos]
    classes = classes[_class_pos]
    scores = (class_max_score* box_confidences)[_class_pos]

    return boxes, classes, scores


def nms_boxes(boxes, scores):
    """Suppress non-maximal boxes.

    # Arguments
        boxes: ndarray, boxes of objects.
        scores: ndarray, scores of objects.

    # Returns
        keep: ndarray, index of effective boxes.
    """
    x = boxes[:, 0]
    y = boxes[:, 1]
    w = boxes[:, 2] - boxes[:, 0]
    h = boxes[:, 3] - boxes[:, 1]

    areas = w * h
    order = scores.argsort()[::-1]

    keep = []
    while order.size > 0:
        i = order[0]
        keep.append(i)

        xx1 = np.maximum(x[i], x[order[1:]])
        yy1 = np.maximum(y[i], y[order[1:]])
        xx2 = np.minimum(x[i] + w[i], x[order[1:]] + w[order[1:]])
        yy2 = np.minimum(y[i] + h[i], y[order[1:]] + h[order[1:]])

        w1 = np.maximum(0.0, xx2 - xx1 + 0.00001)
        h1 = np.maximum(0.0, yy2 - yy1 + 0.00001)
        inter = w1 * h1


        ovr = inter / (areas[i] + areas[order[1:]] - inter)
        inds = np.where(ovr <= NMS_THRESH)[0]
        order = order[inds + 1]
    keep = np.array(keep)
    return keep


def yolov5_post_process(input_data):
    masks = [[0, 1, 2], [3, 4, 5], [6, 7, 8]]
    anchors = [[10, 13], [16, 30], [33, 23], [30, 61], [62, 45],
               [59, 119], [116, 90], [156, 198], [373, 326]]

    boxes, classes, scores = [], [], []
    for input, mask in zip(input_data, masks):
        b, c, s = process(input, mask, anchors)
        b, c, s = filter_boxes(b, c, s)
        boxes.append(b)
        classes.append(c)
        scores.append(s)

    boxes = np.concatenate(boxes)
    boxes = xywh2xyxy(boxes)
    classes = np.concatenate(classes)
    scores = np.concatenate(scores)

    nboxes, nclasses, nscores = [], [], []
    for c in set(classes):
        inds = np.where(classes == c)
        b = boxes[inds]
        c = classes[inds]
        s = scores[inds]

        keep = nms_boxes(b, s)

        nboxes.append(b[keep])
        nclasses.append(c[keep])
        nscores.append(s[keep])

    if not nclasses and not nscores:
        return None, None, None

    boxes = np.concatenate(nboxes)
    classes = np.concatenate(nclasses)
    scores = np.concatenate(nscores)

    return boxes, classes, scores


def draw(image, boxes, scores, classes):
    """Draw the boxes on the image.

    # Argument:
        image: original image.
        boxes: ndarray, boxes of objects.
        classes: ndarray, classes of objects.
        scores: ndarray, scores of objects.
        all_classes: all classes name.
    """
    for box, score, cl in zip(boxes, scores, classes):
        top, left, right, bottom = box
        print('class: {}, score: {}'.format(CLASSES[cl], score))
        print('box coordinate left,top,right,down: [{}, {}, {}, {}]'.format(top, left, right, bottom))
        top = int(top)
        left = int(left)
        right = int(right)
        bottom = int(bottom)

        cv2.rectangle(image, (top, left), (right, bottom), (255, 0, 0), 2)
        cv2.putText(image, '{0} {1:.2f}'.format(CLASSES[cl], score),
                    (top, left - 6),
                    cv2.FONT_HERSHEY_SIMPLEX,
                    0.6, (0, 0, 255), 2)


def letterbox(im, new_shape=(640, 640), color=(0, 0, 0)):
    # Resize and pad image while meeting stride-multiple constraints
    shape = im.shape[:2]  # current shape [height, width]
    if isinstance(new_shape, int):
        new_shape = (new_shape, new_shape)

    # Scale ratio (new / old)
    r = min(new_shape[0] / shape[0], new_shape[1] / shape[1])

    # Compute padding
    ratio = r, r  # width, height ratios
    new_unpad = int(round(shape[1] * r)), int(round(shape[0] * r))
    dw, dh = new_shape[1] - new_unpad[0], new_shape[0] - new_unpad[1]  # wh padding

    dw /= 2  # divide padding into 2 sides
    dh /= 2

    if shape[::-1] != new_unpad:  # resize
        im = cv2.resize(im, new_unpad, interpolation=cv2.INTER_LINEAR)
    top, bottom = int(round(dh - 0.1)), int(round(dh + 0.1))
    left, right = int(round(dw - 0.1)), int(round(dw + 0.1))
    im = cv2.copyMakeBorder(im, top, bottom, left, right, cv2.BORDER_CONSTANT, value=color)  # add border
    return im, ratio, (dw, dh)


if __name__ == '__main__':

    # Create RKNN object
    rknn = RKNN(verbose=True)

    # pre-process config
    print('--> Config model')
    rknn.config(mean_values=[[0, 0, 0]], std_values=[[255, 255, 255]],target_platform='rk3588')
    print('done')

    # Load ONNX model
    print('--> Loading model')
    ret = rknn.load_onnx(model=ONNX_MODEL)
    if ret != 0:
        print('Load model failed!')
        exit(ret)
    print('done')

    # Build model
    print('--> Building model')
    ret = rknn.build(do_quantization=QUANTIZE_ON, dataset=DATASET)
    if ret != 0:
        print('Build model failed!')
        exit(ret)
    print('done')

    # Export RKNN model
    print('--> Export rknn model')
    ret = rknn.export_rknn(RKNN_MODEL)
    if ret != 0:
        print('Export rknn model failed!')
        exit(ret)
    print('done')

    # Init runtime environment
    print('--> Init runtime environment')
    ret = rknn.init_runtime()
    # ret = rknn.init_runtime('rk3566')
    if ret != 0:
        print('Init runtime environment failed!')
        exit(ret)
    print('done')

    # Set inputs
    img = cv2.imread(IMG_PATH)
    # img, ratio, (dw, dh) = letterbox(img, new_shape=(IMG_SIZE, IMG_SIZE))
    img = cv2.cvtColor(img, cv2.COLOR_BGR2RGB)
    img = cv2.resize(img, (IMG_SIZE, IMG_SIZE))

    # Inference
    print('--> Running model')
    img2 = np.expand_dims(img, 0)
    outputs = rknn.inference(inputs=[img2], data_format=['nhwc'])
    # np.save('./onnx_yolov5_0.npy', outputs[0])
    # np.save('./onnx_yolov5_1.npy', outputs[1])
    # np.save('./onnx_yolov5_2.npy', outputs[2])
    print('done')

    # post process
    input0_data = outputs[0]
    input1_data = outputs[1]
    input2_data = outputs[2]

    input0_data = input0_data.reshape([3, -1]+list(input0_data.shape[-2:]))
    input1_data = input1_data.reshape([3, -1]+list(input1_data.shape[-2:]))
    input2_data = input2_data.reshape([3, -1]+list(input2_data.shape[-2:]))

    input_data = list()
    input_data.append(np.transpose(input0_data, (2, 3, 0, 1)))
    input_data.append(np.transpose(input1_data, (2, 3, 0, 1)))
    input_data.append(np.transpose(input2_data, (2, 3, 0, 1)))

    boxes, classes, scores = yolov5_post_process(input_data)

    img_1 = cv2.cvtColor(img, cv2.COLOR_RGB2BGR)
    if boxes is not None:
        draw(img_1, boxes, scores, classes)
    # show output
    cv2.imshow("post process result", img_1)
    cv2.waitKey(0)
    cv2.destroyAllWindows()

    rknn.release()
然后运行上述程序,得到运行结果:
得到转换后的rknn模型,如下图所示:
推理后得到的图片:

终端输出推理图片上物体的类别、概率,还有框选物体的框的具体位置,如下图所示:
至此,在rknntoolkit2环境下的推理过程就结束了,接下来我们实现连板推理。
1.2 在rknntoolkit2环境下实现模型在RK3588开发板上的连板推理测试(模型运行在NPU上)
第一步:首先将开发板与电脑相连接。
第二步:打开test.py程序,找到 init_runtime 接口,对其参数进行配置,将: 
修改为:
第三步:然后在开发板上运行 rknn_server 程序。
使用MobaXterm软件通过串口调试连接开发板。然后输入rknn_server ,运行rknn_server 程序:
第四步:接下来便可以运行test.py程序了。注意:在运行程序之前,需要确保开发板的adb已经连接到虚拟机Ubuntu系统上了,连接成功如下图所示:
接下来,运行test.py程序,得到:

连板推理测试成功!证明模型运行在RKNPU上不会发生错误!
1.3 在rknntoolkitlite2环境下完成模型在RK3588开发板上的部署及推理测试工作
1.3.1 rknntoolkit2环境下直接加载RKNN模型进行连板推理(模型运行时环境是在RK3588开发板上)
编写test_rknn.py程序,代码如下所示:
(rknntoolkit2环境下直接加载RKNN模型进行连板推理)
# test_rknn.py
import os
import urllib
import traceback
import time
import sys
import numpy as np
import cv2
from rknn.api import RKNN

ONNX_MODEL = 'yolov5s.onnx'
RKNN_MODEL = 'yolov5s_1.4.0(rknntoolkit2).rknn'
IMG_PATH = './bus.jpg'
DATASET = './dataset.txt'

QUANTIZE_ON = True

OBJ_THRESH = 0.25
NMS_THRESH = 0.45
IMG_SIZE = 640

CLASSES = ("person", "bicycle", "car", "motorbike ", "aeroplane ", "bus ", "train", "truck ", "boat", "traffic light",
           "fire hydrant", "stop sign ", "parking meter", "bench", "bird", "cat", "dog ", "horse ", "sheep", "cow", "elephant",
           "bear", "zebra ", "giraffe", "backpack", "umbrella", "handbag", "tie", "suitcase", "frisbee", "skis", "snowboard", "sports ball", "kite",
           "baseball bat", "baseball glove", "skateboard", "surfboard", "tennis racket", "bottle", "wine glass", "cup", "fork", "knife ",
           "spoon", "bowl", "banana", "apple", "sandwich", "orange", "broccoli", "carrot", "hot dog", "pizza ", "donut", "cake", "chair", "sofa",
           "pottedplant", "bed", "diningtable", "toilet ", "tvmonitor", "laptop	", "mouse	", "remote ", "keyboard ", "cell phone", "microwave ",
           "oven ", "toaster", "sink", "refrigerator ", "book", "clock", "vase", "scissors ", "teddy bear ", "hair drier", "toothbrush ")


def sigmoid(x):
    return 1 / (1 + np.exp(-x))


def xywh2xyxy(x):
    # Convert [x, y, w, h] to [x1, y1, x2, y2]
    y = np.copy(x)
    y[:, 0] = x[:, 0] - x[:, 2] / 2  # top left x
    y[:, 1] = x[:, 1] - x[:, 3] / 2  # top left y
    y[:, 2] = x[:, 0] + x[:, 2] / 2  # bottom right x
    y[:, 3] = x[:, 1] + x[:, 3] / 2  # bottom right y
    return y


def process(input, mask, anchors):

    anchors = [anchors[i] for i in mask]
    grid_h, grid_w = map(int, input.shape[0:2])

    box_confidence = sigmoid(input[..., 4])
    box_confidence = np.expand_dims(box_confidence, axis=-1)

    box_class_probs = sigmoid(input[..., 5:])

    box_xy = sigmoid(input[..., :2])*2 - 0.5

    col = np.tile(np.arange(0, grid_w), grid_w).reshape(-1, grid_w)
    row = np.tile(np.arange(0, grid_h).reshape(-1, 1), grid_h)
    col = col.reshape(grid_h, grid_w, 1, 1).repeat(3, axis=-2)
    row = row.reshape(grid_h, grid_w, 1, 1).repeat(3, axis=-2)
    grid = np.concatenate((col, row), axis=-1)
    box_xy += grid
    box_xy *= int(IMG_SIZE/grid_h)

    box_wh = pow(sigmoid(input[..., 2:4])*2, 2)
    box_wh = box_wh * anchors

    box = np.concatenate((box_xy, box_wh), axis=-1)

    return box, box_confidence, box_class_probs


def filter_boxes(boxes, box_confidences, box_class_probs):
    """Filter boxes with box threshold. It's a bit different with origin yolov5 post process!

    # Arguments
        boxes: ndarray, boxes of objects.
        box_confidences: ndarray, confidences of objects.
        box_class_probs: ndarray, class_probs of objects.

    # Returns
        boxes: ndarray, filtered boxes.
        classes: ndarray, classes for boxes.
        scores: ndarray, scores for boxes.
    """
    boxes = boxes.reshape(-1, 4)
    box_confidences = box_confidences.reshape(-1)
    box_class_probs = box_class_probs.reshape(-1, box_class_probs.shape[-1])

    _box_pos = np.where(box_confidences >= OBJ_THRESH)
    boxes = boxes[_box_pos]
    box_confidences = box_confidences[_box_pos]
    box_class_probs = box_class_probs[_box_pos]

    class_max_score = np.max(box_class_probs, axis=-1)
    classes = np.argmax(box_class_probs, axis=-1)
    _class_pos = np.where(class_max_score >= OBJ_THRESH)

    boxes = boxes[_class_pos]
    classes = classes[_class_pos]
    scores = (class_max_score* box_confidences)[_class_pos]

    return boxes, classes, scores


def nms_boxes(boxes, scores):
    """Suppress non-maximal boxes.

    # Arguments
        boxes: ndarray, boxes of objects.
        scores: ndarray, scores of objects.

    # Returns
        keep: ndarray, index of effective boxes.
    """
    x = boxes[:, 0]
    y = boxes[:, 1]
    w = boxes[:, 2] - boxes[:, 0]
    h = boxes[:, 3] - boxes[:, 1]

    areas = w * h
    order = scores.argsort()[::-1]

    keep = []
    while order.size > 0:
        i = order[0]
        keep.append(i)

        xx1 = np.maximum(x[i], x[order[1:]])
        yy1 = np.maximum(y[i], y[order[1:]])
        xx2 = np.minimum(x[i] + w[i], x[order[1:]] + w[order[1:]])
        yy2 = np.minimum(y[i] + h[i], y[order[1:]] + h[order[1:]])

        w1 = np.maximum(0.0, xx2 - xx1 + 0.00001)
        h1 = np.maximum(0.0, yy2 - yy1 + 0.00001)
        inter = w1 * h1

        ovr = inter / (areas[i] + areas[order[1:]] - inter)
        inds = np.where(ovr <= NMS_THRESH)[0]
        order = order[inds + 1]
    keep = np.array(keep)
    return keep


def yolov5_post_process(input_data):
    masks = [[0, 1, 2], [3, 4, 5], [6, 7, 8]]
    anchors = [[10, 13], [16, 30], [33, 23], [30, 61], [62, 45],
               [59, 119], [116, 90], [156, 198], [373, 326]]

    boxes, classes, scores = [], [], []
    for input, mask in zip(input_data, masks):
        b, c, s = process(input, mask, anchors)
        b, c, s = filter_boxes(b, c, s)
        boxes.append(b)
        classes.append(c)
        scores.append(s)

    boxes = np.concatenate(boxes)
    boxes = xywh2xyxy(boxes)
    classes = np.concatenate(classes)
    scores = np.concatenate(scores)

    nboxes, nclasses, nscores = [], [], []
    for c in set(classes):
        inds = np.where(classes == c)
        b = boxes[inds]
        c = classes[inds]
        s = scores[inds]

        keep = nms_boxes(b, s)

        nboxes.append(b[keep])
        nclasses.append(c[keep])
        nscores.append(s[keep])

    if not nclasses and not nscores:
        return None, None, None

    boxes = np.concatenate(nboxes)
    classes = np.concatenate(nclasses)
    scores = np.concatenate(nscores)

    return boxes, classes, scores


def draw(image, boxes, scores, classes):
    """Draw the boxes on the image.

    # Argument:
        image: original image.
        boxes: ndarray, boxes of objects.
        classes: ndarray, classes of objects.
        scores: ndarray, scores of objects.
        all_classes: all classes name.
    """
    for box, score, cl in zip(boxes, scores, classes):
        top, left, right, bottom = box
        print('class: {}, score: {}'.format(CLASSES[cl], score))
        print('box coordinate left,top,right,down: [{}, {}, {}, {}]'.format(top, left, right, bottom))
        top = int(top)
        left = int(left)
        right = int(right)
        bottom = int(bottom)

        cv2.rectangle(image, (top, left), (right, bottom), (255, 0, 0), 2)
        cv2.putText(image, '{0} {1:.2f}'.format(CLASSES[cl], score),
                    (top, left - 6),
                    cv2.FONT_HERSHEY_SIMPLEX,
                    0.6, (0, 0, 255), 2)


def letterbox(im, new_shape=(640, 640), color=(0, 0, 0)):
    # Resize and pad image while meeting stride-multiple constraints
    shape = im.shape[:2]  # current shape [height, width]
    if isinstance(new_shape, int):
        new_shape = (new_shape, new_shape)

    # Scale ratio (new / old)
    r = min(new_shape[0] / shape[0], new_shape[1] / shape[1])

    # Compute padding
    ratio = r, r  # width, height ratios
    new_unpad = int(round(shape[1] * r)), int(round(shape[0] * r))
    dw, dh = new_shape[1] - new_unpad[0], new_shape[0] - new_unpad[1]  # wh padding

    dw /= 2  # divide padding into 2 sides
    dh /= 2

    if shape[::-1] != new_unpad:  # resize
        im = cv2.resize(im, new_unpad, interpolation=cv2.INTER_LINEAR)
    top, bottom = int(round(dh - 0.1)), int(round(dh + 0.1))
    left, right = int(round(dw - 0.1)), int(round(dw + 0.1))
    im = cv2.copyMakeBorder(im, top, bottom, left, right, cv2.BORDER_CONSTANT, value=color)  # add border
    return im, ratio, (dw, dh)


if __name__ == '__main__':

    # Create RKNN Object
    rknn = RKNN(verbose=True)
    # 直接加载RKNN模型
    rknn.load_rknn(path='yolov5s.rknn')
    # Init runtime environment
    print('--> Init runtime environment')
    ret = rknn.init_runtime(target='rk3588')
    # ret = rknn.init_runtime('rk3566')
    if ret != 0:
        print('Init runtime environment failed!')
        exit(ret)
    print('done')

    # Set inputs
    img = cv2.imread(IMG_PATH)
    # img, ratio, (dw, dh) = letterbox(img, new_shape=(IMG_SIZE, IMG_SIZE))
    img = cv2.cvtColor(img, cv2.COLOR_BGR2RGB)
    img = cv2.resize(img, (IMG_SIZE, IMG_SIZE))

    # Inference
    print('--> Running model')
    img2 = np.expand_dims(img, 0)
    outputs = rknn.inference(inputs=[img2], data_format=['nhwc'])
    # np.save('./onnx_yolov5_0.npy', outputs[0])
    # np.save('./onnx_yolov5_1.npy', outputs[1])
    # np.save('./onnx_yolov5_2.npy', outputs[2])
    print('done')

    # post process
    input0_data = outputs[0]
    input1_data = outputs[1]
    input2_data = outputs[2]

    input0_data = input0_data.reshape([3, -1]+list(input0_data.shape[-2:]))
    input1_data = input1_data.reshape([3, -1]+list(input1_data.shape[-2:]))
    input2_data = input2_data.reshape([3, -1]+list(input2_data.shape[-2:]))

    input_data = list()
    input_data.append(np.transpose(input0_data, (2, 3, 0, 1)))
    input_data.append(np.transpose(input1_data, (2, 3, 0, 1)))
    input_data.append(np.transpose(input2_data, (2, 3, 0, 1)))

    boxes, classes, scores = yolov5_post_process(input_data)

    img_1 = cv2.cvtColor(img, cv2.COLOR_RGB2BGR)
    if boxes is not None:
        draw(img_1, boxes, scores, classes)
    # show output
    cv2.imshow("post process result", img_1)
    cv2.waitKey(0)
    cv2.destroyAllWindows()

    rknn.release()
然后运行该程序。
终端输出:

1.3.2 rknntoolkitlite2环境(该环境在RK3588开发板的系统上)下模型部署在RK3588开发板上并在开发板上完成推理测试
接下来我们来编写rknntoolkitlite2在开发板上部署运行的程序:
代码为:
#test_rknn_lite.py
import os
import urllib
import traceback
import time
import sys
import numpy as np
import cv2
from rknnlite.api import RKNNLite

ONNX_MODEL = 'yolov5s.onnx'
RKNN_MODEL = 'yolov5s.rknn'
IMG_PATH = './bus.jpg'
DATASET = './dataset.txt'

QUANTIZE_ON = True

OBJ_THRESH = 0.25
NMS_THRESH = 0.45
IMG_SIZE = 640

CLASSES = ("person", "bicycle", "car", "motorbike ", "aeroplane ", "bus ", "train", "truck ", "boat", "traffic light",
           "fire hydrant", "stop sign ", "parking meter", "bench", "bird", "cat", "dog ", "horse ", "sheep", "cow", "elephant",
           "bear", "zebra ", "giraffe", "backpack", "umbrella", "handbag", "tie", "suitcase", "frisbee", "skis", "snowboard", "sports ball", "kite",
           "baseball bat", "baseball glove", "skateboard", "surfboard", "tennis racket", "bottle", "wine glass", "cup", "fork", "knife ",
           "spoon", "bowl", "banana", "apple", "sandwich", "orange", "broccoli", "carrot", "hot dog", "pizza ", "donut", "cake", "chair", "sofa",
           "pottedplant", "bed", "diningtable", "toilet ", "tvmonitor", "laptop	", "mouse	", "remote ", "keyboard ", "cell phone", "microwave ",
           "oven ", "toaster", "sink", "refrigerator ", "book", "clock", "vase", "scissors ", "teddy bear ", "hair drier", "toothbrush ")


def sigmoid(x):
    return 1 / (1 + np.exp(-x))


def xywh2xyxy(x):
    # Convert [x, y, w, h] to [x1, y1, x2, y2]
    y = np.copy(x)
    y[:, 0] = x[:, 0] - x[:, 2] / 2  # top left x
    y[:, 1] = x[:, 1] - x[:, 3] / 2  # top left y
    y[:, 2] = x[:, 0] + x[:, 2] / 2  # bottom right x
    y[:, 3] = x[:, 1] + x[:, 3] / 2  # bottom right y
    return y


def process(input, mask, anchors):

    anchors = [anchors[i] for i in mask]
    grid_h, grid_w = map(int, input.shape[0:2])

    box_confidence = sigmoid(input[..., 4])
    box_confidence = np.expand_dims(box_confidence, axis=-1)

    box_class_probs = sigmoid(input[..., 5:])

    box_xy = sigmoid(input[..., :2])*2 - 0.5

    col = np.tile(np.arange(0, grid_w), grid_w).reshape(-1, grid_w)
    row = np.tile(np.arange(0, grid_h).reshape(-1, 1), grid_h)
    col = col.reshape(grid_h, grid_w, 1, 1).repeat(3, axis=-2)
    row = row.reshape(grid_h, grid_w, 1, 1).repeat(3, axis=-2)
    grid = np.concatenate((col, row), axis=-1)
    box_xy += grid
    box_xy *= int(IMG_SIZE/grid_h)

    box_wh = pow(sigmoid(input[..., 2:4])*2, 2)
    box_wh = box_wh * anchors

    box = np.concatenate((box_xy, box_wh), axis=-1)

    return box, box_confidence, box_class_probs


def filter_boxes(boxes, box_confidences, box_class_probs):
    """Filter boxes with box threshold. It's a bit different with origin yolov5 post process!

    # Arguments
        boxes: ndarray, boxes of objects.
        box_confidences: ndarray, confidences of objects.
        box_class_probs: ndarray, class_probs of objects.

    # Returns
        boxes: ndarray, filtered boxes.
        classes: ndarray, classes for boxes.
        scores: ndarray, scores for boxes.
    """
    boxes = boxes.reshape(-1, 4)
    box_confidences = box_confidences.reshape(-1)
    box_class_probs = box_class_probs.reshape(-1, box_class_probs.shape[-1])

    _box_pos = np.where(box_confidences >= OBJ_THRESH)
    boxes = boxes[_box_pos]
    box_confidences = box_confidences[_box_pos]
    box_class_probs = box_class_probs[_box_pos]

    class_max_score = np.max(box_class_probs, axis=-1)
    classes = np.argmax(box_class_probs, axis=-1)
    _class_pos = np.where(class_max_score >= OBJ_THRESH)

    boxes = boxes[_class_pos]
    classes = classes[_class_pos]
    scores = (class_max_score* box_confidences)[_class_pos]

    return boxes, classes, scores


def nms_boxes(boxes, scores):
    """Suppress non-maximal boxes.

    # Arguments
        boxes: ndarray, boxes of objects.
        scores: ndarray, scores of objects.

    # Returns
        keep: ndarray, index of effective boxes.
    """
    x = boxes[:, 0]
    y = boxes[:, 1]
    w = boxes[:, 2] - boxes[:, 0]
    h = boxes[:, 3] - boxes[:, 1]

    areas = w * h
    order = scores.argsort()[::-1]

    keep = []
    while order.size > 0:
        i = order[0]
        keep.append(i)

        xx1 = np.maximum(x[i], x[order[1:]])
        yy1 = np.maximum(y[i], y[order[1:]])
        xx2 = np.minimum(x[i] + w[i], x[order[1:]] + w[order[1:]])
        yy2 = np.minimum(y[i] + h[i], y[order[1:]] + h[order[1:]])

        w1 = np.maximum(0.0, xx2 - xx1 + 0.00001)
        h1 = np.maximum(0.0, yy2 - yy1 + 0.00001)
        inter = w1 * h1

        ovr = inter / (areas[i] + areas[order[1:]] - inter)
        inds = np.where(ovr <= NMS_THRESH)[0]
        order = order[inds + 1]
    keep = np.array(keep)
    return keep


def yolov5_post_process(input_data):
    masks = [[0, 1, 2], [3, 4, 5], [6, 7, 8]]
    anchors = [[10, 13], [16, 30], [33, 23], [30, 61], [62, 45],
               [59, 119], [116, 90], [156, 198], [373, 326]]

    boxes, classes, scores = [], [], []
    for input, mask in zip(input_data, masks):
        b, c, s = process(input, mask, anchors)
        b, c, s = filter_boxes(b, c, s)
        boxes.append(b)
        classes.append(c)
        scores.append(s)

    boxes = np.concatenate(boxes)
    boxes = xywh2xyxy(boxes)
    classes = np.concatenate(classes)
    scores = np.concatenate(scores)

    nboxes, nclasses, nscores = [], [], []
    for c in set(classes):
        inds = np.where(classes == c)
        b = boxes[inds]
        c = classes[inds]
        s = scores[inds]

        keep = nms_boxes(b, s)

        nboxes.append(b[keep])
        nclasses.append(c[keep])
        nscores.append(s[keep])

    if not nclasses and not nscores:
        return None, None, None

    boxes = np.concatenate(nboxes)
    classes = np.concatenate(nclasses)
    scores = np.concatenate(nscores)

    return boxes, classes, scores


def draw(image, boxes, scores, classes):
    """Draw the boxes on the image.

    # Argument:
        image: original image.
        boxes: ndarray, boxes of objects.
        classes: ndarray, classes of objects.
        scores: ndarray, scores of objects.
        all_classes: all classes name.
    """
    for box, score, cl in zip(boxes, scores, classes):
        top, left, right, bottom = box
        print('class: {}, score: {}'.format(CLASSES[cl], score))
        print('box coordinate left,top,right,down: [{}, {}, {}, {}]'.format(top, left, right, bottom))
        top = int(top)
        left = int(left)
        right = int(right)
        bottom = int(bottom)

        cv2.rectangle(image, (top, left), (right, bottom), (255, 0, 0), 2)
        cv2.putText(image, '{0} {1:.2f}'.format(CLASSES[cl], score),
                    (top, left - 6),
                    cv2.FONT_HERSHEY_SIMPLEX,
                    0.6, (0, 0, 255), 2)


def letterbox(im, new_shape=(640, 640), color=(0, 0, 0)):
    # Resize and pad image while meeting stride-multiple constraints
    shape = im.shape[:2]  # current shape [height, width]
    if isinstance(new_shape, int):
        new_shape = (new_shape, new_shape)

    # Scale ratio (new / old)
    r = min(new_shape[0] / shape[0], new_shape[1] / shape[1])

    # Compute padding
    ratio = r, r  # width, height ratios
    new_unpad = int(round(shape[1] * r)), int(round(shape[0] * r))
    dw, dh = new_shape[1] - new_unpad[0], new_shape[0] - new_unpad[1]  # wh padding

    dw /= 2  # divide padding into 2 sides
    dh /= 2

    if shape[::-1] != new_unpad:  # resize
        im = cv2.resize(im, new_unpad, interpolation=cv2.INTER_LINEAR)
    top, bottom = int(round(dh - 0.1)), int(round(dh + 0.1))
    left, right = int(round(dw - 0.1)), int(round(dw + 0.1))
    im = cv2.copyMakeBorder(im, top, bottom, left, right, cv2.BORDER_CONSTANT, value=color)  # add border
    return im, ratio, (dw, dh)


if __name__ == '__main__':

    # Create RKNN Object
    rknn = RKNNLite(verbose=True)
    # 直接加载RKNN模型
    rknn.load_rknn(path='yolov5s.rknn')
    # Init runtime environment
    print('--> Init runtime environment')
    ret = rknn.init_runtime()
    # ret = rknn.init_runtime('rk3566')
    if ret != 0:
        print('Init runtime environment failed!')
        exit(ret)
    print('done')

    # Set inputs
    img = cv2.imread(IMG_PATH)
    # img, ratio, (dw, dh) = letterbox(img, new_shape=(IMG_SIZE, IMG_SIZE))
    img = cv2.cvtColor(img, cv2.COLOR_BGR2RGB)
    img = cv2.resize(img, (IMG_SIZE, IMG_SIZE))

    # Inference
    print('--> Running model')
    img2 = np.expand_dims(img, 0)
    outputs = rknn.inference(inputs=[img2], data_format=['nhwc'])
    # np.save('./onnx_yolov5_0.npy', outputs[0])
    # np.save('./onnx_yolov5_1.npy', outputs[1])
    # np.save('./onnx_yolov5_2.npy', outputs[2])
    print('done')

    # post process
    input0_data = outputs[0]
    input1_data = outputs[1]
    input2_data = outputs[2]

    input0_data = input0_data.reshape([3, -1]+list(input0_data.shape[-2:]))
    input1_data = input1_data.reshape([3, -1]+list(input1_data.shape[-2:]))
    input2_data = input2_data.reshape([3, -1]+list(input2_data.shape[-2:]))

    input_data = list()
    input_data.append(np.transpose(input0_data, (2, 3, 0, 1)))
    input_data.append(np.transpose(input1_data, (2, 3, 0, 1)))
    input_data.append(np.transpose(input2_data, (2, 3, 0, 1)))

    boxes, classes, scores = yolov5_post_process(input_data)

    img_1 = cv2.cvtColor(img, cv2.COLOR_RGB2BGR)
    if boxes is not None:
        draw(img_1, boxes, scores, classes)
    # show output
    cv2.imshow("post process result", img_1)
    cv2.waitKey(0)
    cv2.destroyAllWindows()

    rknn.release()
到这里,使用rknntoolkitlite2在开发板上部署运行的程序已经修改完成。接下来需要将项目文件夹使用 adb push 命令拷贝到开发板上去。
打开终端:
输入adb push [xxx] [xxx],如下图所示:
接下来,我们使用MobaXterm软件控制开发板并运行上述程序,在运行程序之前,需要确保rknn的虚拟环境已经被激活。
在开发板上打开项目文件夹:
运行test_rknn_lite.py程序,如下所示:![]()
得到运行结果:
开发板系统界面已经显示出推理后的图片了。
到这里,在开发板上加载RKNN模型并对图片进行目标识别的程序就测试完成了。而我们最终的目的是对摄像头采集到的数据进行实时的目标识别,接下来,会对现有的程序进行修改,加入摄像头相关的程序内容。详细请参考1.4小节。
1.4 引入摄像头部分的程序
首先将摄像头相关的程序(/05_摄像头程序/01_Python程序/camera_demo.py)拷贝到项目文件夹中,如下所示:(该程序是摄像头的测试程序,可以显示摄像头的采集内容)
使用 adb push 命令将该程序传递到开发板上,如下所示:![]()
接下来使用 MobaXterm 软件,与开发板进行串口通信,输入指令 v4l2-ctl --list-devices 查看摄像头的对应设备节点:
上图中的 /dev/video11 是mipi摄像头的设备节点,/dev/video21 是USB摄像头的设备节点。
然后对传输的摄像头程序 camera_demo.py 进行查看,为了方便,我们在虚拟机上进行查看,如下图所示:
因此运行该程序后,显示的是mipi摄像头的拍摄图像。
终端输出如下所示:
在开发板上得到的视频画面如下:
接下来我们测试usb摄像头,对camera_demo.py文件进行修改,如下:

然后在开发板上运行该程序:

1.4.1 引入MIPI摄像头实时监测【注:RGB格式是MIPI摄像头采集到的数据格式之一】
接下来我们将摄像头程序与前述 rknntoolkitlite2 的程序相结合, 进行摄像头数据实时目标检测的程序的编写。
给出最终的程序,如下所示:
# test_rknn_lite_mipi.py
import os
import urllib
import traceback
import time
import sys
import numpy as np
import cv2
from rknnlite.api import RKNNLite

ONNX_MODEL = 'yolov5s.onnx'
RKNN_MODEL = 'yolov5s.rknn'
IMG_PATH = './bus.jpg'
DATASET = './dataset.txt'

QUANTIZE_ON = True

OBJ_THRESH = 0.25
NMS_THRESH = 0.45
IMG_SIZE = 640

CLASSES = ("person", "bicycle", "car", "motorbike ", "aeroplane ", "bus ", "train", "truck ", "boat", "traffic light",
           "fire hydrant", "stop sign ", "parking meter", "bench", "bird", "cat", "dog ", "horse ", "sheep", "cow", "elephant",
           "bear", "zebra ", "giraffe", "backpack", "umbrella", "handbag", "tie", "suitcase", "frisbee", "skis", "snowboard", "sports ball", "kite",
           "baseball bat", "baseball glove", "skateboard", "surfboard", "tennis racket", "bottle", "wine glass", "cup", "fork", "knife ",
           "spoon", "bowl", "banana", "apple", "sandwich", "orange", "broccoli", "carrot", "hot dog", "pizza ", "donut", "cake", "chair", "sofa",
           "pottedplant", "bed", "diningtable", "toilet ", "tvmonitor", "laptop	", "mouse	", "remote ", "keyboard ", "cell phone", "microwave ",
           "oven ", "toaster", "sink", "refrigerator ", "book", "clock", "vase", "scissors ", "teddy bear ", "hair drier", "toothbrush ")


def sigmoid(x):
    return 1 / (1 + np.exp(-x))


def xywh2xyxy(x):
    # Convert [x, y, w, h] to [x1, y1, x2, y2]
    y = np.copy(x)
    y[:, 0] = x[:, 0] - x[:, 2] / 2  # top left x
    y[:, 1] = x[:, 1] - x[:, 3] / 2  # top left y
    y[:, 2] = x[:, 0] + x[:, 2] / 2  # bottom right x
    y[:, 3] = x[:, 1] + x[:, 3] / 2  # bottom right y
    return y


def process(input, mask, anchors):

    anchors = [anchors[i] for i in mask]
    grid_h, grid_w = map(int, input.shape[0:2])

    box_confidence = sigmoid(input[..., 4])
    box_confidence = np.expand_dims(box_confidence, axis=-1)

    box_class_probs = sigmoid(input[..., 5:])

    box_xy = sigmoid(input[..., :2])*2 - 0.5

    col = np.tile(np.arange(0, grid_w), grid_w).reshape(-1, grid_w)
    row = np.tile(np.arange(0, grid_h).reshape(-1, 1), grid_h)
    col = col.reshape(grid_h, grid_w, 1, 1).repeat(3, axis=-2)
    row = row.reshape(grid_h, grid_w, 1, 1).repeat(3, axis=-2)
    grid = np.concatenate((col, row), axis=-1)
    box_xy += grid
    box_xy *= int(IMG_SIZE/grid_h)

    box_wh = pow(sigmoid(input[..., 2:4])*2, 2)
    box_wh = box_wh * anchors

    box = np.concatenate((box_xy, box_wh), axis=-1)

    return box, box_confidence, box_class_probs


def filter_boxes(boxes, box_confidences, box_class_probs):
    """Filter boxes with box threshold. It's a bit different with origin yolov5 post process!

    # Arguments
        boxes: ndarray, boxes of objects.
        box_confidences: ndarray, confidences of objects.
        box_class_probs: ndarray, class_probs of objects.

    # Returns
        boxes: ndarray, filtered boxes.
        classes: ndarray, classes for boxes.
        scores: ndarray, scores for boxes.
    """
    boxes = boxes.reshape(-1, 4)
    box_confidences = box_confidences.reshape(-1)
    box_class_probs = box_class_probs.reshape(-1, box_class_probs.shape[-1])

    _box_pos = np.where(box_confidences >= OBJ_THRESH)
    boxes = boxes[_box_pos]
    box_confidences = box_confidences[_box_pos]
    box_class_probs = box_class_probs[_box_pos]

    class_max_score = np.max(box_class_probs, axis=-1)
    classes = np.argmax(box_class_probs, axis=-1)
    _class_pos = np.where(class_max_score >= OBJ_THRESH)

    boxes = boxes[_class_pos]
    classes = classes[_class_pos]
    scores = (class_max_score* box_confidences)[_class_pos]

    return boxes, classes, scores


def nms_boxes(boxes, scores):
    """Suppress non-maximal boxes.

    # Arguments
        boxes: ndarray, boxes of objects.
        scores: ndarray, scores of objects.

    # Returns
        keep: ndarray, index of effective boxes.
    """
    x = boxes[:, 0]
    y = boxes[:, 1]
    w = boxes[:, 2] - boxes[:, 0]
    h = boxes[:, 3] - boxes[:, 1]

    areas = w * h
    order = scores.argsort()[::-1]

    keep = []
    while order.size > 0:
        i = order[0]
        keep.append(i)

        xx1 = np.maximum(x[i], x[order[1:]])
        yy1 = np.maximum(y[i], y[order[1:]])
        xx2 = np.minimum(x[i] + w[i], x[order[1:]] + w[order[1:]])
        yy2 = np.minimum(y[i] + h[i], y[order[1:]] + h[order[1:]])

        w1 = np.maximum(0.0, xx2 - xx1 + 0.00001)
        h1 = np.maximum(0.0, yy2 - yy1 + 0.00001)
        inter = w1 * h1

        ovr = inter / (areas[i] + areas[order[1:]] - inter)
        inds = np.where(ovr <= NMS_THRESH)[0]
        order = order[inds + 1]
    keep = np.array(keep)
    return keep


def yolov5_post_process(input_data):
    masks = [[0, 1, 2], [3, 4, 5], [6, 7, 8]]
    anchors = [[10, 13], [16, 30], [33, 23], [30, 61], [62, 45],
               [59, 119], [116, 90], [156, 198], [373, 326]]

    boxes, classes, scores = [], [], []
    for input, mask in zip(input_data, masks):
        b, c, s = process(input, mask, anchors)
        b, c, s = filter_boxes(b, c, s)
        boxes.append(b)
        classes.append(c)
        scores.append(s)

    boxes = np.concatenate(boxes)
    boxes = xywh2xyxy(boxes)
    classes = np.concatenate(classes)
    scores = np.concatenate(scores)

    nboxes, nclasses, nscores = [], [], []
    for c in set(classes):
        inds = np.where(classes == c)
        b = boxes[inds]
        c = classes[inds]
        s = scores[inds]

        keep = nms_boxes(b, s)

        nboxes.append(b[keep])
        nclasses.append(c[keep])
        nscores.append(s[keep])

    if not nclasses and not nscores:
        return None, None, None

    boxes = np.concatenate(nboxes)
    classes = np.concatenate(nclasses)
    scores = np.concatenate(nscores)

    return boxes, classes, scores


def draw(image, boxes, scores, classes):
    """Draw the boxes on the image.

    # Argument:
        image: original image.
        boxes: ndarray, boxes of objects.
        classes: ndarray, classes of objects.
        scores: ndarray, scores of objects.
        all_classes: all classes name.
    """
    for box, score, cl in zip(boxes, scores, classes):
        top, left, right, bottom = box
       # print('class: {}, score: {}'.format(CLASSES[cl], score))
       # print('box coordinate left,top,right,down: [{}, {}, {}, {}]'.format(top, left, right, bottom))
        top = int(top)
        left = int(left)
        right = int(right)
        bottom = int(bottom)

        cv2.rectangle(image, (top, left), (right, bottom), (255, 0, 0), 2)
        cv2.putText(image, '{0} {1:.2f}'.format(CLASSES[cl], score),
                    (top, left - 6),
                    cv2.FONT_HERSHEY_SIMPLEX,
                    0.6, (0, 0, 255), 2)


def letterbox(im, new_shape=(640, 640), color=(0, 0, 0)):
    # Resize and pad image while meeting stride-multiple constraints
    shape = im.shape[:2]  # current shape [height, width]
    if isinstance(new_shape, int):
        new_shape = (new_shape, new_shape)

    # Scale ratio (new / old)
    r = min(new_shape[0] / shape[0], new_shape[1] / shape[1])

    # Compute padding
    ratio = r, r  # width, height ratios
    new_unpad = int(round(shape[1] * r)), int(round(shape[0] * r))
    dw, dh = new_shape[1] - new_unpad[0], new_shape[0] - new_unpad[1]  # wh padding

    dw /= 2  # divide padding into 2 sides
    dh /= 2

    if shape[::-1] != new_unpad:  # resize
        im = cv2.resize(im, new_unpad, interpolation=cv2.INTER_LINEAR)
    top, bottom = int(round(dh - 0.1)), int(round(dh + 0.1))
    left, right = int(round(dw - 0.1)), int(round(dw + 0.1))
    im = cv2.copyMakeBorder(im, top, bottom, left, right, cv2.BORDER_CONSTANT, value=color)  # add border
    return im, ratio, (dw, dh)


if __name__ == '__main__':

    # Create RKNN Object
    rknn = RKNNLite(verbose=False)
    # 直接加载RKNN模型
    rknn.load_rknn(path='yolov5s.rknn')
    # Init runtime environment
    print('--> Init runtime environment')
    ret = rknn.init_runtime()
    # ret = rknn.init_runtime('rk3566')
    if ret != 0:
        print('Init runtime environment failed!')
        exit(ret)
    print('done')

    # Set inputs
    # img = cv2.imread(IMG_PATH)
    # img, ratio, (dw, dh) = letterbox(img, new_shape=(IMG_SIZE, IMG_SIZE))
    # img = cv2.cvtColor(img, cv2.COLOR_BGR2RGB)
    # img = cv2.resize(img, (IMG_SIZE, IMG_SIZE))
    cap = cv2.VideoCapture('/dev/video11', cv2.CAP_ANY)  # MIPI摄像头
    cap.set(cv2.CAP_PROP_FOURCC, cv2.VideoWriter_fourcc(*'NV12'))
    frames, loopTime, initTime = 0, time.time(), time.time()
    fps = 0
    while True:
        frames += 1
        # 从摄像头捕获帧
        ret, img = cap.read()
        # 如果捕获到帧,则显示它
        if ret:
            # Inference
            # print('--> Running model')
            img = cv2.resize(img,(IMG_SIZE,IMG_SIZE))
            img2 = np.expand_dims(img, 0)
            outputs = rknn.inference(inputs=[img2], data_format=['nhwc'])
            # np.save('./onnx_yolov5_0.npy', outputs[0])
            # np.save('./onnx_yolov5_1.npy', outputs[1])
            # np.save('./onnx_yolov5_2.npy', outputs[2])
            # print('done')

            # post process
            input0_data = outputs[0]
            input1_data = outputs[1]
            input2_data = outputs[2]

            input0_data = input0_data.reshape([3, -1]+list(input0_data.shape[-2:]))
            input1_data = input1_data.reshape([3, -1]+list(input1_data.shape[-2:]))
            input2_data = input2_data.reshape([3, -1]+list(input2_data.shape[-2:]))

            input_data = list()
            input_data.append(np.transpose(input0_data, (2, 3, 0, 1)))
            input_data.append(np.transpose(input1_data, (2, 3, 0, 1)))
            input_data.append(np.transpose(input2_data, (2, 3, 0, 1)))

            boxes, classes, scores = yolov5_post_process(input_data)

            img_1 = cv2.cvtColor(img, cv2.COLOR_RGB2BGR)
            if boxes is not None:
                draw(img_1, boxes, scores, classes)
            # show output
                if frames % 30 == 0:
                    print("30帧平均帧率:\t", 30 / (time.time() - loopTime), "帧")
                    fps = 30 / (time.time() - loopTime)
                    loopTime = time.time()
                # frame = cv2.cvtColor(frame, cv2.COLOR_RGB2BGR)
                cv2.putText(img_1, "FPS: {:.2f}".format(fps), (10, 30), cv2.FONT_HERSHEY_SIMPLEX, 1, (0, 0, 255),
                            2)  # 在图像上显示帧率
                cv2.imshow("MIPI Camera", img_1)
            # 按下'q'键退出循环
            if cv2.waitKey(1) & 0xFF == ord("q"):
                break
    # cv2.imshow("post process result", img_1)
    cv2.waitKey(0)
    cv2.destroyAllWindows()

    rknn.release()
至此,接下来可以使用adb push 命令将程序传入到开发板系统上去。
然后运行该程序,运行结果为:
开发板上的结果为:
1.4.2 使用USB摄像头实时监测【注:BGR格式是USB摄像头采集到的数据格式之一】
使用usb摄像头实时监测的程序为:
# test_rknn_lite_usb.py
import os
import urllib
import traceback
import time
import sys
import numpy as np
import cv2
from rknnlite.api import RKNNLite

ONNX_MODEL = 'yolov5s.onnx'
RKNN_MODEL = 'yolov5s.rknn'
IMG_PATH = './bus.jpg'
DATASET = './dataset.txt'

QUANTIZE_ON = True

OBJ_THRESH = 0.25
NMS_THRESH = 0.45
IMG_SIZE = 640

CLASSES = ("person", "bicycle", "car", "motorbike ", "aeroplane ", "bus ", "train", "truck ", "boat", "traffic light",
           "fire hydrant", "stop sign ", "parking meter", "bench", "bird", "cat", "dog ", "horse ", "sheep", "cow", "elephant",
           "bear", "zebra ", "giraffe", "backpack", "umbrella", "handbag", "tie", "suitcase", "frisbee", "skis", "snowboard", "sports ball", "kite",
           "baseball bat", "baseball glove", "skateboard", "surfboard", "tennis racket", "bottle", "wine glass", "cup", "fork", "knife ",
           "spoon", "bowl", "banana", "apple", "sandwich", "orange", "broccoli", "carrot", "hot dog", "pizza ", "donut", "cake", "chair", "sofa",
           "pottedplant", "bed", "diningtable", "toilet ", "tvmonitor", "laptop	", "mouse	", "remote ", "keyboard ", "cell phone", "microwave ",
           "oven ", "toaster", "sink", "refrigerator ", "book", "clock", "vase", "scissors ", "teddy bear ", "hair drier", "toothbrush ")


def sigmoid(x):
    return 1 / (1 + np.exp(-x))


def xywh2xyxy(x):
    # Convert [x, y, w, h] to [x1, y1, x2, y2]
    y = np.copy(x)
    y[:, 0] = x[:, 0] - x[:, 2] / 2  # top left x
    y[:, 1] = x[:, 1] - x[:, 3] / 2  # top left y
    y[:, 2] = x[:, 0] + x[:, 2] / 2  # bottom right x
    y[:, 3] = x[:, 1] + x[:, 3] / 2  # bottom right y
    return y


def process(input, mask, anchors):

    anchors = [anchors[i] for i in mask]
    grid_h, grid_w = map(int, input.shape[0:2])

    box_confidence = sigmoid(input[..., 4])
    box_confidence = np.expand_dims(box_confidence, axis=-1)

    box_class_probs = sigmoid(input[..., 5:])

    box_xy = sigmoid(input[..., :2])*2 - 0.5

    col = np.tile(np.arange(0, grid_w), grid_w).reshape(-1, grid_w)
    row = np.tile(np.arange(0, grid_h).reshape(-1, 1), grid_h)
    col = col.reshape(grid_h, grid_w, 1, 1).repeat(3, axis=-2)
    row = row.reshape(grid_h, grid_w, 1, 1).repeat(3, axis=-2)
    grid = np.concatenate((col, row), axis=-1)
    box_xy += grid
    box_xy *= int(IMG_SIZE/grid_h)

    box_wh = pow(sigmoid(input[..., 2:4])*2, 2)
    box_wh = box_wh * anchors

    box = np.concatenate((box_xy, box_wh), axis=-1)

    return box, box_confidence, box_class_probs


def filter_boxes(boxes, box_confidences, box_class_probs):
    """Filter boxes with box threshold. It's a bit different with origin yolov5 post process!

    # Arguments
        boxes: ndarray, boxes of objects.
        box_confidences: ndarray, confidences of objects.
        box_class_probs: ndarray, class_probs of objects.

    # Returns
        boxes: ndarray, filtered boxes.
        classes: ndarray, classes for boxes.
        scores: ndarray, scores for boxes.
    """
    boxes = boxes.reshape(-1, 4)
    box_confidences = box_confidences.reshape(-1)
    box_class_probs = box_class_probs.reshape(-1, box_class_probs.shape[-1])

    _box_pos = np.where(box_confidences >= OBJ_THRESH)
    boxes = boxes[_box_pos]
    box_confidences = box_confidences[_box_pos]
    box_class_probs = box_class_probs[_box_pos]

    class_max_score = np.max(box_class_probs, axis=-1)
    classes = np.argmax(box_class_probs, axis=-1)
    _class_pos = np.where(class_max_score >= OBJ_THRESH)

    boxes = boxes[_class_pos]
    classes = classes[_class_pos]
    scores = (class_max_score* box_confidences)[_class_pos]

    return boxes, classes, scores


def nms_boxes(boxes, scores):
    """Suppress non-maximal boxes.

    # Arguments
        boxes: ndarray, boxes of objects.
        scores: ndarray, scores of objects.

    # Returns
        keep: ndarray, index of effective boxes.
    """
    x = boxes[:, 0]
    y = boxes[:, 1]
    w = boxes[:, 2] - boxes[:, 0]
    h = boxes[:, 3] - boxes[:, 1]

    areas = w * h
    order = scores.argsort()[::-1]

    keep = []
    while order.size > 0:
        i = order[0]
        keep.append(i)

        xx1 = np.maximum(x[i], x[order[1:]])
        yy1 = np.maximum(y[i], y[order[1:]])
        xx2 = np.minimum(x[i] + w[i], x[order[1:]] + w[order[1:]])
        yy2 = np.minimum(y[i] + h[i], y[order[1:]] + h[order[1:]])

        w1 = np.maximum(0.0, xx2 - xx1 + 0.00001)
        h1 = np.maximum(0.0, yy2 - yy1 + 0.00001)
        inter = w1 * h1

        ovr = inter / (areas[i] + areas[order[1:]] - inter)
        inds = np.where(ovr <= NMS_THRESH)[0]
        order = order[inds + 1]
    keep = np.array(keep)
    return keep


def yolov5_post_process(input_data):
    masks = [[0, 1, 2], [3, 4, 5], [6, 7, 8]]
    anchors = [[10, 13], [16, 30], [33, 23], [30, 61], [62, 45],
               [59, 119], [116, 90], [156, 198], [373, 326]]

    boxes, classes, scores = [], [], []
    for input, mask in zip(input_data, masks):
        b, c, s = process(input, mask, anchors)
        b, c, s = filter_boxes(b, c, s)
        boxes.append(b)
        classes.append(c)
        scores.append(s)

    boxes = np.concatenate(boxes)
    boxes = xywh2xyxy(boxes)
    classes = np.concatenate(classes)
    scores = np.concatenate(scores)

    nboxes, nclasses, nscores = [], [], []
    for c in set(classes):
        inds = np.where(classes == c)
        b = boxes[inds]
        c = classes[inds]
        s = scores[inds]

        keep = nms_boxes(b, s)

        nboxes.append(b[keep])
        nclasses.append(c[keep])
        nscores.append(s[keep])

    if not nclasses and not nscores:
        return None, None, None

    boxes = np.concatenate(nboxes)
    classes = np.concatenate(nclasses)
    scores = np.concatenate(nscores)

    return boxes, classes, scores


def draw(image, boxes, scores, classes):
    """Draw the boxes on the image.

    # Argument:
        image: original image.
        boxes: ndarray, boxes of objects.
        classes: ndarray, classes of objects.
        scores: ndarray, scores of objects.
        all_classes: all classes name.
    """
    for box, score, cl in zip(boxes, scores, classes):
        top, left, right, bottom = box
       # print('class: {}, score: {}'.format(CLASSES[cl], score))
       # print('box coordinate left,top,right,down: [{}, {}, {}, {}]'.format(top, left, right, bottom))
        top = int(top)
        left = int(left)
        right = int(right)
        bottom = int(bottom)

        cv2.rectangle(image, (top, left), (right, bottom), (255, 0, 0), 2)
        cv2.putText(image, '{0} {1:.2f}'.format(CLASSES[cl], score),
                    (top, left - 6),
                    cv2.FONT_HERSHEY_SIMPLEX,
                    0.6, (0, 0, 255), 2)


def letterbox(im, new_shape=(640, 640), color=(0, 0, 0)):
    # Resize and pad image while meeting stride-multiple constraints
    shape = im.shape[:2]  # current shape [height, width]
    if isinstance(new_shape, int):
        new_shape = (new_shape, new_shape)

    # Scale ratio (new / old)
    r = min(new_shape[0] / shape[0], new_shape[1] / shape[1])

    # Compute padding
    ratio = r, r  # width, height ratios
    new_unpad = int(round(shape[1] * r)), int(round(shape[0] * r))
    dw, dh = new_shape[1] - new_unpad[0], new_shape[0] - new_unpad[1]  # wh padding

    dw /= 2  # divide padding into 2 sides
    dh /= 2

    if shape[::-1] != new_unpad:  # resize
        im = cv2.resize(im, new_unpad, interpolation=cv2.INTER_LINEAR)
    top, bottom = int(round(dh - 0.1)), int(round(dh + 0.1))
    left, right = int(round(dw - 0.1)), int(round(dw + 0.1))
    im = cv2.copyMakeBorder(im, top, bottom, left, right, cv2.BORDER_CONSTANT, value=color)  # add border
    return im, ratio, (dw, dh)


if __name__ == '__main__':

    # Create RKNN Object
    rknn = RKNNLite(verbose=False)
    # 直接加载RKNN模型
    rknn.load_rknn(path='yolov5s.rknn')
    # Init runtime environment
    print('--> Init runtime environment')
    ret = rknn.init_runtime()
    # ret = rknn.init_runtime('rk3566')
    if ret != 0:
        print('Init runtime environment failed!')
        exit(ret)
    print('done')

    # Set inputs
    # img = cv2.imread(IMG_PATH)
    # img, ratio, (dw, dh) = letterbox(img, new_shape=(IMG_SIZE, IMG_SIZE))
    # img = cv2.cvtColor(img, cv2.COLOR_BGR2RGB)
    # img = cv2.resize(img, (IMG_SIZE, IMG_SIZE))
    cap = cv2.VideoCapture('/dev/video21', cv2.CAP_ANY)  # USB摄像头
    frames, loopTime, initTime = 0, time.time(), time.time()
    fps = 0
    while True:
        frames += 1
        # 从摄像头捕获帧
        ret, img = cap.read()
        # 如果捕获到帧,则显示它
        if ret:
            # Inference
            # print('--> Running model')
            img = cv2.cvtColor(img, cv2.COLOR_BGR2RGB)
            img = cv2.resize(img, (IMG_SIZE,IMG_SIZE))
            img = np.expand_dims(img, 0)
            outputs = rknn.inference(inputs=[img], data_format=['nhwc'])
            # np.save('./onnx_yolov5_0.npy', outputs[0])
            # np.save('./onnx_yolov5_1.npy', outputs[1])
            # np.save('./onnx_yolov5_2.npy', outputs[2])
            # print('done')

            # post process
            input0_data = outputs[0]
            input1_data = outputs[1]
            input2_data = outputs[2]

            input0_data = input0_data.reshape([3, -1]+list(input0_data.shape[-2:]))
            input1_data = input1_data.reshape([3, -1]+list(input1_data.shape[-2:]))
            input2_data = input2_data.reshape([3, -1]+list(input2_data.shape[-2:]))

            input_data = list()
            input_data.append(np.transpose(input0_data, (2, 3, 0, 1)))
            input_data.append(np.transpose(input1_data, (2, 3, 0, 1)))
            input_data.append(np.transpose(input2_data, (2, 3, 0, 1)))

            boxes, classes, scores = yolov5_post_process(input_data)

            img_1 = cv2.cvtColor(img, cv2.COLOR_RGB2BGR)
            if boxes is not None:
                draw(img_1, boxes, scores, classes)
            # show output
                if frames % 30 == 0:
                    print("30帧平均帧率:\t", 30 / (time.time() - loopTime), "帧")
                    fps = 30 / (time.time() - loopTime)
                    loopTime = time.time()
                # frame = cv2.cvtColor(frame, cv2.COLOR_RGB2BGR)
                cv2.putText(img_1, "FPS: {:.2f}".format(fps), (10, 30), cv2.FONT_HERSHEY_SIMPLEX, 1, (0, 0, 255),
                            2)  # 在图像上显示帧率
                cv2.imshow("USB Camera", img_1)
            # 按下'q'键退出循环
            if cv2.waitKey(1) & 0xFF == ord("q"):
                break
    # cv2.imshow("post process result", img_1)
    cv2.waitKey(0)
    cv2.destroyAllWindows()

    rknn.release()
注意:USB摄像头采集到的数据一般为BGR格式 ,因此在推理之前需要引入数据格式的转换。
将上述程序推送拷贝到开发板上,如下:
在开发板上运行该程序,![]()
终端输出:
开发板上运行效果图如下:
1.4.3 给定视频情况下的实时监测(test_rknn_lite_video.py)
对 1.4.2 中的程序进行修改,将:
修改为:![]()
其余位置不做修改。
然后将视频文件和该程序推送拷贝到开发板上,有:
执行该程序:![]()
开发板上效果:

1.5 帧率优化
由 1.4 节中运行结果可知,最终的帧率基本在十几帧左右,那么如何提高帧率呢?
1.5.1 设置多核心工作模式
RK3588有三个NPU核心,在init_runtime接口中,将core_mask参数进行修改,表示三个核心同时工作。

1.5.2 定频
然后也可以固定CPU和NPU的频率,从而提高性能,加快推理和后处理的速度,进而提高帧率。
将网盘中的定频脚本拷贝到工程目录中,

使用 adb push 命令将修改之后的test_rknn_lite_video.py以及定频脚本performance.sh推送拷贝到开发板上,即:

拷贝之后,修改定频脚本的权限,有:![]()
然后运行该脚本:
可以看到CPU的八个核心都被固定到了最大的频率,NPU被固定为了1GHZ。
然后运行程序:
我们发现帧率仍然稳定在13帧左右,没有提升。【按道理使用三个NPU帧率是会提升的,但是这里没有,博主也不得而知了。】
1.6 帧率进一步优化
提高这一点点帧率也是不够的,我们还需另寻他法来进行帧率的优化,首先我们打开项目文件夹进入08_多线程程序文件夹,如下:
打开github网址.txt,如下:
这个txt文档存放的是一位大佬的项目链接,分别包括python版本的和c++版本的,并且还有演示视频。
08_多线程程序 文件夹存放的两个文件夹 01_Python 和 02_C 存放的即是链接所下载的项目。
接下来我们先来看python版本的项目,请看1.6.1小节。
1.6.1 python版本的多线程帧率优化(给定测试视频文件)
将python版本的项目文件夹拷贝到虚拟机中,如下所示:
rknnModel 用来存放RKNN模型,func.py是推理完成后进行后处理的代码,performance.sh 是定频脚本,rkcat.sh 可以查看当前核心的温度以及NPU的使用率,rknnpool.py表示线程池的实现。
在main.py文件中有如下修改:
注意:修改为之前的视频文件时需要将之前的视频文件拷贝到项目文件夹中,如下:
然后将整个项目文件夹使用adb push 推送拷贝到开发板上去,有:
然后在开发板上运行 main.py 程序。
在运行main.py之前,需要对 func.py 进行修改(原因是:目前使用的rknn toolkit2、rknn toolkit lite2、rknn_server 版本是2.0.0,若这些版本为1.4.0的,就可以不用修改,可直接运行),修改后如下图所示:
修改完成之后需将 func.py 文件推送拷贝到开发板上即可。
接下来,我们就可以运行 main.py 程序了。得到运行结果如下图所示:
我们发现帧率达到了70左右,帧率大大提升。
1.6.2 python版本的多线程帧率优化(usb摄像头实时监测)
将main.py复制拷贝一份,重新命名为main_usb.py,然后做如下修改:
修改为:
然后将修改完成的代码传输到开发板上,运行main_usb.py,如下所示:
帧率基本维持在29帧。这是因为摄像头的采集帧率为30帧,如果换一个更高帧率的摄像头,那么就不仅仅是29帧了。
1.6.3 python版本的多线程帧率优化(mipi 摄像头实时监测)
将main.py复制拷贝一份,重新命名为main_mipi.py,然后做如下修改:
修改为:
对func.py中进行修改:
修改为:
这是因为mipi摄像头采集到的数据已经是RGB格式了。
接下来将修改好的文件拷贝到开发板上,运行main_mipi.py 得到结果:
帧率稳定在15帧左右。
1.6.4 C++ 版本的多线程帧率优化(给定视频文件实时监测)
将c++版本的项目拷贝到Ubuntu虚拟机上,如下图所示:

include文件夹用来存放程序运行用到的头文件和第三方库。
model文件夹用来存放推理要用到的rknn模型。
src文件夹用来存放主程序 main.cc 和后处理原码。
build-linux_RK3588.sh是用来进行cmake构建的脚本文件。
cmakelists.txt是cmake的配置文件。
performace.sh是CPU和NPU的定频脚本。
在程序运行前,还需要对部分文件进行修改。
首先修改build-linux_RK3588.sh文件,如下:
将:
修改为:
将:
修改为:
由于该工程的构建需要opencv,但是在项目文件夹中并没有提供opencv相应的库。将网盘所给资料中 09_编译完成的opencv库/opencv.tar.gz 拷贝到Ubuntu虚拟机上并解压。
然后修改cmakelists.txt文件中关于opencv相关的部分。如下:
将:
修改为:
添加opencv的安装路径:
然后运行build-linux_RK3588.sh脚本文件进行cmake工程的构建。
运行结束后终端输出:
生成build和install目录,如下图所示:
将install目录推送拷贝至开发板上,

然后在开发板上运行程序,注意在运行程序之前需要确定测试视频的路径,在这里我们使用python版本下的测试视频即可,如下:
得到运行结果:
平均帧率达到70帧率左右。效果还是很不错的。
注意:在运行程序过程中,可能会报错,错误原因是没有安装libdc1394-22-dev这个依赖库,要先安装这个库之后再次运行程序就不会出错了。
我们更换模型,如下所示:
运行结果:
我们看到平均帧率在102帧,这已经是很好的表现了。
1.6.5 C++ 版本的多线程帧率优化(USB摄像头实时监测)
这里只需要将运行程序指令的第二个参数修改为USB摄像头对应的设备节点即可。
我们看到帧率基本稳定在29帧左右,这是因为该摄像头最大采集帧率为30帧。
1.6.5 C++ 版本的多线程帧率优化(mipi摄像头实时监测)

可以看到帧率只有仅仅十五帧左右。

