一、说明
前面文章我们写到了通过数据库查询出用户信息并返回,那么在真实的项目中呢,后端是需要给前端返回一个tocken,当前端通过登录功能认证成功之后,我们后端需要将用户信息和权限整合成一个tocken返回给前端,当前端再次访问别的接口的时候,需要携带着tocken,请求到达后端的时候,后端需要从前端传递过来的tocken中解析出用户信息和权限,判断是否可以访问。
实现思路:在登录中的查询用户中,将权限也查询出来,随后通过jwt来生成tocken和解析tocken
二、 编写jwt工具类(生成tocken和解析tocken)
package com.ljy.myspringbootlogin.utils;

import io.jsonwebtoken.*;
import io.jsonwebtoken.io.Decoders;
import io.jsonwebtoken.security.Keys;
import org.springframework.stereotype.Component;

import javax.crypto.SecretKey;
import java.util.Date;
import java.util.Map;

@Component
public class JwtUtils {

    /**
     * 创建一个密钥
     */

    private String secret = "Ljy991008X123435asdfSFS34wfsdfsdfSDSD32dfsddDDerQSNCK34SOWEK5354fdgdf4";

    SecretKey  key = Keys.hmacShaKeyFor(Decoders.BASE64.decode(secret));


    /**
     * 生成tocken
     */
    public String createTocken(Map<String,Object> map){
        String tocken = Jwts.builder()
                .setClaims(map)
                .issuedAt(new Date())
                .expiration(new Date(System.currentTimeMillis() * 30 * 60 * 1000))
                .signWith(key)
                .compact();
        return tocken;
    }

    /**
     * 解析tocken
     */
    public Claims parasTocken(String tocken){
        Jws<Claims> claimsJws = Jwts.parser()
                .verifyWith(key)
                .build()
                .parseSignedClaims(tocken);

        return claimsJws.getBody();
    }
}
三、通过jwt工具类将用户信息和权限生成tocken返回给前端
修改userServiceImpl中的代码
package com.ljy.myspringbootlogin.impl;

import com.baomidou.mybatisplus.core.conditions.query.QueryWrapper;
import com.baomidou.mybatisplus.extension.service.impl.ServiceImpl;
import com.ljy.myspringbootlogin.commont.Reuslt;
import com.ljy.myspringbootlogin.mapper.UserMapper;
import com.ljy.myspringbootlogin.model.UserModel;
import com.ljy.myspringbootlogin.service.IUserService;
import com.ljy.myspringbootlogin.utils.JwtUtils;
import lombok.extern.slf4j.Slf4j;
import org.springframework.beans.factory.annotation.Autowired;
import org.springframework.security.authentication.AuthenticationManager;
import org.springframework.security.authentication.BadCredentialsException;
import org.springframework.security.authentication.UsernamePasswordAuthenticationToken;
import org.springframework.security.core.Authentication;
import org.springframework.security.core.GrantedAuthority;
import org.springframework.security.core.authority.AuthorityUtils;
import org.springframework.security.core.userdetails.UserDetails;
import org.springframework.security.core.userdetails.UsernameNotFoundException;
import org.springframework.stereotype.Service;

import java.util.*;

@Service
@Slf4j
public class UserServiceImpl extends ServiceImpl<UserMapper, UserModel> implements IUserService {

    @Autowired
    private AuthenticationManager authenticationManager;
    @Autowired
    private JwtUtils jwtUtils;

    @Override
    public Reuslt<UserModel> login(String username, String password) {
        System.out.println("进入serviceimpl");
        System.out.println(username);
        System.out.println(password);
        //传入用户名和密码
        UsernamePasswordAuthenticationToken tocken = new UsernamePasswordAuthenticationToken(username, password);
        System.out.println("tocken"+tocken);
        //实现登录,此时就会调用loadUserByName
        //authenticate其实就是userdetails
        Authentication authenticate = null;
        try{
            authenticate= authenticationManager.authenticate(tocken);
            System.out.println("測試!!!!!");
        }catch (BadCredentialsException e){
            return Reuslt.error(500,"用户名或者密码错误");
        }
        UserModel principal = (UserModel)authenticate.getPrincipal();
        System.out.println("principal:"+principal);

        //生成tocken   修改这里就可以
        HashMap<String,Object> map = new HashMap<>();
        map.put("id",principal.getId());
        map.put("username",principal.getUsername());
        map.put("menuList",principal.getMenuList());
        map.put("roleList",principal.getRoleList());
        String tocken1 = jwtUtils.createTocken(map);
        System.out.println("tocken1"+tocken1);
        principal.setTocken(tocken1);
        return Reuslt.ok(principal);
    }
}
四、编写自定义过滤器(作用:当前端携带tocken访问别的接口的时候,需要进行判断是否有权限访问)
package com.ljy.myspringbootlogin.filter;

import com.ljy.myspringbootlogin.model.MenuModel;
import com.ljy.myspringbootlogin.model.RoleModel;
import com.ljy.myspringbootlogin.model.UserModel;
import com.ljy.myspringbootlogin.utils.JwtUtils;
import io.jsonwebtoken.Claims;
import org.springframework.beans.factory.annotation.Autowired;
import org.springframework.security.authentication.UsernamePasswordAuthenticationToken;
import org.springframework.security.core.GrantedAuthority;
import org.springframework.security.core.authority.AuthorityUtils;
import org.springframework.security.core.context.SecurityContextHolder;
import org.springframework.stereotype.Component;
import org.springframework.web.filter.OncePerRequestFilter;
import org.springframework.security.core.authority.SimpleGrantedAuthority;
import javax.servlet.FilterChain;
import javax.servlet.ServletException;
import javax.servlet.http.HttpServletRequest;
import javax.servlet.http.HttpServletResponse;
import java.io.IOException;
import java.util.ArrayList;
import java.util.Collection;
import java.util.List;
import java.util.stream.Collectors;

/**
 * 这个过滤器的作用:
 * 当某一个用户登录认证成功之后,后端给前端返回一个tocken信息,这个tocken信息里面包含着用户的属性和用户的角色、权限信息
 * 那么当这个用户再次访问别的接口的时候,后端就需要对前端传递过来的tocken信息进行解析,判断里面是否有权限访问接口
 *
 * 我们需要集成OncePerRequestFilter,这个是一个抽象类,其中有一个doFilter方法,在doFilter方法中调用了doFilterInternal方法,也是一个抽象方法,所以需要实现
 * 并且只会在请求之前执行一次
 *
 * 实现逻辑:
 * 1.获取前端传递过来的tocken
 * 2.解析tocken
 * 3.将解析出来的用户信息和权限使用Authentication告诉给springSecurity框架,springsecurity会将信息存储到SecurityContet中,
 * 从而放在SecurityContetHolder中
 * 4.有权限就访问,没有权限就报错
 *
 *
 * 注意:登录的时候,只需要放用户名和密码
 *      登录成功之后请求别的接口的时候,需要放的是用户信息和用户权限
 *
 */

@Component
public class JwtAuthenticationFilter extends OncePerRequestFilter {
    @Autowired
    JwtUtils jwtUtils;

    /**
     * 这个方法会被doFilter调用
     * @param request
     * @param response
     * @param filterChain
     * @throws ServletException
     * @throws IOException
     */
    @Override
    protected void doFilterInternal(HttpServletRequest request, HttpServletResponse response, FilterChain filterChain) throws ServletException, IOException {


        /**
         * 1.获取tocken
         * 因为前端将tocken信息放到了请求头中,所以我们需要使用request.getHeader("XXXX")来获取tocken
         */
        String tocken = request.getHeader("Authorization");
        if(tocken == null){
            doFilter(request,response,filterChain);
            return;
        }

        /**
         * 2.解析tocken
         * 使用我们自己编写的工具类,JwtUtils来解析
         */
        Claims claims = jwtUtils.parasTocken(tocken);
        System.out.println("解析出来的用户信息:"+claims);

        /**
         * 3.将解析出来的用户信息和权限使用Authentication告诉给springSecurity框架,springsecurity会将信息存储到SecurityContet中,
         * 从而放在SecurityContetHolder中
         */
        //3.1 从tocken中拿到信息
        Long id = claims.get("id", Long.class);
        String username = claims.get("username", String.class);
        List<String> menuList = claims.get("menuList", ArrayList.class);
        System.out.println("menuList:"+menuList);
        List<String> roleList = claims.get("roleList", ArrayList.class);
        //3.2 将信息放到userModel中
        UserModel userModel = new UserModel();
        userModel.setId(id);
        userModel.setUsername(username);
        userModel.setMenuList(menuList);
        //将权限信息转换成
        Collection<GrantedAuthority> grantedAuthorities = AuthorityUtils.createAuthorityList(menuList.toArray(new String[0]));
        userModel.setAuthorities(grantedAuthorities);
        System.out.println("userModel:"+userModel);
        //3.3 将信息当道SecurityContet中
        UsernamePasswordAuthenticationToken usernamePasswordAuthenticationToken =
                new UsernamePasswordAuthenticationToken(userModel, "", userModel.getAuthorities());
        SecurityContextHolder.getContext().setAuthentication(usernamePasswordAuthenticationToken);
        System.out.println("userModel.getAuthorities():"+userModel.getAuthorities());
        //3.4 放行
        doFilter(request,response,filterChain);

    }
}
五、将自定义过滤器加载到springsecurity框架的过滤器链中
修改springsecurityConfig
package com.ljy.myspringbootlogin.config;

import com.ljy.myspringbootlogin.filter.JwtAuthenticationFilter;
import com.ljy.myspringbootlogin.springSecurityService;
import org.springframework.beans.factory.annotation.Autowired;
import org.springframework.context.annotation.Bean;
import org.springframework.context.annotation.Configuration;
import org.springframework.security.authentication.AuthenticationManager;
import org.springframework.security.authentication.ProviderManager;
import org.springframework.security.authentication.dao.DaoAuthenticationProvider;
import org.springframework.security.config.annotation.method.configuration.EnableMethodSecurity;
import org.springframework.security.config.annotation.web.builders.HttpSecurity;
import org.springframework.security.config.annotation.web.configuration.EnableWebSecurity;
import org.springframework.security.core.Authentication;
import org.springframework.security.core.AuthenticationException;
import org.springframework.security.crypto.bcrypt.BCryptPasswordEncoder;
import org.springframework.security.crypto.password.NoOpPasswordEncoder;
import org.springframework.security.crypto.password.PasswordEncoder;
import org.springframework.security.web.SecurityFilterChain;
import org.springframework.security.web.authentication.AuthenticationFailureHandler;
import org.springframework.security.web.authentication.AuthenticationSuccessHandler;
import org.springframework.security.web.authentication.UsernamePasswordAuthenticationFilter;

import javax.servlet.ServletException;
import javax.servlet.http.HttpServletRequest;
import javax.servlet.http.HttpServletResponse;
import java.io.IOException;

@EnableWebSecurity //开启springSecurity,会注册大量的过滤器链
@Configuration
@EnableMethodSecurity //开启方法级别的安全校验
public class springSecurityConfig {

    @Autowired
    private springSecurityService springSecurityService;
    @Autowired
    private JwtAuthenticationFilter jwtAuthenticationFilter;

    /**
     * 配置过滤器链
     * @param http
     * @return
     * @throws Exception
     */

    @Bean
    public SecurityFilterChain securityFilterChain(HttpSecurity http) throws Exception{
        http.csrf().disable();//跨域漏洞防御:关闭
        http.cors().disable();//跨域拦截关闭
        http.authorizeHttpRequests()
                .antMatchers("/user/**").permitAll()
                .anyRequest().authenticated();

        //将自己定义的过滤器添加到过滤器链中
        //将自定义过滤器放到认证过滤器之前
        http.addFilterBefore(jwtAuthenticationFilter, UsernamePasswordAuthenticationFilter.class);
        return http.build();
    }


    /**
     * AuthenticationManager:负责认证,也就是认证规则
     * DaoAuthenticationProvider:负责将springSecurityService和passwordEncoder放进AuthenticationManager中
     * @return
     */

    @Bean
    public AuthenticationManager authenticationManager(){

        System.out.println("進入authenticationManager");
        DaoAuthenticationProvider daoAuthenticationProvider = new DaoAuthenticationProvider();
        daoAuthenticationProvider.setUserDetailsService(springSecurityService);
        //关联使用的密码编码器
        daoAuthenticationProvider.setPasswordEncoder(passwordEncoder());
        //将daoAuthenticationProvider放到ProviderManager中
        ProviderManager providerManager = new ProviderManager(daoAuthenticationProvider);
        System.out.println("結束authenticationManager");
        return providerManager;

    }

    /**
     * 密码编码器
     * @return
     */
    @Bean
    public PasswordEncoder passwordEncoder(){
        return NoOpPasswordEncoder.getInstance();
    }
}
六、编写一个测试接口进行验证
package com.ljy.myspringbootlogin.controller;
import com.ljy.myspringbootlogin.commont.Reuslt;
import org.springframework.security.access.prepost.PreAuthorize;
import org.springframework.web.bind.annotation.RequestMapping;
import org.springframework.web.bind.annotation.RestController;
@RestController
public class TestController {
//创建登录控制器
@RequestMapping("/test01")
@PreAuthorize("hasAnyAuthority('qxgl')") //需要的权限
public Reuslt<String> aaa(){
String a="测试";
return Reuslt.ok(a);
}
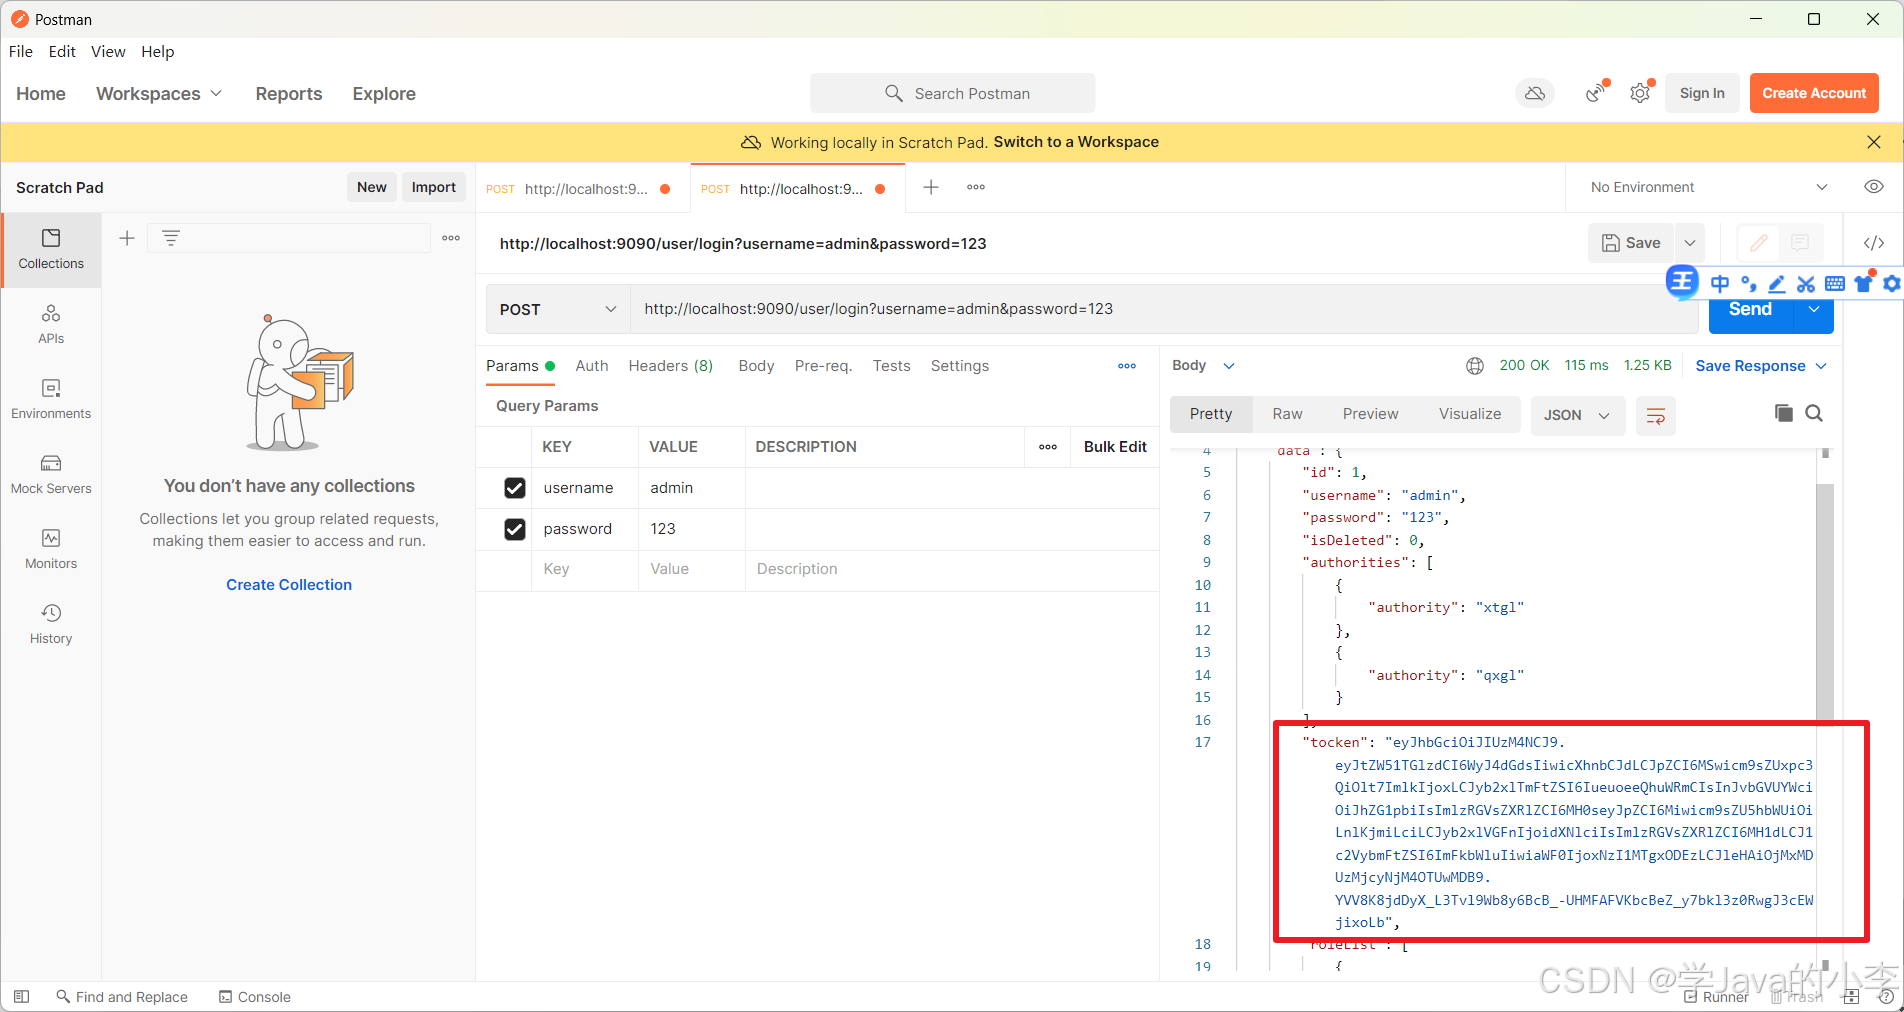
}七、postman测试
1.登录生成tocken
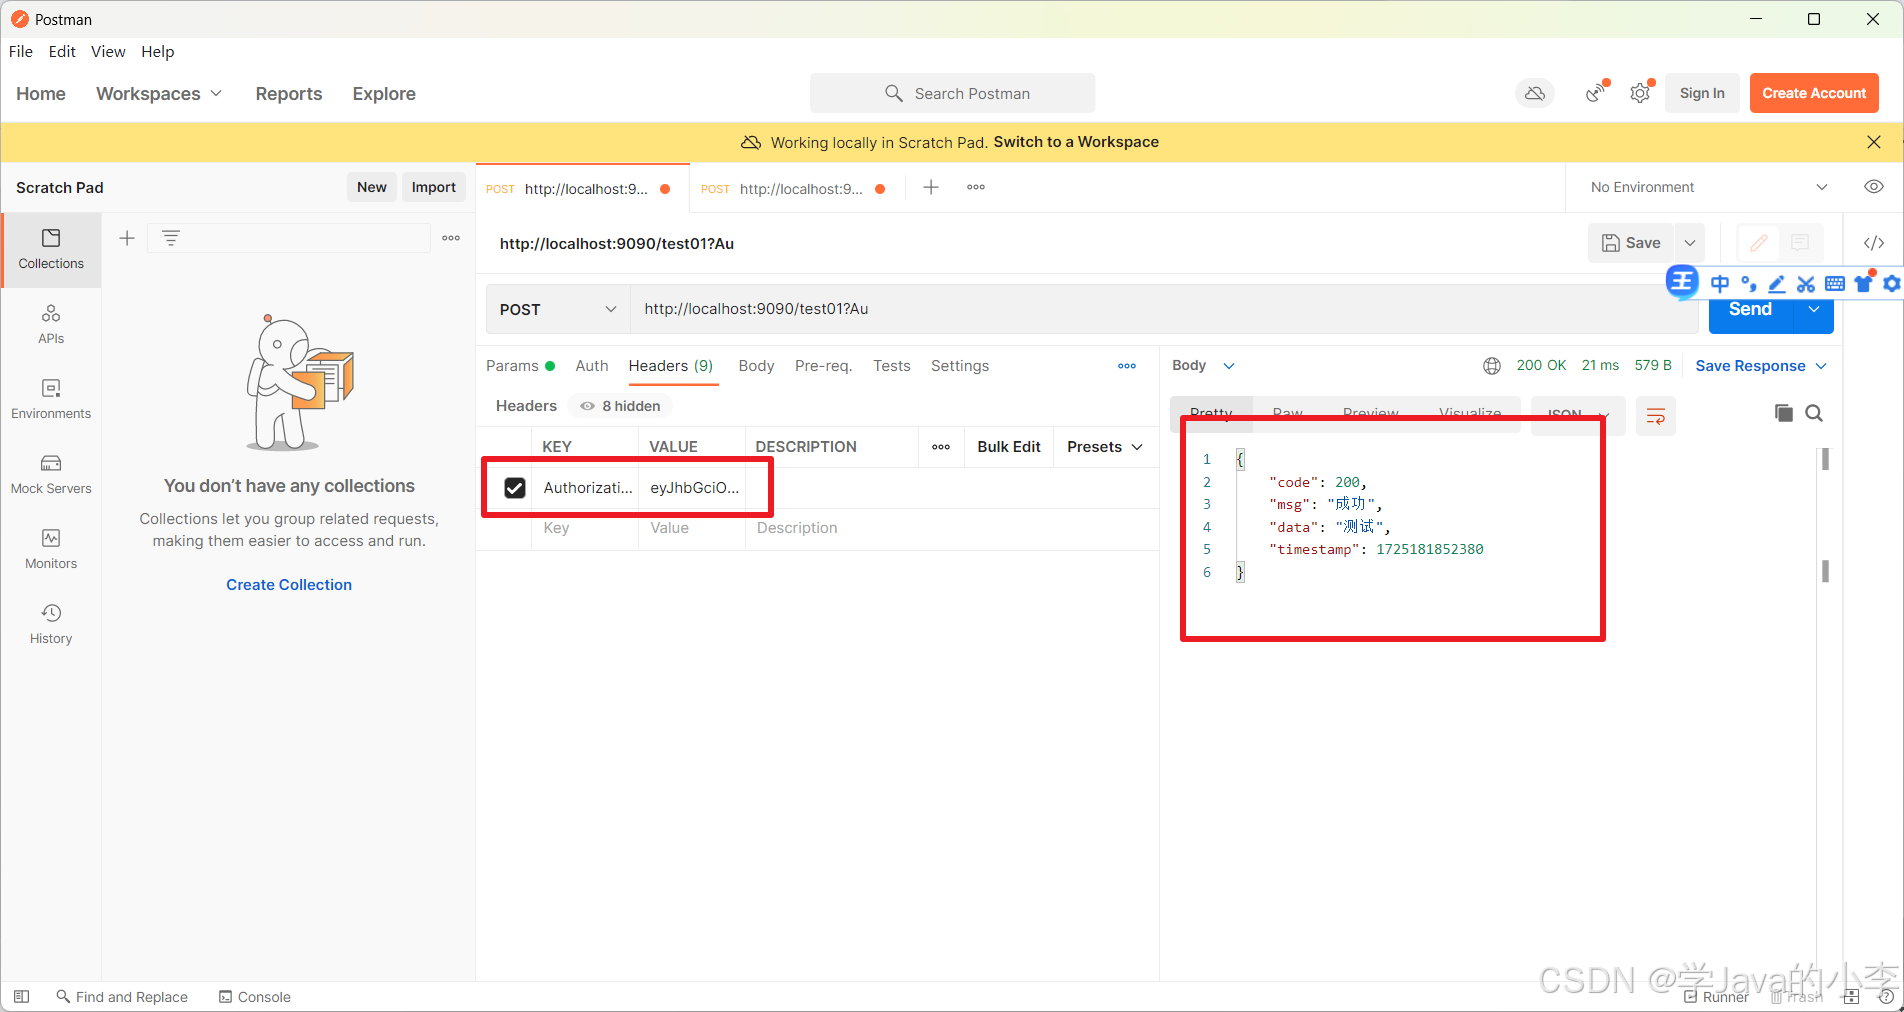
2.访问测试接口,并写到上面的tocken
八、引入jwt依赖
<!--        引入jwt-->
        <dependency>
            <groupId>io.jsonwebtoken</groupId>
            <artifactId>jjwt-api</artifactId>
            <version>0.12.6</version>
        </dependency>
        <dependency>
            <groupId>io.jsonwebtoken</groupId>
            <artifactId>jjwt-impl</artifactId>
            <version>0.12.6</version>
            <scope>runtime</scope>
        </dependency>
        <dependency>
            <groupId>io.jsonwebtoken</groupId>
            <artifactId>jjwt-jackson</artifactId>
            <version>0.12.6</version>
            <scope>runtime</scope>
        </dependency>
九、总结
到目前位置,我们实现了前端登录成功之后,通过数据库查询用户信息,并将用户信息生成tocken返回给前端,当前端携带tocken访问权限控制接口的时候,会判断是否有权限,进而判断是否可以访问。
但是存在一个问题,在上面的代码中,我们的接口权限是通过注解的方式写死的,在真实项目中,这个是绝对不可以的,所以我们需要动态实现权限,我们在下一章进行编写!


