一、veloro 简介
Velero 是vmware开源的一个云原生的灾难恢复和迁移工具,它本身也是开源的,采用Go语言编写,可以安全的备份、恢复和迁移Kubernetes集群资源数据;Velero 是西班牙语意思是帆船,非常符合Kubernetes社区的命名风格,Velero的开发公司Heptio,已被VMware收购。Velero 支持标准的K8S集群,既可以是私有云平台也可以是公有云,除了灾备之外它还能做资源移转,支持把容器应用从一个集群迁移到另一个集群。Velero 的工作方式就是把kubernetes中的数据备份到对象存储以实现高可用和持久化,默认的备份保存时间为720小时,并在需要的时候进行下载和恢复。
- github: https://github.com/vmware-tanzu/velero
- 官网:https://velero.io/
二、velero整体架构
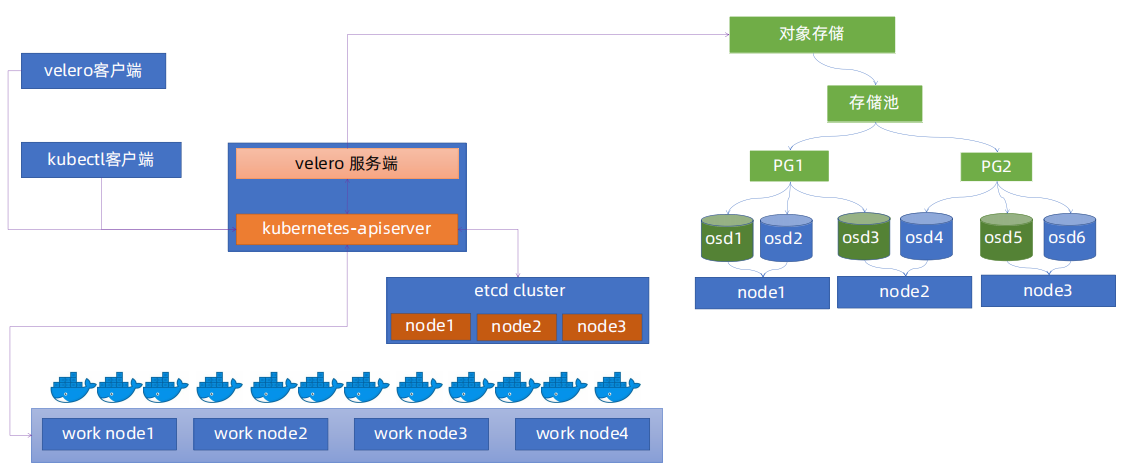
- 需要部署一个 Velero 服务端到集群,该服务端拥有访问集群资源的权限;
- 通过 velero 二进制程序部署服务端的同时,其也会向 kubernetes 集群中同时注册一些 crd 资源,这些 crd 资源可以对我们备份、还原的资源做抽象;
- 通过 crd 资源创建一个备份请求对象,服务端控制器会根据请求内容完成目标预期的备份,并将备份后的文件上传至配置的远端存储(需要支持 S3 协议,如 Ceph、Minio 都可以);
- 备份完毕后,可以通过获取特定的 crd 资源来查看备份的记录(文件);
- 通过 crd 资源创建一个还原请求对象,服务端控制器会根据请求内容对应的备份文件,将备份内容恢复到集群;
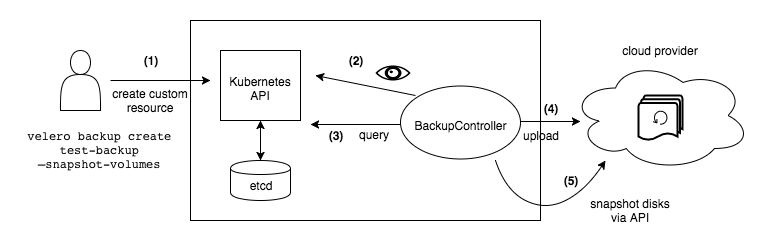
四、velero备份流程

- Velero 客户端调用Kubernetes API Server创建Backup任务。
- Backup 控制器基于watch 机制通过API Server获取到备份任务。
- Backup 控制器开始执行备份动作,其会通过请求API Server获取需要备份的数据。
- Backup 控制器将获取到的数据备份到指定的对象存储server端。
五、集群迁移示例
实验目的:
在两个集群迁移 kubernetes 资源需要进行的动作,使用velero,将 A 集群 default 名称空间及其下的资源迁移到 B 集群
| 软件名称 | 版本 | 备注 |
|---|---|---|
| K8S-A集群 | V1.20.15 | |
| K8S-B集群 | V1.20.15 | |
| minio 单节点 | RELEASE.2024-06-13T22-53-53Z | docker-compose 部署 |
| velero | V1.14.0 |
大致步骤:
- 部署一个 minio,用来作为 Velero 上传备份文件的远端存储;
- 在两个 kubernetes 集群中都部署一个 Velero 服务端,这两个服务端的远端存储都配置同一个 minio,且指定使用同一个 bucket;
- 在 A 集群中创建一个对 default 名称空间的备份请求,确认备份动作执行完毕;
- 登录 B 集群 查看 A 集群中 备份的记录文件;
- 在B 集群创建一个还原请求,将 A 集群备份的文件还原到 B 集群;
- 在B 集群验证 default 命名空间下的资源 是否正确。
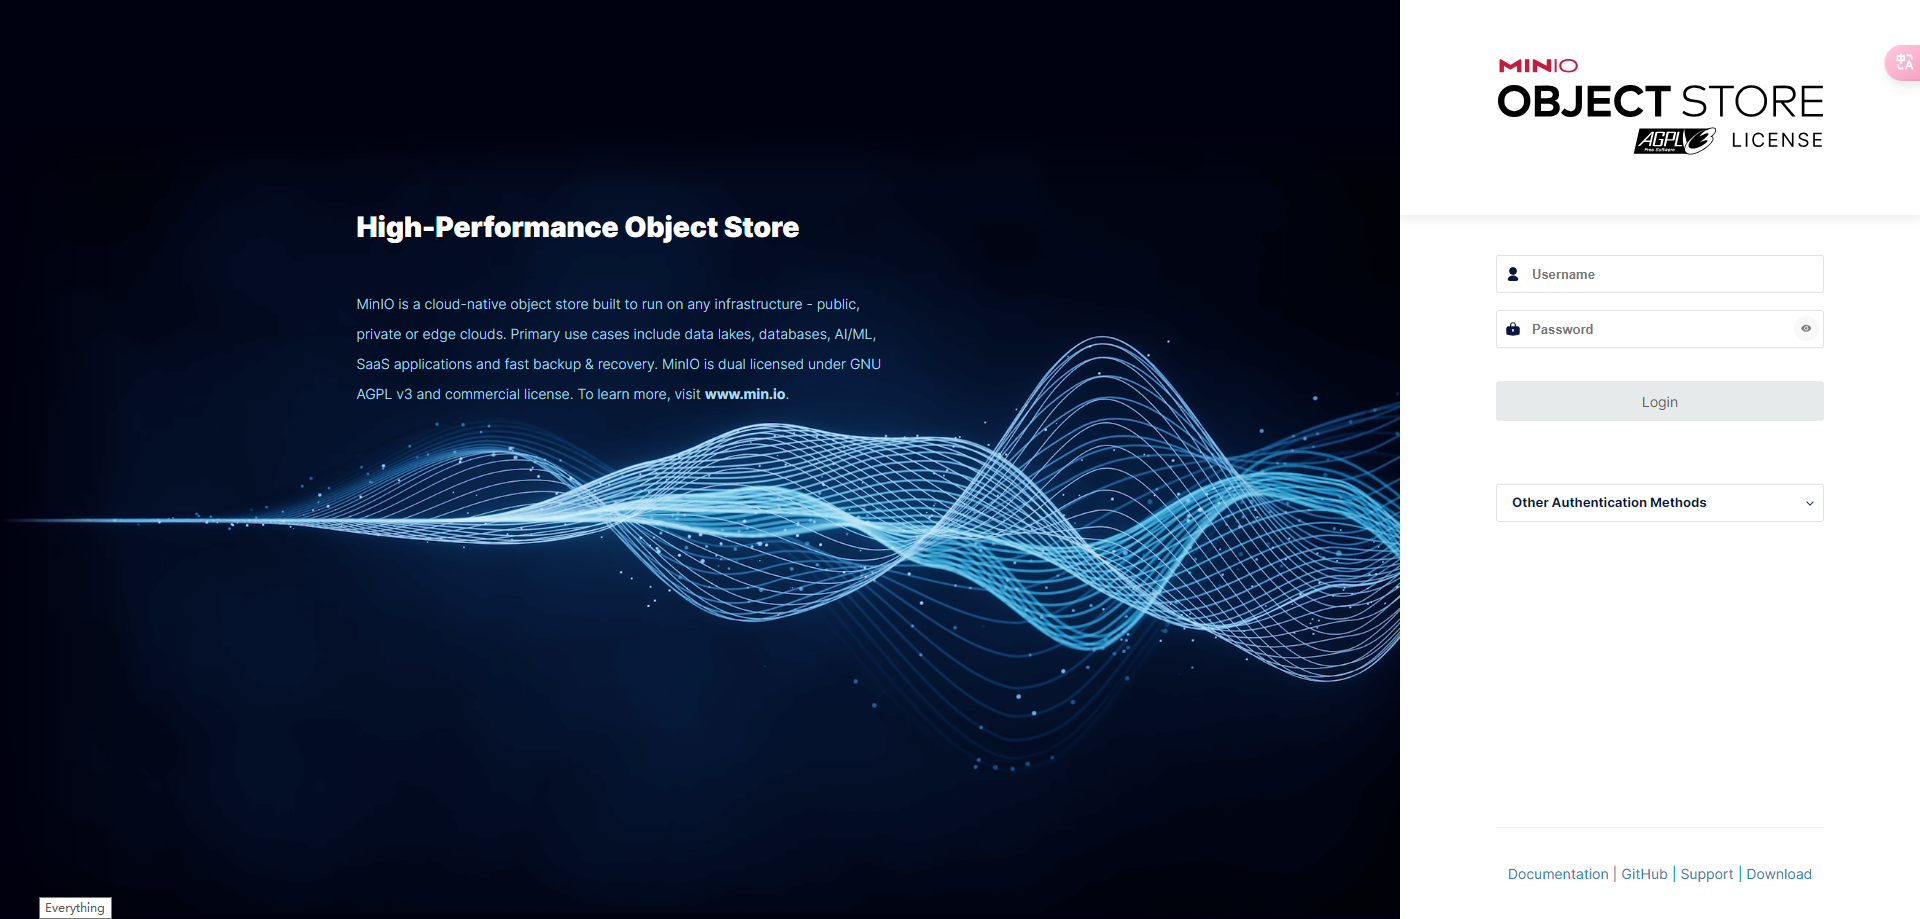
六、对象存储minio部署
为了方便测试,这里 测试docker-compose 的部署方式
6.1 创建minio工作目录
$ mkdir -p /home/application/minio
6.2 编写docker-compose.yaml 文件
$ vim /home/application/minio/docker-compose.yaml

version: '3'
services:
  minio:
    image: minio/minio:latest
    container_name: minio
    networks:
      - srebro
    ports:
      - 9000:9000
      - 9001:9001
    volumes:
      - /home/application/minio/data:/data
      - /etc/localtime:/etc/localtime
    environment:
      MINIO_ROOT_USER: admin
      MINIO_ROOT_PASSWORD: 'srebro'
    command: server /data --console-address :9001
    restart: unless-stopped

networks:
  srebro:
    driver: bridge
6.3 运行minio,并创建bucket
$ cd /home/application/minio

$ docker-compose up -d

[root@localhost minio]# docker-compose ps
NAME                COMMAND                  SERVICE             STATUS              PORTS
minio               "/usr/bin/docker-ent…"   minio               running             0.0.0.0:9000-9001->9000-9001/tcp, :::9000-9001->9000-9001/tcp
打开web控制台: http://XX.XX.XX.XX:9001
docker-compose文件中已经指定了用户名/密码: admin/srebro
- 创建bucket,名称为:velero

七、部署velero
7.1 下载velero二进制程序
分别部署到 A 和 B 集群中
$ wget https://github.com/vmware-tanzu/velero/releases/download/v1.14.0/velero-v1.14.0-linux-amd64.tar.gz

$ tar -xf velero-v1.14.0-linux-amd64.tar.gz

$ mv velero-v1.14.0-linux-amd64/velero /usr/local/bin

#查看velero版本
[root@openeuler ~]#  velero version
Client:
	Version: v1.14.0
	Git commit: 2fc6300f2239f250b40b0488c35feae59520f2d3
<error getting server version: namespaces "velero" not found>
7.2 部署服务端到集群
7.2.1 创建velero创建远端存储认证文件
分别部署到 A 和 B 集群中
aws_access_key_id: minio用户名
aws_secret_access_key: minio密码
$ mkdir -p /home/application/velero/


$ cat  > /home/application/velero/velero-auth.txt << EOF
[default]
aws_access_key_id = admin
aws_secret_access_key = srebro
EOF
7.2.1 部署服务端到A 集群
- 使用 --kubeconfig 选项指定部署到的集群;
- 使用 --namespace 指定部署到的名称空间;
- 使用 s3Url 指定备份使用的远端存储 Url,这里我指定的是 Minio 地址;
velero install \
  --kubeconfig /root/.kube/config \
  --provider aws \
  --plugins velero/velero-plugin-for-aws:v1.5.5 \
  --bucket velero \
  --secret-file /home/application/velero/velero-auth.txt \
  --use-volume-snapshots=false \
  --namespace velero-system \
  --backup-location-config region=minio,s3ForcePathStyle="true",s3Url=http://172.22.33.204:9000

.......................以下为输出内容.........................................................
CustomResourceDefinition/backuprepositories.velero.io: attempting to create resource
CustomResourceDefinition/backuprepositories.velero.io: attempting to create resource client
CustomResourceDefinition/backuprepositories.velero.io: created
CustomResourceDefinition/backups.velero.io: attempting to create resource
CustomResourceDefinition/backups.velero.io: attempting to create resource client
CustomResourceDefinition/backups.velero.io: created
CustomResourceDefinition/backupstoragelocations.velero.io: attempting to create resource
CustomResourceDefinition/backupstoragelocations.velero.io: attempting to create resource client
CustomResourceDefinition/backupstoragelocations.velero.io: created
CustomResourceDefinition/deletebackuprequests.velero.io: attempting to create resource
CustomResourceDefinition/deletebackuprequests.velero.io: attempting to create resource client
CustomResourceDefinition/deletebackuprequests.velero.io: created
CustomResourceDefinition/downloadrequests.velero.io: attempting to create resource
CustomResourceDefinition/downloadrequests.velero.io: attempting to create resource client
CustomResourceDefinition/downloadrequests.velero.io: created
CustomResourceDefinition/podvolumebackups.velero.io: attempting to create resource
CustomResourceDefinition/podvolumebackups.velero.io: attempting to create resource client
CustomResourceDefinition/podvolumebackups.velero.io: created
CustomResourceDefinition/podvolumerestores.velero.io: attempting to create resource
CustomResourceDefinition/podvolumerestores.velero.io: attempting to create resource client
CustomResourceDefinition/podvolumerestores.velero.io: created
CustomResourceDefinition/restores.velero.io: attempting to create resource
CustomResourceDefinition/restores.velero.io: attempting to create resource client
CustomResourceDefinition/restores.velero.io: created
CustomResourceDefinition/schedules.velero.io: attempting to create resource
CustomResourceDefinition/schedules.velero.io: attempting to create resource client
CustomResourceDefinition/schedules.velero.io: created
CustomResourceDefinition/serverstatusrequests.velero.io: attempting to create resource
CustomResourceDefinition/serverstatusrequests.velero.io: attempting to create resource client
CustomResourceDefinition/serverstatusrequests.velero.io: created
CustomResourceDefinition/volumesnapshotlocations.velero.io: attempting to create resource
CustomResourceDefinition/volumesnapshotlocations.velero.io: attempting to create resource client
CustomResourceDefinition/volumesnapshotlocations.velero.io: created
CustomResourceDefinition/datadownloads.velero.io: attempting to create resource
CustomResourceDefinition/datadownloads.velero.io: attempting to create resource client
CustomResourceDefinition/datadownloads.velero.io: created
CustomResourceDefinition/datauploads.velero.io: attempting to create resource
CustomResourceDefinition/datauploads.velero.io: attempting to create resource client
CustomResourceDefinition/datauploads.velero.io: created
Waiting for resources to be ready in cluster...
Namespace/velero-system: attempting to create resource
Namespace/velero-system: attempting to create resource client
Namespace/velero-system: created
ClusterRoleBinding/velero-velero-system: attempting to create resource
ClusterRoleBinding/velero-velero-system: attempting to create resource client
ClusterRoleBinding/velero-velero-system: created
ServiceAccount/velero: attempting to create resource
ServiceAccount/velero: attempting to create resource client
ServiceAccount/velero: created
Secret/cloud-credentials: attempting to create resource
Secret/cloud-credentials: attempting to create resource client
Secret/cloud-credentials: created
BackupStorageLocation/default: attempting to create resource
BackupStorageLocation/default: attempting to create resource client
BackupStorageLocation/default: created
Deployment/velero: attempting to create resource
Deployment/velero: attempting to create resource client
Deployment/velero: created
Velero is installed! ⛵ Use 'kubectl logs deployment/velero -n velero-system' to view the status.
7.2.2 部署服务端到B 集群
velero install \
  --kubeconfig /root/.kube/config \
  --provider aws \
  --plugins velero/velero-plugin-for-aws:v1.5.5 \
  --bucket velero \
  --secret-file /home/application/velero/velero-auth.txt \
  --use-volume-snapshots=false \
  --namespace velero-system \
  --backup-location-config region=minio,s3ForcePathStyle="true",s3Url=http://172.22.33.204:9000


..........................以下为输出内容.........................................................
CustomResourceDefinition/backuprepositories.velero.io: attempting to create resource
CustomResourceDefinition/backuprepositories.velero.io: attempting to create resource client
CustomResourceDefinition/backuprepositories.velero.io: created
CustomResourceDefinition/backups.velero.io: attempting to create resource
CustomResourceDefinition/backups.velero.io: attempting to create resource client
CustomResourceDefinition/backups.velero.io: created
CustomResourceDefinition/backupstoragelocations.velero.io: attempting to create resource
CustomResourceDefinition/backupstoragelocations.velero.io: attempting to create resource client
CustomResourceDefinition/backupstoragelocations.velero.io: created
CustomResourceDefinition/deletebackuprequests.velero.io: attempting to create resource
CustomResourceDefinition/deletebackuprequests.velero.io: attempting to create resource client
CustomResourceDefinition/deletebackuprequests.velero.io: created
CustomResourceDefinition/downloadrequests.velero.io: attempting to create resource
CustomResourceDefinition/downloadrequests.velero.io: attempting to create resource client
CustomResourceDefinition/downloadrequests.velero.io: created
CustomResourceDefinition/podvolumebackups.velero.io: attempting to create resource
CustomResourceDefinition/podvolumebackups.velero.io: attempting to create resource client
CustomResourceDefinition/podvolumebackups.velero.io: created
CustomResourceDefinition/podvolumerestores.velero.io: attempting to create resource
CustomResourceDefinition/podvolumerestores.velero.io: attempting to create resource client
CustomResourceDefinition/podvolumerestores.velero.io: created
CustomResourceDefinition/restores.velero.io: attempting to create resource
CustomResourceDefinition/restores.velero.io: attempting to create resource client
CustomResourceDefinition/restores.velero.io: created
CustomResourceDefinition/schedules.velero.io: attempting to create resource
CustomResourceDefinition/schedules.velero.io: attempting to create resource client
CustomResourceDefinition/schedules.velero.io: created
CustomResourceDefinition/serverstatusrequests.velero.io: attempting to create resource
CustomResourceDefinition/serverstatusrequests.velero.io: attempting to create resource client
CustomResourceDefinition/serverstatusrequests.velero.io: created
CustomResourceDefinition/volumesnapshotlocations.velero.io: attempting to create resource
CustomResourceDefinition/volumesnapshotlocations.velero.io: attempting to create resource client
CustomResourceDefinition/volumesnapshotlocations.velero.io: created
CustomResourceDefinition/datadownloads.velero.io: attempting to create resource
CustomResourceDefinition/datadownloads.velero.io: attempting to create resource client
CustomResourceDefinition/datadownloads.velero.io: created
CustomResourceDefinition/datauploads.velero.io: attempting to create resource
CustomResourceDefinition/datauploads.velero.io: attempting to create resource client
CustomResourceDefinition/datauploads.velero.io: created
Waiting for resources to be ready in cluster...
Namespace/velero-system: attempting to create resource
Namespace/velero-system: attempting to create resource client
Namespace/velero-system: created
ClusterRoleBinding/velero-velero-system: attempting to create resource
ClusterRoleBinding/velero-velero-system: attempting to create resource client
ClusterRoleBinding/velero-velero-system: created
ServiceAccount/velero: attempting to create resource
ServiceAccount/velero: attempting to create resource client
ServiceAccount/velero: created
Secret/cloud-credentials: attempting to create resource
Secret/cloud-credentials: attempting to create resource client
Secret/cloud-credentials: created
BackupStorageLocation/default: attempting to create resource
BackupStorageLocation/default: attempting to create resource client
BackupStorageLocation/default: created
Deployment/velero: attempting to create resource
Deployment/velero: attempting to create resource client
Deployment/velero: created
Velero is installed! ⛵ Use 'kubectl logs deployment/velero -n velero-system' to view the status.
7.3 在 A,b 集群确认 Velero 服务端已成功启动并就绪:
#A集群
[root@k8s-master ~]# kubectl get pods -n velero-system
NAME                      READY   STATUS    RESTARTS   AGE
velero-6cc6986575-h6r2k   1/1     Running   0          2m


#B集群
[root@openeuler ~]# kubectl get pods -n velero-system
NAME                      READY   STATUS    RESTARTS   AGE
velero-6cc6986575-hk6tc   1/1     Running   0          2m
八、备份与还原操作
8.1 A 集群执行备份动作
先查看下A 集群中,default 命名空间下资源信息
$  kubectl get all -n default

NAME                                READY   STATUS    RESTARTS   AGE
pod/pig-auth-66f5bcfd74-9qhlz       1/1     Running   0          4d
pod/pig-codegen-5865cd994b-g4rkd    1/1     Running   0          4d15h
pod/pig-gateway-7f754ffdbc-dhf72    1/1     Running   0          4d
pod/pig-monitor-5c5d67f57c-5gnwp    1/1     Running   0          4d15h
pod/pig-mysql-6c665c56c7-6jdq4      1/1     Running   0          4d15h
pod/pig-quartz-76fdbdf497-w9f6g     1/1     Running   0          4d15h
pod/pig-redis-554cfcc5cc-kfmv8      1/1     Running   0          4d15h
pod/pig-register-777df8f59b-lh7pt   1/1     Running   0          4d15h
pod/pig-ui-f48d64f76-wnpcx          1/1     Running   0          4d14h
pod/pig-upms-58d6f8448f-8njxd       1/1     Running   0          4d15h

NAME                   TYPE        CLUSTER-IP       EXTERNAL-IP   PORT(S)                         AGE
service/kubernetes     ClusterIP   10.96.0.1        <none>        443/TCP                         5d2m
service/pig-auth       ClusterIP   10.96.16.113     <none>        3000/TCP                        4d15h
service/pig-codegen    ClusterIP   10.108.2.9       <none>        5002/TCP                        4d15h
service/pig-gateway    NodePort    10.110.236.0     <none>        9999:32750/TCP                  4d15h
service/pig-monitor    ClusterIP   10.106.84.163    <none>        5001/TCP                        4d15h
service/pig-mysql      NodePort    10.106.57.25     <none>        3306:30406/TCP                  4d15h
service/pig-quartz     ClusterIP   10.104.94.147    <none>        5007/TCP                        4d15h
service/pig-redis      ClusterIP   10.101.95.155    <none>        6379/TCP                        4d15h
service/pig-register   NodePort    10.108.162.125   <none>        8848:31458/TCP,9848:32186/TCP   4d15h
service/pig-ui         NodePort    10.97.53.70      <none>        80:32545/TCP                    4d14h
service/pig-upms       ClusterIP   10.100.129.94    <none>        4000/TCP                        4d15h

NAME                           READY   UP-TO-DATE   AVAILABLE   AGE
deployment.apps/pig-auth       1/1     1            1           4d15h
deployment.apps/pig-codegen    1/1     1            1           4d15h
deployment.apps/pig-gateway    1/1     1            1           4d15h
deployment.apps/pig-monitor    1/1     1            1           4d15h
deployment.apps/pig-mysql      1/1     1            1           4d15h
deployment.apps/pig-quartz     1/1     1            1           4d15h
deployment.apps/pig-redis      1/1     1            1           4d15h
deployment.apps/pig-register   1/1     1            1           4d15h
deployment.apps/pig-ui         1/1     1            1           4d14h
deployment.apps/pig-upms       1/1     1            1           4d15h

NAME                                      DESIRED   CURRENT   READY   AGE
replicaset.apps/pig-auth-66f5bcfd74       1         1         1       4d15h
replicaset.apps/pig-codegen-5865cd994b    1         1         1       4d15h
replicaset.apps/pig-gateway-7f754ffdbc    1         1         1       4d15h
replicaset.apps/pig-monitor-5c5d67f57c    1         1         1       4d15h
replicaset.apps/pig-mysql-6c665c56c7      1         1         1       4d15h
replicaset.apps/pig-quartz-76fdbdf497     1         1         1       4d15h
replicaset.apps/pig-redis-554cfcc5cc      1         1         1       4d15h
replicaset.apps/pig-register-777df8f59b   1         1         1       4d15h
replicaset.apps/pig-ui-f48d64f76          1         1         1       4d14h
replicaset.apps/pig-upms-58d6f8448f       1         1         1       4d15h
使用 velero 二进制程序创建备份请求,通过
--namespace 指定 Velero服务端所在名称空间,--include-namespaces指定要备份的名称空间:
$ DATE=`date +%Y%m%d%H%M%S`

$ velero backup create \
default-${DATE} \
--namespace velero-system \
--include-namespaces default \
--kubeconfig /root/.kube/config

Backup request "default-20240813102355" submitted successfully.
Run `velero backup describe default-20240813102355` or `velero backup logs default-20240813102355` for more details.
查看备份:
$ kubectl get backups.velero.io -n velero-system
NAME                     AGE
default-20240813102355   22s
查看备份日志:
velero -n velero-system backup logs default-20240813102355
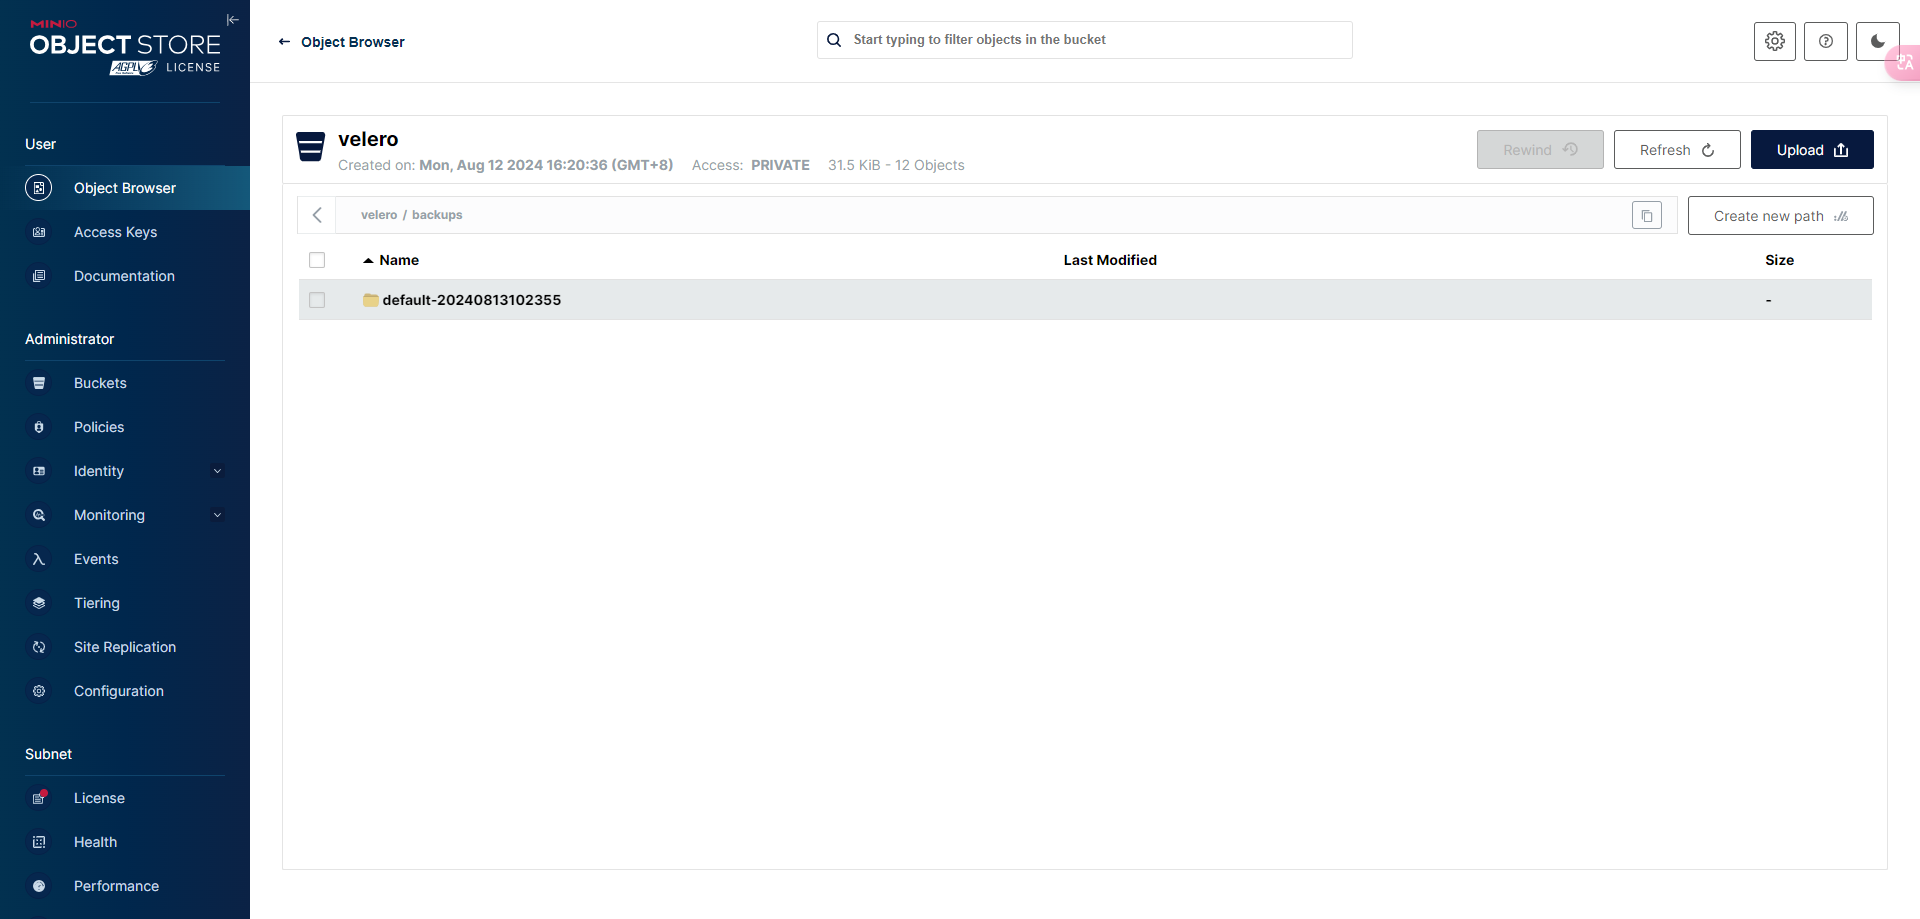
登录 Minio 进入名为 velero 的 bucket 可以看到对应的备份文件。
8.2 B 集群执行还原操作
先确认在 B 集群 确认可以看到刚刚的备份:
$ kubectl -n velero-system get backups.velero.io
NAME                     AGE
default-20240813102355   4m4s
使用 velero 二进制程序创建还原请求,通过
--namespace指定 Velero 服务端所在名称空间,--from-backup指定要还原的备份文件:
velero restore create \
  --namespace velero-system \
  --kubeconfig /root/.kube/config \
  --from-backup default-20240813102355 --wait


Restore request "default-20240813102355-20240813103010" submitted successfully.
Waiting for restore to complete. You may safely press ctrl-c to stop waiting - your restore will continue in the background.
....
Restore completed with status: Completed. You may check for more information using the commands `velero restore describe default-20240813102355-20240813103010` and `velero restore logs default-20240813102355-20240813103010`.
查看还原日志:
$ velero -n velero-system restore logs default-20240813102355-20240813103010
查看还原后的资源:
$  kubectl get all -n default
NAME                                READY   STATUS    RESTARTS   AGE
pod/pig-auth-66f5bcfd74-9qhlz       1/1     Running   0          20S
pod/pig-codegen-5865cd994b-g4rkd    1/1     Running   0          20S
pod/pig-gateway-7f754ffdbc-dhf72    1/1     Running   0          20S
pod/pig-monitor-5c5d67f57c-5gnwp    1/1     Running   0          20S
pod/pig-mysql-6c665c56c7-6jdq4      1/1     Running   0          20S
pod/pig-quartz-76fdbdf497-w9f6g     1/1     Running   0          20S
pod/pig-redis-554cfcc5cc-kfmv8      1/1     Running   0          20S
pod/pig-register-777df8f59b-lh7pt   1/1     Running   0          20S
pod/pig-ui-f48d64f76-wnpcx          1/1     Running   0          20S
pod/pig-upms-58d6f8448f-8njxd       1/1     Running   0          20S

NAME                   TYPE        CLUSTER-IP       EXTERNAL-IP   PORT(S)                         AGE
service/kubernetes     ClusterIP   10.96.0.1        <none>        443/TCP                         20S
service/pig-auth       ClusterIP   10.110.68.56     <none>        3000/TCP                        20S
service/pig-codegen    ClusterIP   10.102.86.142    <none>        5002/TCP                        20S
service/pig-gateway    NodePort    10.98.59.211     <none>        9999:30618/TCP                  20S
service/pig-monitor    ClusterIP   10.102.164.245   <none>        5001/TCP                        20S
service/pig-mysql      NodePort    10.99.227.133    <none>        3306:30785/TCP                  20S
service/pig-quartz     ClusterIP   10.104.167.59    <none>        5007/TCP                        20S
service/pig-redis      ClusterIP   10.99.193.119    <none>        6379/TCP                        20S
service/pig-register   NodePort    10.99.188.165    <none>        8848:32639/TCP,9848:32506/TCP   20S
service/pig-ui         NodePort    10.105.20.18     <none>        80:31260/TCP                    20S
service/pig-upms       ClusterIP   10.106.203.13    <none>        4000/TCP                        20S

NAME                           READY   UP-TO-DATE   AVAILABLE   AGE
deployment.apps/pig-auth       1/1     1            1           20S
deployment.apps/pig-codegen    1/1     1            1           20S
deployment.apps/pig-gateway    1/1     1            1           20S
deployment.apps/pig-monitor    1/1     1            1           20S
deployment.apps/pig-mysql      1/1     1            1           20S
deployment.apps/pig-quartz     1/1     1            1           20S
deployment.apps/pig-redis      1/1     1            1           20S
deployment.apps/pig-register   1/1     1            1           20S
deployment.apps/pig-ui         1/1     1            1           20S
deployment.apps/pig-upms       1/1     1            1           20S

NAME                                      DESIRED   CURRENT   READY   AGE
replicaset.apps/pig-auth-66f5bcfd74       1         1         1       20S
replicaset.apps/pig-codegen-5865cd994b    1         1         1       20S
replicaset.apps/pig-gateway-7f754ffdbc    1         1         1       20S
replicaset.apps/pig-monitor-5c5d67f57c    1         1         1       20S
replicaset.apps/pig-mysql-6c665c56c7      1         1         1       20S
replicaset.apps/pig-quartz-76fdbdf497     1         1         1       20S
replicaset.apps/pig-redis-554cfcc5cc      1         1         1       20S
replicaset.apps/pig-register-777df8f59b   1         1         1       20S
replicaset.apps/pig-ui-f48d64f76          1         1         1       20S
replicaset.apps/pig-upms-58d6f8448f       1         1         1       20S

九、补充
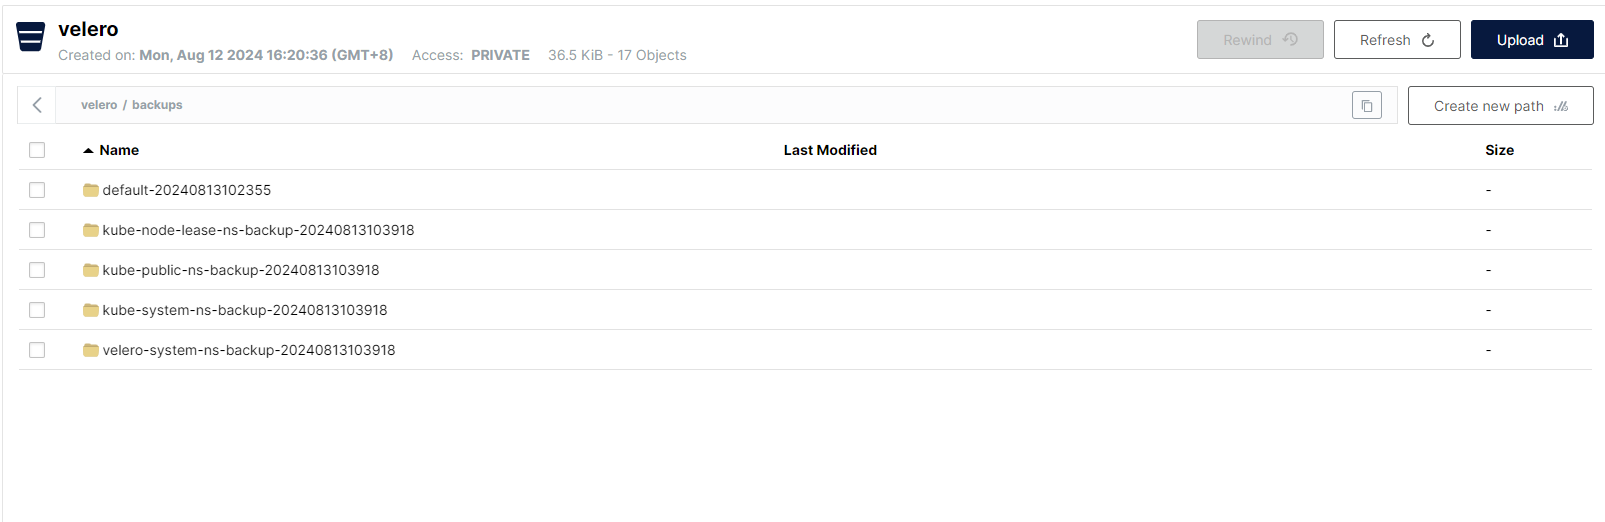
批量备份所有namespace
vim  all-ns-velero-backup.sh

#!/bin/bash
NS_NAME=`kubectl get ns | awk '{if (NR>2){print}}' | awk '{print $1}'`
DATE=`date +%Y%m%d%H%M%S`

cd /home/application/velero/
for i in $NS_NAME;do
velero backup create ${i}-ns-backup-${DATE} \
--include-namespaces ${i} \
--kubeconfig=/root/.kube/config \
--namespace velero-system
done
将备份设置为过期
创建备份时,可以通过添加标志 --ttl <DURATION> 来指定 TTL(生存时间)。如果 Velero 发现现有备份资源已过期,它将删除:
The TTL flag allows the user to specify the backup retention period with the value specified in hours, minutes and seconds in the form --ttl 24h0m0s. If not specified, a default TTL value of 30 days will be applied.
TTL 标志允许用户使用以小时、分钟和秒为单位指定的值指定备份保留期,格式为 --ttl 24h0m0s。如果未指定,将应用默认的 TTL 值 30 天。
十、参考
- https://www.zze.xyz/archives/velero-backup-restore-k8s-resources
- https://www.cnblogs.com/qiuhom-1874/p/17670945.html