想象一下,如果你的React组件不仅能自描述其逻辑,还能直接声明自己的样式,这种“所见即所得”的编程体验是不是让人心动不已?styled-components正是这样一把钥匙,它彻底颠覆了我们对React样式管理的传统认知,让样式与组件的结合变得如此自然与和谐。
目录
初识styled-components
styled-components基础使用
props传值
样式扩展(继承)
附加属性(道具)
伪元素(选择器)和嵌套
动画操作
设置公共样式
设置全局样式
styled-components高级操作
设置主题
as多态道具
初识styled-components
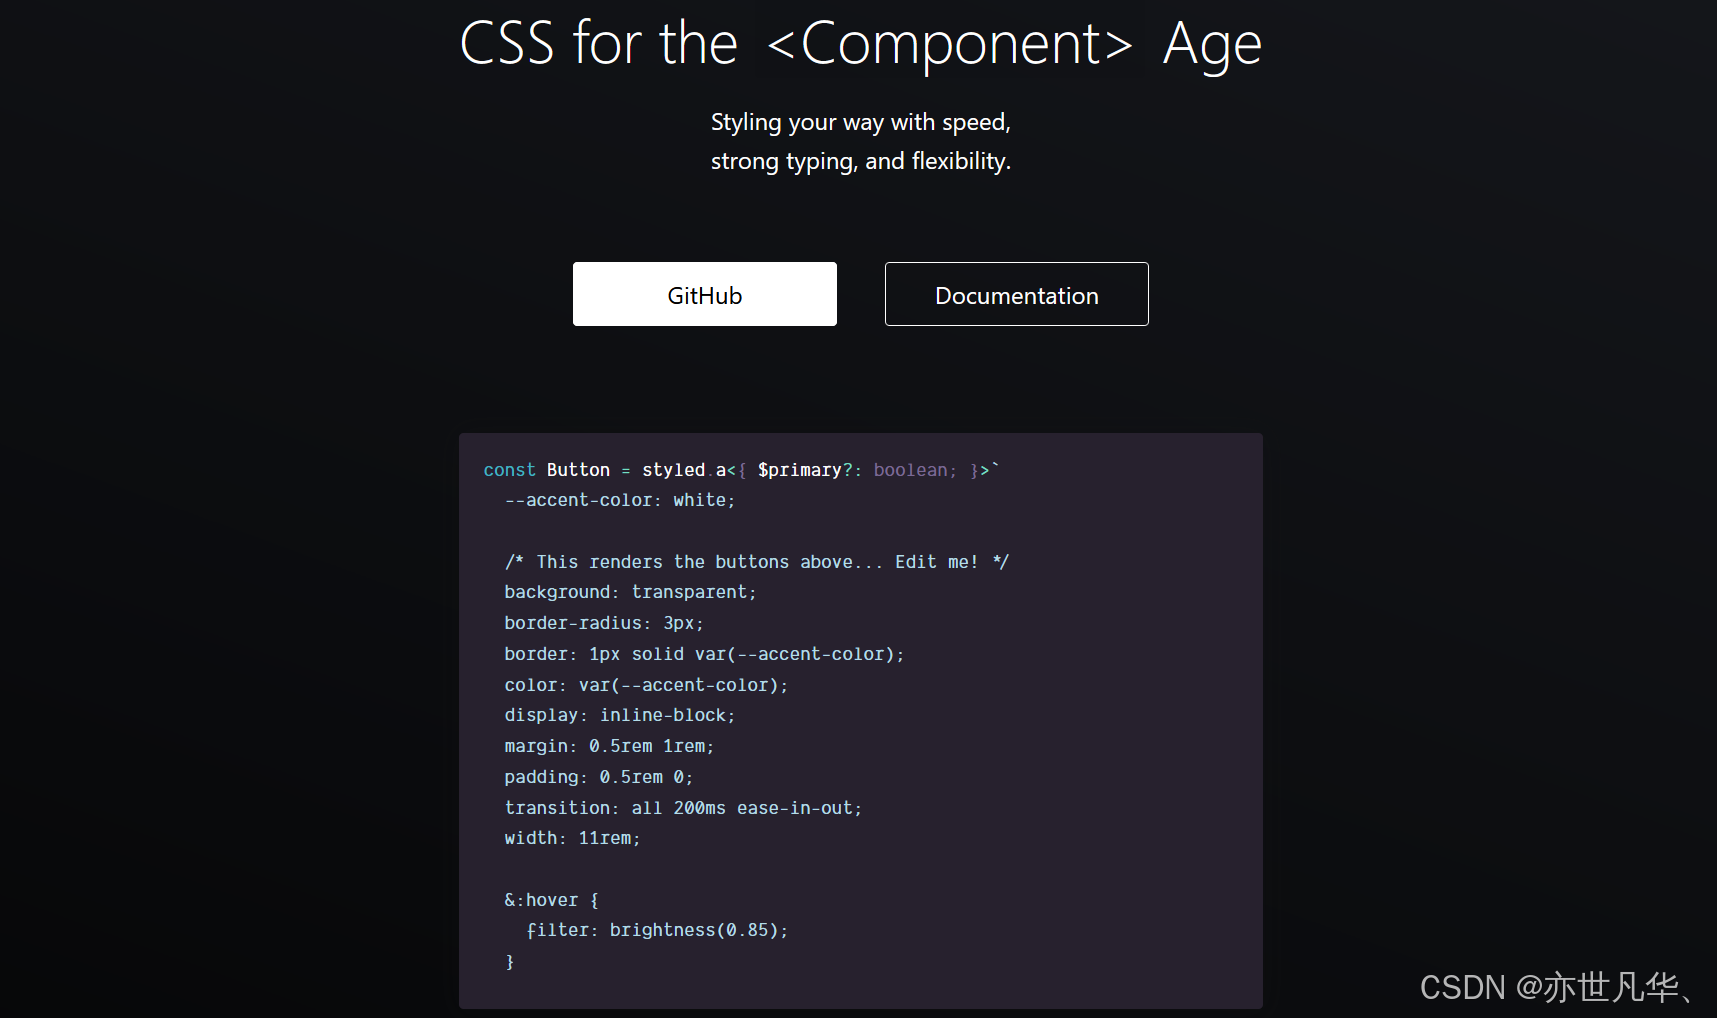
styled-components:是针对react中一个前端广泛使用的css-in-js样式库,它利用了ES里面最新的语法:模板字符串,通过模板字符串就把css和js打通,样式与组件直接结合,为react开发者提供了一种全新的、灵活的方式来处理样式问题,其官网文档:地址 和github地址:地址,也可以查阅具体内容,官方文档如下所示:
使用styled-components理由:要知道我们平常写的react语法无非就两种情况:jsx或tsx。jsx语法相当于对js原来的语法进行一个扩展,它允许你在js语法里面通过函数的返回值里面嵌入html模板,这样就相当于jsx语法把html和js两种进行打通了,可以让html模板化、组件化、可编程等,但在原生的react里面,jsx或tsx语法对样式的解决并不是很完美,如果在react里面进行书写样式的话,除内联样式外写css代码还是比较割裂的,需要单独再抽离一个css文件出来再进行一个引入的操作,等于react它就没有把css和js进行打通,而且后续写项目的话也是要来回在jsx和css文件中进行一个来回的切换,说实话还是比较繁琐的。如果在react基础上再加上styled-components就相当于js可以通吃html和css了。
vue能使用styled-components嘛?:vue已经将js和css放在一个文件中并且通过scoped进行了一个样式隔离,vue自身也已经具备样式管理且相当强大和易于使用,因此并不需要额外的css-in-js库来管理样式,如果是写vue的朋友转react开发,一时间有点难以接收说实话,毕竟react语法就摆在这没办法!正应正了那句老话:“由简入奢易,由奢入俭难”啊。
styled-components的优势有哪些?:在react项目中通过将样式与组件直接结合,为react开发者提供了一种全新的、灵活的方式来处理样式问题,以下是styled-components的一些主要优势:
1)样式局部化:生成的样式是局部化的,即样式仅应用于当前组件,避免了全局污染和样式冲突,可以确保不同组件之间的样式互不干扰。
2)动态样式和主题化:允许开发者根据组件的props或全局主题来动态调整样式,而无需手动管理多个类名。
3)易于删除和维护:样式与组件直接关联,所以很容易知道哪些样式是多余的,从而轻松删除,此外由于样式和组件的紧密耦合,维护也变得更为简单,无需在不同的文件中查找影响组件的样式。
4)避免类名冲突:每个样式组件生成唯一的类名(通常是通过哈希算法生成的),彻底解决了类名冲突的问题,即使在不同的子应用或组件库中定义了相同的类名,也不会相互干扰。
5)强大的嵌套和组合能力:支持类似于预处理器(如 SASS/SCSS)样式的嵌套和组合,可以使用css选择器、伪元素、媒体查询等特性来编写复杂的样式,而无需担心样式的作用域问题。
6)无缝集成和兼容性:完美支持所有css特性,包括媒体查询、伪选择器、动画等。
7)支持单元测试:通过使用像jest-styled-components这样的库,可以对样式组件进行单元测试,以确保样式的正确性和可维护性。
8)提升开发体验:对于习惯在vue框架中工作的开发者来说,styled-components减少了在 js和css文件之间切换的需要,从而提高了开发效率。
接下来我们通过代码进行一个演示,终端执行如下命令对styled-components进行一个安装:
npm install styled-components我们在react组件中使用styled加上一个html标签即可实现html+css的样式,演示代码如下。
注意:作为样式组件,组件设置的名称必须符合规范,然后首字母必须大写!!!
import styled from "styled-components"

const App = () => {
    return (
        <>
            <MyButton>hello world</MyButton>
        </>
    )
}
export default App
// 组件样式(定义在渲染方法外面)
const MyButton = styled.button`
    width: 100px;
    height: 30px;
    background-color: #008c8c;
    color: white;
    border-radius: 5px;
    border: none;
    cursor: pointer;
    &:hover {
        background-color: #005252;
    }
`
页面的呈现的效果如下所示,可以看到这是我们想要的结果:

注意:从上面代码可以看出,我是将样式组件(元素和样式规则的组合)定义在渲染方法App之外的,因为渲染组件每次数据发生变化重新渲染时都会重新创建,在渲染方法之外定义样式组件将避免阻碍缓存从而降低渲染速度!!!
styled-components基础使用
上面我们演示了styled-components的一个简单使用,可以看出我们没有定义html标签的button按钮而是被styled-components连同样式一起定义了。可见其删除了组件和样式之间的映射,这也就意味着我们实际上在创建一个普通的react组件且组件也可以附加自定义样式:
import styled from "styled-components"

const App = () => {
    return (
        <>
            <AppContainer>
                <Title>hello styled-components</Title>
            </AppContainer>
        </>
    )
}
export default App
// 组件样式
const AppContainer = styled.div`
    width: 100%;
    height: 100vh;
    background-color: #ccc;
`
const Title = styled.h1`
    width: 100%;
    height: 100%;
    fs-size: 20px;
    display: flex;
    align-items: center;
    justify-content: center;
    color: #ff0000;
`
props传值
styled-components也支持通过props传值来实现动态改变样式,css样式中通过类型jq的方式来实现条件判断的方式,这里我们做一个简单的代码演示:
import styled from "styled-components"

const App = () => {
    return (
        <>
            <MyDiv>正常按钮</MyDiv>
            <MyDiv primary>primary</MyDiv>
        </>
    )
}
export default App
// 组件样式
const MyDiv = styled.div<{ primary?: boolean }>`
    width: 100px;
    height: 50px;
    background-color: ${props => props.primary ? "red" : "blue"};
    color: ${props => props.primary ? "white" : "black"};
    padding: 10px;
    font-size: 16px;
    border-radius: 10px;
`
当然props传值也可以写成箭头函数的方式进行,这里通过一段示例代码演示:
const LabelText = styled.span`
  ${(props) => {
    switch (props.$mode) {
      case "dark":
        return css`
          background-color: black;
          color: white;
          ${Input}:checked + && {
            color: blue;
          }
        `;
      default:
        return css`
          background-color: white;
          color: black;
          ${Input}:checked + && {
            color: red;
          }
        `;
    }
  }}
`
样式扩展(继承)
如果经常使用一个组件,现在有一个需求,需要对经常使用的组件进行一个样式的改变,但是大部分的样式是一致的,正常我们还是需要再写一遍样式或通过逗号分隔两个类名的方式来实现,但是在styled-components可以使用styled()构造函数实现样式继承,示例代码如下:
import styled from "styled-components"

const App = () => {
    return (
        <>
            <MyDiv>基础样式</MyDiv>
            <MyDivInherit>继承样式</MyDivInherit>
        </>
    )
}
export default App
// 组件样式
const MyDiv = styled.div`
    width: 100px;
    height: 50px;
    background-color: red;
    color: white;
    padding: 10px;
    font-size: 16px;
    border-radius: 10px;
`
const MyDivInherit = styled(MyDiv)`
    background-color: blue; // 修改背景颜色
`
当然样式继承同样可以用于自定义组件,如下我们记住MyDiv的样式,然后通过js反转标签内容
import styled from "styled-components"

const App = () => {
    return (
        <>
            <MyDiv>基础样式</MyDiv>
            <ReversedButton>基础样式</ReversedButton>
        </>
    )
}
export default App
// 组件样式
const MyDiv = styled.div`
    width: 100px;
    color: #BF4F74;
    font-size: 1em;
    border: 2px solid #BF4F74;
    border-radius: 3px;
    text-align: center;
    padding: 10px;
`
const ReversedButton = props => <MyDiv {...props} children={props.children.split('').reverse()} />
附加属性(道具)
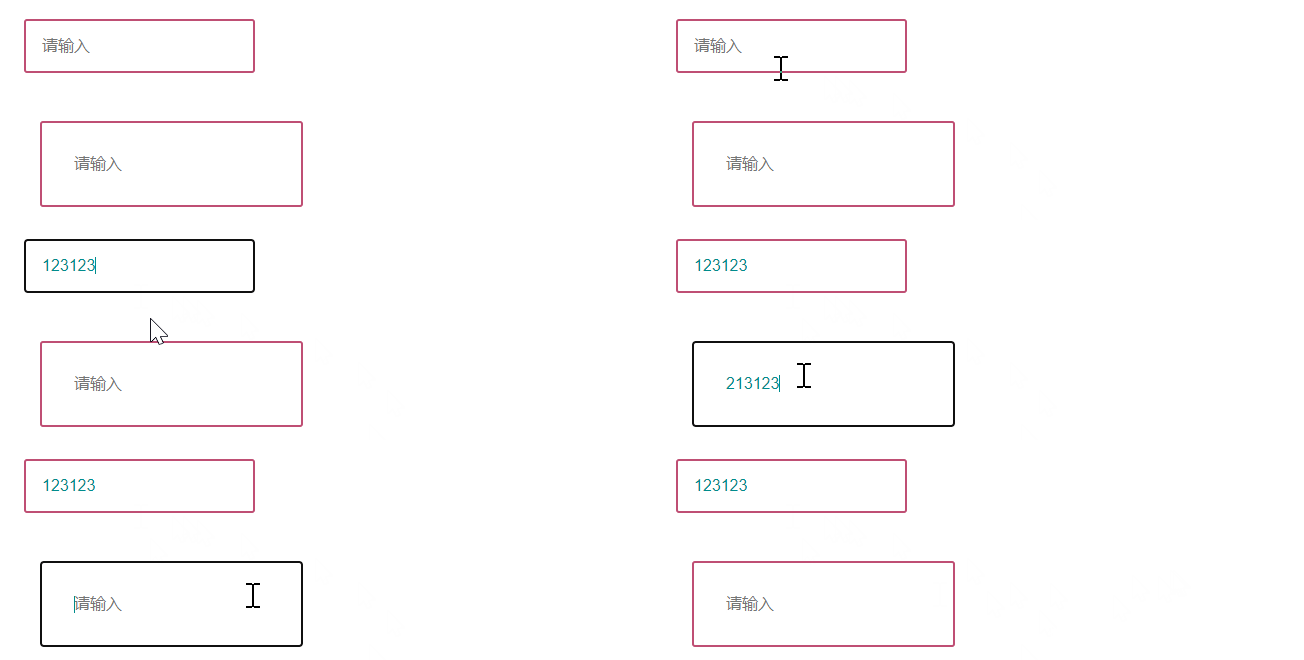
像一个标签可能有许多不同的属性,而不同的属性又呈现不同的效果,像input默认情况下就是text输入框,如果修改成checkbox属性则会变成勾选框,所以这里我们可以通过借助attrs构造函数实现添加不同的属性或者接收属性的数据,这里我们通过代码进行简单的演示:
import styled from "styled-components";

const App = () => {
    return (
        <>
            <Input placeholder="请输入" />
            <br />
            <Input placeholder="请输入" $size="2em" />
        </>
    )
}

export default App

const Input = styled.input.attrs<{ $size?: string }>(props => ({
    type: "text",
    $size: props.$size || "1em"
}))`
    color: #008c8c;
    font-size: 1em;
    border: 2px solid #BF4F74;
    border-radius: 3px;
    margin: ${props => props.$size};
    padding: ${props => props.$size};
`
这里我们也可以借助上文介绍的样式扩展(继承)搭配附加属性进行操作,这里我们可以制作一个登录框的账户密码进行一个简单的演示:
import styled from "styled-components";

const App = () => {
    return (
        <>
            <Input placeholder="请输入" $size="2em" />
            <br />
            <PasswordInput placeholder="请输入" $size="2em" />
        </>
    )
}

export default App
// 样式组件
const Input = styled.input.attrs<{ $size?: string }>(props => ({
    type: "text",
    $size: props.$size || "1em"
}))`
    border: 2px solid #BF4F74;
    margin: ${props => props.$size};
    padding: ${props => props.$size};
`
// 继承输入框设置成密码框
const PasswordInput = styled(Input).attrs({
    type: "password"
})`
    border-color: #009688;
`
伪元素(选择器)和嵌套
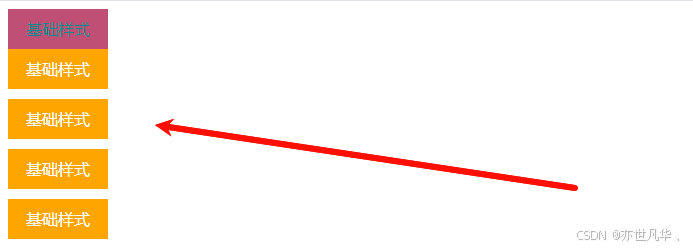
因为styled-components支持嵌套样式类似scss语法,所以其也是支持一些高级的选择器模式的,这里对这些高级选择器模式做一个简单的概述:
&:单个&符号是指组件的所有实例,常用于广泛的内容覆盖,如下是常用的&的操作,当然这里也通过代码进行一个简单演示:
1)&: :&后面加一个冒号就是我们常用的对伪类选择器进行操作
2)& ~ &:用于选择紧跟在另一个具有相同选择器 “之后” 的同级元素
3)& + &:选择所有紧跟在当前组件之后的同级且相邻的相同组件,并为它们应用样式
4)&.something:类选择器,单独为一个或多个相同的类名设置单独样式
import styled from "styled-components"

const App = () => {
    return (
        <>
            <MyDiv className="change">基础样式</MyDiv>
            <MyDiv>基础样式</MyDiv>
            <MyDiv>基础样式</MyDiv>
            <MyDiv>基础样式</MyDiv>
            <MyDiv>基础样式</MyDiv>
        </>
    )
}
export default App
// 组件样式
const MyDiv = styled.div`
    width: 100px;
    height: 40px;
    background-color: #BF4F74;
    font-size: 1em;
    text-align: center;
    line-height: 40px;
    color: #fff;
    &:hover { // 伪类选择器
        background-color: #008c8c;
    }
    & ~ & { // 同级选择器
        margin-bottom: 10px;
    }
    & + & { // 相邻选择器
        background-color: orange;
    }
    &.change { // 类选择器
        color: #008c8c;
    }
`
&&:双&符号引用组件的一个实例,如果您正在进行条件样式覆盖并且不希望样式应用于特定组件的所有实例,这很有用:
import React from "react";
import styled, { css } from "styled-components";

interface LabelTextProps {
  $mode?: "dark" | "light";
}

const App = () => {
    return (
        <>
            <React.Fragment>
                <Label>
                    <Input defaultChecked />
                    <LabelText>Foo</LabelText>
                </Label>
                <Label>
                    <Input />
                    <LabelText $mode="dark">Foo</LabelText>
                </Label>
                <Label>
                    <Input defaultChecked />
                    <LabelText>Foo</LabelText>
                </Label>
                <Label>
                    <Input defaultChecked />
                    <LabelText $mode="dark">Foo</LabelText>
                </Label>
            </React.Fragment>
        </>
    )
}

export default App

const Input = styled.input.attrs({ type: "checkbox" })``;

const Label = styled.label`
  align-items: center;
  display: flex;
  gap: 8px;
  margin-bottom: 8px;
`

const LabelText = styled.span<LabelTextProps>`
  ${(props) => {
    switch (props.$mode) {
      case "dark":
        return css`
          background-color: black;
          color: white;
          ${Input}:checked + & {
            color: blue;
          }
        `;
      case "light":
        return css`
          background-color: white;
          color: black;
          ${Input}:checked + & {
            color: red;
          }
        `;
      default:
        return css`
          background-color: white;
          color: black;
          ${Input}:checked + & {
            color: red;
          }
        `;
    }
  }}
`;
当然双&符号有一种称为“优先级提升”的特殊行为;如果您正在处理可能存在冲突样式的混合样式组件和普通CSS环境,这可能很有用:
const Thing = styled.div`
   && {
     color: blue;
   }
 `
 const GlobalStyle = createGlobalStyle`
   div${Thing} {
     color: red;
   }
 `
 render(
   <React.Fragment>
     <GlobalStyle />
     <Thing>
       I'm blue, da ba dee da ba daa
     </Thing>
   </React.Fragment>
 )
动画操作
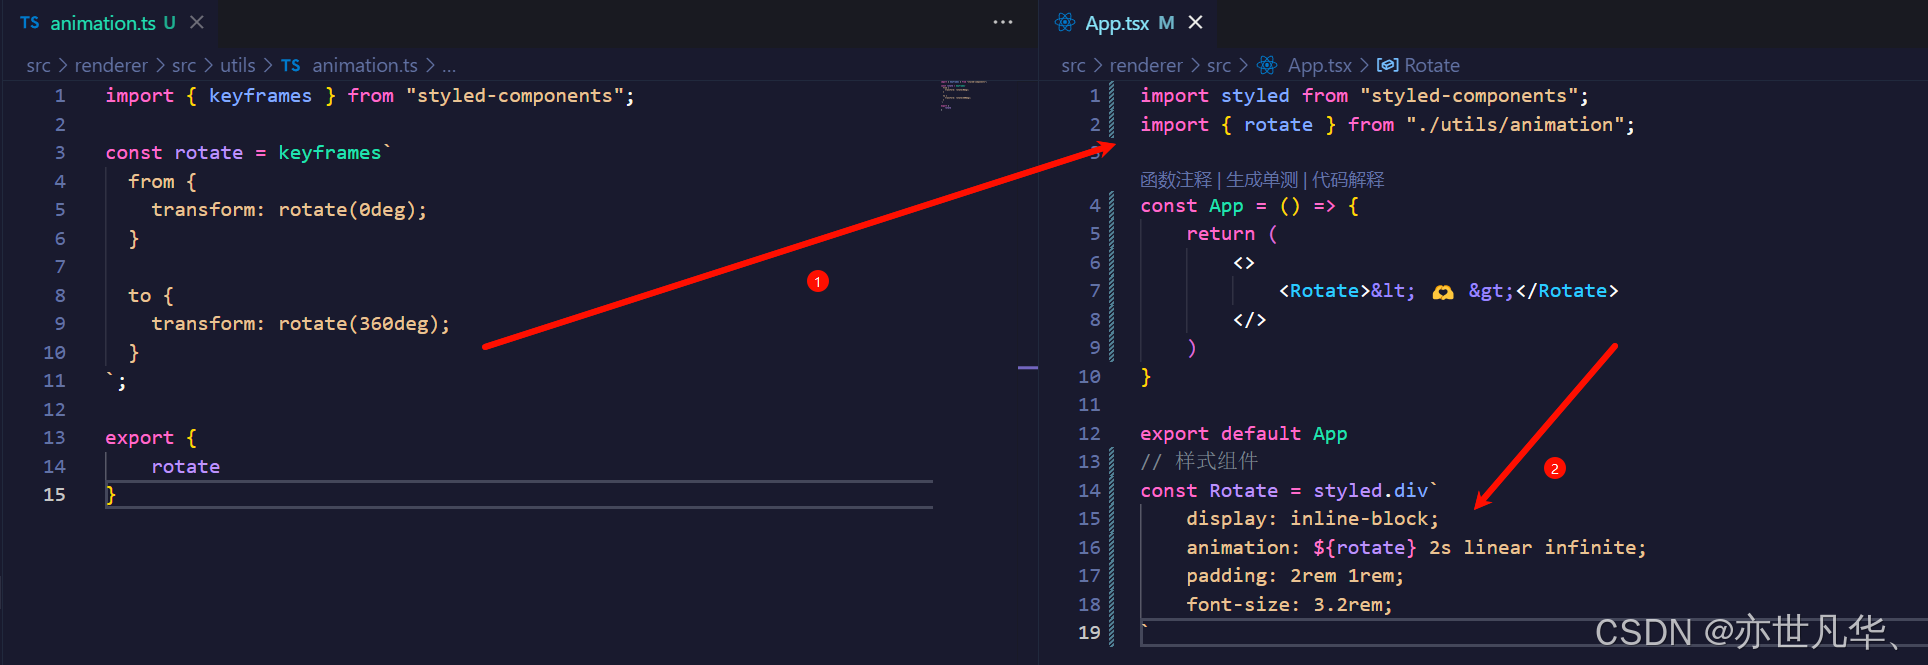
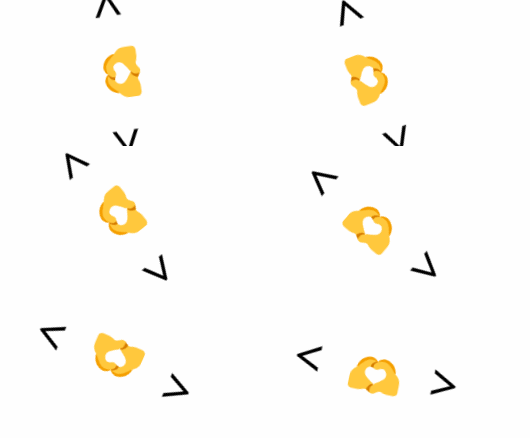
因为带有@keyframes的css动画可能不仅仅只限于单个组件,但是你只想在单个组件中使用从而避免全局样式名称的冲突,styled-components也给我们提供了keyframes助手从而生成一个整个应用程序中使用的唯一实例,这里通过一段代码进行演示操作:
这里我们将控制动画的函数抽离出一个工具函数,然后统一暴露出去,然后在组件中进行引入使用我们设置的动画函数:
设置公共样式
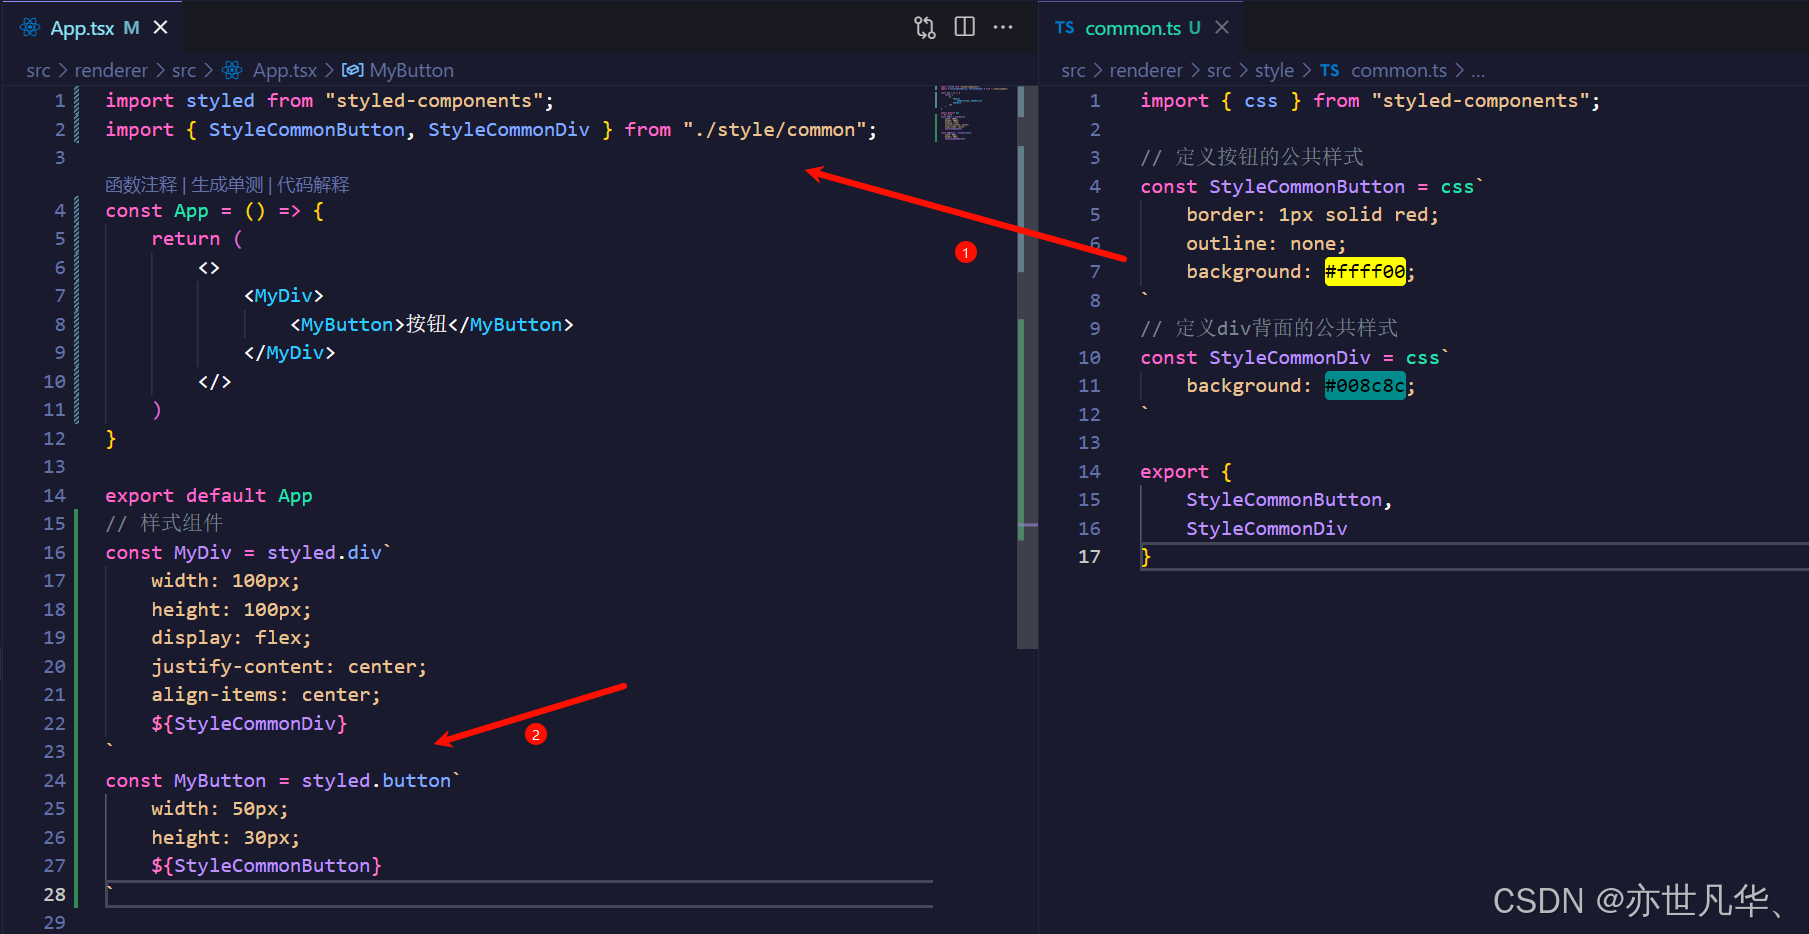
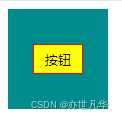
学习了styled-components之后肯定要掌握如何设置公共样式呢?这里我们可以使用styled-components提供的css函数来生成一个公共样式,这里我单独将公共样式抽离出来,后期如果要使用公共样式直接引入即可:
设置全局样式
学习了styled-components之后肯定要掌握如何设置全局样式呢? 这里styled-components也是提供了全局组件的API函数,注意这个函数要求styled-components版本必须在v4以上,如果是低版本的话就不能使用了。
要知道浏览器是存在默认样式的,这里我们可以通过全局样式对浏览器的默认样式进行一个清除:
import { createGlobalStyle } from "styled-components";

// 设置全局样式组件
const GlobalStyle = createGlobalStyle`
    body {
        margin: 0;
        padding: 0;
    }
`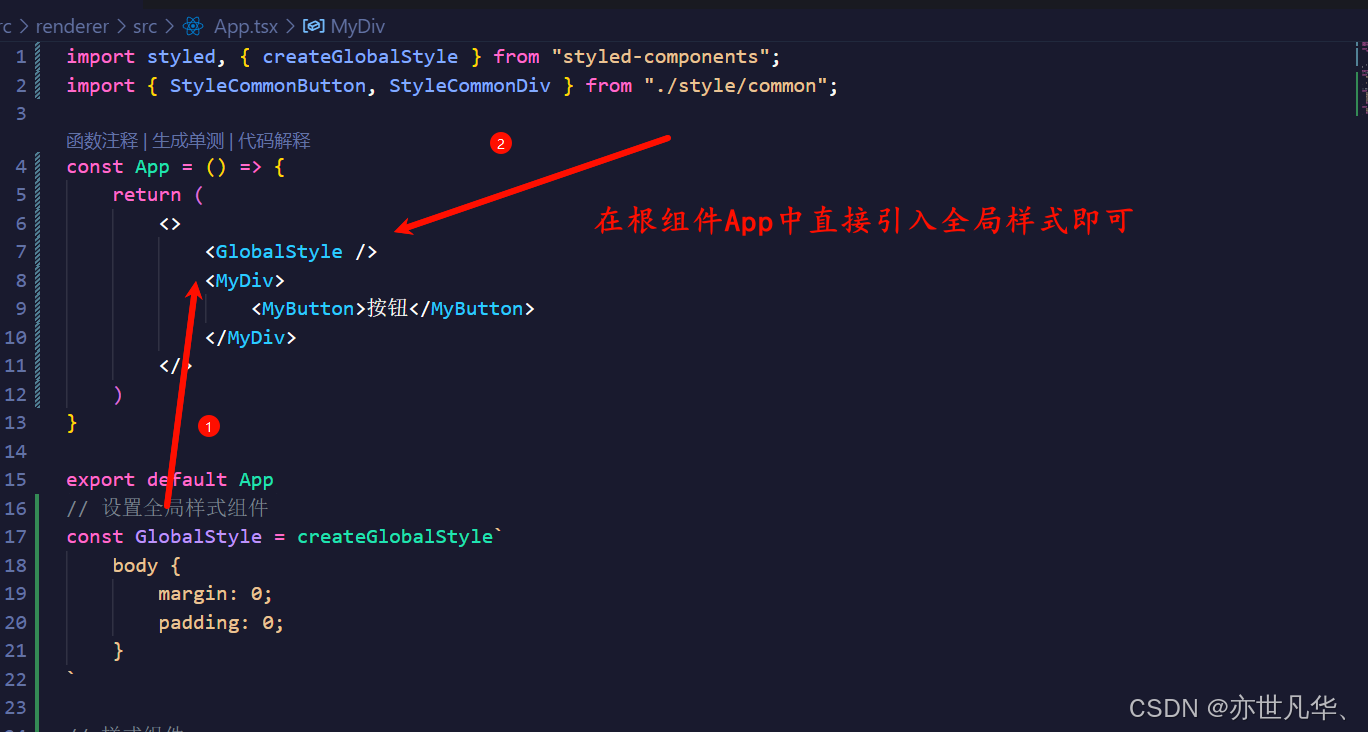
可以看到我们的浏览器存在的默认内外边距被清除掉了:

styled-components高级操作
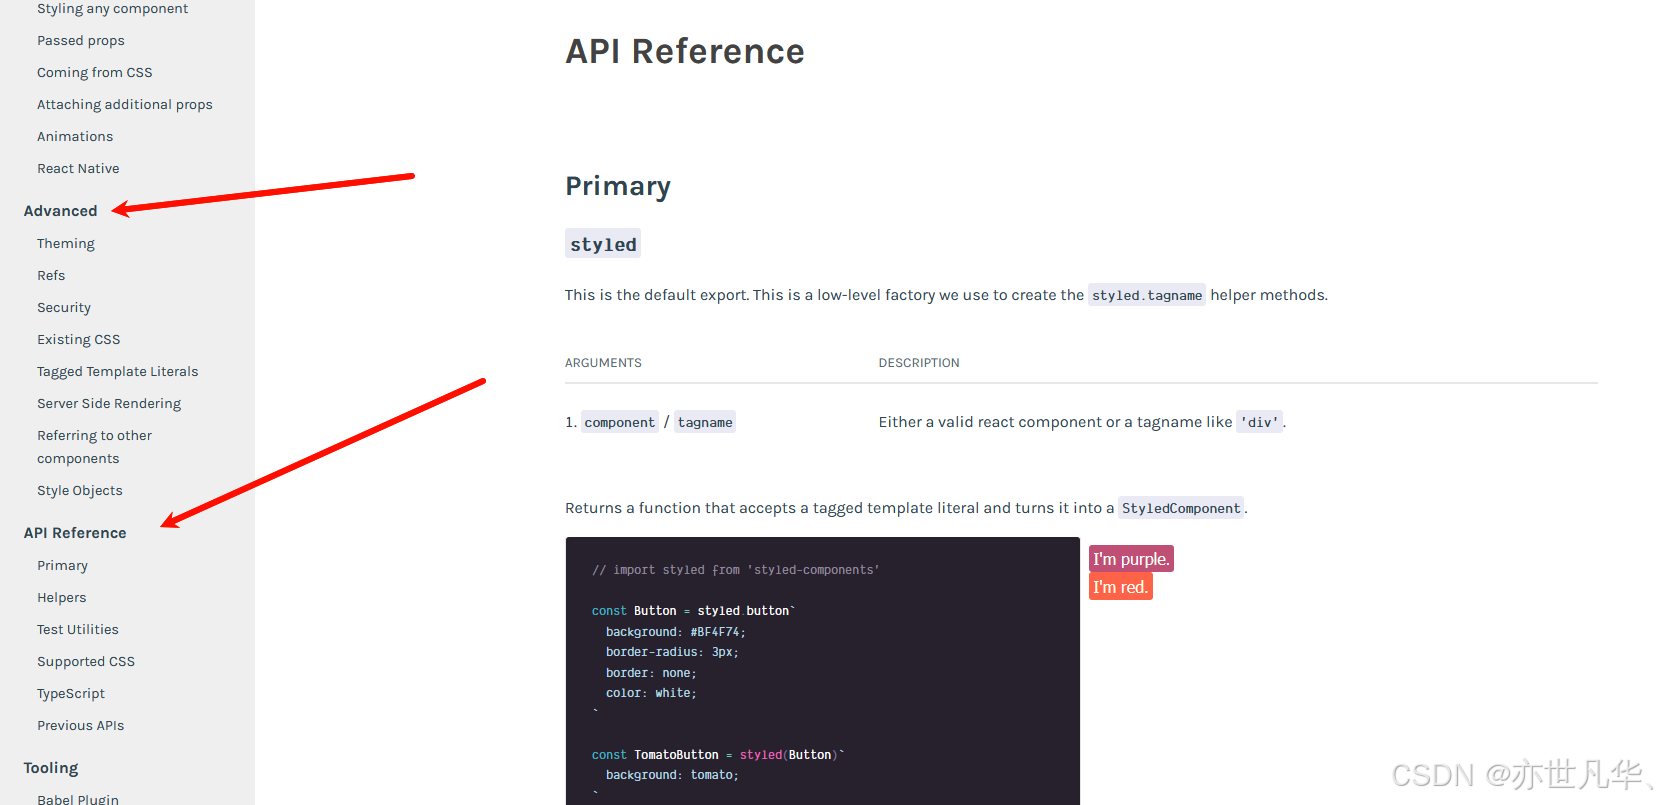
对于styled-components还有许多高阶的操作的内容,这里就挑几个实用的方法进行一个简单的讲解吧,如果想了解具体的内容,可以参考官方文档的内容即可,如下:
设置主题
styled-components也是提供了设置主题的操作,这里我们可以通过导出的ThemeProvider包装器组件实现主题内容的支持,并且主题还可以嵌套多层,这里通过一段代码进行示例演示:
import styled, { ThemeProvider } from "styled-components";

const App = () => {
    return (
        <>
            <ThemeProvider theme={theme}>
                <Button>默认主题</Button>
                <ThemeProvider theme={changeTheme}>
                    <Button>主题改变</Button>
                </ThemeProvider>
            </ThemeProvider>
        </>
    )
}

export default App
// 样式组件
const theme = {
    defaultColor: "#008c8c",
    borderColor: "#f0f00f",
}
const changeTheme = {
    defaultColor: "#ff000f",
    borderColor: "#00ff00",
}

const Button = styled.button`
    color: ${(props) => props.theme.defaultColor};
    border: 1px solid ${(props) => props.theme.borderColor};
    font-size: 1.5rem;
    padding: 1rem;
    border-radius: 0.5rem;
`
如果想在没有样式组件的情况下获取主题,可以采用下面几种方式:
withTheme:在样式组件之外(例如在大型组件内部)使用当前主题
// App.tsx组件
import InnerComponent from "./components/InnerComponent"
const theme = {
    color: "red",
    background: "#008c8c",
    border: "1px solid orange",
}

const App = () => {
    return (
        <>
            <InnerComponent theme={theme}></InnerComponent>
        </>
    )
}

export default App

// 注入主题组件
import styled, { withTheme } from 'styled-components'

interface ThemeProps {
    color: string;
    background: string;
    border?: string;
};

function InnerComponent({ theme }: { theme: ThemeProps }) {
    console.log('Current theme: ', theme);
    return (
        <StyledContent theme={theme}>Use withTheme API</StyledContent>
    )
}

export default withTheme(InnerComponent);

const StyledContent = styled.div<{ theme: ThemeProps }>`
    color: ${props => props.theme.color};
    background: ${props => props.theme.background};
    border: ${props => props.theme.border || 'none'};
`;
useContext与ThemeContext:访问样式组件之外的当前主题
import { useContext } from 'react';
import { ThemeContext } from 'styled-components';

function InnerComponent() {
    const themeContext = useContext(ThemeContext);
    console.log('themeContext: ', themeContext);
}useTheme:访问样式组件之外的当前主题
import { useTheme } from 'styled-components';

function InnerReactComponent() {
    const theme = useTheme()
    console.log('theme: ', theme); // { color: '#333', background: '#fff', border: '1px solid #eee' }
}
as多态道具
如果想保留应用于组件的所有样式,但仅仅只是切换最终呈现的内容,无论是不同的超文本标记语言还是不同的自定义组件,可以使用 “as” 在运行时执行此操作:
import styled from "styled-components";
// 自定义组件
interface MyDivProps {
    onClick?: () => void;
    as?: React.ElementType;
}

const App = () => {
    return (
        <>
            <MyDiv as="button" onClick={() => alert('hello world')}>按钮</MyDiv>
        </>
    );
}

export default App;
// 样式组件
const MyDiv = styled.div<MyDivProps>`
    color: red;
`;
当然还有其他的用法,这里博主就不再赘述了,大家自行查阅官网吧!


