在Web应用程序中,安全性是一个至关重要的方面。Spring Security是Spring框架的一个子项目,用于提供安全访问控制的功能。通过集成Spring Security,我们可以轻松实现用户认证、授权、加密、会话管理等安全功能。本篇文章将指导大家从零开始,在Spring Boot项目中集成Spring Security,并通过MyBatis-Plus从数据库中获取用户信息,实现用户认证与授权。
环境准备
在开始之前,请确保你的开发环境已经安装了Java、Gradle和IDE(如IntelliJ IDEA或Eclipse)。同时,你也需要在项目中引入Spring Boot、Spring Security、MyBatis-Plus以及数据库的依赖。
创建Spring Boot项目
首先,我们需要创建一个Spring Boot项目。可以使用Spring Initializr(https://start.spring.io/)来快速生成项目结构。在生成项目时,选择所需的依赖,如Web、Thymeleaf(或JSP)、Spring Security等。
添加Spring Security依赖
在项目的pom.xml(Maven)或build.gradle(Gradle)文件中,添加Spring Security的依赖。 对于Gradle,添加以下依赖:
group = 'cn.daimajiangxin'
version = '0.0.1-SNAPSHOT'
description ='Spring Security'
dependencies {
    implementation 'org.springframework.boot:spring-boot-starter-web'
    compileOnly 'org.projectlombok:lombok'
    annotationProcessor 'org.projectlombok:lombok'
    runtimeOnly 'mysql:mysql-connector-java:8.0.17'
    // MyBatis-Plus 依赖
    implementation 'com.baomidou:mybatis-plus-spring-boot3-starter:3.5.5'
    implementation 'org.springframework.boot:spring-boot-starter-security'
    implementation 'org.springframework.boot:spring-boot-starter-thymeleaf'
}
对于Maven,添加以下依赖:
<dependency>
    <groupId>org.springframework.boot</groupId>
    <artifactId>spring-boot-starter-security</artifactId>
</dependency>
创建实体类
创建一个简单的实体类,映射到数据库表。
package cn.daimajiangxin.springboot.learning.model;

import com.baomidou.mybatisplus.annotation.IdType;
import com.baomidou.mybatisplus.annotation.TableField;
import com.baomidou.mybatisplus.annotation.TableId;
import com.baomidou.mybatisplus.annotation.TableName;
import lombok.Data;

import java.io.Serializable;

@TableName(value ="user")
@Data
public class User implements Serializable {
    /**
     * 学生ID
     */
    @TableId(type = IdType.AUTO)
    private Long id;

    /**
     * 姓名
     */
    private String name;
    @TableField(value="user_name")
    private String userName;

    private String password;

    /**
     * 邮箱
     */
    private String email;

    /**
     * 年龄
     */
    private Integer age;

    /**
     * 备注
     */
    private String remark;


    @TableField(exist = false)
    private static final long serialVersionUID = 1L;
}
创建Mapper接口
创建对应的Mapper接口,通常放在与实体类相同的包下,并继承BaseMapper 接口。例如:
package cn.daimajiangxin.springboot.learning.mapper;

import cn.daimajiangxin.springboot.learning.model.User;
import com.baomidou.mybatisplus.core.mapper.BaseMapper;
public interface UserMapper extends BaseMapper<User> {

}
创建Mapper XML文件
在resources的mapper目录下创建对应的XML文件,例如UserMapper.xml:
<?xml version="1.0" encoding="UTF-8"?>
<!DOCTYPE mapper
        PUBLIC "-//mybatis.org//DTD Mapper 3.0//EN"
        "http://mybatis.org/dtd/mybatis-3-mapper.dtd">
<mapper namespace="cn.daimajiangxin.springboot.learning.mapper.UserMapper">

    <resultMap id="BaseResultMap" type="cn.daimajiangxin.springboot.learning.model.User">
            <id property="id" column="id" jdbcType="BIGINT"/>
            <result property="name" column="name" jdbcType="VARCHAR"/>
            <result property="user_name" column="userName" jdbcType="VARCHAR"/>
            <result property="password" column="password" jdbcType="VARCHAR"/>
            <result property="email" column="email" jdbcType="VARCHAR"/>
            <result property="age" column="age" jdbcType="INTEGER"/>
            <result property="remark" column="remark" jdbcType="VARCHAR"/>
    </resultMap>

    <sql id="Base_Column_List">
        id,name,email,age,remark
    </sql>

    <select id="findAllUsers"  resultMap="BaseResultMap">
     select
       <include refid="Base_Column_List"></include>
     from user
    </select>
</mapper>
创建Service 接口
在service目录下服务类接口UserService
package cn.daimajiangxin.springboot.learning.service;

import cn.daimajiangxin.springboot.learning.model.User;
import com.baomidou.mybatisplus.extension.service.IService;

public interface UserService extends IService<User> {

}
创建Service实现类
在service目录下创建一个impl目录,并创建UserService实现类UserServiceImpl
package cn.daimajiangxin.springboot.learning.service.impl;

import com.baomidou.mybatisplus.extension.service.impl.ServiceImpl;
import cn.daimajiangxin.springboot.learning.model.User;
import cn.daimajiangxin.springboot.learning.service.UserService;
import cn.daimajiangxin.springboot.learning.mapper.UserMapper;
import org.springframework.stereotype.Service;
@Service
public class UserServiceImpl extends ServiceImpl<UserMapper, User>implements UserService{

}
创建UserDetailsService实现类
package cn.daimajiangxin.springboot.learning.service.impl;

import cn.daimajiangxin.springboot.learning.model.User;
import cn.daimajiangxin.springboot.learning.service.UserService;
import com.baomidou.mybatisplus.core.conditions.query.LambdaQueryWrapper;
import jakarta.annotation.Resource;
import org.springframework.security.core.GrantedAuthority;
import org.springframework.security.core.userdetails.UserDetails;
import org.springframework.security.core.userdetails.UserDetailsService;
import org.springframework.security.core.userdetails.UsernameNotFoundException;
import org.springframework.stereotype.Service;

import java.util.ArrayList;
import java.util.List;

@Service
public class UserDetailServiceImpl implements UserDetailsService {
    @Resource
    private  UserService userService;
    @Override
    public UserDetails loadUserByUsername(String username) throws UsernameNotFoundException {
        LambdaQueryWrapper<User>  queryWrapper=new LambdaQueryWrapper<User>();
        queryWrapper.eq(User::getUserName,username);
        User user=userService.getOne(queryWrapper);
        List<GrantedAuthority> authorities = new ArrayList<>();
        return new org.springframework.security.core.userdetails.User(user.getName(), user.getPassword(),authorities );
    }
}
Java配置类
创建一个配置类,并创建SecurityFilterChain 的Bean。
package cn.daimajiangxin.springboot.learning.config;

import jakarta.annotation.Resource;
import org.springframework.context.annotation.Bean;
import org.springframework.context.annotation.Configuration;
import org.springframework.security.config.annotation.web.builders.HttpSecurity;
import org.springframework.security.config.annotation.web.configuration.EnableWebSecurity;
import org.springframework.security.core.userdetails.UserDetailsService;
import org.springframework.security.crypto.password.PasswordEncoder;
import org.springframework.security.crypto.password.StandardPasswordEncoder;
import org.springframework.security.web.SecurityFilterChain;

@Configuration
@EnableWebSecurity
public class SecurityConfig   {
    @Resource
    private UserDetailsService userDetailsService;
    @Bean
    public SecurityFilterChain filterChain(HttpSecurity http) throws Exception {
        http.authorizeHttpRequests(authorizeRequests ->
                        authorizeRequests
                                .requestMatchers("/", "/home")
                                .permitAll()
                                .anyRequest().authenticated() // 其他所有请求都需要认证
                )
                .formLogin(formLogin ->
                        formLogin
                                .loginPage("/login") // 指定登录页面
                                .permitAll() // 允许所有人访问登录页面
                )
                .logout(logout ->
                        logout
                                .permitAll() // 允许所有人访问注销URL
                )    // 注册重写后的UserDetailsService实现
                .userDetailsService(userDetailsService);
        return http.build();
        // 添加自定义过滤器或其他配置
    }

    @Bean
    public PasswordEncoder passwordEncoder() {
        return new StandardPasswordEncoder();
    }
}
创建登录页面
在src/main/resources/templates目录下创建一个Thymeleaf模板作为登录页面,例如login.html。
<!DOCTYPE html>
<html xmlns:th="http://www.thymeleaf.org">
<head>
    <title>登录</title>
</head>
<body>
<form th:action="@{/doLogin}" method="post">
    <div><label> User Name : <input type="text" name="username"/> </label></div>
    <div><label> Password: <input type="password" name="password"/> </label></div>
    <div><input type="submit" value="登录"/></div>
</form>
</body>
</html>
创建控制器
创建一个UserController,
package cn.daimajiangxin.springboot.learning.controller;

import cn.daimajiangxin.springboot.learning.model.User;
import cn.daimajiangxin.springboot.learning.service.UserService;
import com.baomidou.mybatisplus.core.conditions.query.QueryWrapper;
import org.springframework.beans.factory.annotation.Autowired;
import org.springframework.stereotype.Controller;
import org.springframework.ui.Model;
import org.springframework.web.bind.annotation.GetMapping;
import org.springframework.web.bind.annotation.PostMapping;
import org.springframework.web.bind.annotation.RequestParam;
import org.springframework.web.bind.annotation.RestController;
import org.springframework.web.servlet.ModelAndView;

import java.util.List;

@RestController
public class UserController {
    private final UserService userService;

    @Autowired
    public UserController(UserService userService) {
        this.userService = userService;
    }

    @GetMapping({"/login",})
    public ModelAndView login(Model model) {
        ModelAndView mv = new ModelAndView("login");
        return mv ;
    }
    @PostMapping("/doLogin")
    public String doLogin(@RequestParam String username,@RequestParam String password) {
        QueryWrapper<User> queryWrapper=new QueryWrapper<>();
        queryWrapper.eq("user_name",username);
        User user=  userService.getOne(queryWrapper);
        if(user==null){
            return "登录失败,用户没有找到";
        }
        if(! user.getPassword().equals(password)){
            return "登录失败,密码错误";
        }
        return "登录成功";
    }

}
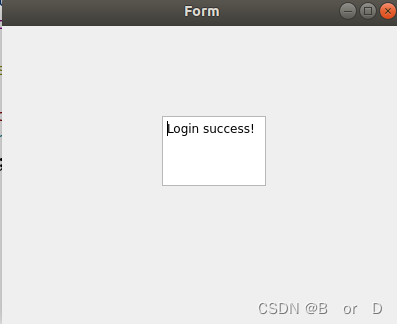
登录页面
运行你的Spring Boot应用程序,用浏览器访问http://localhost:8080/login. 
我是代码匠心,和我一起学习更多精彩知识!!!扫描二维码!关注我,实时获取推送。
 源文来自:https://daimajiangxin.cn 源码地址:https://gitee.com/daimajiangxin/springboot-learning





![SpringBoot学习05-[SpringBoot的嵌入式Servlet容器]](https://img-blog.csdnimg.cn/direct/7f34a7b37fdd42e1acb845e153d3511f.png)


