目录
1、安装ElementUI
2、在main.js文件中加入
3、使用组件
终端运行:
Element,一套为开发者、设计师和产品经理准备的基于Vue2.0的桌面端组件库.
1、安装ElementUI
控制台输入
npm i element-ui -S
2、在main.js文件中加入
import ElementUI from 'element-ui';
import 'element-ui/lib/theme-chalk/index.css';Vue.use(ElementUI);
导入ElementUI
import Vue from 'vue'
import App from './App.vue'
//导入elementUI
import ElementUI from 'element-ui';
import 'element-ui/lib/theme-chalk/index.css';

Vue.use(ElementUI);

Vue.config.productionTip=false

import router from './router/index.js'
Vue.use(router);

new Vue({
el: '#app',
router,
render: h => h(App)
}).$mount('#app')
3、使用组件
创建src下目录的router
index.js
import Vue from "vue";
// 导入路由
import router from "vue-router";
//导入注册组件
import Index from '../Index.vue';
import Login from '../Login.vue';
import MajorList from"../views/MajorList.vue";
import StudentList from"../views/StudentList.vue";
/* 注册 定义组件访问地址 */
Vue.use(router);

var rout = new router({
	routes: [{
			path: '/',
			component: Login
		},
		{
			path: '/login',
			component: Login
		},
		{
			path: '/index',
			component: Index,
			children: [{
					path: '/majorlist',
					component: MajorList
				},
				{
					path:'/studentlist',
					component: StudentList
				}
			]
		}
	]
});

//导出路由对象
export default rout;
创建src下目录的views
Index.vue
<template>
	<div>
		<el-container>
			<el-header style="text-align: right; font-size: 12px">
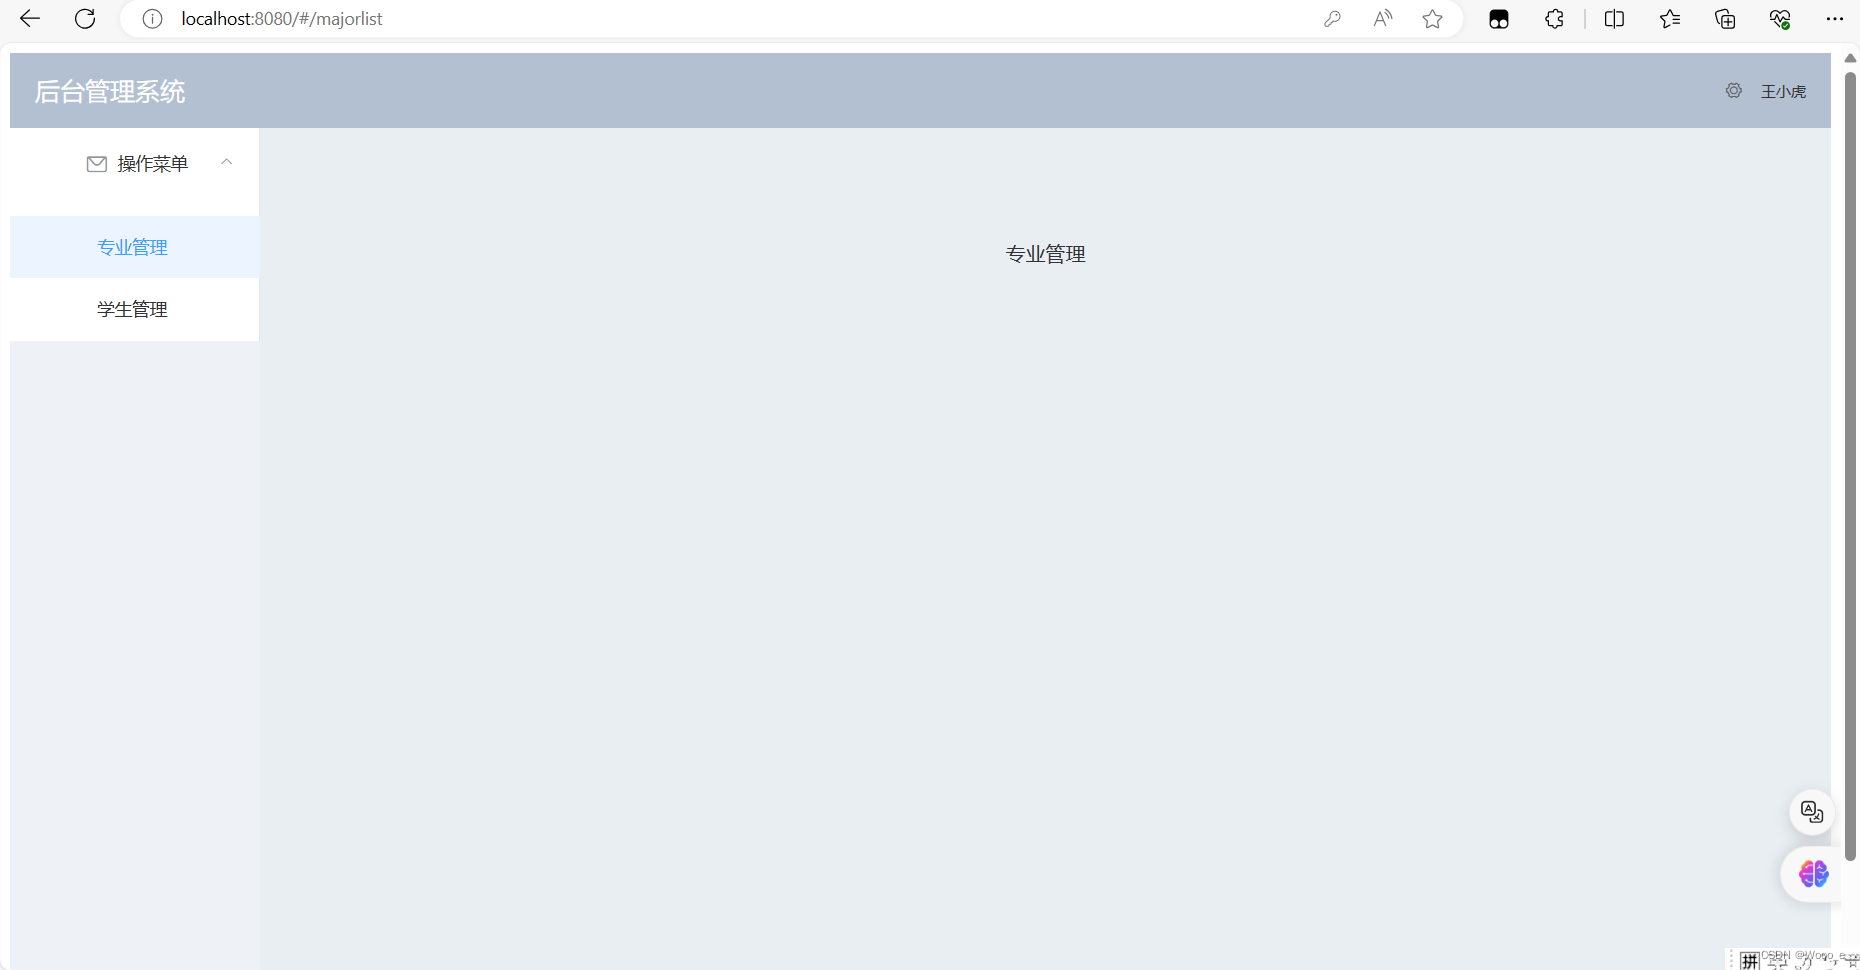
				<div class="header-title">后台管理系统</div>
				<el-dropdown>
					<i class="el-icon-setting" style="margin-right: 15px"></i>
					<el-dropdown-menu slot="dropdown">
						<el-dropdown-item>修改密码</el-dropdown-item>
						<el-dropdown-item><span @click="logout()"> 安全退出</span></el-dropdown-item>
					</el-dropdown-menu>
				</el-dropdown>
				<span>王小虎</span>
			</el-header>
			<el-container>
				<!-- 侧边栏 -->
				<el-aside width="200px" style="background-color: rgb(238, 241, 246)">
					<el-menu :default-openeds="['1', '3']" router>
						<el-submenu index="1">
							<template slot="title"><i class="el-icon-message"></i>操作菜单</template>
							<el-menu-item-group>
								<el-menu-item index="/majorlist">专业管理</el-menu-item>
								<el-menu-item index="/studentlist">学生管理</el-menu-item>
							</el-menu-item-group>
						</el-submenu>
					</el-menu>
				</el-aside>
				<!-- 工作区间 -->
				<el-main>
					<!-- 显示子路由 -->
					<router-view></router-view>
				</el-main>
			</el-container>
		</el-container>
	</div>
</template>

<script>
	export default {
		data() {
			return {

			}
		},
		methods: {
			logout() {
				this.$confirm('您确定要退出?', '提示', {
					confirmButtonText: '确定',
					cancelButtonText: '取消',
					type: 'warning'
				}).then(() => {
					this.$router.push("/login");
				})
			}
		}
	}
</script>

<style>
	.el-header {
		text-align: center;
		background-color: #B3C0D1;
		color: #333;
		line-height: 60px;
	}

	.header-title {
		width: 300px;
		float: left;
		text-align: left;
		font-size: 20px;
		color: white;
	}

	.el-aside {
		background-color: #D3DCE6;
		color: #333;
		text-align: center;
		line-height: 200px;
	}

	.el-main {
		background-color: #E9EEF3;
		color: #333;
		text-align: center;
		line-height: 160px;
		height: 100vh;
	}
</style>
Login.vue
<template>
	<!-- 一个.vue文件是一个组件,可以理解为一个页面,但是和页面不同
	  内容都写在一个template标签中,
	  template标签必须有一个根标签
	-->
	<div class="login_container">
		<!-- 登录盒子-->
		<div class="login_box">
			<!-- 头像盒子-->
			<div class="img_box">
				<img src="./assets/logo.png" />
			</div>
			<!-- 登陆表单 -->
			<div>
				<el-form ref="form" lable-width="80px"  style="margin: 50px;">
					<el-form-item label="账号" >
						<el-input v-model="account"></el-input>
					</el-form-item>
					<el-form-item label="密码">
						<el-input v-model="password" show-password></el-input>
					</el-form-item>
					<el-form-item>
						<el-button type="primary" @click="login()">登录</el-button>
						<el-button>取消</el-button>
					</el-form-item>
				</el-form>
			</div>
		</div>
	</div>
</template>

<script>
	/* 导出组件,并为组件定义数据,函数,生命周期函数 */
	export default {
		data() {
			return {
				account: "",
				password: ""
			}
		},
		methods: {
			login() {
				//前端验证账号和密码不能为空
				if (this.account.length == 0) {
					this.$message({
						message: '账号不能为空!',
						type: 'warning'
					});
					return;
				}
				if (this.password.length == 0) {
					this.$message({
						message: '密码不能为空!',
						type: 'warning'
					});
					return;
				}
				//与后端交互
				//向后端相应一个结果
				this.$router.push("/index");
			}
		}
	}
</script>

<style>
	.login_container {
		height: 100vh;
		margin: 0px;
		padding: 0px;
		background-repeat: no-repeat;
		background-size: cover;
		background-image: url(assets/bc.jpg);
	}

	.login_box {
		width: 450px;
		height: 350px;
		background-color: #fff;
		border-radius: 10px;
		position: absolute;
		left: 50%;
		top: 50%;
		transform: translate(-50%, -50%);
		opacity: 0.95;
	}

	.img_box {
		width: 130px;
		height: 130px;
		position: absolute;
		left: 50%;
		transform: translate(-50%, -50%);
		background-color: #fff;
		border-radius: 50%;
		padding: 5px;
		border: 1px solid #eee;
	}

	.img_box img {
		width: 100%;
		height: 100%;
		border-radius: 50%;
		background-color: #eee;
	}
</style>
App.vue
<template>
	<div id="app">
		<router-view></router-view>
	</div>
</template>

<script>
	export default {
		name: 'app'
	}
</script>

<style>
</style>
最后再加入专业管理和学生管理即可
终端运行:


