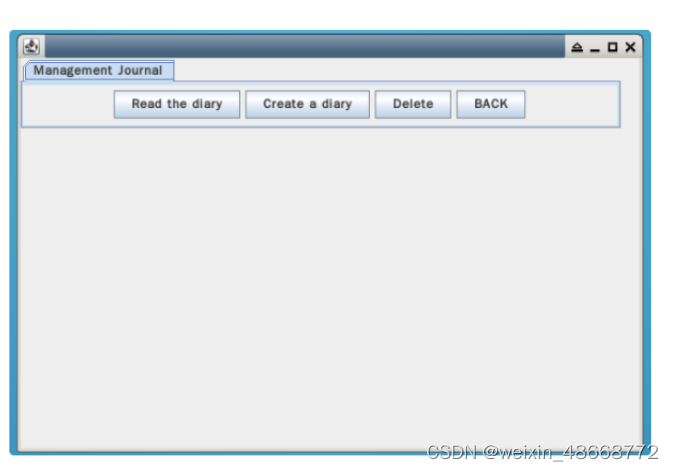
完成效果图:
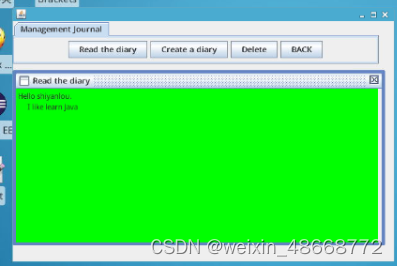
点击阅读按钮:
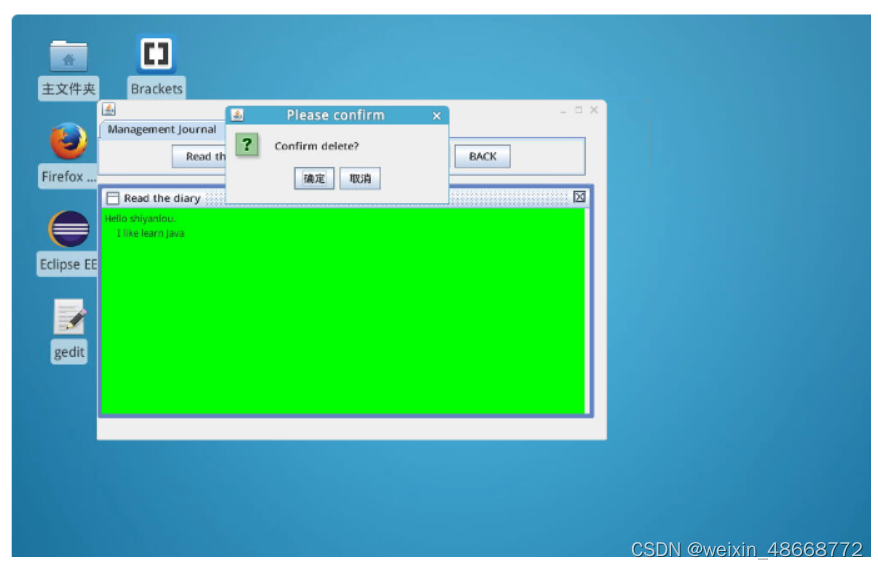
点击删除按钮:
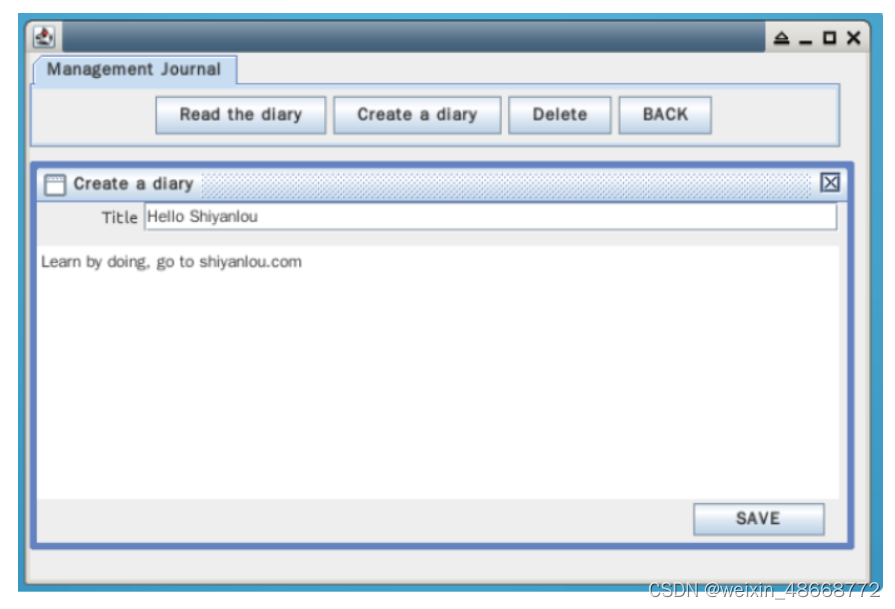
点击新建按钮:
Code
/*
This GUI application allows users to manage their diaries:
Read: Users can read existing diaries.
Create: Users can create new diaries.
Delete: Users can delete diaries.
Back: Users can go back to the main index screen.
*/
//Package and Imports
/*
This part imports the necessary Java classes and the custom Diary class for handling diary operations.
*/
package com.shiyanlou.view;
import java.awt.Color;
import java.awt.EventQueue;
import java.awt.Font;
import java.awt.event.ActionEvent;
import java.awt.event.ActionListener;
import java.awt.event.MouseAdapter;
import java.awt.event.MouseEvent;
import java.io.File;
import javax.swing.JButton;
import javax.swing.JEditorPane;
import javax.swing.JFileChooser;
import javax.swing.JFrame;
import javax.swing.JInternalFrame;
import javax.swing.JLabel;
import javax.swing.JOptionPane;
import javax.swing.JPanel;
import javax.swing.JTabbedPane;
import javax.swing.JTextField;
import javax.swing.JTextPane;
import javax.swing.border.EmptyBorder;
import javax.swing.filechooser.FileNameExtensionFilter;
import com.shiyanlou.util.Diary;
/Class Definition
/*
UsersGUI extends JFrame, meaning it is a Swing GUI application window.
*/
public class UsersGUI extends JFrame{
/Class Variables
/*
contentPane: The main panel of the frame.
textField: A text field for entering text.
chooser: A file chooser for selecting files.
pathname: The path where user's diaries are stored.
*/
private JPanel contentPane;
private JTextField textField;
//文件选择组建,用于用户阅读日记和删除日记时选择文件。
private JFileChooser chooser;
/*每个注册用户所记录的日记都位于自己的文件夹下,pathname用于保存用户的文件夹路径*/
private static String pathname;
/Static Method init
/*
This method initializes the GUI and sets the pathname to the provided path. It uses EventQueue.invokeLater to ensure the GUI updates happen on the Event Dispatch Thread.
*/
//成员方法
//初始化方法
public static void init(String path) {
pathname = path;
EventQueue.invokeLater(new Runnable() {
public void run() {
try {
UsersGUI frame = new UsersGUI();
frame.setVisible(true);
}catch(Exception e) {
e.printStackTrace();
}
}
});
}
///Constructor
/**
* Create the frame.
*/
//Constructor Definition
/*
This is the constructor for the UsersGUI class. A constructor is a special method that is called when an object is instantiated. In this case, it sets up the initial state of the UsersGUI frame.
*/
public UsersGUI() {
//Setting the Default Close Operation
/*
setDefaultCloseOperation is a method from the JFrame class.
JFrame.EXIT_ON_CLOSE is a constant that specifies the default close operation for the frame.
This line ensures that when the user closes the window, the application will terminate.
*/
setDefaultCloseOperation(JFrame.EXIT_ON_CLOSE);
//Setting the Frame Bounds
/*setBounds is a method that sets the position and size of the frame.
It takes four parameters: x, y, width, and height.
100, 100: The x and y coordinates for the top-left corner of the frame. This means the frame will be positioned 100 pixels from the left and 100 pixels from the top of the screen.
600, 400: The width and height of the frame in pixels. The frame will be 600 pixels wide and 400 pixels tall.
*/
setBounds(100, 100, 600, 400);
//Creating the Content Pane
/*
contentPane is a JPanel that will serve as the main container for other components within the frame.
JPanel is a generic lightweight container.
*/
contentPane = new JPanel();
//Setting the Border for the Content Pane
/*
setBorder is a method used to set the border of a component.
new EmptyBorder(5, 5, 5, 5) creates an empty border with 5 pixels of padding on each side (top, left, bottom, right).
This ensures that there is some space (padding) between the edges of the content pane and its child components.
*/
contentPane.setBorder(new EmptyBorder(5, 5, 5, 5));
//Adding the Content Pane to the Frame
/*
setContentPane is a method that sets the content pane of the JFrame.
By calling this method, we're telling the frame to use contentPane as its main container for all other components.
*/
setContentPane(contentPane);
//Setting the Layout Manager
/*
setLayout is a method that sets the layout manager for a container.
null means no layout manager is used (absolute positioning).
With absolute positioning, components are placed at specific x and y coordinates and are not automatically managed by a layout manager.
This allows for precise control over the position and size of components but requires manual management.
*/
contentPane.setLayout(null);
Tabbed Pane
//Creating a JTabbedPane
/*
JTabbedPane is a Swing component that allows you to create a tabbed pane, which can hold multiple tabs, each containing a different component.
The new JTabbedPane(JTabbedPane.TOP) creates a JTabbedPane with tabs positioned at the top.
JTabbedPane.TOP is a constant indicating that the tabs should be positioned at the top of the tabbed pane.
*/
JTabbedPane tabbedPane = new JTabbedPane(JTabbedPane.TOP);
//Setting the Tooltip Text
/*
setToolTipText is a method that sets the tooltip text for a component.
"KnowYou" is the text that will be displayed when the user hovers over the tabbed pane with the mouse.
Tooltips are useful for providing additional information to users.
*/
tabbedPane.setToolTipText("KnowYou");
//Setting the Bounds
/*
setBounds is a method that sets the position and size of the component.
It takes four parameters: x, y, width, and height.
0, 0: The x and y coordinates for the top-left corner of the tabbed pane. This places the tabbed pane at the top-left corner of its parent container (contentPane).
574, 67: The width and height of the tabbed pane in pixels. The tabbed pane will be 574 pixels wide and 67 pixels tall.
*/
tabbedPane.setBounds(0, 0, 574, 67);
//Adding the JTabbedPane to the Content Pane
/*
add is a method used to add a component to a container.
This line adds the tabbedPane to the contentPane, which is the main panel of the frame.
*/
contentPane.add(tabbedPane);
///看到这里
///Panel
/*Usage
The JPanel will serve as a container for other components related to the "Management Journal" functionality. By adding it to the JTabbedPane, users can switch to this tab to interact with the components contained within panel.
This design helps in organizing the user interface into separate sections or functionalities, making it easier for users to navigate and use the application. Each tab in the JTabbedPane can represent a different section or module of the application, with its own set of components and behaviors.
*/
//Creating a JPanel
/*
JPanel is a generic lightweight container used to group other components together.
final is a keyword that makes the panel variable immutable; you cannot reassign it after its initial assignment.
new JPanel() creates an instance of JPanel.
*/
final JPanel panel = new JPanel();
//Adding the JPanel to the JTabbedPane
/*
tabbedPane is an instance of JTabbedPane that we've already created and configured in the previous code.
addTab is a method of JTabbedPane used to add a new tab to the tabbed pane.
This method takes four parameters:
title: The text to be displayed on the tab. In this case, it is "Management Journal".
icon: An Icon to be displayed on the tab. Here, it is null, meaning no icon is used.
component: The component to be displayed when the tab is selected. Here, it is the panel we created.
tip: The tooltip text to be displayed when the mouse hovers over the tab. Here, it is null, meaning no tooltip is provided.
*/
tabbedPane.addTab("Management Journal",null,panel,null);
//File Chooser
/*Practical Use:
When a user opens the file chooser dialog, they will only see files with the .ky extension in the specified directory. This ensures that users can only select files of the desired type, making the application's file handling more controlled and error-free.
*/
//JFileChooser Initialization
/*
chooser is an instance of JFileChooser, which is a Swing component that provides a simple mechanism for the user to choose files.
new JFileChooser(".\\" + pathname) creates a new JFileChooser instance with the specified starting directory.
".\\" + pathname is a string that combines the current directory (".\\") with the pathname variable.
pathname is a static string variable that represents the directory path for the current user. This path was set earlier in the code.
Explanation:
JFileChooser will open in the directory specified by the pathname variable, which is prefixed with the current directory (".\\").
*/
chooser = new JFileChooser(".\\"+pathname);
//Creating and Setting File Filter:
//文件选择器,只允许选择.ky文件
/*
FileNameExtensionFilter is a class that allows you to specify which types of files can be selected in the JFileChooser.
new FileNameExtensionFilter("Allowed", "ky") creates a new filter that allows only files with the .ky extension to be selected.
"Allowed" is the description of the file type. It will be shown in the JFileChooser dialog as the type of files allowed.
"ky" is the file extension that the filter will allow. This means only files with a .ky extension can be selected.
Explanation:
chooser.setFileFilter(filter) sets this filter on the chooser. Now, the JFileChooser will only display and allow selection of files with the .ky extension.
*/
FileNameExtensionFilter filter = new FileNameExtensionFilter("Allowed","ky");
//为文件设置选择器
chooser.setFileFilter(filter);
//看到这里
Read Button
/*
This code sets up a button labeled "Read the diary" that, when clicked, opens a file chooser dialog. If a file is selected and exists, it opens an internal frame displaying the contents of the selected file in a text pane. The text pane is non-editable, and its background color is set to green. This internal frame is displayed within the main application window.
*/
//Creating the "Read the diary" Button
/*
This line creates a new button labeled "Read the diary".
*/
JButton readButton = new JButton("Read the diary");
//Adding a Mouse Listener to the Button
/*
Here, a mouse listener is added to the button. MouseAdapter is an abstract class used to receive mouse events.
*/
readButton.addMouseListener(new MouseAdapter() {
//Overriding the mouseClicked Method
/*
This overrides the mouseClicked method, which will be executed when the button is clicked.
*/
@Override
public void mouseClicked(MouseEvent e) {
//判断用户是否选择了文件
//Showing the Open File Dialog
/*
Summary
chooser.showOpenDialog(panel) opens a file chooser dialog centered on panel.
The dialog blocks other interactions until the user selects a file or cancels the dialog.
The return value (value) indicates whether the user selected a file or canceled the dialog.
The code then handles the selected file accordingly if the user approved the selection.
*/
/*
Understanding chooser.showOpenDialog(panel)
What is JFileChooser?
JFileChooser is a part of the javax.swing package. It provides a simple mechanism for the user to choose a file or directory from the filesystem.
What is showOpenDialog?
showOpenDialog(Component parent): This method shows an "Open File" dialog. It is a modal dialog, which means it blocks user interaction with other windows in the application until the dialog is closed.
parent: This is the parent component of the dialog. The dialog will be centered on this component. In this case, panel is passed as the parent.
What Does the Method Return?
showOpenDialog returns an integer indicating the option selected by the user. The possible return values are:
JFileChooser.APPROVE_OPTION: The user approved the file selection (clicked "Open" or "Save").
JFileChooser.CANCEL_OPTION: The user canceled the operation (clicked "Cancel").
JFileChooser.ERROR_OPTION: An error occurred or the dialog was dismissed.
*/
/*Detailed Explanation of the Line
1. Display the File Chooser Dialog:
When showOpenDialog(panel) is called, a file chooser dialog is displayed to the user.
The dialog allows the user to navigate the filesystem and select a file.
2. Block Other Interactions:
The dialog is modal, so it will block interaction with other windows in the application until the user has closed it by selecting a file or canceling the dialog.
3. Store the Result:
The return value of showOpenDialog(panel) is stored in the integer variable value.
This value indicates what action the user took in the dialog.
*/
/*
Handling User Actions
The code then uses this value to determine the next steps:
The code then uses this value to determine the next steps:
java
Copy code
if (value == JFileChooser.APPROVE_OPTION) {
File file = chooser.getSelectedFile();
if (file.exists()) {
Diary.read(file, doc);
internalFrame_Read.setVisible(true);
}
}
Check if the User Approved:
If value is equal to JFileChooser.APPROVE_OPTION, it means the user selected a file and clicked "Open".
Get the Selected File:
chooser.getSelectedFile() retrieves the file the user selected.
Check if the File Exists:
The code checks if the file exists on the filesystem.
Read and Display the File:
If the file exists, Diary.read(file, doc) reads the contents of the file into the document doc.
The internal frame internalFrame_Read is made visible to display the file contents.
*/
int value = chooser.showOpenDialog(panel);
//看到这里
//内部窗体
//Creating an Internal Frame for Reading the Diary
/*
This line initializes a new JInternalFrame with the title "Read the diary". The boolean parameters specify whether the internal frame is resizable, closable, maximizable, and iconifiable, respectively.
*/
JInternalFrame internalFrame_Read = new JInternalFrame("Read the diary", false, true, false, false);
//Setting the bounds of the internal frame:
/*
This line sets the position and size of the internal frame. It is positioned at (0, 77) and has a width of 584 and a height of 275.
*/
internalFrame_Read.setBounds(0, 77, 584, 275);
//Adding the internal frame to the parent container:
/*
This line adds the JInternalFrame instance (internalFrame_Read) to a parent container (contentPane).
*/
contentPane.add(internalFrame_Read);
//Setting the layout of the internal frame's content pane to null:
/*
This line sets the layout manager of the internal frame's content pane to null, which means you will manually specify the position and size of any components added to the internal frame.
*/
internalFrame_Read.getContentPane().setLayout(null);
//Adding a Text Pane to the Internal Frame
/*
This creates a new JTextPane object named txtDiary.
txtDiary.setBounds(0, 0, 568, 246); sets the position and size of txtDiary within the internal frame.
internalFrame_Read.getContentPane().add(txtDiary); adds the JTextPane to the content pane of internalFrame_Read.
*/
JTextPane txtDiary = new JTextPane();
txtDiary.setBounds(0, 0, 568, 246);
internalFrame_Read.getContentPane().add(txtDiary);
//JTextPane没有append方法,所以使用Document来不断插入文本
//Document for Text Insertion:
/*
JTextPane does not have an append method for adding text like JTextArea does.
javax.swing.text.Document doc = txtDiary.getDocument(); retrieves the Document object associated with txtDiary.
The Document interface provides methods for manipulating the content of the JTextPane, allowing you to insert, remove, or modify text programmatically.
*/
javax.swing.text.Document doc = txtDiary.getDocument();
背景颜色 为绿色
//Setting Background Color:
/*
txtDiary.setBackground(Color.GREEN); sets the background color of the JTextPane to green.
*/
txtDiary.setBackground(Color.GREEN);
设置为不可编辑
//Making the Text Pane Non-Editable:
/*
txtDiary.setEditable(false); makes the JTextPane non-editable. This means users cannot modify the text within the text pane, but the content can still be modified programmatically.
*/
txtDiary.setEditable(false);
//看到这里
//当value的值和JFileChooser.APPROVE_OPTION相等时,证明用户选择了文件
//Checking the User's Action
//Check if the File Chooser's Value is APPROVE_OPTION:
/*
JFileChooser.APPROVE_OPTION is a constant that indicates the user has selected a file and approved the selection (typically by clicking the "Open" or "Save" button).
*/
if(value == JFileChooser.APPROVE_OPTION) {
//得到用户选择的文件
//Reading the Selected File
/*
chooser.getSelectedFile() retrieves the file the user selected in the JFileChooser.
*/
File file = chooser.getSelectedFile();
//如果文件存在
//Check if the File Exists:
/*
This checks if the selected file actually exists on the file system.
*/
if(file.exists()) {
//Diary.read()方法读取日记;
//该方法将会在以后的课程中完成
//Reading the Diary File:
/*
Diary.read(file, doc); calls a method read from the Diary class. This method is responsible for reading the contents of the file and inserting it into the Document object (doc), which is associated with a JTextPane.
*/
Diary.read(file, doc);
//Making the Internal Frame Visible:
/*
internalFrame_Read.setVisible(true); makes the internal frame (JInternalFrame) visible. This frame likely contains the JTextPane that displays the diary content.
*/
internalFrame_Read.setVisible(true);
}
}
}
});
//Adding the Button to the Panel
panel.add(readButton);
Add Button
//新建按钮
//Creating the Button:
/*
This line creates a new button with the label "Create a diary".
*/
JButton addButton = new JButton("Create a diary");
//Adding a Mouse Listener to the Button:
/*
This adds a mouse listener to the button. The mouseClicked method is overridden to specify what happens when the button is clicked.
*/
addButton.addMouseListener(new MouseAdapter() {
@Override
public void mouseClicked(MouseEvent e) {
//创建新建日记内部窗体
//Creating a New Internal Frame:
/*
This creates a new internal frame with the title "Create a diary". The boolean parameters specify whether the internal frame is resizable, closable, maximizable, and iconifiable, respectively.
The internal frame is positioned and sized using setBounds.
The internal frame is added to the contentPane.
The layout manager of the internal frame's content pane is set to null, allowing for manual positioning of components.
*/
final JInternalFrame internalFrame_Write = new JInternalFrame("Create a diary",false, true, false, false);
internalFrame_Write.setBounds(0, 77, 584, 275);
contentPane.add(internalFrame_Write);
internalFrame_Write.getContentPane().setLayout(null);
//Creating and Adding a Text Field:
/*
This creates a text field where the user can input the title of the diary.
The text field is positioned and sized using setBounds.
The text field is added to the internal frame's content pane.
setColumns(10) sets the number of columns in the text field, which affects its preferred width.
*/
/* 'JTextField' Overview
JTextField Overview:
JTextField is a Swing component that allows users to enter and edit a single line of text. It is commonly used for input fields in forms and dialogs.
Key Features of JTextField:
Text Handling:
You can get and set the text content of the JTextField using methods like getText() and setText(String text).
Columns:
You can set the number of columns (i.e., the width) of the JTextField using the setColumns(int columns) method. This affects the preferred size of the text field.
Event Handling:
JTextField generates events such as ActionEvent when the user presses Enter while the text field is focused. You can add an ActionListener to handle these events.
Common Methods:
Creating a JTextField:
java
Copy code
JTextField textField = new JTextField();
Creates an empty text field.
java
Copy code
JTextField textField = new JTextField(String text);
Creates a text field initialized with the specified text.
java
Copy code
JTextField textField = new JTextField(int columns);
Creates an empty text field with the specified number of columns.
java
Copy code
JTextField textField = new JTextField(String text, int columns);
Creates a text field initialized with the specified text and number of columns.
Setting and Getting Text:
java
Copy code
textField.setText("Some text");
String text = textField.getText();
Setting Columns:
java
Copy code
textField.setColumns(10);
Event Handling:
java
Copy code
textField.addActionListener(new ActionListener() {
@Override
public void actionPerformed(ActionEvent e) {
System.out.println("Enter pressed");
}
});
Example Usage:
Here’s a simple example to demonstrate how to use JTextField:
java
Copy code
import javax.swing.*;
import java.awt.*;
import java.awt.event.ActionEvent;
import java.awt.event.ActionListener;
public class JTextFieldExample {
public static void main(String[] args) {
// Create a frame
JFrame frame = new JFrame("JTextField Example");
frame.setDefaultCloseOperation(JFrame.EXIT_ON_CLOSE);
frame.setSize(400, 200);
frame.setLayout(new FlowLayout());
// Create a JTextField
JTextField textField = new JTextField(20);
frame.add(textField);
// Create a JButton
JButton button = new JButton("Get Text");
frame.add(button);
// Create a JLabel to display the text
JLabel label = new JLabel("Text will be displayed here");
frame.add(label);
// Add ActionListener to the button
button.addActionListener(new ActionListener() {
@Override
public void actionPerformed(ActionEvent e) {
// Get text from the text field and display it in the label
String text = textField.getText();
label.setText("Entered text: " + text);
}
});
// Add ActionListener to the text field to handle Enter key press
textField.addActionListener(new ActionListener() {
@Override
public void actionPerformed(ActionEvent e) {
// Get text from the text field and display it in the label
String text = textField.getText();
label.setText("Entered text: " + text);
}
});
// Make the frame visible
frame.setVisible(true);
}
}
Explanation of the Example:
Creating the Frame:
A JFrame is created and set up with a flow layout for simplicity.
Creating the JTextField:
A JTextField is created with a specified number of columns (20), meaning it has a width that can accommodate roughly 20 characters.
Creating and Adding Components:
A JButton and a JLabel are created and added to the frame.
Adding Action Listeners:
An ActionListener is added to the button to retrieve and display the text from the text field when the button is clicked.
Another ActionListener is added to the text field to handle the Enter key press event in a similar manner.
Displaying the Frame:
The frame is made visible, allowing the user to interact with the text field, button, and label.
*/
textField = new JTextField();
textField.setBounds(76, 0, 492, 21);
internalFrame_Write.getContentPane().add(textField);
textField.setColumns(10);
//Creating and Adding a Label:
/*
This creates a label with the text "Title".
The font of the label is set to a specific font ("楷体", a Chinese typeface), with a plain style and size 12.
The label is positioned and sized using setBounds.
The label is added to the internal frame's content pane.
*/
JLabel label = new JLabel("Title");
label.setFont(new Font("楷体",Font.PLAIN,12));
label.setBounds(46, 3, 52, 15);
internalFrame_Write.getContentPane().add(label);
//日记编辑区
//Creating and Adding an Editor Pane:
/*
This creates an editor pane where the user can input the content of the diary.
The editor pane is positioned and sized using setBounds.
The editor pane is added to the internal frame's content pane.
*/
final JEditorPane editorPane = new JEditorPane();
editorPane.setBounds(0, 31, 568, 179);
internalFrame_Write.getContentPane().add(editorPane);
//Creating and Adding a Save Button:
/*
This creates a save button with the label "SAVE".
The save button is positioned and sized using setBounds.
A mouse listener is added to the save button. When the button is clicked:
The title is retrieved from the text field.
The content is retrieved from the editor pane.
The Diary.addDiary() method is called to save the diary. The implementation of this method will be completed later.
The internal frame is hidden after the diary is saved.
*/
JButton save = new JButton("SAVE");//保存按钮
save.setBounds(465, 213, 93, 23);
save.addMouseListener(new MouseAdapter() {
public void mouseClicked(MouseEvent e) {
//获取标题
String title = textField.getText();
//获取内容
String txt = editorPane.getText();
//调用Diary.addDiary()方法建立日记
//该方法将会在以后的课程中完成
Diary.addDiary(pathname, title, txt);
//日记建立完成后隐藏当前窗口
internalFrame_Write.setVisible(false);
}
});
internalFrame_Write.getContentPane().add(save);
//Making the Internal Frame Visible:
/*
This line makes the internal frame visible, allowing the user to interact with it.
*/
internalFrame_Write.setVisible(true);
}
});
//Adding the Button to the Panel:
/*
This adds the "Create a diary" button to the panel.
*/
panel.add(addButton);
///Delete Button
//删除按钮
//Creating the Delete Button:
/*
This line creates a new button with the label "Delete".
*/
JButton delButton = new JButton("Delete");
//Adding an Action Listener to the Button:
/*
This adds an action listener to the delete button. The actionPerformed method specifies what happens when the button is clicked.
*/
delButton.addActionListener(new ActionListener() {
public void actionPerformed(ActionEvent e) {
//Declaring a File Variable:
/*
This initializes a File variable to null. It will later hold the file selected by the user.
*/
File file = null;
//Showing the File Chooser Dialog:
/*
The line int value = chooser.showOpenDialog(panel); is a crucial part of the file selection process using JFileChooser. Let's break it down step by step:
JFileChooser Overview
JFileChooser is a Swing component that provides a simple mechanism for the user to choose a file. It displays a dialog window where the user can navigate the file system and select a file or directory.
Detailed Breakdown of showOpenDialog()
Method Call:
java
Copy code
int value = chooser.showOpenDialog(panel);
chooser: This is an instance of JFileChooser.
showOpenDialog(panel): This method displays an "Open" file dialog. The panel parameter specifies the parent component for the dialog, which ensures that the dialog is centered relative to the panel.
Parent Component:
panel: The parent component. This can be any Component, but commonly it's the main panel or frame of your application. It helps the dialog to be positioned correctly on the screen.
Return Value:
int value: The method returns an integer that indicates the user's action. The possible return values are:
JFileChooser.APPROVE_OPTION: Indicates that the user selected a file and clicked "Open".
JFileChooser.CANCEL_OPTION: Indicates that the user canceled the file selection.
JFileChooser.ERROR_OPTION: Indicates that an error occurred or the dialog was closed without an explicit selection.
Example in Context
Here's a simplified example to demonstrate how showOpenDialog works:
java
Copy code
import javax.swing.*;
import java.awt.*;
import java.awt.event.ActionEvent;
import java.awt.event.ActionListener;
import java.io.File;
public class FileChooserExample {
public static void main(String[] args) {
// Create the main frame
JFrame frame = new JFrame("File Chooser Example");
frame.setDefaultCloseOperation(JFrame.EXIT_ON_CLOSE);
frame.setSize(400, 300);
frame.setLayout(new BorderLayout());
// Create a panel to hold buttons
JPanel panel = new JPanel();
frame.add(panel, BorderLayout.SOUTH);
// Create a JFileChooser
JFileChooser chooser = new JFileChooser();
// Create an Open button
JButton openButton = new JButton("Open File");
openButton.addActionListener(new ActionListener() {
public void actionPerformed(ActionEvent e) {
// Show the open dialog
int value = chooser.showOpenDialog(panel);
// Check the user's action
if (value == JFileChooser.APPROVE_OPTION) {
// Get the selected file
File selectedFile = chooser.getSelectedFile();
// Display the selected file's path
JOptionPane.showMessageDialog(panel, "Selected file: " + selectedFile.getPath());
} else if (value == JFileChooser.CANCEL_OPTION) {
JOptionPane.showMessageDialog(panel, "File selection canceled.");
} else if (value == JFileChooser.ERROR_OPTION) {
JOptionPane.showMessageDialog(panel, "An error occurred.");
}
}
});
// Add the Open button to the panel
panel.add(openButton);
// Make the frame visible
frame.setVisible(true);
}
}
Explanation of the Example:
Main Frame:
A JFrame is created to hold the application window.
Panel:
A JPanel is added to the bottom of the frame to hold the buttons.
File Chooser:
An instance of JFileChooser is created.
Open Button:
A button labeled "Open File" is created and added to the panel. An ActionListener is attached to the button to handle the click event.
Showing the Open Dialog:
When the button is clicked, chooser.showOpenDialog(panel) is called, which displays the file chooser dialog.
Handling the User's Action:
The returned value is checked to determine the user's action:
If the user selects a file and clicks "Open", the selected file's path is displayed in a message dialog.
If the user cancels the selection, a cancellation message is shown.
If an error occurs, an error message is displayed.
Summary:
JFileChooser provides a standard dialog for file selection.
showOpenDialog(Component parent) method displays the "Open" file dialog, with parent determining the positioning of the dialog.
The method returns an integer indicating the user's action, which can be checked to handle the file selection, cancellation, or any errors appropriately.
*/
int value = chooser.showOpenDialog(panel);
//Checking if a File was Selected:
/*
This checks if the user approved (selected a file and clicked "Open"). If approved, the selected file is stored in the file variable.
*/
if(value == JFileChooser.APPROVE_OPTION) {
file = chooser.getSelectedFile();
//删除确认框,用于确定用户是否确定删除
//Showing a Confirmation Dialog:
/*
This line displays a confirmation dialog asking the user if they are sure they want to delete the file. The user's response (OK or Cancel) is stored in the x variable.
*/
/*
let's dive into the JOptionPane.showConfirmDialog method and understand it in detail.
JOptionPane.showConfirmDialog Method:
The JOptionPane.showConfirmDialog method is used to display a dialog with a question and options for the user to confirm or cancel. This is particularly useful when you want to ask the user to make a decision, such as confirming the deletion of a file.
Method Signature:
java
Copy code
int showConfirmDialog(Component parentComponent, Object message, String title, int optionType, int messageType)
Parameters:
parentComponent:
The component that the dialog will be centered on. This helps position the dialog relative to the parent component.
In your code, panel is used as the parent component.
message:
The message to display in the dialog. This can be a String or any other object that provides a toString method.
In your code, the message is "Confirm delete?".
title:
The title of the dialog window.
In your code, the title is "Please confirm".
optionType:
Specifies the options that the dialog will display. Common option types are:
JOptionPane.OK_CANCEL_OPTION: Displays OK and Cancel buttons.
JOptionPane.YES_NO_OPTION: Displays Yes and No buttons.
JOptionPane.YES_NO_CANCEL_OPTION: Displays Yes, No, and Cancel buttons.
In your code, JOptionPane.OK_CANCEL_OPTION is used, so the dialog will have OK and Cancel buttons.
messageType:
The type of message to be displayed. Common message types are:
JOptionPane.ERROR_MESSAGE: Error message.
JOptionPane.INFORMATION_MESSAGE: Information message.
JOptionPane.WARNING_MESSAGE: Warning message.
JOptionPane.QUESTION_MESSAGE: Question message.
JOptionPane.PLAIN_MESSAGE: No icon.
In your code, JOptionPane.QUESTION_MESSAGE is used, so the dialog will have a question icon.
Return Value:
The method returns an integer that indicates the option chosen by the user. Common return values are:
JOptionPane.OK_OPTION: Indicates that the user chose the OK button.
JOptionPane.CANCEL_OPTION: Indicates that the user chose the Cancel button.
JOptionPane.YES_OPTION: Indicates that the user chose the Yes button.
JOptionPane.NO_OPTION: Indicates that the user chose the No button.
JOptionPane.CLOSED_OPTION: Indicates that the user closed the dialog without choosing an option.
Example in Your Code:
java
Copy code
int x = JOptionPane.showConfirmDialog(panel, "Confirm delete?", "Please confirm", JOptionPane.OK_CANCEL_OPTION, JOptionPane.QUESTION_MESSAGE);
panel:
The dialog will be centered on the panel component.
"Confirm delete?":
This is the message displayed in the dialog.
"Please confirm":
This is the title of the dialog.
JOptionPane.OK_CANCEL_OPTION:
The dialog will display OK and Cancel buttons.
JOptionPane.QUESTION_MESSAGE:
The dialog will display a question icon.
Handling the Return Value:
The return value (x in your code) is used to determine which button the user clicked.
java
Copy code
if (x == JOptionPane.OK_OPTION) {
// The user clicked OK
file.delete();
JOptionPane.showMessageDialog(panel, "Delete Success!", "Information", JOptionPane.PLAIN_MESSAGE);
} else if (x == JOptionPane.CANCEL_OPTION) {
// The user clicked Cancel
// You can handle the cancellation here if needed
}
*/
int x =
JOptionPane.showConfirmDialog(panel,"Confirm delete?","Please confirm",JOptionPane.OK_CANCEL_OPTION,JOptionPane.QUESTION_MESSAGE);
//Checking if the File Exists:
/*
This checks if the file exists before attempting to delete it.
*/
if(file.exists()) {
//当用户选择了OK时,调用删除方法
//Deleting the File on Confirmation:
/*
This checks if the user clicked "OK" in the confirmation dialog. If so, the file is deleted using file.delete().
A success message is then displayed to inform the user that the file was deleted successfully.
*/
if(x == JOptionPane.OK_OPTION) {
file.delete();
//打印删除成功提示信息
JOptionPane.showMessageDialog(panel, "Delete Success!","informaton",JOptionPane.PLAIN_MESSAGE);
/*explaination for the above ode
Let's break down the JOptionPane.showMessageDialog method and understand each component of the line in detail.
Method Signature:
java
Copy code
JOptionPane.showMessageDialog(Component parentComponent, Object message, String title, int messageType)
Parameters:
parentComponent:
Type: Component
Description: This is the parent component of the dialog. The dialog will be centered on this component.
In your code: panel
The dialog will appear centered over the panel component. This ensures the dialog is positioned in a user-friendly manner relative to the parent component.
message:
Type: Object
Description: The message to be displayed in the dialog. This can be a String or any other object that provides a toString method.
In your code: "Delete Success!"
This is the message shown to the user. It informs them that the deletion operation was successful.
title:
Type: String
Description: The title of the dialog window.
In your code: "information"
This is the title displayed at the top of the dialog window. It gives context to the message, usually indicating the type of message (e.g., information, error, warning).
messageType:
Type: int
Description: The type of message to be displayed. This determines the icon used in the dialog.
Common values:
JOptionPane.ERROR_MESSAGE: Displays an error icon.
JOptionPane.INFORMATION_MESSAGE: Displays an information icon.
JOptionPane.WARNING_MESSAGE: Displays a warning icon.
JOptionPane.QUESTION_MESSAGE: Displays a question icon.
JOptionPane.PLAIN_MESSAGE: No icon.
In your code: JOptionPane.PLAIN_MESSAGE
This indicates that no icon will be displayed in the dialog.
*/
}
}
}
}
});
//Adding the Delete Button to the Panel:
panel.add(delButton);
/Back Button
//返回按钮
//1. Creating a JButton:
/*
JButton: This creates a new button with the label "BACK".
Label "BACK": The text displayed on the button is "BACK". This is what the user will see and click.
*/
JButton back = new JButton("BACK");
//2. Adding an Action Listener:
/*
back.addActionListener: This adds an ActionListener to the button. An ActionListener is an interface that listens for action events, such as button clicks.
Anonymous Inner Class: The new ActionListener() { ... } is an anonymous inner class implementing the ActionListener interface. This means you are creating an instance of an object with a custom implementation of the actionPerformed method right where it's needed.
public void actionPerformed(ActionEvent e): This is the method that will be called when the button is clicked. The ActionEvent e parameter contains information about the event (e.g., the source of the event, the time it occurred).
*/
back.addActionListener(new ActionListener() {
public void actionPerformed(ActionEvent e) {
/*
Inside the actionPerformed Method:
IndexGUI.init();:
IndexGUI: This refers to a class named IndexGUI.
.init(): This is a static method of the IndexGUI class. When this line is executed, it calls the init method of the IndexGUI class. This method likely initializes and displays the main index or home GUI of the application. The exact behavior of this method depends on its implementation.
setVisible(false);:
setVisible(false): This hides the current window. The setVisible method is used to change the visibility of a component. When set to false, the component (in this case, the window or panel containing the "BACK" button) is hidden from view.
*/
IndexGUI.init();
setVisible(false);
}
});
//3. Adding the Button to the Panel:
/*
panel.add(back): This adds the "BACK" button to a panel. The panel is a container that holds and arranges components, such as buttons, labels, text fields, etc.
*/
panel.add(back);
}
}