目录
一、Log4cpp简介
二、Windows下的Log4cpp的安装
1、下载网址
2、解决方案
三、Vistual Studio中使用第三方库
1、拷贝对应下图路径下的include文件进入你的项目目录下面去,并将之前编译好的库文件也放在对应项目目录下面去。
2、打开你的项目,右键项目属性
3、选择常规选项卡,在附加包含目录里面输入你之前对应的log4cpp的include文件夹路径
5、选择链接器选项卡,进行附加依赖性,输入log4cpp.lib
6、测试程序
7、实际开发中可以用的,对于log4cpp单例类
四、Linux下的Log4cpp的安装
1、安装log4cpp,执行如下指令进行编译安装
2、包含头文件
3、初始化日志输出的目的地(appenders)
4、设置日志输出的格式
5、设置类别输出的(category)和日志优先级(priority)
6、定义一个宏,方便我们更好的调用
7、使用宏定义记录日志
8、加载配置ini
一、Log4cpp简介
Log4cpp是个基于LGPL的开源项目,移植自Java的日志处理跟踪项目log4j,并保持了API上的一致。其类似的支持库还包括Java(log4j),C++(log4cpp、log4cplus),C(log4c),python(log4p)等。
Log4cpp有如下优点:
•提供了可扩展的多种日志记录方式;
•提供了NDC(嵌套诊断上下文),可用于多线程、多场景的跟踪调试;
•提供了完整的日志动态优先级控制,可随时调整需要记录的日志优先级;
•可通过配置文件完成所有配置并动态加载;
•性能优秀,内存占用小,经过编译后的log4cpp.dll大小仅有160kb;
•代码级的平台无关性,Log4cpp源代码经过编译后,适用于大多数主流的操作系统和开发工具;
•概念清晰,学习和使用方便,熟练程序员一天之内即可很好地应用log4cpp进行开发。
二、Windows下的Log4cpp的安装
1、下载网址
http://log4cpp.sourceforge.net/![]() http://log4cpp.sourceforge.net/
http://log4cpp.sourceforge.net/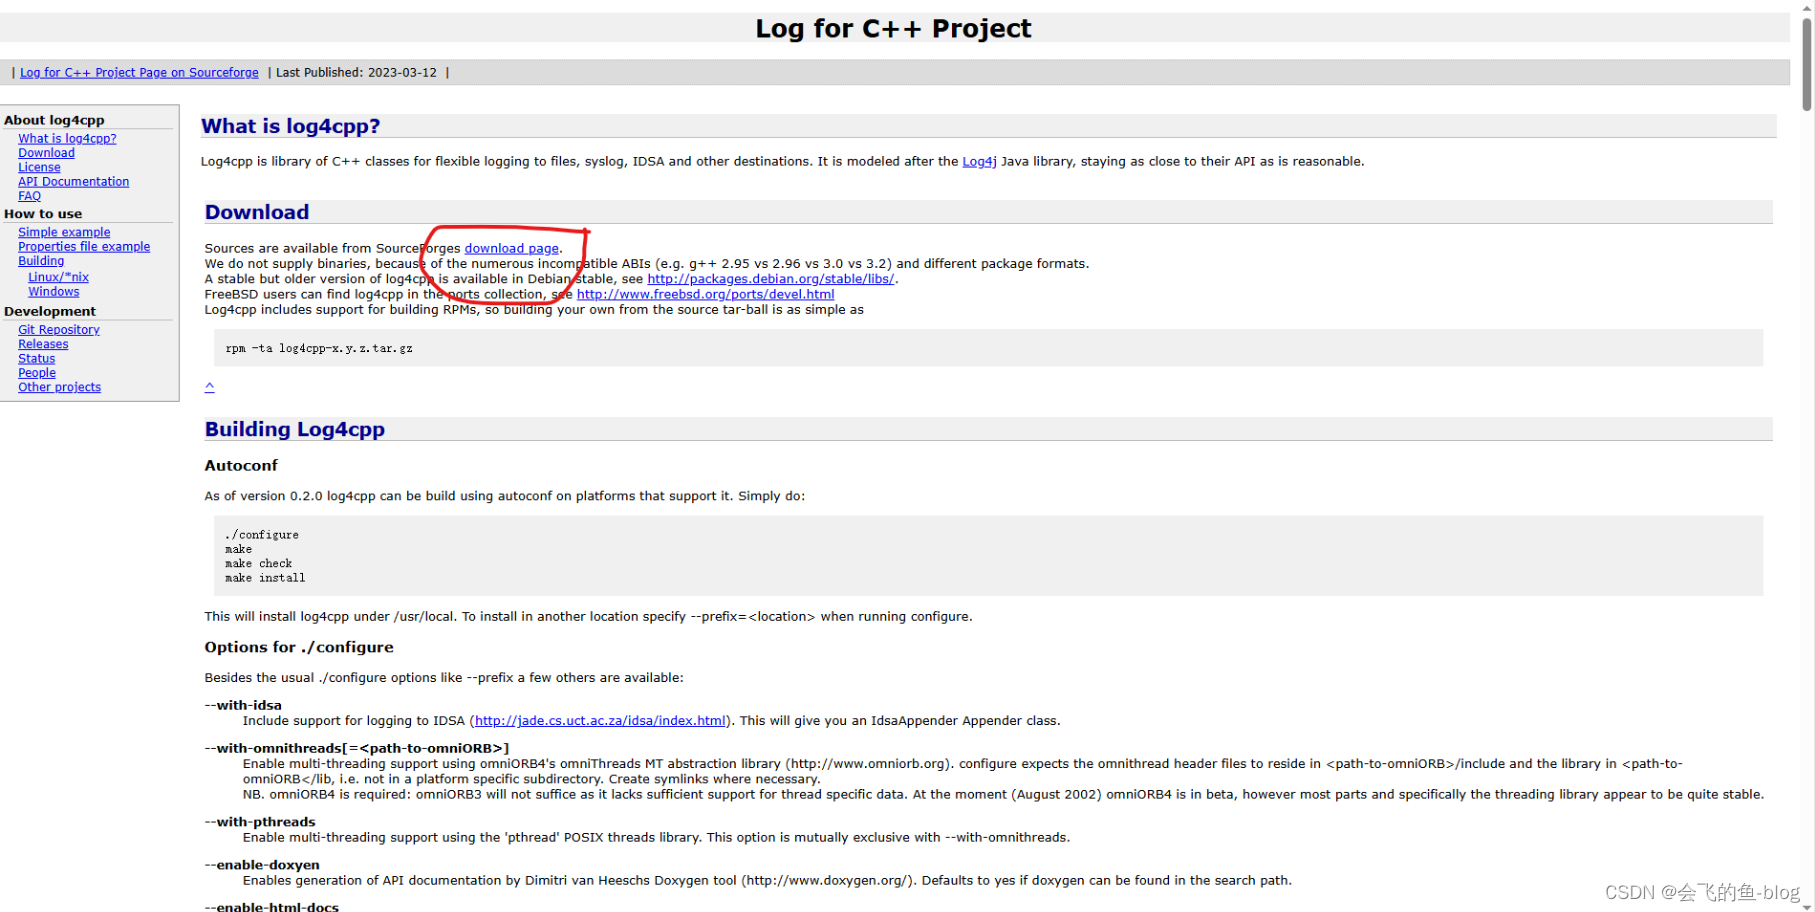
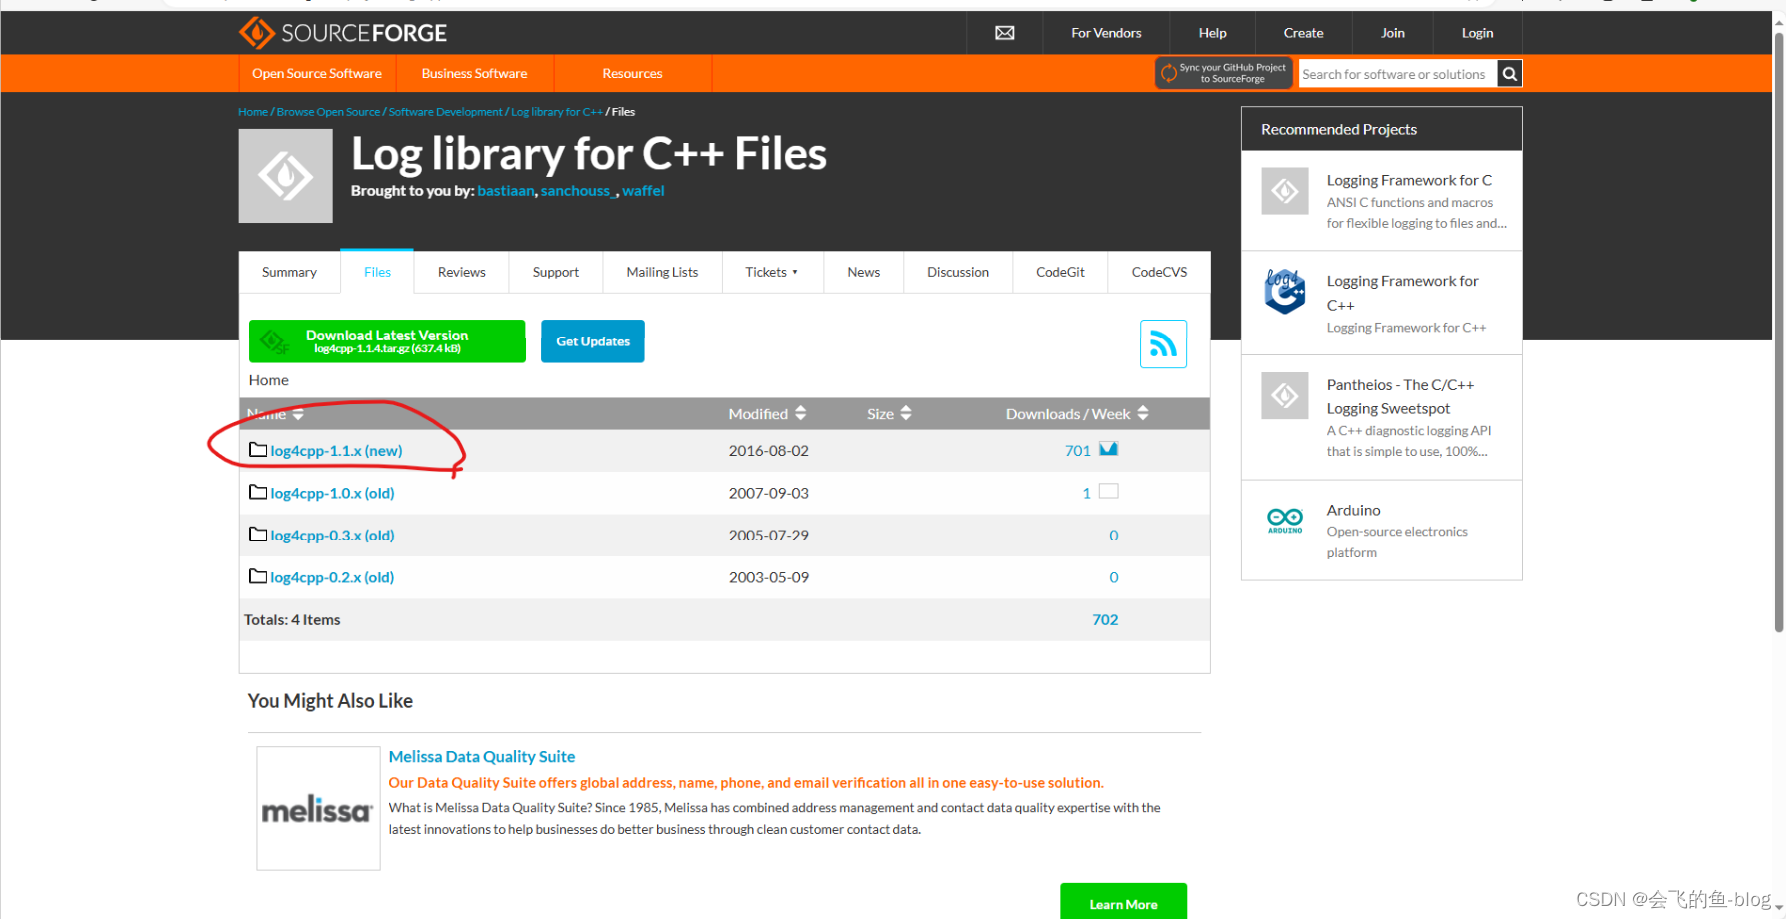
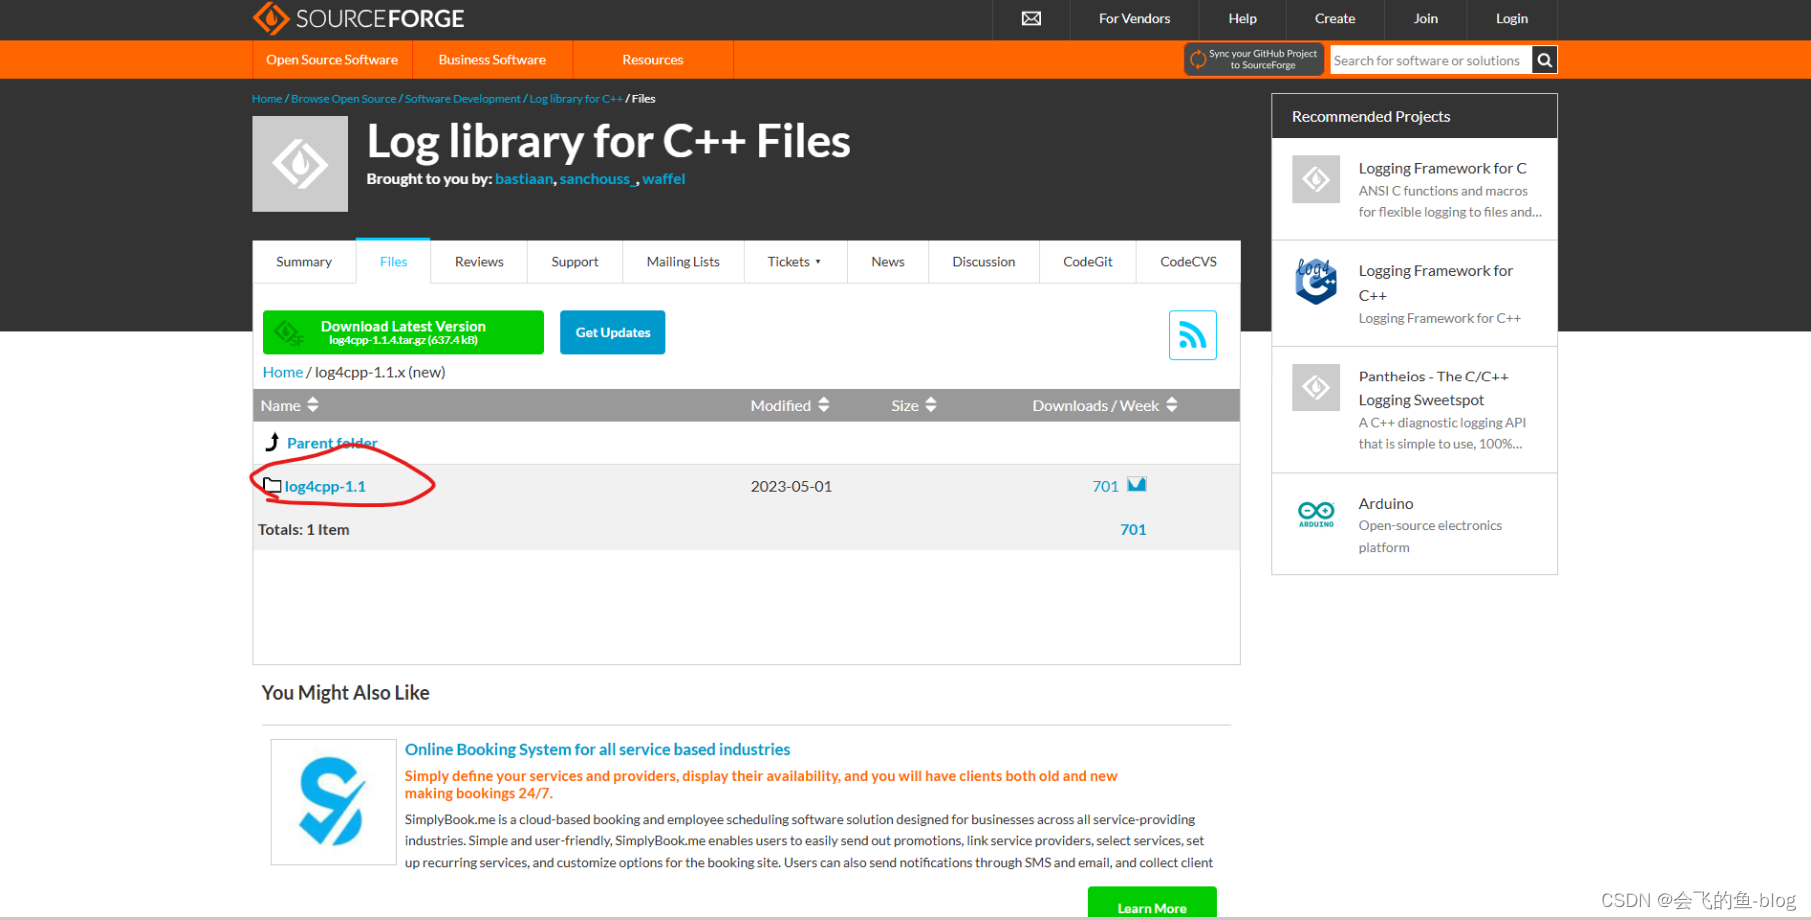
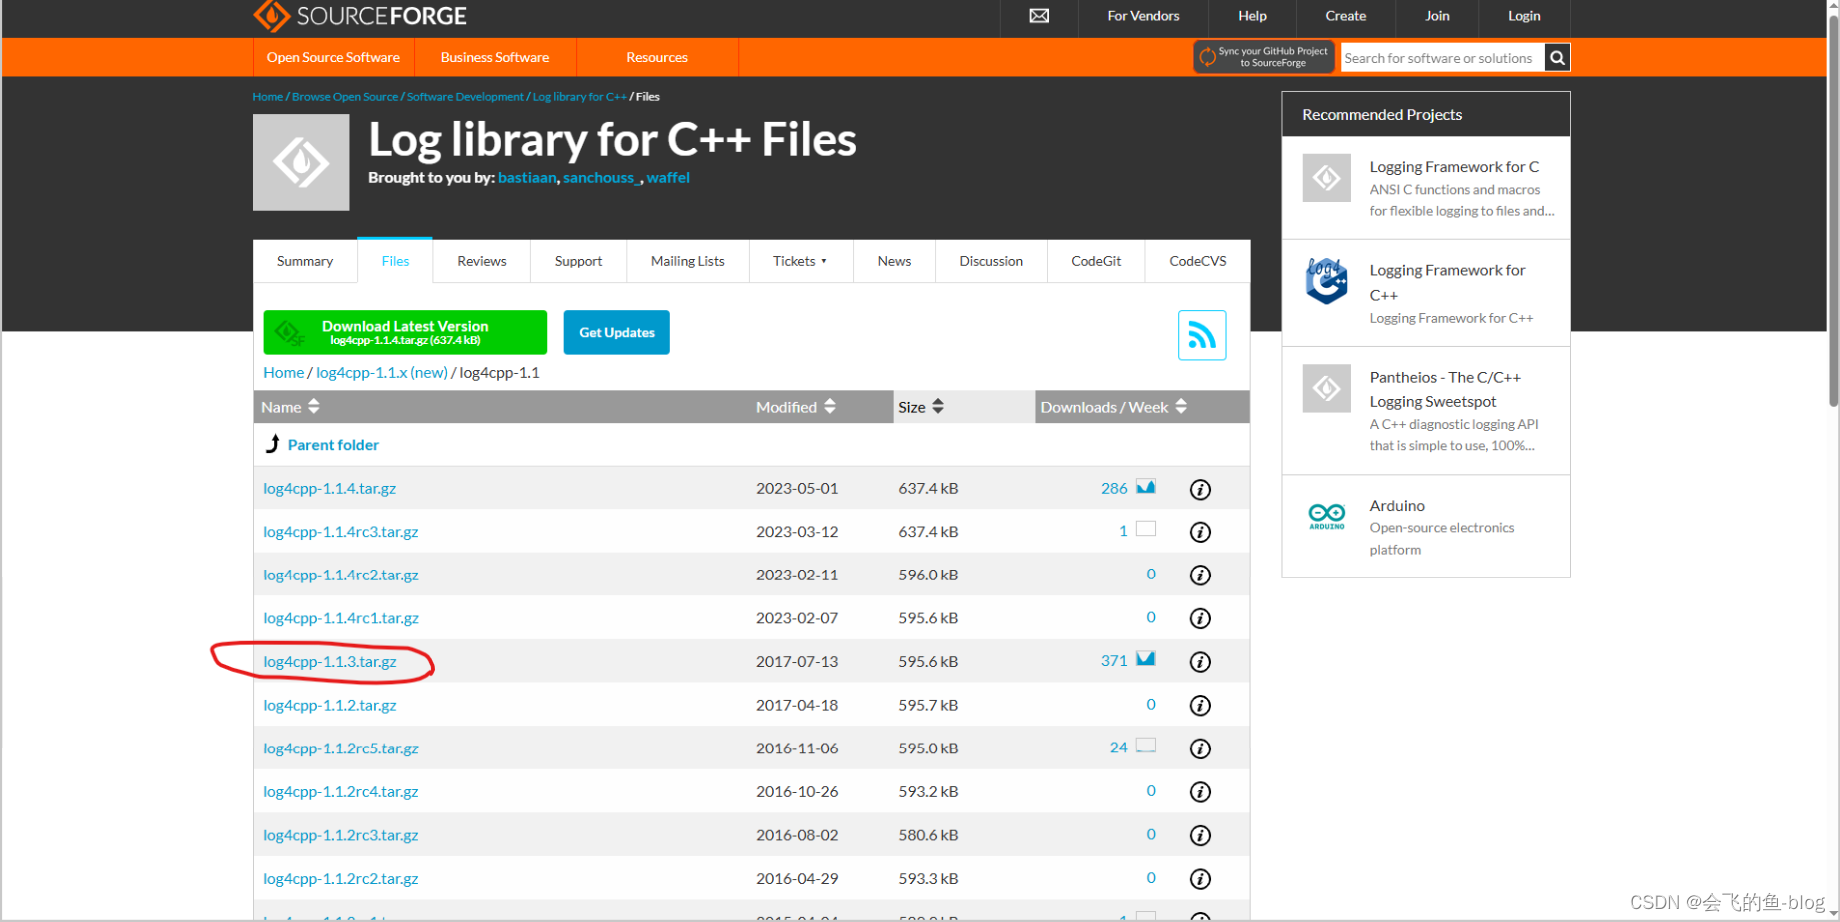
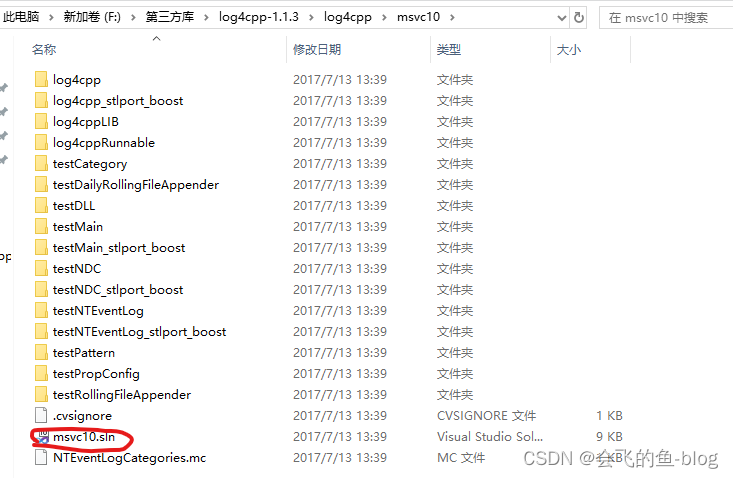
选择图片红色圈出来的,进行下载。下载好后,解压文件并打开文件。双击打开下面的没事msvc10.sln
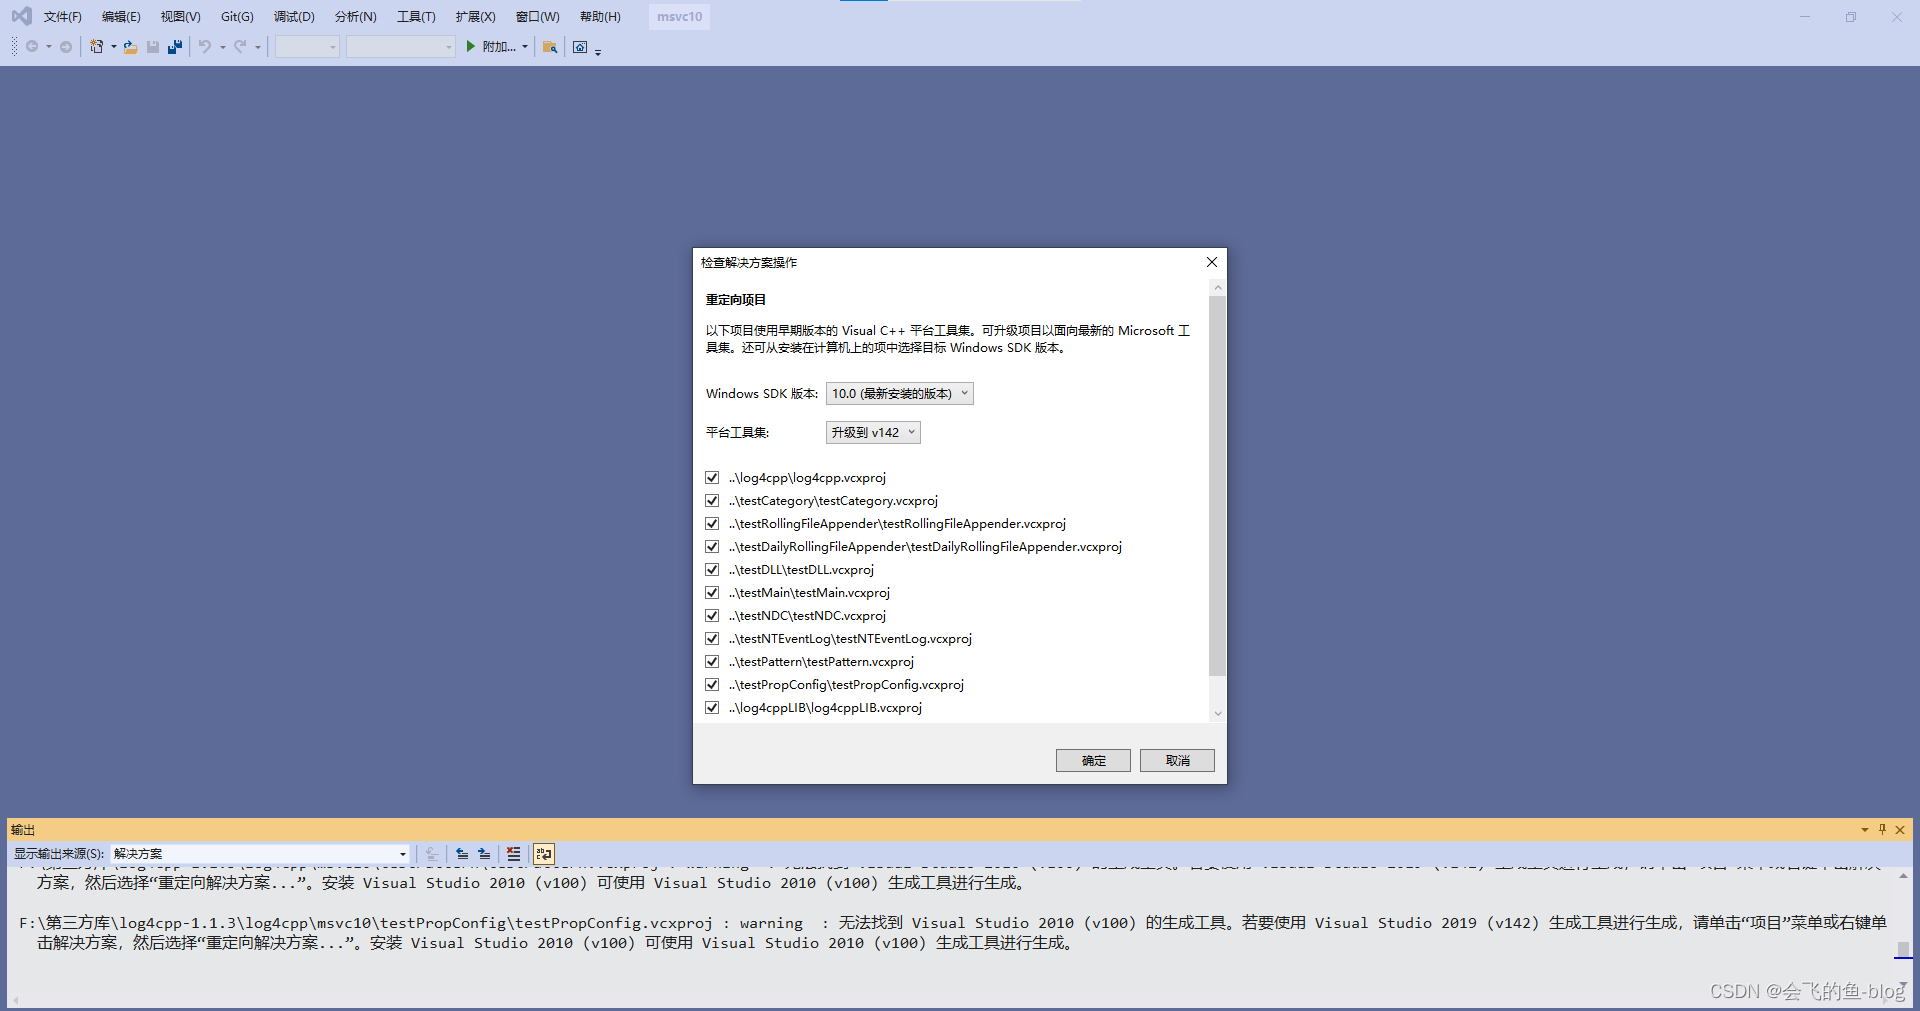
这里使用的是Visutal Studio 2019,注意这里的库只针对Visutal Studio 2017及其以上的IDE。点击确定
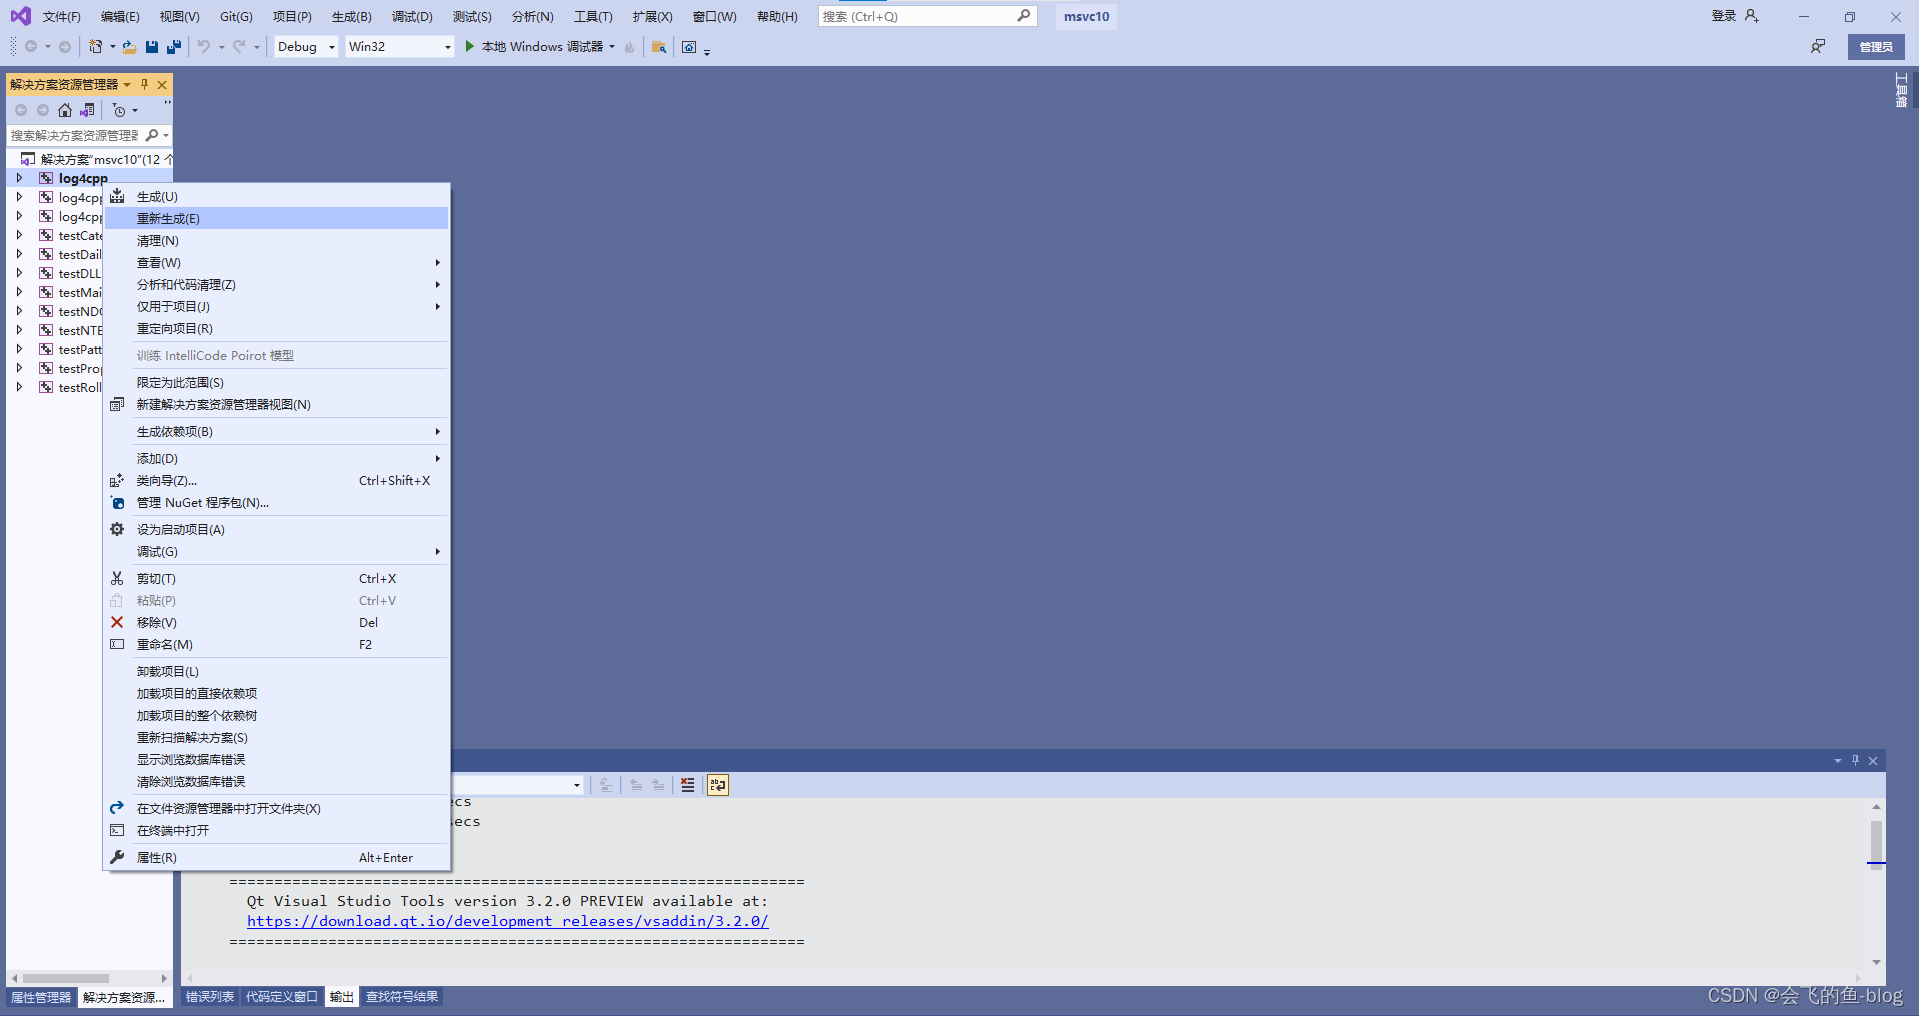
右击重新生成
报错

2、解决方案
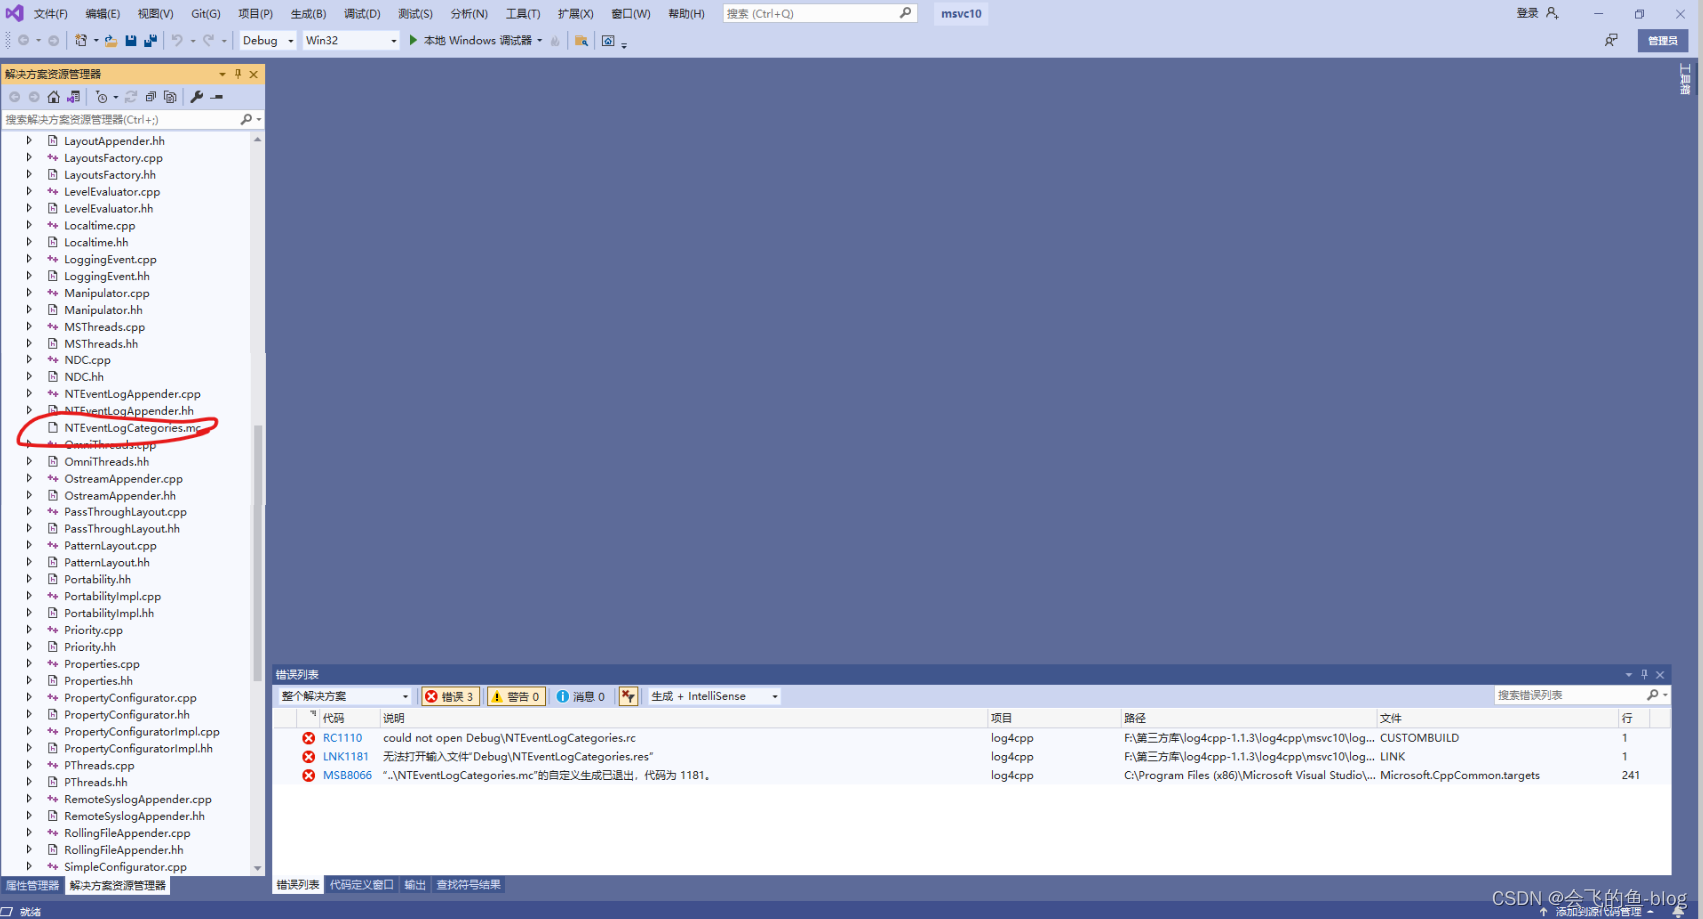
1.双击log4cpp项目,在log4cpp项目下找到以下红色圈出来的
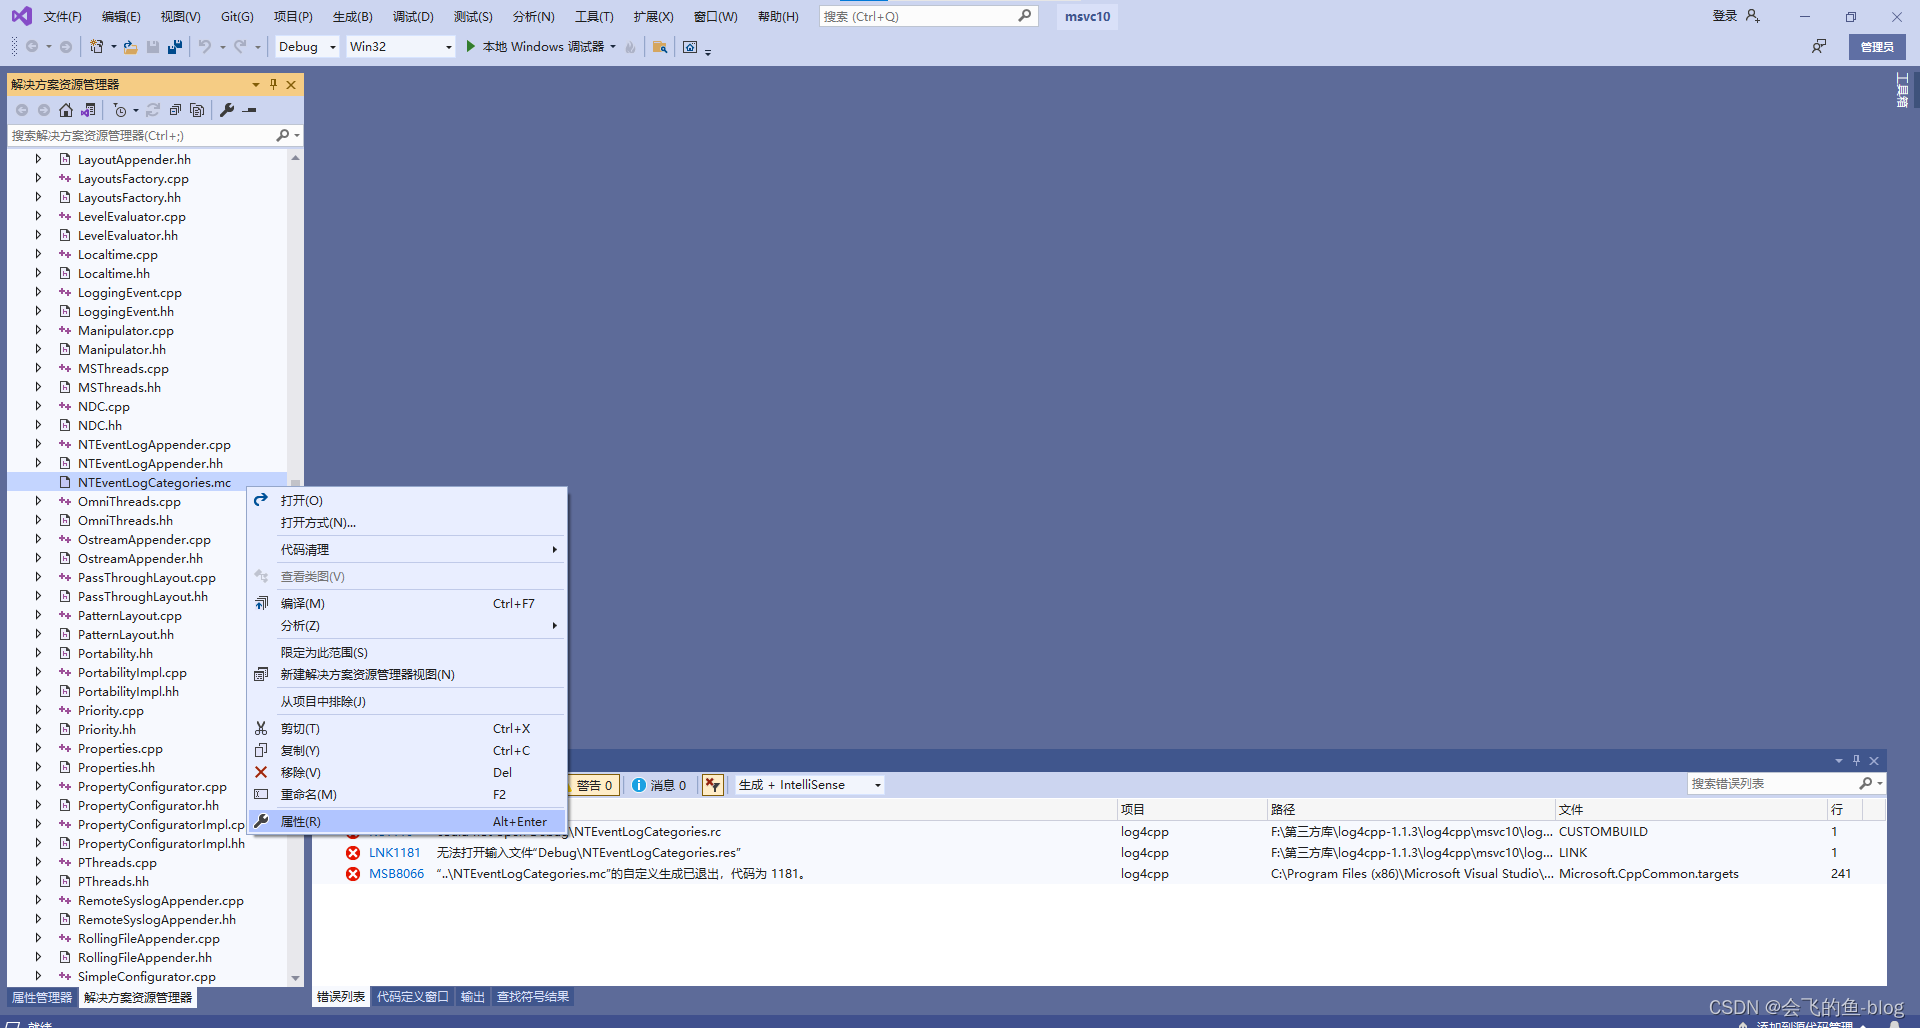
2.右键属性
3.在常规命令行里面输入以下命令
if not exist $(OutDir) md $(OutDir)
mc.exe -h $(OutDir) -r $(OutDir) $(ProjectDir)..\%(Filename).mc
RC.exe -r -fo $(OutDir)%(Filename).res $(OutDir)%(Filename).rc
link.exe /MACHINE:IX86 -dll -noentry -out:$(OutDir)NTEventLogAppender.dll $(OutDir)%(Filename).res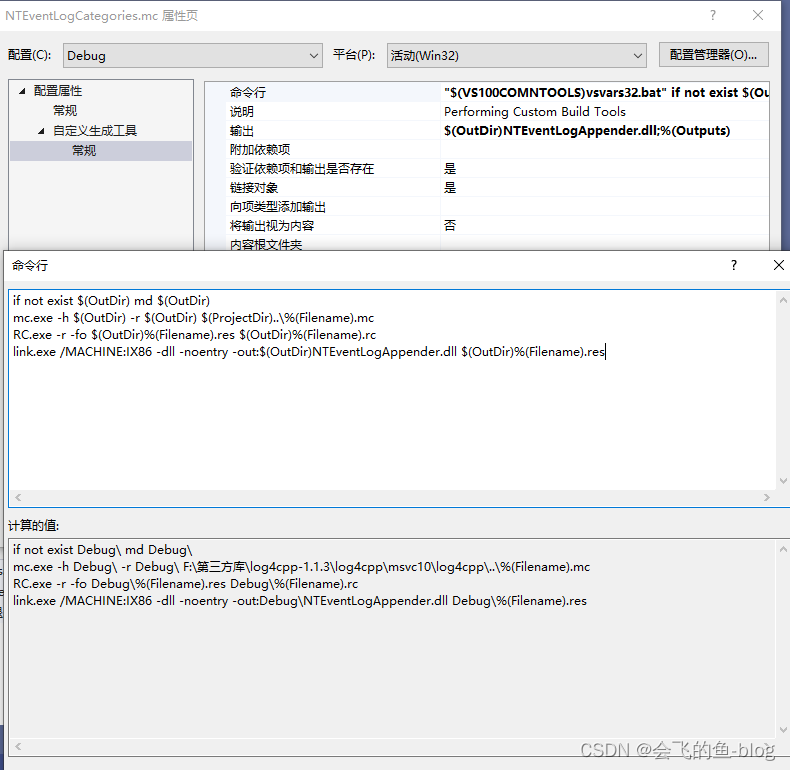
4.继续右击log4cpp项目,选择属性
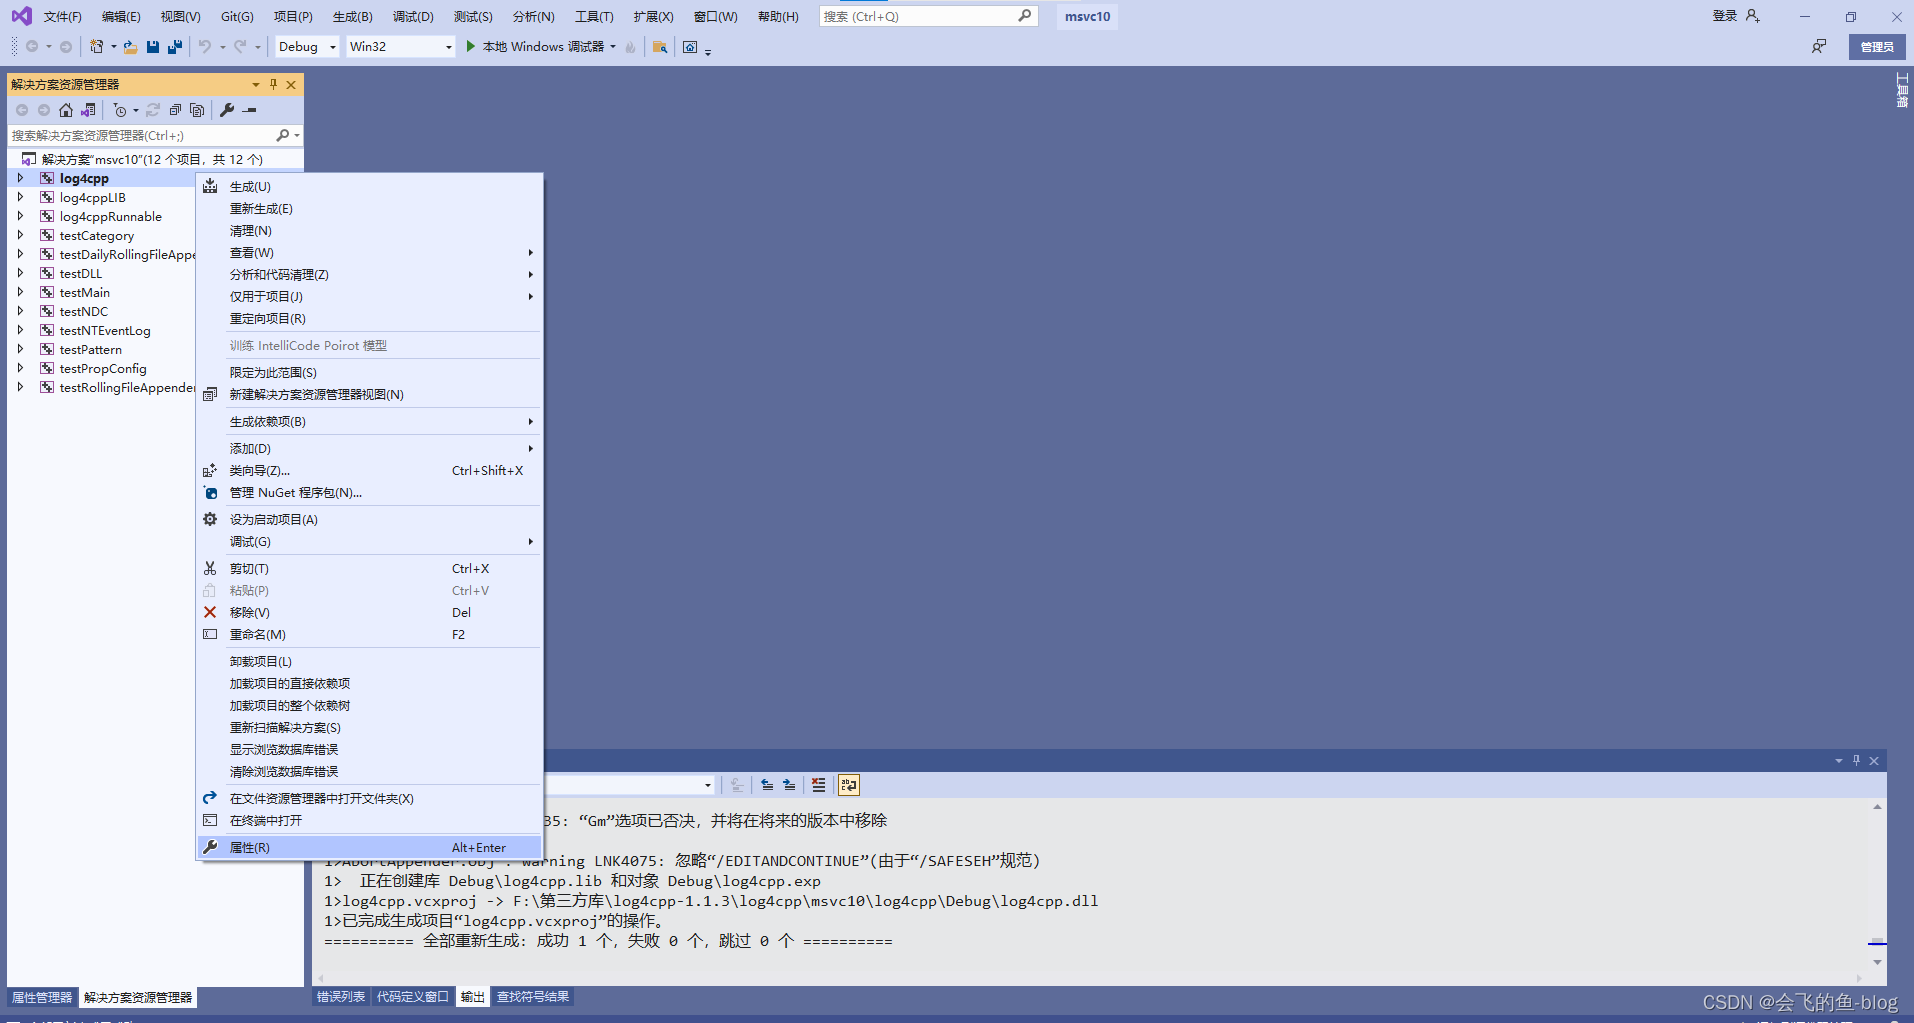
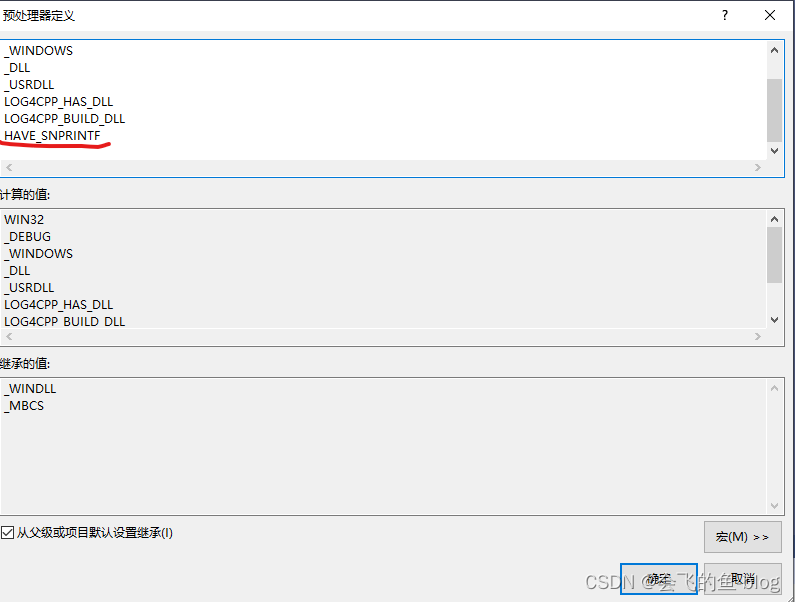
5.选择C/C++下的预处理器,在预处理器定义里面的最下面添加,然后点击确定保存
HAVE_SNPRINTF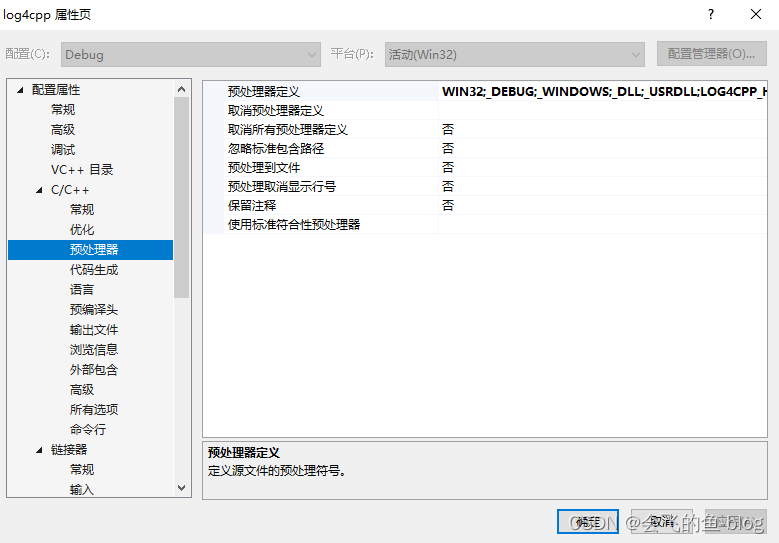
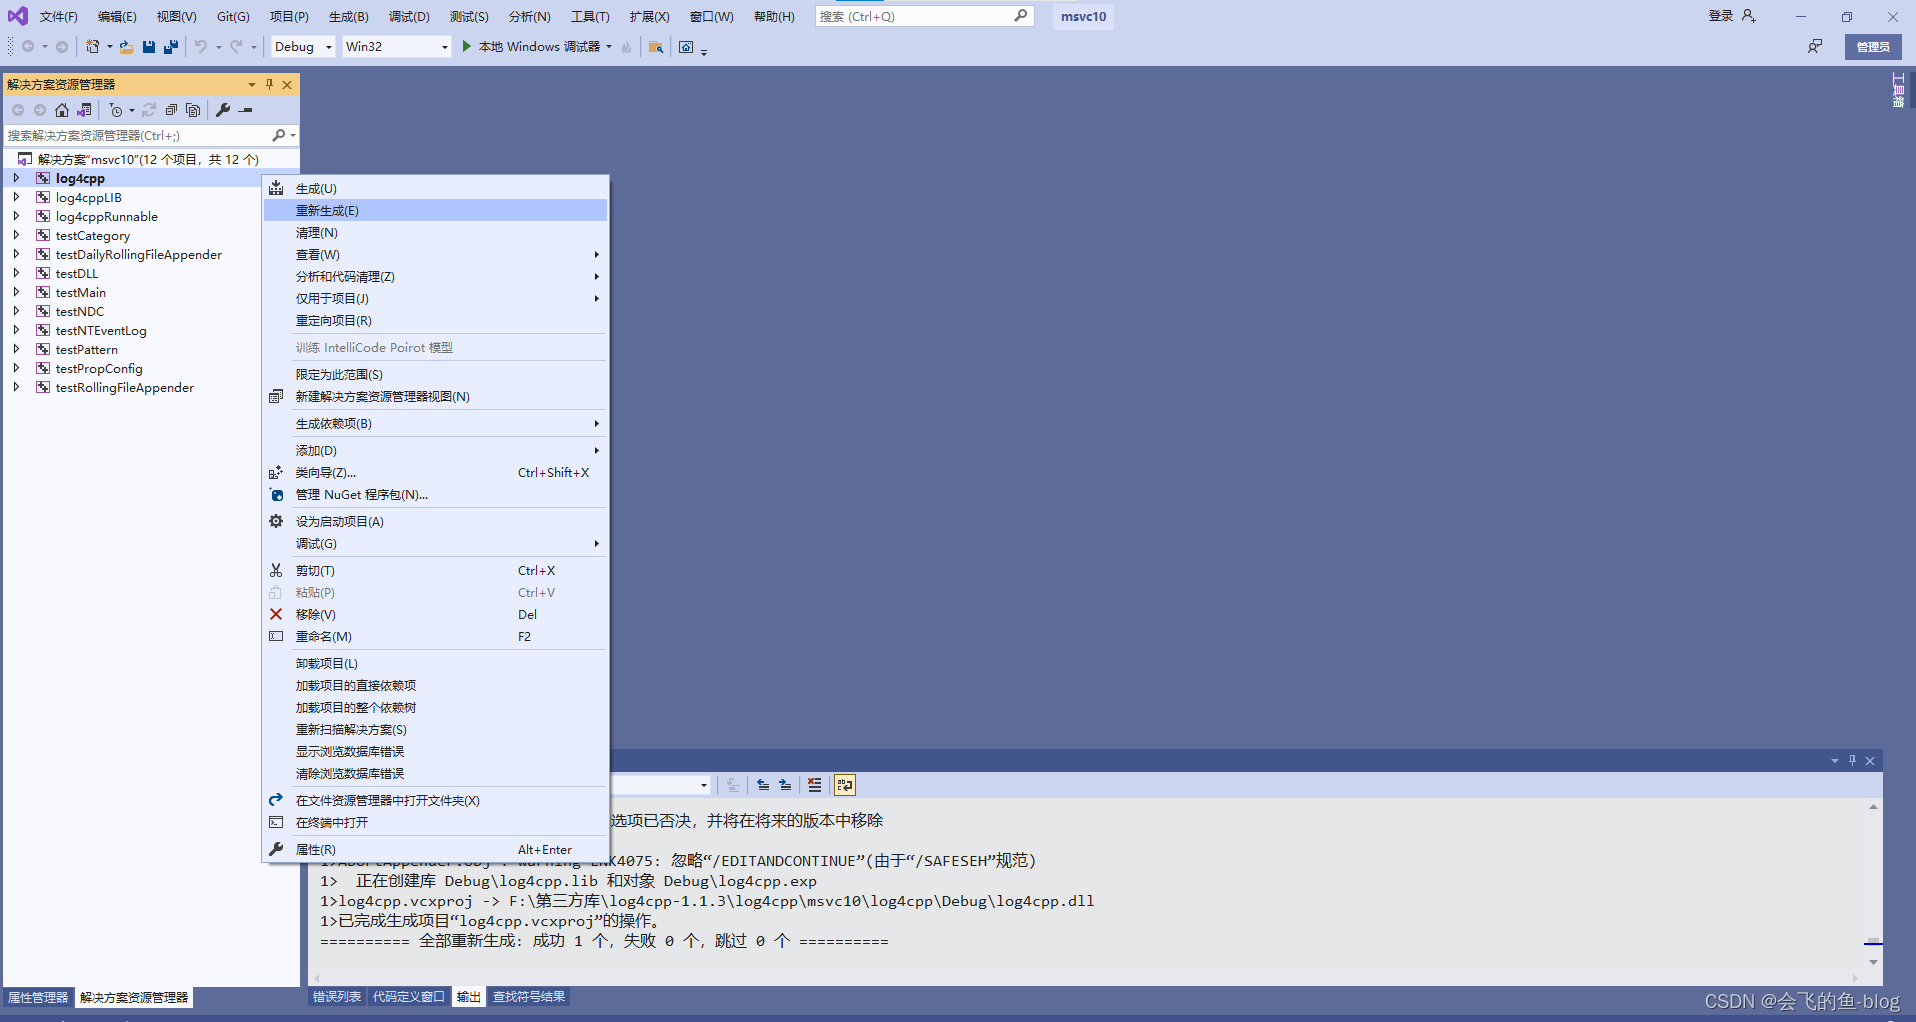
6.选择Log4cpp重新生成,发现程序成功运行
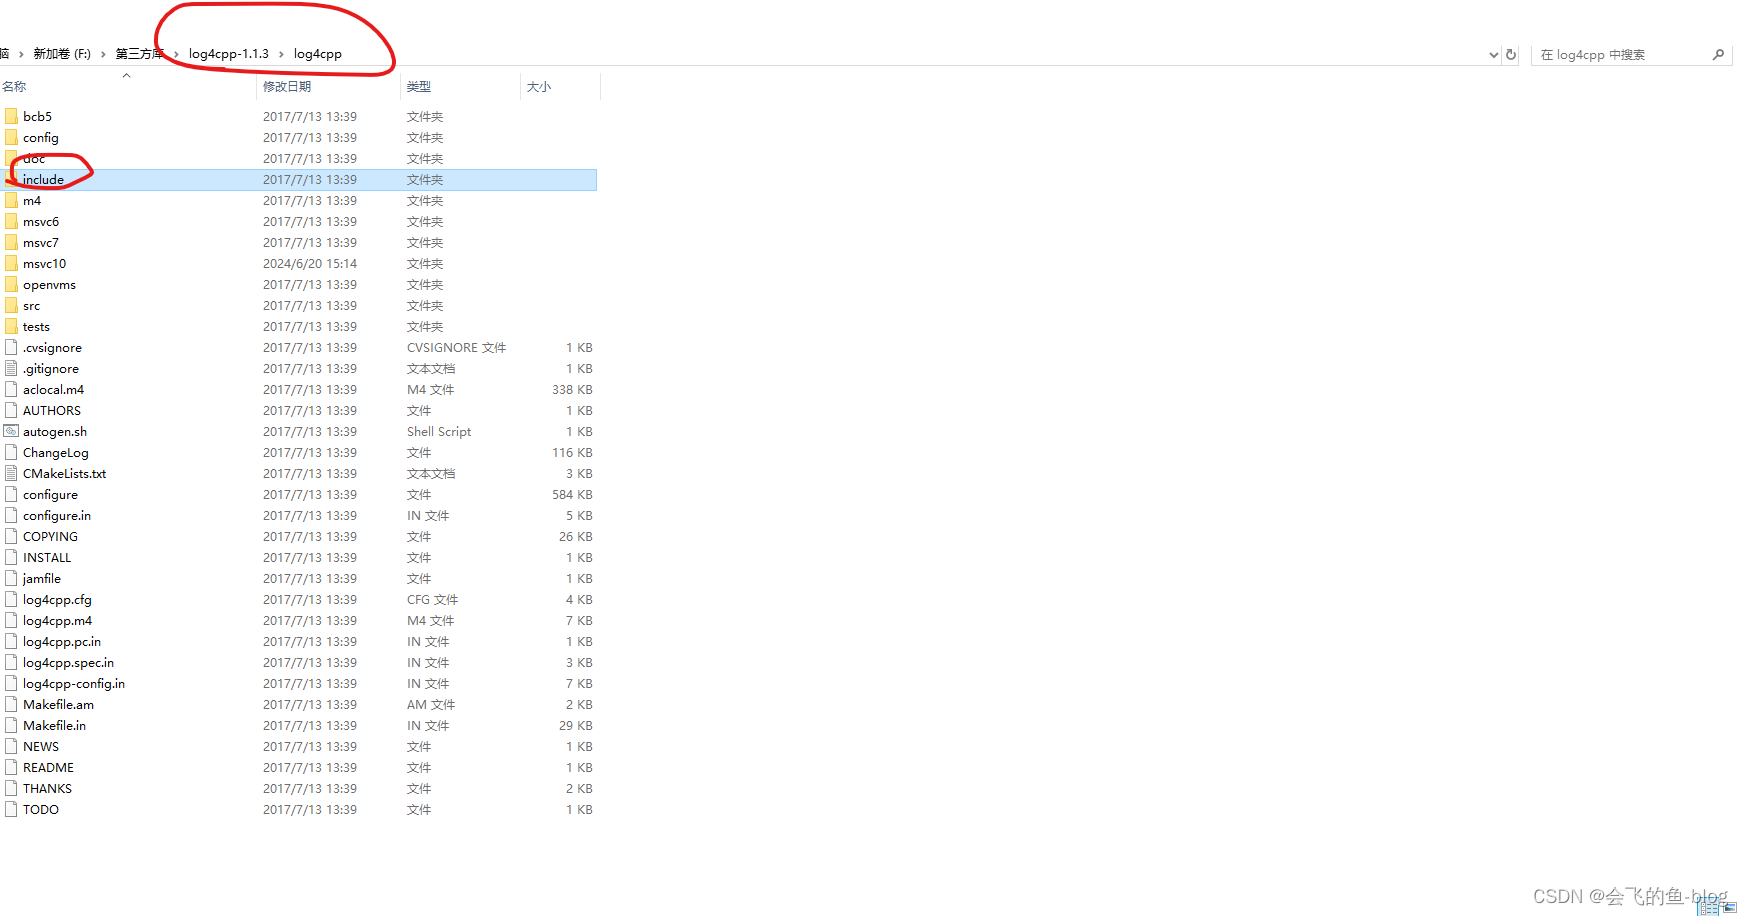
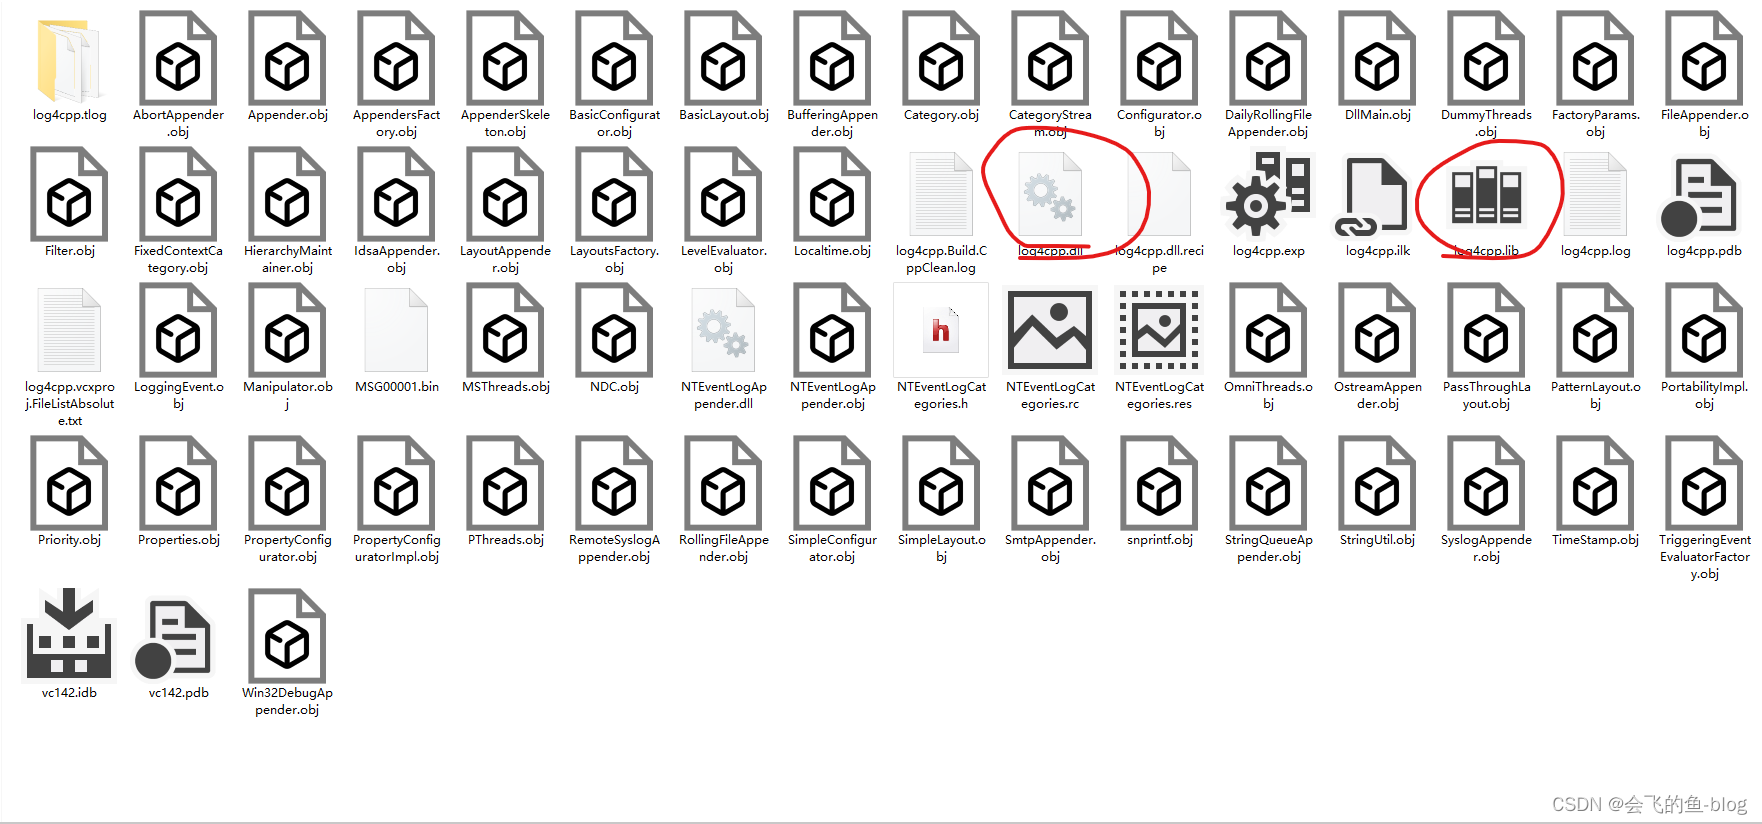
7.进入对应路径,查找我们编译好的库文件,红色圈出来的是对应查找路径,读者对应在该路径查找编译好的库文件,黄色是编译好的库文件

三、Vistual Studio中使用第三方库
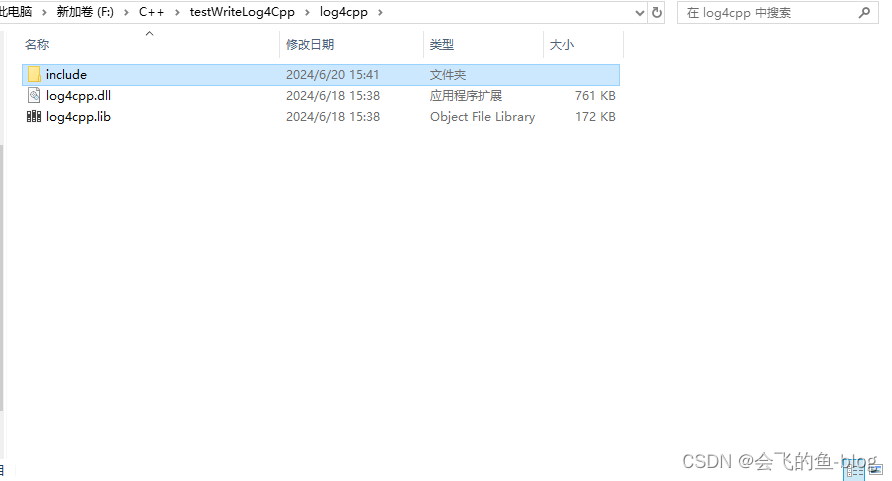
1、拷贝对应下图路径下的include文件进入你的项目目录下面去,并将之前编译好的库文件也放在对应项目目录下面去。
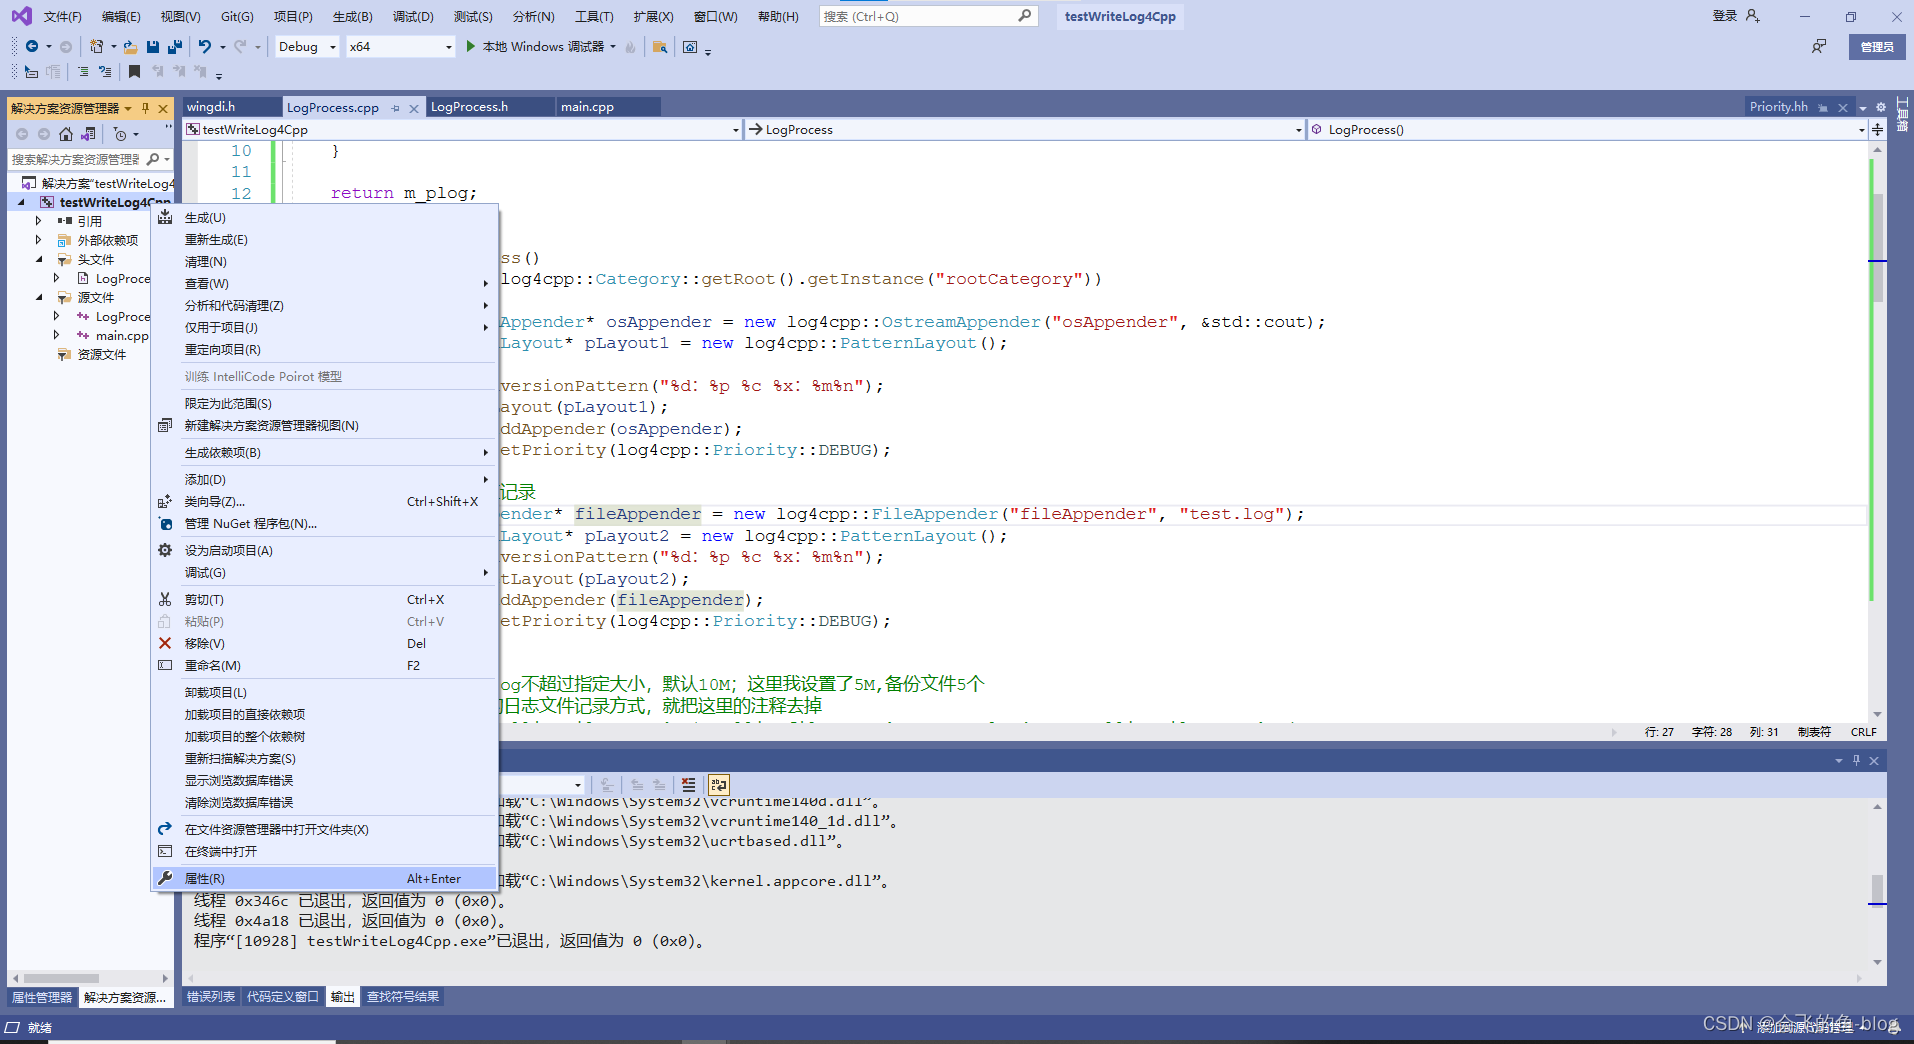
2、打开你的项目,右键项目属性
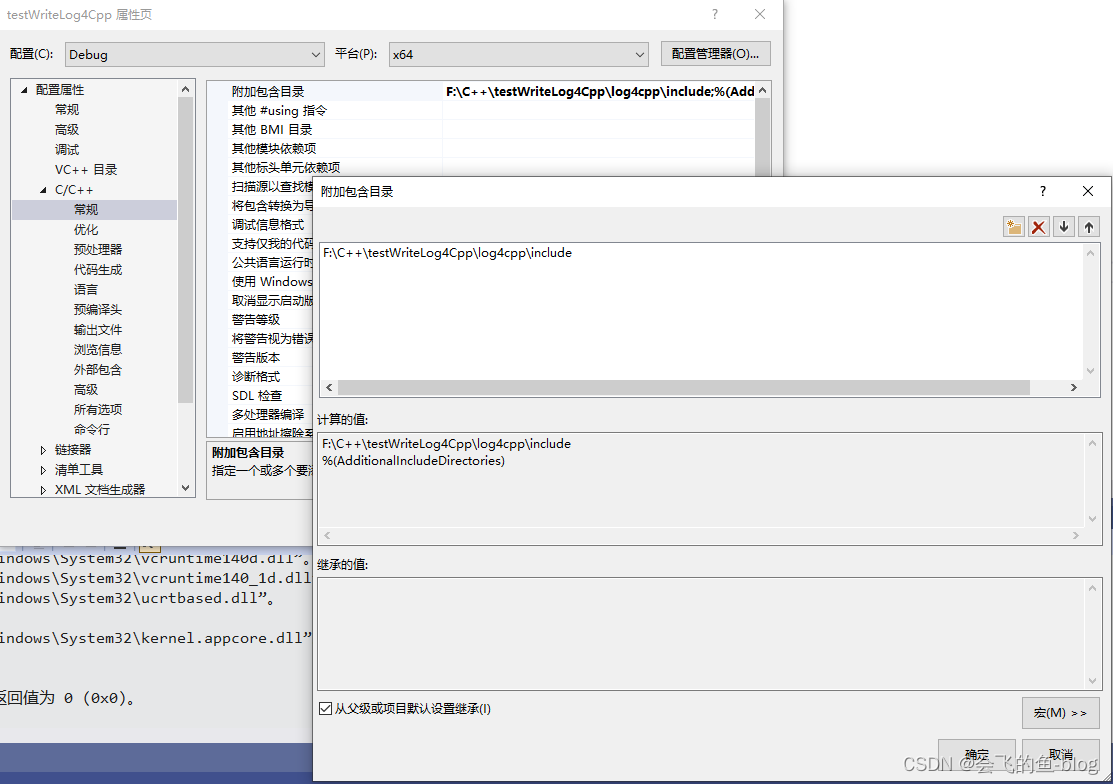
3、选择常规选项卡,在附加包含目录里面输入你之前对应的log4cpp的include文件夹路径
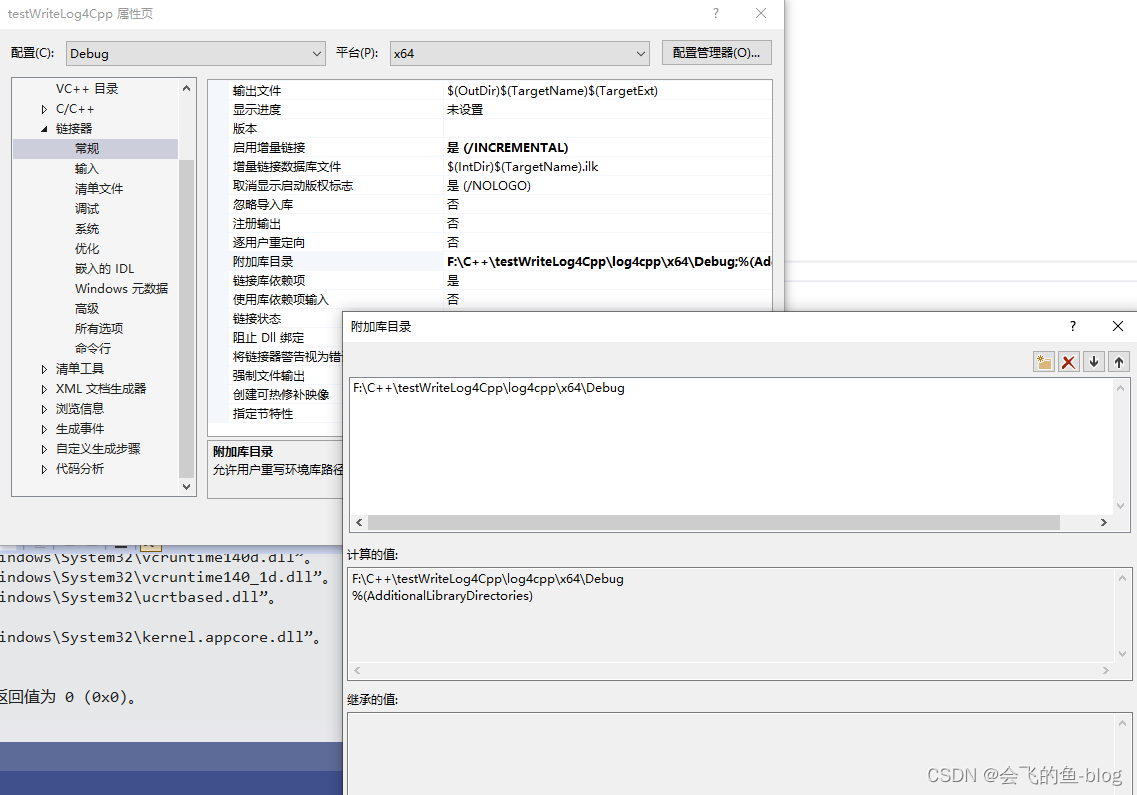
4、选择链接器选项卡,附加库目录,输入对应的库文件路径(Debug路径下装的是编译好的库文件log4cpp.lib和log4cpp.dll)
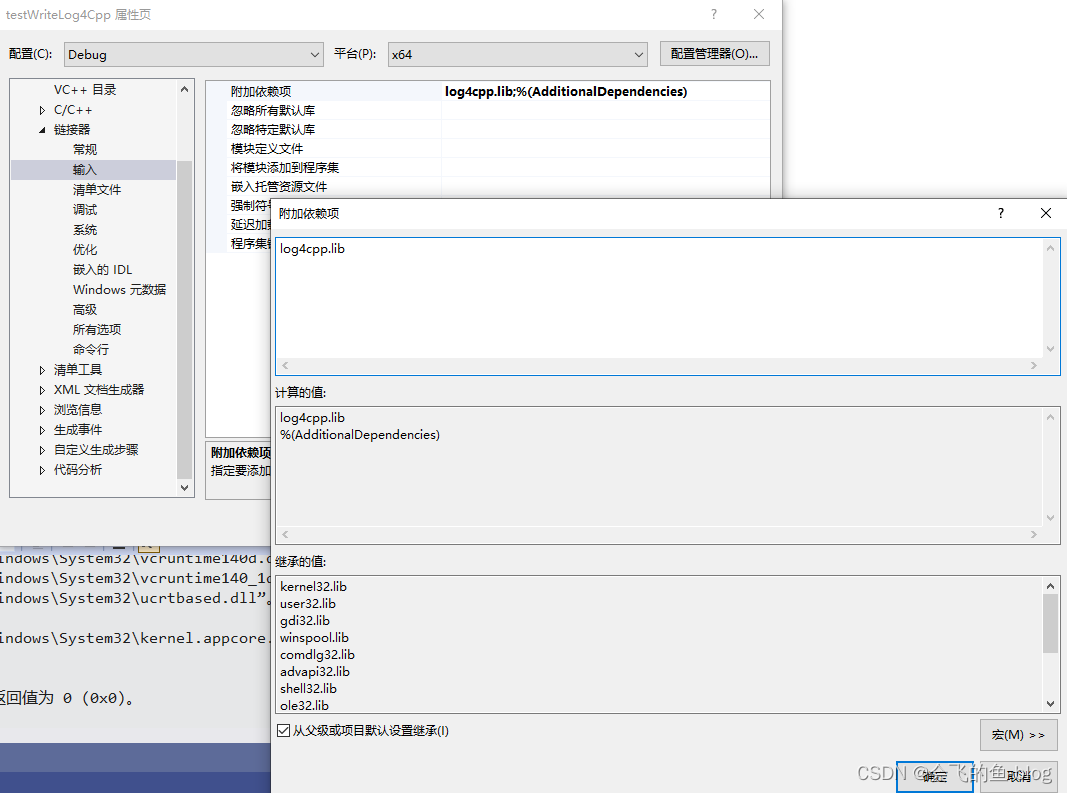
5、选择链接器选项卡,进行附加依赖性,输入log4cpp.lib
6、测试程序
#include "log4cpp/Category.hh"
#include "log4cpp/Appender.hh"
#include "log4cpp/FileAppender.hh"
#include "log4cpp/OstreamAppender.hh"
#include "log4cpp/Layout.hh"
#include "log4cpp/BasicLayout.hh"
#include "log4cpp/Priority.hh"
#include "log4cpp/PatternLayout.hh"

void testOutputConsole()
{
	log4cpp::Appender* appender1 = new log4cpp::OstreamAppender("console", &std::cout);
	appender1->setLayout(new log4cpp::BasicLayout());	// 默认配置

	log4cpp::Category& root = log4cpp::Category::getRoot();
	root.setPriority(log4cpp::Priority::DEBUG); //低于WARN类型的日志不记录  NOTSET < DEBUG < INFO < NOTICE < WARN < ERROR < CRIT < ALERT < FATAL = EMERG
	root.addAppender(appender1);

	// 1.use of functions for logging messages	1.使用记录消息的函数
	root.debug("root debug");
	root.warn("root warn");
	root.error("root error");
	root.info("root info");

	// 2.printf-style for logging variables  2.printf风格的日志变量
	root.warn("%d + %d == %s ?", 1, 1, "two");

	// 3.use of streams for logging messages  3.使用流记录消息
	root << log4cpp::Priority::ERROR << "Streamed root error";
	root << log4cpp::Priority::INFO << "Streamed root info";

	// 4.or this way:  4.或者这样说:
	root.errorStream() << "Another streamed error";
	root.debugStream() << "Another streamed debug";

	log4cpp::Category::shutdown();
}
7、实际开发中可以用的,对于log4cpp单例类
头文件
#ifndef _MY_LOGGER_H_
#define _MY_LOGGER_H_

#include <string>
#include <log4cpp/Category.hh>

class MyLogger {
public:
	bool init(const std::string &log_conf_file);			// 指定加载log配置文件
	static MyLogger *instance() { return &_instance; };		// 单例模式,返回自己

	log4cpp::Category *GetHandle() { return _category; };

private:
	static MyLogger _instance;
	log4cpp::Category *_category;	// 通过此对象可以实现日志写入
};

/* 宏定义,方便调用 */
#define LOG_DEBUG MyLogger::instance()->GetHandle()->debug		// 调试
#define LOG_INFO MyLogger::instance()->GetHandle()->info		// 信息,消息
#define Log_NOTICE MyLogger::instance()->GetHandle()->notice	// 通知
#define LOG_WARN MyLogger::instance()->GetHandle()->warn		// 警告
#define LOG_ERROR MyLogger::instance()->GetHandle()->error		// 错误
#define LOG_FATAL MyLogger::instance()->GetHandle()->fatal		// 致命错误

/*
 * __LINE__ : 文件中的当前行号;
 * __FILE__ : 文件的完整路径和文件名;如果用在包含文件中,则返回包含文件名;
 * __FUNCTION__ : 函数名字。
 */
#define LOG(__level) log4cpp::Category::getRoot() << log4cpp::Priority::__level << "[" << __FUNCTION__ << "][" << __LINE__ << "]: "
//#define LOG(__level) log4cpp::Category::getRoot() << log4cpp::Priority::__level << "[" << __FILE__ << "][" << __FUNCTION__ << "][" << __LINE__ << "]: "

#endif
源文件
#include "MyLogger.h"

#include <iostream>
#include <log4cpp/FileAppender.hh>
#include <log4cpp/PatternLayout.hh>
#include <log4cpp/PropertyConfigurator.hh>


// 静态变量,需要在类外部初始化一下
MyLogger MyLogger::_instance;

bool MyLogger::init(const std::string &log_conf_file) {
	try {
		log4cpp::PropertyConfigurator::configure(log_conf_file);	// 初始化log配置文件
	} catch (log4cpp::ConfigureFailure &f) {
		std::cerr << "load log config file " << log_conf_file.c_str() << " failed with result: " << f.what() << std::endl;
		return false;
	}

	// 初始化成功后,使用getRoot()获取操作日志的对象
	_category = &log4cpp::Category::getRoot();

	return true;
}
main文件
#include "MyLogger.h"

int main(void) {
	if (!MyLogger::instance()->init("log.conf")) {
		fprintf(stderr, "init log module failed.\n");
		return -1;
	}

	LOG_DEBUG("测试 debug.");
	LOG_INFO("测试 inof.");
	Log_NOTICE("测试 notice.");
	LOG_WARN("测试 warn.");
	LOG_ERROR("测试 error.");
	LOG_FATAL("测试 fatal.");

	LOG_DEBUG("%d + %c == %s", 1, 'a', "1a");

	LOG(DEBUG) << "123";
	LOG(ERROR) << "ERROR";

    // 关闭日志
	log4cpp::Category::shutdown();

	return 0;
}
四、Linux下的Log4cpp的安装
1、安装log4cpp,执行如下指令进行编译安装
- log4cpp的官网是:http://log4cpp.sourceforge.net/
 http://log4cpp.sourceforge.net/
wget https://nchc.dl.sourceforge.net/project/log4cpp/log4cpp-1.1.x%20%28new%29/log4cpp-1.1/log4cpp-1.1.3.tar.gz
tar xzvf log4cpp-1.1.3.tar.gz
cd log4cpp-1.1.3
./configure
make
make install
安装完毕后,log4cpp库路径在 /usr/local/lib
可以使用命令 mv -if /usr/local/lib/liblog4cpp.* 自己的项目路径 拷贝到自己的项目路径中去;例如,我会在项目路径中创建一个lib文件夹,将刚刚安装的log4cpp库拷贝到此文件夹中
log4cpp头文件路径在 /usr/local/include/log4cpp
可以使用命令 mv -if /usr/local/include/log4cpp 自己的项目路径 拷贝到自己的项目路径中去;例如,我会在项目路径中创建一个include文件夹,将刚刚安装的log4cpp头文件拷贝到此文件夹中
2、包含头文件
#include <log4cpp/Category.hh>
#include <log4cpp/FileAppender.hh>
#include <log4cpp/PatternLayout.hh>
#include <log4cpp/OstreamAppender.hh>
3、初始化日志输出的目的地(appenders)
// 输出到std::cout
log4cpp::Appender *appender = new log4cpp::OstreamAppender("root", &std::cout);
// 输出到log文件
//log4cpp::Appender *appender = new log4cpp::FileAppender("root", "test.log");
appender有以下这些:
log4cpp::FileAppender // 输出到文件
log4cpp::RollingFileAppender // 输出到回卷文件,即当文件到达某个大小后回卷
log4cpp::OstreamAppender // 输出到一个ostream类
log4cpp::RemoteSyslogAppender // 输出到远程syslog服务器
log4cpp::StringQueueAppender // 内存队列
log4cpp::SyslogAppender // 本地syslog
log4cpp::Win32DebugAppender // 发送到缺省系统调试器
log4cpp::NTEventLogAppender // 发送到win 事件日志
上文,我们说过日志输出到终端或者文件中实际上是很慢的,会引起IO中断,所以我们可以输出到内存里StringQueueAppender,然后从StringQueueAppender输出到其它地方,这样我们的线程执行是比较高效的。
4、设置日志输出的格式
log4cpp::PatternLayout *patternLayout = new log4cpp::PatternLayout();
patternLayout->setConversionPattern("%d [%p] - %m%n");
appender->setLayout(patternLayout);
日志输出格式控制有: PatternLayout supports following set of format characters:
%% - a single percent sign
%c - the category
%d - the date\n Date format: The date format character may be followed by a date format specifier enclosed between braces. For example, %d{%\H:%M:%S,%l} or %d{%\d %m %Y %H:%\M:%S,%l}. If no date format specifier is given then the following format is used: "Wed Jan 02 02:03:55 1980". The date format specifier admits the same syntax as the ANSI C function strftime, with 1 addition. The addition is the specifier %l for milliseconds, padded with zeros to make 3 digits.
%m - the message
%n - the platform specific line separator
%p - the priority
%r - milliseconds since this layout was created.
%R - seconds since Jan 1, 1970
%u - clock ticks since process start
%x - the NDC
%t - thread name
By default, ConversionPattern for PatternLayout is set to "%m%n".
5、设置类别输出的(category)和日志优先级(priority)
log4cpp::Category &root = log4cpp::Category::getRoot();
root.setPriority(log4cpp::Priority::NOTICE);
root.addAppender(appender);
日志的级别总共有:NOTSET < DEBUG < INFO < NOTICE < WARN < ERROR < CRIT < ALERT < FATAL = EMERG。日志级别的意思是低于该级别的日志不会被记录。
6、定义一个宏,方便我们更好的调用
#define LOG(__level) log4cpp::Category::getRoot() << log4cpp::Priority::__level << __FILE__ << " " << __LINE__ << ": "
当然也可以使用Category定义的函数:
       /**
         * Log a message with the specified priority.
         * @param priority The priority of this log message.
         * @param stringFormat Format specifier for the string to write
         * in the log file.
         * @param ... The arguments for stringFormat
         **/
        virtual void log(Priority::Value priority, const char* stringFormat,
                         ...) throw();

        /**
         * Log a message with the specified priority.
         * @param priority The priority of this log message.
         * @param message string to write in the log file
         **/
        virtual void log(Priority::Value priority,
                         const std::string& message) throw();

       void debug(const char* stringFormat, ...) throw();
	   void debug(const std::string& message) throw();
	   void info(const char* stringFormat, ...) throw();
	   ...
7、使用宏定义记录日志
LOG(DEBUG) << "i am happy.";
LOG(INFO)  << "oh, you happy, we happy.";
LOG(NOTICE)<< "please do not contact me. ";
LOG(WARN)  << "i am very busy now.";
LOG(ERROR) << "oh, what happed?";
当然我们在使用过程中,可以封装一个单例,像上面给出的例子一样
在实际工程上应用,我们是使用日志配置文件去控制日志记录的。接下来让我们先配置一个日志配置文件,比如下面这个例子:
#定义Root category的属性
log4cpp.rootCategory=DEBUG, RootLog

#定义RootLog属性
log4cpp.appender.RootLog=RollingFileAppender
log4cpp.appender.RootLog.layout=PatternLayout
#log4cpp.appender.RootLog.layout.ConversionPattern=%d{% m-%d %H:%M:%S %l} [%t][%p]%m%n
log4cpp.appender.RootLog.layout.ConversionPattern=%d{\%\m-%d %H:%M:%S %l} [%t][%p]%m%n
log4cpp.appender.RootLog.fileName=/var/log/qiniu_bike.log
log4cpp.appender.RootLog.maxFileSize=268435456 #256MB
log4cpp.appender.RootLog.fileNamePattern=qiniu_bike_%i.log
log4cpp.appender.RootLog.maxBackupIndex=256
8、加载配置ini
BOOL Logger::init(const std::string & log_conf_file)
{
    try
    {
        log4cpp::PropertyConfigurator::configure(log_conf_file);
    }
    catch(log4cpp::ConfigureFailure& f)
    {
        std::cerr << " load log config file " << log_conf_file.c_str() << " failed with result : " << f.what()<< std::endl;
        return FALSE;
    }

    m_Category = &log4cpp::Category::getRoot();

    return TRUE;
}