在之前的文章 “Elasticsearch:智能 RAG,获取周围分块(一) ” 里,它介绍了如何实现智能 RAG,获取周围分块。在那个文章里有一个 notebook。为了方便在本地部署的开发者能够顺利的运行那里的 notebook。在本篇文章里,我来详述如何进行配置。

安装
Elastisearch 及 Kibana
如果你还没有安装好自己的 Elasticsearch 及 Kibana,请参考如下的链接来进行安装:
- 如何在 Linux,MacOS 及 Windows 上进行安装 Elasticsearch
- Kibana:如何在 Linux,MacOS 及 Windows上安装 Elastic 栈中的 Kibana
在安装的时候,我们选择 Elastic Stack 8.x 来进行安装。特别值得指出的是:ES|QL 只在 Elastic Stack 8.11 及以后得版本中才有。你需要下载 Elastic Stack 8.11 及以后得版本来进行安装。
在首次启动 Elasticsearch 的时候,我们可以看到如下的输出:
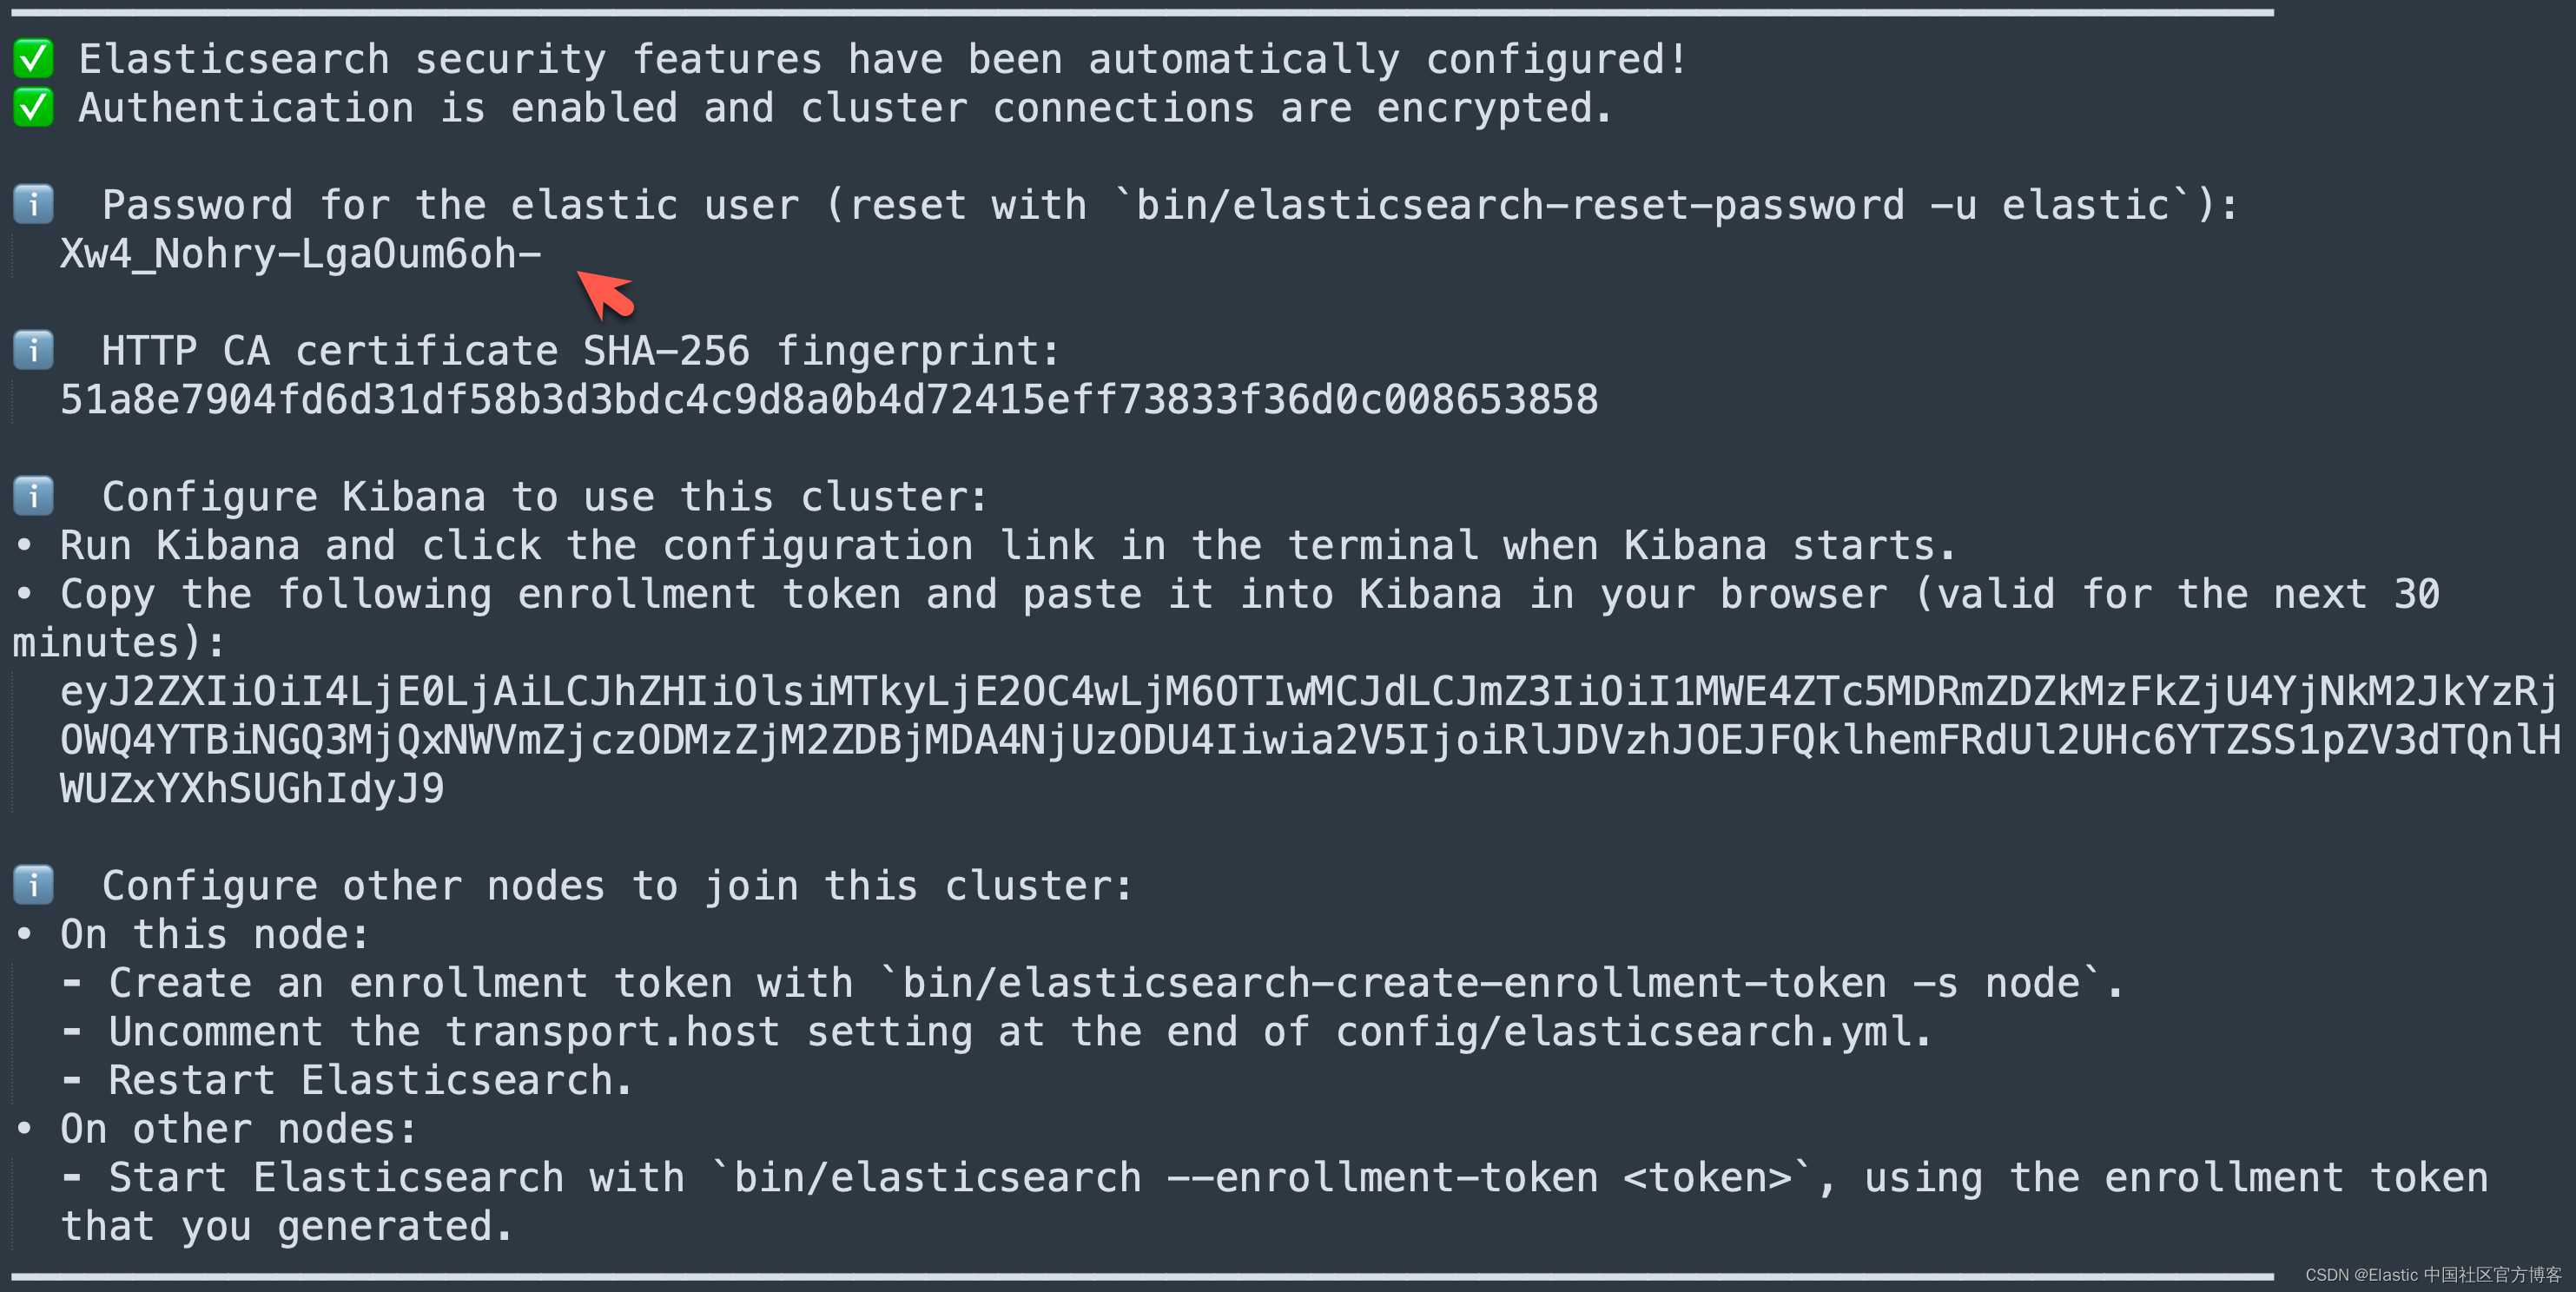
我们需要记下 Elasticsearch 超级用户 elastic 的密码。
我们还可以在安装 Elasticsearch 目录中找到 Elasticsearch 的访问证书:
$ pwd
/Users/liuxg/elastic/elasticsearch-8.14.0/config/certs
$ ls
http.p12      http_ca.crt   transport.p12
在上面,http_ca.crt 是我们需要用来访问 Elasticsearch 的证书。
我们首先克隆已经写好的代码:
git clone https://github.com/liu-xiao-guo/elasticsearch-labs我们然后进入到该项目的根目录下:
$ pwd
/Users/liuxg/python/elasticsearch-labs/supporting-blog-content/fetch-surrounding-chunks
$ cp ~/elastic/elasticsearch-8.14.0/config/certs/http_ca.crt .
$ ls
README.md      fetch-surrounding-chunks.ipynb
http_ca.crt
在上面,我们把 Elasticsearch 的证书拷贝到当前的目录下。上面的 09-geospatial-search.ipynb 就是我们下面要展示的 notebook。
启动白金试用
在下面,我们需要使用 ELSER。这是一个白金试用的功能。我们按照如下的步骤来启动白金试用:
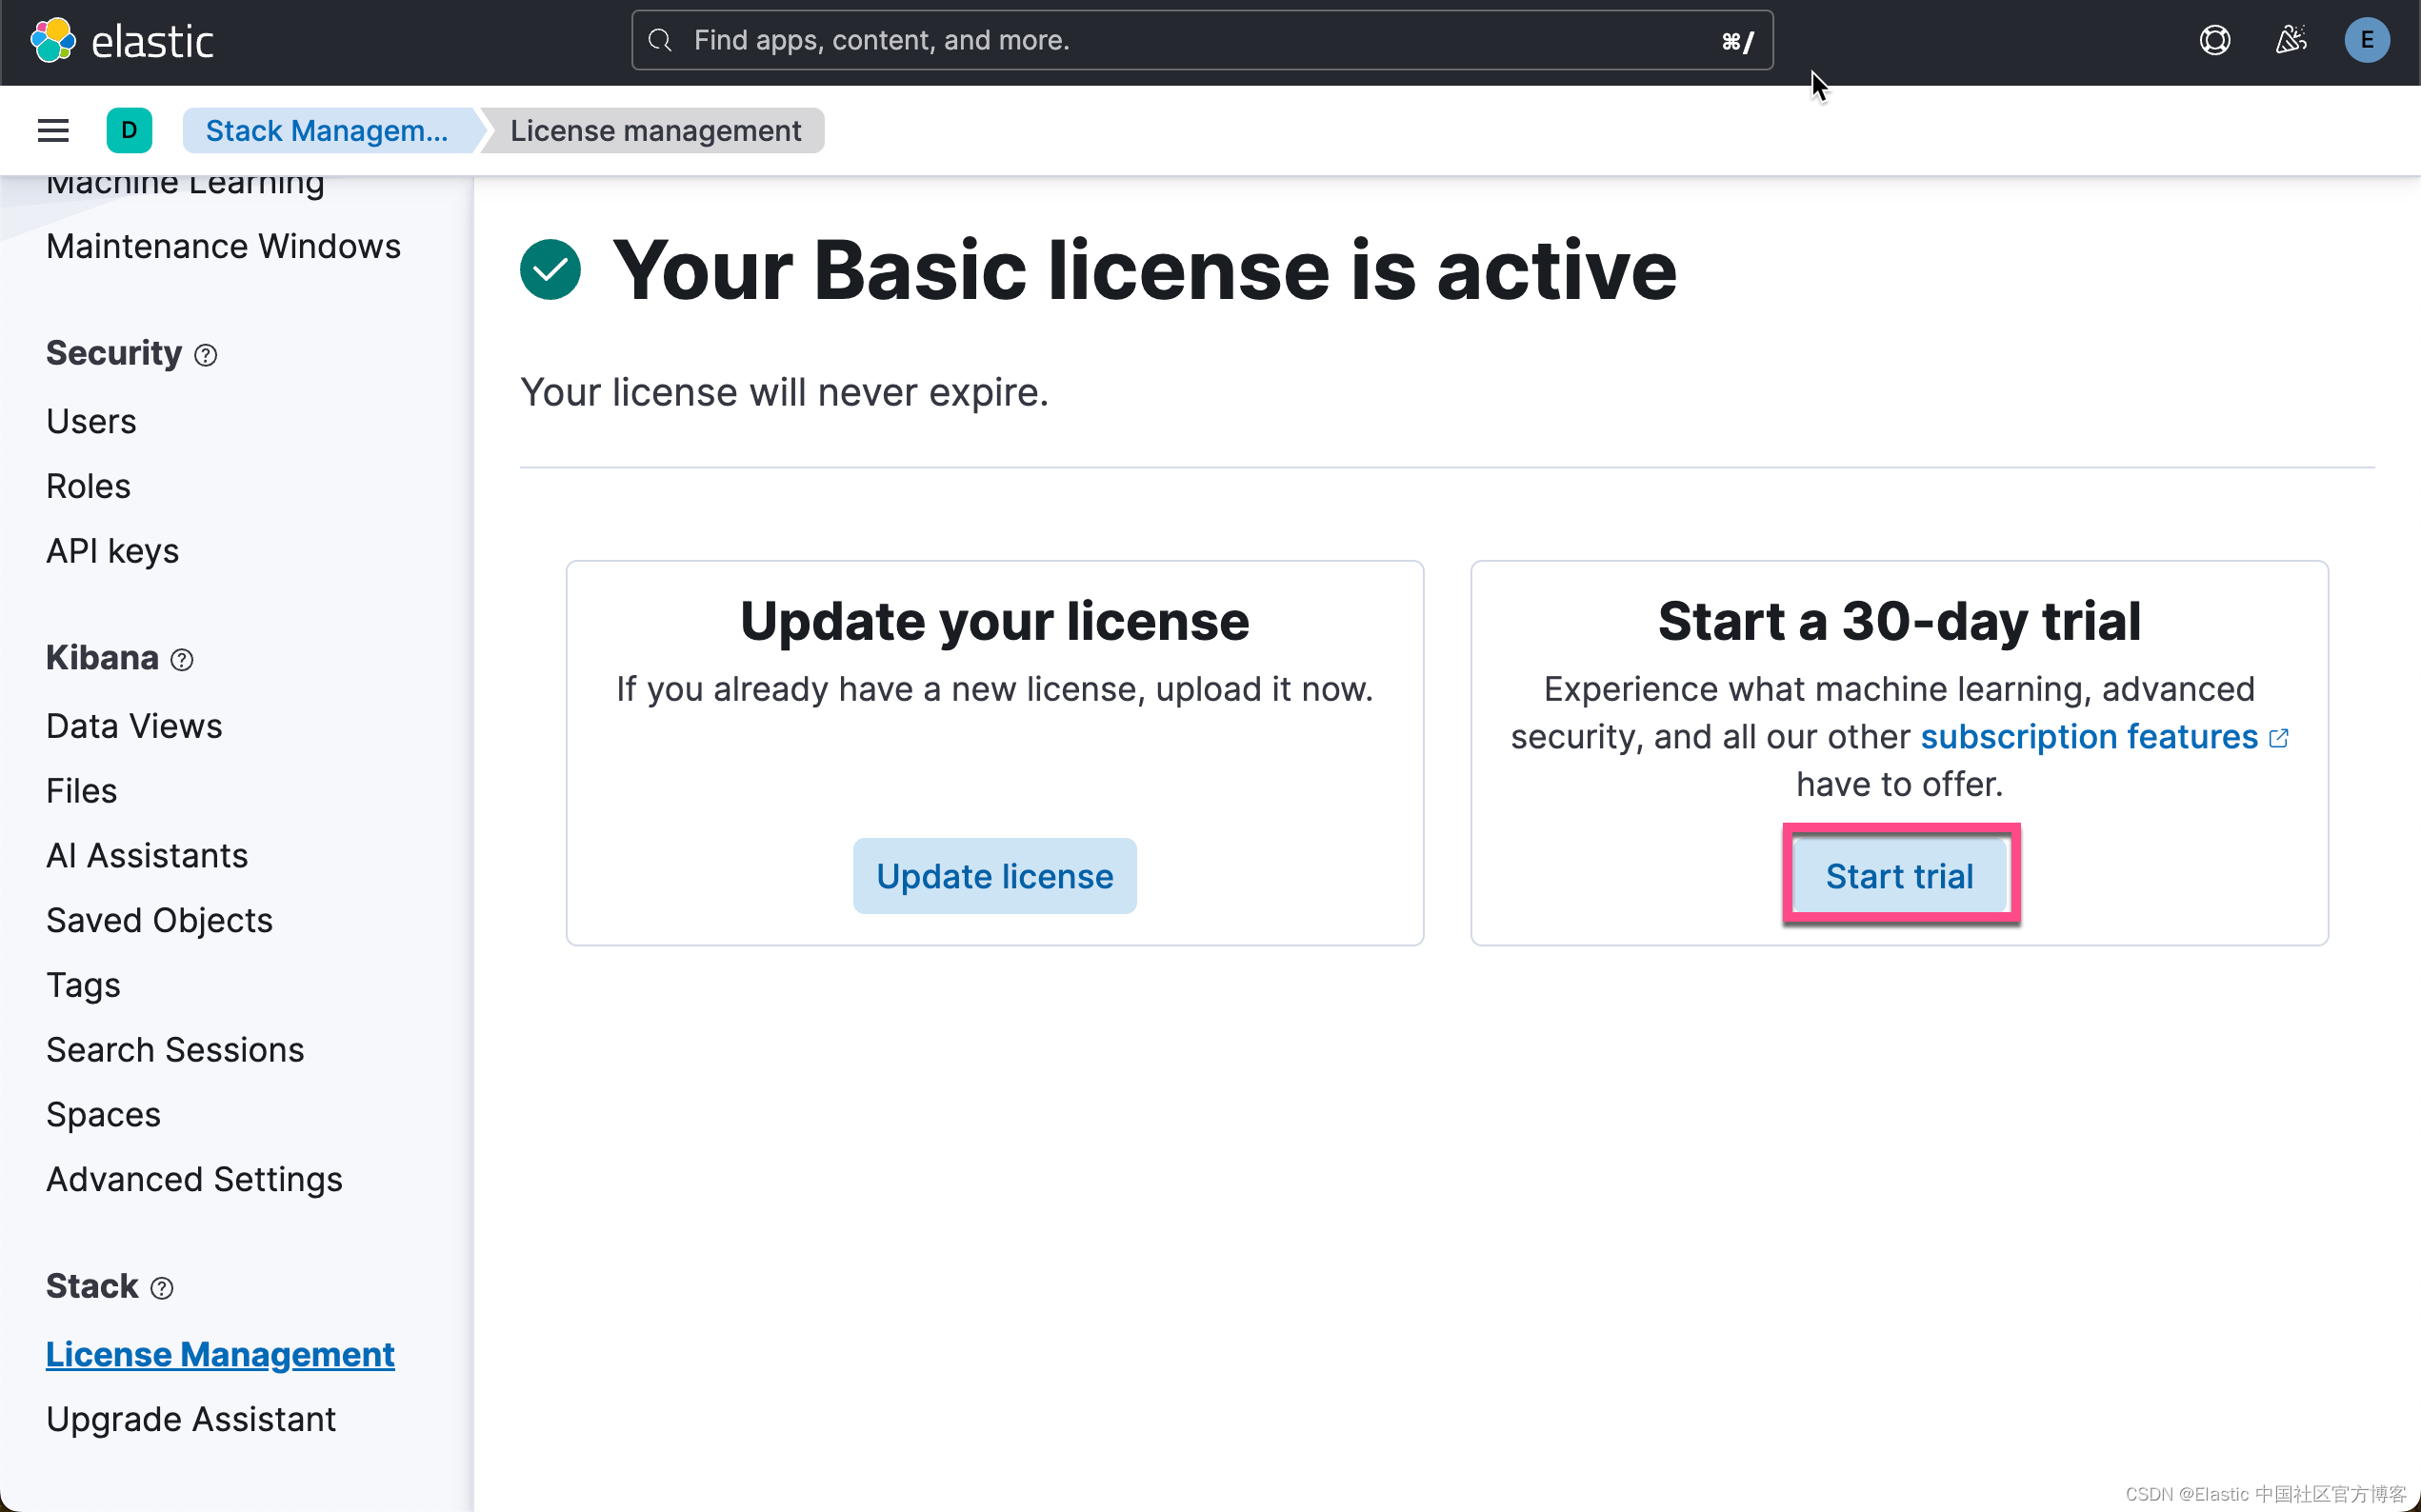
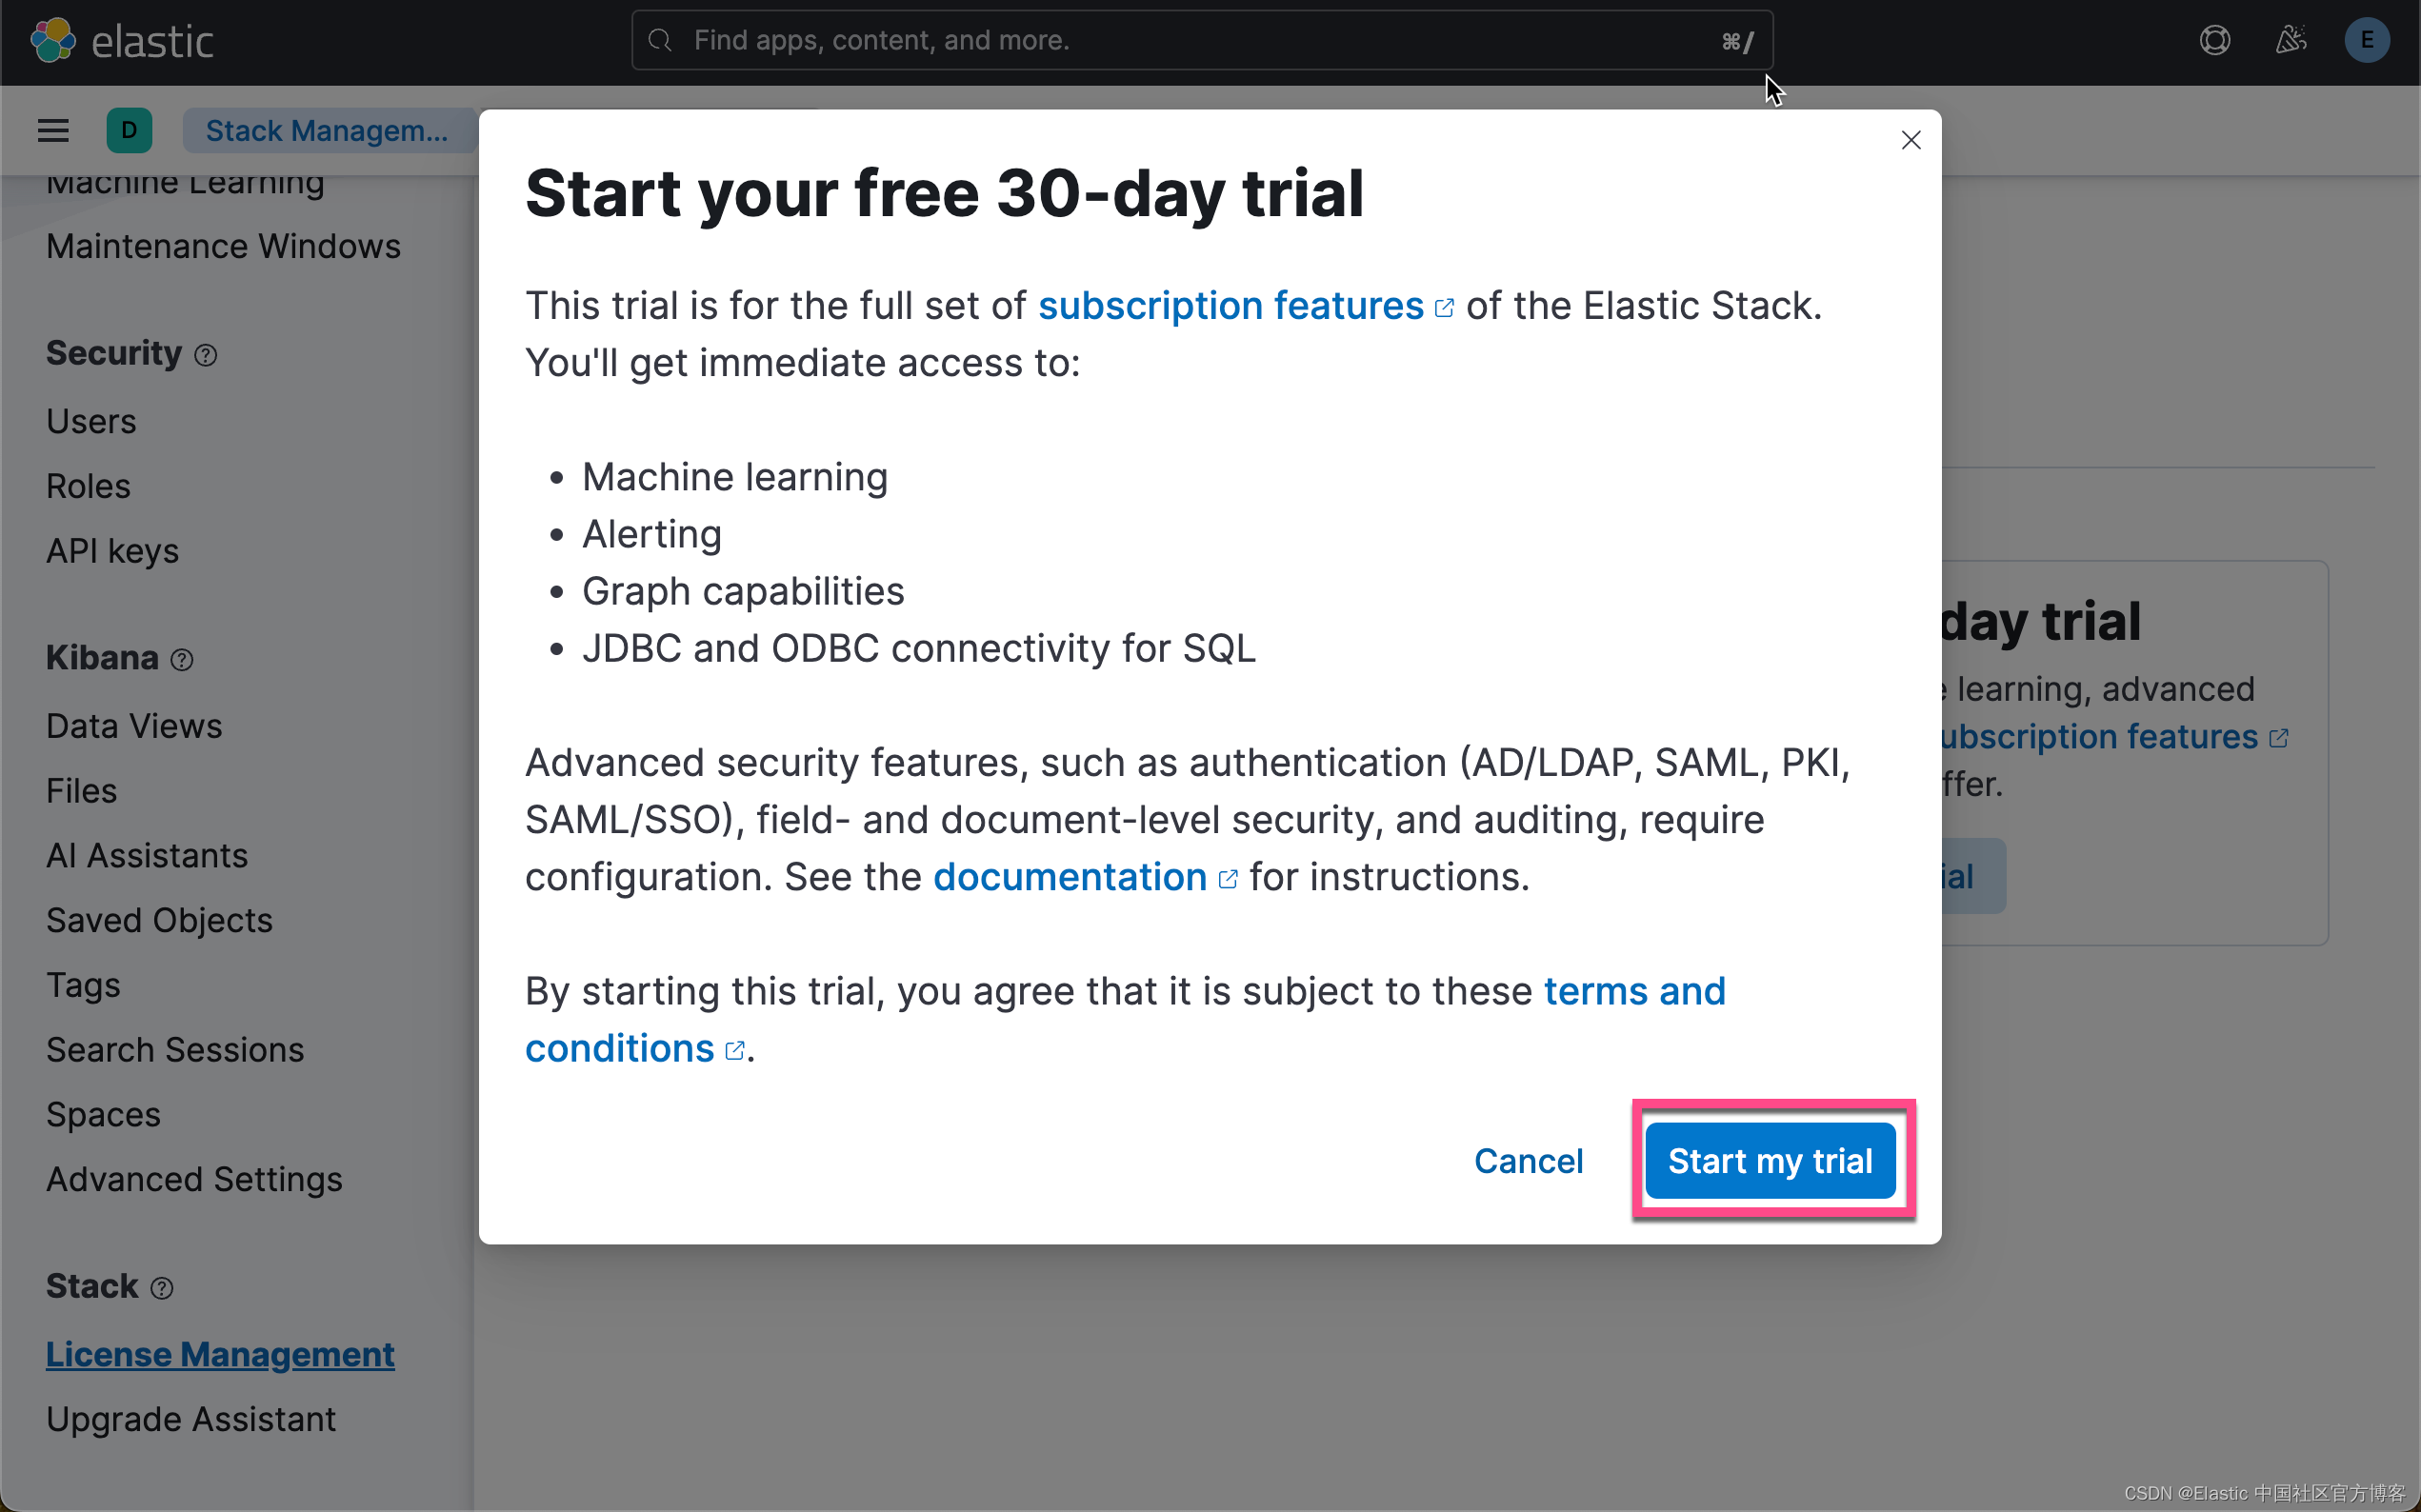
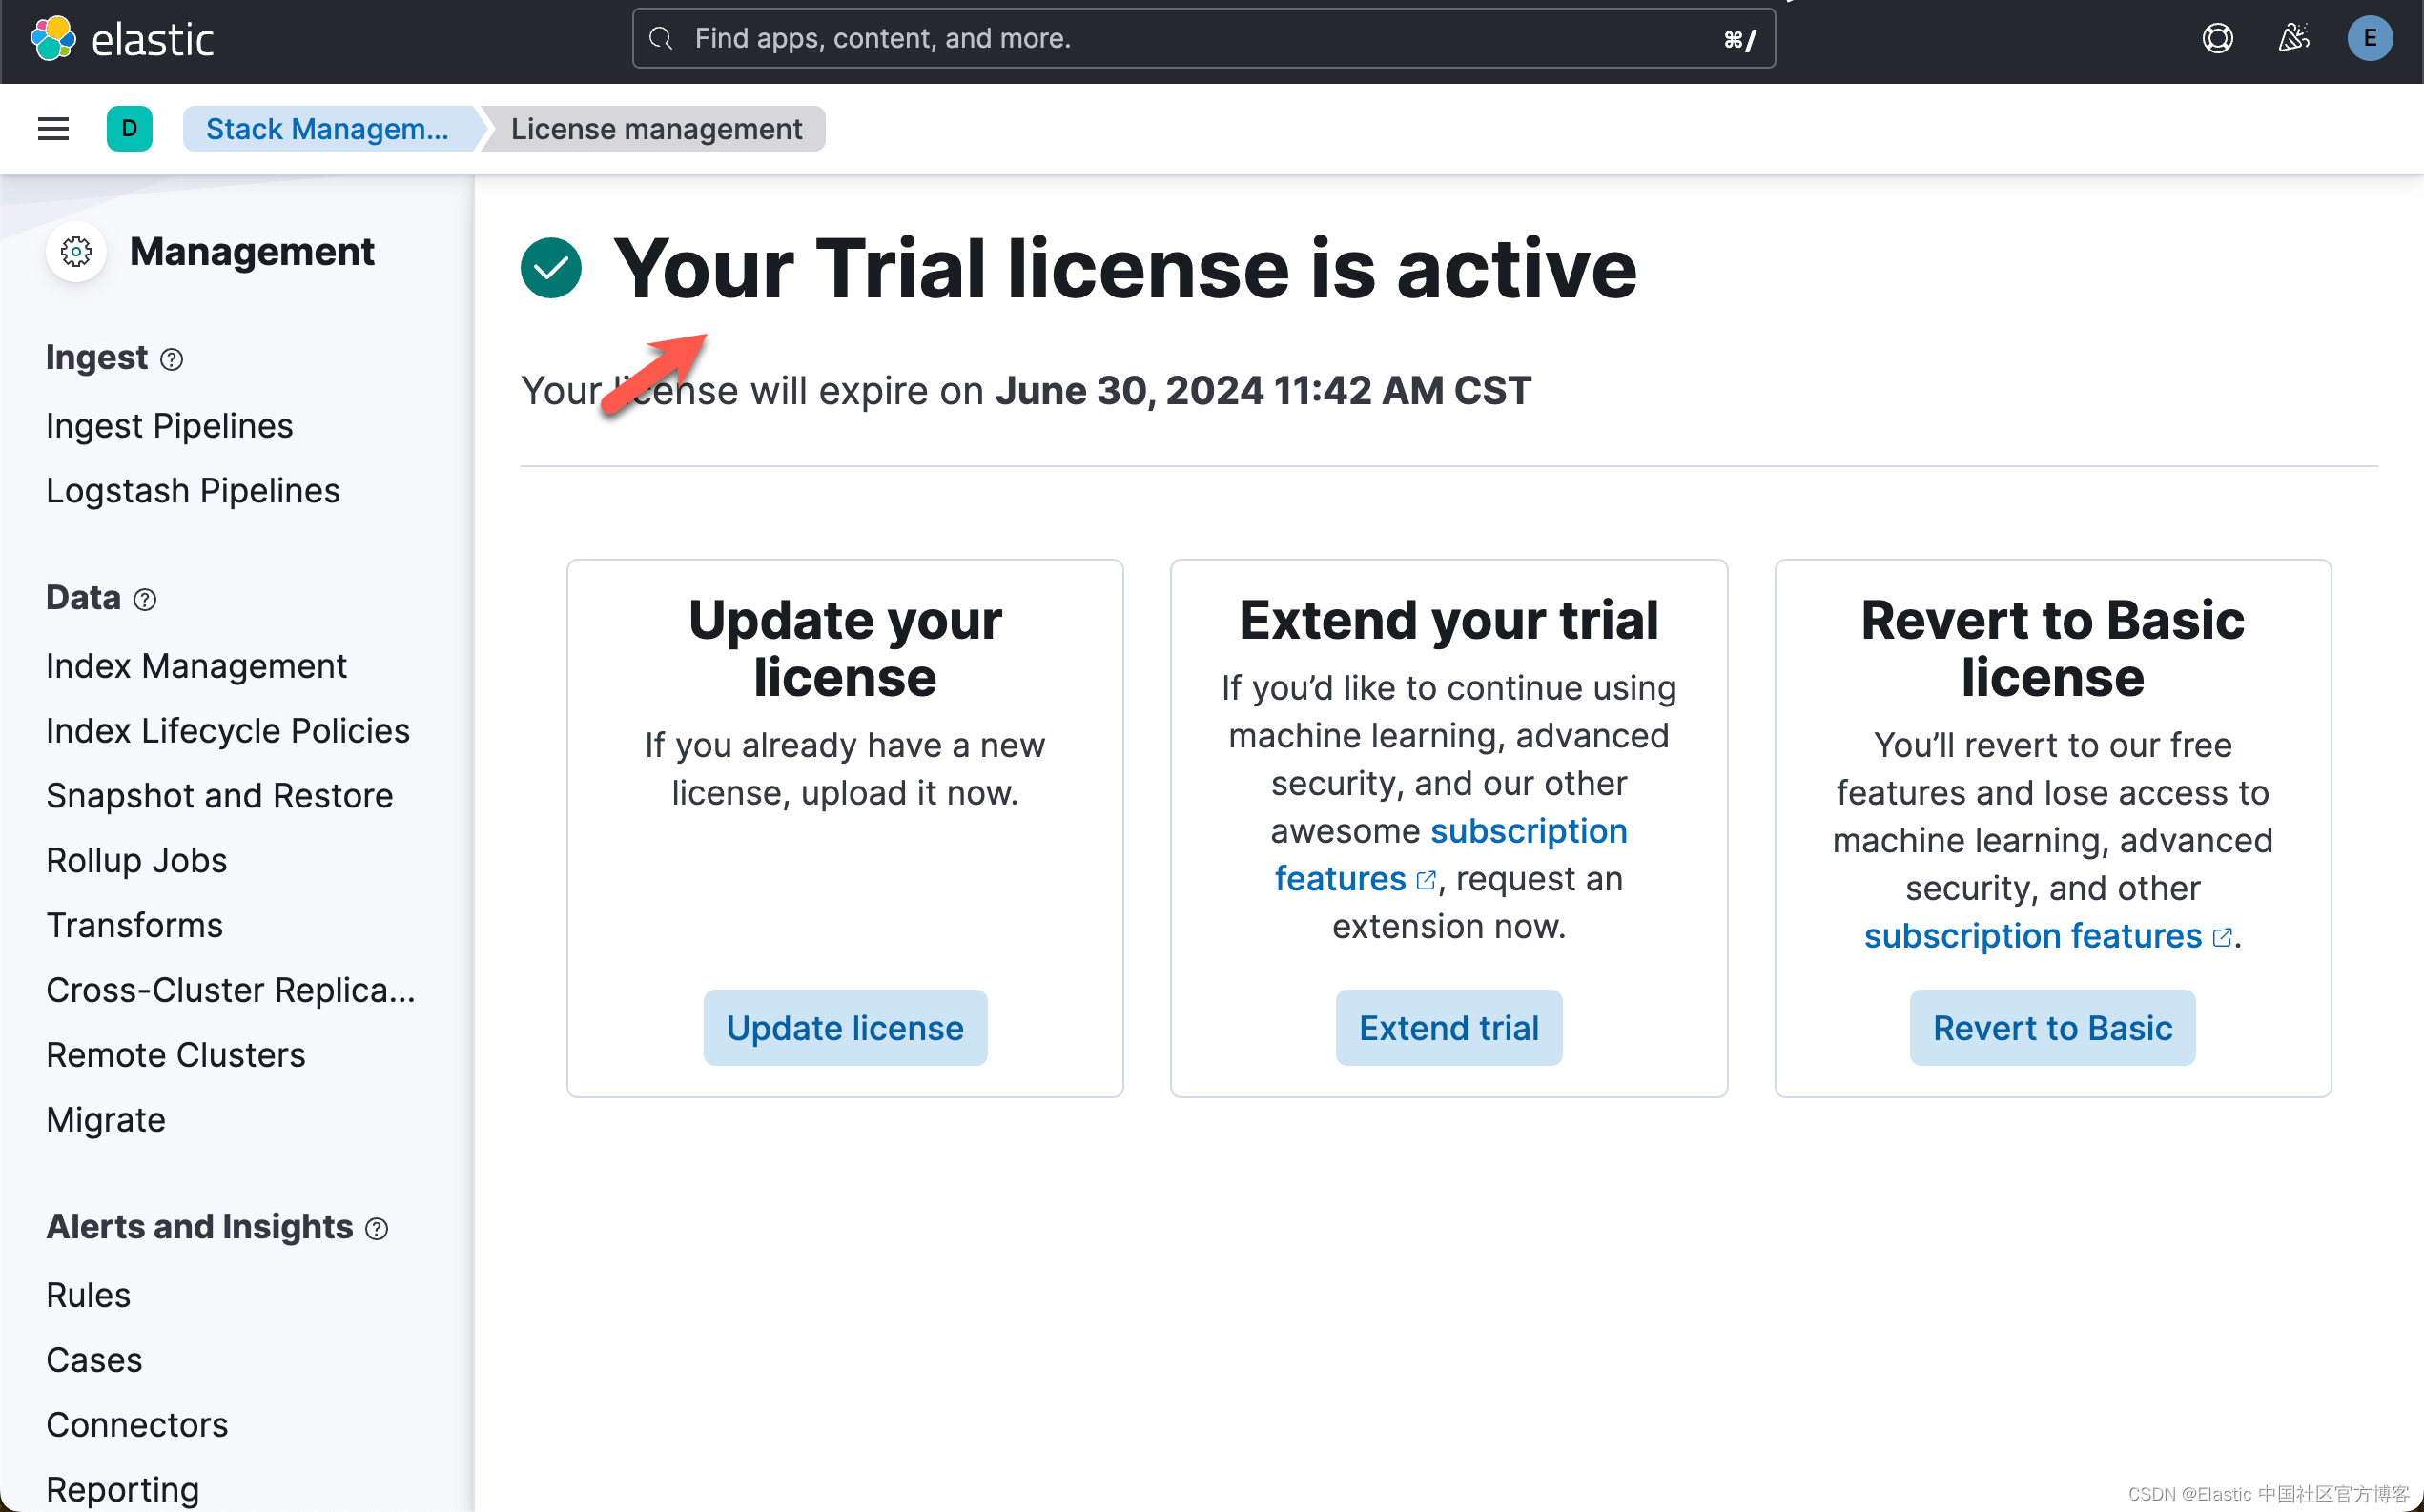
这样我们就完成了白金试用功能。
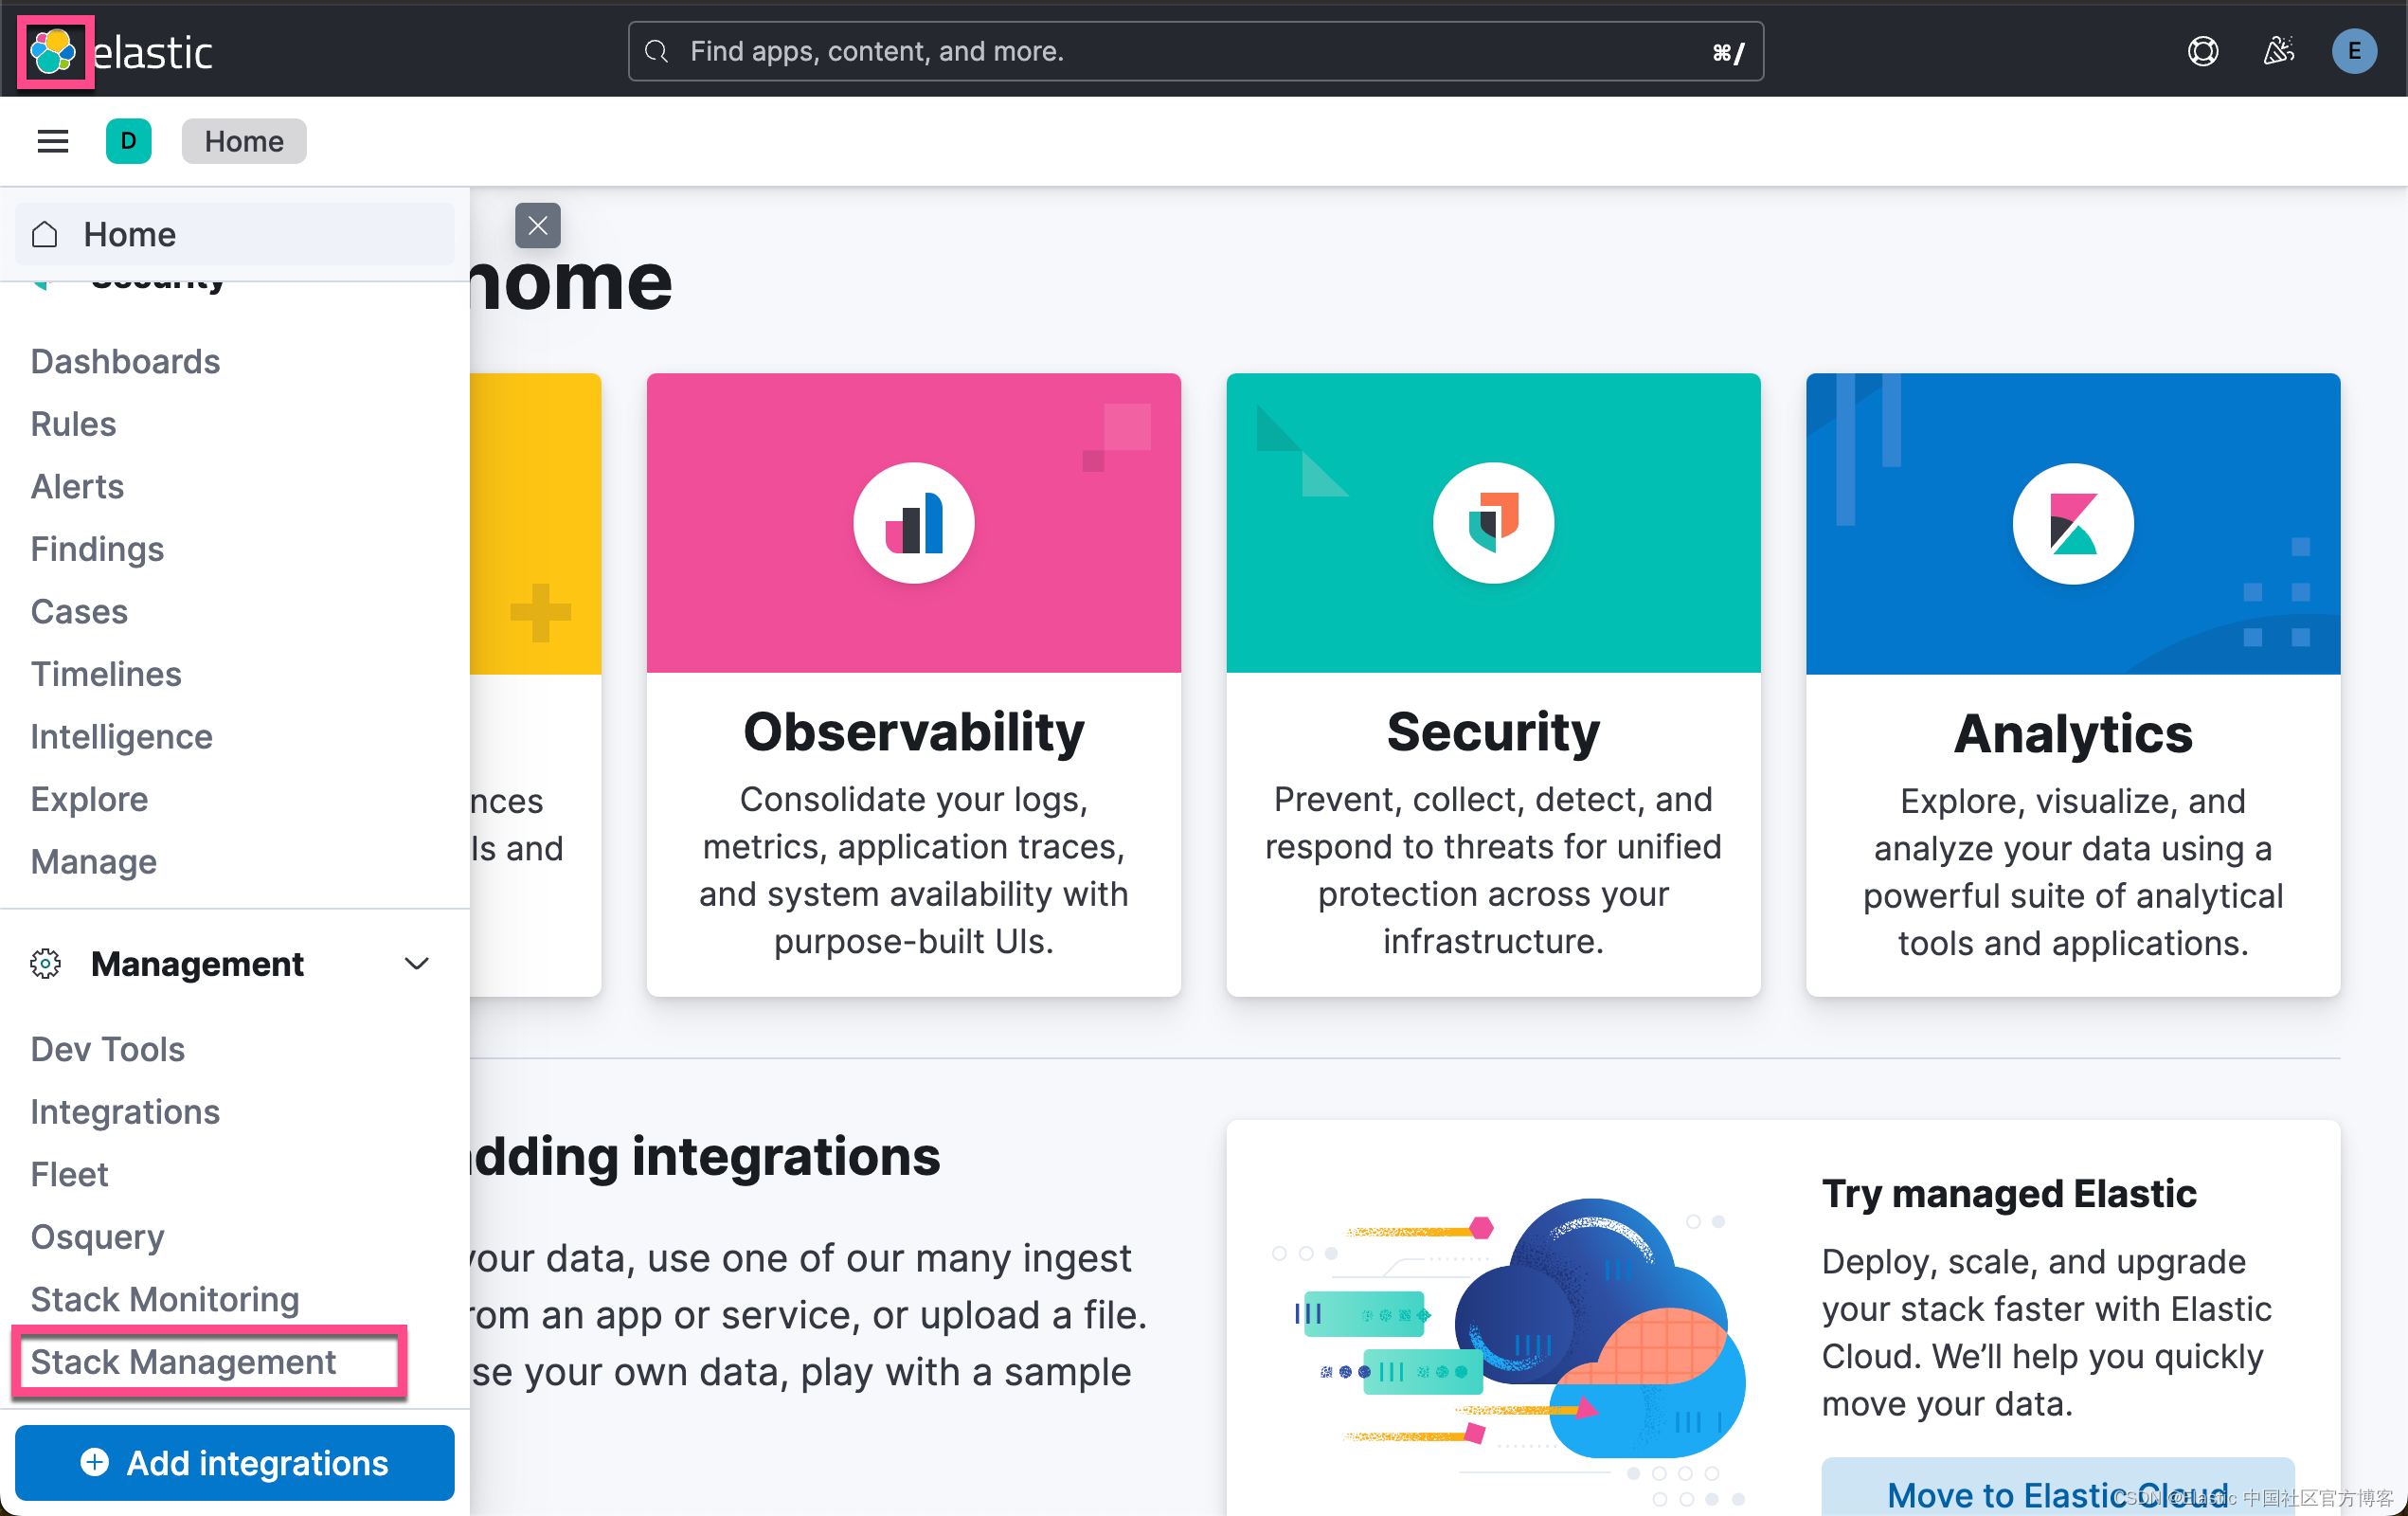
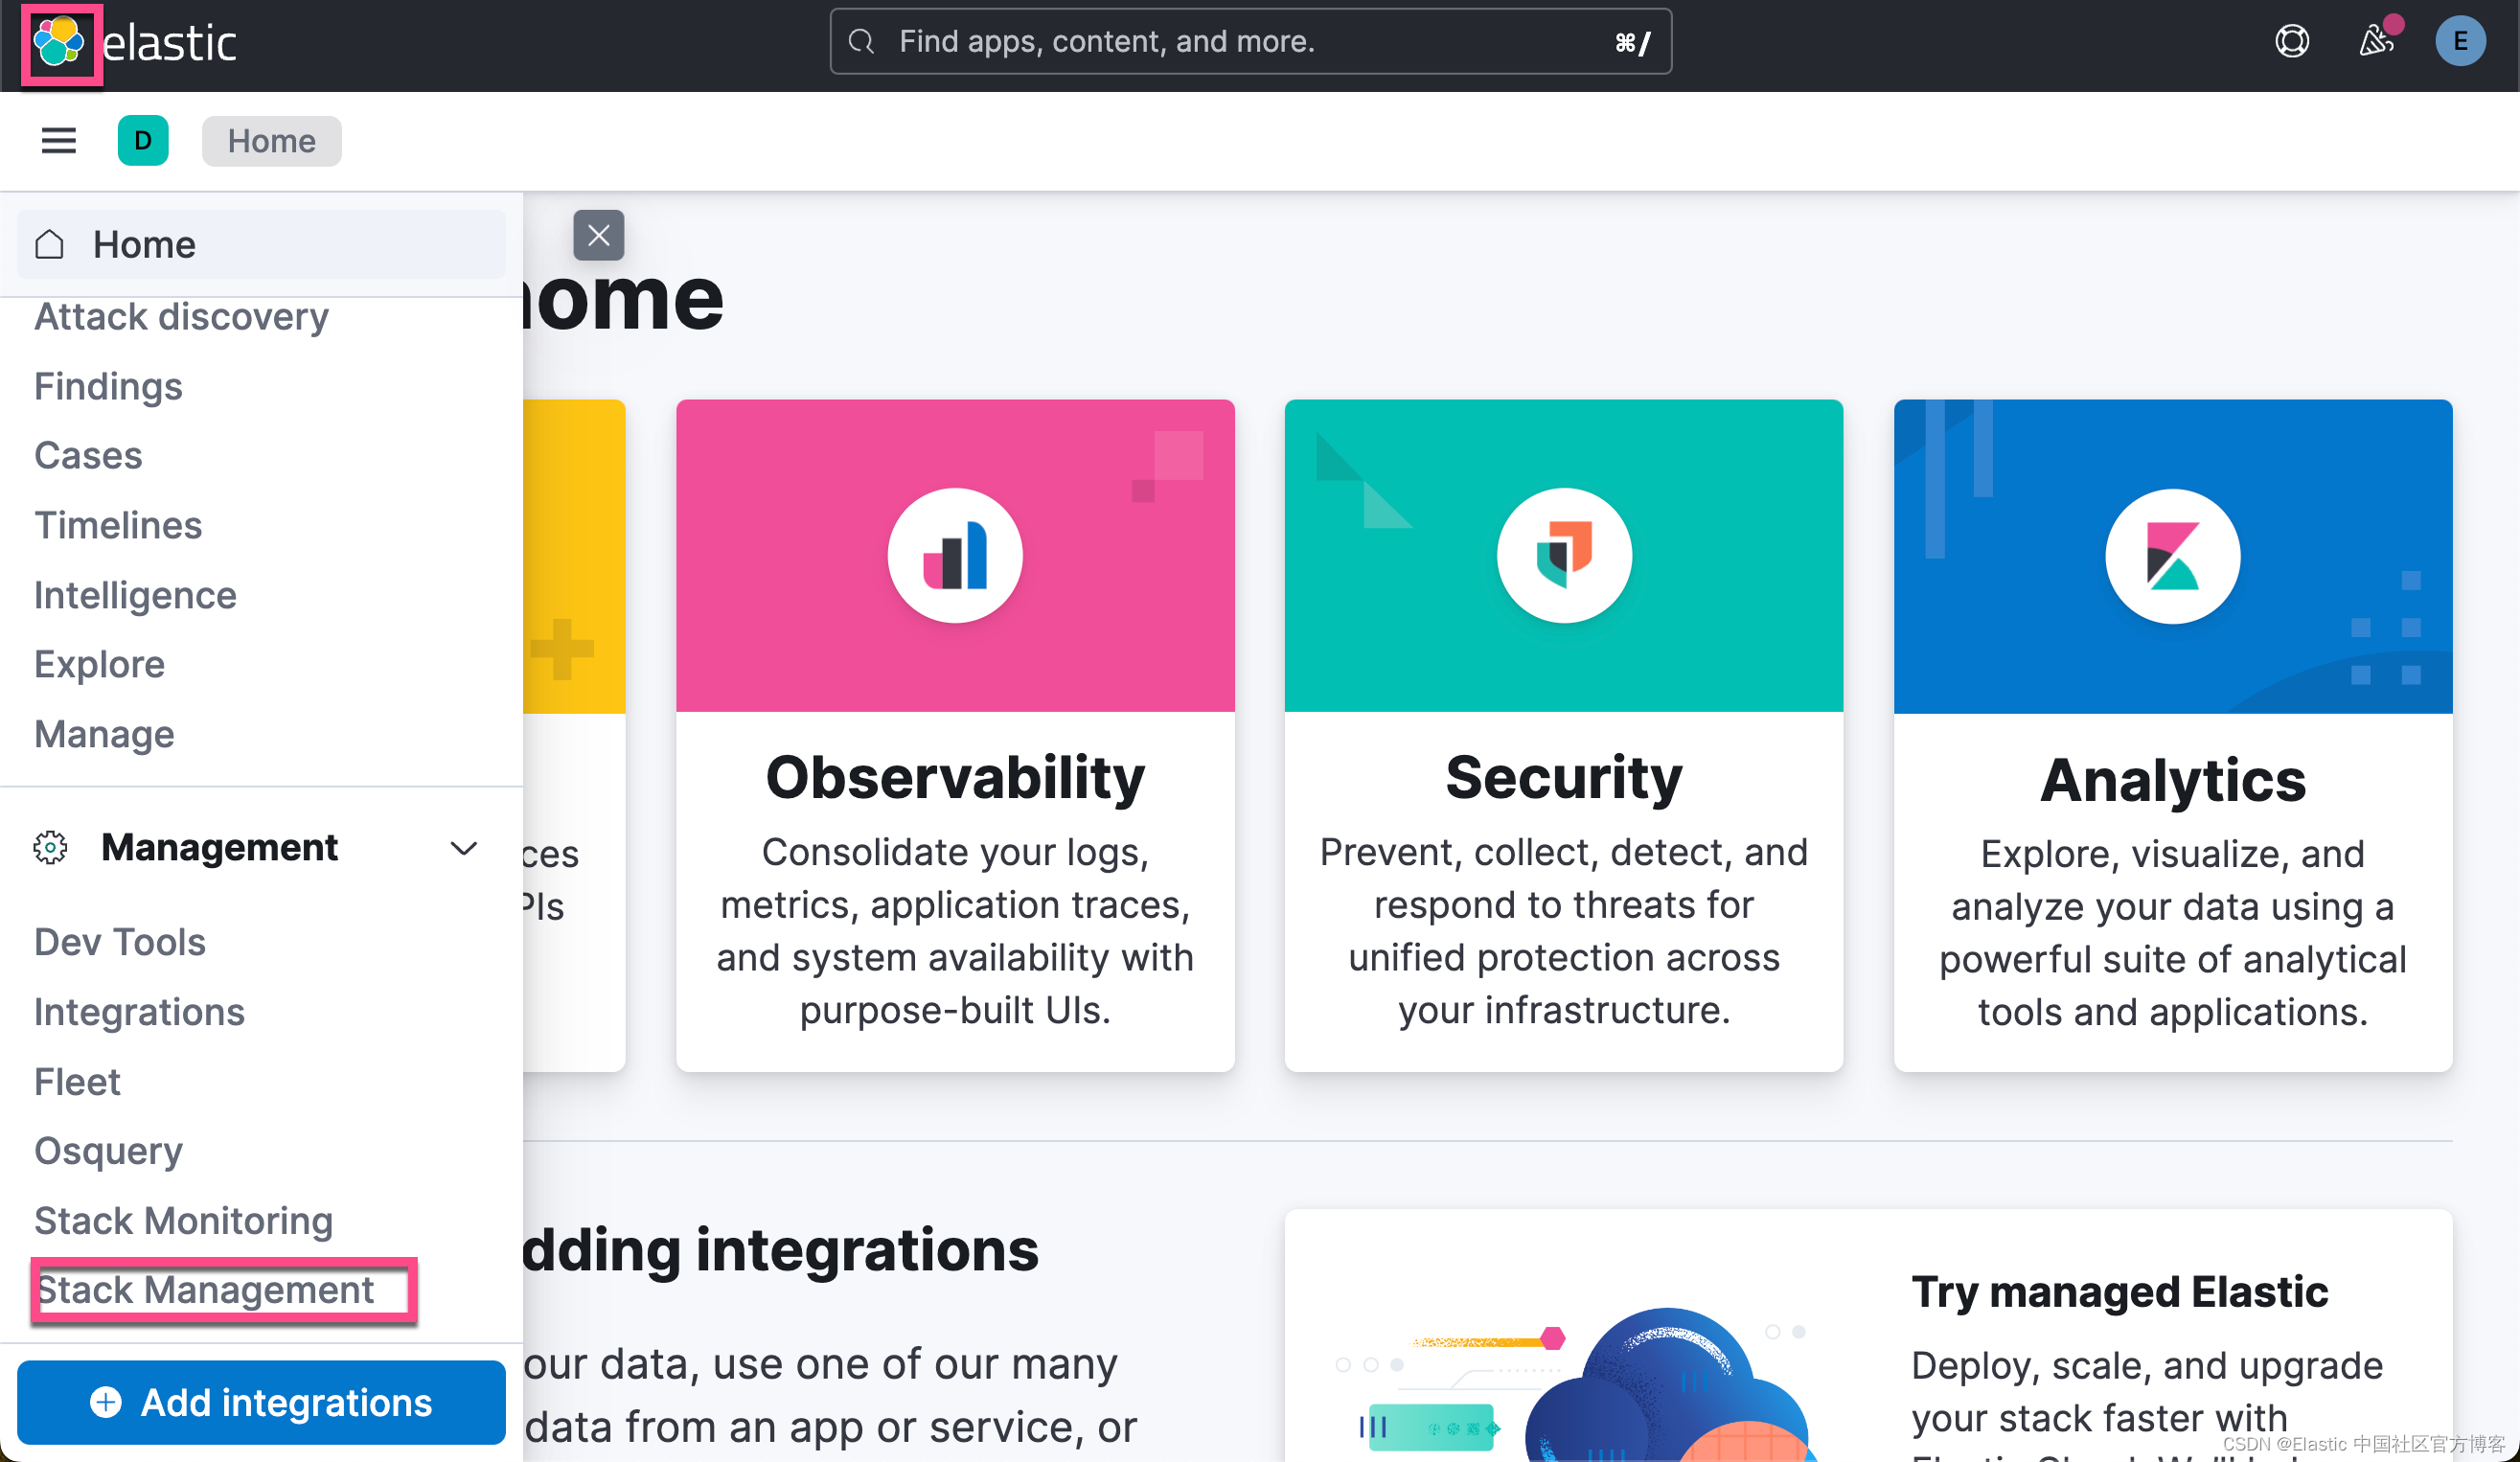
获取 Elasticsearch API key
我们在 Kibana 中,进行如下的步骤:
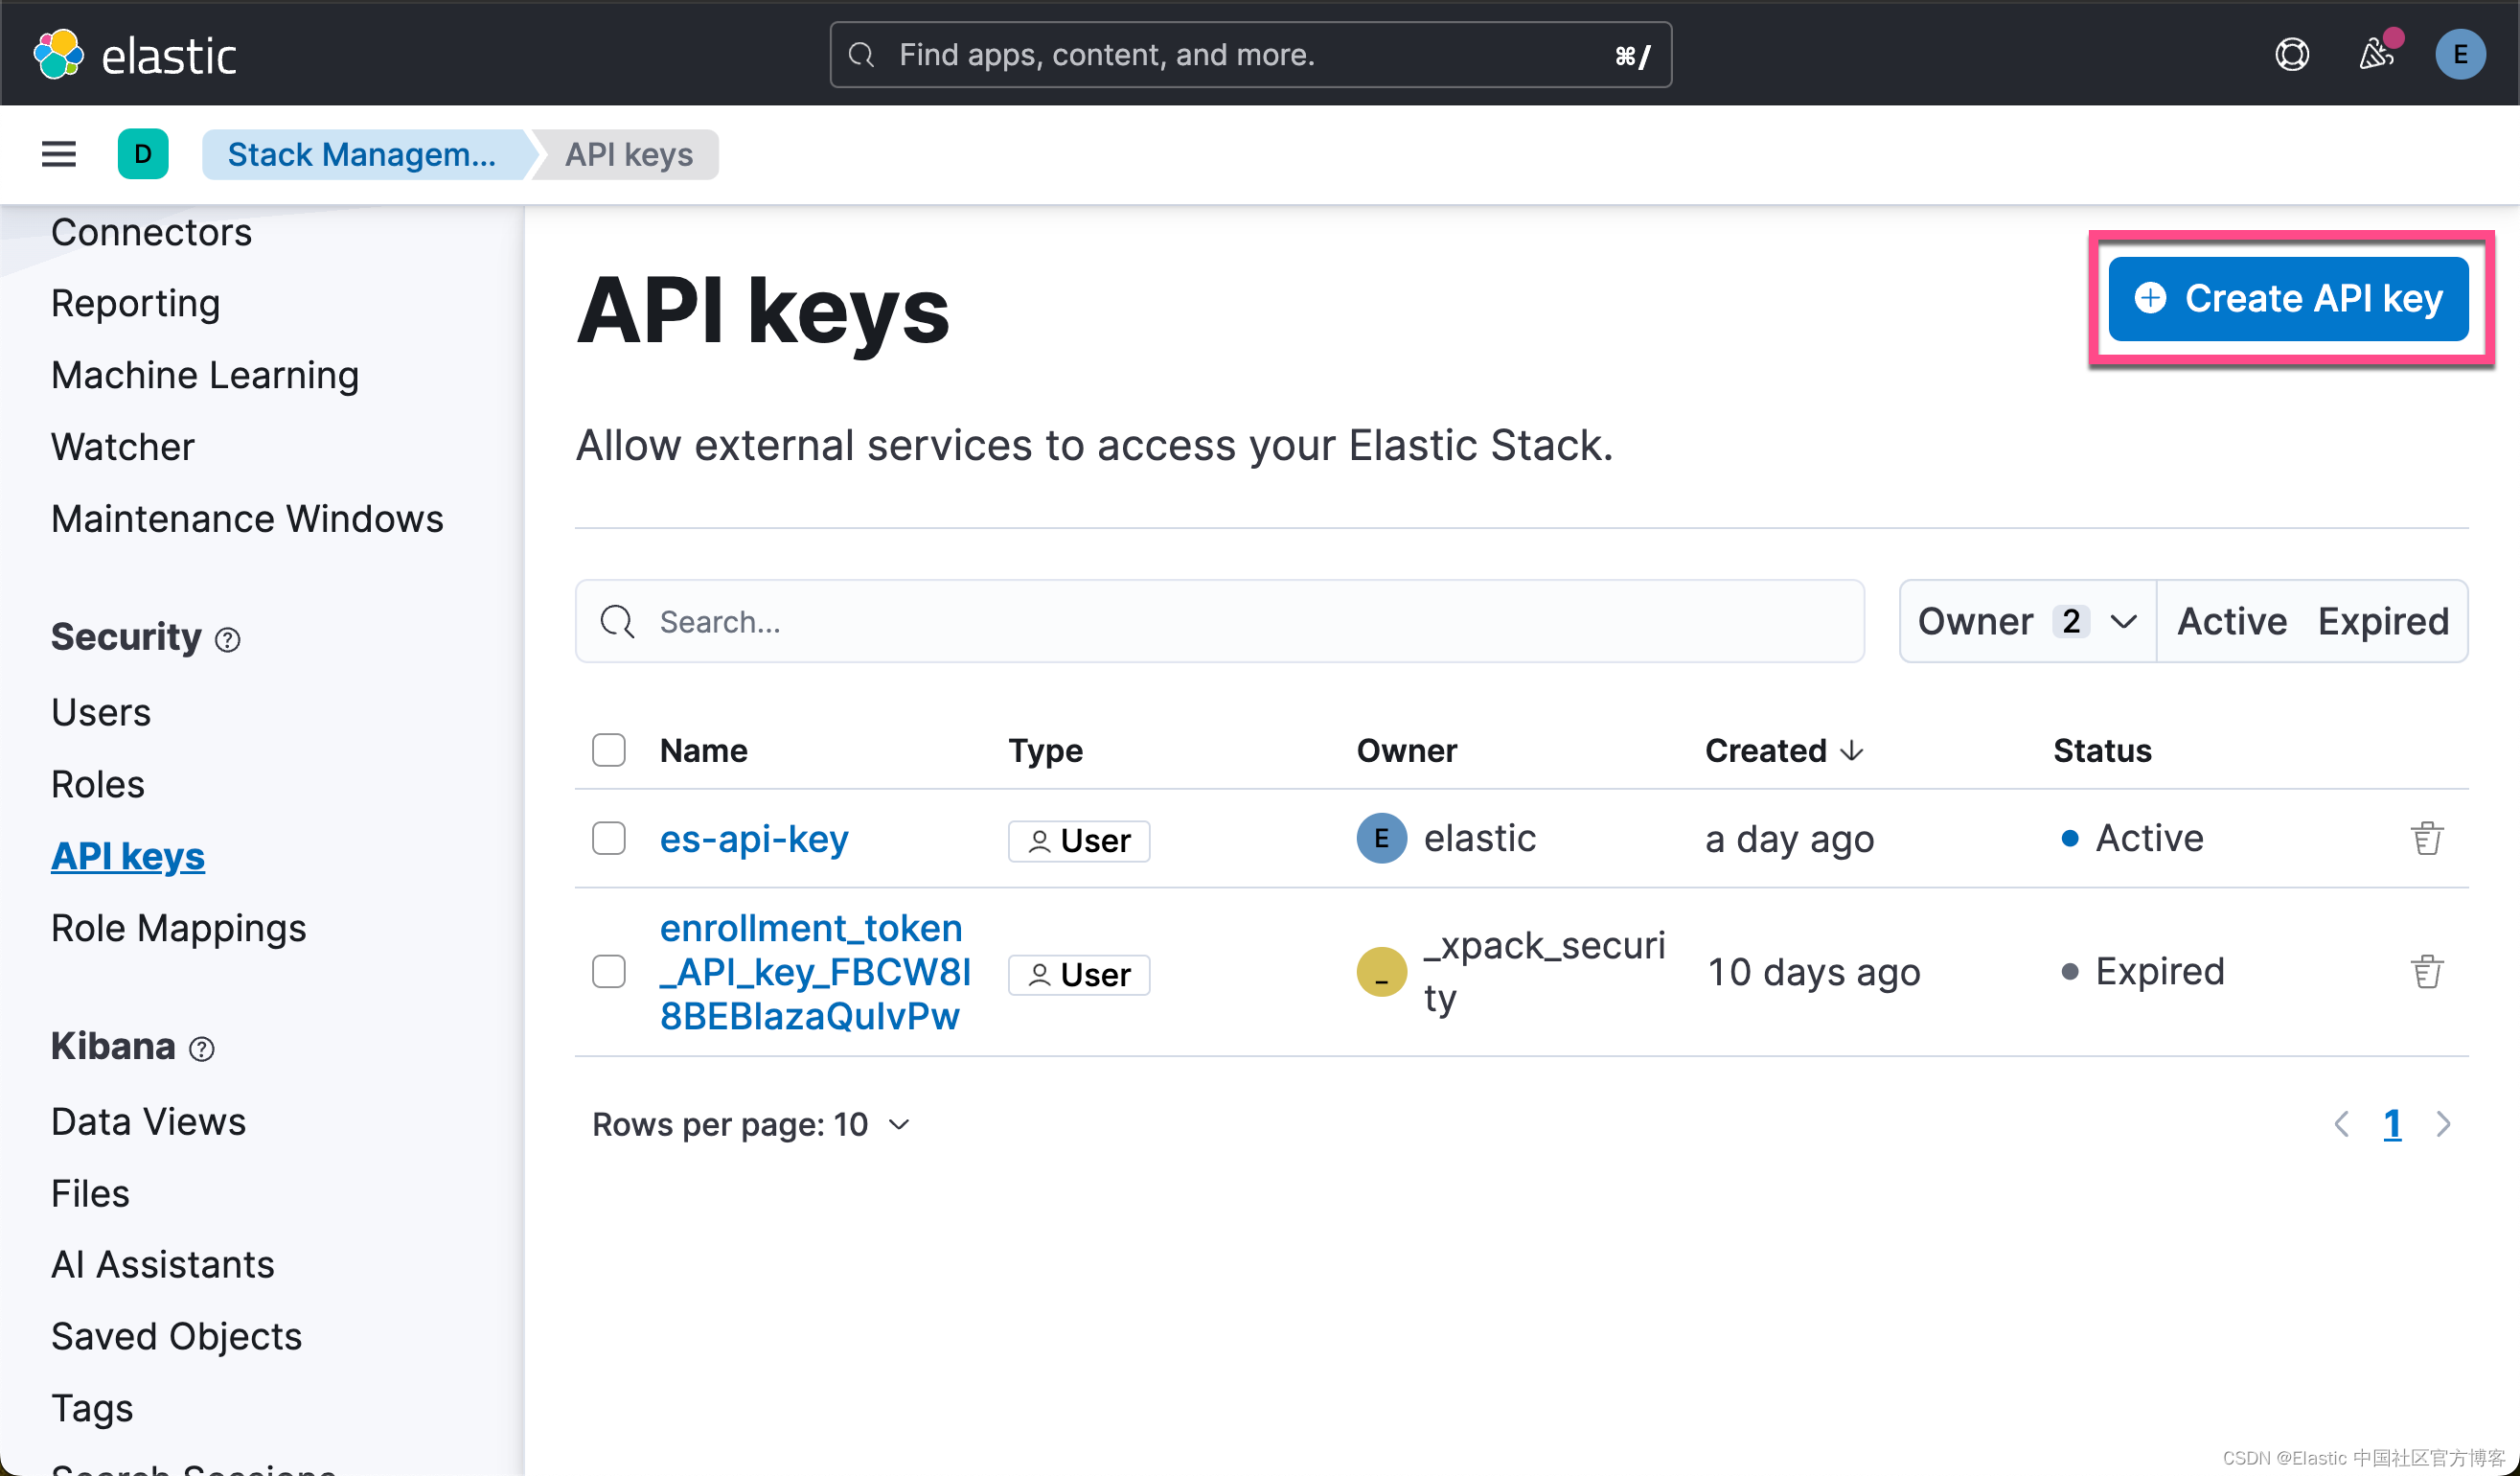
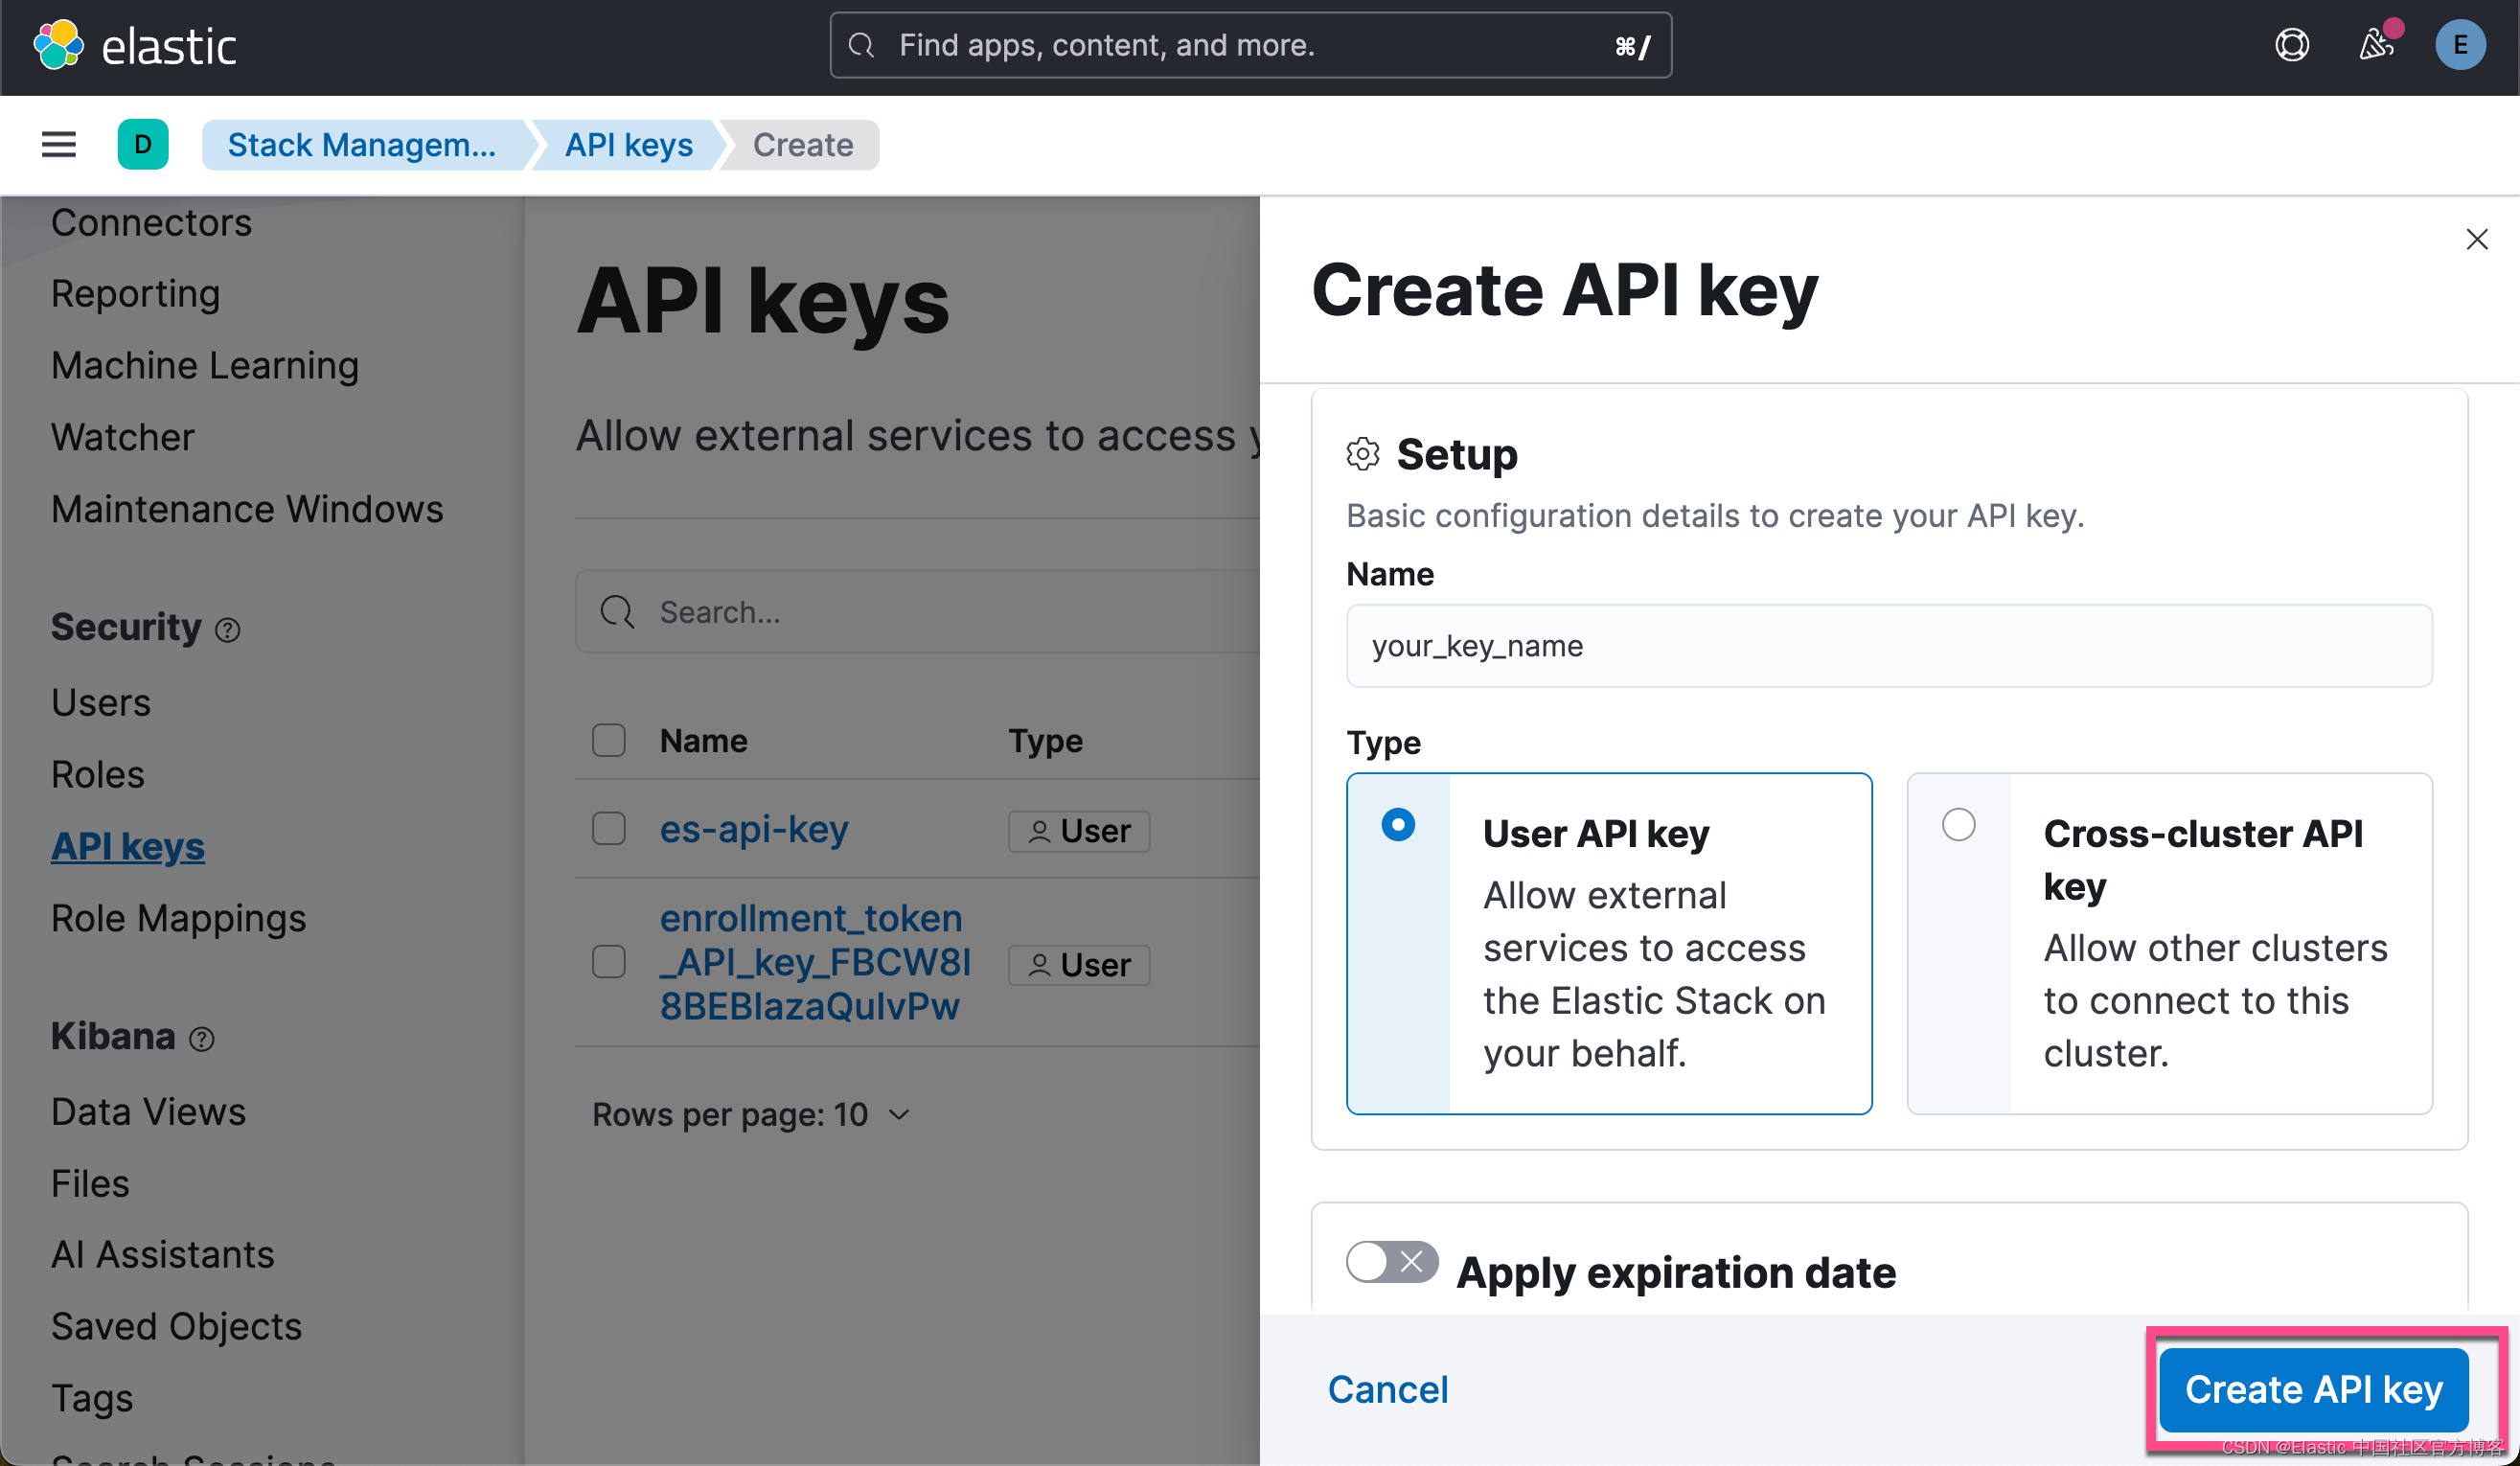
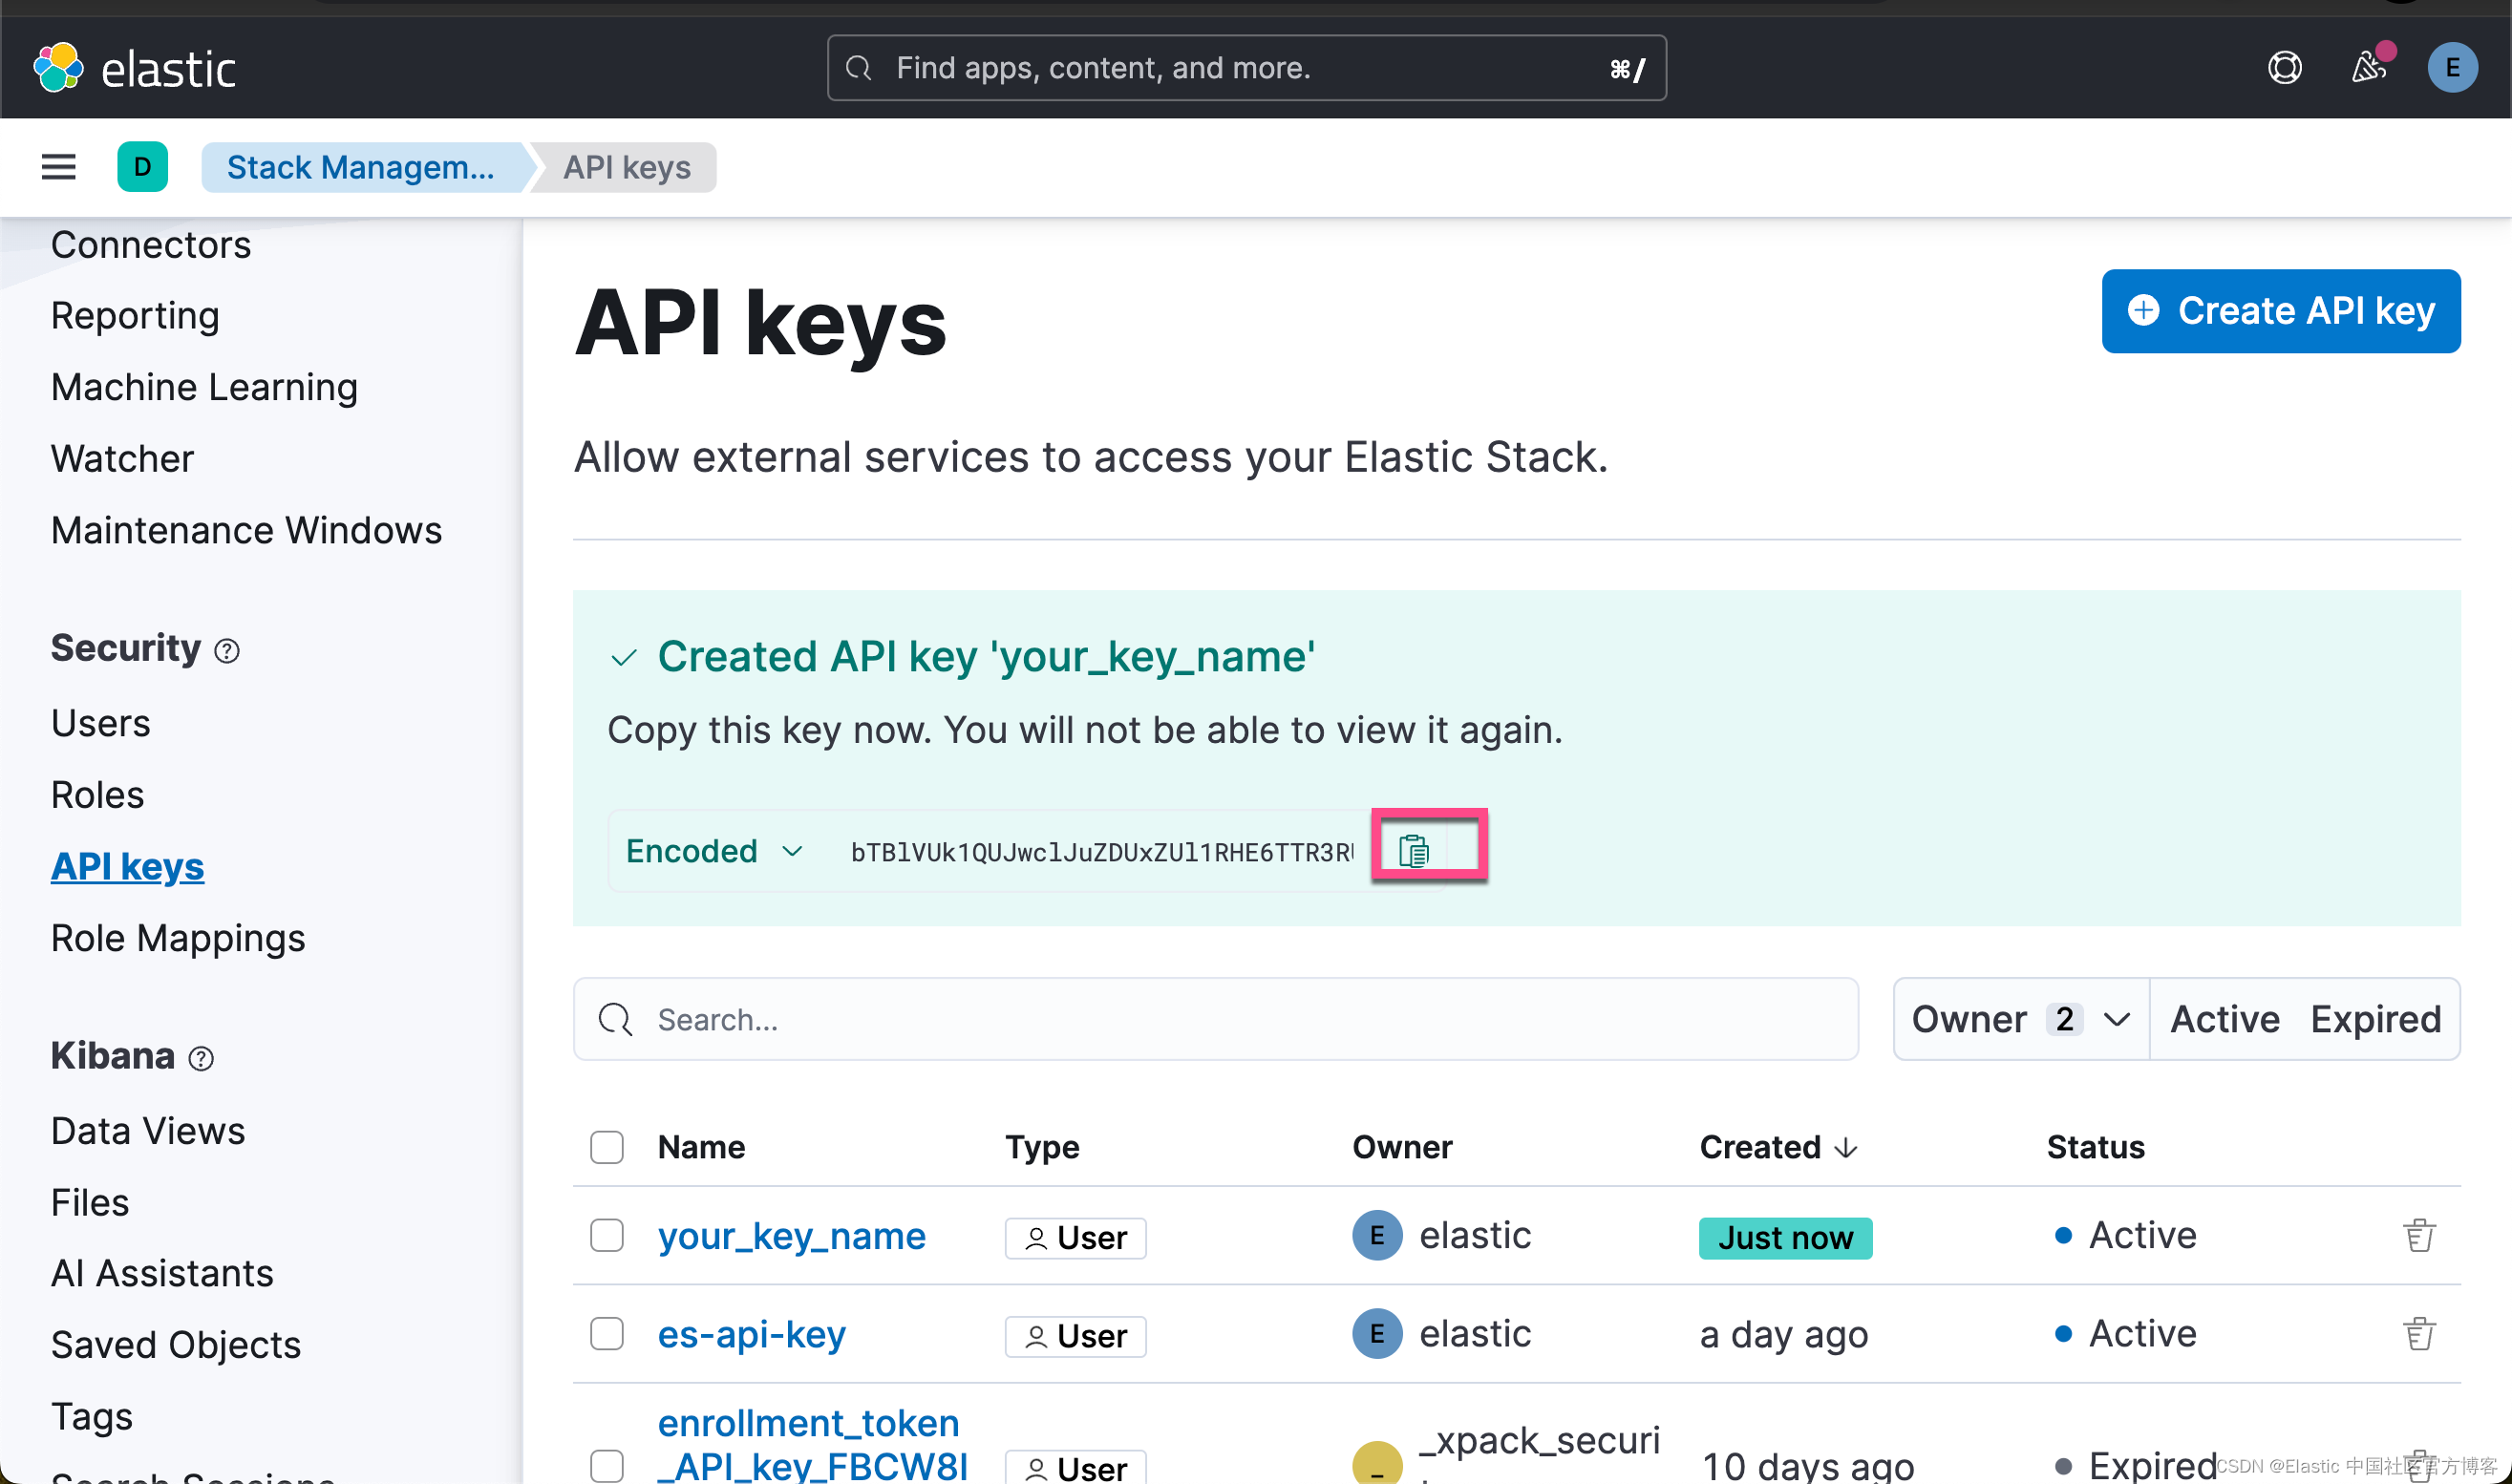
点击上面的拷贝按钮,我们就可以得到所需要的 Elastic API key。
创建环境变量
为了能够使得下面的应用顺利执行,在项目当前的目录下运行如下的命令:
export ES_ENDPOINT="localhost"
export ES_USER="elastic"
export ES_PASSWORD="Xw4_Nohry-LgaOum6oh-"
export ELASTIC_API_KEY="WXhDakhwQUJFQklhemFRdVRQTkw6V3A0TFFieFZTRjJDdzFZbkF5dGVyUQ=="
在上面,我们需要根据自己的 Elasticsearch 配置来进行设置。
下载文档
在我们的例程中,它讲使用哈利波特的文字来进行练习。这个文字,我们可以在地址进行获得。我们可以通过如下的方式来进行下载:
curl -o harry_potter.txt https://raw.githubusercontent.com/amephraim/nlp/master/texts/J.%20K.%20Rowling%20-%20Harry%20Potter%201%20-%20Sorcerer\'s%20Stone.txt$ pwd
/Users/liuxg/python/elasticsearch-labs/supporting-blog-content/fetch-surrounding-chunks
$ ls
README.md fetch-surrounding-chunks.ipynb http_ca.crt
$ curl -o harry_potter.txt https://raw.githubusercontent.com/amephraim/nlp/master/texts/J.%20K.%20Rowling%20-%20Harry%20Potter%201%20-%20Sorcerer\'s%20Stone.txt
% Total % Received % Xferd Average Speed Time Time Time Current
Dload Upload Total Spent Left Speed
100 429k 100 429k 0 0 274k 0 0:00:01 0:00:01 --:--:-- 274k这样我们可以在当前目录下看到一个叫做 harry_potter.txt 的文件:
$ ls
README.md                      harry_potter.txt
fetch-surrounding-chunks.ipynb http_ca.crt
安装 Python 响应的包
pip3 install python-dotenv elasticsearch==8.14.0 pandas eland好了,我们的一切准备工作就完成了。我们在下面,就可以打开 notebook 来进行练习了。
代码展示
我们可以使用如下的命令来启动 notebook:
jupyter notebook fetch-surrounding-chunks.ipynb$ pwd
/Users/liuxg/python/elasticsearch-labs/supporting-blog-content/fetch-surrounding-chunks
$ jupyter notebook fetch-surrounding-chunks.ipynb 安装及导入包
!pip install elasticsearch==8.14.0
!pip install pandas
!python -m pip install eland

import json
import time
import urllib.request
import re
import pandas as pd
from transformers import AutoTokenizer, BertTokenizer
from elasticsearch import Elasticsearch, helpers, exceptions
import textwrap
如果在上面已经安装了所需要的包,那么我们可以省去上面的安装命令。
读入变量并连接到 Elasticsearch
from elasticsearch import Elasticsearch
from dotenv import load_dotenv
import os
from transformers import BertTokenizer, BertForMaskedLM

load_dotenv()

raw_source_index = "harry_potter_dataset-raw"
index_name = "harry_potter_dataset_enriched"

dense_embedding_model_id = "sentence-transformers__all-minilm-l6-v2"
dense_huggingface_model_id = "sentence-transformers/all-MiniLM-L6-v2"
dense_model_number_of_allocators = 2

elser_model_id = ".elser_model_2"
elser_model_number_of_allocators = 2

bert_tokenizer = BertTokenizer.from_pretrained("bert-base-uncased")


SEMANTIC_SEARCH_TOKEN_LIMIT = 500
ELSER_TOKEN_OVERLAP = 0.0


# Create the client instance
load_dotenv()

ES_USER = os.getenv("ES_USER")
ES_PASSWORD = os.getenv("ES_PASSWORD")
ES_ENDPOINT = os.getenv("ES_ENDPOINT")
ELASTIC_API_KEY = os.getenv("ELASTIC_API_KEY")

url = f"https://{ES_USER}:{ES_PASSWORD}@{ES_ENDPOINT}:9200"
print(url)

esclient = Elasticsearch(url, ca_certs = "./http_ca.crt", verify_certs = True)
print(esclient.info())
如果你运行顺利的话,那么你可以看到如下的输出结果:

它表明我们的 Elasticsearch 客户端连接是成功的。
导入模型
在这里,我们用到脚本来上传所需要的模型。使用 eland_import_hub_model 脚本,下载并安装 all-MiniLM-L6-v2 转换器模型。将 NLP --task-type 设置为 text_embedding。
要验证你的请求,请使用 Elastic API API 密钥。
CA_CERT = "./http_ca.crt"
print(url)
!eland_import_hub_model --url $url --es-model-id {dense_embedding_model_id} --hub-model-id {dense_huggingface_model_id} --task-type text_embedding --es-api-key $ELASTIC_API_KEY --ca-cert $CA_CERT --start --clear-previous
resp = esclient.ml.update_trained_model_deployment(
    model_id=dense_embedding_model_id,
    body={"number_of_allocations": dense_model_number_of_allocators},
)
print(resp)
https://elastic:Xw4_Nohry-LgaOum6oh-@localhost:9200
2024-06-17 07:36:04,762 INFO : Establishing connection to Elasticsearch
2024-06-17 07:36:04,781 INFO : Connected to cluster named 'elasticsearch' (version: 8.14.0)
2024-06-17 07:36:04,781 INFO : Loading HuggingFace transformer tokenizer and model 'sentence-transformers/all-MiniLM-L6-v2'
STAGE:2024-06-17 07:36:09 54226:14164655 ActivityProfilerController.cpp:314] Completed Stage: Warm Up
STAGE:2024-06-17 07:36:09 54226:14164655 ActivityProfilerController.cpp:320] Completed Stage: Collection
STAGE:2024-06-17 07:36:09 54226:14164655 ActivityProfilerController.cpp:324] Completed Stage: Post Processing
2024-06-17 07:36:09,768 WARNING : `SentenceTransformer._target_device` has been removed, please use `SentenceTransformer.device` instead.
2024-06-17 07:36:09,768 WARNING : `SentenceTransformer._target_device` has been removed, please use `SentenceTransformer.device` instead.
2024-06-17 07:36:09,996 WARNING : `SentenceTransformer._target_device` has been removed, please use `SentenceTransformer.device` instead.
2024-06-17 07:36:09,996 WARNING : `SentenceTransformer._target_device` has been removed, please use `SentenceTransformer.device` instead.
2024-06-17 07:36:10,705 INFO : Stopping deployment for model with id 'sentence-transformers__all-minilm-l6-v2'
2024-06-17 07:36:10,806 INFO : Deleting model with id 'sentence-transformers__all-minilm-l6-v2'
2024-06-17 07:36:10,962 INFO : Creating model with id 'sentence-transformers__all-minilm-l6-v2'
2024-06-17 07:36:11,120 INFO : Uploading model definition
100%|███████████████████████████████████████| 87/87 [00:03<00:00, 25.11 parts/s]
2024-06-17 07:36:14,584 INFO : Uploading model vocabulary
2024-06-17 07:36:14,622 INFO : Starting model deployment
2024-06-17 07:36:16,031 INFO : Model successfully imported with id 'sentence-transformers__all-minilm-l6-v2'
{'assignment': {'task_parameters': {'model_id': 'sentence-transformers__all-minilm-l6-v2', 'deployment_id': 'sentence-transformers__all-minilm-l6-v2', 'model_bytes': 90303522, 'threads_per_allocation': 1, 'number_of_allocations': 2, 'queue_capacity': 1024, 'cache_size': '90303522b', 'priority': 'normal', 'per_deployment_memory_bytes': 90269696, 'per_allocation_memory_bytes': 291876956}, 'routing_table': {'PEyvsErNSXu8NbrlO_HPxA': {'current_allocations': 1, 'target_allocations': 2, 'routing_state': 'started', 'reason': ''}}, 'assignment_state': 'started', 'start_time': '2024-06-16T23:36:14.652847Z', 'max_assigned_allocations': 1}}这个步骤,你可以参考之前的文章 “Elasticsearch:如何部署 NLP:文本嵌入和向量搜索” 来在命令行中进行部署。运行完上面的命令后,你需要在 Kibana 界面中进行选择:

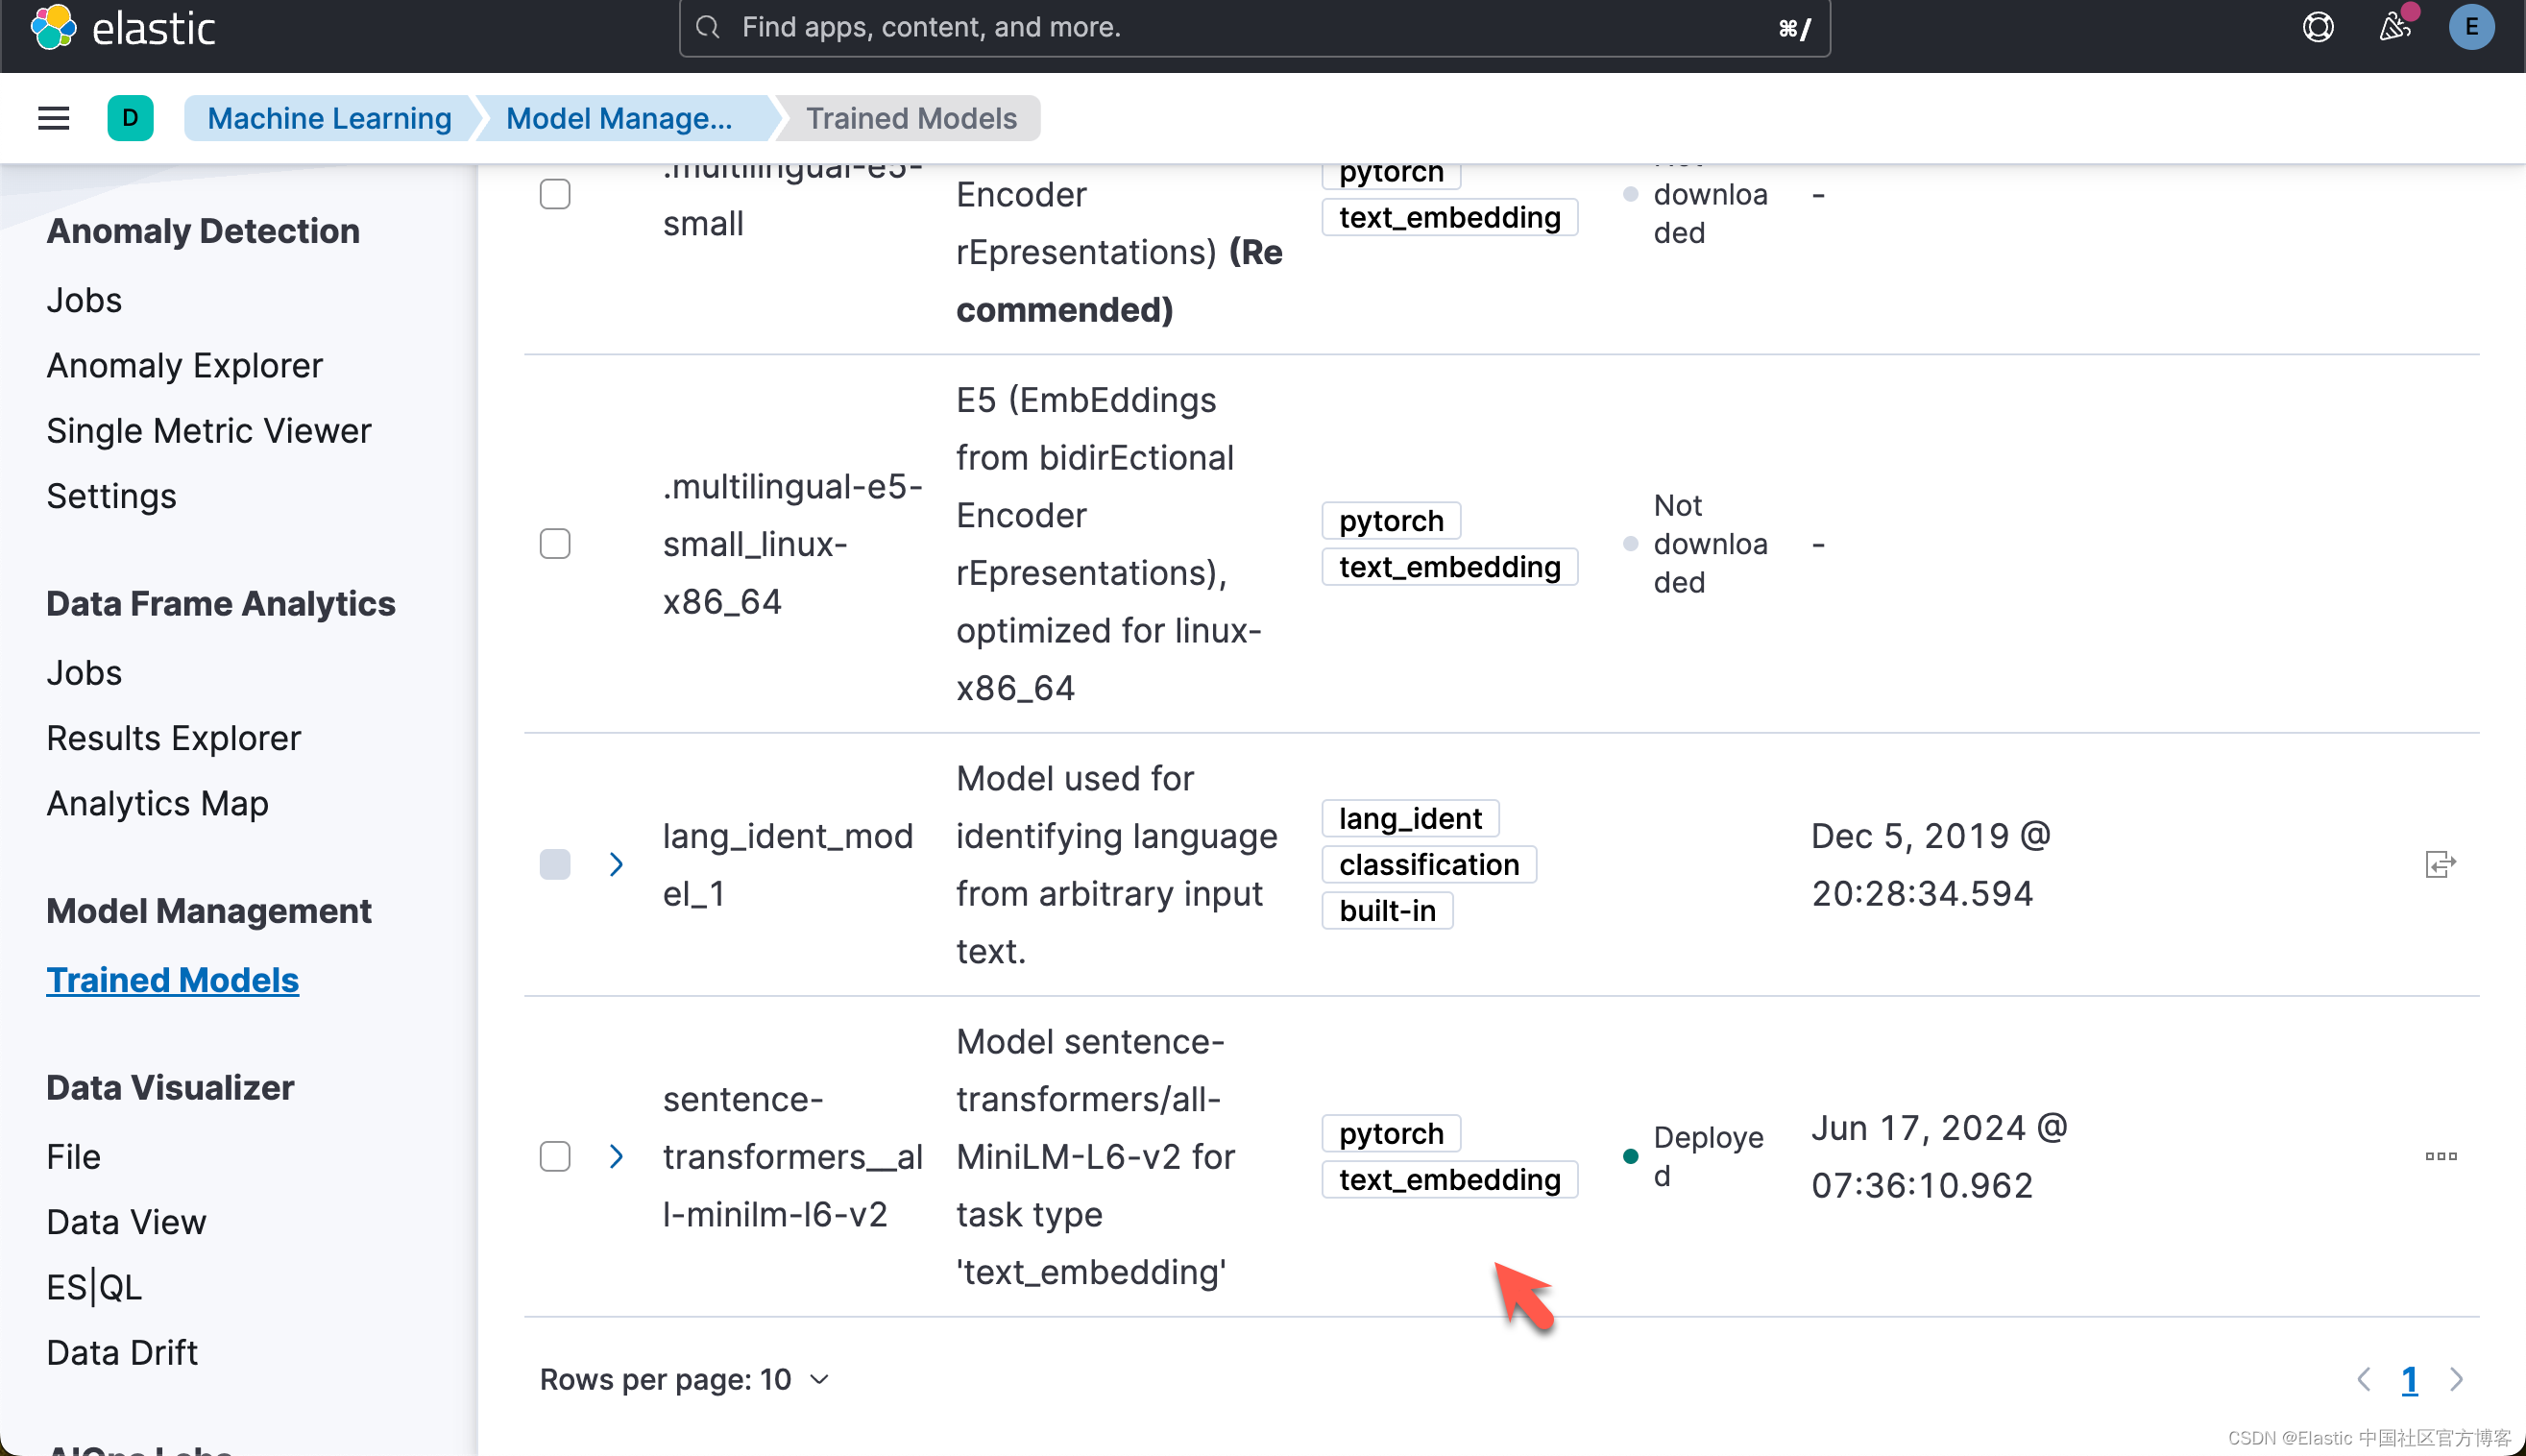
下载及部署 ELSER 模型
对于一些开发者对 ELSER 还不是很熟的话,那么请阅我之前的文章 “Elasticsearch:部署 ELSER - Elastic Learned Sparse EncoderR”。
# delete model if already downloaded and deployed
try:
    esclient.ml.delete_trained_model(model_id=elser_model_id, force=True)
    print("Model deleted successfully, We will proceed with creating one")
except exceptions.NotFoundError:
    print("Model doesn't exist, but We will proceed with creating one")

# Creates the ELSER model configuration. Automatically downloads the model if it doesn't exist.
esclient.ml.put_trained_model(
    model_id=elser_model_id, input={"field_names": ["text_field"]}
)
在上面,它删除已经部署好的 ELSER,并重新对它进行部署。
Model deleted successfully, We will proceed with creating one
ObjectApiResponse({'model_id': '.elser_model_2', 'model_type': 'pytorch', 'model_package': {'packaged_model_id': 'elser_model_2', 'model_repository': 'https://ml-models.elastic.co', 'minimum_version': '11.0.0', 'size': 438123914, 'sha256': '2e0450a1c598221a919917cbb05d8672aed6c613c028008fedcd696462c81af0', 'metadata': {}, 'tags': [], 'vocabulary_file': 'elser_model_2.vocab.json'}, 'created_by': 'api_user', 'version': '12.0.0', 'create_time': 1718580981790, 'model_size_bytes': 0, 'estimated_operations': 0, 'license_level': 'platinum', 'description': 'Elastic Learned Sparse EncodeR v2', 'tags': ['elastic'], 'metadata': {}, 'input': {'field_names': ['text_field']}, 'inference_config': {'text_expansion': {'vocabulary': {'index': '.ml-inference-native-000002'}, 'tokenization': {'bert': {'do_lower_case': True, 'with_special_tokens': True, 'max_sequence_length': 512, 'truncate': 'first', 'span': -1}}}}, 'location': {'index': {'name': '.ml-inference-native-000002'}}})
上述命令将下载 ELSER 模型。这将需要几分钟才能完成。使用以下命令检查模型下载的状态。
while True:
    status = esclient.ml.get_trained_models(
        model_id=elser_model_id, include="definition_status"
    )

    if status["trained_model_configs"][0]["fully_defined"]:
        print("ELSER Model is downloaded and ready to be deployed.")
        break
    else:
        print("ELSER Model is downloaded but not ready to be deployed.")
    time.sleep(5)
ELSER Model is downloaded but not ready to be deployed.
ELSER Model is downloaded but not ready to be deployed.
ELSER Model is downloaded but not ready to be deployed.
ELSER Model is downloaded but not ready to be deployed.
ELSER Model is downloaded and ready to be deployed.
下载模型后,我们可以在 ML 节点中部署该模型。使用以下命令部署模型。这也需要几分钟才能完成。
# Start ELSER model deployment if not already deployed
esclient.ml.start_trained_model_deployment(
    model_id=elser_model_id,
    number_of_allocations=elser_model_number_of_allocators,
    wait_for="starting",
)

while True:
    status = esclient.ml.get_trained_models_stats(
        model_id=elser_model_id,
    )
    if status["trained_model_stats"][0]["deployment_stats"]["state"] == "started":
        print("ELSER Model has been successfully deployed.")
        break
    else:
        print("ELSER Model is currently being deployed.")
    time.sleep(5)
ELSER Model is currently being deployed.
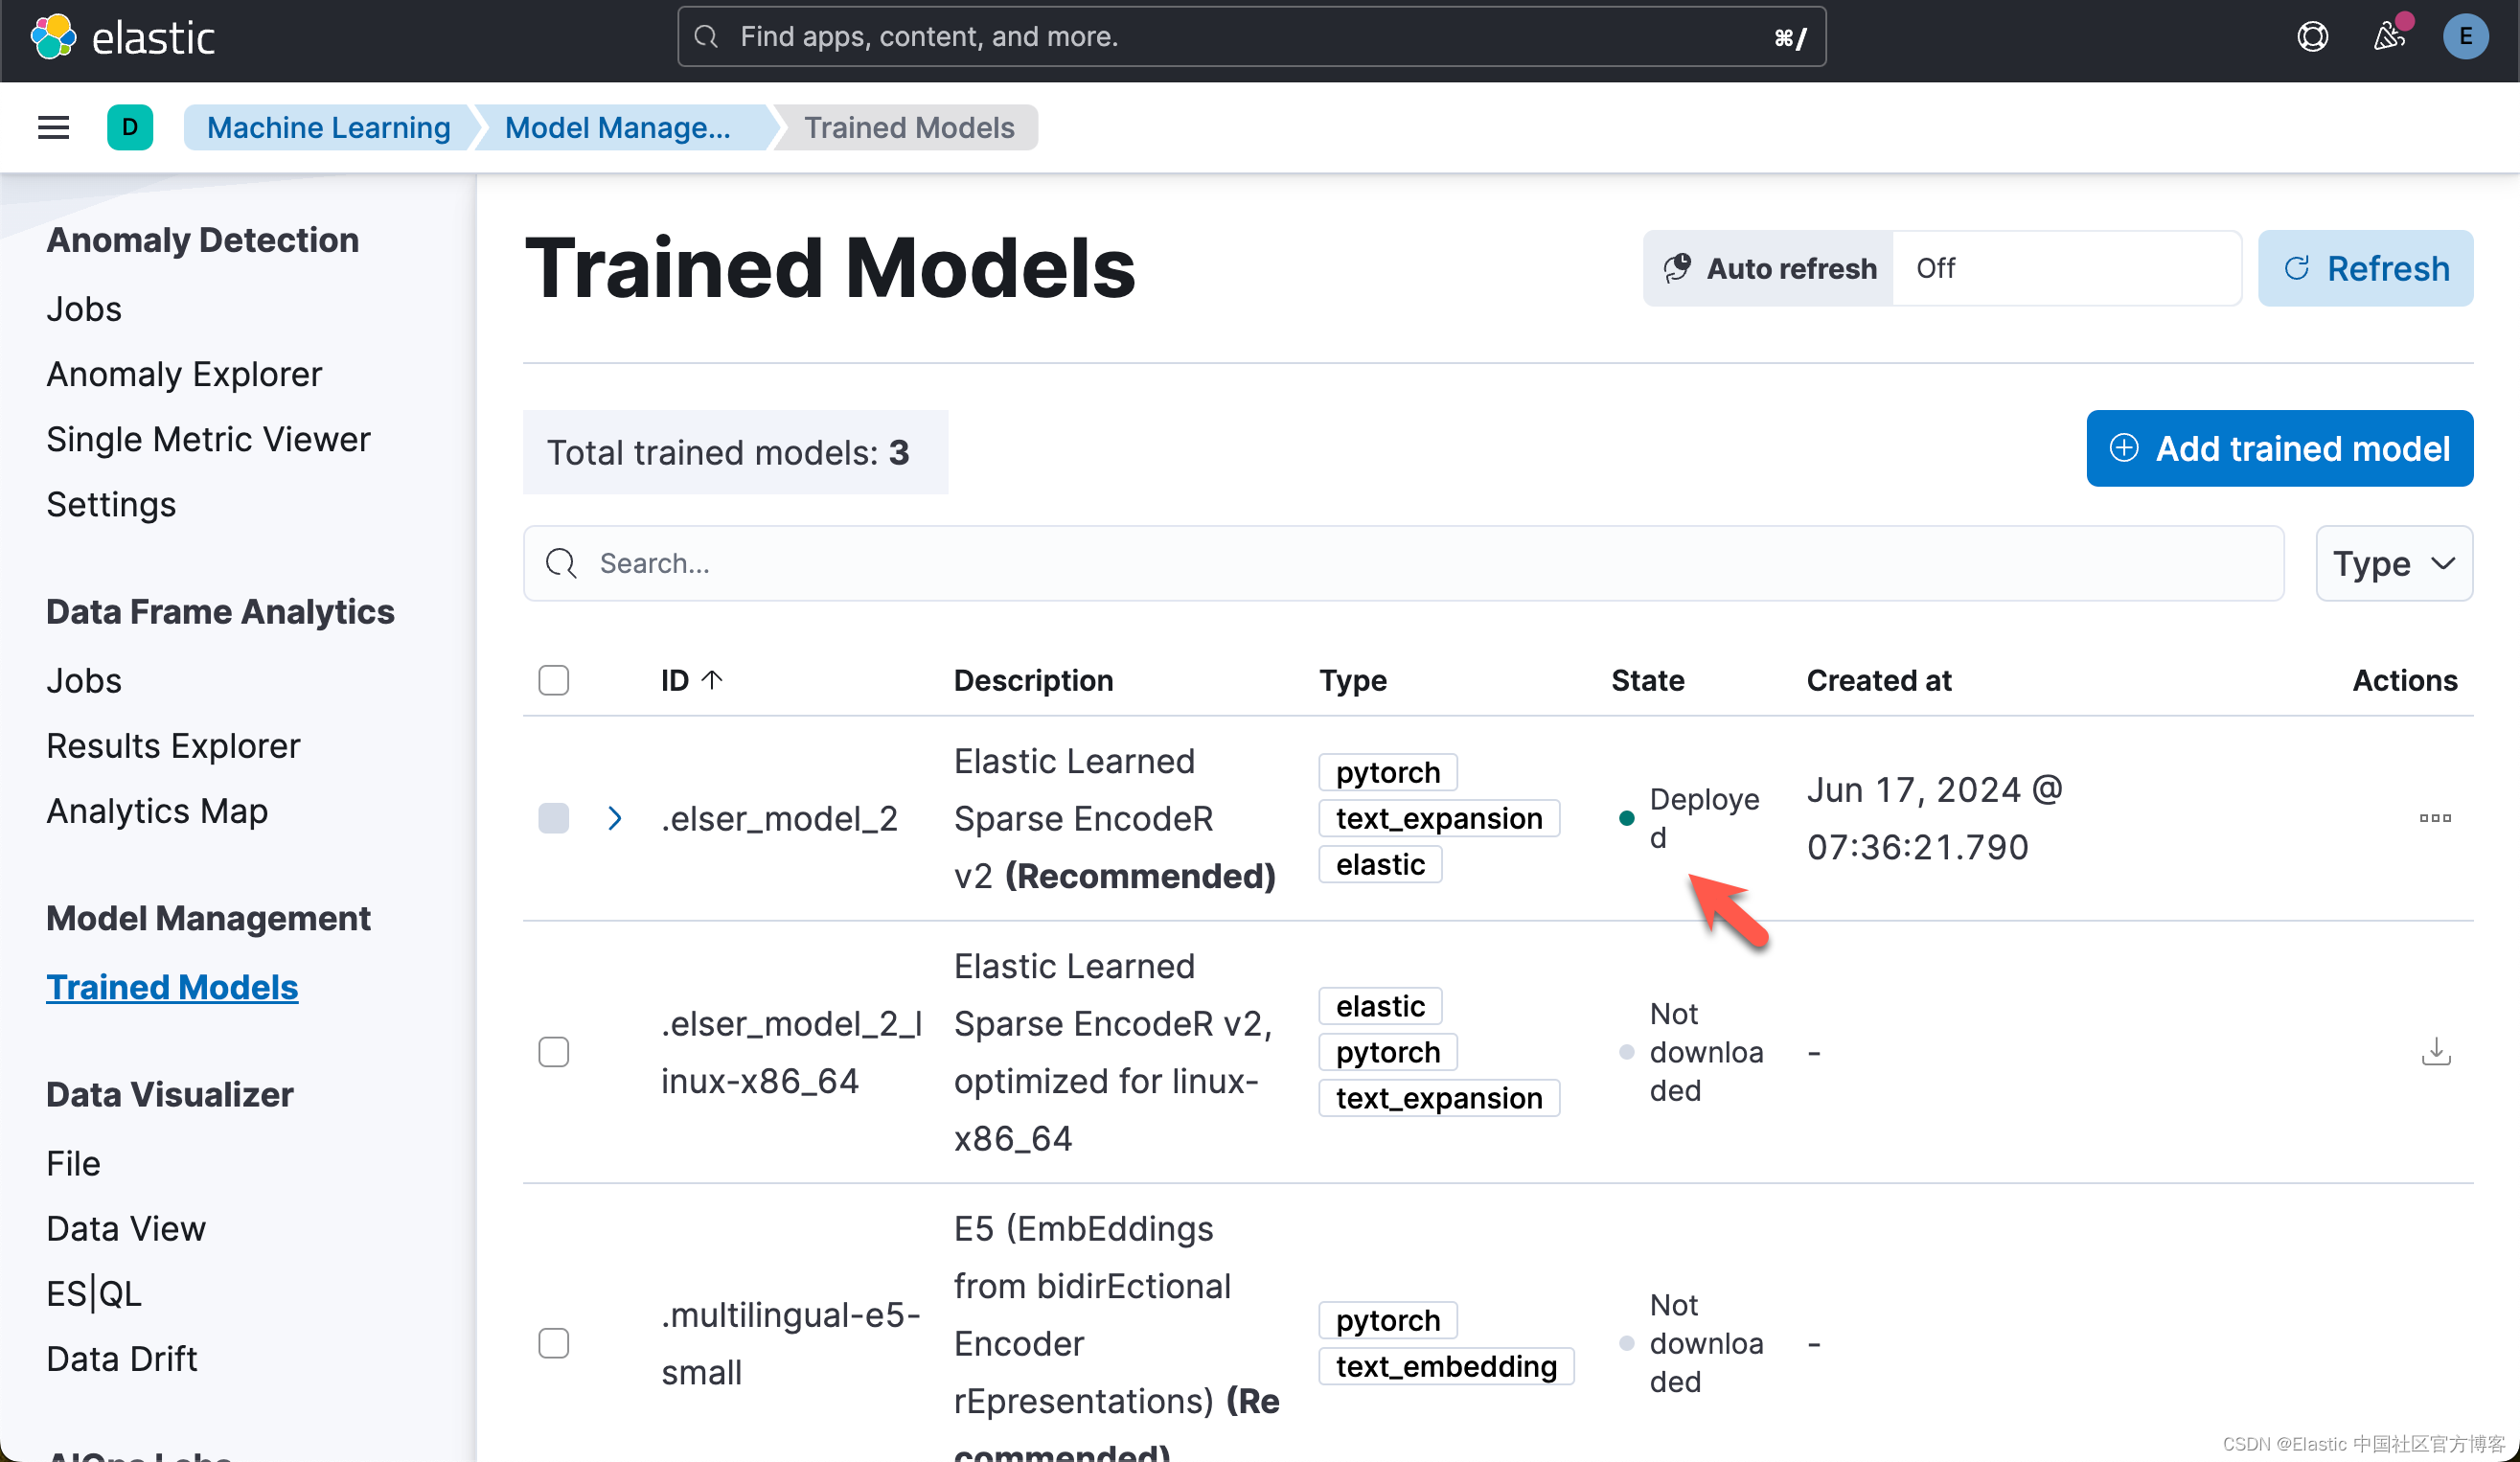
ELSER Model has been successfully deployed.一旦部署完毕,我们可以在 Kibana 中进行查看:
写入数据
import codecs
f = codecs.open("harry_potter.txt", "r", "utf-8")
harry_potter_book_text = f.read()
chapter_pattern = re.compile(r"CHAPTER [A-Z]+", re.IGNORECASE)
chapters = chapter_pattern.split(harry_potter_book_text)[1:]
chapter_titles = re.findall(chapter_pattern, harry_potter_book_text)
chapters_with_titles = list(zip(chapter_titles, chapters))
print("Total chapters found:", len(chapters))
if chapters_with_titles:
print("First chapter title:", chapters_with_titles[0][0])
print("Text sample from first chapter:", chapters_with_titles[0][1][:500])
# Structuring chapters into a DataFrame
df = pd.DataFrame(chapters_with_titles, columns=["chapter_title", "chapter_full_text"])
df["chapter"] = df.index + 1
df["book_title"] = "Harry Potter and the Sorcerer’s Stone"
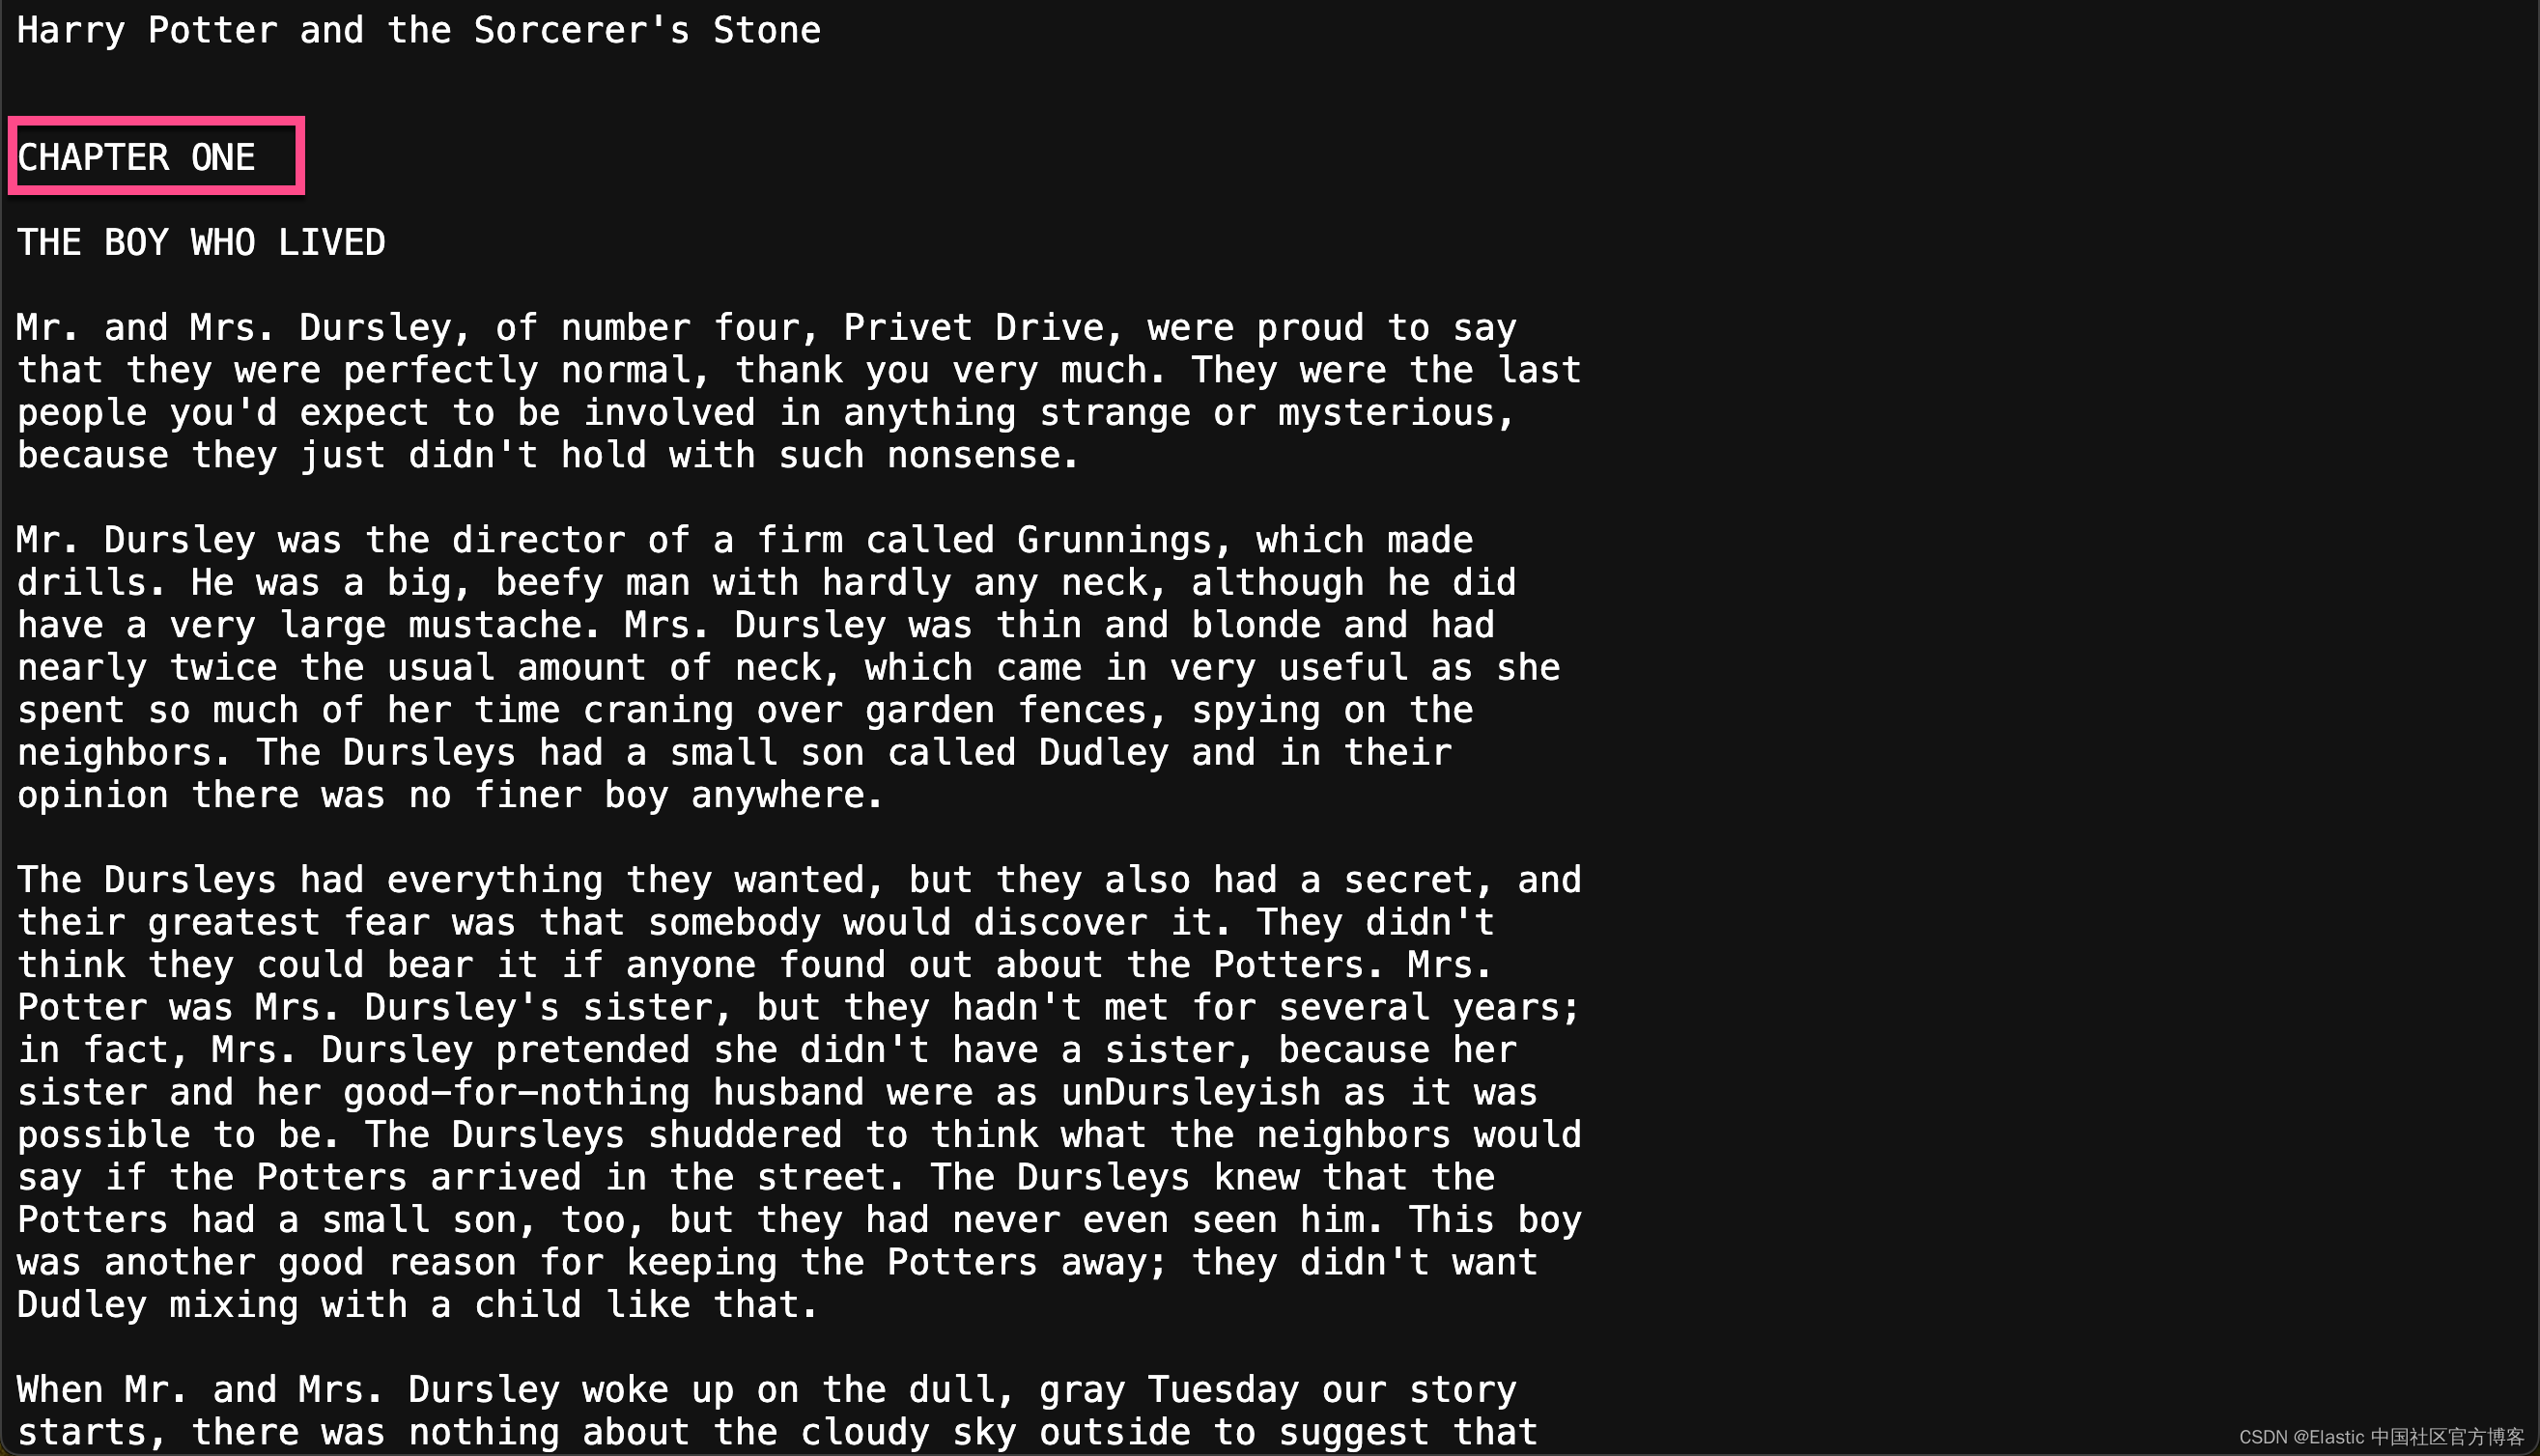
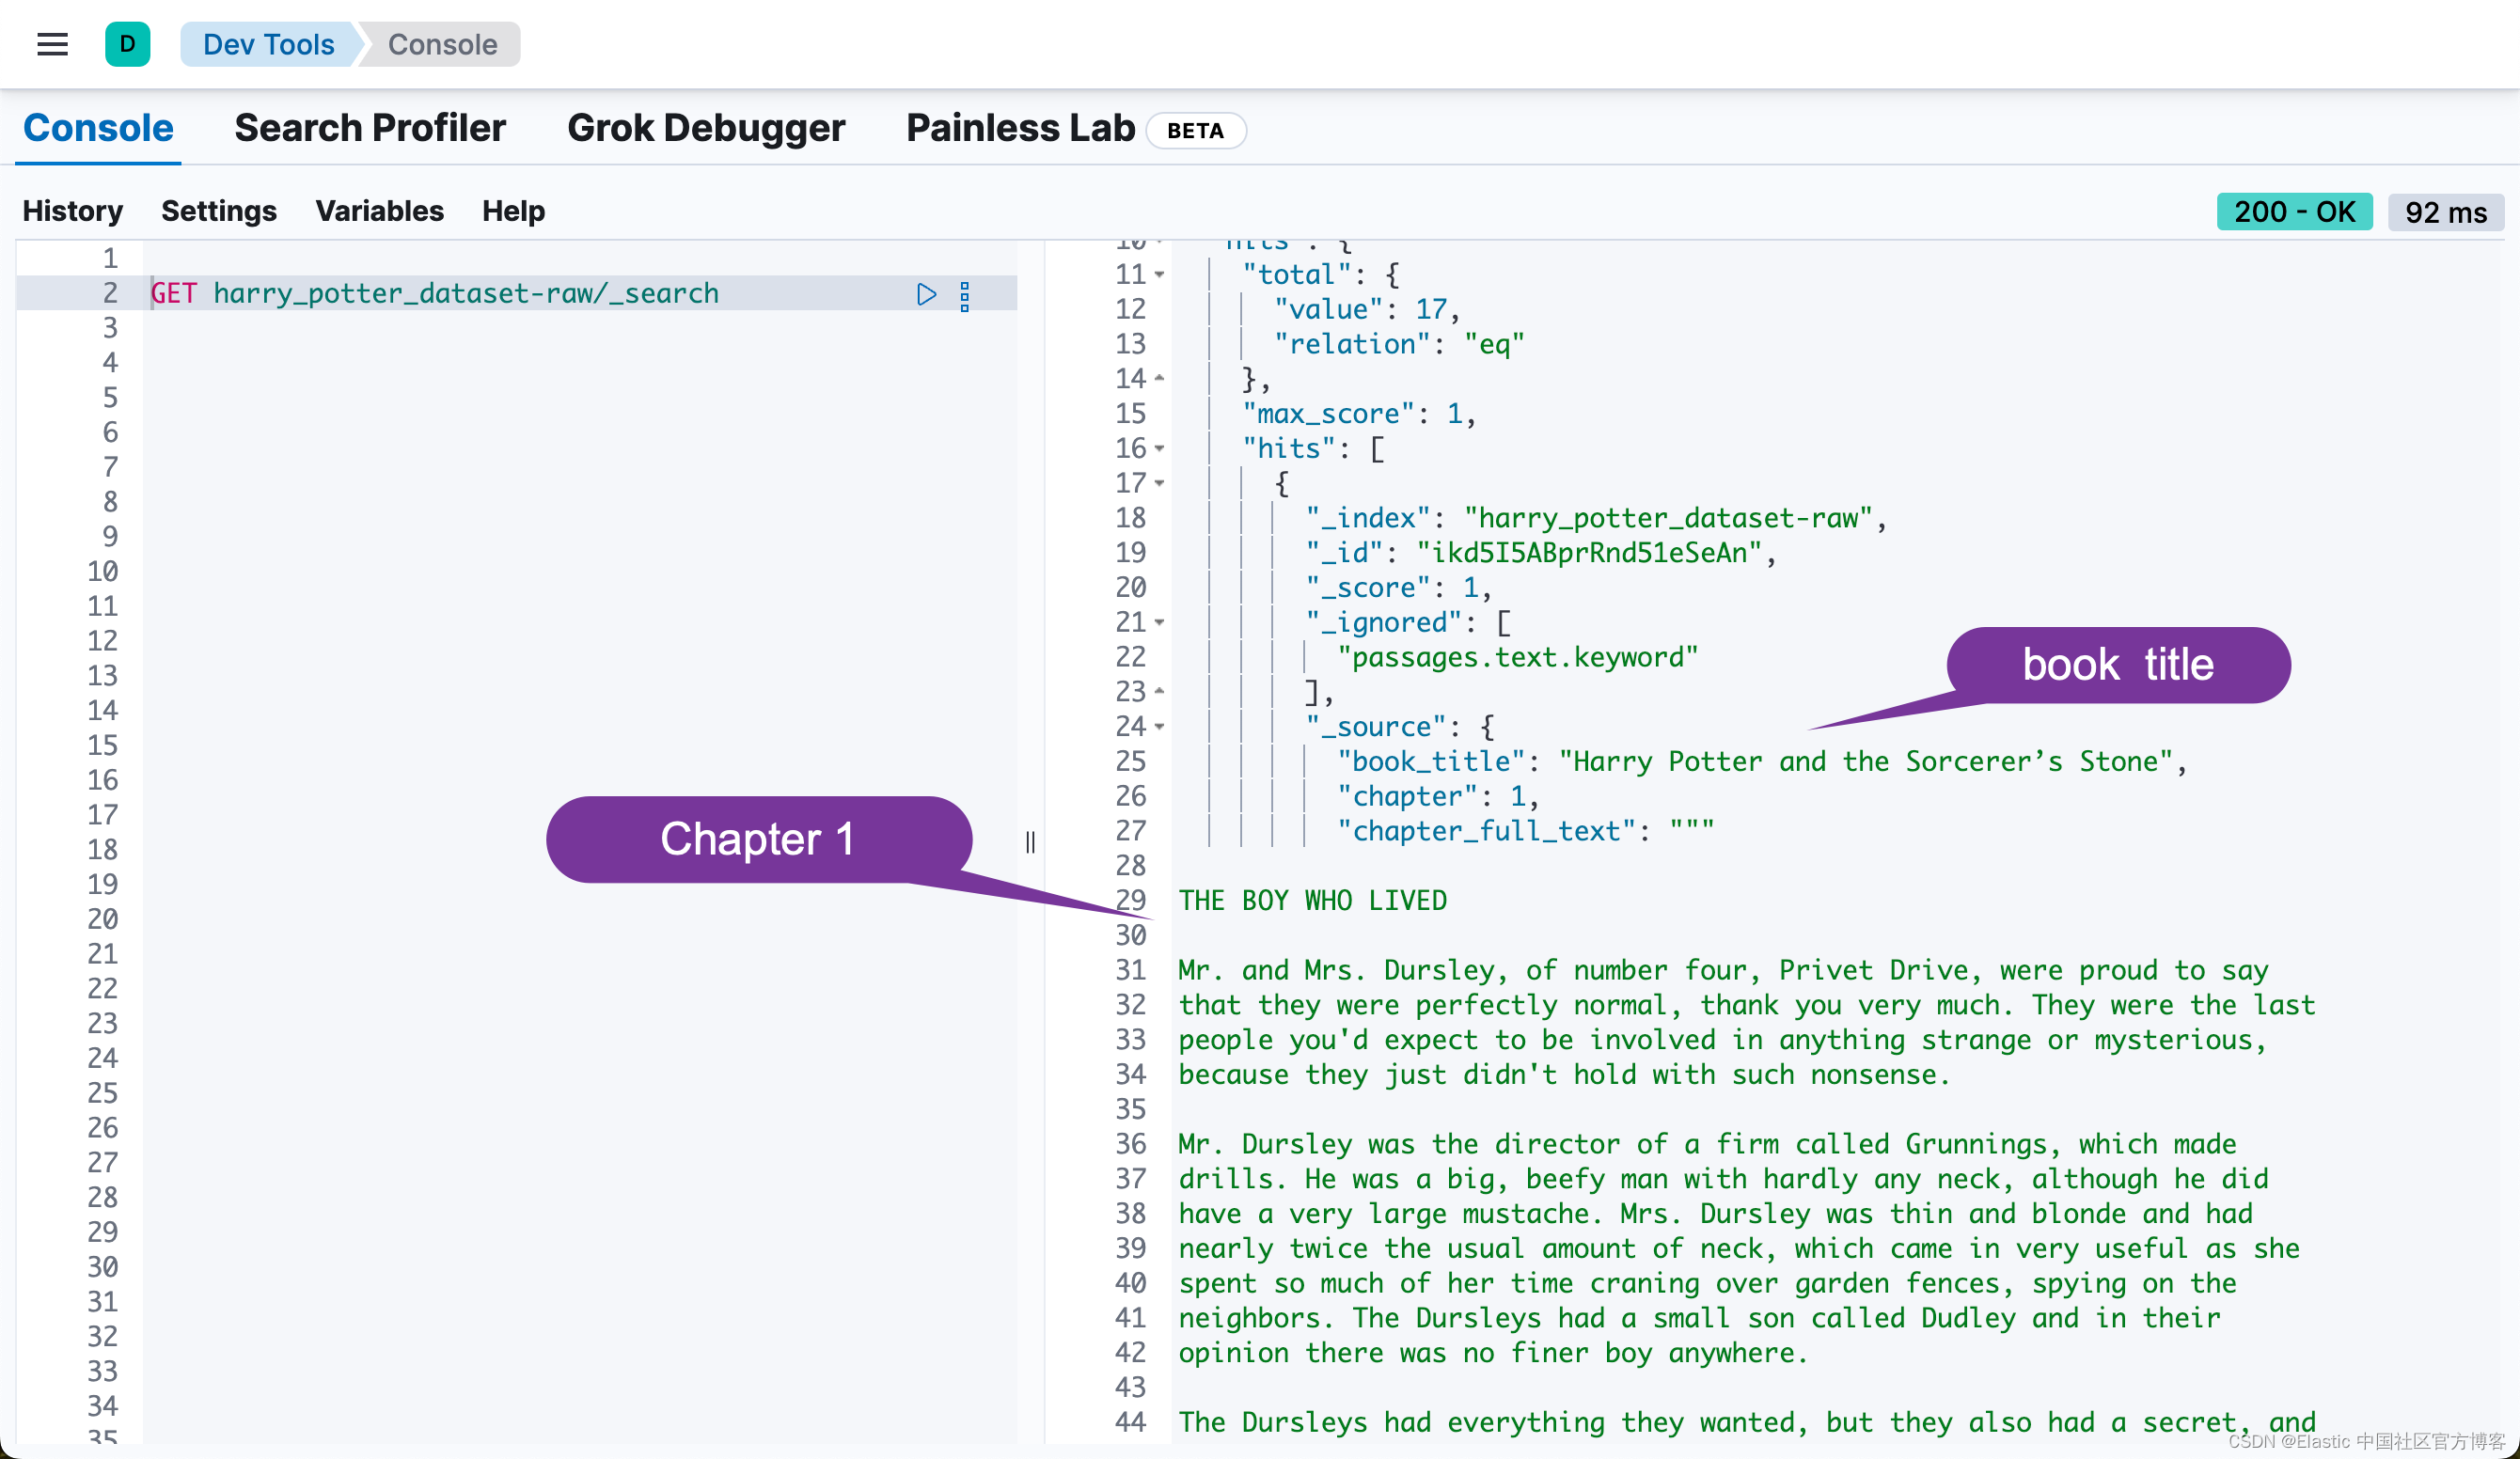
df["passages"] = df["chapter_full_text"].apply(lambda text: chunk(text))Total chapters found: 17
First chapter title: CHAPTER ONE
Text sample from first chapter:
THE BOY WHO LIVED
Mr. and Mrs. Dursley, of number four, Privet Drive, were proud to say
that they were perfectly normal, thank you very much. They were the last
people you'd expect to be involved in anything strange or mysterious,
because they just didn't hold with such nonsense.
Mr. Dursley was the director of a firm called Grunnings, which made
drills. He was a big, beefy man with hardly any neck, although he did
have a very large mustache. Mrs. Dursley was thin and blonde and had
nearly t上面的代码把文章按照每个 chapter 来进行拆分:

然后,我们通过如下的代码,把每个 chapter 写入到 Elasticsearch 中:
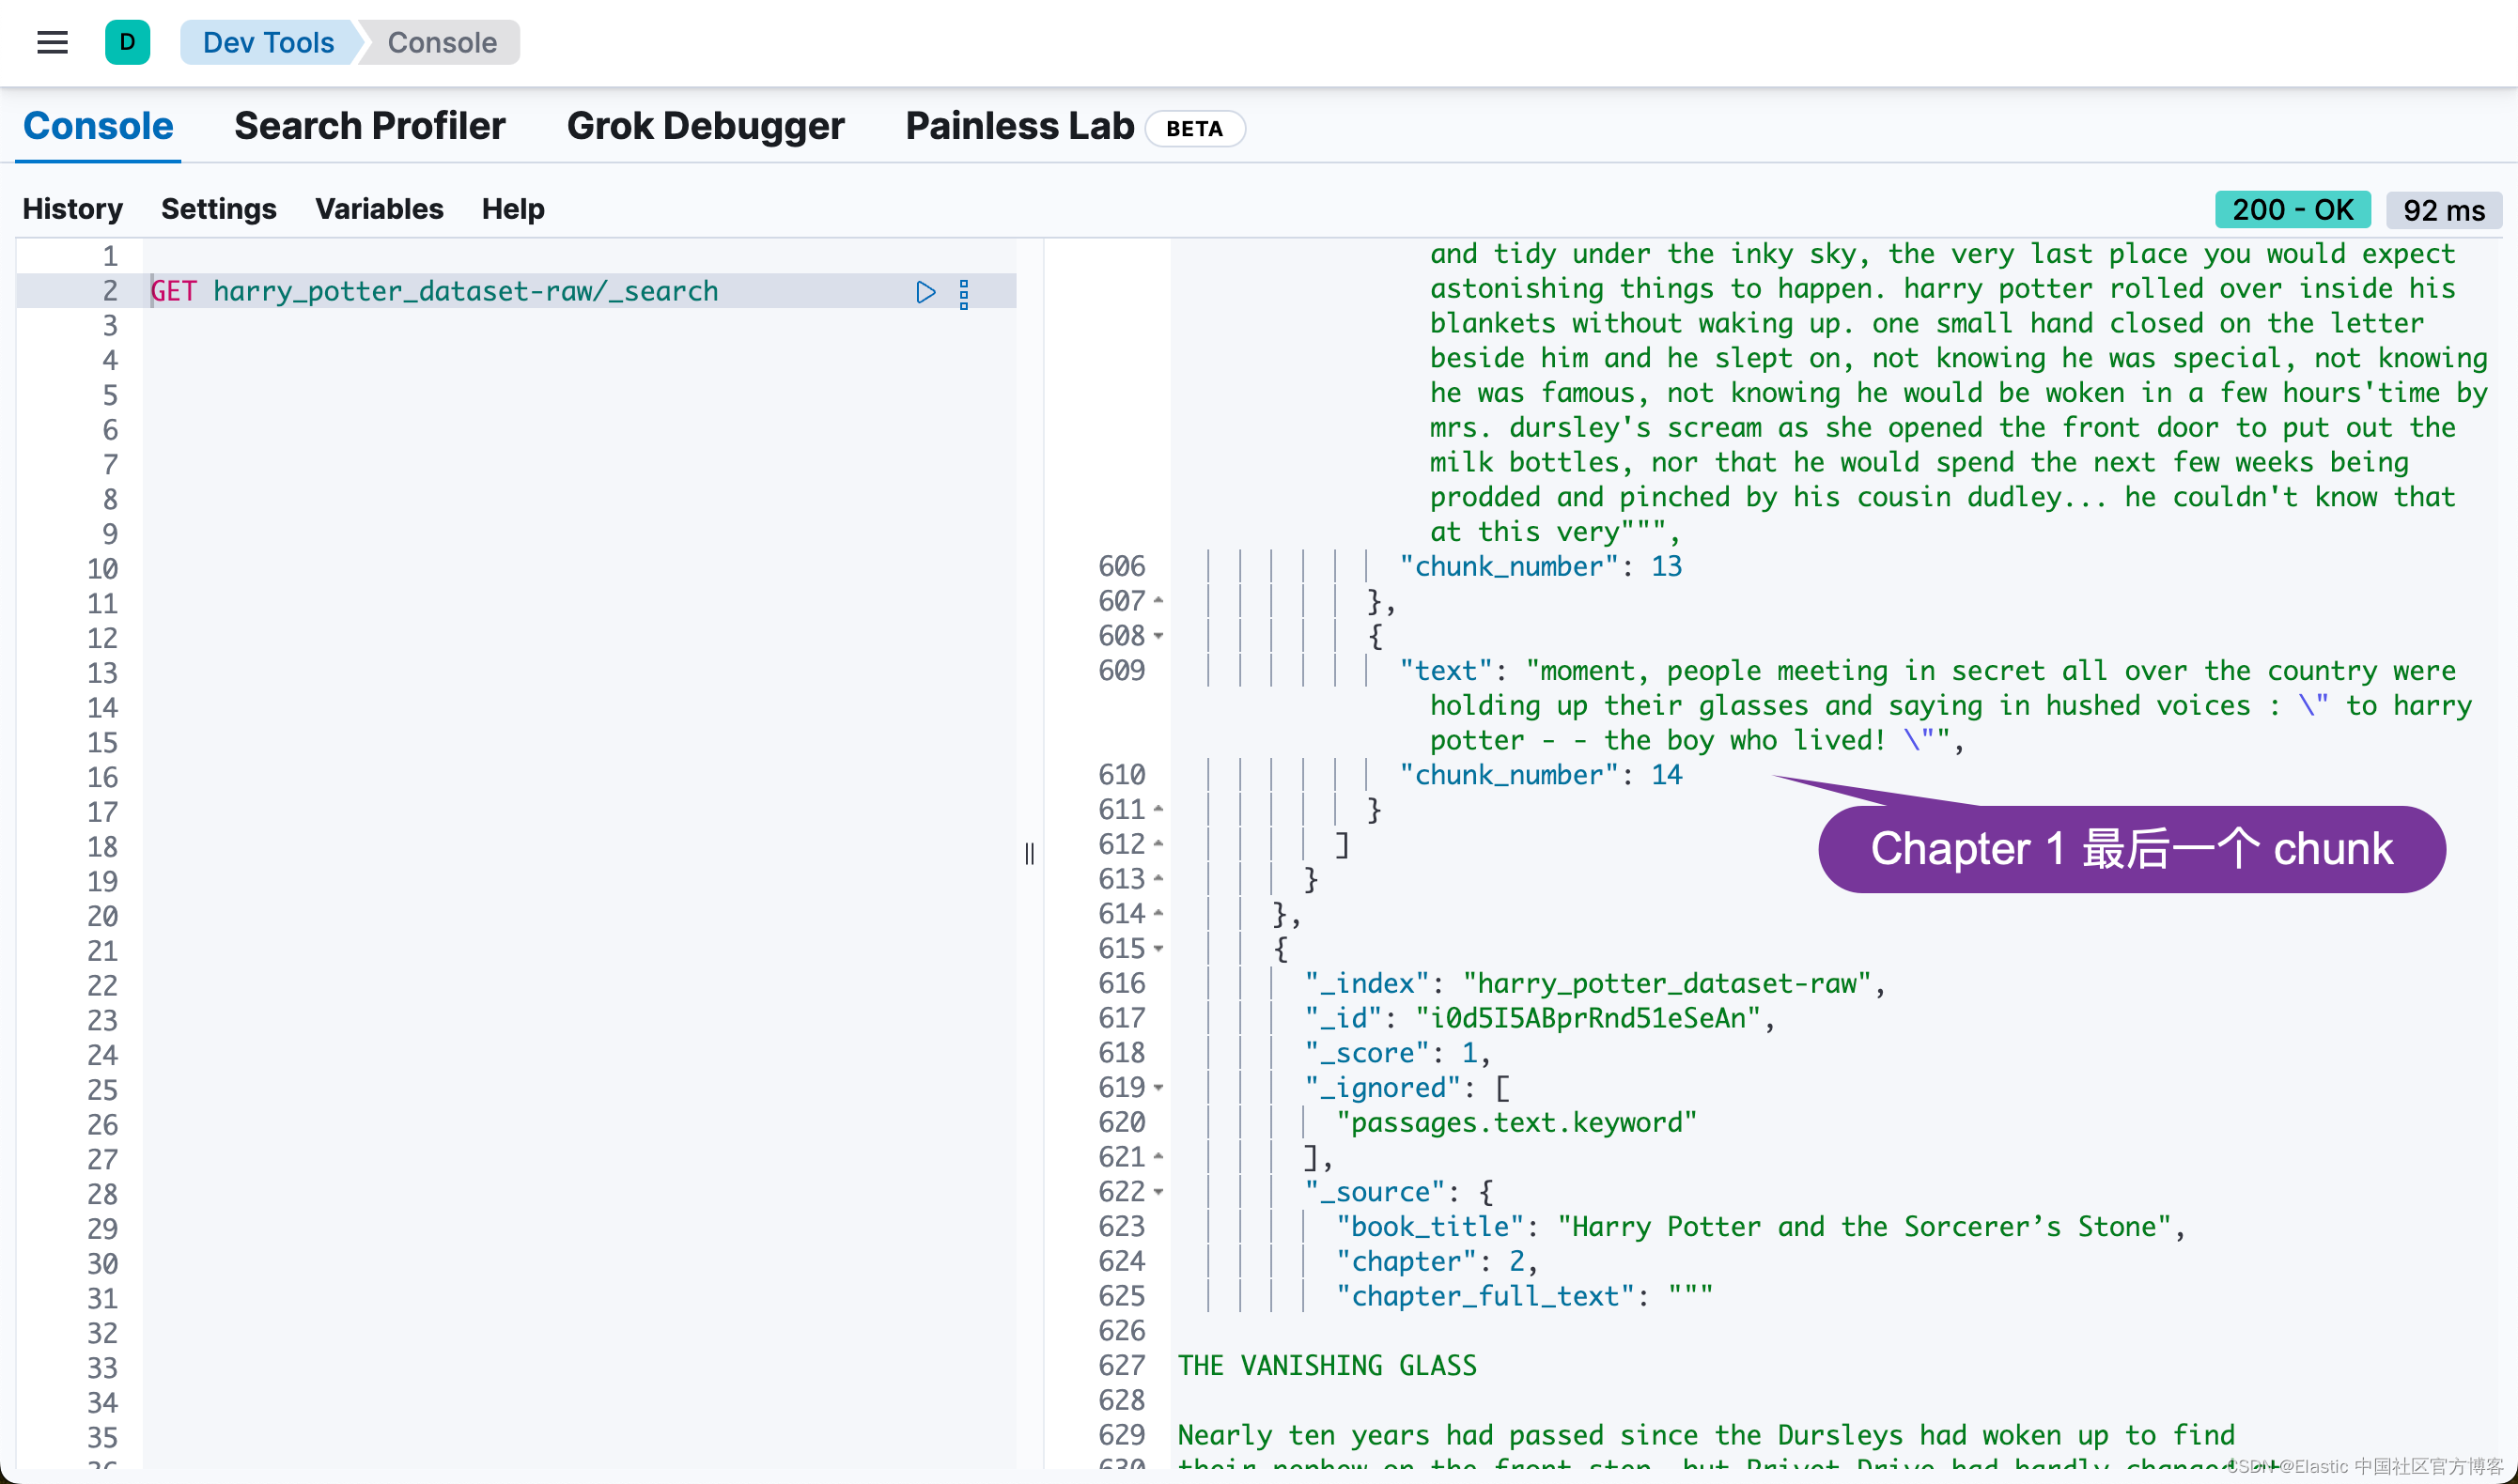
ndex_dataframe(esclient, raw_source_index, df)Indexing documents to harry_potter_dataset-raw...
Successfully indexed 17 documents.
Failed to index 0 documents.我们可以在 Kibana 中进行查看:
Elasticsearch 中的异步重新索引
此部分启动异步重新索引操作,将数据从原始源索引传输到 Elasticsearch 中的丰富索引。此过程在后台运行,允许其他操作继续进行而无需等待完成。
关键步骤:
- 启动重新索引:从 raw_source_index 到 index_name 触发重新索引操作,将 wait_for_completion 设置为 False 以允许异步执行。
- 检索任务 ID:捕获并打印重新索引操作的任务 ID 以用于监控目的。
- 监控进度:check_task_status 函数持续检查重新索引任务的状态,每 10 秒提供一次更新,直到操作完成。
# Start the reindex operation asynchronously
response = esclient.reindex(
    body={"source": {"index": raw_source_index}, "dest": {"index": index_name}},
    wait_for_completion=False,
)
task_id = response["task"]
print("Task ID:", task_id)
check_task_status(esclient, task_id)
在上面 reindex 的过程中,它讲自动调用 index_name 所定义的 default_pipeline。这个在上面的代码中所定义:
index_settings = {
    "settings": {
        "number_of_shards": 2,
        "number_of_replicas": 0,
        "default_pipeline": "books_dataset_chunker",
    },
    "mappings": {
        "dynamic": "false",
        "properties": {
            "book_title": {"type": "keyword"},
            "chapter": {"type": "keyword"},
            "chapter_full_text": {"type": "text", "index": False},
            "passages": {
                "type": "nested",
                "properties": {
                    "content_embedding": {
                        "properties": {
                            "is_truncated": {"type": "boolean"},
                            "model_id": {
                                "type": "text",
                                "fields": {
                                    "keyword": {"type": "keyword", "ignore_above": 256}
                                },
                            },
                            "predicted_value": {"type": "sparse_vector"},
                        }
                    },
请注意上面的 default_pipeline。这个在 reindex 时,会自动调用。这个 pipeline 的定义是在 pipeline_body 中所定义的:
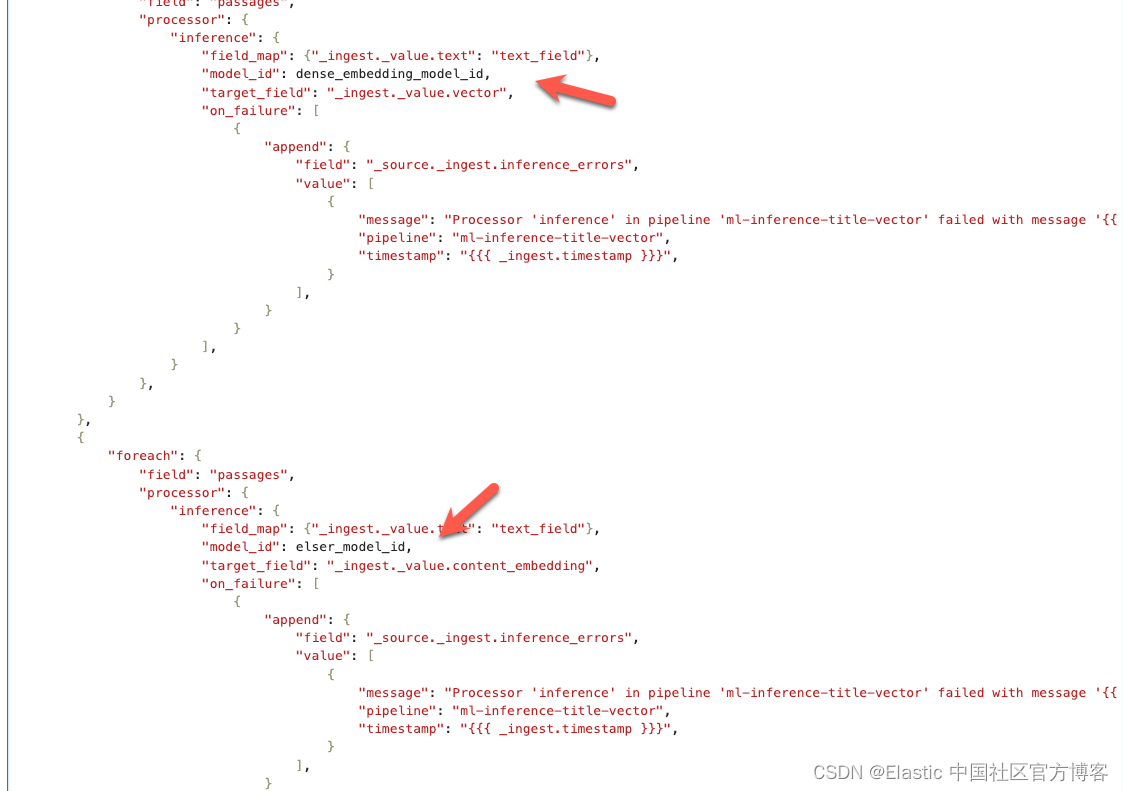
# Define the ingest pipeline configuration
pipeline_body = {
"description": "Pipeline for processing book passages",
"processors": [
{
"foreach": {
"field": "passages",
"processor": {
"inference": {
"field_map": {"_ingest._value.text": "text_field"},
"model_id": dense_embedding_model_id,
"target_field": "_ingest._value.vector",
"on_failure": [
{
"append": {
"field": "_source._ingest.inference_errors",
"value": [
{
"message": "Processor 'inference' in pipeline 'ml-inference-title-vector' failed with message '{{ _ingest.on_failure_message }}'",
"pipeline": "ml-inference-title-vector",
"timestamp": "{{{ _ingest.timestamp }}}",
}
],
}
}
],
}
},
}
},
{
"foreach": {
"field": "passages",
"processor": {
"inference": {
"field_map": {"_ingest._value.text": "text_field"},
"model_id": elser_model_id,
"target_field": "_ingest._value.content_embedding",
"on_failure": [
{
"append": {
"field": "_source._ingest.inference_errors",
"value": [
{
"message": "Processor 'inference' in pipeline 'ml-inference-title-vector' failed with message '{{ _ingest.on_failure_message }}'",
"pipeline": "ml-inference-title-vector",
"timestamp": "{{{ _ingest.timestamp }}}",
}
],
}
}
],
}
},
}
},
],
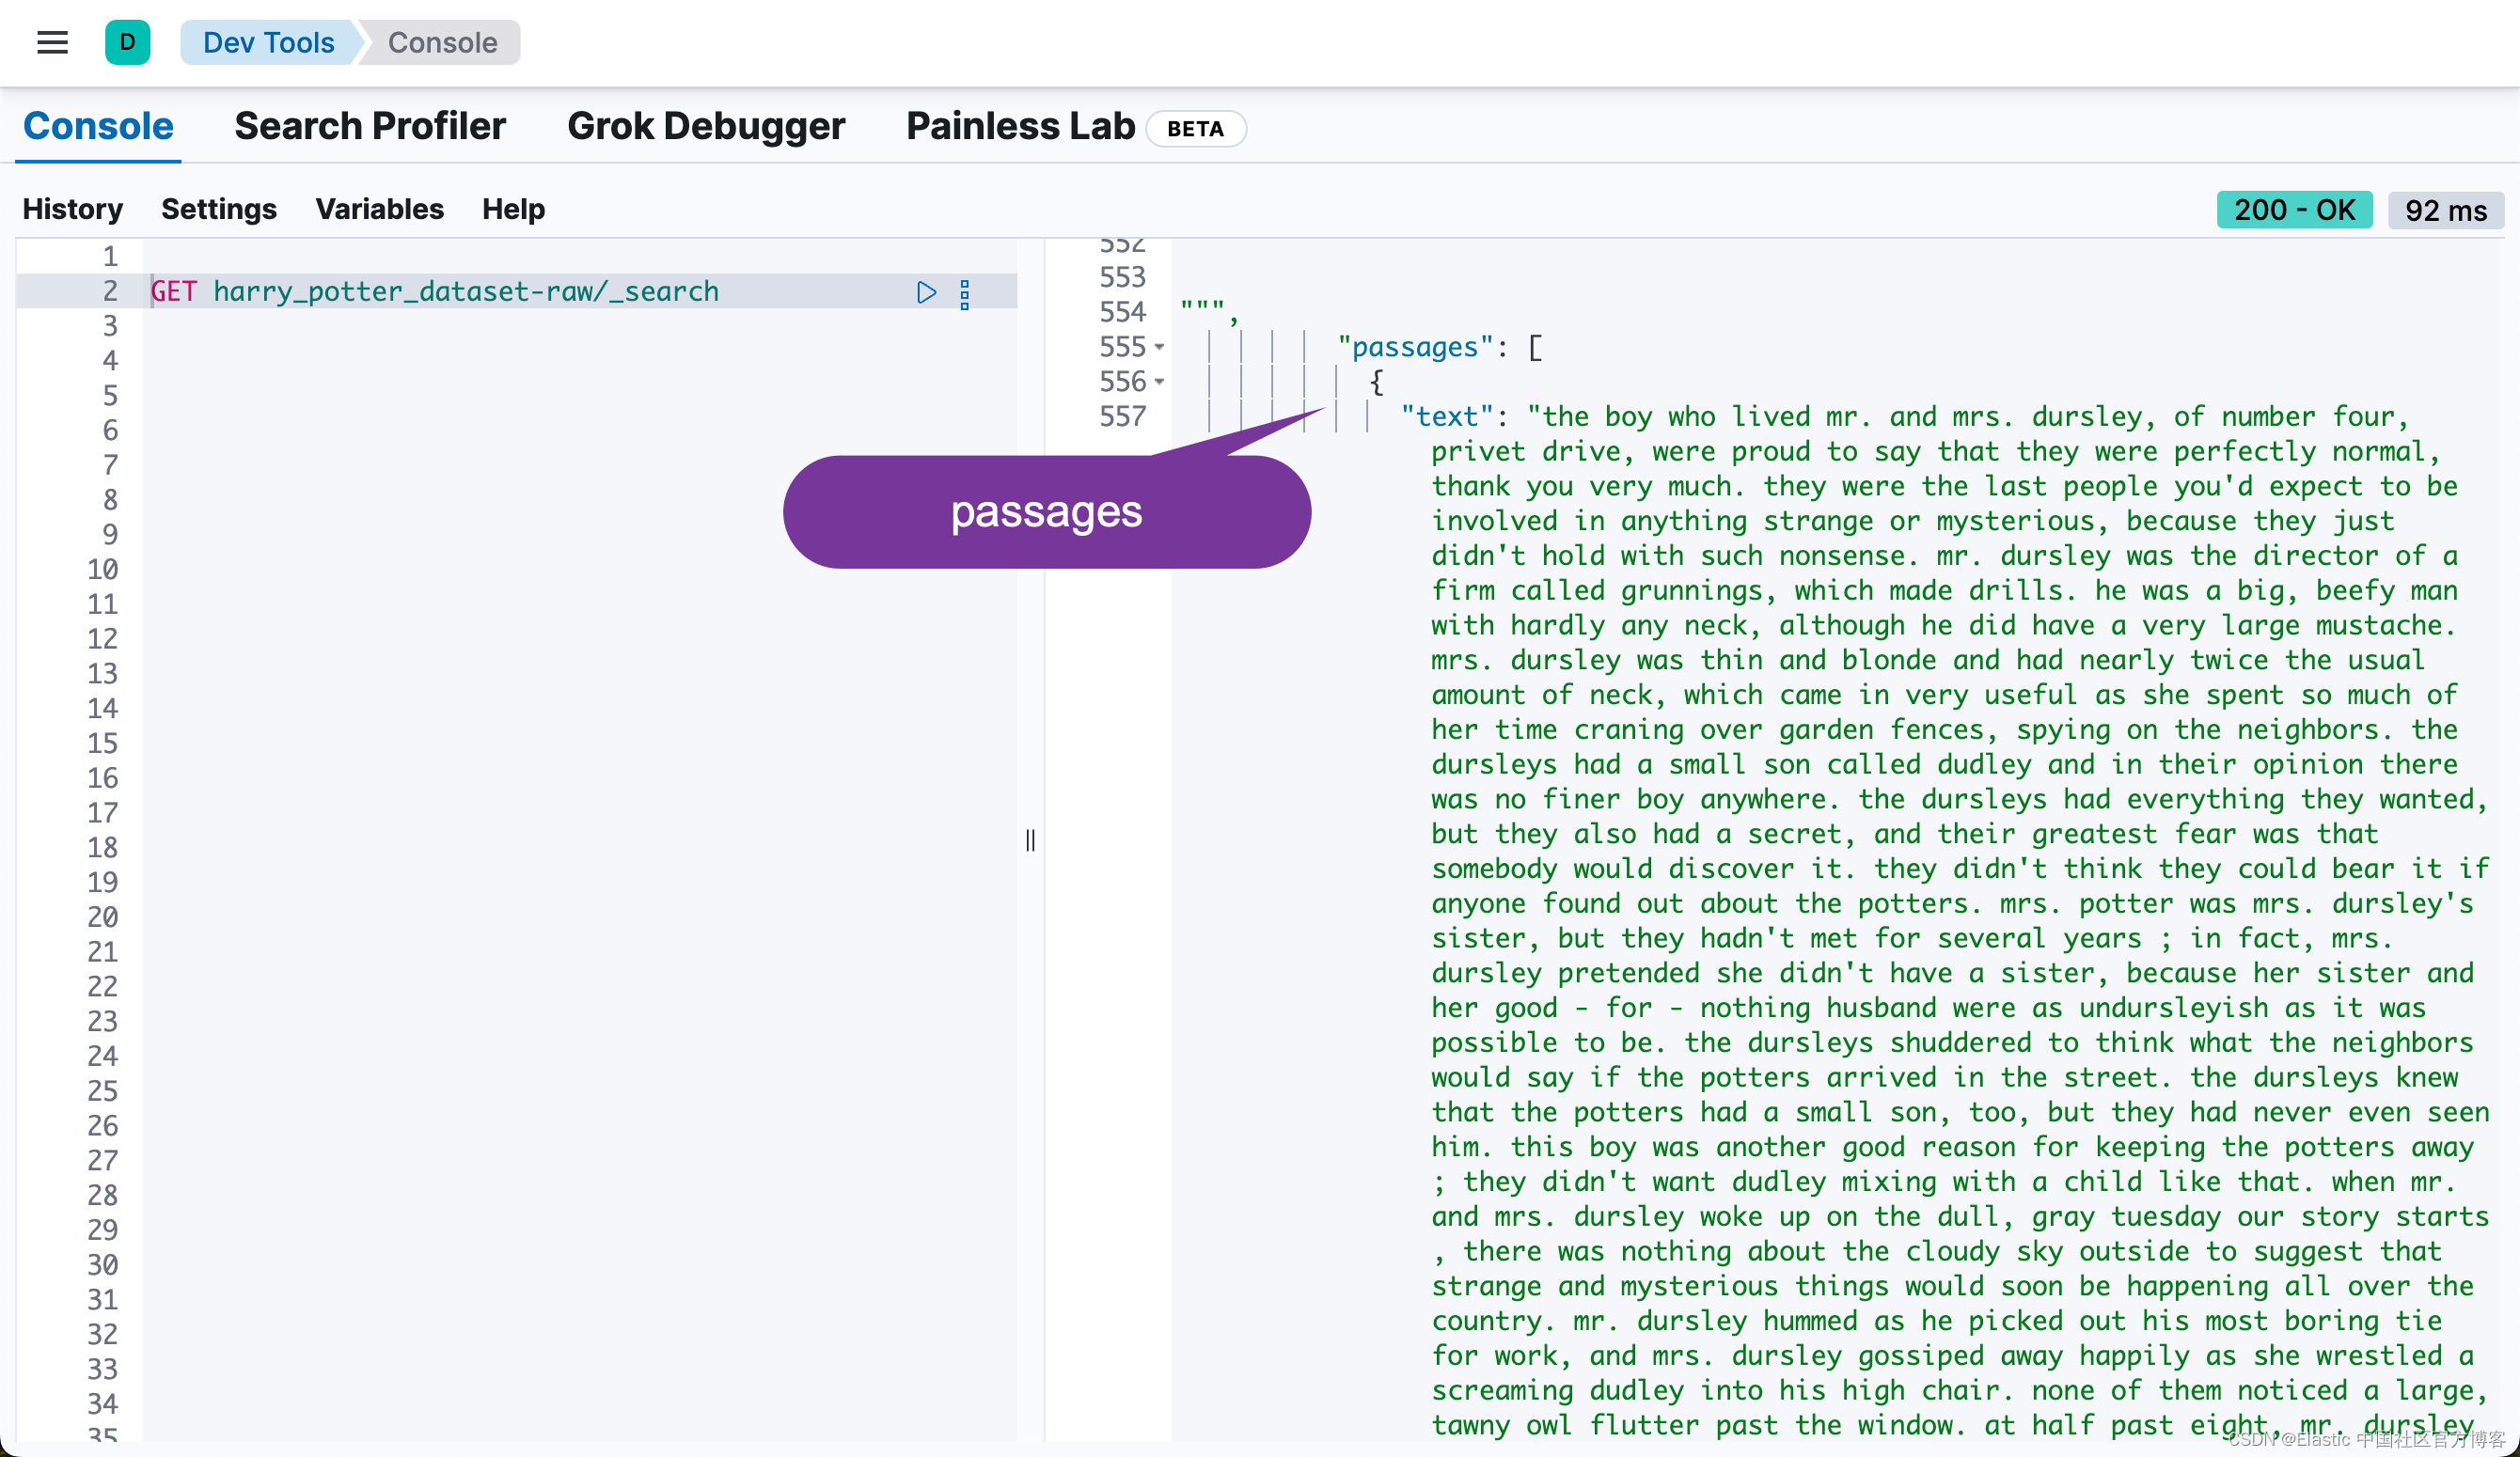
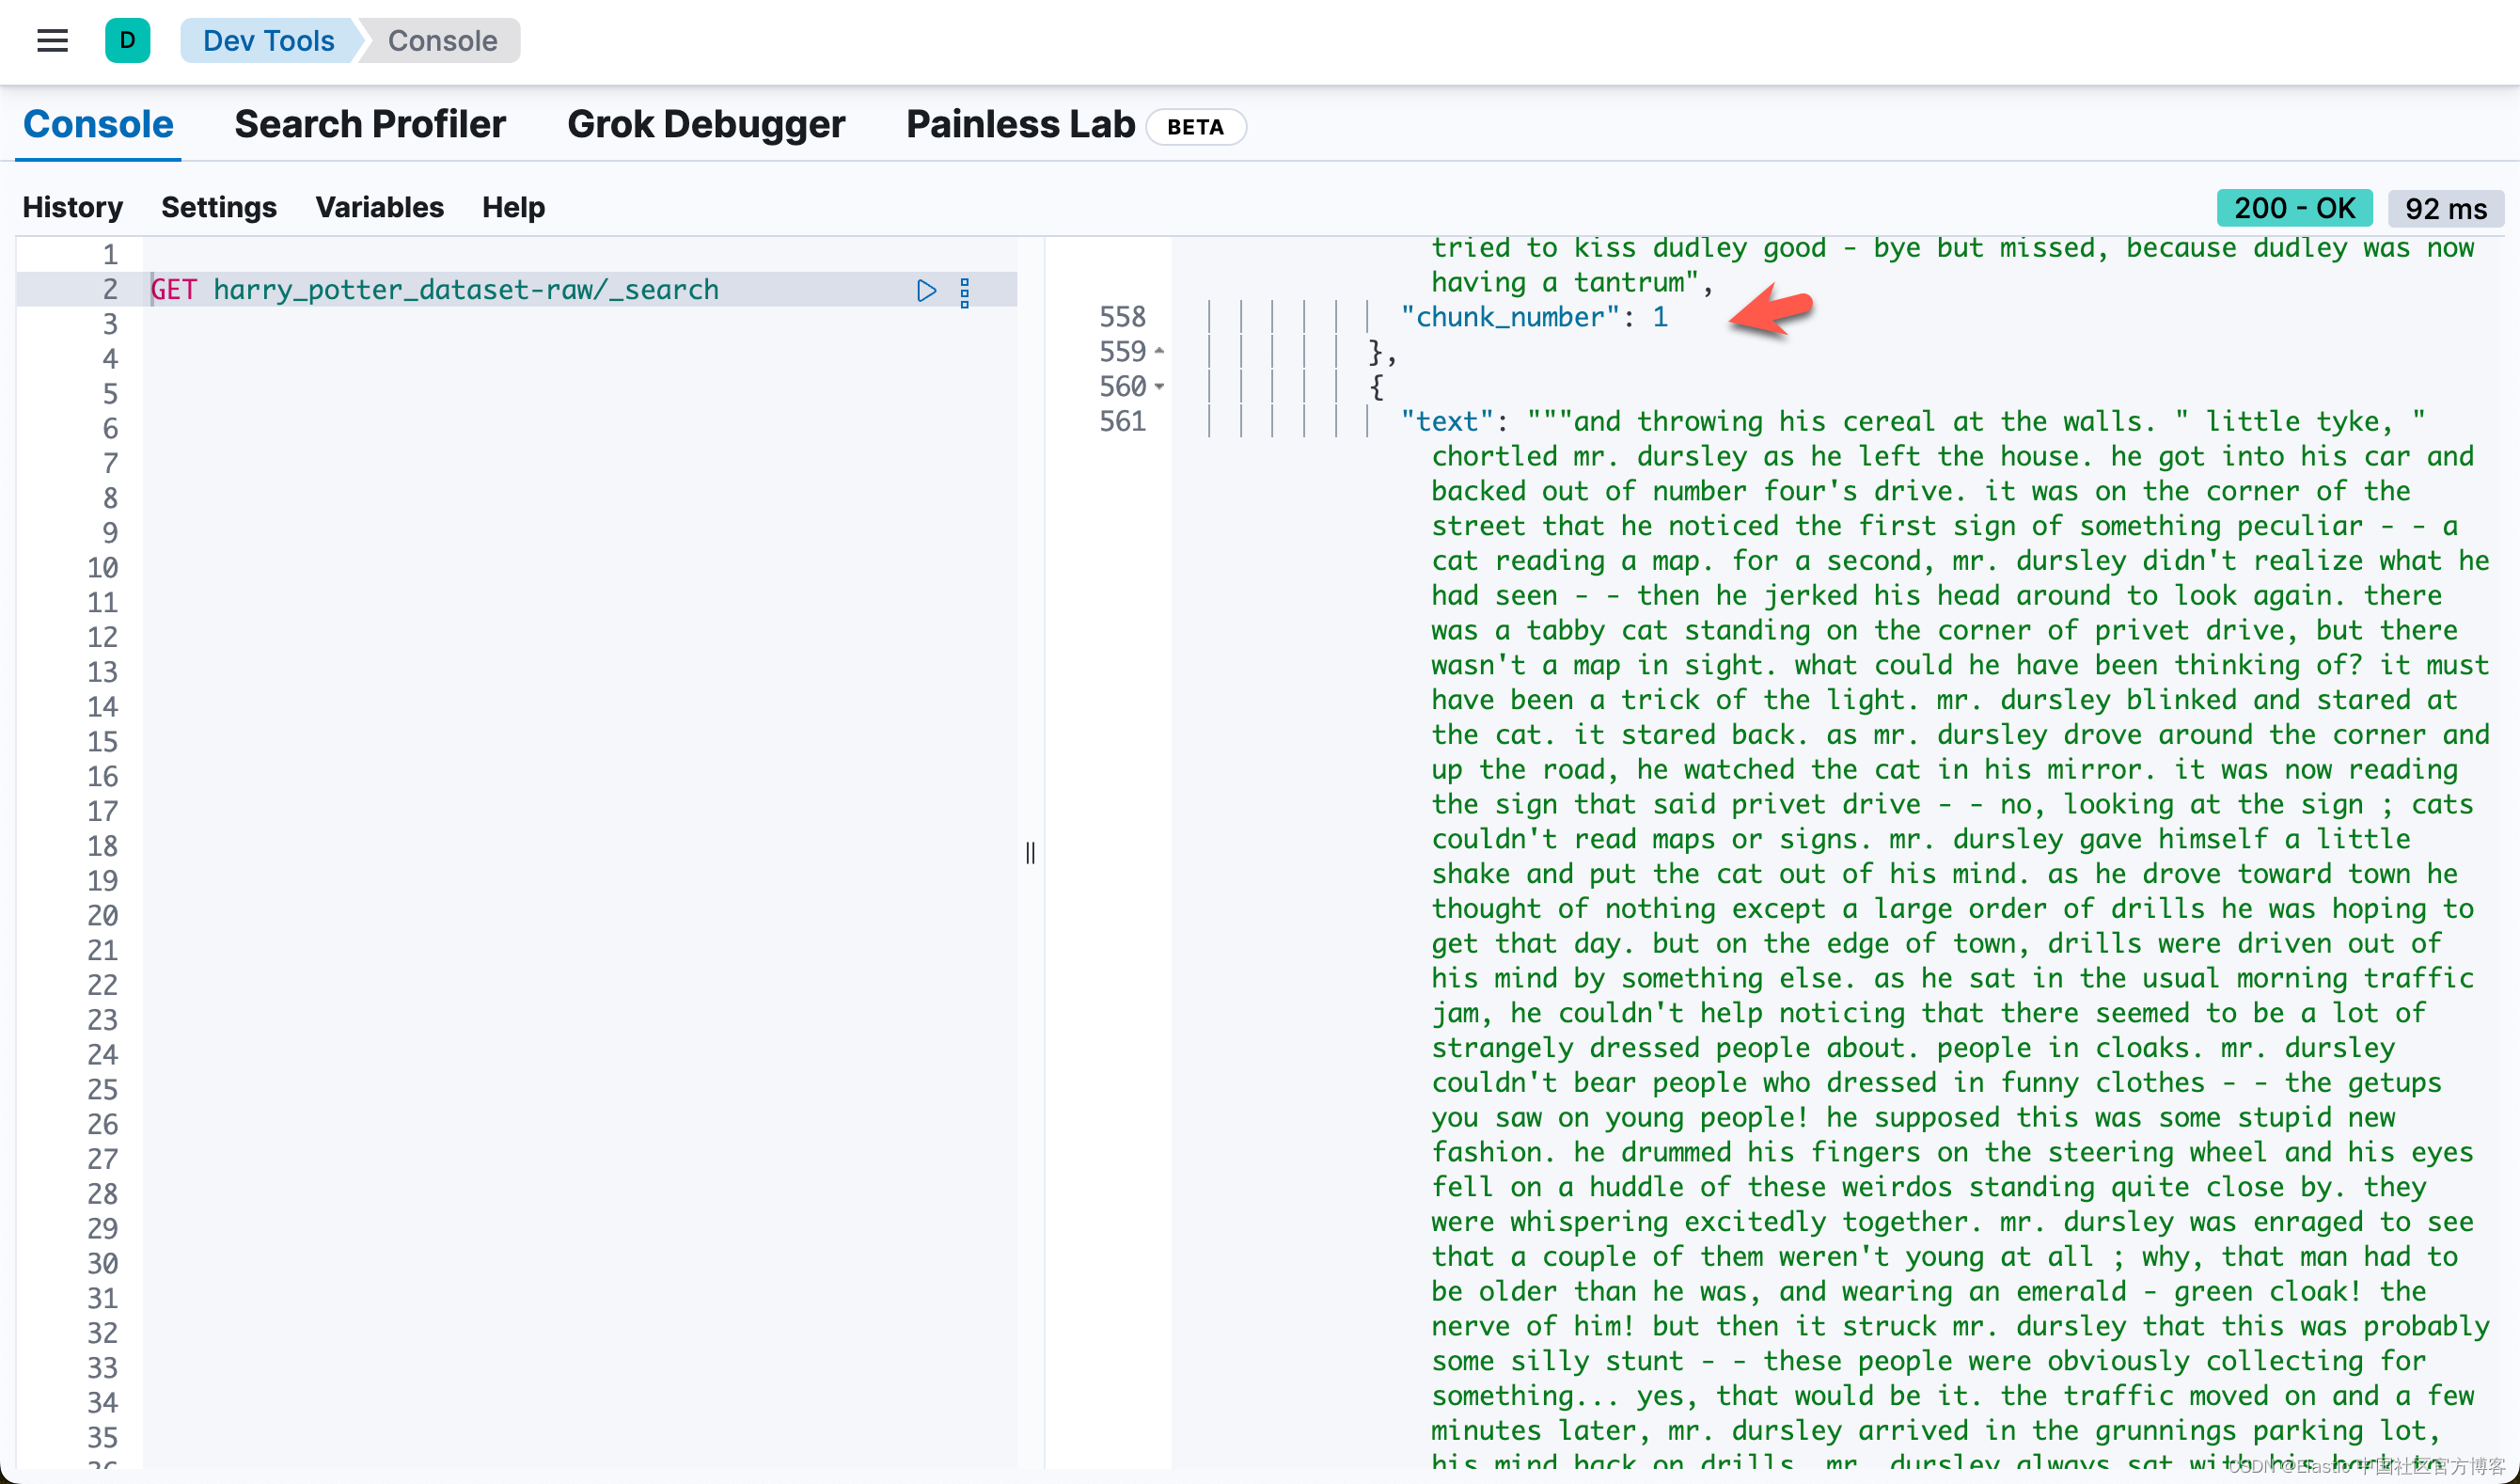
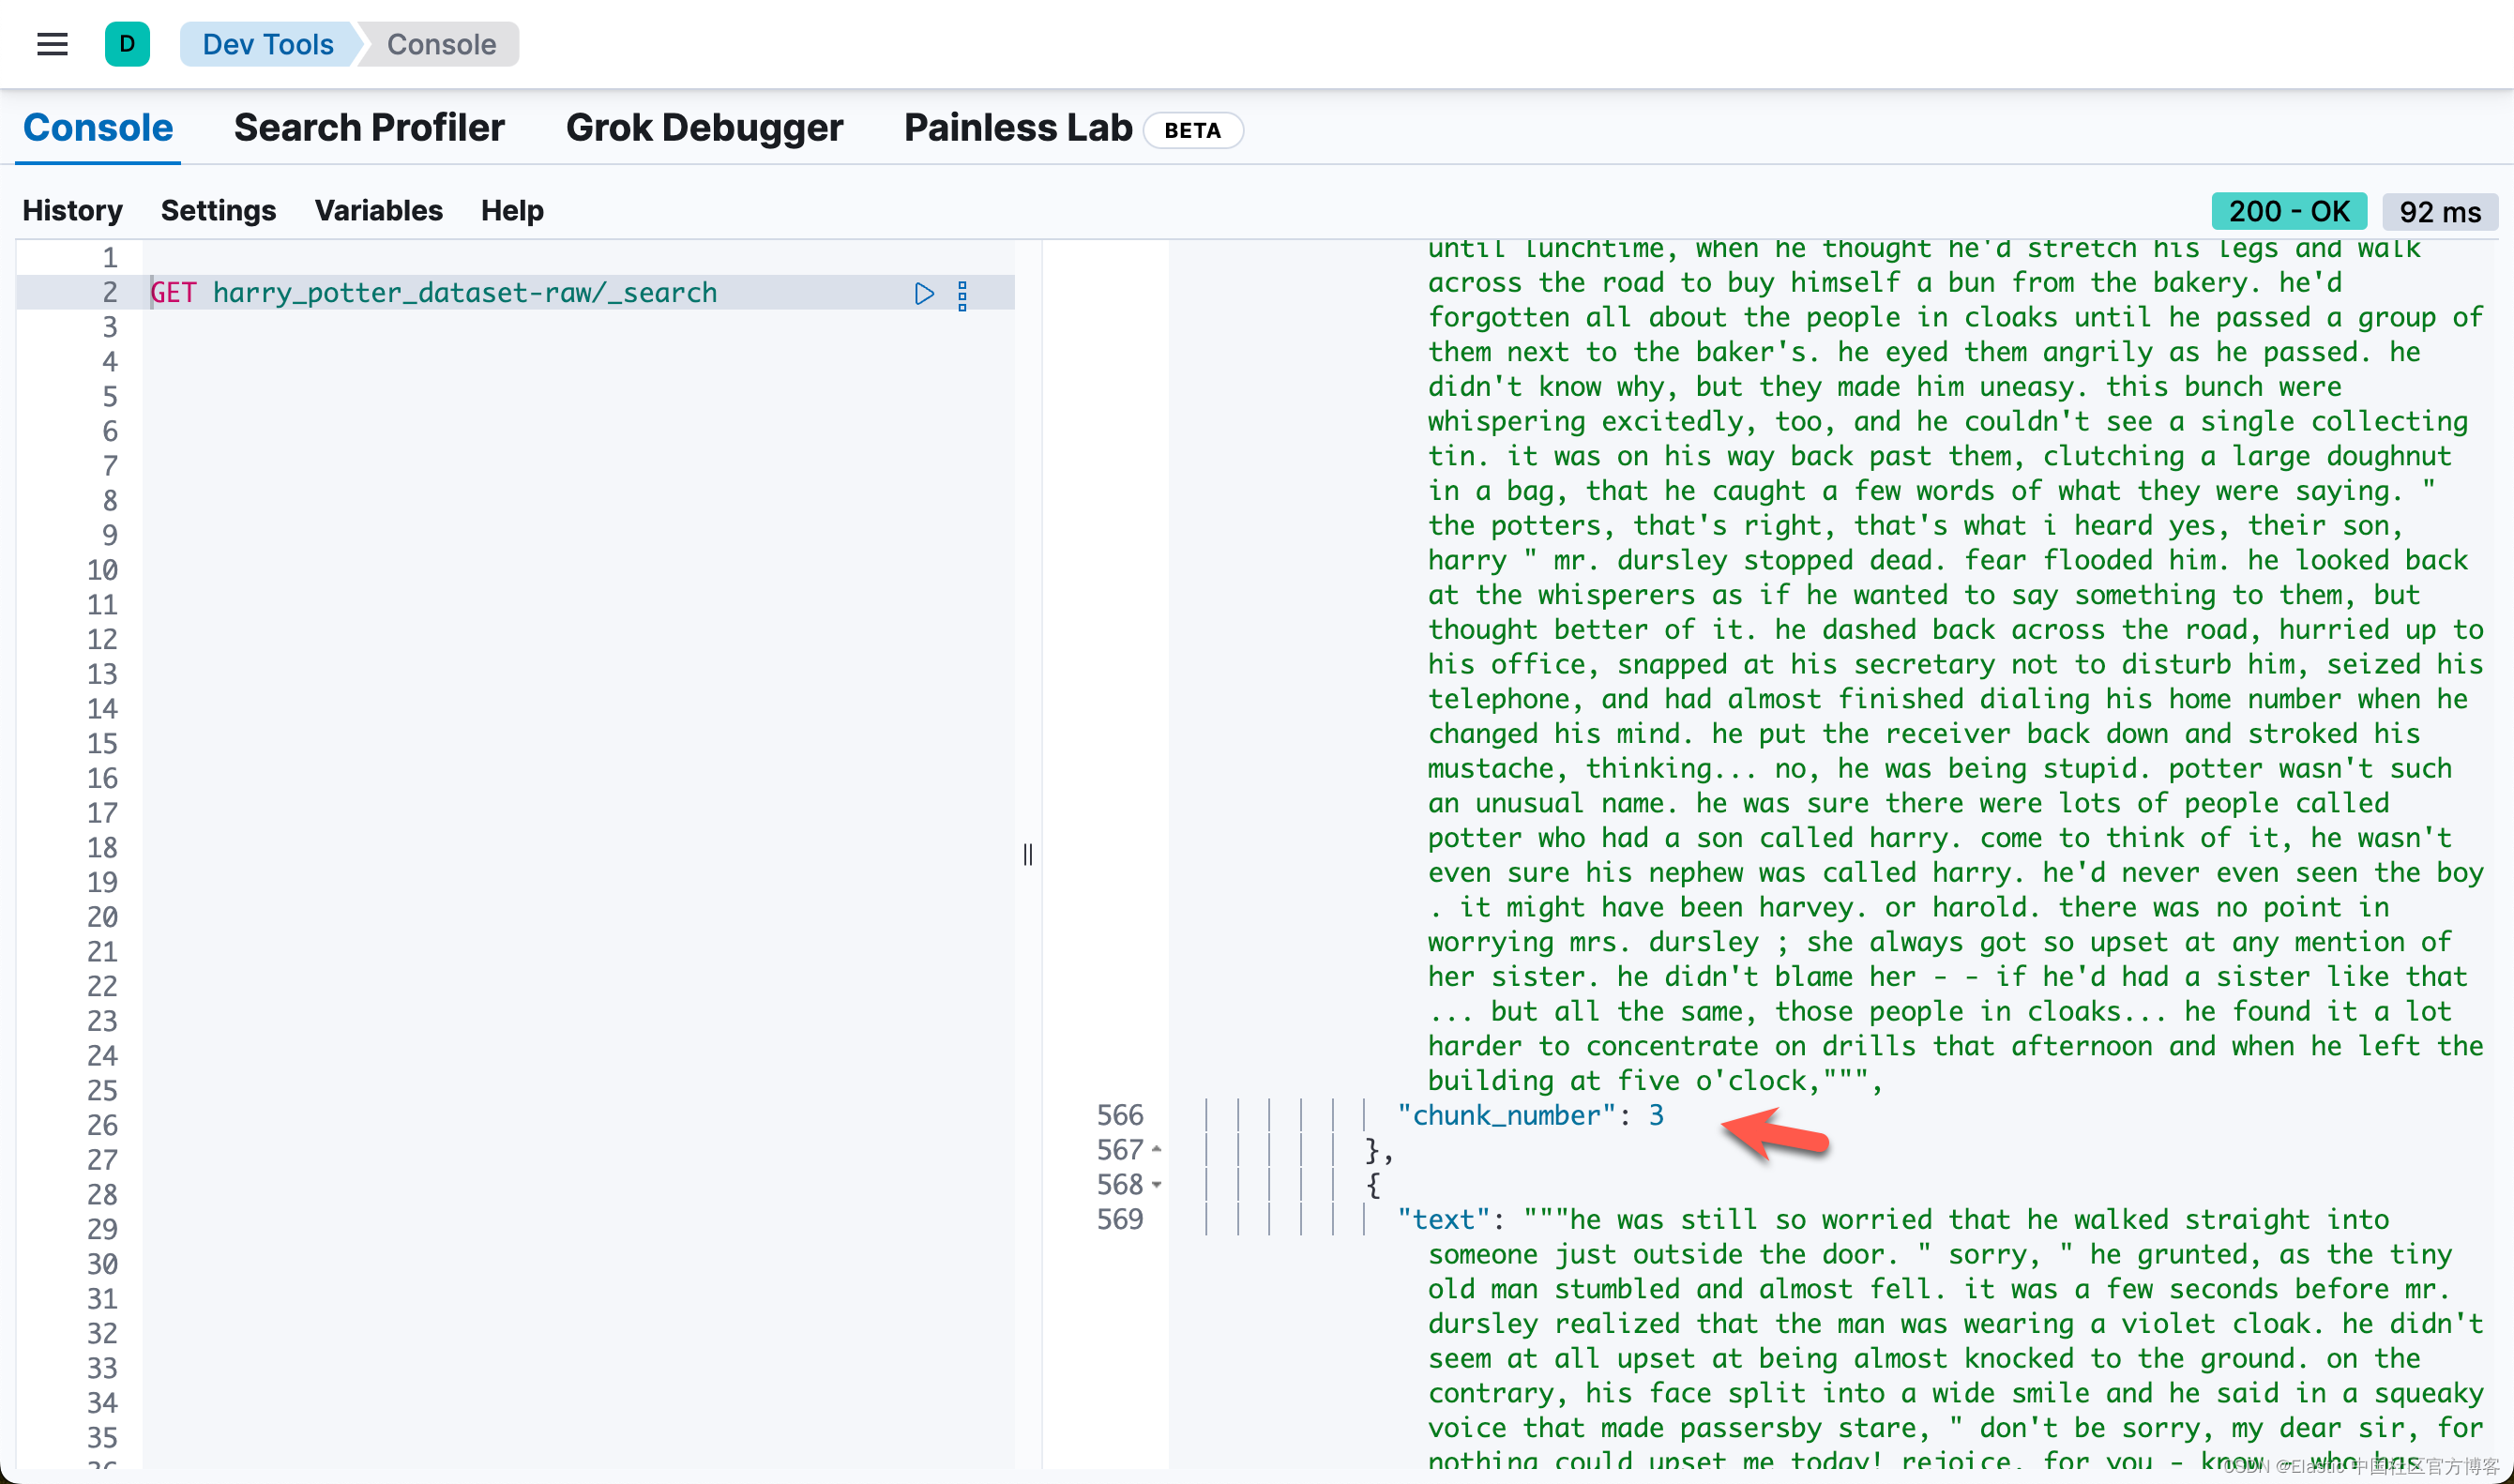
}它分别针对 passages 中的每个段落进行 dene vector 的向量化(使用 sentence-transformers__all-minilm-l6-v2 模型),同时也针对它进行 sparse vectore 的向量化(使用 ELSER 模型):
整个 reindex 需要一定的时间来完成:
Task ID: PEyvsErNSXu8NbrlO_HPxA:122681
Indexing...
Indexing...
Indexing...
Indexing...
Indexing...
Indexing...
Indexing...
Indexing...
Indexing...
Reindexing complete.
等 reindex 完成后,我们可以在 Kibana 中进行查看:
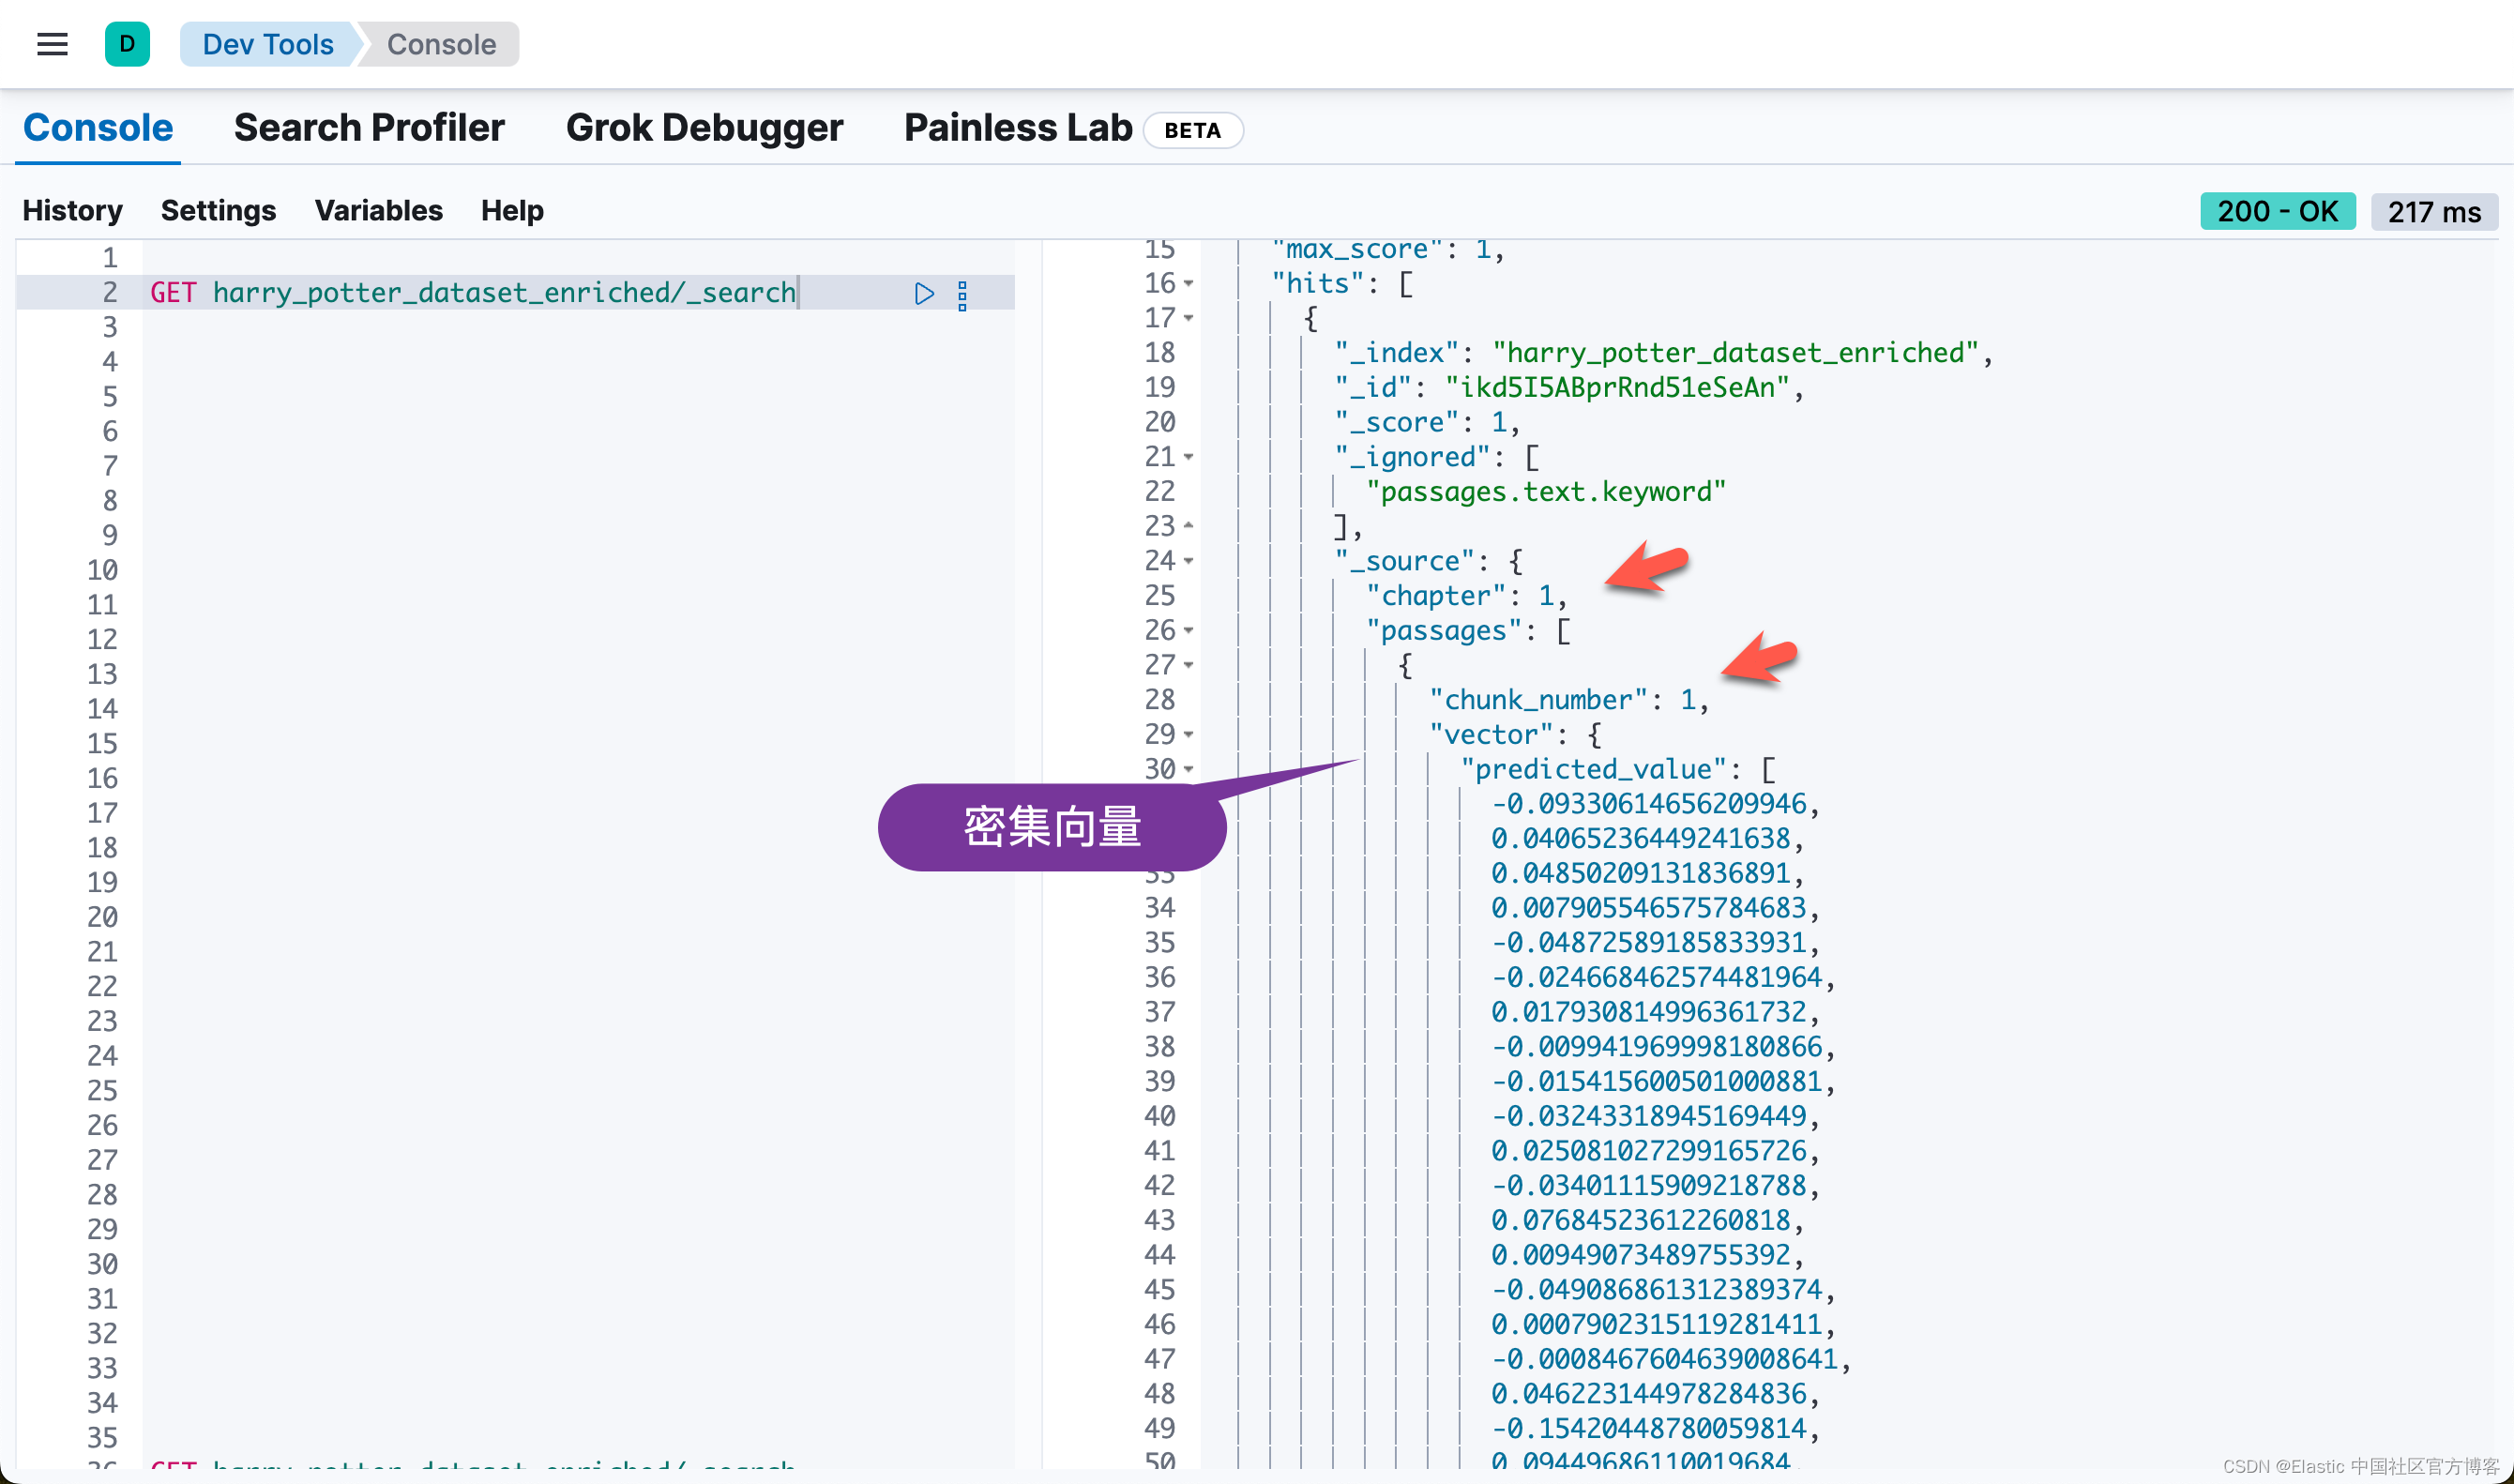
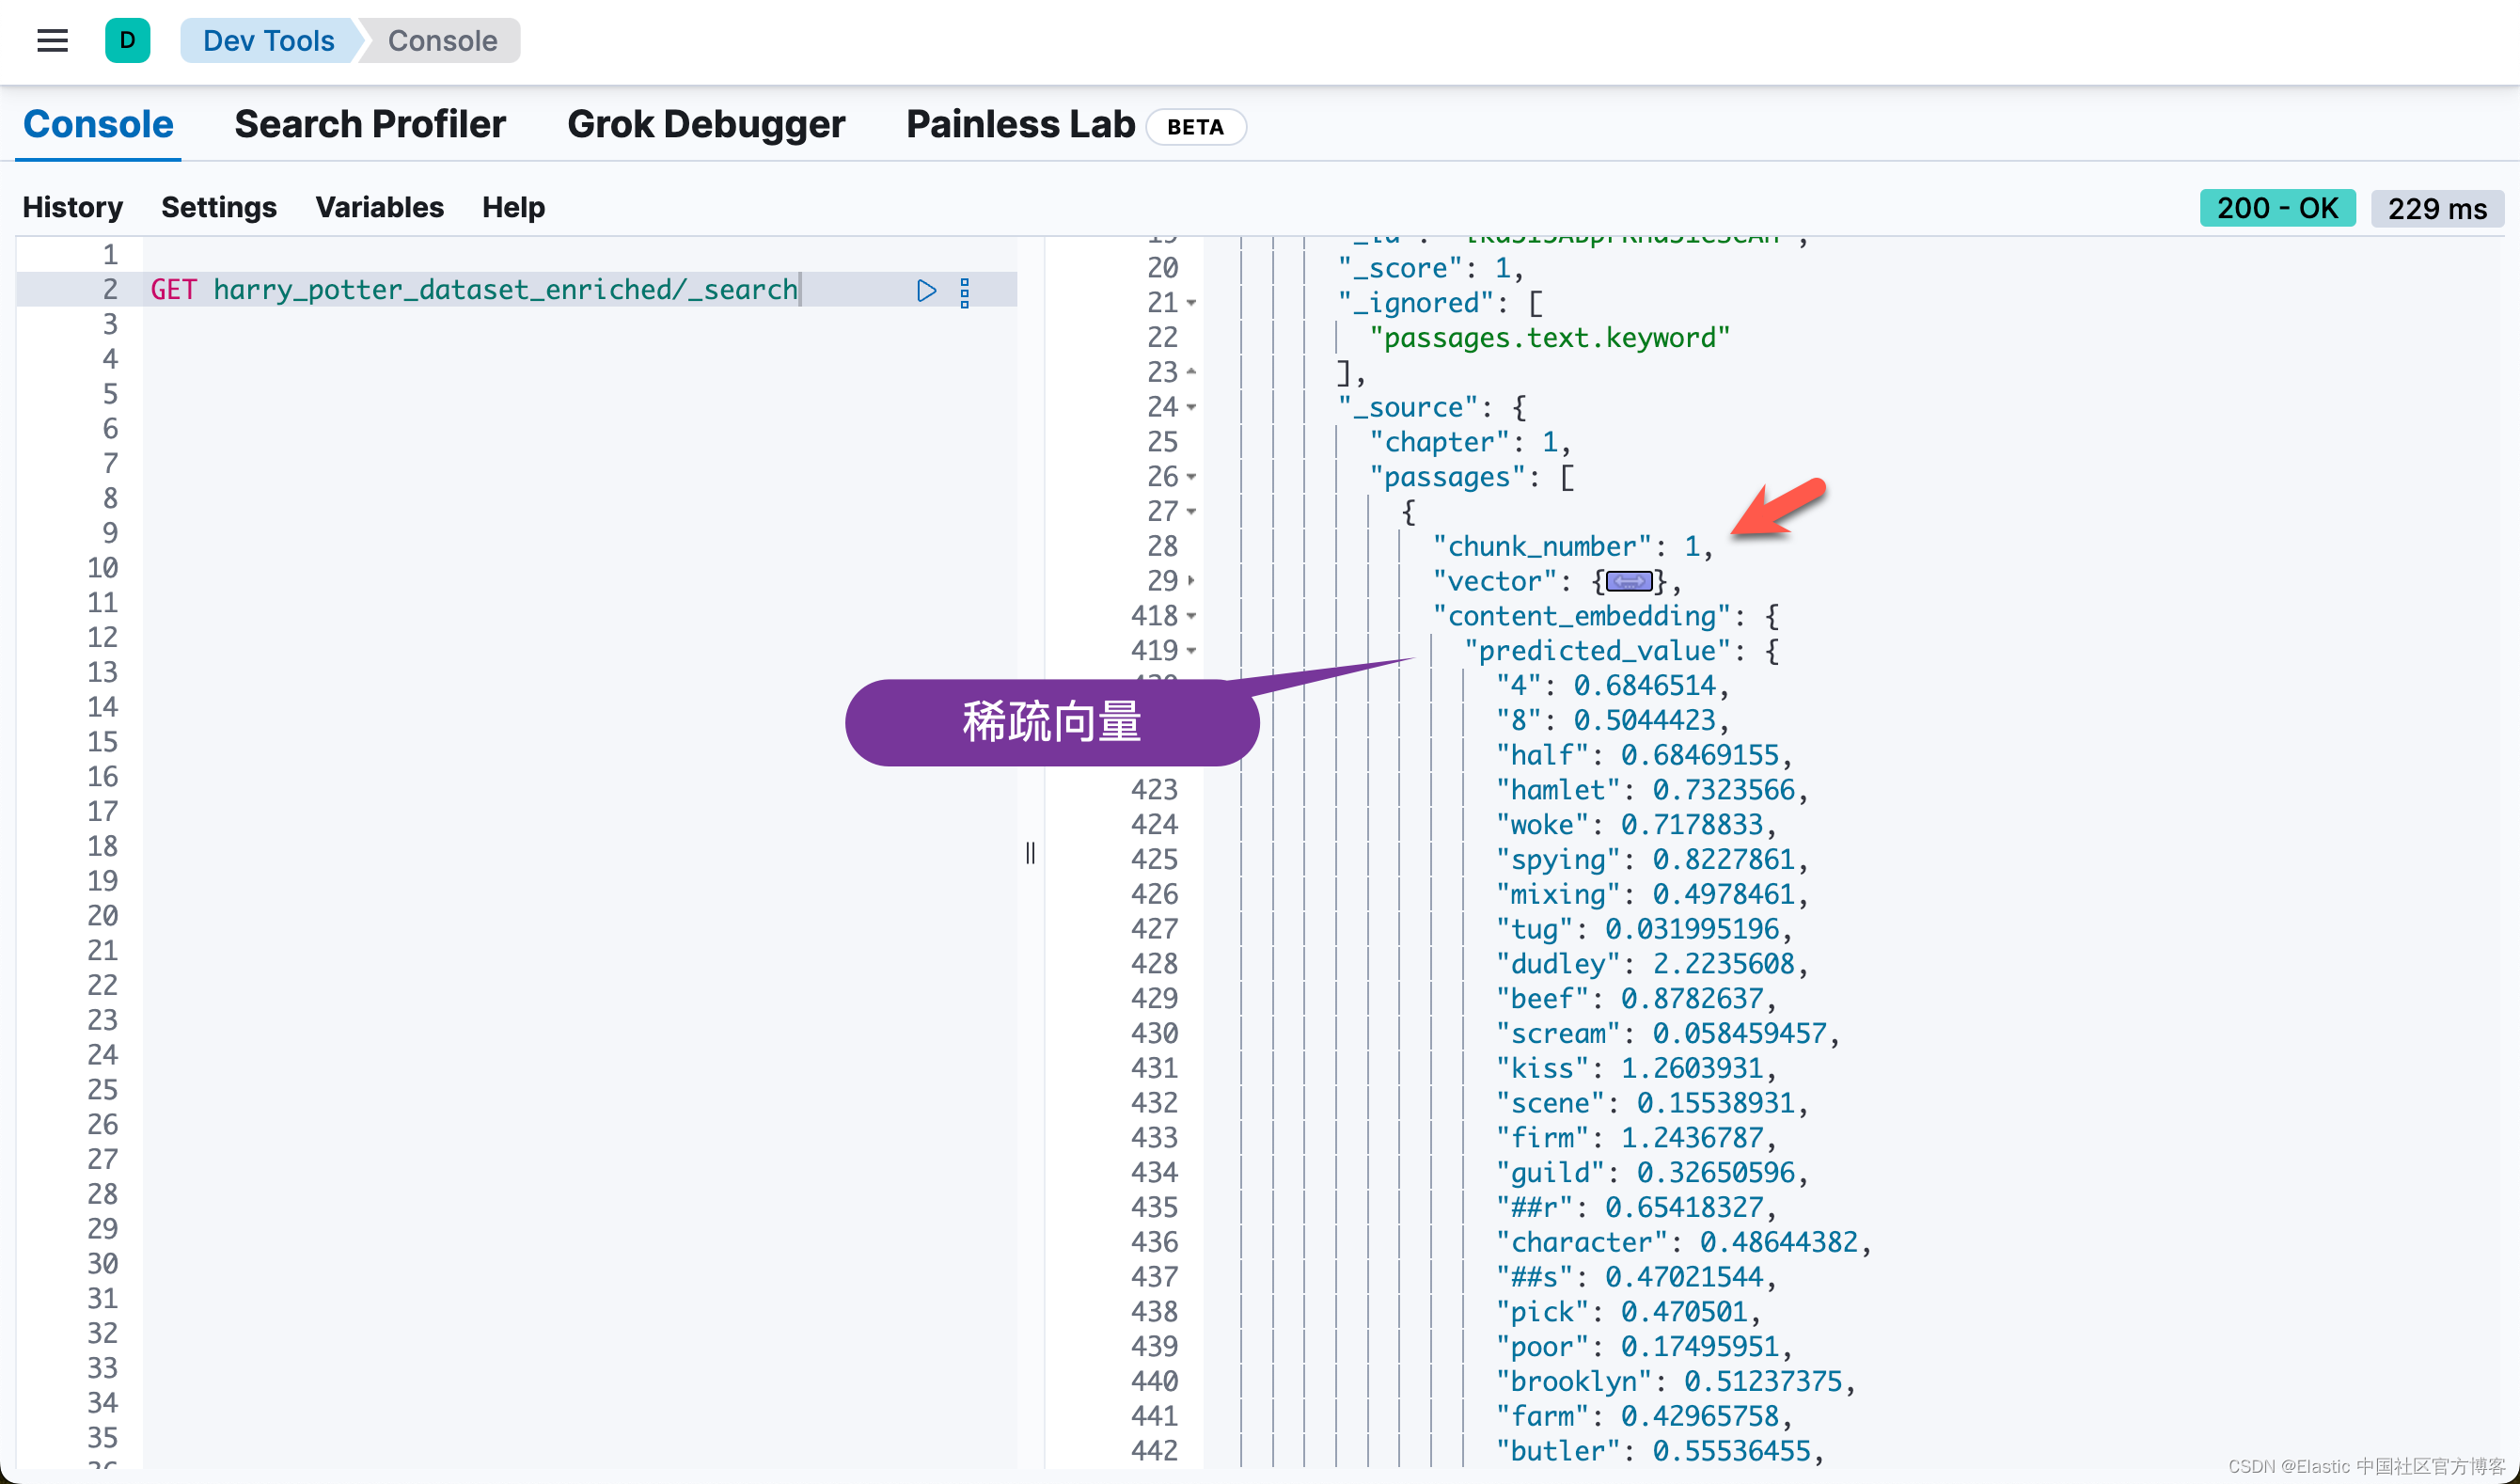

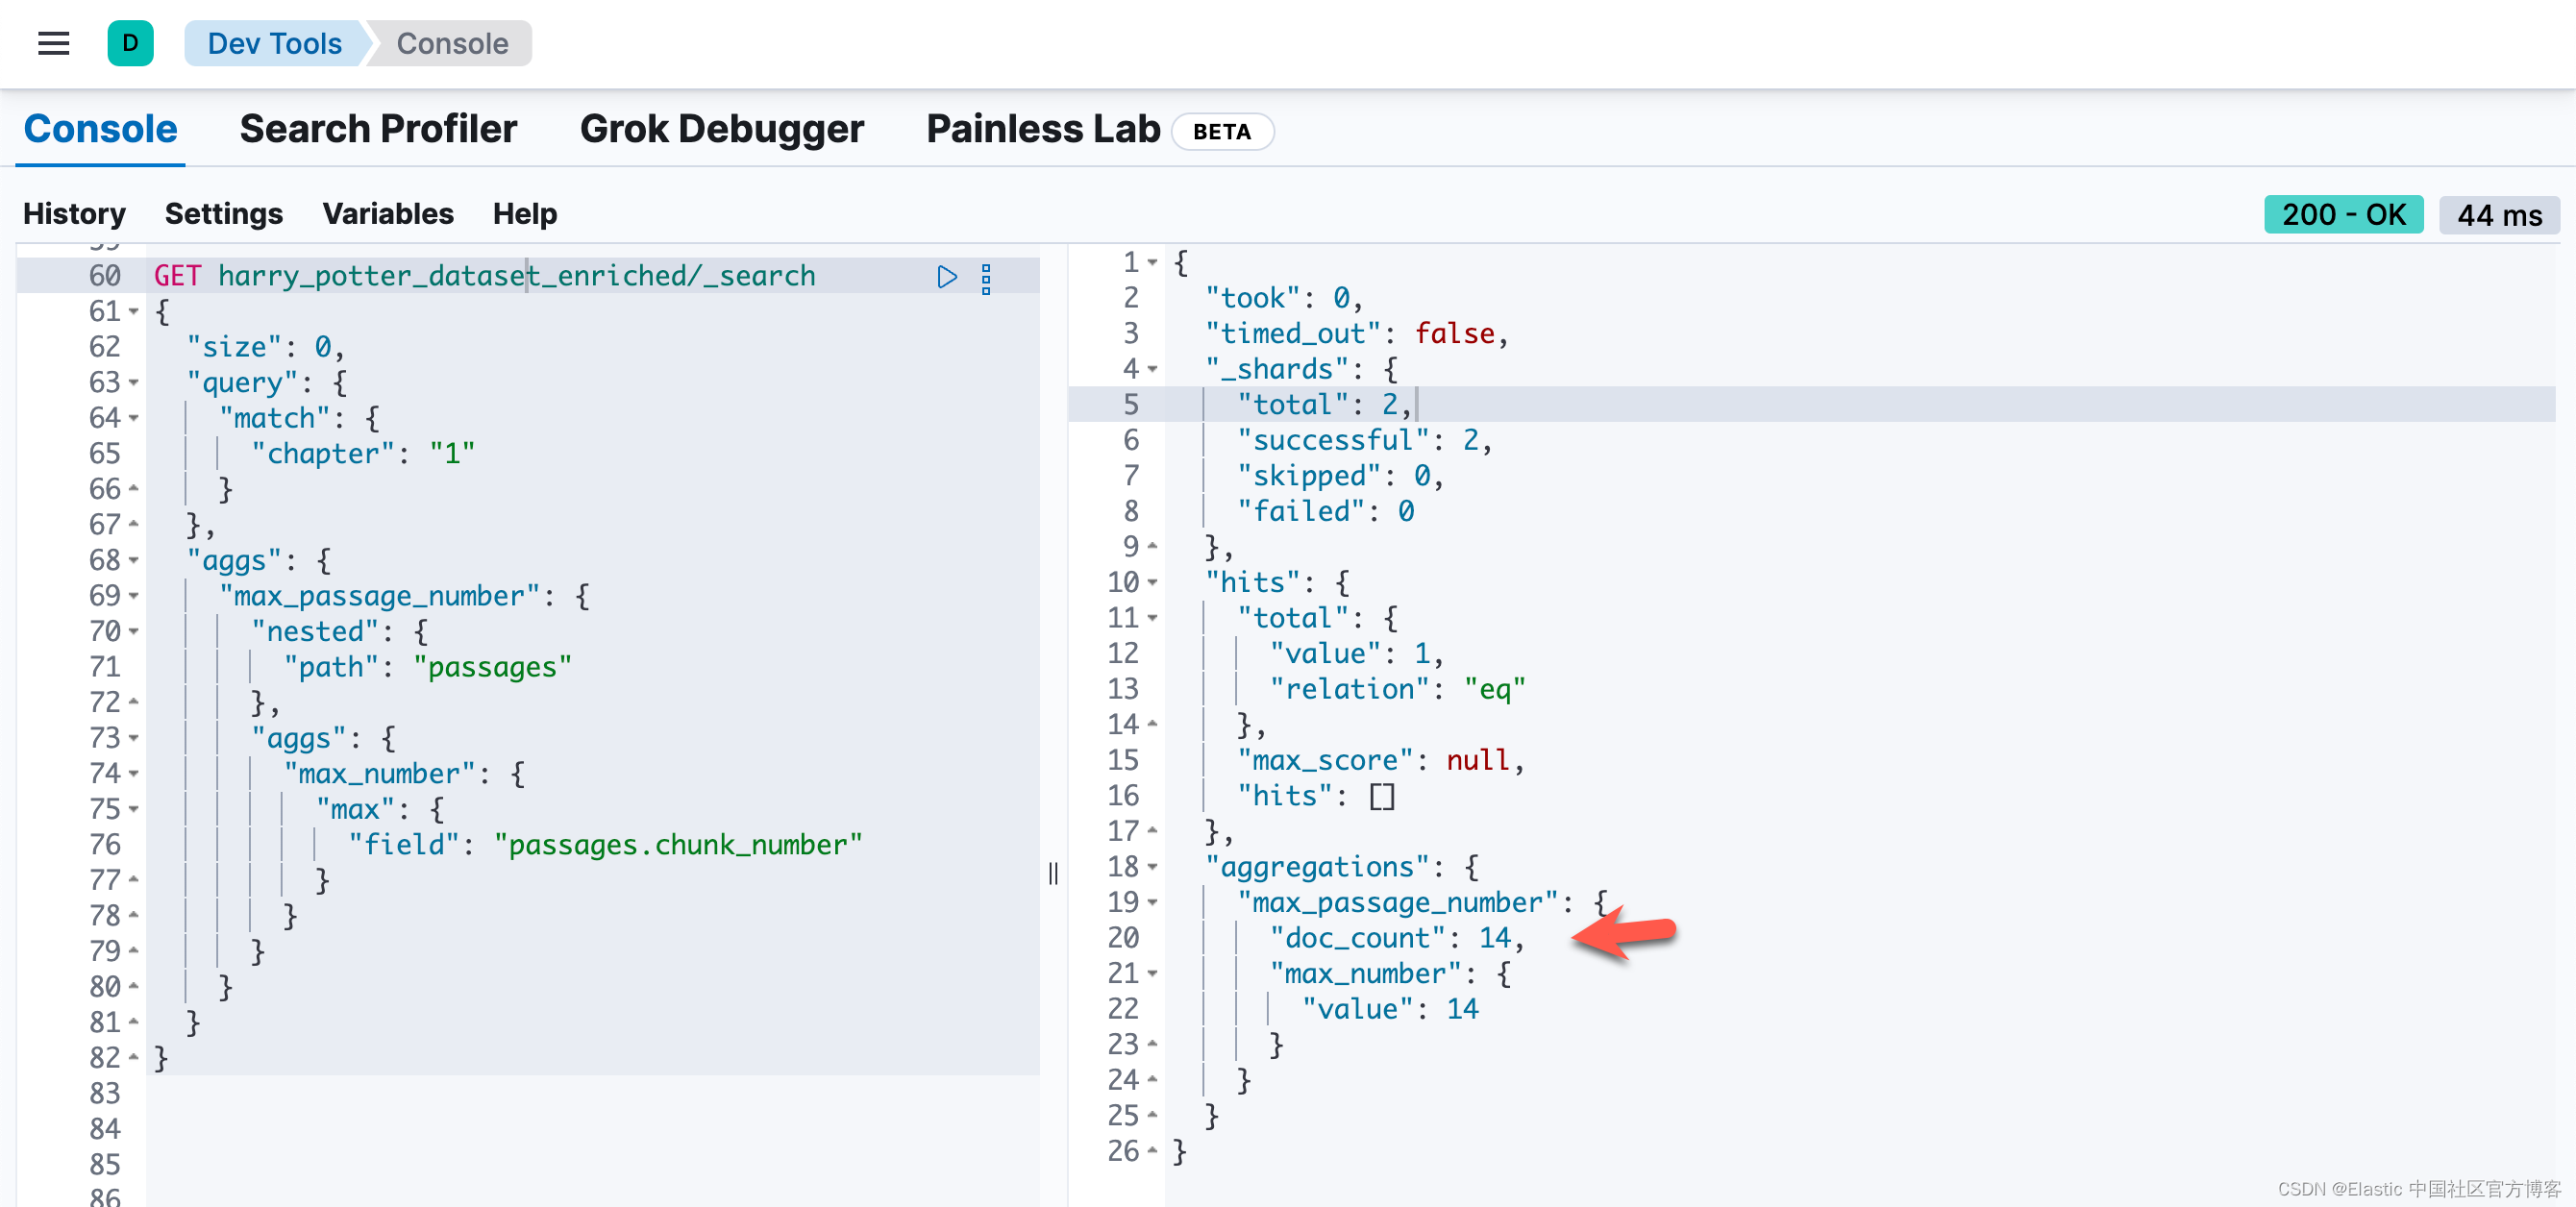
也就是说,同样一个 passage,被同时密集向量化和稀疏向量化。我们可以看到每个 chunk 都是同样的。我们可以通过如下的方法来查看每个 chapter 最多的 chunk 数值:
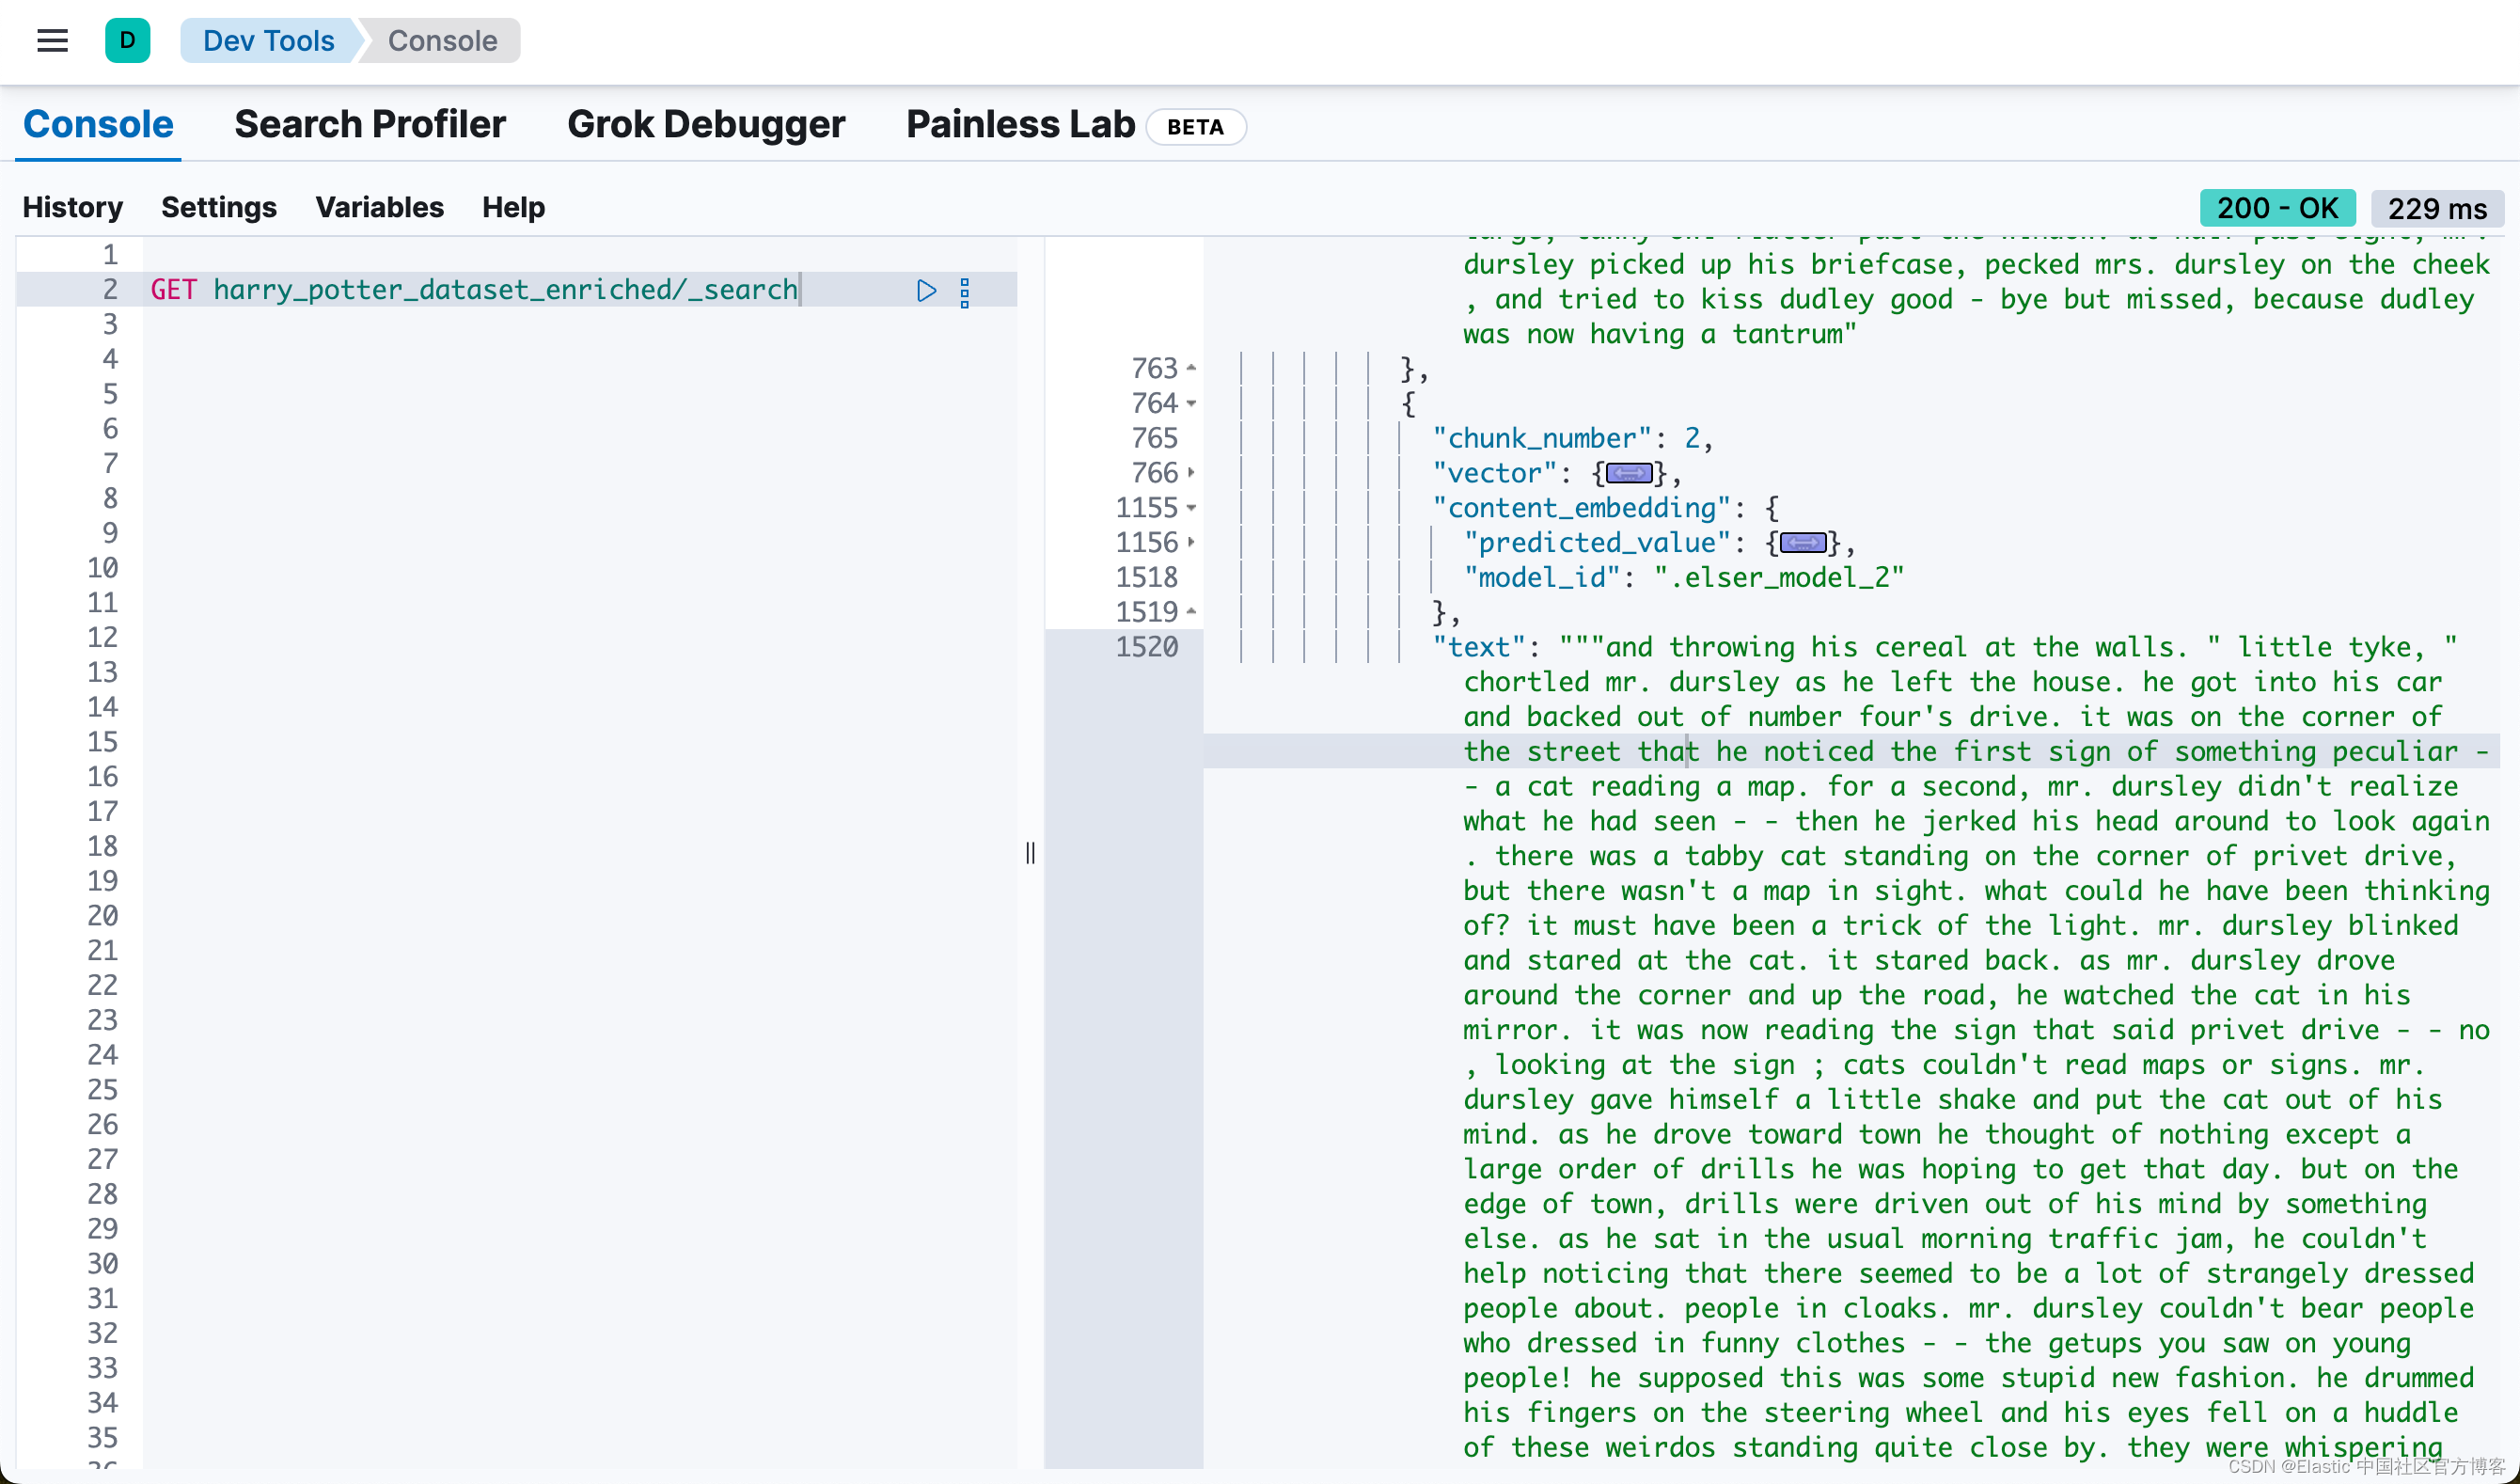
GET harry_potter_dataset_enriched/_search
{
  "size": 0,
  "query": {
    "match": {
      "chapter": "1"
    }
  },
  "aggs": {
    "max_passage_number": {
      "nested": {
        "path": "passages"
      },
      "aggs": {
        "max_number": {
          "max": {
            "field": "passages.chunk_number"
          }
        }
      }
    }
  }
}
或者通过如下的方法来得到各个 chapter 的 passages 数值:
GET harry_potter_dataset_enriched/_search
{
  "size": 0,
  "aggs": {
    "chapter_chunks": {
      "terms": {
        "field": "chapter"
      },
      "aggs": {
        "max_passage_number": {
          "nested": {
            "path": "passages"
          },
          "aggs": {
            "max_number": {
              "max": {
                "field": "passages.chunk_number"
              }
            }
          }
        }
      }
    }
  }
}
自定义搜索查询的构建和执行
本节在 Elasticsearch 中构建和执行自定义搜索查询,利用结合向量和基于文本的搜索方法的混合方法来提高搜索准确性和相关性。使用的具体示例是关于“Nimbus 2000” 的用户查询。
关键步骤:
- 定义用户查询:将用户查询指定为“what is a nimbus 2000”。
- 设置提升因子:
- knn_boost_factor:用于放大 vector-based 的搜索组件的重要性的值。
- text_expansion_boost:用于修改 text-based 的搜索组件的权重的值。
- 构建查询:build_custom_query 函数构建搜索查询,结合密集向量和文本扩展组件。
- 执行搜索:针对指定的 Elasticsearch 索引执行查询。
- 识别相关段落:
- 分析搜索结果以找到相关性得分最高的段落。
- 捕获并打印最佳匹配段落的 ID 和 chunk 编号。
- 获取周围区块:构建并执行查询以检索与已识别段落相邻的区块,以获得更广泛的上下文。如果匹配的区块是第一个区块,则获取 n、n+1 和 n+2。如果该区块是章节中的最后一区块,则获取 n、n-1 和 n-2。对于其他区块,则获取 n-1、n 和 n+1。
- 显示结果:输出相关和相邻段落的文本。
# Custom Search Query Construction
user_query = "what is a nimbus 2000"


knn_boost_factor = 20
text_expansion_boost = 1
query = build_custom_query(
    build_vector(user_query),
    user_query,
    knn_boost_factor,
    text_expansion_boost,
    debug=False,
)

# Searching and identifying relevant passages
results = esclient.search(index=index_name, body=query, _source=False)

hit_id = None
chunk_number = None
chapter_number = None
max_chunk_number = None
max_chapter_chunk_result = None
max_chunk_query = None


if results and results.get("hits") and results["hits"].get("hits"):
    highest_score = -1
    best_hit = None
    hit_id = results["hits"]["hits"][0]["_id"]
    chapter_number = results["hits"]["hits"][0]["fields"]["chapter"][0]
    if "inner_hits" in results["hits"]["hits"][0]:
        for hit_type in ["text_hits", "dense_hit", "sparse_hits"]:
            if hit_type in results["hits"]["hits"][0]["inner_hits"]:
                inner_hit = results["hits"]["hits"][0]["inner_hits"][hit_type]["hits"]
                if inner_hit["hits"]:
                    max_score = inner_hit["max_score"]
                    if max_score and max_score > highest_score:
                        highest_score = max_score
                        best_hit = inner_hit["hits"][0]

    if best_hit:
        first_passage_text = best_hit["_source"]["text"]
        chunk_number = best_hit["_source"]["chunk_number"]
        # print(f"Matched Chunk ID: {hit_id}, Chunk Number: {chunk_number}, Text: {first_passage_text}")
        print(
            f"Matched Chunk ID: {hit_id}, Chunk Number: {chunk_number}, Text:\n{textwrap.fill(first_passage_text, width=200)}"
        )
        print(f"\n")
    else:
        print(f"ID: {hit_id}, No relevant passages found.")
else:
    print("No results found.")

# Fetch Surrounding Chunks if chapter_number is not None
if chapter_number is not None:
    print(f"Fetch Surrounding Chunks")
    print(f"------------------------")

    # max_chunk_query = get_max_chunk_number_query(chapter_number, debug=False)
    # max_chapter_chunk_result = esclient.search(index=index_name, body=max_chunk_query, _source=False)
    max_chapter_chunk_result = esclient.search(
        index=index_name,
        body=get_max_chunk_number_query(chapter_number, debug=False),
        _source=False,
    )
    max_chunk_number = max_chapter_chunk_result["aggregations"]["max_chunk_number"][
        "max_chunk"
    ]["value"]

    adjacent_chunks_query = get_adjacent_chunks_query(
        hit_id, chunk_number, max_chunk_number, debug=False
    )
    results = esclient.search(
        index=index_name, body=adjacent_chunks_query, _source=False
    )
    print_text_from_results(results)
else:
print("Skipping fetch of surrounding chunks due to no initial results.") 
完整的代码可以在地址 elasticsearch-labs/supporting-blog-content/fetch-surrounding-chunks at main · liu-xiao-guo/elasticsearch-labs · GitHub 进行下载。