环境:SpringBoot.3.3.0
- 简介
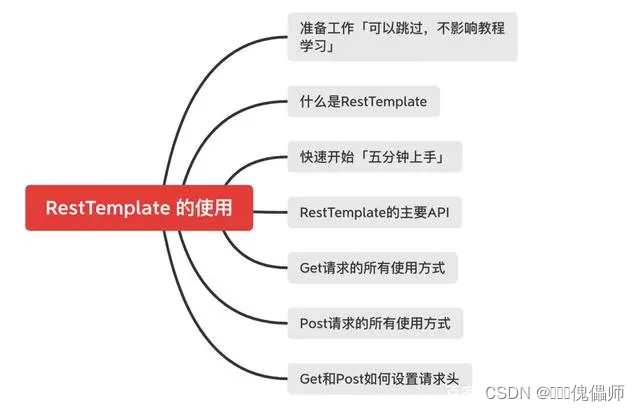
在项目中调用第三方接口是日常开发中非常常见的。调用方式的选择通常遵循公司既定的技术栈和架构规范,以确保项目的一致性和可维护性。无论是RESTful API调用、Feign声明式HTTP客户端、Apache HttpClient等调用方式,每种方式都有其适用场景和优势,选择最适合的方式将有助于提高开发效率和系统性能。接下来将全面介绍10种第三方接口调用的实现方式。 - 实战案例
2.1 JDK URL
URL url = URI.create("http://192.168.0.124:8000/api/data").toURL() ;
URLConnection connection = url.openConnection() ;
connection.setDoInput(true) ;
connection.setDoOutput(true) ;
InputStream inputStream = connection.getInputStream() ;
String ret = StreamUtils.copyToString(inputStream, StandardCharsets.UTF_8) ;
System.out.println(ret) ;
2.2 JDK HttpClient
URI uri = URI.create("http://192.168.0.124:8000/api/data") ;
HttpClient client = HttpClient.newBuilder()
.connectTimeout(Duration.ofSeconds(3))
.executor(Executors.newCachedThreadPool()
.build() ;
HttpRequest request = HttpRequest.newBuilder(uri).GET().build();
HttpResponse<String> response = client.send(request, BodyHandlers.ofString()) ;
System.out.println(response.body()) ;
2.3 Apache Http Client
HttpGet httpget = new HttpGet("http://192.168.0.124:8000/api/data") ;
CloseableHttpClient client = HttpClients.custom()
  .build() ;
HttpClientResponseHandler<String> responseHandler = new BasicHttpClientResponseHandler() ;
String ret = client.execute(httpget, responseHandler) ;
System.out.println(ret) ;
Apache HttpClient 5是一个支持HTTP/2、高度可定制、支持异步请求的开源HTTP工具包,提供了丰富的API和扩展特性。异步请求方式:
CloseableHttpAsyncClient client = HttpAsyncClients.custom().build() ;
client.start() ;
SimpleHttpRequest request = SimpleRequestBuilder.get()
  .setHttpHost(HttpHost.create("http://192.168.0.124:8000"))
  .setPath("/api/data")
  .build() ;
FutureCallback<SimpleHttpResponse> callback = new FutureCallback<SimpleHttpResponse>() {
  @Override
  public void failed(Exception ex) {
    System.err.printf("请求失败: %s%n", ex.getMessage()) ;
  }
  @Override
  public void completed(SimpleHttpResponse result) {
    System.out.printf("当前线程: %s, 请求完成...%n", Thread.currentThread().getName()) ;
  }
  public void cancelled() {
  }
};
Future<SimpleHttpResponse> future = client.execute(request, callback) ;
System.out.println(new String(future.get().getBodyBytes(), StandardCharsets.UTF_8)) ;
client.close(CloseMode.GRACEFUL) ;
Apache Client功能还是非常强大的。
2.4 OkHttp
OkHttp是一个高效的HTTP客户端:
HTTP/2 支持允许对同一主机的所有请求共享一个套接字。
连接池可减少请求延迟(如果 HTTP/2 不可用)。
透明GZIP缩小了下载大小。
响应缓存可完全避免网络重复请求。
使用 OkHttp 非常简单。其请求/响应 API 采用流畅的构建器和不变性设计。它既支持同步阻塞调用,也支持带回调的异步调用。
URL url = URI.create("http://192.168.0.124:8000/api/data").toURL() ;
OkHttpClient client = new OkHttpClient();
Request request = new Request.Builder()
  .url(url)
  .build() ;
try (Response response = client.newCall(request).execute()) {
  System.out.println(response.body().string()) ;
}
异步请求
URL url = URI.create("http://192.168.0.124:8000/api/data").toURL() ;
OkHttpClient client = new OkHttpClient();
Request request = new Request.Builder()
  .url(url)
  .build();
client.newCall(request).enqueue(new Callback() {
  public void onResponse(Call call, Response response) throws IOException {
    System.out.printf("当前线程: %s, 内容: %s%n", Thread.currentThread().getName(), response.body().string()) ;
  }
  public void onFailure(Call call, IOException e) {
    System.err.printf("请求失败: %s%n", e.getMessage()) ;
  }
}) ;
2.5 RestTemplate
RestTemplate是我们项目中最为常用的接口调用方式了,它以经典 Spring Template 类的形式为 HTTP 客户端库提供了高级 API。
RestTemplate restTemplate = new RestTemplate() ;
Map ret = restTemplate.getForObject(URI.create("http://192.168.0.124:8000/api/data"), Map.class) ;
System.out.println(ret) ;
通过RestTemplateBuilder可以对RestTemplate提供更多的配置。
RestTemplate restTemplate = new RestTemplateBuilder()
  // 设置超时时间
  .setConnectTimeout(Duration.ofSeconds(5))
  .setReadTimeout(Duration.ofSeconds(5))
  // 设置拦截器
  .interceptors(List.of())
  .build() ;
Map ret = restTemplate.getForObject(URI.create("http://192.168.0.124:8000/api/data"), Map.class) ;
System.out.println(ret) ;
注:默认情况下RestTemplate是通过JDK URL实现接口访问,我们可以自定义设置Apache Http或OKHttp实现。
2.6 WebClient
WebClient 是执行 HTTP 请求的非阻塞、反应式客户端。它在 Spring 5.0 中引入,提供了 RestTemplate 的替代方案,支持同步、异步和流场景。WebClient 支持以下功能:
非阻塞IO
反应流背压
用较少的硬件资源实现高并发
利用 Java 8 lambdas 的函数式流畅应用程序接口
支持同步和异步交互
向服务器传输数据流或从服务器向下传输数据流
WebClient 需要一个 HTTP 客户端库来执行请求。内置的支持包括:
Reactor Netty
JDK HttpClient
Jetty Reactive HttpClient
Apache HttpComponents
其他可以通过ClientHttpConnector插入。
如下示例:
WebClient client = WebClient.create("http://192.168.0.124:8000");
client
  .get()
  .uri("/api/data")
  // 获取结果
  .retrieve()
  .bodyToMono(String.class)
  .subscribe(System.out::println) ;
更多配置,超时/错误
HttpClient httpClient = HttpClient.create()
  .option(ChannelOption.CONNECT_TIMEOUT_MILLIS, 10000) ;
WebClient client = WebClient
  .builder()
  .clientConnector(new ReactorClientHttpConnector(httpClient))
  .build() ;
client
  .get()
  .uri("http://192.168.0.124:8000/api/data")
  .retrieve()
  .onStatus(HttpStatusCode::is4xxClientError, resp -> Mono.error(new RuntimeException("客户端请求错误")))
  .bodyToMono(String.class).subscribe(System.out::println) ;
System.in.read() ;
通过WebClient#builder可以进行更多的配置信息。
2.7 RestClient
RestClient是Spring6.1起添加的新的API。创建(或构建)后,RestClient 可由多个线程安全使用。
RestClient client = RestClient.create() ;
ParameterizedTypeReference<Map<String, Object>> bodyType = new ParameterizedTypeReference<Map<String, Object>>() {} ;
Map<String, Object> ret = client.get()
  .uri(URI.create("http://192.168.0.124:8000/api/data"))
  .retrieve()
  .body(bodyType) ;
还可以通过RestClient#builder
RestClient client = RestClient.builder()
  // 设置请求Header
  .defaultHeader("Authorization", "Bearer eGvS0owCfhwkTcCHghNFMwOWODoz8WWXGhDT80R-EuBY7-EBNaMyZPsAZI0pmy3Zg7BTnoS3VTQlz_e7AKslpDL39trOYv_BY9uw5lZthsAi404iZnhWJz2p5v1Mm6Xb")
  // 设置拦截器
  .requestInterceptor((request, body, execution) -> execution.execute(request, body))
  .baseUrl("http://192.168.0.124:8000")
  .build() ;
通过builder方式,你还可以进行更多的设置,具体查看API。
2.8 Http Interface
将 HTTP 服务定义为带有 @HttpExchange 方法的 Java 接口。你可以将这样的接口传递给 HttpServiceProxyFactory,创建一个代理,通过 HTTP 客户端(如 RestClient 或 WebClient)执行请求。
// 接口定义
public interface RemoteClient {
  @GetExchange("/api/data")
  Map<String, Object> queryInfo() ;
}
// 执行调用
RestClient restClient = RestClient.builder().baseUrl("http://192.168.0.124:8000").build() ;
RestClientAdapter adapter = RestClientAdapter.create(restClient) ;
HttpServiceProxyFactory factory = HttpServiceProxyFactory.builderFor(adapter).build() ;
RemoteClient client = factory.createClient(RemoteClient.class);
System.out.println(client.queryInfo()) ;
上面调用通过RestClient进行,你也可以换成RestTemplate。
2.9 OpenFeign
注意这里是OpenFeign可不是Spring Cloud OpenFeign,Spring Cloud openfeign对OpenFeign进行了包装,所以在使用上是有差别的。
<!--feign 依赖-->
<dependency>
	<groupId>org.springframework.cloud</groupId>
	<artifactId>spring-cloud-starter-openfeign</artifactId>
</dependency>
示例代码
// 接口定义
public interface RemoteClient {
  @RequestLine("GET /api/data")
  Map<String, Object> queryInfo() ;
}
// 接口调用
RemoteClient client = Feign.builder()
  .decoder(new JacksonDecoder())
  .target(RemoteClient.class, "http://192.168.0.124:8000") ;
Map<String, Object> ret = client.queryInfo() ;
OpenFeign还是至其他很多的注解,如:@Param,@Headers,@Body等。
2.10 Gateway Proxy
引入依赖
<dependency>
  <groupId>org.springframework.cloud</groupId>
  <artifactId>spring-cloud-gateway-mvc</artifactId>
</dependency>
代码示例
private URI uri = URI.create("http://192.168.0.124:8000");

@GetMapping("/api")
public ResponseEntity<?> proxy(ProxyExchange<byte[]> proxy) throws Exception {
  return proxy.uri(String.format("%s%s", uri.toString(), "/api/data")).get() ;
}
在上面的方法中通过ProxyExchange进行远程接口的调用。
Spring Boot 3太强:全新Controller接口定义方式
- 回顾定义接口方式
1.1 常规定义
@RestController
@RequestMapping("/user")
public class UsersController {

  @PostMapping("addUer")
  public Object save(@RequestBody Users users) {

  }
}
正确Servlet定义方法
@Component("/user/api")
public class ControllerHttpRequestHandler implements HttpRequestHandler {
  public void handleRequest(HttpServletRequest request, HttpServletResponse response) throws ServletException, 		      IOException {
    response.setContentType("text/html;charset=utf8");
    PrintWriter out = response.getWriter() ;
    out.print("<h1>你好,HttpRequestHandler</h1>") ;
    out.close() ;
  }
}
注意:接下来定义接口的方式需要在Spring6.0以上版本
2. 新的定义方式
从Spring6开始新增了一个新注解@HttpExchange。该注解将一个类或具体方法声明为HTTP 接口。接口的细节通过注解的属性以及方法参数定义。如下示例:
@HttpExchange("/persons")
interface PersonService {

  @GetExchange("/{id}")
  Person getPerson(@PathVariable Long id);

  @PostExchange
  void add(@RequestBody Person person) ;
}
// Person对象
@Data
@TableName("person")
@EqualsAndHashCode(callSuper = false)
public class Person {
  private Long id ;
  private String name ;
}
实现接口
@RestController
public class PersonController implements PersonService {

  public Person getPerson(@PathVariable Long id) {
    return new Person(id, "姓名 - " + id) ;
  }

  @ResponseStatus(HttpStatus.CREATED)
  public void add(@RequestBody Person person) {

  }
}
除了上面使用的@GetExchange和@PostExchange,还有下面这几个注解:
@DeleteExchange
@PatchExchange
@PutExchange
与@RequestMapping一样,这里的@HttpExchange注解也可以直接使用到方法上,如下:
@HttpExchange(value = "/list", method = "GET")
default List<Person> listPerson() {
  return List.of(new Person(100L, "mandala")) ;
} ;
- @HttpExchange真正目的
@HttpExchange的主要目的是使用生成的代理抽象HTTP客户端代码。如下示例
还是使用上面的PersonService接口定义,通过该接口生成代理类
@Configuration
public class PersonServiceClient {

  @Bean
  PersonService personServiceProxy() {
    RestClient restClient = RestClient.builder().baseUrl("http://192.168.13.124:8000").build();
    RestClientAdapter adapter = RestClientAdapter.create(restClient);
    HttpServiceProxyFactory factory = HttpServiceProxyFactory.builderFor(adapter).build();
    PersonService personService = factory.createClient(PersonService.class);
    return personService ;
  }

}
将PersonService创建代理对象,通过JDK代理。注意:这里的RestClient必须使用Spring6.1以上版本,如果你不是那你可以换成RestTemplate.
@Resource
private PersonService personServiceProxy;

@GetMapping("/persons")
public List<Person> list() {
  return this.personServiceProxy.listPerson() ;
}
