1、环境介绍
操作系统版本:centos 7.9
2、存储库安装
curl -s https://install.crowdsec.net | sudo sh

3、安装安全引擎CrowdSec
yum install crowdsec
启动
systemctl start crowdsec
systemctl enable crowdsec
4、安装修正组件
yum install crowdsec-firewall-bouncer-iptables
启动
systemctl start crowdsec-firewall-bouncer
systemctl enable crowdsec-firewall-bouncer
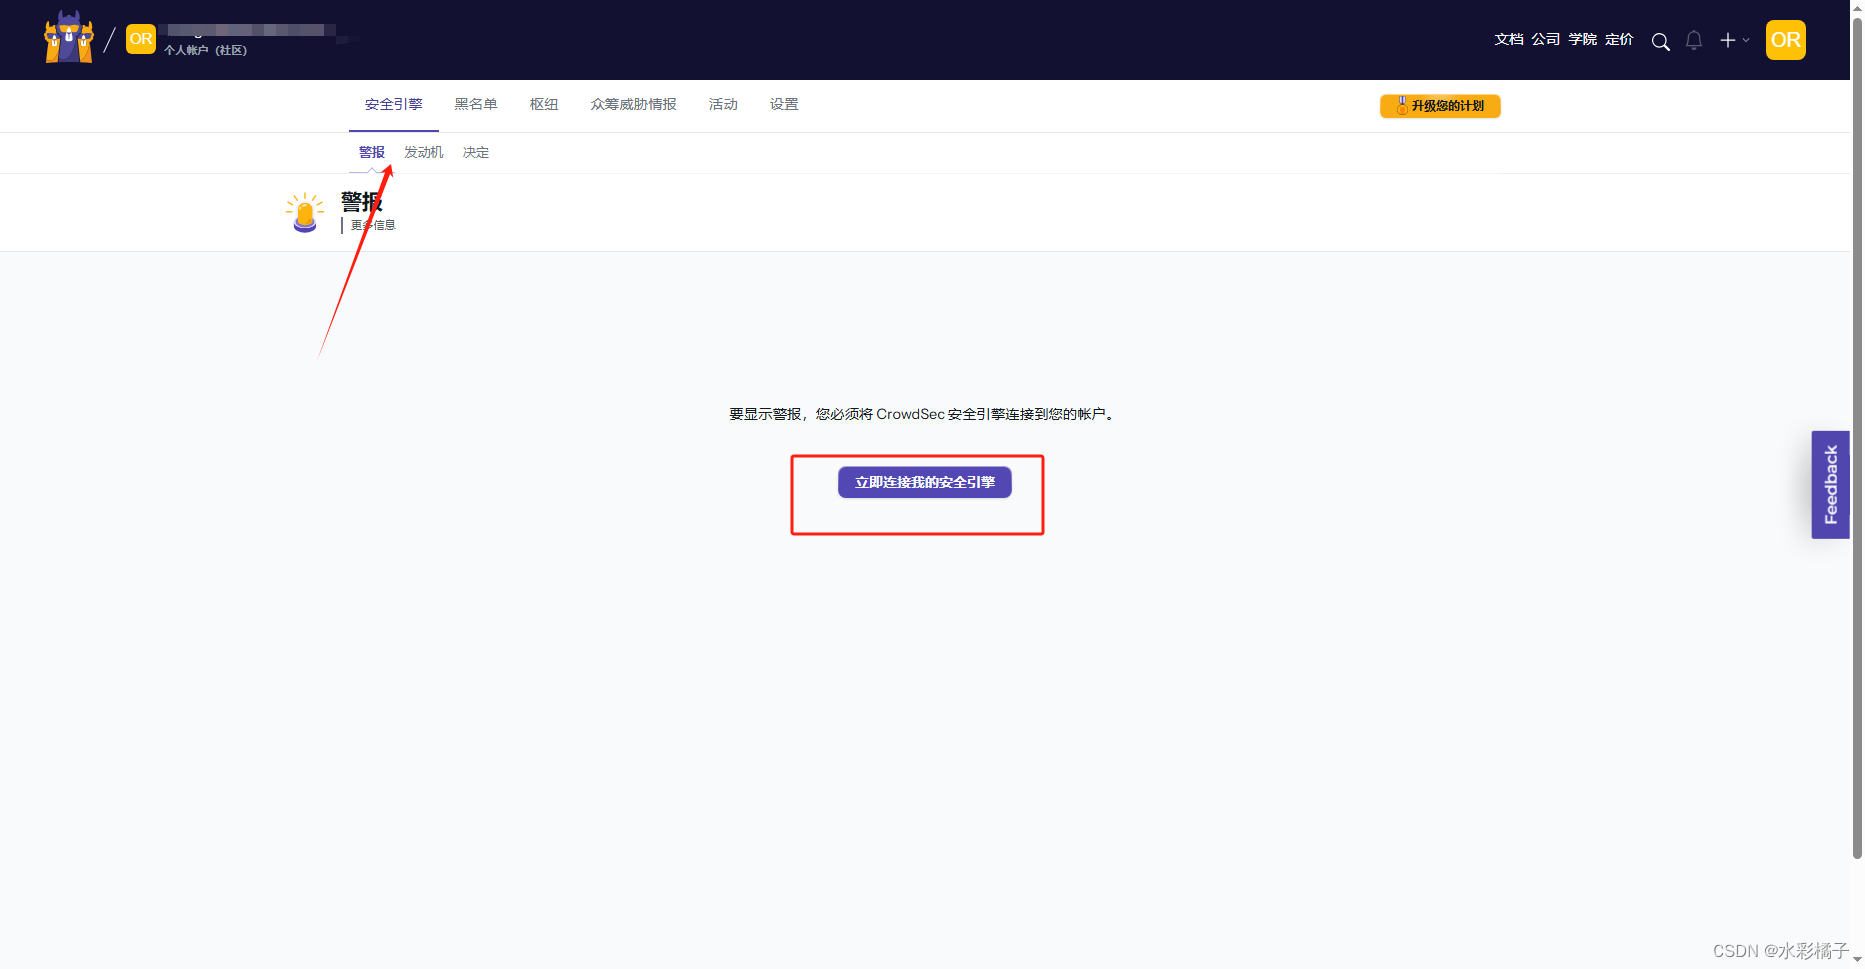
5、添加到控制台
https://app.crowdsec.net/
注册后登录
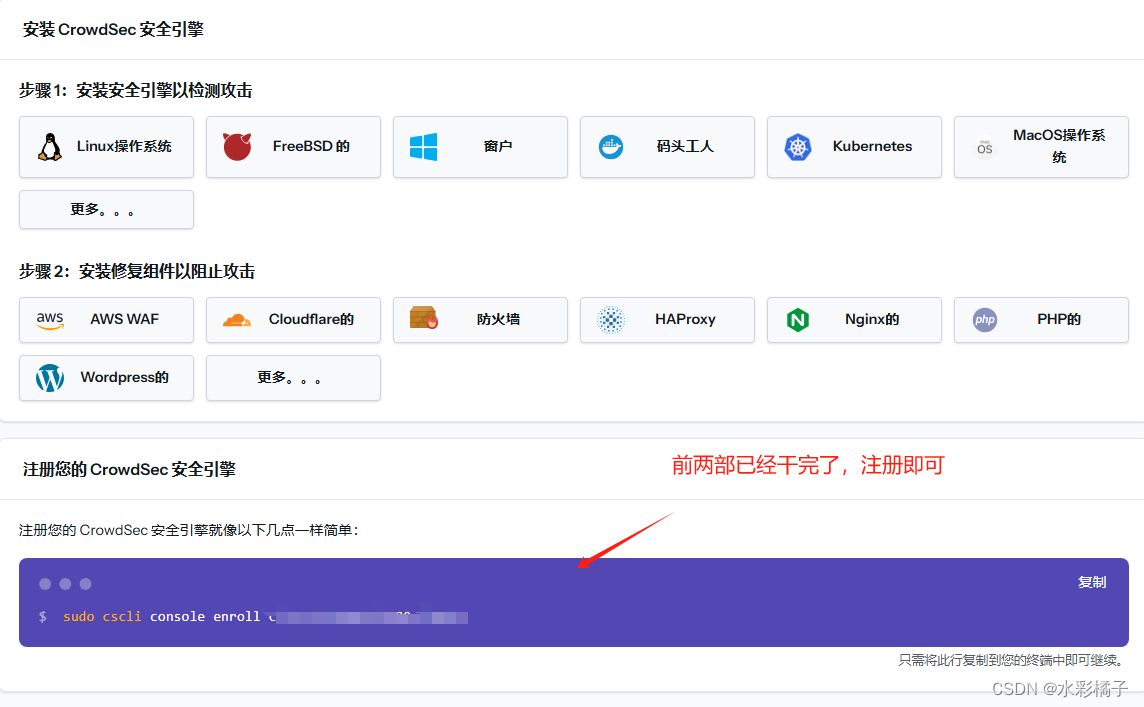
sudo cscli console enroll xxxxx
刷新后,点接受就注册进来了
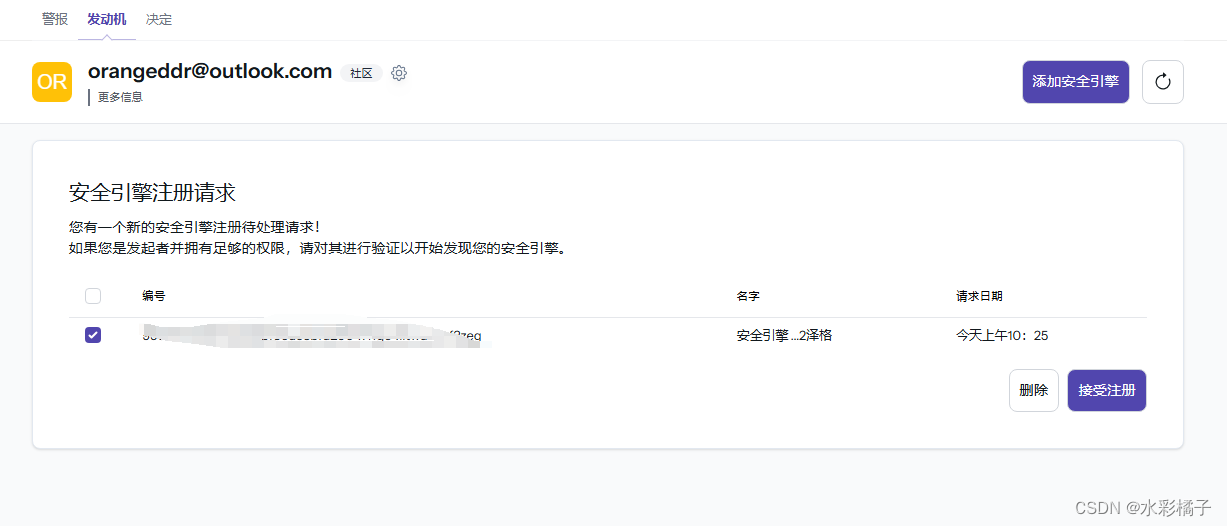
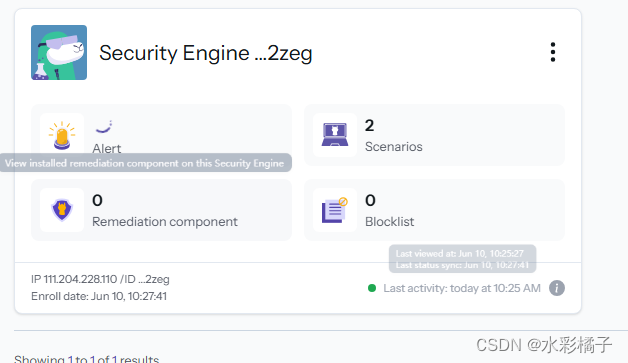
6、订阅黑名单
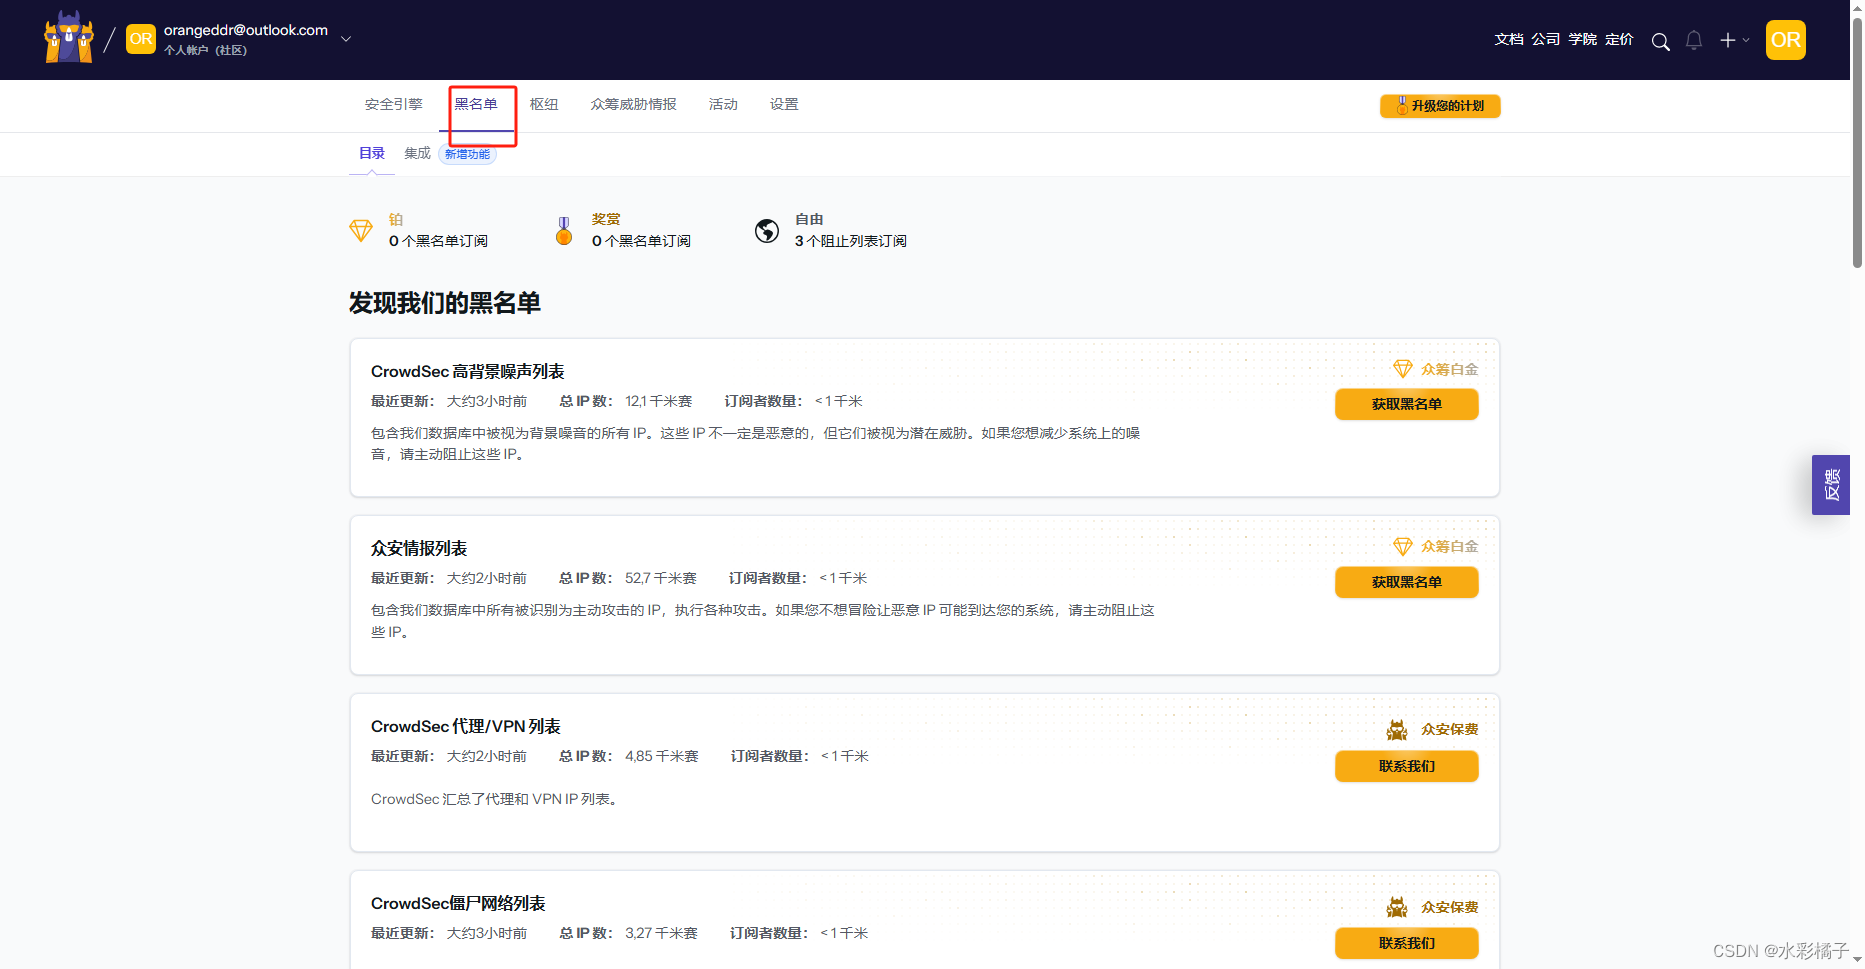
找到合适的黑名单订阅
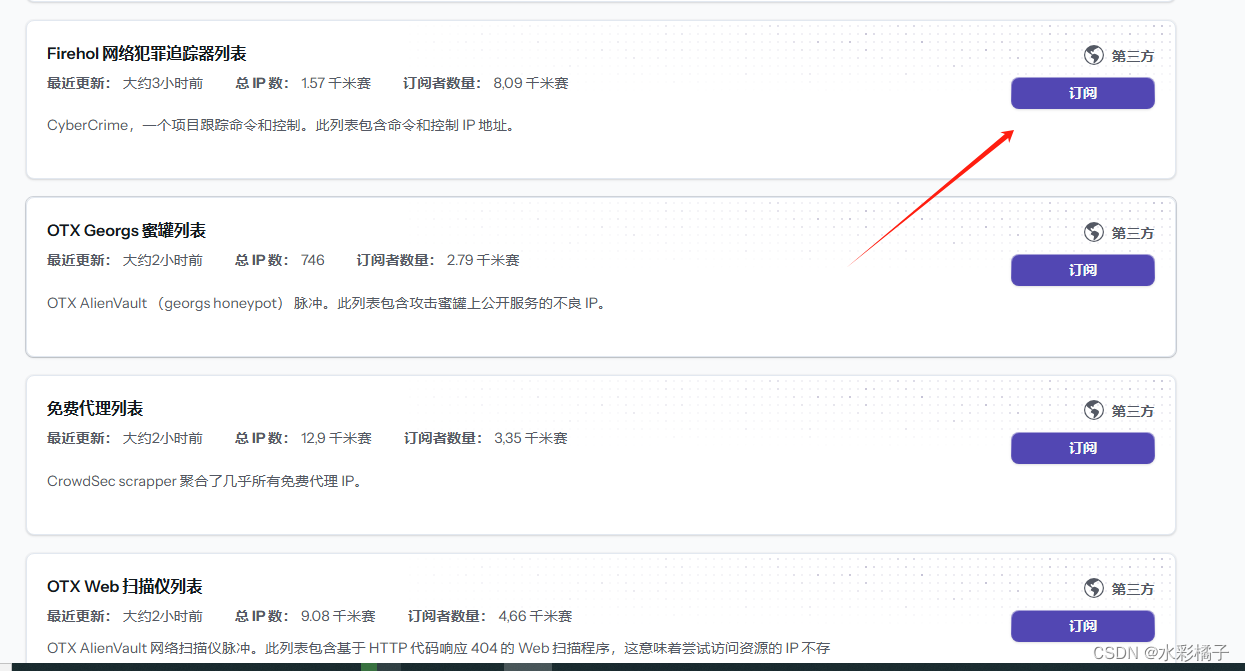

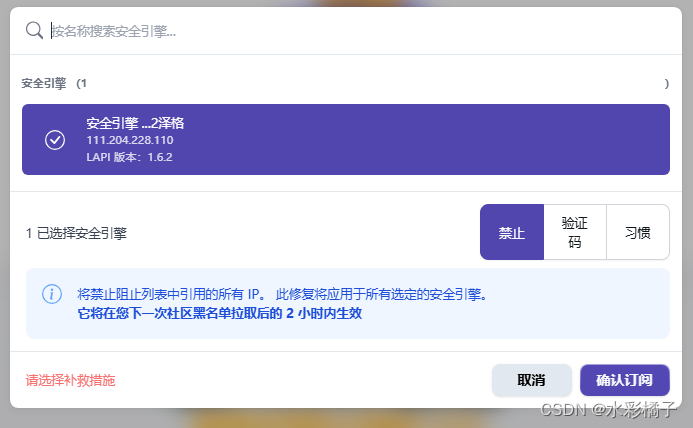
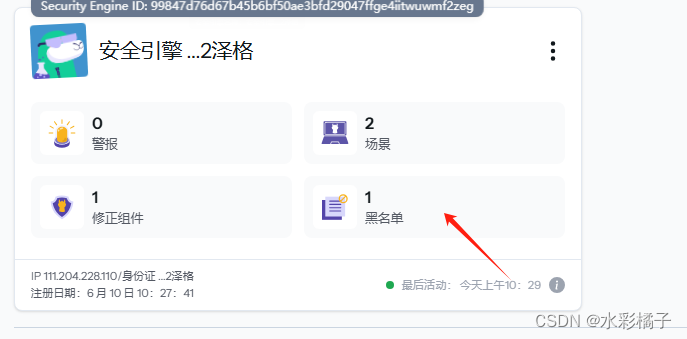
返回安全引擎 已经可以看到订阅了和名单
**以下为额外补充:以crowdsec 为中央处理器,在需要防护的服务器部署修正组件(这里以nginx为例),存储在共享nfs中,然后crowdsec分析,通过filebeat、logstash等工具收集日志到ES用于分析
1、nginx 开启日志
主配置文件,设置如下
设置日志格式
  log_format  main  '$remote_addr - $remote_user [$time_local] "$request" '
                      '$status $body_bytes_sent "$http_referer" '
                      '"$http_user_agent" "$http_x_forwarded_for"';
    access_log  logs/50-18-accesslog.log  main;

设置脚本和计划任务,按天分割日志,删除7天前日志
#!/bin/bash

# 配置部分
LOG_DIR="/usr/local/nginx/logs"
LOG_FILE="50-118-accesslog.log"
ARCHIVE_DIR="${LOG_DIR}/archive"
DAYS_TO_KEEP=7
NGINX_PID_FILE="/usr/local/nginx/nginx.pid"

# 确保归档目录存在
mkdir -p ${ARCHIVE_DIR}

# 获取当前日期
CURRENT_DATE=$(date +"%Y-%m-%d")

# 移动日志文件并创建新的日志文件
if [ -f "${LOG_DIR}/${LOG_FILE}" ]; then
    mv ${LOG_DIR}/${LOG_FILE} ${ARCHIVE_DIR}/${LOG_FILE}.${CURRENT_DATE}
    touch ${LOG_DIR}/${LOG_FILE}
    # 通知 Nginx 重新打开日志文件
    if [ -f "${NGINX_PID_FILE}" ]; then
        kill -USR1 $(cat ${NGINX_PID_FILE})
    else
        echo "Nginx PID file ${NGINX_PID_FILE} does not exist."
    fi
else
    echo "Log file ${LOG_DIR}/${LOG_FILE} does not exist."
fi

# 删除 7 天前的日志文件
find ${ARCHIVE_DIR} -type f -name "${LOG_FILE}.*" -mtime +${DAYS_TO_KEEP} -exec rm -f {} \;

# 压缩归档目录中的日志文件
find ${ARCHIVE_DIR} -type f -name "${LOG_FILE}.*" -exec gzip {} \;

创建计划任务
0 0 * * * /usr/local/nginx/logs/rotate_nginx_logs.sh

3、配置nfs服务器,用于共享日志
https://blog.csdn.net/zyj81092211/article/details/127300889
配置文件
4、安装nginx的修复组件,用于下发策略
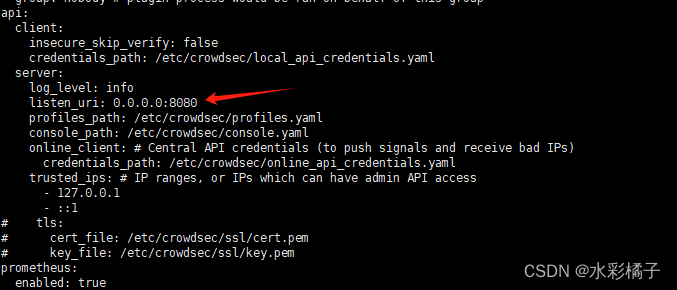
配置server端api可以外部访问(/etc/corwdsec/config.yaml)
添加防火墙规则
 firewall-cmd --permanent --add-port=8080/tcp
 firewall-cmd --reload
客户端安装
首先在server端添加一个bouncers,添加后生成一个key 下面到客户端下配置文件
cscli bouncers add 10.99.50.119 #这个ip地址我用作name 这里填写的是name

curl -s https://install.crowdsec.net | sudo sh
yum install crowdsec-firewall-bouncer-iptables
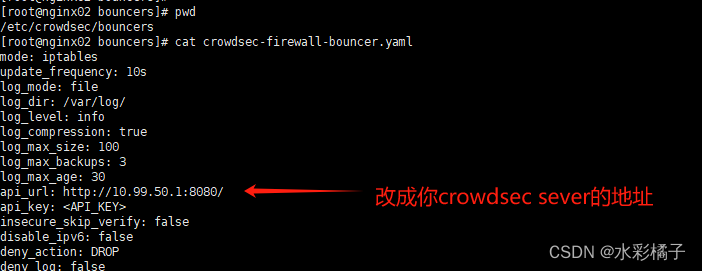
更改配置(/etc/crowdsec/bouncers/crowdsec-firewall-bouncer.yaml),这里key填写上面获取的
启动
systemctl start crowdsec-firewall-bouncer
systemctl enable crowdsec-firewall-bouncer
启动后返回server端是否添加成功
cscli bouncers list

在客户端上 查看黑名单
ipset list crowdsec-blacklists

5、配置corwdsec 检查nginx日志文件
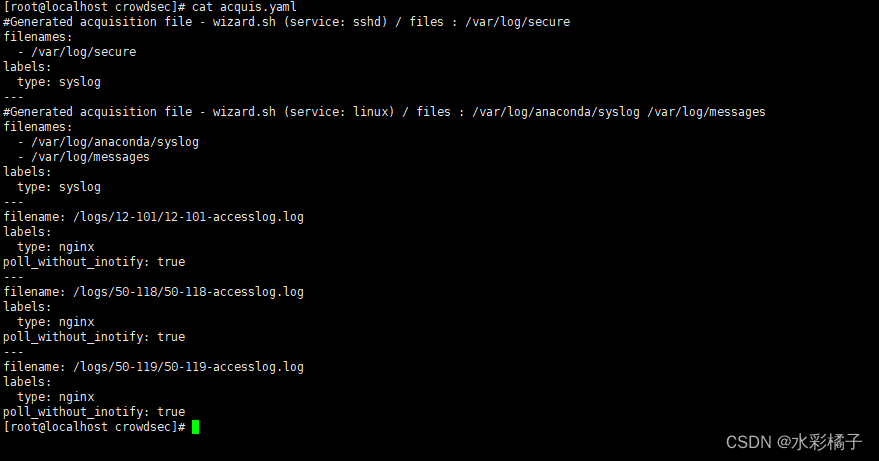
修改解释器配置文件(/etc/crowdsec/acquis.yaml)
filename: /logs/12-101/12-101-accesslog.log
labels:
  type: nginx
poll_without_inotify: true
---
filename: /logs/50-118/50-118-accesslog.log
labels:
  type: nginx
poll_without_inotify: true
---
filename: /logs/50-119/50-119-accesslog.log
labels:
  type: nginx
poll_without_inotify: true
重启
systemctl restart crowdsec
6、白名单和黑名单
mkdir -p /usr/local/etc/crowdsec/postoverflows/s01-whitelist/
vi /etc/crowdsec/postoverflows/s01-whitelist/mywhitelist.yaml
添加类似如下
name: crowdsecurity/whitelists
description: "Whitelist events from my ip addresses"
whitelist:
  reason: "my ip ranges"
  ip:
    - "80.x.x.x"
  cidr:
    - "80.x.x.x/24"
重新加载配置
systemctl reload crowdsec
在决策列表中操作黑白名单
白名单
cscli decisions add --ip 1.2.3.4 --type bypass --duration 24h
cscli decisions add --ip 192.168.1.100 --type bypass --duration forever
cscli decisions delete --ip 192.168.1.100 --type bypass
黑名单
cscli decisions add --ip 1.2.3.4 --type ban --duration 24h
cscli decisions add --ip 1.2.3.4 --type ban --duration forever
cscli decisions delete --ip 1.2.3.4 --type ban
6、将日志采集到es中(es集群前面文章的有介绍)
(1)安装filebeat(我的es是7.x)
安装软件源
rpm --import https://packages.elastic.co/GPG-KEY-elasticsearch
vi /etc/yum.repos.d/elastic.repo
添加如下
[elastic-7.x]
name=Elastic repository for 7.x packages
baseurl=https://artifacts.elastic.co/packages/7.x/yum
gpgcheck=1
gpgkey=https://artifacts.elastic.co/GPG-KEY-elasticsearch
enabled=1
autorefresh=1
type=rpm-md
安装
yum install filebeat
编辑配置文件替换如下
vi /etc/filebeat/filebeat.yml
自行更换es服务器地址信息
filebeat.inputs:
- type: log
  enabled: true
  paths:
    - /usr/local/nginx/logs/50-119-accesslog.log
  fields_under_root: true
  fields:
    log_type: nginx

filebeat.config.modules:
  path: ${path.config}/modules.d/*.yml
  reload.enabled: false

setup.template.settings:
  index.number_of_shards: 1

# 禁用 ILM
setup.ilm.enabled: false

setup.template.name: "nginx-accesslog"
setup.template.pattern: "50-119-accesslog-*"

output.elasticsearch:
  hosts: ["esmn01.wtown.com:9200"]
  protocol: "http"
  username: "xxxx"
  password: "xxxx"
  index: "50-119-accesslog-%{+yyyy.MM}"

processors:
  - add_host_metadata:
      when.not.contains.tags: forwarded
  - add_cloud_metadata: ~
  - add_docker_metadata: ~
  - add_kubernetes_metadata: ~
启动
systemctl restart filebeat
systemctl enable filebeat
