1,提前创建注册的app1应用
Test/Test/settings.py
python manage.py startapp app1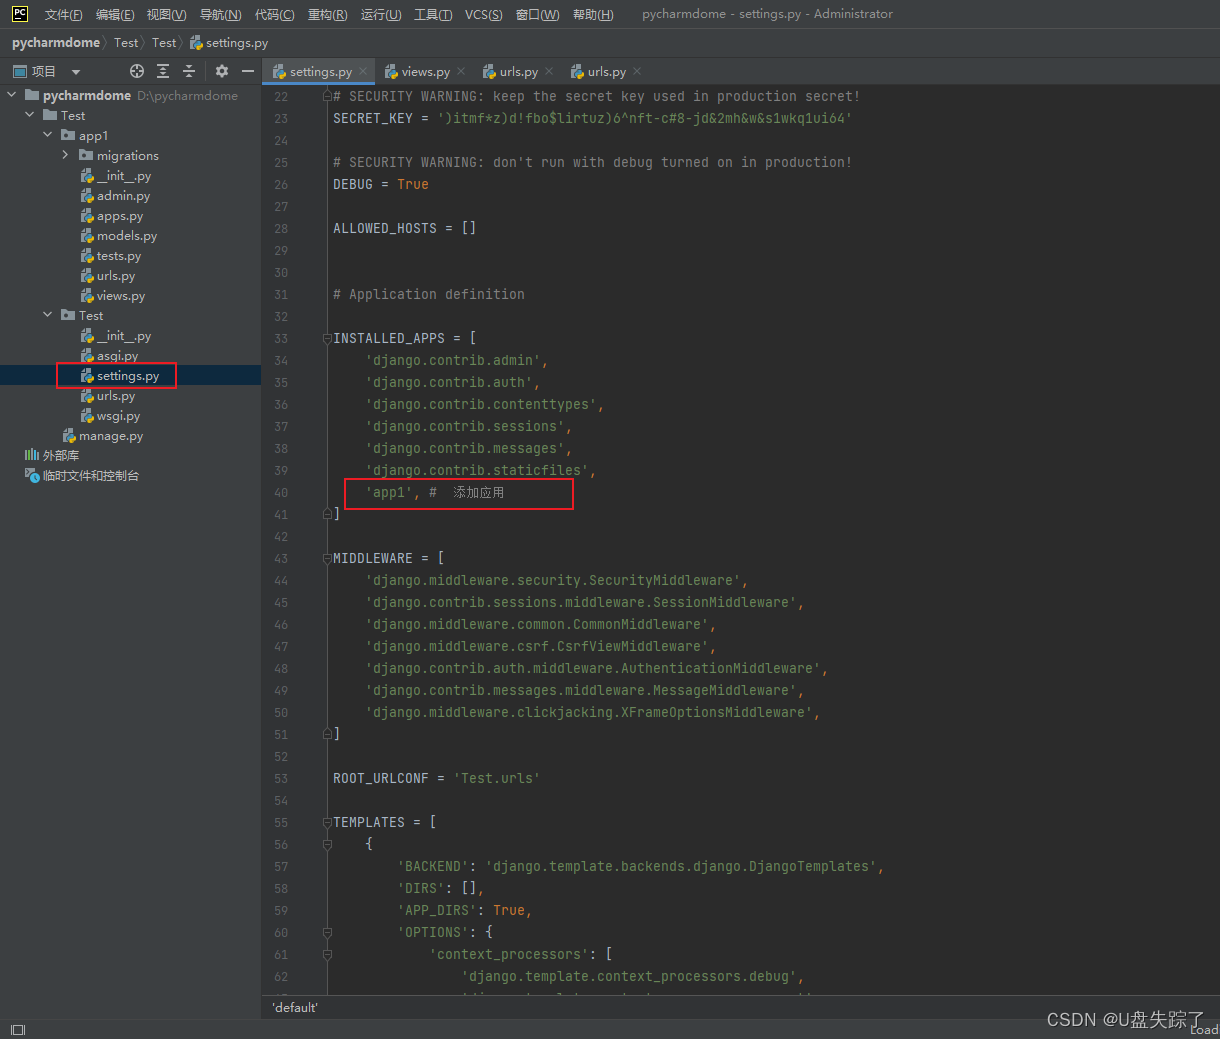
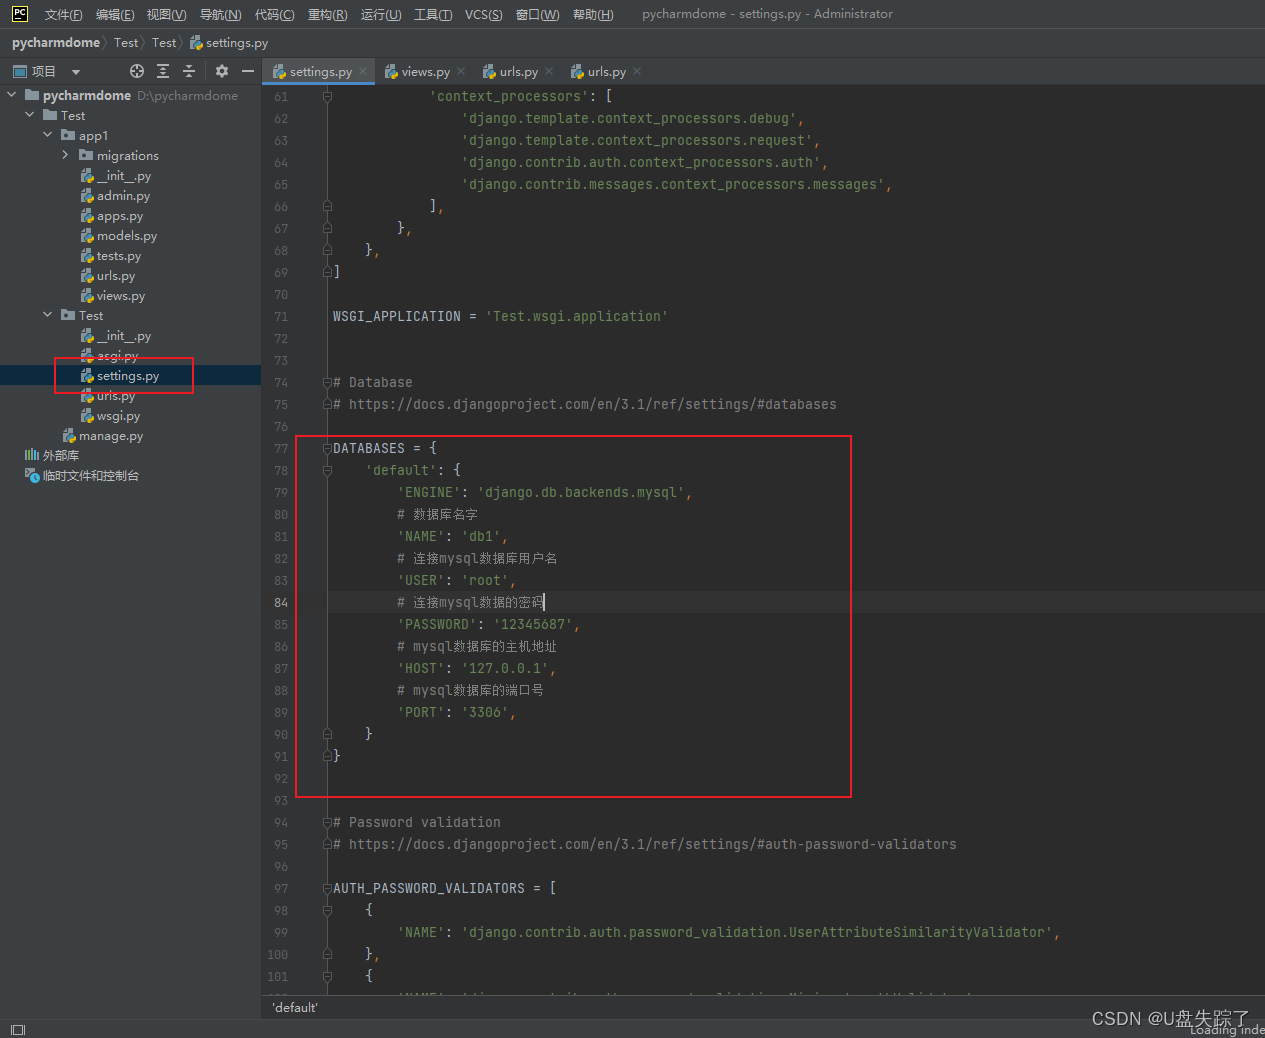
2,配置mysql数据库连接
Test/Test/settings.py
DATABASES = {
    'default': {
        'ENGINE': 'django.db.backends.mysql',
        # 数据库名字
        'NAME': 'db1',
        # 连接mysql数据库用户名
        'USER': 'root',
        # 连接mysql数据的密码
        'PASSWORD': '12345687',
        # mysql数据库的主机地址
        'HOST': '127.0.0.1',
        # mysql数据库的端口号
        'PORT': '3306',
    }
}
3,添加视图函数
Test/app1/views.py
from django.shortcuts import render

# Create your views here.

from django.db import  connection
from django.http import HttpResponse

def index(request):
    # 获取游标对象
    cursor = connection.cursor()
    # 拿到游标对象后执行sql语句
    cursor.execute("SELECT * FROM mechanism_state")

    rows = cursor.fetchall()
    # 遍历查询到的数据
    for row in rows:
        print(row)

    return HttpResponse('查找成功')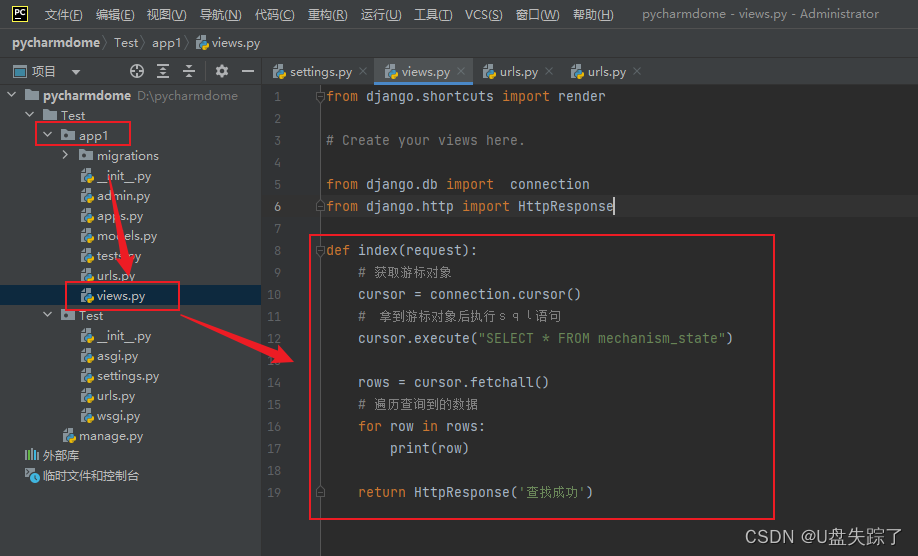
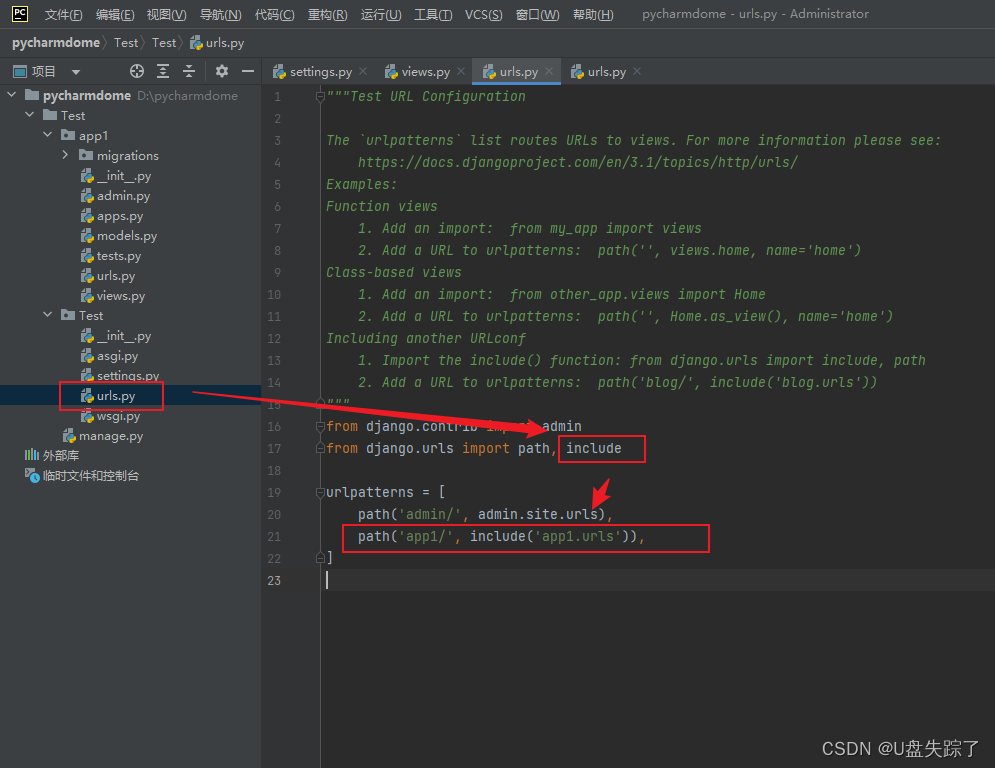
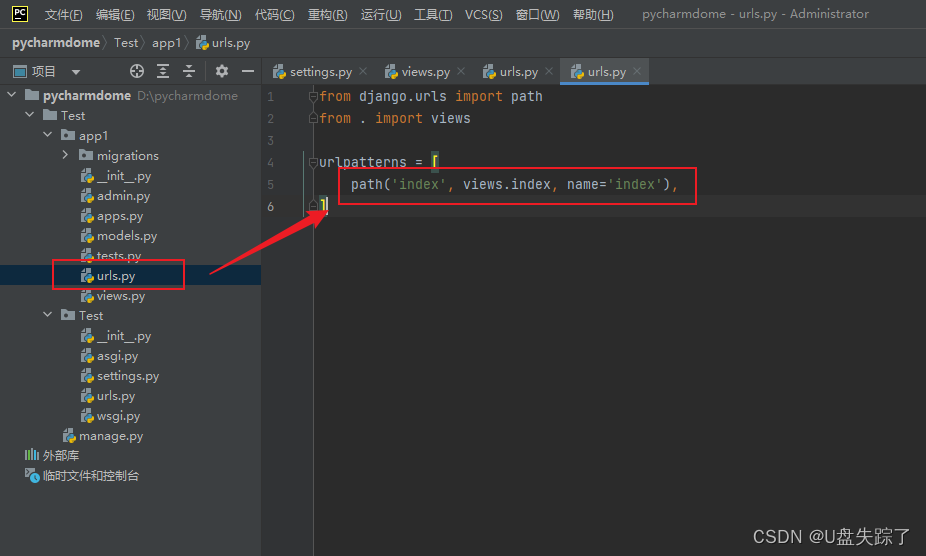
4,添加路由
创建的app1应用,是没有urls.py文件的,需自行创建
Test/app1/urls.py
from django.urls import path
from . import views

urlpatterns = [
    path('index', views.index, name='index'),
]
5,访问页面
127.0.0.1:8000/app1/index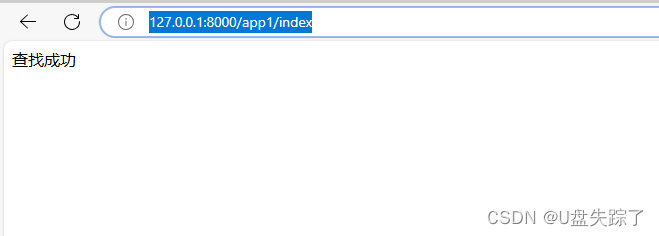
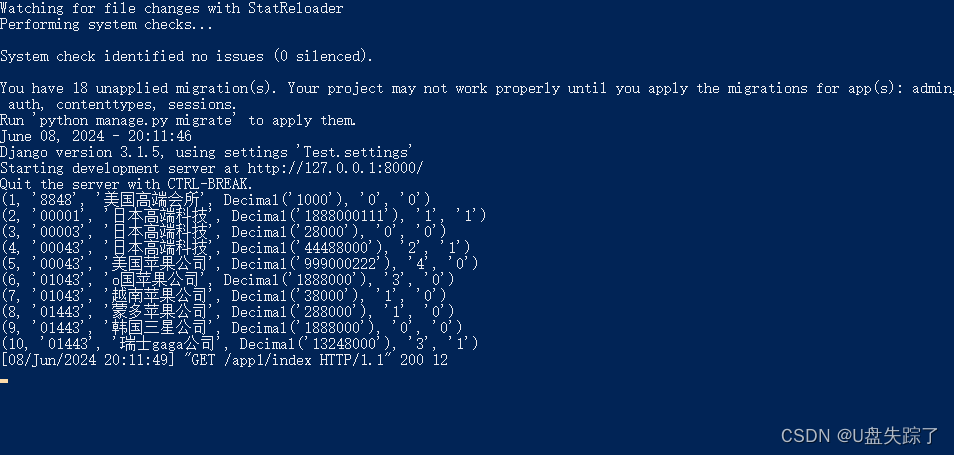
安装配置mysql数据库可参考:
MySQL Community Server win10安装方法_mysql community server 安装 win10-CSDN博客
linux CentOS7 安装MySQL8_linux7 mysql8-CSDN博客
docker 基础操作命令及部署mysql和tomcat_查看 docker mysql 端口-CSDN博客


![[Vue3:axios]:实现实现登陆页面前后端请求,并用Vite解决跨域问题](https://img-blog.csdnimg.cn/direct/3a8ce1fbf345438aafe0060c48a79751.png)


