前言
想深入理解 BERT 模型,在阅读 transformers 库同时记录一下。
笔者小白,错误的地方请不吝指出。
Embedding
为了使 BERT 能处理大量下游任务,它的输入可以明确表示单一句子或句子对,例如<问题,答案>。
To make BERT handle a variety of down-stream tasks, our input representation is able to unambiguously represent both a single sentence and a pair of sentences (e.g., h Question, Answeri) in one token sequence
因此 BERT 的 Embedding 分为三个部分:
- Token Embeddings:对于分词结果进行嵌入。
- Segement Embeddings:用于表示每个词所在句子,例如区分某个词是属于问题句子还是属于答案句子。
- Position Embeddings:位置嵌入。
在 transfoerms 中定义如下:
class BertEmbeddings(nn.Module):
    """Construct the embeddings from word, position and token_type embeddings."""

    def __init__(self, config):
        super().__init__()
        self.word_embeddings = nn.Embedding(config.vocab_size, config.hidden_size, padding_idx=config.pad_token_id)
        self.position_embeddings = nn.Embedding(config.max_position_embeddings, config.hidden_size)
        self.token_type_embeddings = nn.Embedding(config.type_vocab_size, config.hidden_size)

        # self.LayerNorm is not snake-cased to stick with TensorFlow model variable name and be able to load
        # any TensorFlow checkpoint file
        self.LayerNorm = nn.LayerNorm(config.hidden_size, eps=config.layer_norm_eps)
        self.dropout = nn.Dropout(config.hidden_dropout_prob)
        # position_ids (1, len position emb) is contiguous in memory and exported when serialized
        self.position_embedding_type = getattr(config, "position_embedding_type", "absolute")
        self.register_buffer(
        "position_ids", torch.arange(config.max_position_embeddings).expand((1, -1)), persistent=False
        )
        self.register_buffer(
        "token_type_ids", torch.zeros(self.position_ids.size(), dtype=torch.long), persistent=False
)
值得注意的是,BERT 中采用可学习的位置嵌入,而不是 Transformer 中的计算编码。
下面是前向计算代码:
def forward(
    self,
    input_ids: Optional[torch.LongTensor] = None,
    token_type_ids: Optional[torch.LongTensor] = None,
    position_ids: Optional[torch.LongTensor] = None,
    inputs_embeds: Optional[torch.FloatTensor] = None,
    past_key_values_length: int = 0,
) -> torch.Tensor:
    if input_ids is not None:
        input_shape = input_ids.size()
    else:
        input_shape = inputs_embeds.size()[:-1]

    seq_length = input_shape[1]

    if position_ids is None:
        position_ids = self.position_ids[:, past_key_values_length : seq_length + past_key_values_length]

    # Setting the token_type_ids to the registered buffer in constructor where it is all zeros, which usually occurs
    # when its auto-generated, registered buffer helps users when tracing the model without passing token_type_ids, solves
    # issue #5664
    if token_type_ids is None:
        if hasattr(self, "token_type_ids"):
            buffered_token_type_ids = self.token_type_ids[:, :seq_length]
            buffered_token_type_ids_expanded = buffered_token_type_ids.expand(input_shape[0], seq_length)
            token_type_ids = buffered_token_type_ids_expanded
        else:
            token_type_ids = torch.zeros(input_shape, dtype=torch.long, device=self.position_ids.device)

    if inputs_embeds is None:
        inputs_embeds = self.word_embeddings(input_ids)
    token_type_embeddings = self.token_type_embeddings(token_type_ids)

    embeddings = inputs_embeds + token_type_embeddings
    if self.position_embedding_type == "absolute":
        position_embeddings = self.position_embeddings(position_ids)
        embeddings += position_embeddings
    embeddings = self.LayerNorm(embeddings)
    embeddings = self.dropout(embeddings)
    return embeddings
下面介绍各个参数的含义和作用:
input_ids:当前词在词表的位置组成的列表。token_type_ids:当前词对应的句子,所属第一句/第二句/Padding。position_ids:当前词在句子中的位置组成的列表。inputs_embeds:对 input_ids 进行嵌入的结果。past_key_values_length:如果没有传入 position_ids 则从过去计算的地方向后自动取 seq_len 长度作为 position_ids
前向计算逻辑如下:
- 根据 input_ids 计算 input_embeddings,如果提供 input_embeds 则不用计算。
- 根据 token_type_ids 计算 token_type_embeddings。
- 根据 position_ids 计算 position_embeddings。
- 上面三个步骤的结果求和。
- 对步骤4结果做一次 LayerNorm 和 Dropout 后输出。
BertSelfAttention
自注意力是 BERT 中的核心模块,其初始化代码如下:
class BertSelfAttention(nn.Module):
    def __init__(self, config, position_embedding_type=None):
        super().__init__()
        if config.hidden_size % config.num_attention_heads != 0 and not hasattr(config, "embedding_size"):
            raise ValueError(
                f"The hidden size ({config.hidden_size}) is not a multiple of the number of attention "
                f"heads ({config.num_attention_heads})"
            )

        self.num_attention_heads = config.num_attention_heads
        self.attention_head_size = int(config.hidden_size / config.num_attention_heads)
        self.all_head_size = self.num_attention_heads * self.attention_head_size

        self.query = nn.Linear(config.hidden_size, self.all_head_size)
        self.key = nn.Linear(config.hidden_size, self.all_head_size)
        self.value = nn.Linear(config.hidden_size, self.all_head_size)

        self.dropout = nn.Dropout(config.attention_probs_dropout_prob)
        self.position_embedding_type = position_embedding_type or getattr(
            config, "position_embedding_type", "absolute"
        )
        if self.position_embedding_type == "relative_key" or self.position_embedding_type == "relative_key_query":
            self.max_position_embeddings = config.max_position_embeddings
            self.distance_embedding = nn.Embedding(2 * config.max_position_embeddings - 1, self.attention_head_size)

        self.is_decoder = config.is_decoder
与 Transformer 基本一致,都会将 embedding 分为多块计算。虽然判断了 hidden_size 能否整除 num_attention_heads ,但是由于后面的设置,理论上仍然可能导致 hidden_size 与 all_head_size 大小不同。
在 BERT 中对应参数如下:
| type | hidden_size | num_attention_heads |
|---|---|---|
| base | 768 | 12 |
| large | 1024 | 16 |
在 base 和 large 中每个 head 的大小为 64。
下面是对张量进行维度变换,为了后面的计算。
def transpose_for_scores(self, x: torch.Tensor) -> torch.Tensor:
    new_x_shape = x.size()[:-1] + (self.num_attention_heads, self.attention_head_size)
    x = x.view(new_x_shape)
    return x.permute(0, 2, 1, 3)
输入 x 的维度为 [bsz, seq_len, hidden_size],new_x_shape 变为 [bsz, seq_len, heads, head_size],然后交换 1 2 维度,变为 [bsz, heads, seq_len, head_size]。
前向计算代码如下:
def forward(
    self,
    hidden_states: torch.Tensor,
    attention_mask: Optional[torch.FloatTensor] = None,
    head_mask: Optional[torch.FloatTensor] = None,
    encoder_hidden_states: Optional[torch.FloatTensor] = None,
    encoder_attention_mask: Optional[torch.FloatTensor] = None,
    past_key_value: Optional[Tuple[Tuple[torch.FloatTensor]]] = None,
    output_attentions: Optional[bool] = False,
) -> Tuple[torch.Tensor]:
    mixed_query_layer = self.query(hidden_states)

    # If this is instantiated as a cross-attention module, the keys
    # and values come from an encoder; the attention mask needs to be
    # such that the encoder's padding tokens are not attended to.
    is_cross_attention = encoder_hidden_states is not None

    if is_cross_attention and past_key_value is not None:
        # reuse k,v, cross_attentions
        key_layer = past_key_value[0]
        value_layer = past_key_value[1]
        attention_mask = encoder_attention_mask
    elif is_cross_attention:
        key_layer = self.transpose_for_scores(self.key(encoder_hidden_states))
        value_layer = self.transpose_for_scores(self.value(encoder_hidden_states))
        attention_mask = encoder_attention_mask
    elif past_key_value is not None:
        key_layer = self.transpose_for_scores(self.key(hidden_states))
        value_layer = self.transpose_for_scores(self.value(hidden_states))
        key_layer = torch.cat([past_key_value[0], key_layer], dim=2)
        value_layer = torch.cat([past_key_value[1], value_layer], dim=2)
    else:
        key_layer = self.transpose_for_scores(self.key(hidden_states))
        value_layer = self.transpose_for_scores(self.value(hidden_states))

    query_layer = self.transpose_for_scores(mixed_query_layer)

    use_cache = past_key_value is not None
    if self.is_decoder:
        # if cross_attention save Tuple(torch.Tensor, torch.Tensor) of all cross attention key/value_states.
        # Further calls to cross_attention layer can then reuse all cross-attention
        # key/value_states (first "if" case)
        # if uni-directional self-attention (decoder) save Tuple(torch.Tensor, torch.Tensor) of
        # all previous decoder key/value_states. Further calls to uni-directional self-attention
        # can concat previous decoder key/value_states to current projected key/value_states (third "elif" case)
        # if encoder bi-directional self-attention `past_key_value` is always `None`
        past_key_value = (key_layer, value_layer)

    # Take the dot product between "query" and "key" to get the raw attention scores.
    attention_scores = torch.matmul(query_layer, key_layer.transpose(-1, -2))

    if self.position_embedding_type == "relative_key" or self.position_embedding_type == "relative_key_query":
        query_length, key_length = query_layer.shape[2], key_layer.shape[2]
        if use_cache:
            position_ids_l = torch.tensor(key_length - 1, dtype=torch.long, device=hidden_states.device).view(
                -1, 1
            )
        else:
            position_ids_l = torch.arange(query_length, dtype=torch.long, device=hidden_states.device).view(-1, 1)
        position_ids_r = torch.arange(key_length, dtype=torch.long, device=hidden_states.device).view(1, -1)
        distance = position_ids_l - position_ids_r

        positional_embedding = self.distance_embedding(distance + self.max_position_embeddings - 1)
        positional_embedding = positional_embedding.to(dtype=query_layer.dtype)  # fp16 compatibility

        if self.position_embedding_type == "relative_key":
            relative_position_scores = torch.einsum("bhld,lrd->bhlr", query_layer, positional_embedding)
            attention_scores = attention_scores + relative_position_scores
        elif self.position_embedding_type == "relative_key_query":
            relative_position_scores_query = torch.einsum("bhld,lrd->bhlr", query_layer, positional_embedding)
            relative_position_scores_key = torch.einsum("bhrd,lrd->bhlr", key_layer, positional_embedding)
            attention_scores = attention_scores + relative_position_scores_query + relative_position_scores_key

    attention_scores = attention_scores / math.sqrt(self.attention_head_size)
    if attention_mask is not None:
        # Apply the attention mask is (precomputed for all layers in BertModel forward() function)
        attention_scores = attention_scores + attention_mask

    # Normalize the attention scores to probabilities.
    attention_probs = nn.functional.softmax(attention_scores, dim=-1)

    # This is actually dropping out entire tokens to attend to, which might
    # seem a bit unusual, but is taken from the original Transformer paper.
    attention_probs = self.dropout(attention_probs)

    # Mask heads if we want to
    if head_mask is not None:
        attention_probs = attention_probs * head_mask

    context_layer = torch.matmul(attention_probs, value_layer)

    context_layer = context_layer.permute(0, 2, 1, 3).contiguous()
    new_context_layer_shape = context_layer.size()[:-2] + (self.all_head_size,)
    context_layer = context_layer.view(new_context_layer_shape)

    outputs = (context_layer, attention_probs) if output_attentions else (context_layer,)

    if self.is_decoder:
        outputs = outputs + (past_key_value,)
    return outputs
首先判断是否要做交叉注意力,判断原则就是是否输入 encoder_hidden_states。再结合是否输入 past_key_value 就形成了四种情况。
- 计算交叉注意力,传入过去的键值。则 K、V 均采用过去的键值,Mask 采用 encoder_attention_mask。
- 计算交叉注意力,没有传入过去的键值。则 K、V 通过 hidden_size 线性变换得到,Mask 采用 encoder_attention_mask。
- 不计算交叉注意力,传入过去的键值。则 K、V 由 hidden_size 线性变换之后,与过去的键值拼接而成,拼接维度 dim=2。
- 不计算交叉注意力,没有传入过去的键值。则 K、V 通过 hidden_size 线性变换得到。
无论哪种情况,Q 的都是由 hidden_size 线性变换得到。
然后就是计算 QKTQK^TQKT 得到 raw_attention_score。但是在进行 scale 之前,对位置编码种类进行特殊操作。
absolute
不进行任何操作。
relative
分为 relative_key 和 relative_key_query。
这两者都会先计算 Q 和 K 的距离,然后对距离进行 embedding。
不同的是 relative_key 会将 Q 与上述 embedding 进行计算后与 raw_attention_score 相加。
relative_key_query 会将 Q 和 V 都与上述 embedding 进行计算,然后两者与 raw_attention_score 累加。
经过上面的操作后,对 raw_attention_score 进行 scale 操作。
操作之后,与 Mask 计算采用加法而不是乘法,这是因为 Mask 的值是很大的负数而不是零,这种方式 Mask 更加“严实”。
然后就是正常的后续计算。
BertSelfOutput
多头注意力后的操作:
class BertSelfOutput(nn.Module):
    def __init__(self, config):
        super().__init__()
        self.dense = nn.Linear(config.hidden_size, config.hidden_size)
        self.LayerNorm = nn.LayerNorm(config.hidden_size, eps=config.layer_norm_eps)
        self.dropout = nn.Dropout(config.hidden_dropout_prob)

    def forward(self, hidden_states: torch.Tensor, input_tensor: torch.Tensor) -> torch.Tensor:
        hidden_states = self.dense(hidden_states)
        hidden_states = self.dropout(hidden_states)
        hidden_states = self.LayerNorm(hidden_states + input_tensor)
        return hidden_states
需要注意的是,hidden_size 经过线性变换之后,先经过 dropoutdropoutdropout,然后与 input_tensor 进行残差连接,之后进行 LayerNormLayerNormLayerNorm。
BertAttention
上面讲述了 BERT 中的多头注意力层和注意力层之后的输出,这里就是对这两块进行一次封装。
class BertAttention(nn.Module):
    def __init__(self, config, position_embedding_type=None):
        super().__init__()
        self.self = BertSelfAttention(config, position_embedding_type=position_embedding_type)
        self.output = BertSelfOutput(config)
        self.pruned_heads = set()

    def prune_heads(self, heads):
        if len(heads) == 0:
            return
        heads, index = find_pruneable_heads_and_indices(
            heads, self.self.num_attention_heads, self.self.attention_head_size, self.pruned_heads
        )

        # Prune linear layers
        self.self.query = prune_linear_layer(self.self.query, index)
        self.self.key = prune_linear_layer(self.self.key, index)
        self.self.value = prune_linear_layer(self.self.value, index)
        self.output.dense = prune_linear_layer(self.output.dense, index, dim=1)

        # Update hyper params and store pruned heads
        self.self.num_attention_heads = self.self.num_attention_heads - len(heads)
        self.self.all_head_size = self.self.attention_head_size * self.self.num_attention_heads
        self.pruned_heads = self.pruned_heads.union(heads)
里面定义 prune_heads() 函数用于注意力头的剪枝。
其中 find_pruneable_heads_and_indices 用于找到可以剪枝的注意力头。返回需要剪掉的 heads 和保留的维度下标。
def find_pruneable_heads_and_indices(
    heads: List[int], n_heads: int, head_size: int, already_pruned_heads: Set[int]
) -> Tuple[Set[int], torch.LongTensor]:
    """
    Finds the heads and their indices taking `already_pruned_heads` into account.

    Args:
        heads (`List[int]`): List of the indices of heads to prune.
        n_heads (`int`): The number of heads in the model.
        head_size (`int`): The size of each head.
        already_pruned_heads (`Set[int]`): A set of already pruned heads.

    Returns:
        `Tuple[Set[int], torch.LongTensor]`: A tuple with the indices of heads to prune taking `already_pruned_heads`
        into account and the indices of rows/columns to keep in the layer weight.
    """
prune_linear_layer 函数用于具体剪枝注意力头。会按照 index 保留维度。
def prune_linear_layer(layer: nn.Linear, index: torch.LongTensor, dim: int = 0) -> nn.Linear:
    """
    Prune a linear layer to keep only entries in index.

    Used to remove heads.

    Args:
        layer (`torch.nn.Linear`): The layer to prune.
        index (`torch.LongTensor`): The indices to keep in the layer.
        dim (`int`, *optional*, defaults to 0): The dimension on which to keep the indices.

    Returns:
        `torch.nn.Linear`: The pruned layer as a new layer with `requires_grad=True`.
    """
前向计算代码如下:
def forward(
    self,
    hidden_states: torch.Tensor,
    attention_mask: Optional[torch.FloatTensor] = None,
    head_mask: Optional[torch.FloatTensor] = None,
    encoder_hidden_states: Optional[torch.FloatTensor] = None,
    encoder_attention_mask: Optional[torch.FloatTensor] = None,
    past_key_value: Optional[Tuple[Tuple[torch.FloatTensor]]] = None,
    output_attentions: Optional[bool] = False,
) -> Tuple[torch.Tensor]:
    self_outputs = self.self(
        hidden_states,
        attention_mask,
        head_mask,
        encoder_hidden_states,
        encoder_attention_mask,
        past_key_value,
        output_attentions,
    )
    attention_output = self.output(self_outputs[0], hidden_states)
    outputs = (attention_output,) + self_outputs[1:]  # add attentions if we output them
    return outputs
outputs 可能包含(attention, all_attention, past_value_key)
BertIntermediate
Attention 之后加入全连接层和激活函数,比较简单。
class BertIntermediate(nn.Module):
    def __init__(self, config):
        super().__init__()
        self.dense = nn.Linear(config.hidden_size, config.intermediate_size)
        if isinstance(config.hidden_act, str):
            self.intermediate_act_fn = ACT2FN[config.hidden_act]
        else:
            self.intermediate_act_fn = config.hidden_act

    def forward(self, hidden_states: torch.Tensor) -> torch.Tensor:
        hidden_states = self.dense(hidden_states)
        hidden_states = self.intermediate_act_fn(hidden_states)
        return hidden_states
BertOutput
经过中间层后,又是一个全连接层 + dropout + 残差 + 层归一化。和 BertSelfOutput 架构相同。
class BertOutput(nn.Module):
    def __init__(self, config):
        super().__init__()
        self.dense = nn.Linear(config.intermediate_size, config.hidden_size)
        self.LayerNorm = nn.LayerNorm(config.hidden_size, eps=config.layer_norm_eps)
        self.dropout = nn.Dropout(config.hidden_dropout_prob)

    def forward(self, hidden_states: torch.Tensor, input_tensor: torch.Tensor) -> torch.Tensor:
        hidden_states = self.dense(hidden_states)
        hidden_states = self.dropout(hidden_states)
        hidden_states = self.LayerNorm(hidden_states + input_tensor)
        return hidden_states
BertLayer
BertLayer 是将 BertAttention、BertIntermediate 和 BertOutput 封装起来。
class BertLayer(nn.Module):
    def __init__(self, config):
        super().__init__()
        self.chunk_size_feed_forward = config.chunk_size_feed_forward
        self.seq_len_dim = 1
        self.attention = BertAttention(config)
        self.is_decoder = config.is_decoder
        self.add_cross_attention = config.add_cross_attention
        if self.add_cross_attention:
            if not self.is_decoder:
                raise ValueError(f"{self} should be used as a decoder model if cross attention is added")
            self.crossattention = BertAttention(config, position_embedding_type="absolute")
        self.intermediate = BertIntermediate(config)
        self.output = BertOutput(config)
这里注意的是,如果加入交叉注意力,必须作为 decoder。
前向计算代码如下:
def forward(
        self,
        hidden_states: torch.Tensor,
        attention_mask: Optional[torch.FloatTensor] = None,
        head_mask: Optional[torch.FloatTensor] = None,
        encoder_hidden_states: Optional[torch.FloatTensor] = None,
        encoder_attention_mask: Optional[torch.FloatTensor] = None,
        past_key_value: Optional[Tuple[Tuple[torch.FloatTensor]]] = None,
        output_attentions: Optional[bool] = False,
    ) -> Tuple[torch.Tensor]:
        # decoder uni-directional self-attention cached key/values tuple is at positions 1,2
        self_attn_past_key_value = past_key_value[:2] if past_key_value is not None else None
        self_attention_outputs = self.attention(
            hidden_states,
            attention_mask,
            head_mask,
            output_attentions=output_attentions,
            past_key_value=self_attn_past_key_value,
        )
        attention_output = self_attention_outputs[0]

        # if decoder, the last output is tuple of self-attn cache
        if self.is_decoder:
            outputs = self_attention_outputs[1:-1]
            present_key_value = self_attention_outputs[-1]
        else:
            outputs = self_attention_outputs[1:]  # add self attentions if we output attention weights

        cross_attn_present_key_value = None
        if self.is_decoder and encoder_hidden_states is not None:
            if not hasattr(self, "crossattention"):
                raise ValueError(
                    f"If `encoder_hidden_states` are passed, {self} has to be instantiated with cross-attention layers"
                    " by setting `config.add_cross_attention=True`"
                )

            # cross_attn cached key/values tuple is at positions 3,4 of past_key_value tuple
            cross_attn_past_key_value = past_key_value[-2:] if past_key_value is not None else None
            cross_attention_outputs = self.crossattention(
                attention_output,
                attention_mask,
                head_mask,
                encoder_hidden_states,
                encoder_attention_mask,
                cross_attn_past_key_value,
                output_attentions,
            )
            attention_output = cross_attention_outputs[0]
            outputs = outputs + cross_attention_outputs[1:-1]  # add cross attentions if we output attention weights

            # add cross-attn cache to positions 3,4 of present_key_value tuple
            cross_attn_present_key_value = cross_attention_outputs[-1]
            present_key_value = present_key_value + cross_attn_present_key_value

        layer_output = apply_chunking_to_forward(
            self.feed_forward_chunk, self.chunk_size_feed_forward, self.seq_len_dim, attention_output
        )
        outputs = (layer_output,) + outputs

        # if decoder, return the attn key/values as the last output
        if self.is_decoder:
            outputs = outputs + (present_key_value,)

        return outputs

    def feed_forward_chunk(self, attention_output):
        intermediate_output = self.intermediate(attention_output)
        layer_output = self.output(intermediate_output, attention_output)
        return layer_output
基本逻辑:
- 对 hidden_states 进行一次 Attention。
- 如果是 decoder,将 attention_outputs 进行一次 CrossAttention。
- 经过中间层和 Output 层。
需要注意的是,对于第三步,这里采用分块操作来节省内存。
layer_output = apply_chunking_to_forward(
    self.feed_forward_chunk, self.chunk_size_feed_forward, self.seq_len_dim, attention_output
)

def feed_forward_chunk(self, attention_output):
    intermediate_output = self.intermediate(attention_output)
    layer_output = self.output(intermediate_output, attention_output)
    return layer_output

def apply_chunking_to_forward(
    forward_fn: Callable[..., torch.Tensor], chunk_size: int, chunk_dim: int, *input_tensors
) -> torch.Tensor:
    """
    This function chunks the `input_tensors` into smaller input tensor parts of size `chunk_size` over the dimension
    `chunk_dim`. It then applies a layer `forward_fn` to each chunk independently to save memory.

    If the `forward_fn` is independent across the `chunk_dim` this function will yield the same result as directly
    applying `forward_fn` to `input_tensors`.

    Args:
        forward_fn (`Callable[..., torch.Tensor]`):
            The forward function of the model.
        chunk_size (`int`):
            The chunk size of a chunked tensor: `num_chunks = len(input_tensors[0]) / chunk_size`.
        chunk_dim (`int`):
            The dimension over which the `input_tensors` should be chunked.
        input_tensors (`Tuple[torch.Tensor]`):
            The input tensors of `forward_fn` which will be chunked

    Returns:
        `torch.Tensor`: A tensor with the same shape as the `forward_fn` would have given if applied`.
apply_chunking_to_forward 函数就是将输入的 tensor 在指定的 chunk_dim 上分为若干个大小为 chunk_size 的块,然后对每块进行前向计算。
BERT 中指定的维度是 seq_len_dim,也就是将一个句子分为若干指定大小的块,分别进行计算。
BertEncoder
有了前面的 BertLayer,BertEncoder 就是若干 BertLayer 堆叠而成。
class BertEncoder(nn.Module):
    def __init__(self, config):
        super().__init__()
        self.config = config
        self.layer = nn.ModuleList([BertLayer(config) for _ in range(config.num_hidden_layers)])
        self.gradient_checkpointing = False
前向计算也就是输入经过若干 BertLayer。如果设置了梯度检查点,并且处于训练状态,BERT 会采用 torch.utils.checkpoint.checkpoint() 来节省内存。
if self.gradient_checkpointing and self.training:

    def create_custom_forward(module):
        def custom_forward(*inputs):
            return module(*inputs, past_key_value, output_attentions)

        return custom_forward

    layer_outputs = torch.utils.checkpoint.checkpoint(
        create_custom_forward(layer_module),
        hidden_states,
        attention_mask,
        layer_head_mask,
        encoder_hidden_states,
        encoder_attention_mask,
    )

def checkpoint(function, *args, use_reentrant: bool = True, **kwargs):
    r"""Checkpoint a model or part of the model

    Checkpointing works by trading compute for memory. Rather than storing all
    intermediate activations of the entire computation graph for computing
    backward, the checkpointed part does **not** save intermediate activations,
    and instead recomputes them in backward pass. It can be applied on any part
    of a model.
这是一种时间换空间的思想。
BertPooler
class BertPooler(nn.Module):
    def __init__(self, config):
        super().__init__()
        self.dense = nn.Linear(config.hidden_size, config.hidden_size)
        self.activation = nn.Tanh()

    def forward(self, hidden_states: torch.Tensor) -> torch.Tensor:
        # We "pool" the model by simply taking the hidden state corresponding
        # to the first token.
        first_token_tensor = hidden_states[:, 0]
        pooled_output = self.dense(first_token_tensor)
        pooled_output = self.activation(pooled_output)
        return pooled_output
BertPooler 仅仅获取 hidden_states 在 seq_len 维度上的第一个向量,然后经过线性变换后传入激活函数。
Summary
BERT 是由若干 BertLayer 堆叠而成,可以在最后一层加入不同的线性层,以适应不同的下游任务。
BertLayer 是由 BertAttention、CrossAttention(可选)、BertIntermediate 和 BertOutput 堆叠而成。
- BertAttention:由自注意力层和输出层构成
- 自注意力层:Mask 采用加法,被遮罩的地方为较大负数
- 输出层:依次经过 线性层 dropout 残差 LayerNorm
- BertIntermediate:依次经过 线性层 激活函数
- BertOutput:依次经过 线性层 dropout 残差 LayerNorm
那么,我们该如何学习大模型?
作为一名热心肠的互联网老兵,我决定把宝贵的AI知识分享给大家。 至于能学习到多少就看你的学习毅力和能力了 。我已将重要的AI大模型资料包括AI大模型入门学习思维导图、精品AI大模型学习书籍手册、视频教程、实战学习等录播视频免费分享出来。
一、大模型全套的学习路线
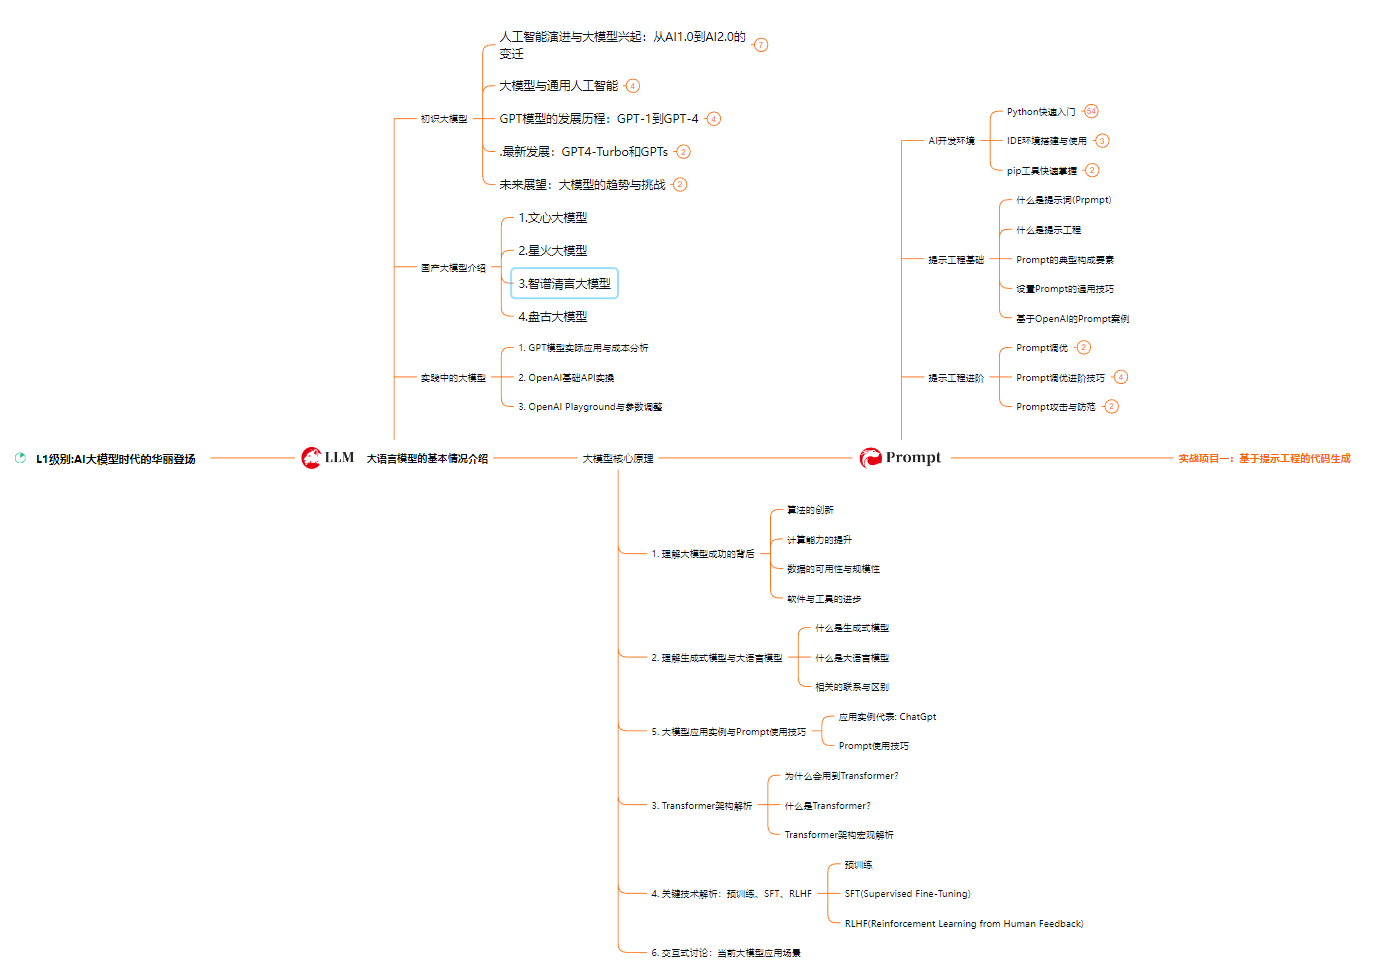
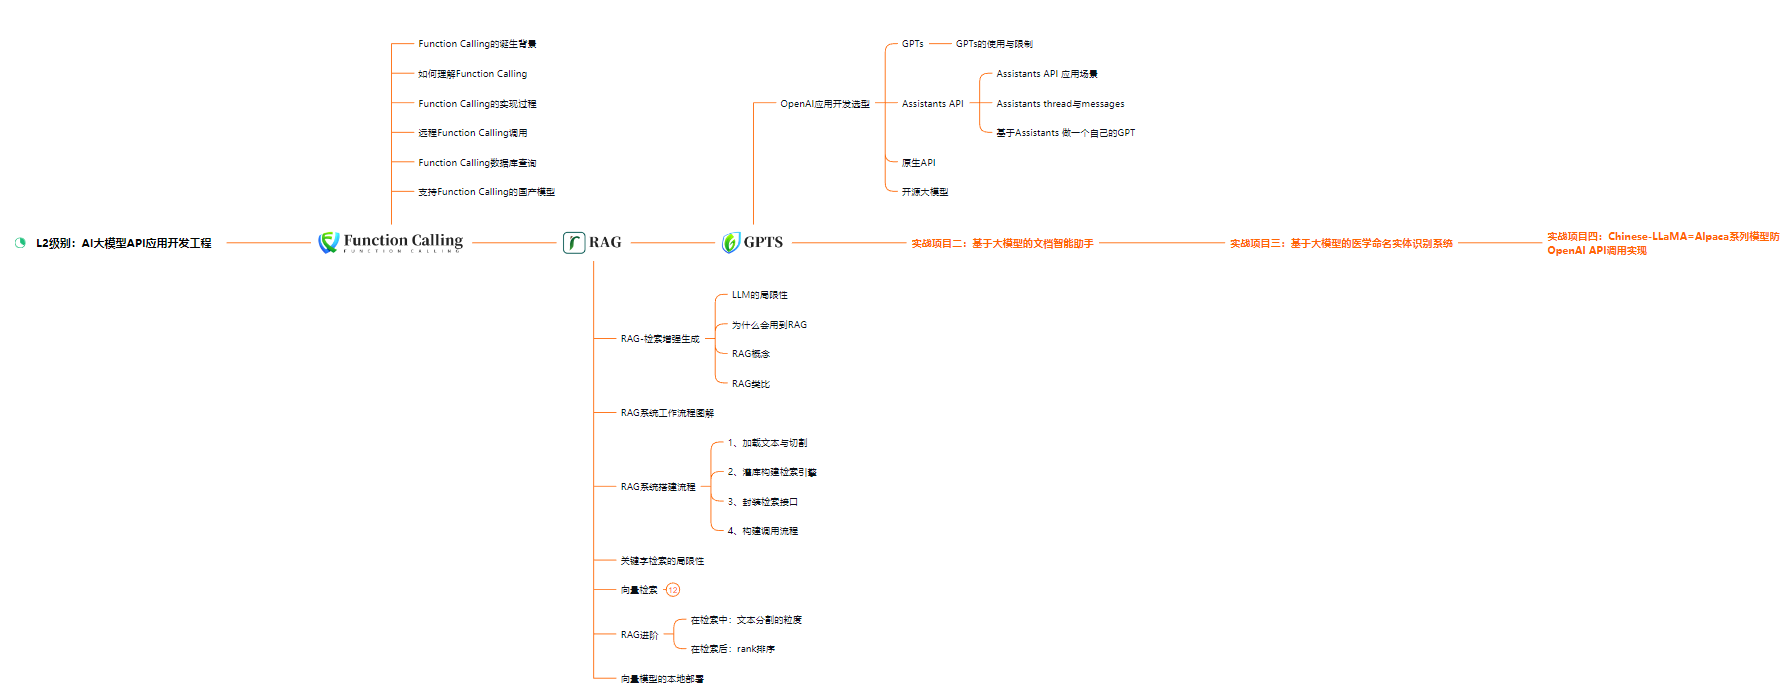
学习大型人工智能模型,如GPT-3、BERT或任何其他先进的神经网络模型,需要系统的方法和持续的努力。既然要系统的学习大模型,那么学习路线是必不可少的,下面的这份路线能帮助你快速梳理知识,形成自己的体系。
L1级别:AI大模型时代的华丽登场
L2级别:AI大模型API应用开发工程
L3级别:大模型应用架构进阶实践

L4级别:大模型微调与私有化部署

一般掌握到第四个级别,市场上大多数岗位都是可以胜任,但要还不是天花板,天花板级别要求更加严格,对于算法和实战是非常苛刻的。建议普通人掌握到L4级别即可。
以上的AI大模型学习路线,不知道为什么发出来就有点糊,高清版可以微信扫描下方CSDN官方认证二维码免费领取【保证100%免费】

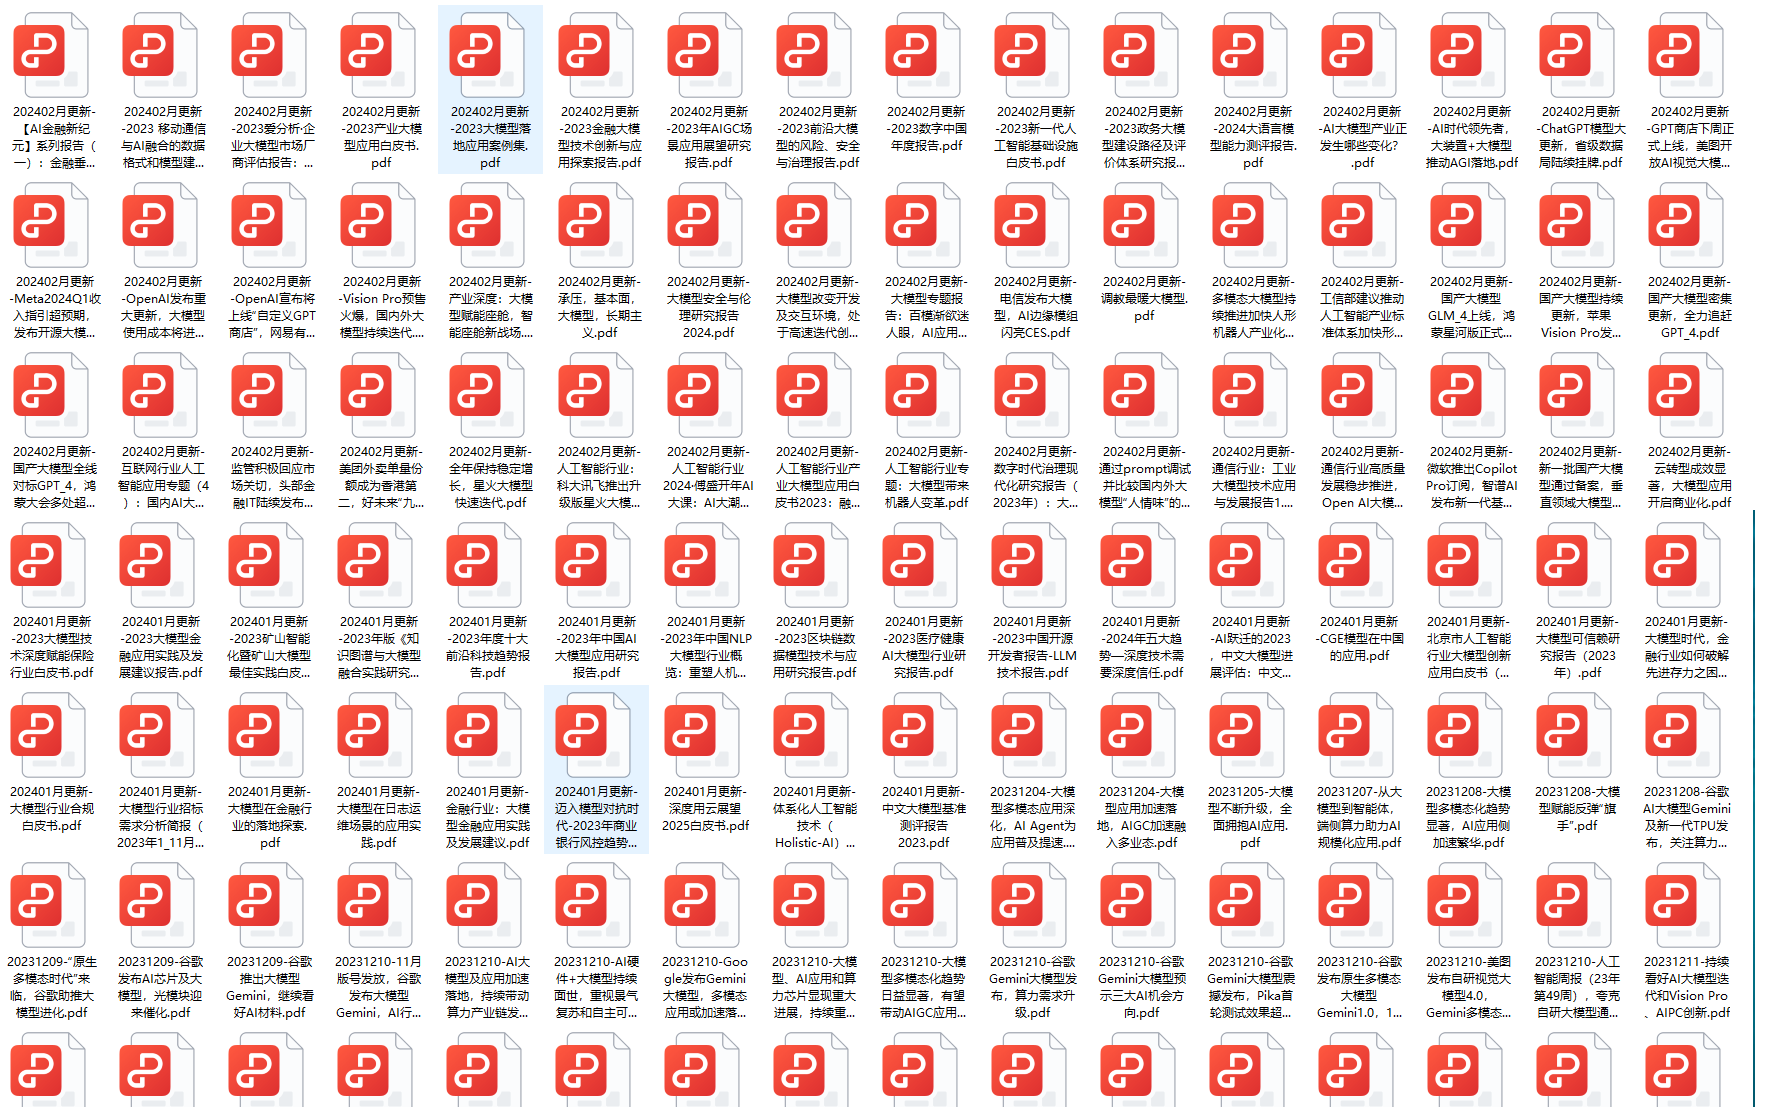
二、640套AI大模型报告合集
这套包含640份报告的合集,涵盖了AI大模型的理论研究、技术实现、行业应用等多个方面。无论您是科研人员、工程师,还是对AI大模型感兴趣的爱好者,这套报告合集都将为您提供宝贵的信息和启示。
三、大模型经典PDF籍
随着人工智能技术的飞速发展,AI大模型已经成为了当今科技领域的一大热点。这些大型预训练模型,如GPT-3、BERT、XLNet等,以其强大的语言理解和生成能力,正在改变我们对人工智能的认识。 那以下这些PDF籍就是非常不错的学习资源。

四、AI大模型商业化落地方案

作为普通人,入局大模型时代需要持续学习和实践,不断提高自己的技能和认知水平,同时也需要有责任感和伦理意识,为人工智能的健康发展贡献力量。



![[每周一更]-(第100期):介绍 goctl自动生成代码](https://img-blog.csdnimg.cn/direct/a12ecf2f35644037adb8209605eccf85.jpeg#pic_center)

