基础
canvas标签
canvas是H5中新推出的标签,这个提供一块画布,可以在上面绘制图案,通过这种方式制作web游戏带来的性能消耗比操作DOM要小的多。
如果知做浏览器游戏,为了保证性能最好使用画布来制作。
坐标系
画布的坐标系和浏览器相同,以画布的左上角为原点。向左x坐标递增,向右y坐标递增,默认单位为像素。
绘图方式
canvas使用命令式编程的方式,使用语句说明出作图的路径和画笔的属性,最后进行着色并闭合路径。下面canvas的直线绘制流程。
// 获取画布
const canvas = document.querySelector('canvas');
// 获取画笔
const ctx = canvas.getContext('2d');
/ 开启路径
ctx.beginPath();
// 移动画笔到某点
ctx.moveTo(0, 0);
// 画直线到某点
ctx.lineTo(800, 600);
// 设置直线的颜色,设置颜色要在上色之前
ctx.strokeStyle = 'lightpink';
// 设置线条宽度,也要在上色之前设置
ctx.lineWidth = 5;
// 上色
ctx.stroke();
// 闭合路径
ctx.closePath();
绘图函数
直线和曲线
上面举的例子我们绘制了一个直线,但我们可以发现上面的步骤很多都是重复的,没有必要重复得写,因此我们可以将其封装为一个函数。
// 可以画实线就可以画虚线,虚线本质上就是多条很短的直线,canvas内部提供了一个绘制虚线的函数,只需要我们将封装的函数进行一些修改
// 使用setLineDash() 函数可以设置一条虚线的长度和间距组合,这是对画笔的设置,会影响到之后的所有线条
// 使用getLineDash() 函数可以获取到当前路径下的虚线参数信息
function drawLine(x1, y1, x2, y2, color, width, dashed) {
  ctx.beginPath();
  ctx.moveTo(x1, y1);
  ctx.lineTo(x2, y2);
  if(dashed) ctx.setLineDash(dashed);
  ctx.strokeStyle = color;
  ctx.lineWidth = width;
  ctx.stroke();
  // 取消掉之前的曲线配置,防止影响下一条线
  ctx.setLineDash([0,0])
  ctx.closePath();
}
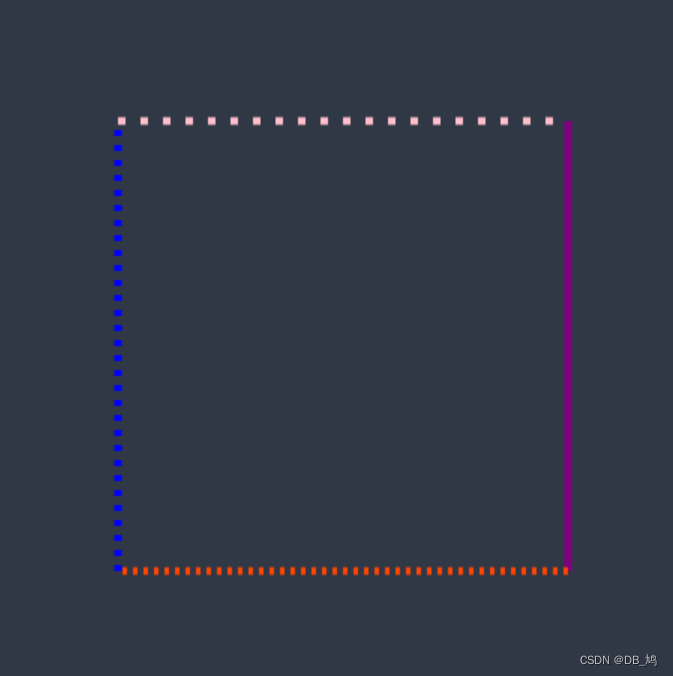
在连续调用4次之后我们可以绘制一个虚线组成的矩形边框
drawLine(100,100,400,100,'pink',5,[5,10]);
drawLine(400,100,400,400,'purple',5);
drawLine(400,400,100,400,'orangered',5,[3,4]);
drawLine(100,400,100,100,'blue',5,[4,6]);
矩形
上面我们绘制了一个四条边都不同的矩形,但如果是绘制普通的矩形,使用上面的方法就过于烦琐,我们可以使用canvas使用的矩形API来绘制。
绘制矩形有三个方法:
rect()绘制空矩形,可以分别描边和填充strokeRect()绘制空心矩形,不能填充,会自动描边fillRect()绘制实心矩形,不能描边,会自动填充
下面的代码是一个矩形的绘制流程
ctx.beginPath();
ctx.rect(100,100,300,300);
// 设置填充颜色
ctx.fillStyle = 'skyblue';
ctx.fill();
// 设置描边颜色
ctx.strokeStyle = 'lightpink';
// 设置线宽
ctx.lineWidth = 5;
ctx.stroke();
ctx.closePath();
圆和圆弧
使用arc函数可以回执圆形或圆弧,共接收6个参数,具体的参数如下:
- 圆心的x坐标和y坐标
- 圆的半径
- 圆的起点角度和终点角度(弧度制,三点钟方向为0)
- 圆的绘制方向(选填,默认为逆时针)true表示逆时针,false表示顺时针
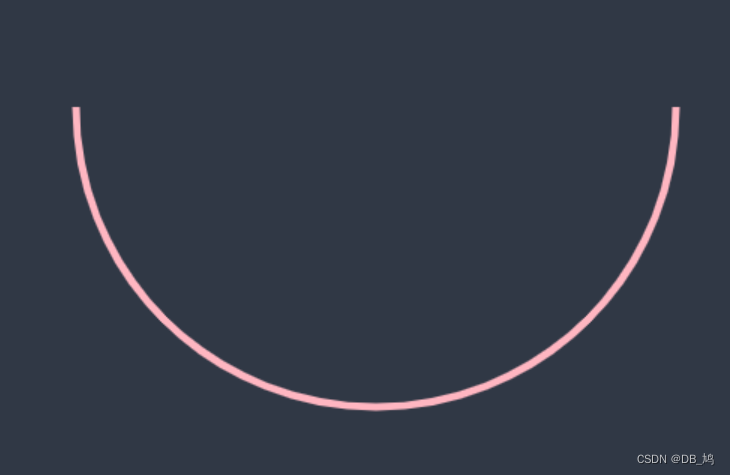
下面是一个例子,可以绘制一个半圆:
    ctx.strokeStyle = 'lightpink';
    ctx.lineWidth = 5;
    ctx.arc(250,250,200,0,pi);
    ctx.stroke();
画布清除
通过claerRect()可以清除一个矩形区域。
清除一个画布大小的矩形就可以清除整个画布
claerRect(0,0,width,height)
canvas动画
计时器动画
以一个逐渐出现的圆作为例子来演示canvas是如何制作动画的
    const pi = Math.PI;
    const deg = pi * 2 / 360;
    ctx.strokeStyle = 'lightpink';
    ctx.lineWidth = 5;
    let count = 0;
    const timer = setInterval(() => {
      count++;
      ctx.beginPath();
      ctx.arc(250,250,200,0,deg * count);
      ctx.stroke();
      ctx.closePath();
      if(count == 360) clearInterval(timer);
    }, 10)
边缘碰撞检测
现在我想做一个小球碰到边框后就转向的动画,我们先做简单的与边界的碰撞,之后在去做两个物体之间的碰撞。
下面为实现的代码,有状态法和速度法两种实现方法,推荐使用速度法,与物理的运动学一致,且代码更易懂:
	// 状态法通过修改状态的真值来决定运动方向
	// let statusX = true;
    // let statusY = true;

	// 速度法通过速度的正负来决定运动方向,这种方法与物理知识更契合
    let speedX = 5;
    let speedY = 5;
    const timer = setInterval(() => {
      // 清空画布
      ctx.clearRect(0,0,w,h);
      // 修改小球方向
      if(x + r == 500) speedX = -5 // statusX = false;
      if(x - r == 0)   speedX = 5  // statusX = true;
      if(y - r == 0)   speedY = 5  // statusY = true;
      if(y + r == 500) speedY = -5 // statusY = false;

      // 根据小球的移动方向修改小球的坐标
      // if(statusX) {
      //   x = x + 10;
      // } else {
      //   x = x - 10;
      // }

      // if(statusY) {
      //   y = y + 10;
      // } else {
      //   y = y - 10;
      // }

      x += speedX;
      y += speedY;

      // 绘制小球
      ctx.beginPath();
      ctx.arc(x, y, r, 0, 2*pi);
      ctx.fill();
      ctx.closePath();
    },50)
使用速度法还可以使用取相反数反的方法来修改速度,或者更方便为小球设置不同的速度
// 设置小球速度
    let speedX = 5;
    let speedY = 8;
// 修改小球方向
    if(x + r >= 500 || x - r <= 0) speedX = -speedX
    if(y - r <= 0 || y + r >= 500) speedY = -speedY
面向对象
如果要制作多个小球,就需要用到面相对象的思想,将每个小球作为对象存储起来,这样就可以解决因为是一幅画而无法获取的问题。
代码如下:
	class Ball {
      constructor() {
        this.r = this.ran(90) + 10;
        // 防止出现边缘性问题
        this.x = this.ran(200) + this.r;
        this.y = this.ran(200) + this.r;

        this.color = `#${parseInt(Math.random() * 0xffffff).toString(16)}`;
        this.speedX = this.ran(5) + 2;
        this.speedY = this.ran(4) + 1;
        this.move();
      }

      ran(number) {
        return Math.random() * number;
      }

      show() {
        ctx.beginPath();
        ctx.arc(this.x, this.y, this.r, 0, pi*2);
        ctx.fillStyle = this.color;
        ctx.fill();
        ctx.closePath();
      }

      move() {
        if(this.x - this.r <= 0 || this.x + this.r >= w) this.speedX = -this.speedX;
        if(this.y - this.r <= 0 || this.y + this.r >= h) this.speedY = -this.speedY;
        this.x += this.speedX;
        this.y += this.speedY;
        this.show();
      }
    }

    // 生成并存储小球
    const ballArr = [];
    for(let i = 0; i < 100000; i++){
      ballArr.push(new Ball());
    }

    // 小球定时运动
    setInterval(() => {
      ctx.clearRect(0,0,w,h);
      ballArr.forEach(item => {
        item.move();
      })
    }, 10)
