function fruitImageProcessingGUI
    % 创建主窗口和控件
    mainFigure = figure('Units', 'normalized', 'Position', [0.3, 0.3, 0.4, 0.4]);
    instructionText = uicontrol('Style', 'text', 'String', '请点击按钮执行相应的图像处理步骤', ...
        'Units', 'normalized', 'Position', [0.1, 0.7, 0.8, 0.2], 'FontSize', 12);
    readImageBtn = uicontrol('Style', 'pushbutton', 'String', '读取图像', ...
        'Units', 'normalized', 'Position', [0.2, 0.4, 0.6, 0.1], 'FontSize', 12, ...
        'Callback', @readImageBtn_Callback);
    thresholdBtn = uicontrol('Style', 'pushbutton', 'String', '阈值化', ...
        'Units', 'normalized', 'Position', [0.2, 0.3, 0.6, 0.1], 'FontSize', 12, ...
        'Enable', 'off', 'Callback', @thresholdBtn_Callback);
    % 在这里继续添加其他按钮和控件

    % 存储GUI数据的结构体
    handles = struct();

    % 读取图像按钮的回调函数
    function readImageBtn_Callback(~, ~)
        % 读取图像
        rgb = imread('fruit.jpg');
        [m, n, d] = size(rgb);

        % 更新说明文本框
        set(instructionText, 'String', '图像已读取');

        % 将图像保存到GUI数据中,以便其他按钮功能使用
        handles.rgb = rgb;
        handles.m = m;
        handles.n = n;
        handles.d = d;

        % 启用下一个按钮
        set(thresholdBtn, 'Enable', 'on');

        % 更新GUI数据
        guidata(mainFigure, handles);
    end

    % 阈值化按钮的回调函数
    function thresholdBtn_Callback(~, ~)
        % 获取GUI数据中的图像和尺寸信息
        rgb = handles.rgb;
        m = handles.m;
        n = handles.n;
        d = handles.d;

        % 阈值设置
        level1 = [255 * 0.2, 255 * 0.3];

        % 转换数据类型,图像输出类型只能是uint型
        rgb = uint8(rgb);

        % 剔除r-g < level1(1), r-g < level1(2)的部分
        r = rgb;
        for i = 1:m
            for j = 1:n
                if (rgb(i, j, 1) - rgb(i, j, 2)) < level1(1) && (rgb(i, j, 1) - rgb(i, j, 3)) < level1(2)
                    r(i, j, 1) = 0;
                    r(i, j, 2) = 0;
                    r(i, j, 3) = 0;
                end
            end
        end

        % 更新说明文本框
        set(instructionText, 'String', '图像阈值化完成');

        % 在此处可以添加显示阈值化后的图像的代码,例如使用imshow函数显示r

        % 更新GUI数据
        handles.rgb = r;
        guidata(mainFigure, handles);
    end

    % 在这里继续添加其他按钮的回调函数

end
function imageSegmentationGUI()
    % 创建GUI窗口
    fig = figure('Name', '目标与背景的分割与提取', 'NumberTitle', 'off', 'Position', [200, 200, 900, 600]);

    % 创建UI组件
    btnSelectImage = uicontrol('Style', 'pushbutton', 'String', '选择图像', 'Position', [50, 500, 100, 30], 'Callback', @selectImage);
    btnMeanFilter = uicontrol('Style', 'pushbutton', 'String', '均值滤波', 'Position', [50, 450, 100, 30], 'Callback', @applyMeanFilter);
    btnThresholding = uicontrol('Style', 'pushbutton', 'String', '二值图像', 'Position', [50, 400, 100, 30], 'Callback', @applyThresholding);
    btnOpening = uicontrol('Style', 'pushbutton', 'String', '开启运算', 'Position', [50, 350, 100, 30], 'Callback', @applyOpening);
    btnClosing = uicontrol('Style', 'pushbutton', 'String', '闭合运算', 'Position', [50, 300, 100, 30], 'Callback', @applyClosing);
    btnEdgeDetection = uicontrol('Style', 'pushbutton', 'String', '提取边缘', 'Position', [50, 250, 100, 30], 'Callback', @applyEdgeDetection);
    btnShowResult = uicontrol('Style', 'pushbutton', 'String', '显示结果', 'Position', [50, 200, 100, 30], 'Callback', @showResult);
    btnSegmentation = uicontrol('Style', 'pushbutton', 'String', '分割图像', 'Position', [50, 150, 100, 30], 'Callback', @performSegmentation);
    btnExit = uicontrol('Style', 'pushbutton', 'String', '退出', 'Position', [50, 100, 100, 30], 'Callback', @exitGUI);


    axesHandle1 = axes('Parent', fig, 'Position', [0.3, 0.1, 0.6, 0.8]);

    % 全局变量
    rgb = [];
    r=[];
    grayImage = [];
    thresholdedImage = [];
    openedImage = [];
    closedImage = [];
    edgeImage = [];
    resultImage = [];

    % 图像处理函数
    function selectImage(~, ~)
        [fileName, pathName] = uigetfile({'*.jpg;*.png;*.bmp', '图像文件 (*.jpg, *.png, *.bmp)'}, '选择图像');

        if isequal(fileName, 0) || isequal(pathName, 0)
            return;
        end

        % 读取图像
        rgb = imread(fullfile(pathName, fileName));

        % 显示原图像
        imshow(rgb, 'Parent', axesHandle1);
    end

    function applyMeanFilter(~, ~)
        if isempty(rgb)
            errordlg('请先选择图像!', '错误');
            return;
        end

        % 均值滤波
        r2=rgb;
        grayImage = rgb2gray(r2);
        n = 3;
        template = ones(n) / (n * n);
        filteredImage = imfilter(double(grayImage), template, 'replicate');

        % 显示均值滤波后的图像
        imshow(filteredImage, 'Parent', axesHandle1);
    end

    function applyThresholding(~, ~)
        if isempty(grayImage)
            errordlg('请先进行均值滤波!', '错误');
            return;
        end

        % 二值图像
        threshold = graythresh(grayImage);
        thresholdedImage = imbinarize(grayImage, threshold);

        % 显示二值图像
        imshow(thresholdedImage, 'Parent', axesHandle1);
    end

    function applyOpening(~, ~)
        if isempty(thresholdedImage)
            errordlg('请先进行二值图像处理!', '错误');
            return;
        end

        % 开启运算
        se = strel('disk', 12);
        openedImage = imopen(thresholdedImage, se);

        % 显示开启运算后的图像
        imshow(openedImage, 'Parent', axesHandle1);
    end

    function applyClosing(~, ~)
        if isempty(openedImage)
            errordlg('请先进行开启运算!', '错误');
            return;
        end

        % 闭合运算
        se = strel('disk', 5);
        closedImage = imclose(openedImage, se);

        % 显示闭合运算后的图像
        imshow(closedImage, 'Parent', axesHandle1);
    end

    function applyEdgeDetection(~, ~)
        if isempty(closedImage)
            errordlg('请先进行闭合运算!', '错误');
            return;
        end

        % 提取边缘
        edgeImage = edge(closedImage, 'canny');

        % 显示边缘图像
        imshow(edgeImage, 'Parent', axesHandle1);
    end

    function showResult(~, ~)
        if isempty(edgeImage)
            errordlg('请先进行边缘提取!', '错误');
            return;
        end

        % 分割完成的图像
        resultImage = edgeImage; % 这里将边缘图像作为分割结果,您可以根据需要修改这部分代码

        % 显示分割结果
        imshow(resultImage, 'Parent', axesHandle1);
    end

    function performSegmentation(~, ~)
        if isempty(rgb)
            errordlg('请先选择图像!', '错误');
            return;
        end

        % 在这里执行分割任务
        % 根据您的代码进行相应的处理
        % ...

        % 显示分割结果
        resultImage = rgb; % 这里将原图像作为分割结果,您可以根据需要修改这部分代码

        % 显示分割结果
        imshow(resultImage, 'Parent', axesHandle1);
    end

    function exitGUI(~, ~)
        choice = questdlg('确定要退出吗?', '退出', '是', '取消', '取消');

        if strcmp(choice, '是')
            close(fig);
        end
    end
end
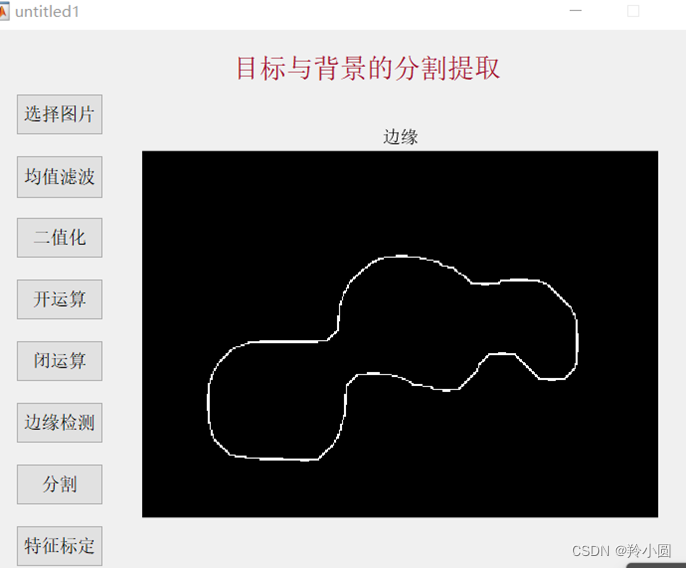
GUI界面设计如下
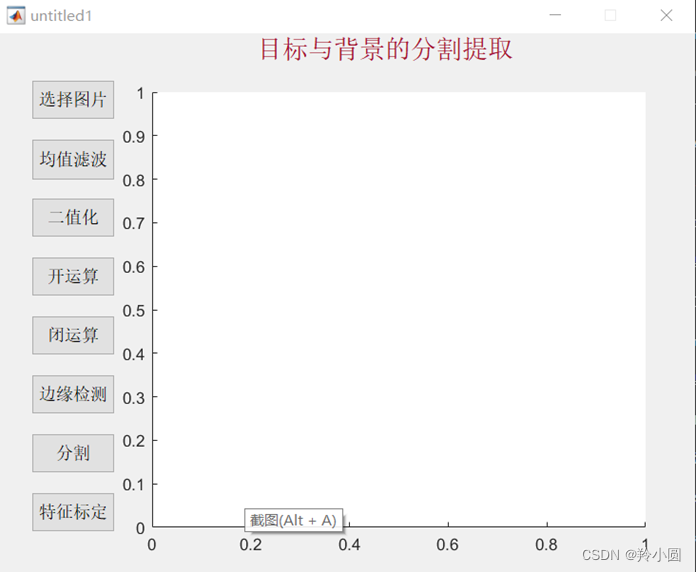
实现目标与背景的分割和提取
clear
clc
close all

h = 0.002; % 步长
x1 = 100;
x0 = 0:h:x1;
y0 = [2; 2; 2; 2]; % 初始条件,对应 x, y, z, w
% 不同的 c
c = 1:1:500;
N_c = length(c);
N_P = 300; % 假设穿过截面的共有 300 个点
BF = nan(N_c, N_P);
for k = 1:N_c
    c_k = c(k);
    disp(c_k)
    % 计算轨迹
    [y1, ~] = ODE_RK4_hyh(0:10*h:x1, 10*h, y0, [c_k, 0.1, 0.1, 0.1, 0.1, 0.1, 0.1, 0.1]); % 先粗略的计算前几步,然后排除初始点的影响,舍弃不要
    [y1, ~] = ODE_RK4_hyh(x0 + x1, h, y1(:, end), [c_k, 0.1, 0.1, 0.1, 0.1, 0.1, 0.1, 0.1]);
    % 计算 Poincare 平面
    Plane = [1; -1; 0; 0]; % x - y = 0 平面 (正方向)
    [tP_List, yP_List] = Solve_Poincare(x0, y1, Plane); % 计算 Poincare 平面
    % 对于混沌系统再加一条,如果系统稳定了,则将稳定点也记录在最终分岔图内:
    if isempty(tP_List) && abs(y1(1, end) - y1(2, end)) < 1e-2 % 如果最后 x 和 y 足够接近,则认为收敛了
        tP_List = x0(end - 1:end);
        yP_List = y1(:, end - 1:end);
    end
    % 储存 y 值作为待会分岔图的点
    N_P_temp = size(tP_List, 2);
    if N_P_temp > N_P
        BF(k, 1:N_P) = yP_List(2, 1:N_P);
    else
        BF(k, 1:N_P_temp) = yP_List(2, 1:N_P_temp);
    end
end

% 绘制分岔图
figure()
hold on
for k = 1:N_P
    c_k = c(k);
    plot(c_k * ones(1, N_P), BF(k, 1:N_P), ...
        'LineStyle', 'none', 'Marker', '.', 'MarkerFaceColor', 'k', 'MarkerEdgeColor', 'k', ...
        'MarkerSize', 1)
end
hold off

function [tP_List, yP_List] = Solve_Poincare(t, y, Plane)
    % 截面方程 z = 0
    % Plane = [0; 0; 1; 0]; % 一般情况下是个垂直某个轴的平面
    % 一般只记录从负到正穿越。如果想反向也记录,可以设置 Plane = -Plane.

    % 第二步,插值得到线与面的交点
    yP_List = [];
    tP_List = [];
    Dis = DistancePlane(y, Plane);
    N = size(y, 2);
    for k = 1:N - 1
        if Dis(k) <= 0 && Dis(k + 1) > 0
            t0 = t(k);
            t1 = t(k + 1);
            yP0 = y(:, k);
            yP1 = y(:, k + 1);
            Dis0 = Dis(k);
            Dis1 = Dis(k + 1);
            % 一维线性插值,求 Dis = 0 时的 t 和 y
            yP = yP0 + (yP1 - yP0) / (Dis1 - Dis0) * (0 - Dis0);
            tP = t0 + (t1 - t0) / (Dis1 - Dis0) * (0 - Dis0);
            % 储存
            yP_List = [yP_List, yP];
            tP_List = [tP_List, tP];
        end
    end
end

% 点到平面的距离
function Dis = DistancePlane(xk, Plane)
    % xk,坐标点,如果是 3 维坐标,大小就是 3*N 的矩阵。
    % Plane,平面,形如 Ax + By + Cz + D = 0 形式的平面。

    N = size(xk, 2); % 计算总共多少个点
    xk2 = [xk; ones(1, N)];
    Dis = dot(xk2, Plane * ones(1, N), 1) / norm(Plane(1:end - 1));
end

function [F, Output] = Fdydx(x, y, Input)
    % 形式为 Y' = F(x, Y) 的方程,参见数值分析求解常系数微分方程相关知识
    % 高次用列向量表示,F = [dy(1); dy(2)]; y(1) 为函数,y(2) 为函数导数
    % 给定混沌系统的微分方程
    a = Input(1);
    b = Input(2);
    c = Input(3);
    d = Input(4);
    e = Input(5);
    f = Input(6);
    g = Input(7);
    h = Input(8);

    dxdt = a * y(3) * y(2) + c * y(4) * cos(y(2));
    dydt = -y(1) * y(3) + b * y(2) + e * y(1) + f * y(2);
    dzdt = y(1) * y(2) - c * y(3) + f * y(3);
    dwdt = y(2) * y(3) - d * y(4) + g * y(1) * cos(y(2)) + h * y(2) * sin(y(3));

    F = [dxdt; dydt; dzdt; dwdt];
    Output = [];
end

function [y, Output] = ODE_RK4_hyh(x, h, y0, Input)
    % 4阶RK方法
    % h 间隔为常数的算法
    y = zeros(size(y0, 1), size(x, 2));
    y(:, 1) = y0;
    for ii = 1:length(x) - 1
        yn = y(:, ii);
        xn = x(ii);
        [K1, ~] = Fdydx(xn, yn, Input);
        [K2, ~] = Fdydx(xn + h / 2, yn + h / 2 * K1, Input);
        [K3, ~] = Fdydx(xn + h / 2, yn + h / 2 * K2, Input);
        [K4, ~] = Fdydx(xn + h, yn + h * K3, Input);
        y(:, ii + 1) = yn + h / 6 * (K1 + 2 * K2 + 2 * K3 + K4);
    end
    Output = [];
end
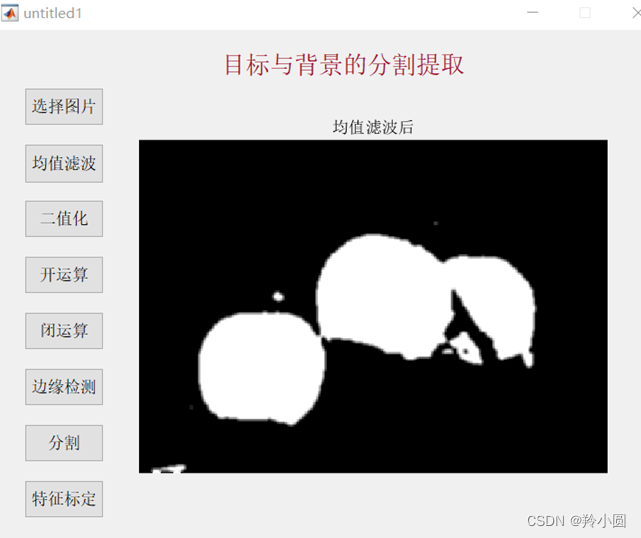
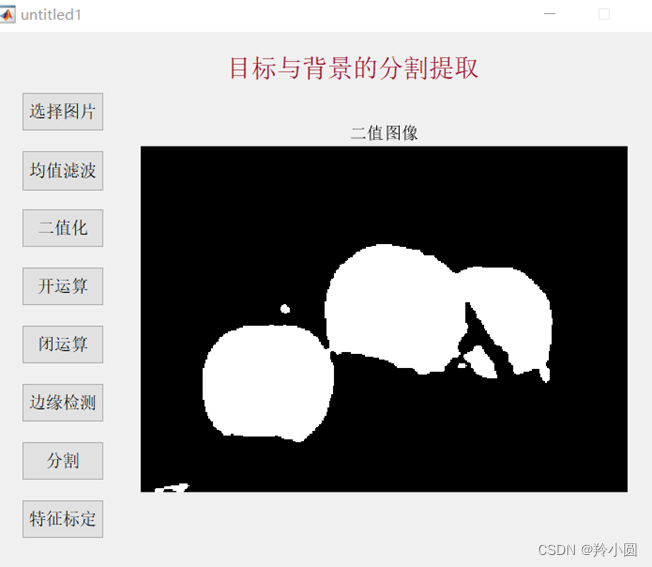
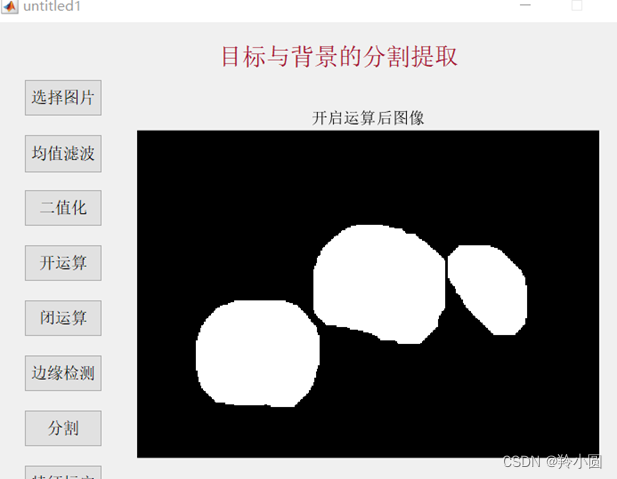
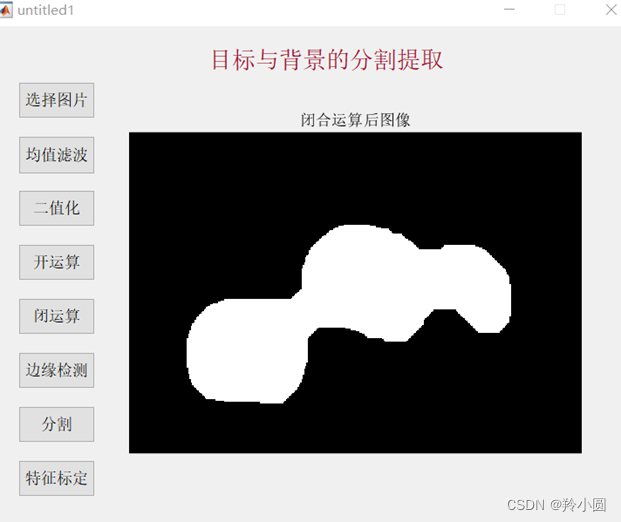

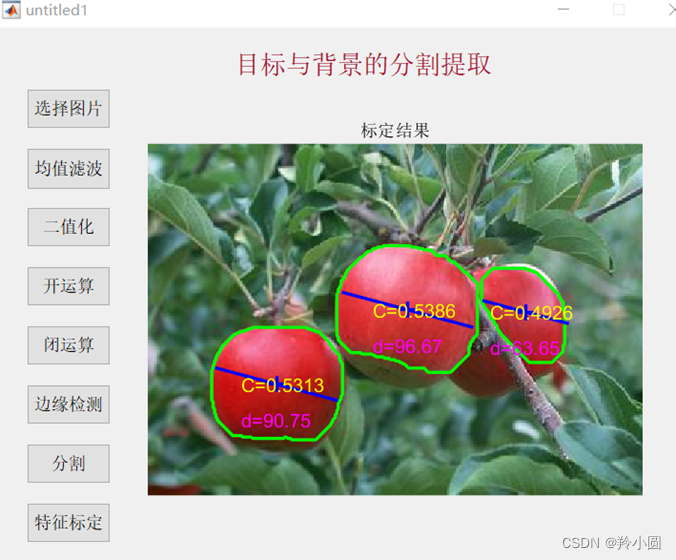 使用matlab对图像进行去噪处理、对彩色图像 进行目标和背景分析,通过阈值法将图像进行分割,提取特征参数,并对圆度和直径进行标定。使用均值滤波等一系列方法实现了对苹果的分割提取以及特征参数的标定。但是本次设计存在不足之处,对于重叠区域的分割与提取暂未处理好。
[1]陈贝文,陈淦.水果分类识别与成熟度检测技术综述[J].计算机时代,2022(07):62-65.DOI:10.16644/j.cnki.cn33-1094/tp.2022.07.016.
[2]王运祥,马本学,贾艳婷等.采用夹持果梗方法的水果检测分级机设计[J].食品与机械,2015,31(05):107-110.DOI:10.13652/j.issn.1003-5788.2015.05.027.
[3]苗玉彬,王浙明,刘秦.水果轮廓特征提取的Zernike矩分水岭分割方法[J].农业工程学报,2013,29(01):158-163.
[4]应义斌.水果图像的背景分割和边缘检测技术研究[J].浙江大学学报(农业与生命科学版),2000(01):37-40.
[5]徐琳,吕宇玲,王晓娟.水果的分割算法研究[J].数字通信世界,2018(05):274-275.
[6]苗玉彬,王浙明,刘秦.水果轮廓特征提取的Zernike矩分水岭分割方法[J].农业工程学报,2013,29(01):158-163.
