(作者:陈玓玏)
一、前提条件
- 已部署k8s;
- 已部署hadoop和hive,可参考以下链接:
https://blog.csdn.net/weixin_39750084/article/details/136750613?spm=1001.2014.3001.5502
https://blog.csdn.net/weixin_39750084/article/details/138585155?spm=1001.2014.3001.5502
https://blog.csdn.net/weixin_39750084/article/details/138674399?spm=1001.2014.3001.5502
二、镜像拉取或封装
国外镜像源太慢了,直接拉一个现成的镜像吧:docker pull prestodb/presto:0.287,自己打包也可以,自己写个dockerfile。
FROM ubuntu:20.04

RUN wget https://repo.huaweicloud.com/java/jdk/8u202-b08/jdk-8u202-linux-x64.tar.gz
RUN wget https://repo1.maven.org/maven2/com/facebook/presto/presto-server/0.286/presto-server-0.286.tar.gz

RUN tar -zxvf jdk-8u202-linux-x64.tar.gz -C /opt/ && mv /opt/jdk-8u202-linux-x64 /opt/jdk
RUN tar -zxvf presto-server-0.286.tar.gz -C /opt/ && mv /opt/presto-server-0.286 /opt/presto-server

ENV PRESTO_HOME /opt/presto-server
ENV JAVA_HOME /opt/jdk
ENV PATH $PATH:$JAVA_HOME/bin:$PRESTO_HOME/bin
jdk用的华为的镜像源,不用登录oracle。https://repo.huaweicloud.com/java/jdk/
打包并推送镜像:
docker build -t ccr.ccs.tencentyun.com/cube-studio/presto-server:0.286 .
sudo docker push ccr.ccs.tencentyun.com/cube-studio/presto-server:0.286
三、部署presto
启动脚本和Presto配置文件
apiVersion: v1
kind: ConfigMap
metadata:
  name: presto-config-cm
  labels:
    app: presto-coordinator
data:
  bootstrap.sh: |-
    #!/bin/bash

    cd /root/bootstrap

    mkdir -p $PRESTO_HOME/etc/catalog

    apt-get update
    export JDK_JAVA_OPTIONS="-Djdk.attach.allowAttachSelf=true"
    apt-get install -y less
    export PATH=$PATH:$(whereis less)

    cat ./node.properties > $PRESTO_HOME/etc/node.properties
    cat ./jvm.config > $PRESTO_HOME/etc/jvm.config
    cat ./config.properties > $PRESTO_HOME/etc/config.properties
    cat ./log.properties > $PRESTO_HOME/etc/log.properties

    sed -i 's/${COORDINATOR_NODE}/'$COORDINATOR_NODE'/g' $PRESTO_HOME/etc/config.properties

    for cfg in ../catalog/*; do
      cat $cfg > $PRESTO_HOME/etc/catalog/${cfg##*/}
    done

    $PRESTO_HOME/bin/launcher run --verbose

  node.properties: |-
    node.environment=production
    node.data-dir=/var/presto/data
  jvm.config: |-
    -server
    -Xmx16G
    -XX:+UseG1GC
    -XX:G1HeapRegionSize=32M
    -XX:+UseGCOverheadLimit
    -XX:+ExplicitGCInvokesConcurrent
    -XX:+HeapDumpOnOutOfMemoryError
    -XX:+ExitOnOutOfMemoryError
  config.properties: |-
    coordinator=${COORDINATOR_NODE}
    node-scheduler.include-coordinator=true
    http-server.http.port=8080
    query.max-memory=10GB
    query.max-memory-per-node=1GB
    query.max-total-memory-per-node=2GB
    #discovery-server.enabled=true
    discovery.uri=http://presto-coordinator-service:8080
  log.properties: |-
    com.facebook.presto=INFO
如果部署时出现报错:Can not attach to current VM (try adding ‘-Djdk.attach.allowAttachSelf=true‘ to the JVM),记得在环境变量里加上export JDK_JAVA_OPTIONS="-Djdk.attach.allowAttachSelf=true"
如果出现报错:Configuration property 'discovery-server.enabled' was not used,记得把配置discovery-server.enabled=true注释掉。
配置Hive连接文件
apiVersion: v1
kind: ConfigMap
metadata:
  name: presto-catalog-config-cm
  labels:
    app: presto-coordinator
data:
  hive.properties: |-
    connector.name=hive-hadoop2
    hive.metastore.uri=thrift://hive-service:9083
部署presto
apiVersion: apps/v1
kind: Deployment
metadata:
  name: presto-coordinator
spec:
  replicas: 1
  revisionHistoryLimit: 10
  selector:
    matchLabels:
      app: presto-coordinator
  template:
    metadata:
      labels:
        app: presto-coordinator
    spec:
      containers:
        - name: presto-coordinator
          image: prestodb/presto:0.287
          command: ["bash", "-c", "bash /root/bootstrap/bootstrap.sh"]
          ports:
            - name: http-coord
              containerPort: 8080
              protocol: TCP
          env:
            - name: COORDINATOR_NODE
              value: "true"
          volumeMounts:
            - name: presto-config-volume
              mountPath: /root/bootstrap
            - name: presto-catalog-config-volume
              mountPath: /root/catalog
            - name: presto-data-volume
              mountPath: /var/presto/data
          readinessProbe:
            initialDelaySeconds: 60
            periodSeconds: 5
            httpGet:
              path: /v1/status
              port: http-coord
      volumes:
        - name: presto-config-volume
          configMap:
            name: presto-config-cm
        - name: presto-catalog-config-volume
          configMap:
            name: presto-catalog-config-cm
        - name: presto-data-volume
          emptyDir: {}
---
kind: Service
apiVersion: v1
metadata:
  labels:
    app: presto-coordinator
  name: presto-coordinator-service
spec:
  ports:
    - port: 8080
      targetPort: http-coord
      name: http-coord
  selector:
    app: presto-coordinator
  type: NodePort
---
apiVersion: apps/v1
kind: Deployment
metadata:
  name: presto-worker
spec:
  replicas: 2
  revisionHistoryLimit: 10
  selector:
    matchLabels:
      app: presto-worker
  template:
    metadata:
      labels:
        app: presto-worker
    spec:
      initContainers:
        - name: wait-coordinator
          image:  prestodb/presto:0.287
          command: ["bash", "-c", "until curl -sf http://presto-coordinator-service:8080/ui/; do echo 'waiting for coordinator started...'; sleep 2; done;"]
      containers:
        - name: presto-worker
          image: prestodb/presto:0.287
          command: ["bash", "-c", "bash /root/bootstrap/bootstrap.sh"]
          ports:
            - name: http-coord
              containerPort: 8080
              protocol: TCP
          env:
            - name: COORDINATOR_NODE
              value: "false"
          volumeMounts:
            - name: presto-config-volume
              mountPath: /root/bootstrap
            - name: presto-catalog-config-volume
              mountPath: /root/catalog
            - name: presto-data-volume
              mountPath: /var/presto/data
          readinessProbe:
            initialDelaySeconds: 60
            periodSeconds: 5
            httpGet:
              path: /v1/status
              port: http-coord
      volumes:
        - name: presto-config-volume
          configMap:
            name: presto-config-cm
        - name: presto-catalog-config-volume
          configMap:
            name: presto-catalog-config-cm
        - name: presto-data-volume
          emptyDir: {}
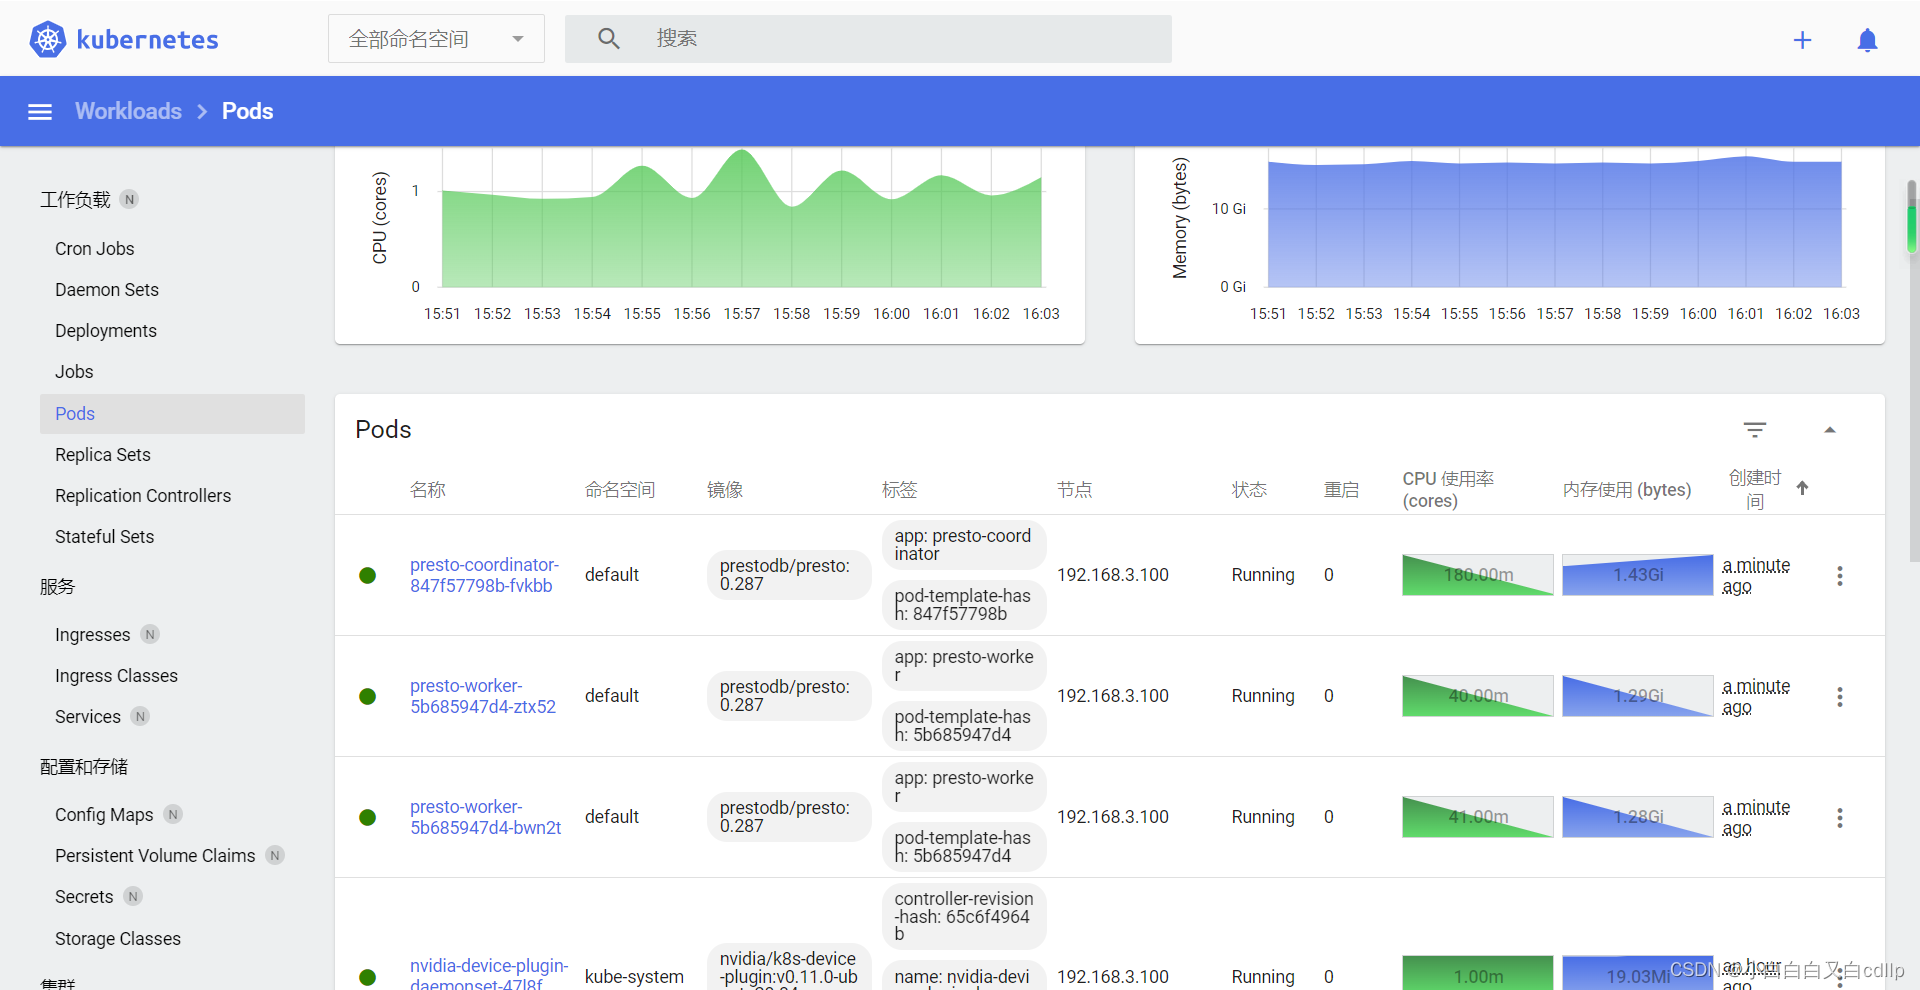
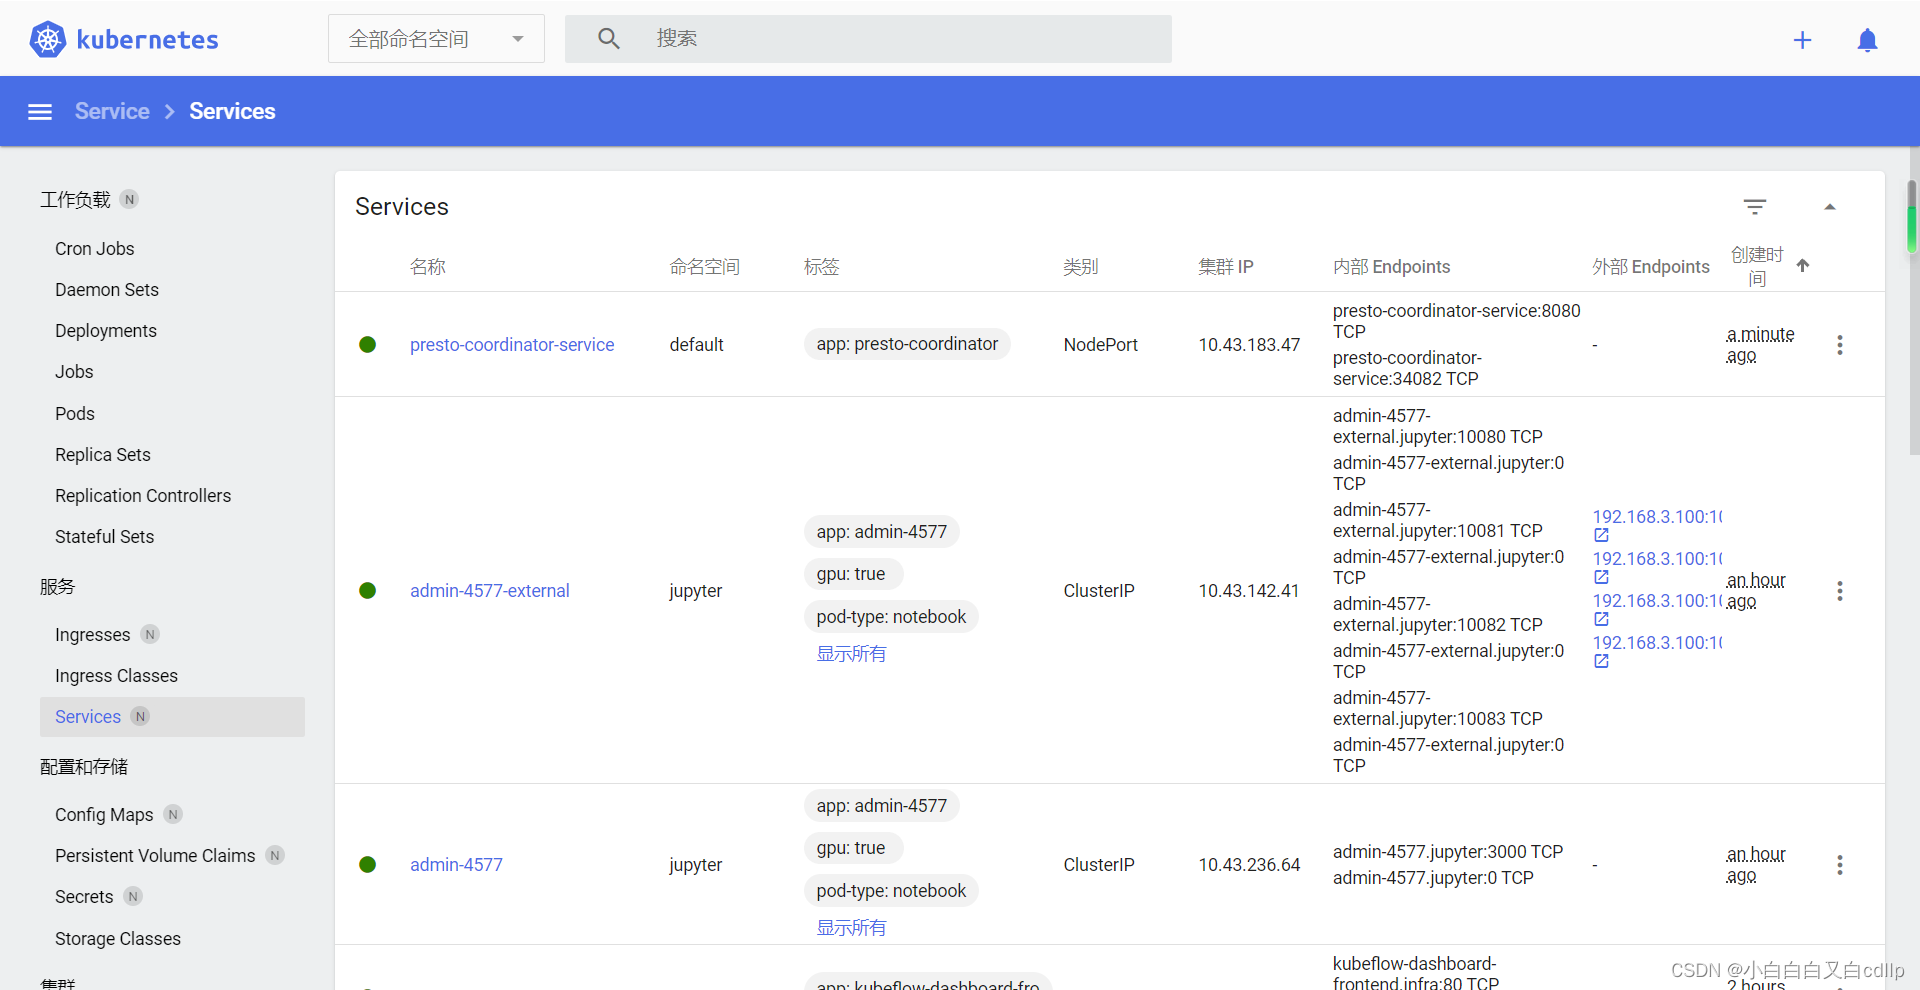
部署结束后,会起3个pod,一个服务:
四、使用presto
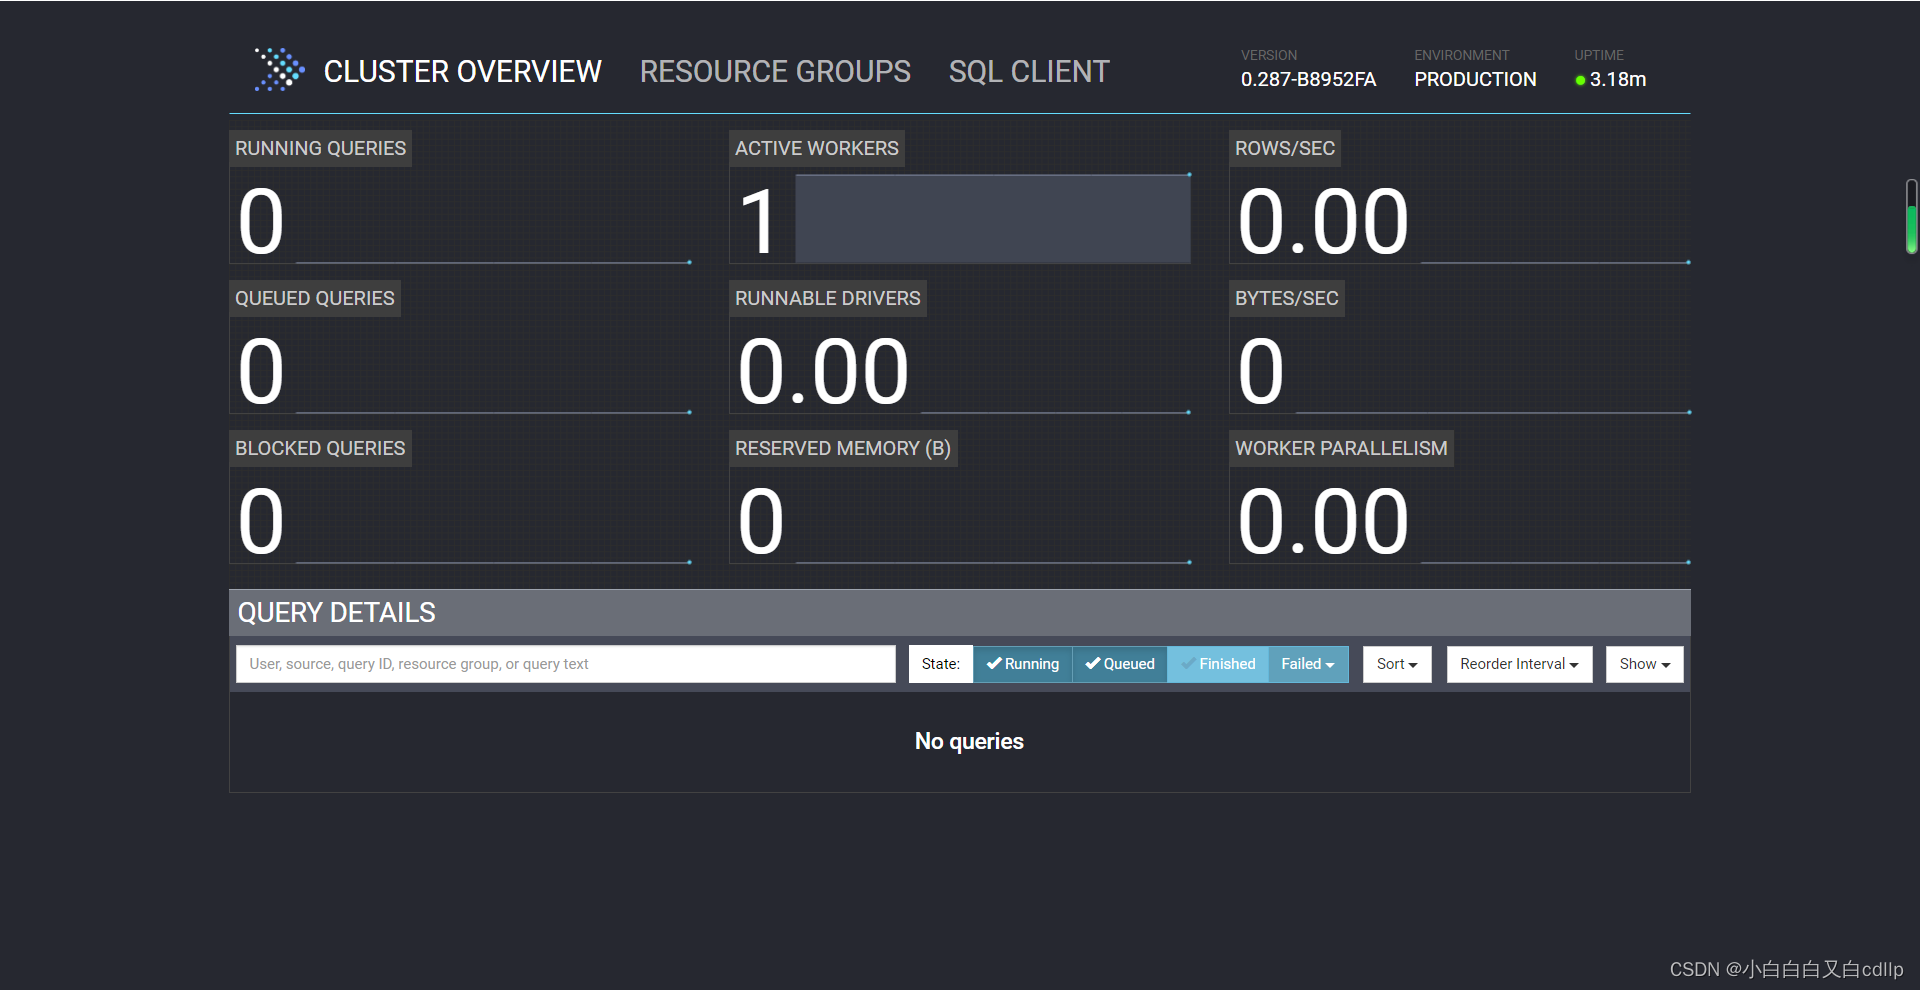
访问web界面
安装及连接客户端:
wget https://repo1.maven.org/maven2/com/facebook/presto/presto-cli/0.208/presto-cli-0.208-executable.jar
chmod +x presto-cli-0.208-executable.jar
./presto-cli-0.208-executable.jar --server 192.168.3.100:34082 --catalog hive --schema default
使用客户端:
show schemas;
show tables;
select * from test;
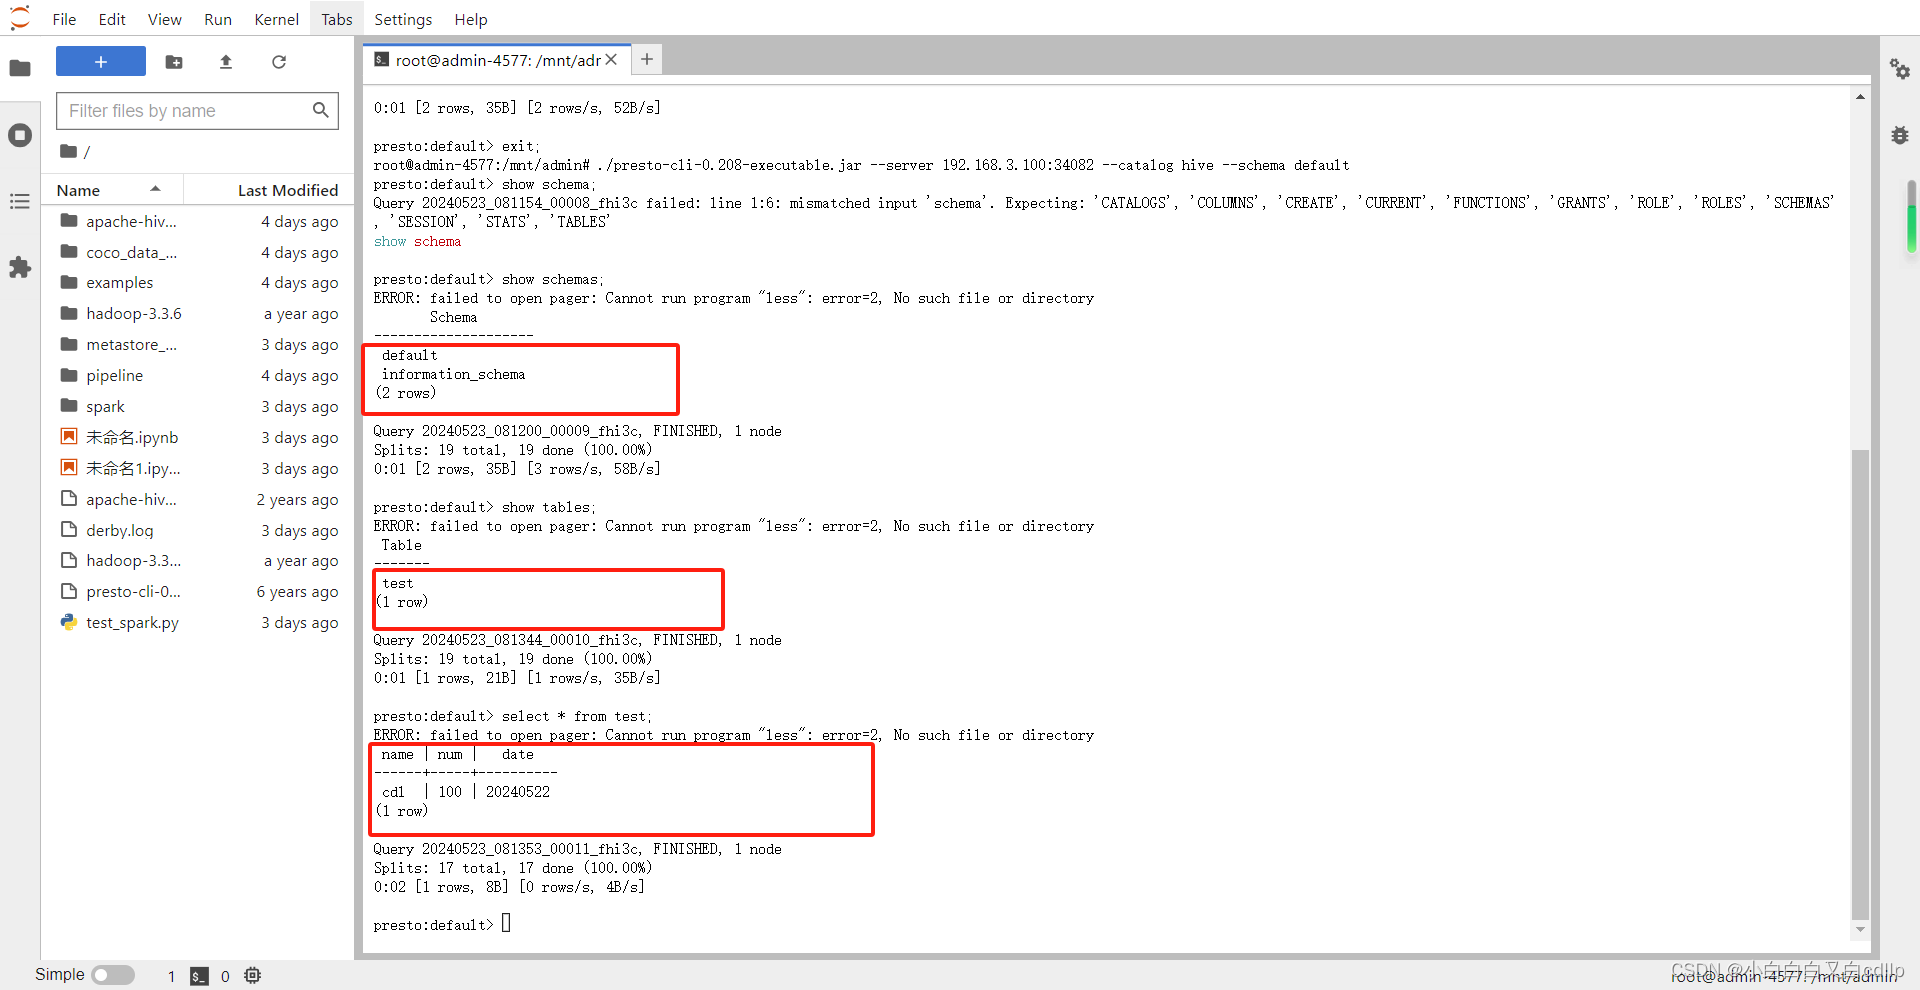
我部署后能正确查询信息,但是总是有报错:ERROR: failed to open pager: Cannot run program "less": error=2, No such file or directory,这个报错的原因是没有装less,是presto用来分页的工具,在初始化脚本里已添加了,加上之后就没问题了。由初始化脚本中的以下代码解决:
apt-get update
apt-get install -y less
export PATH=$PATH:$(whereis less)
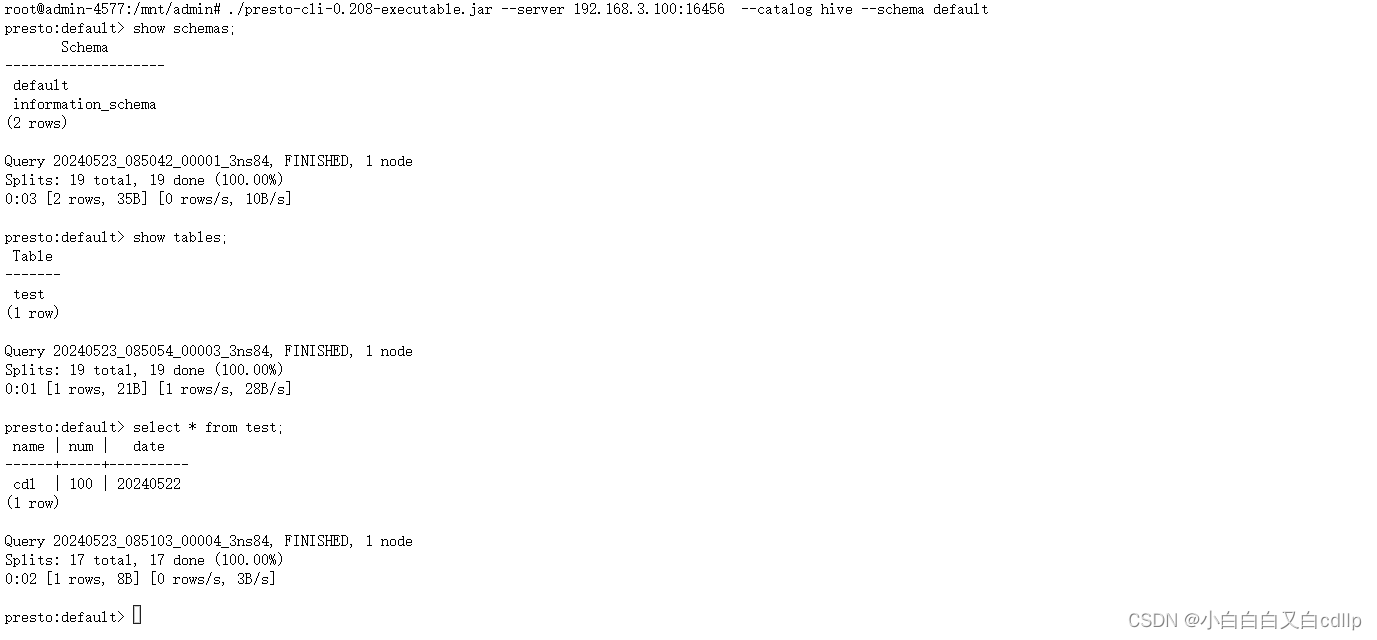
BUG全部解决后,使用如下:
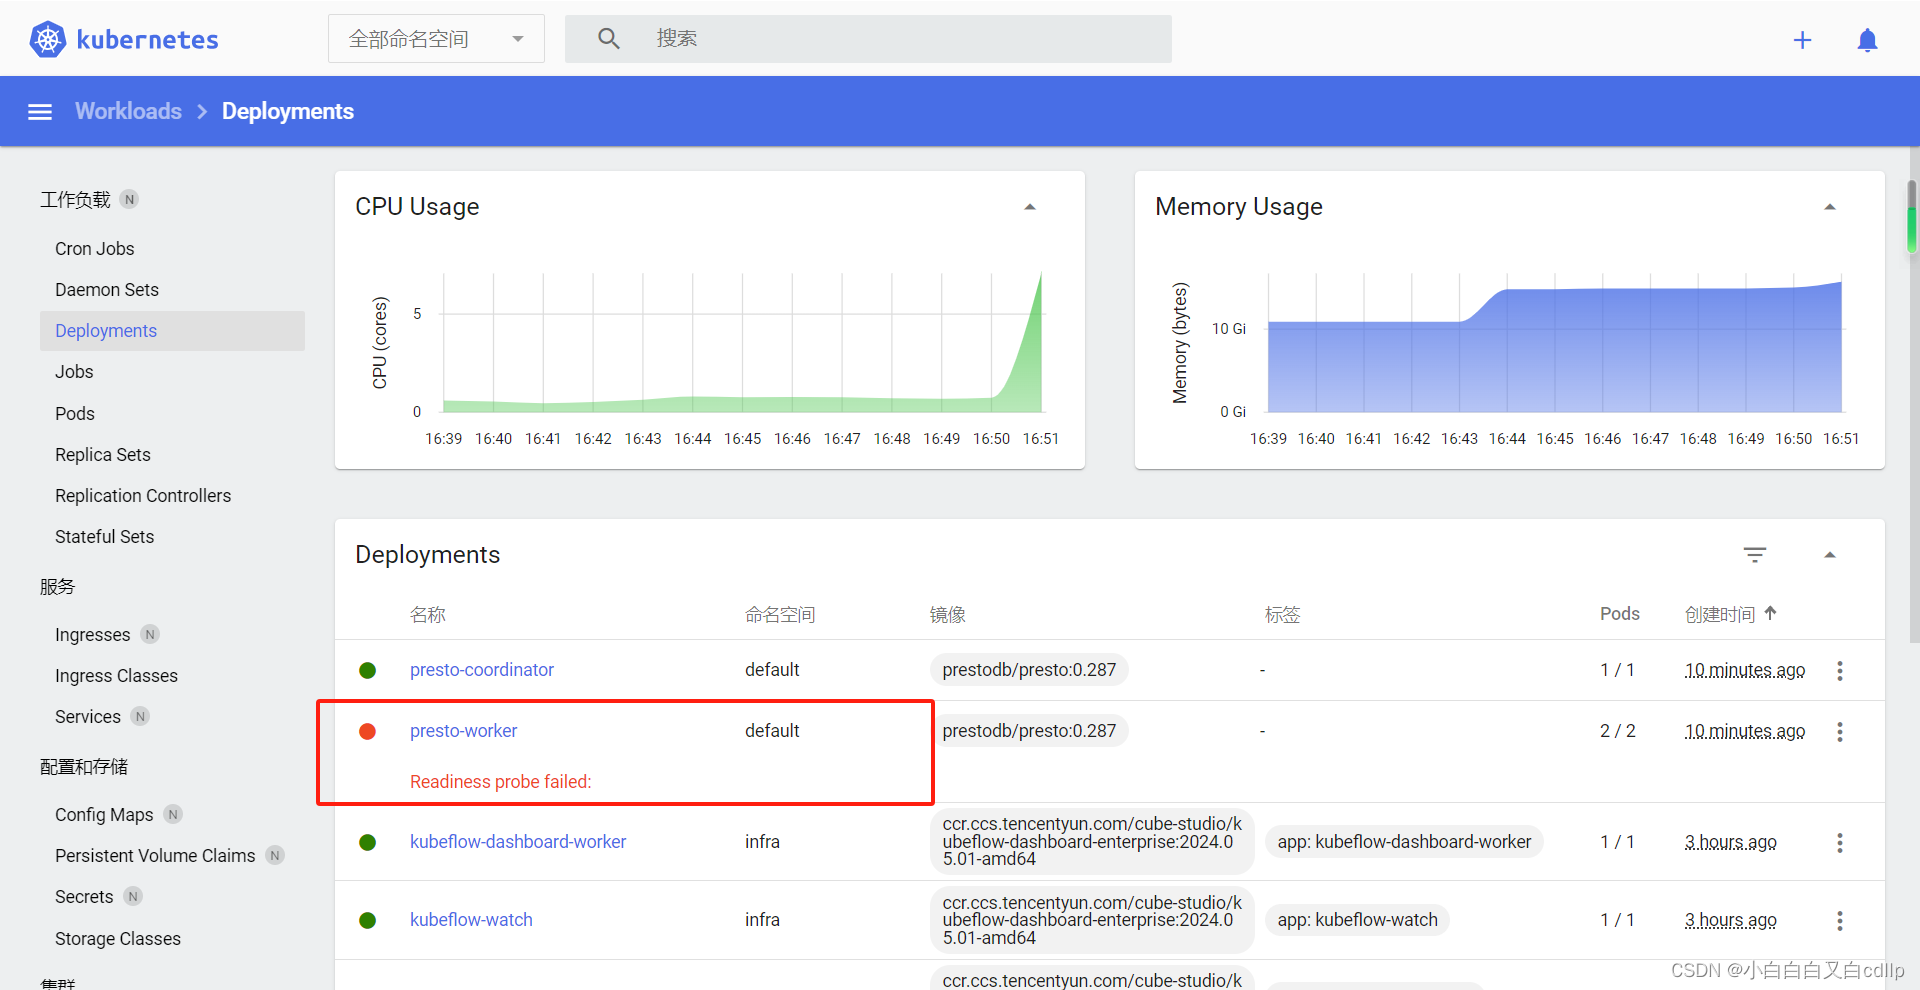
虽然能正常使用presto了,但是k8s中显示presto-worker的deployment有BUG,Readiness probe failed:,应该是健康检查出了问题。
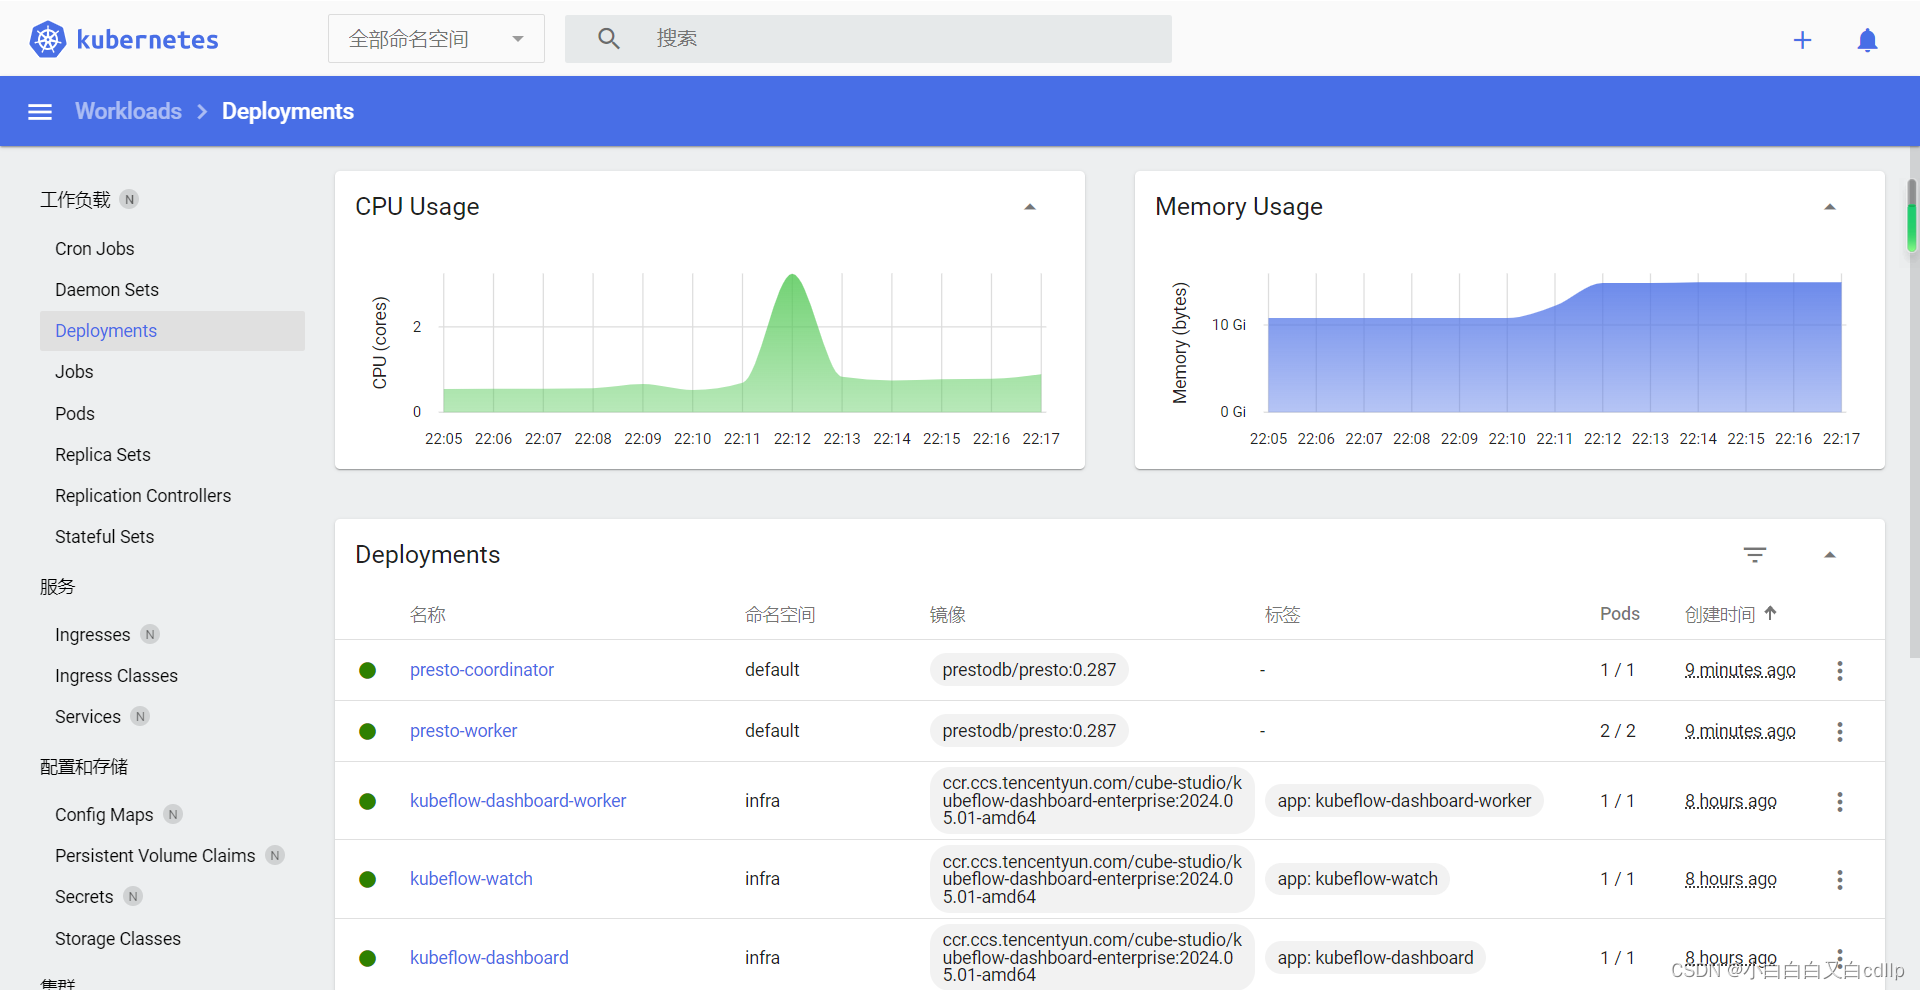
这个问题的解决,有两步:1. 把readinessProbe的initialDelaySeconds时间延长些;2.注意httpget写的path要正确,不知道怎么是正确的,可以用helm生成一个yaml,对比看看。我的正确配置后,如下:
  readinessProbe:
    initialDelaySeconds: 60
    periodSeconds: 5
    httpGet:
      path: /v1/status
      port: http-coord
注意port和yaml里设置的保持一致。
至此,部署都没问题了。
参考链接:
https://blog.csdn.net/chenleiking/article/details/82493798







![[GUET-CTF2019]encrypt](https://img-blog.csdnimg.cn/direct/5bc6fba5252b4ba1927931c4edfa2653.png)


