前言
不得承认java应用的广泛,所以毅然决定java版本的数据结构和算法专题还是要坚决更新。每日更新2题,希望学习的小伙伴可以关注一波跟上,评论区欢迎讨论交流。
实现原理
-
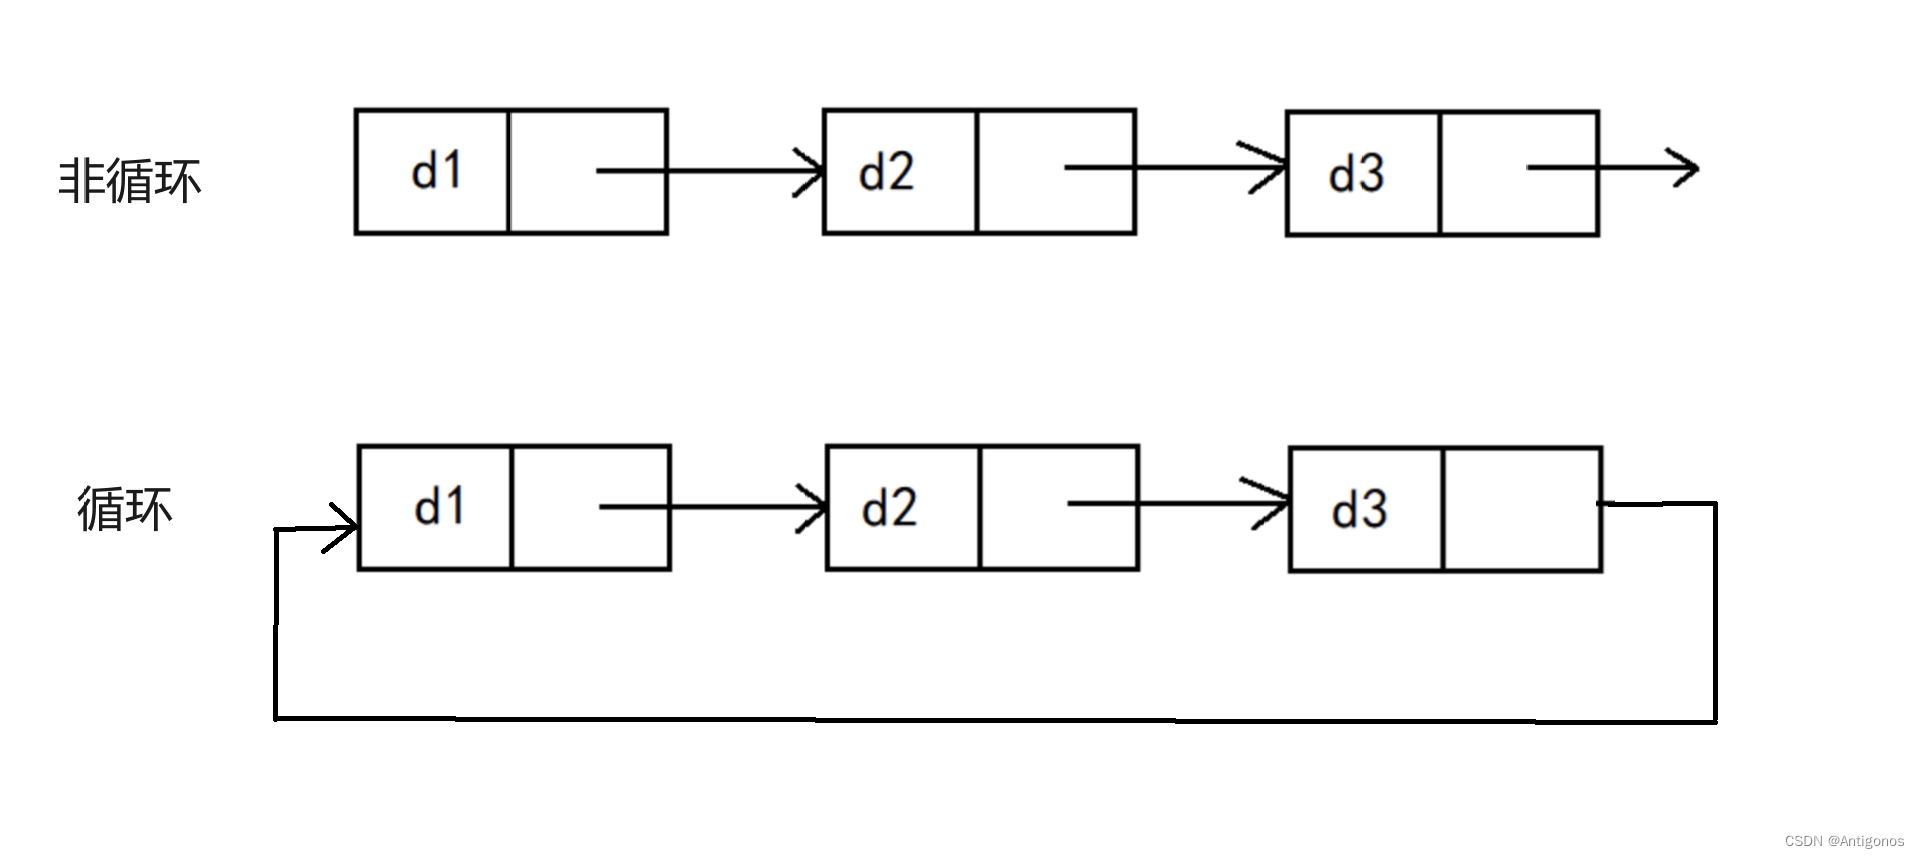
节点(Node):链表的基本构建单元是节点,每个节点包含两部分:数据和指向下一个节点的指针。
class Node {
    int data;
    Node next;

    public Node(int data) {
        this.data = data;
        this.next = null;
    }
}-
头指针(Head Pointer):链表的起始节点被称为头节点。头指针是指向链表第一个节点的指针。通过头指针,可以访问整个链表。
-
尾节点(Tail Node):链表中最后一个节点称为尾节点。它的指针通常指向NULL,表示链表的结束。
-
指针连接:链表中的节点通过指针相互连接。每个节点的指针指向下一个节点,形成一个链式结构。

动画演示过程
Linked List Stack Visualization
头插法
// 定义节点类
class Node {
    int data;
    Node next;

    public Node(int data) {
        this.data = data;
        this.next = null;
    }
}

// 定义单链表类
class LinkedList {
    private Node head;

    public LinkedList() {
        this.head = null;
    }

    // 在链表头部插入节点
    public void prepend(int data) {
        Node newNode = new Node(data);
        newNode.next = head;
        head = newNode;
    }

    // 打印链表
    public void printList() {
        Node current = head;
        while (current != null) {
            System.out.print(current.data + " ");
            current = current.next;
        }
        System.out.println();
    }
}

// 测试单链表头插法
public class Main {
    public static void main(String[] args) {
        LinkedList list = new LinkedList();
        list.prepend(3); // 链表:3
        list.prepend(5); // 链表:5 -> 3
        list.prepend(7); // 链表:7 -> 5 -> 3
        list.printList(); // 打印链表:7 5 3
    }
}
尾插法
// 定义节点类
class Node {
    int data;
    Node next;

    public Node(int data) {
        this.data = data;
        this.next = null;
    }
}

// 定义单链表类
class LinkedList {
    private Node head;

    public LinkedList() {
        this.head = null;
    }

    // 在链表尾部插入节点
    public void append(int data) {
        Node newNode = new Node(data);
        if (head == null) {
            head = newNode;
            return;
        }
        Node current = head;
        while (current.next != null) {
            current = current.next;
        }
        current.next = newNode;
    }

    // 打印链表
    public void printList() {
        Node current = head;
        while (current != null) {
            System.out.print(current.data + " ");
            current = current.next;
        }
        System.out.println();
    }
}

// 测试单链表尾插法
public class Main {
    public static void main(String[] args) {
        LinkedList list = new LinkedList();
        list.append(3); // 链表:3
        list.append(5); // 链表:3 -> 5
        list.append(7); // 链表:3 -> 5 -> 7
        list.printList(); // 打印链表:3 5 7
    }
}



![[公开课学习]台大李宏毅-自注意力机制 Transformer](https://img-blog.csdnimg.cn/direct/a37043ac6d2149c3a637c1fa97c9be36.png)







![【YOLOv8改进[Backbone]】使用SCINet改进YOLOv8在黑暗环境的目标检测效果](https://img-blog.csdnimg.cn/direct/7d418373e9244b59812b503f09eae225.png)