1、Gin 快速开发
1.1、环境准备
1.1.1、导入 gin 依赖
这里就叫 gin 依赖了,在 Goland 命令行中输入下面的命令:
go get -u github.com/gin-gonic/gin1.1.2、设置代理
如果下载失败,最好设置一下代理,在 cmd 命令行中输入下面的命令:
go env -w GOPROXY=https://goproxy.cn,direct完了之后再 Goland 这里同样设置启用 environment:

1.2、快速开发
1.2.1、Hello world
package main

import "github.com/gin-gonic/gin"

func main() {
	// 创建一个服务
	ginServer := gin.Default()

    // todo Go语言中的处理请求方法都是函数式编程:第一个参数是请求地址 第二个请求是函数
	// 访问地址,处理请求
	ginServer.GET("/hello", func(context *gin.Context) {
		context.JSON(200,gin.H{"msg":"hello world"})
	})

    // 设置服务器端口
	ginServer.Run(":8082") // 默认 8080
}
上面,我们首先得到了 ginServer ,然后直接通过函数式编程,给 GET 请求 "/hello" 设置处理函数:直接返回给前端一段 JSON 数据。
这个返回格式和我们之前学习的 SpringBoot 是不谋而合的,它们都会返回一个状态码和一段任意类型的信息(在 SpringBoot 中是 Object,在这里是 any 类型)。
启动程序,访问 localhost:8082:

1.2.2、给网页设置 icon
直接在 Goland 命令行输入:go get "github.com/thinkerou/favicon":

直接在上面的代码基础上添加下面的代码:
import(
    "github.com/thinkerou/favicon"
)
在 main 方法中添加一行代码即可:
    // 设置网页icon
	ginServer.Use(favicon.New("./sxau.ico"))
测试:

// todo 新增用户
	ginServer.POST("/user", func(ctx *gin.Context) {
		ctx.JSON(200,gin.H{
			"msg":"新增用户",
		})
	})
1.2.3、给前端响应界面
1、加载 HTML 文件
有两种方法,一种是加载 html 所在目录下所有文件,一种是加载单个 html 文件:
    // 加载静态页面
	ginServer.LoadHTMLGlob("static/html/*")
	//ginServer.LoadHTMLFiles("static/index.html") // 加载指定的 HTML 文件

2、加载 css、js
    // 加载资源文件 css、js
	ginServer.Static("/static","./static")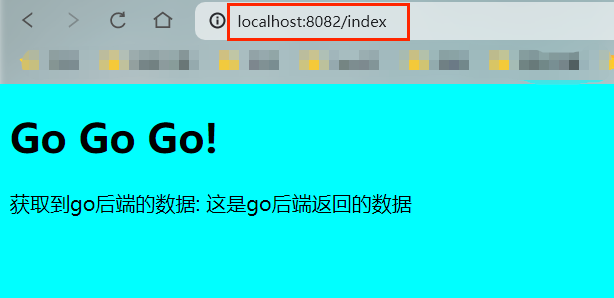
此外,我们可以看到每次运行,Go 都会把我们的程序打包为一个 exe(windows),在 linux 和 mac 上同样会直接打包为一个可执行文件,所以特别方便!

1.2.4、获取请求中的参数
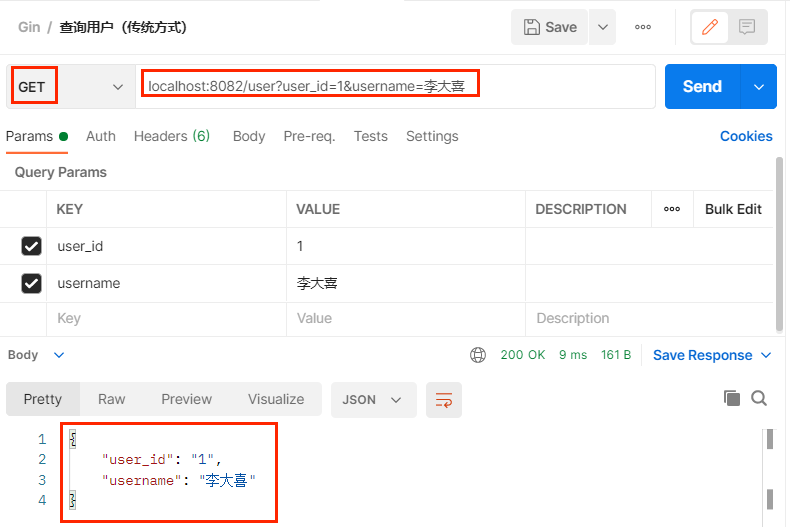
1)& ?格式
// 1. /user?user_id=xxx&username=xxx 格式
	ginServer.GET("/user", func(ctx *gin.Context) {
		user_id := ctx.Query("user_id")
		username := ctx.Query("username")
		ctx.JSON(http.StatusOK,gin.H{
			"user_id": user_id,
			"username": username,
		})
	})
2)RESTful 风格
SpringBoot 中我们使用 /user/{user_id} 的格式来传递参数,go 语言中我们使用 :user_id 来传递
// 2. /user/user_id/username
	ginServer.GET("/user/:user_id/:username", func(ctx *gin.Context) {
		user_id := ctx.Param("user_id")
		username := ctx.Param("username")
		ctx.JSON(http.StatusOK,gin.H{
			"user_id": user_id,
			"username": username,
		})
	})
1.2.5、序列化数据
把前端发来的数据(已经不是 json 了)转为 json 再返回:
	// todo 前端给后端传递 json
	ginServer.POST("/json", func(ctx *gin.Context) {
		// 从请求体(request.body)获得对象
		// GetRawData() 返回请求体切片[]byte和错误信息err
		data,err := ctx.GetRawData()
		fmt.Println("date => "+string(data))
		fmt.Println("err => ",err)

		var m map[string]interface{}
		// 序列化包装为json数据
		_ = json.Unmarshal(data,&m)

		ctx.JSON(http.StatusOK,m)
	})

1.2.6、获取表单数据
    // todo 新增用户
	ginServer.POST("/user", func(ctx *gin.Context) {

		// 对应表单的input标签的name属性
		username := ctx.PostForm("username")
		password := ctx.PostForm("password")

		ctx.JSON(200,gin.H{
			"msg":"新增用户",
			"username":username,
			"password":password,
		})
	})

1.2.5、路由之重定向到首页
重定向的状态码是 301 !
    // todo 路由
	ginServer.GET("/test", func(ctx *gin.Context) {
		// 重定向 301
		ctx.Redirect(http.StatusMovedPermanently,"/index")
	})
1.2.6、路由之404页面
    // 404
	ginServer.NoRoute(func(ctx *gin.Context) {
		// 它会自动拼接 static/html/
		ctx.HTML(http.StatusNotFound,"404.html",nil)
	})
1.2.7、路由之路由组
路由组就相当于我们 SpringBoot 中控制器类上面 @RequestMapping 的统一前缀:
    // 路由组(RESTful 风格)
	book := ginServer.Group("/book")
	{
		// 相当于访问 /book/id
		book.GET("/:id", func(ctx *gin.Context) {

		})
		// 相当于访问 /book/id
		book.DELETE("/:id", func(ctx *gin.Context) {

		})
	}
1.2.8、拦截器(中间件)
在我们的 JavaWeb 项目中叫做拦截器,在 Go 语言的 Web 项目中一般叫中间件。
1、自定义拦截器
下面自定义一个拦截器,请求参数中必须包含 username ,如果用户名是 admin 则放行,否则阻止。此外,我们可以在拦截器中设置一些全局变量,如果一个请求设置了拦截器,那么就可以在这个请求的处理方法中获取拦截器中设置的参数。
// 自定义go中间件 (相当于Java中的拦截器)
func interceptor() gin.HandlerFunc {
	return func(ctx *gin.Context) {
		// 通过自定义的中间件设置的值,后续都可以通过中间件访问到这个值
		ctx.Set("usersession","user")
		username := ctx.Query("username")
		if username=="admin" {
			ctx.Next() // 放行
		}else {
			ctx.Abort() // 阻止
		}
	}
}
2、注册拦截器
注意:如果注册之后没有在任何请求方法中使用拦截器,那么将作用于所有拦截器!如果指定了任意一个或多个拦截器,那么将只会作用于这些请求!
// 注册中间件 注册之后未使用的话默认全局使用 如果未注册或者给某个请求使用了这个中间件的话就只对这个请求生效
	ginServer.Use(interceptor())
3、使用拦截器
// 这里设置了中间件 会先通过拦截器才能继续处理
	ginServer.GET("/index",interceptor(),func(ctx *gin.Context) {

		// 取出中间件爱中的值
		usersession := ctx.MustGet("usersession").(string)
		log.Println("=========> ",usersession)

		//ctx.JSON(200,gin.H{"msg":"返回 json 数据"})
		ctx.HTML(http.StatusOK,"index.html",gin.H{
			"msg":"这是go后端返回的数据",
		})
	})
测试放行:

测试阻止:

1.3、Web 登录验证 Demo
下面做一个简单的用户登录界面验证,结合 MySQL:
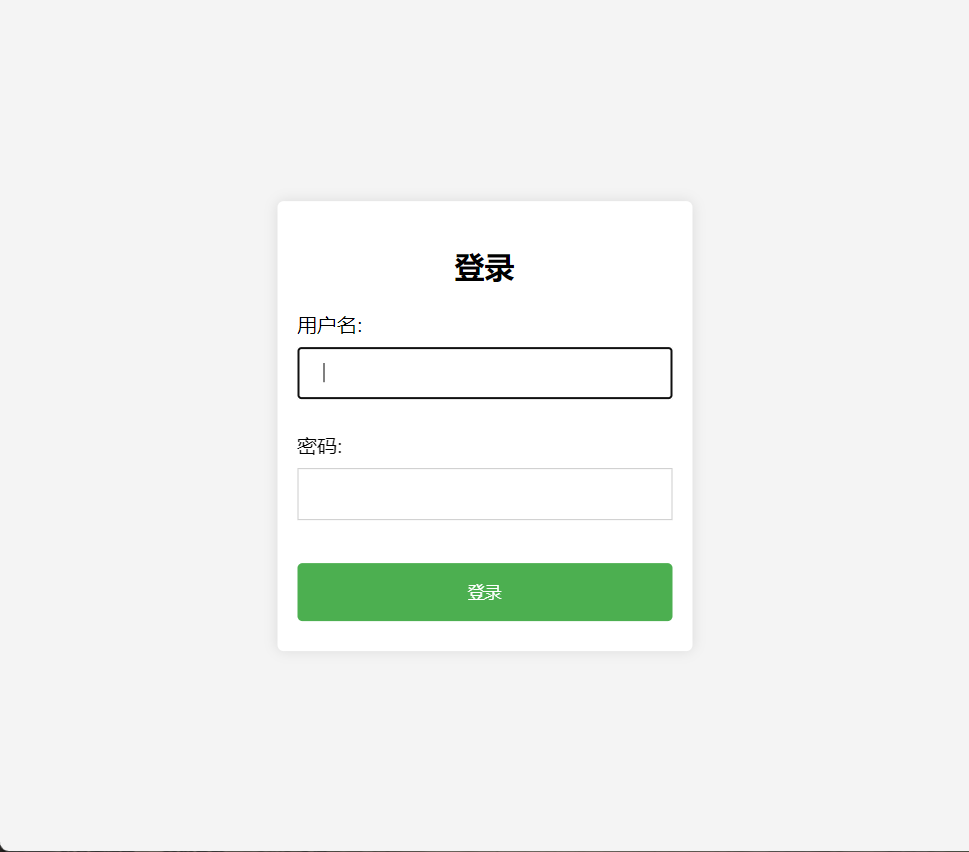
1.3.1、登录界面 HTML
<!DOCTYPE html>
<html lang="en">
<head>
    <meta charset="UTF-8">
    <meta name="viewport" content="width=device-width, initial-scale=1.0">
    <title>登录页面</title>
    <link rel="stylesheet" href="/static/css/style.css">
</head>
<body>
<div class="login-container">
    <h2>登录</h2>
    <form method="post" action="/login">
        <label for="username">用户名:</label>
        <input type="text" name="username" required><br><br>

        <label for="password">密码:</label>
        <input type="password" name="password" required><br><br>

        <input type="submit" value="登录">
    </form>
</div>
</body>
</html>
1.3.2、CSS
body {
    font-family: Arial, sans-serif;
    background-color: #f4f4f4;
}

.login-container {
    width: 300px;
    padding: 16px;
    background-color: white;
    border-radius: 5px;
    box-shadow: 0 0 10px rgba(0, 0, 0, 0.1);
    position: absolute;
    top: 50%;
    left: 50%;
    transform: translate(-50%, -50%);
}

h2 {
    text-align: center;
}

input[type=text], input[type=password] {
    width: 100%;
    padding: 12px 20px;
    margin: 8px 0;
    display: inline-block;
    border: 1px solid #ccc;
    box-sizing: border-box;
}

input[type=submit] {
    width: 100%;
    background-color: #4CAF50;
    color: white;
    padding: 14px 20px;
    margin: 8px 0;
    border: none;
    border-radius: 4px;
    cursor: pointer;
}

input[type=submit]:hover {
    background-color: #45a049;
}
1.3.3、Go 数据库查询代码
需要导入 mysql 的包,连接:
package util

import (
	"database/sql"
	"fmt"
	_ "github.com/go-sql-driver/mysql"
)

const USERNAME,PASSWORD string = "root","Yan1029."

// todo 公开的方法必须首字母大写才能被其它go文件调用
func Connect(username, password string) *sql.DB {
	db,err := sql.Open("mysql","root:Yan1029.@tcp(127.0.0.1:3306)/go_web?charset=utf8mb4")
	if err != nil {
		println("连接失败",err)
	}
	db.Ping() // 尝试连接数据库
	return db
}
func Close(db *sql.DB)  {
	if db != nil {
		db.Close()
	}
}

type User struct {
	id int
	username string
	password string
}
/**
	查询用户是否已经注册
 */
func HasUser(db *sql.DB,username,password string) bool {
	var user User
	querySql := "SELECT * FROM register_users WHERE username=? AND password=?"
	row := db.QueryRow(querySql,username,password)
	err := row.Scan(&user.id,&user.username,&user.password)
	if err!=nil {
		fmt.Print("查询失败",err)
		return false
	}
	return true
}
1.3.4、Go 请求处理代码
package main

// 导入 gin
import (
	"encoding/json"
	"fmt"
	"github.com/gin-gonic/gin"
	"github.com/thinkerou/favicon"
	"go1/util"
	"net/http"
)


func main() {
	// 创建一个服务
	ginServer := gin.Default()
	// 设置网页icon
	ginServer.Use(favicon.New("./sxau.ico"))

	// 加载静态页面
	ginServer.LoadHTMLGlob("static/html/*")
	//ginServer.LoadHTMLFiles("static/index.html") // 加载指定的 HTML 文件
	// 加载资源文件
	ginServer.Static("/static","./static")

	ginServer.POST("/login", func(ctx *gin.Context) {
		// 获得登录参数
		username := ctx.PostForm("username")
		password := ctx.PostForm("password")
		db := util.Connect(util.USERNAME,util.PASSWORD)
		if util.HasUser(db,username,password) {
			fmt.Println("存在该用户")
			ctx.HTML(http.StatusOK,"home.html",nil)
		}else{
			fmt.Println("不存在该用户")
			ctx.HTML(http.StatusNotFound,"404.html",nil)
		}
		util.Close(db)
	})

	// 服务器端口
	ginServer.Run(":8082") // 默认 8080
}
测试:
输入正确的账号密码:
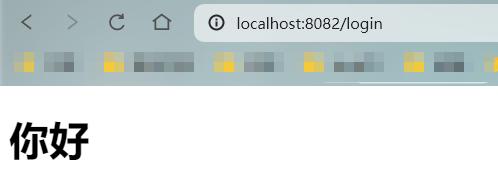
输入错误的账号密码:
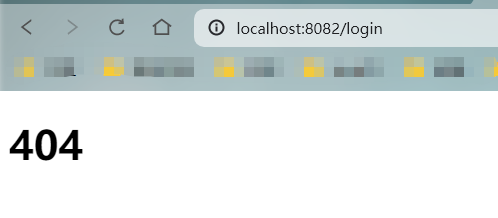
总结
Go 语言开发 Web 应用还是特别简单的,比起 Java 肉眼可见的高效!确实是爽歪歪,下去好好了再去一下 Go 语言的一些基础!






![[疑难杂症2024-004] 通过docker inspect解决celery多进程记录日志莫名报错的记录](https://img-blog.csdnimg.cn/direct/bf4c8192bcd244bfa41137d8c553cad5.png)
