文章目录
- 一、生成Django框架
- 二、项目代码(前端)
- 1、编写前端代码(正文界面)
- 1.1、生产html框架
- 1.2、添加live preview扩展
- 1.3、更改title元素中文本
- 1.4、添加CDN(CSS)样式链接
- 1.5、nav标签
- 1.6、在body标签中添加类
- 1.7、nav下创建div标签
- 1.8、当前界面预览
- 1.9、在div标签后添加footer
- 1.10、完整代码
- 2、编写前端代码(登录注册界面)
- 2.1、创建html框架并添加cdn样式表
- 2.2、创建密码登录框(完整代码)
- 3、编写前端代码(注册页面)
- 3.1、完整代码
- 4、编写前端代码(文章保存记录)
- 4.1、完整代码
- 5、编写前端代码(文章页面)
- 5.1、完整代码
- 三、Django代码(后端)
- 1、添加app功能
- 2、blog_generato添加index视图(views.py)
- 3、添加数据库
- 4、创建管理员用户
- 4.1、后台中文化
- 4.2、在blog_generato下的urls.py中添加url
- 4.3、将注册登录html页面添加到views中
- 5、获取ai转换
- 6、获取openai秘钥
- 四、修改后的完整代码(前后端)
- 1、 ai_blog_app--> settings.py
- 2、ai_blog_app--> urls.py
- 3、ai_blog_app --> _init_.py
- 4、blog_generato --> admin.py
- 5、blog_generato --> models.py
- blog_generato --> urls.py
- 7、 blog_generato --> viwes.py
- 8、templates --> all-logs.html(修改后)
- 9、templates -->blog-details.html(修改后)
- 10、templates -->index.html(修改后)
- 11、templates -->login.html(修改后)
- 12、templates -->signup.html(修改后)
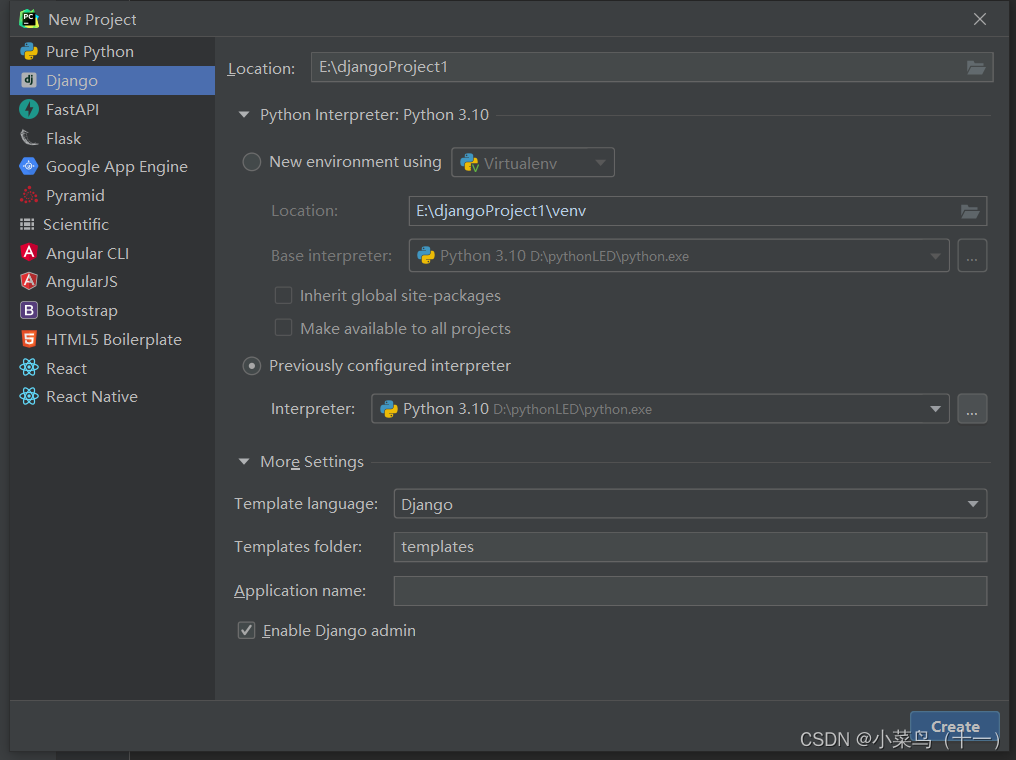
一、生成Django框架
我这里使用的是PyCharm 2021.3.3
创建流程:
- 打开PyCharm
- 点击左上角File
- 选择New Project
- 选择Django
- 最后点击Create
- 然后在Django项目中添加一个文件夹,以便用来保存html文件
二、项目代码(前端)
1、编写前端代码(正文界面)
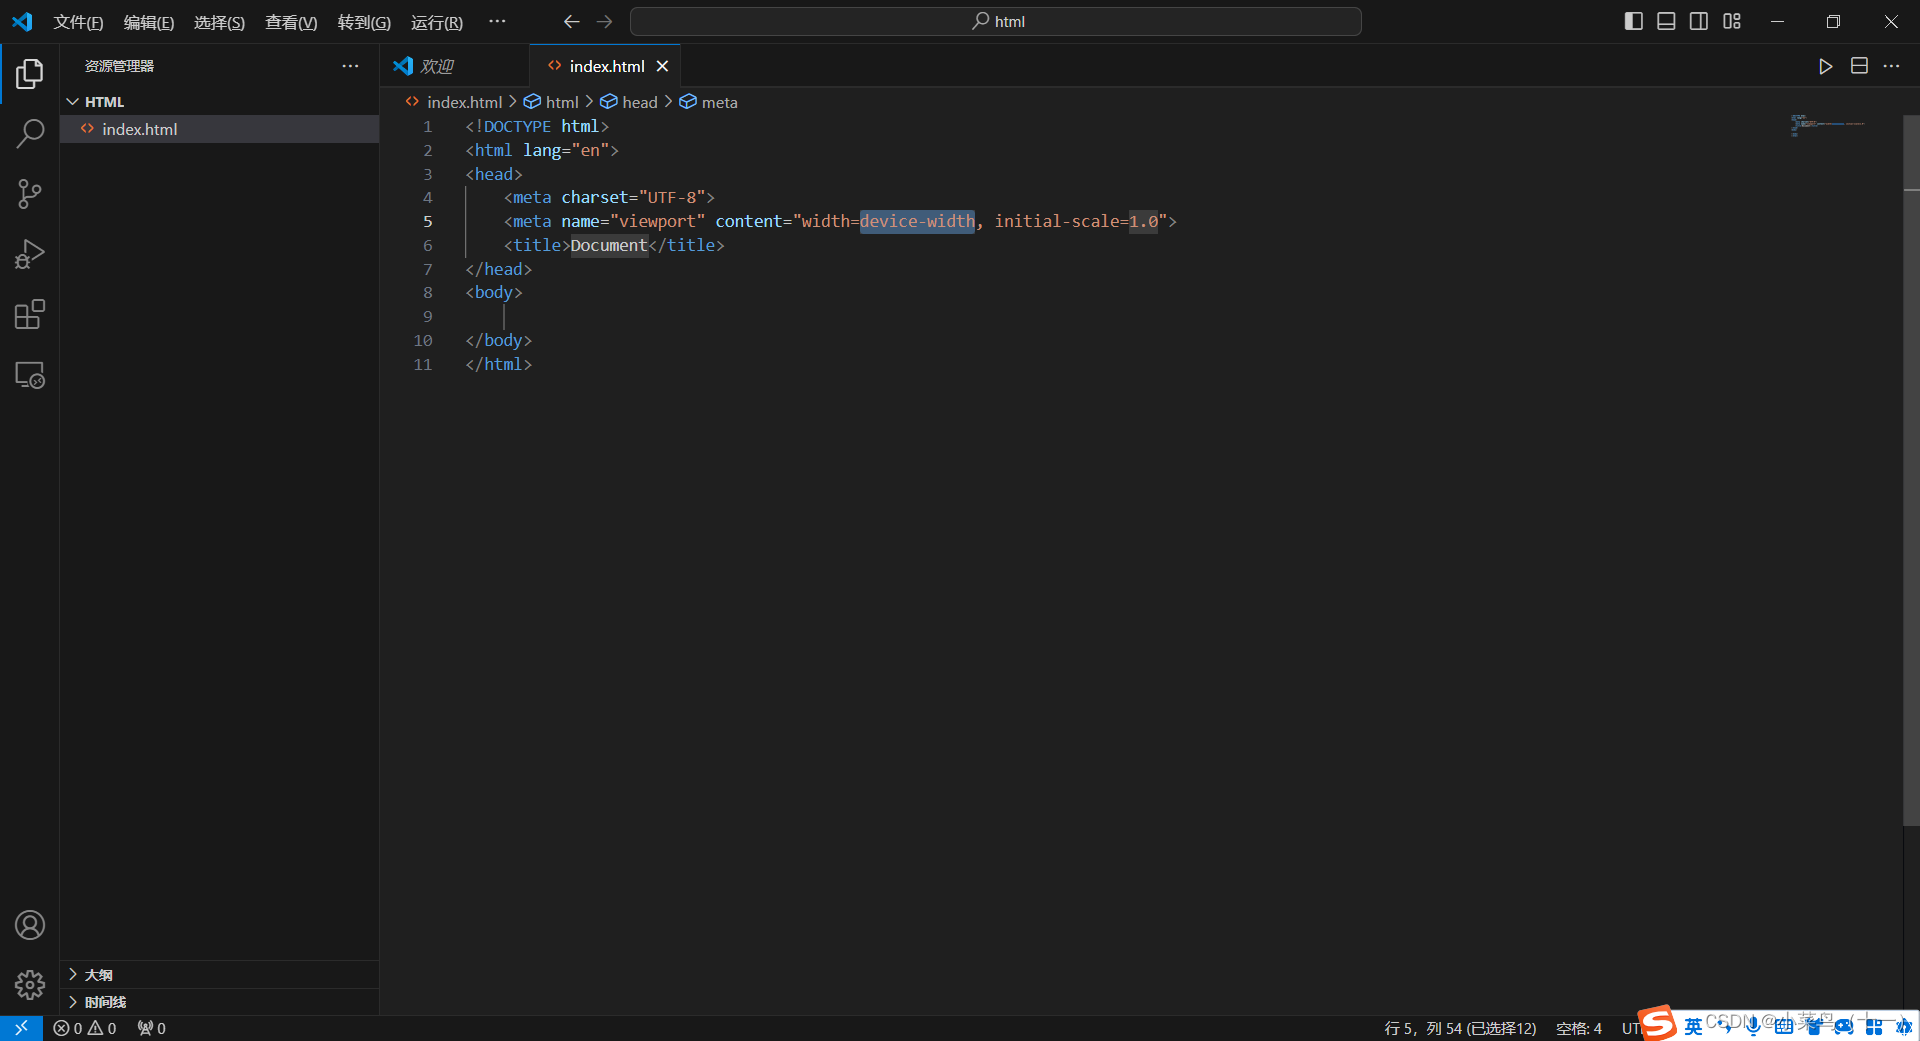
1.1、生产html框架
使用Visual Studio Code打开你刚刚在django项目创建的用来编写html文件的文件夹
首先创建一个index.html文件
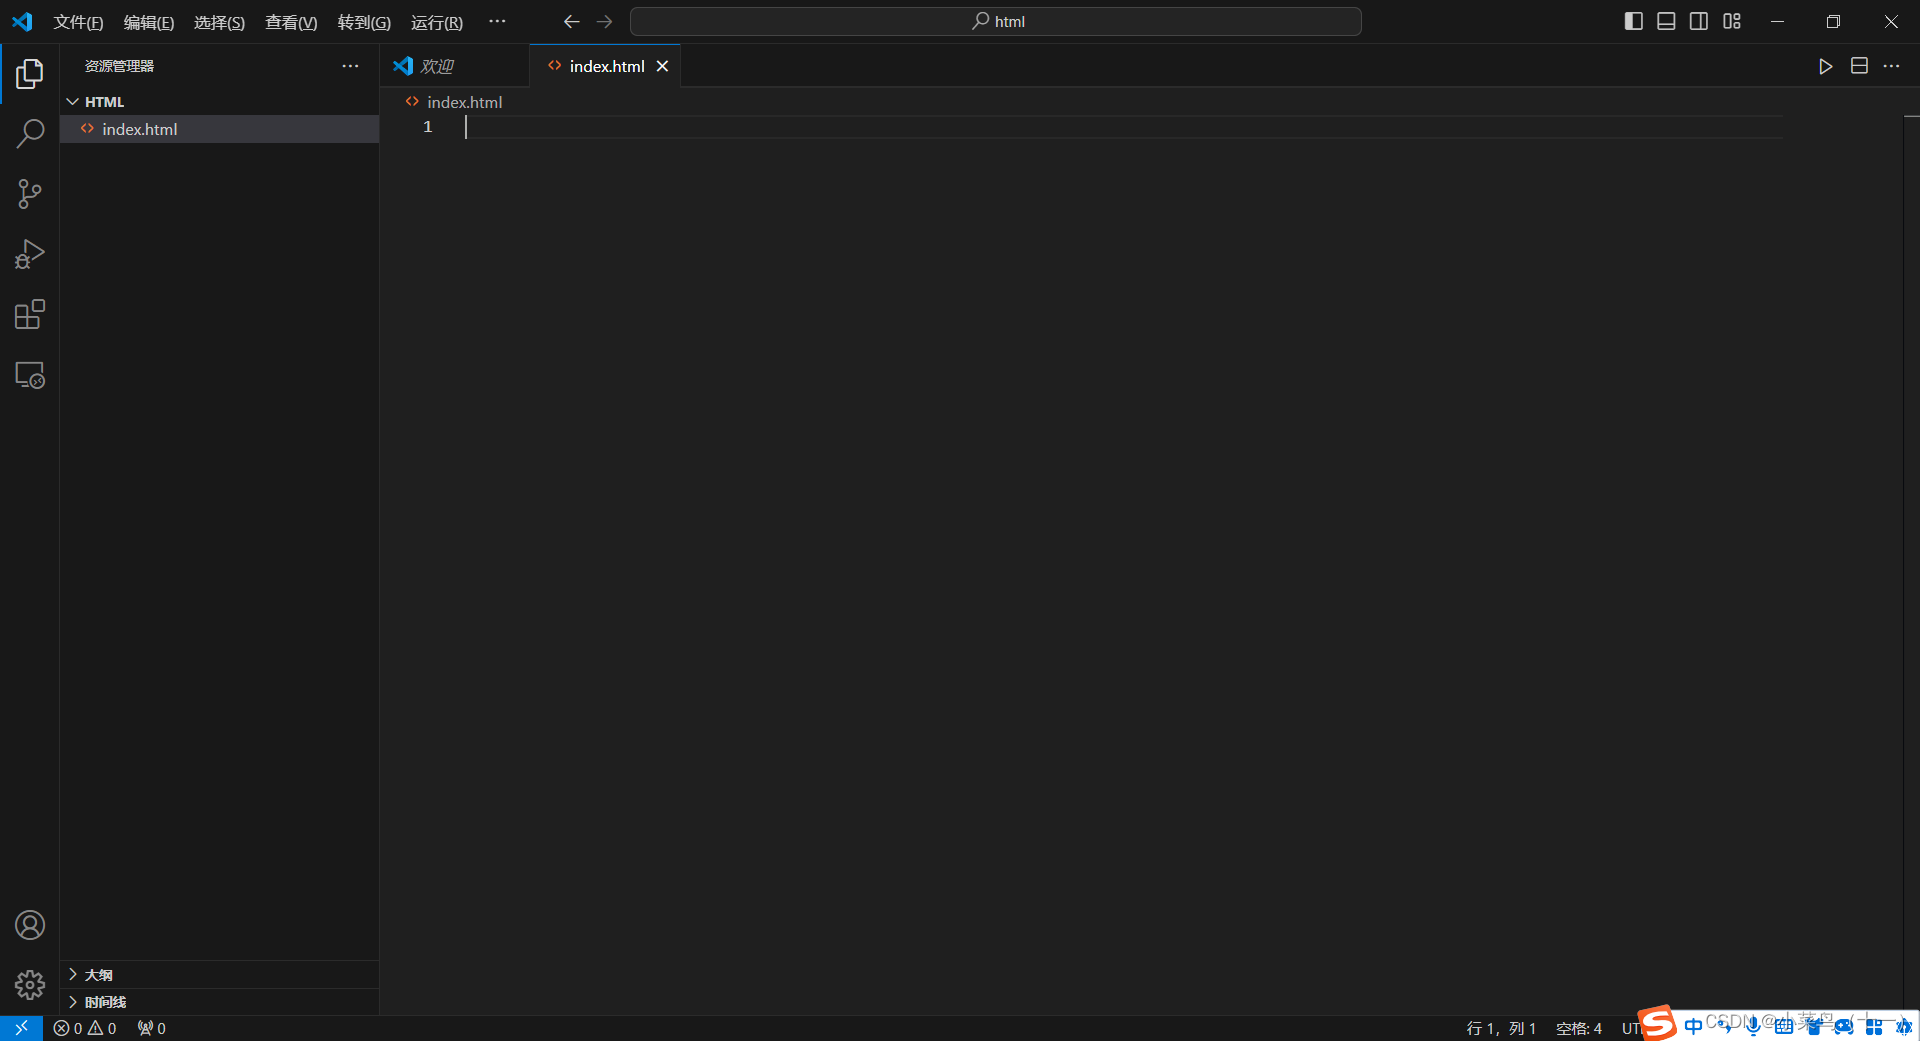
英文感叹号加回车键生成html框架
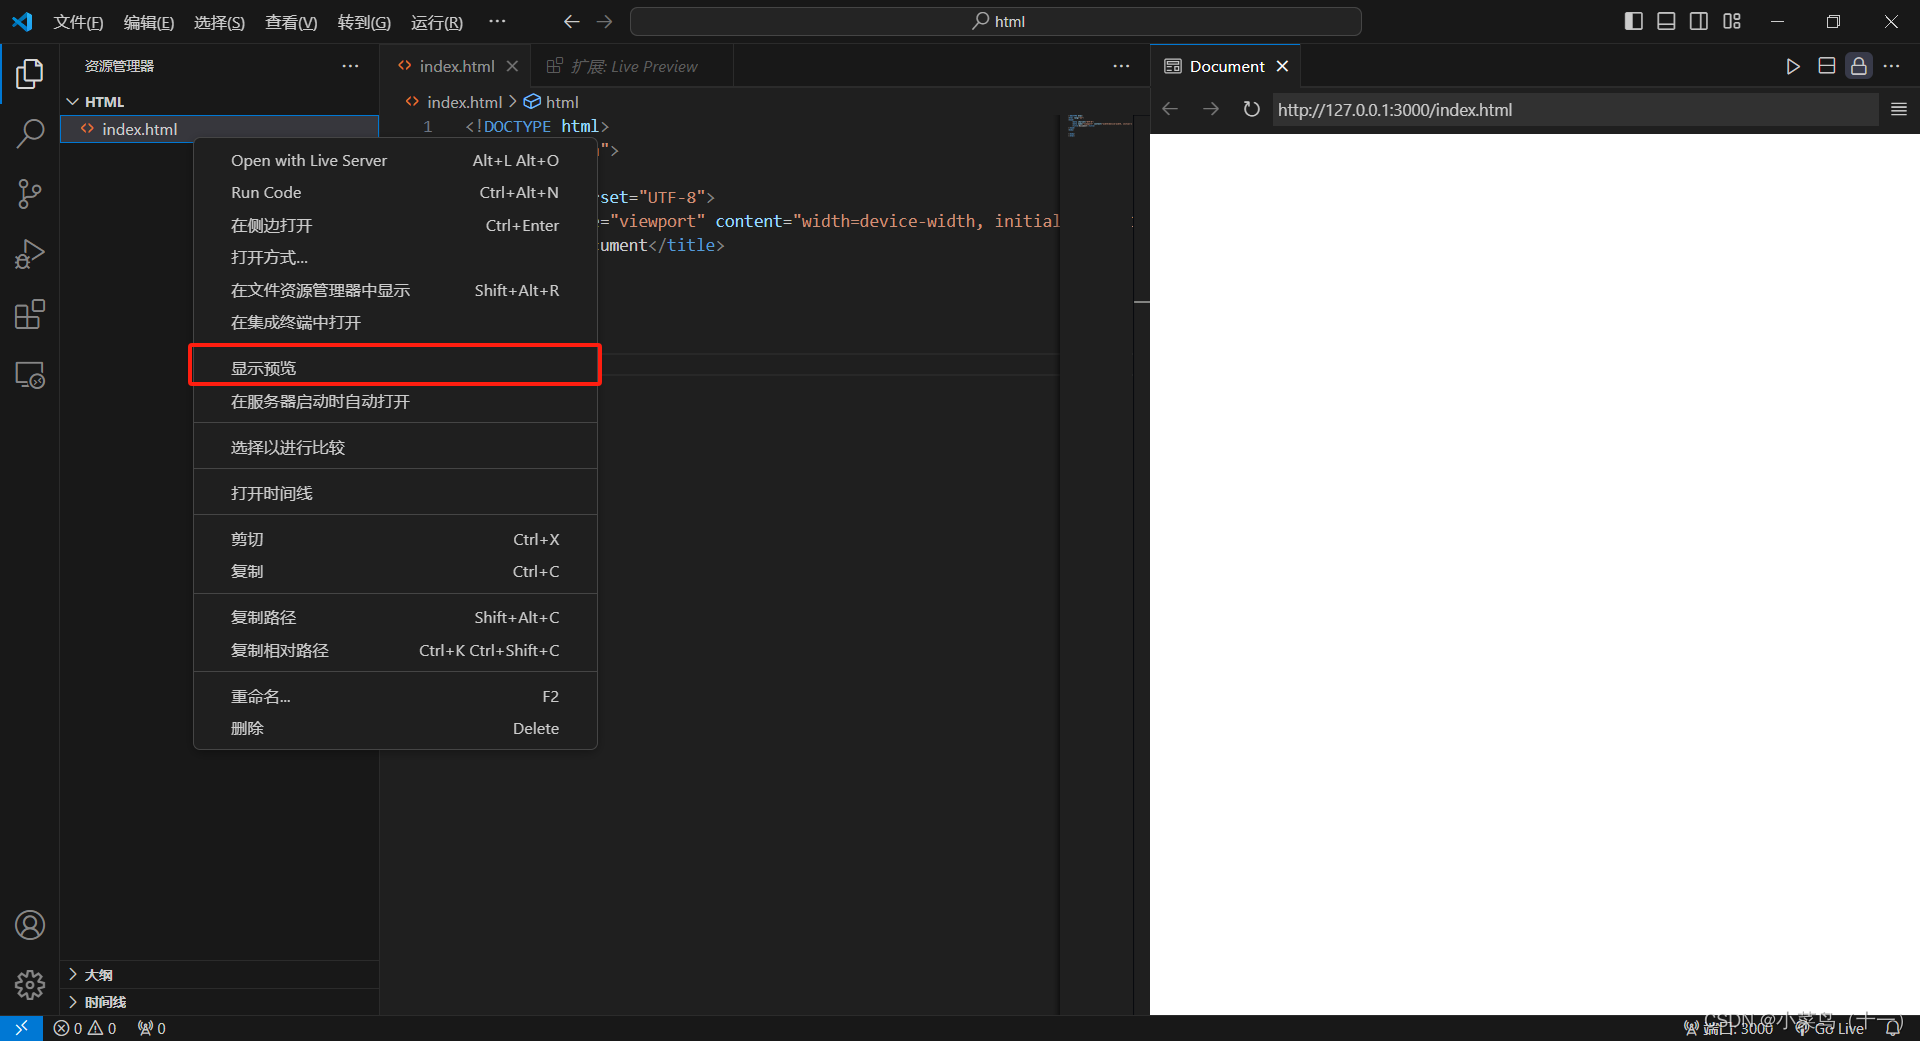
1.2、添加live preview扩展
Live Preview 扩展的作用是在VSCode内部实现边写边预览的效果。
这个扩展主要用于HTML文件,它允许开发者在编写代码的同时实时查看代码渲染的效果,而不需要离开编辑器或打开浏览器。具体来说,Live Preview 扩展提供了以下几个便利的功能:
实时预览:当你在编辑HTML文件时,任何对代码的更改都会立即反映在预览窗口中,这样你可以即时看到改动效果,提高开发效率。
高度集成:作为微软官方插件,Live Preview与VSCode的集成程度非常高,使用起来非常流畅和方便。
简化操作:相比于其他如LiveServer等插件,Live Preview无需额外的保存和重启服务步骤,减少了繁琐的操作流程。
易于安装:你可以通过VSCode的扩展商店直接搜索并安装Live Preview,安装过程简单快捷。
自定义布局:你可以根据自己的需要调整预览窗口的位置,选择向上/下/左/右拆分,以适应不同的工作流程和屏幕布局。
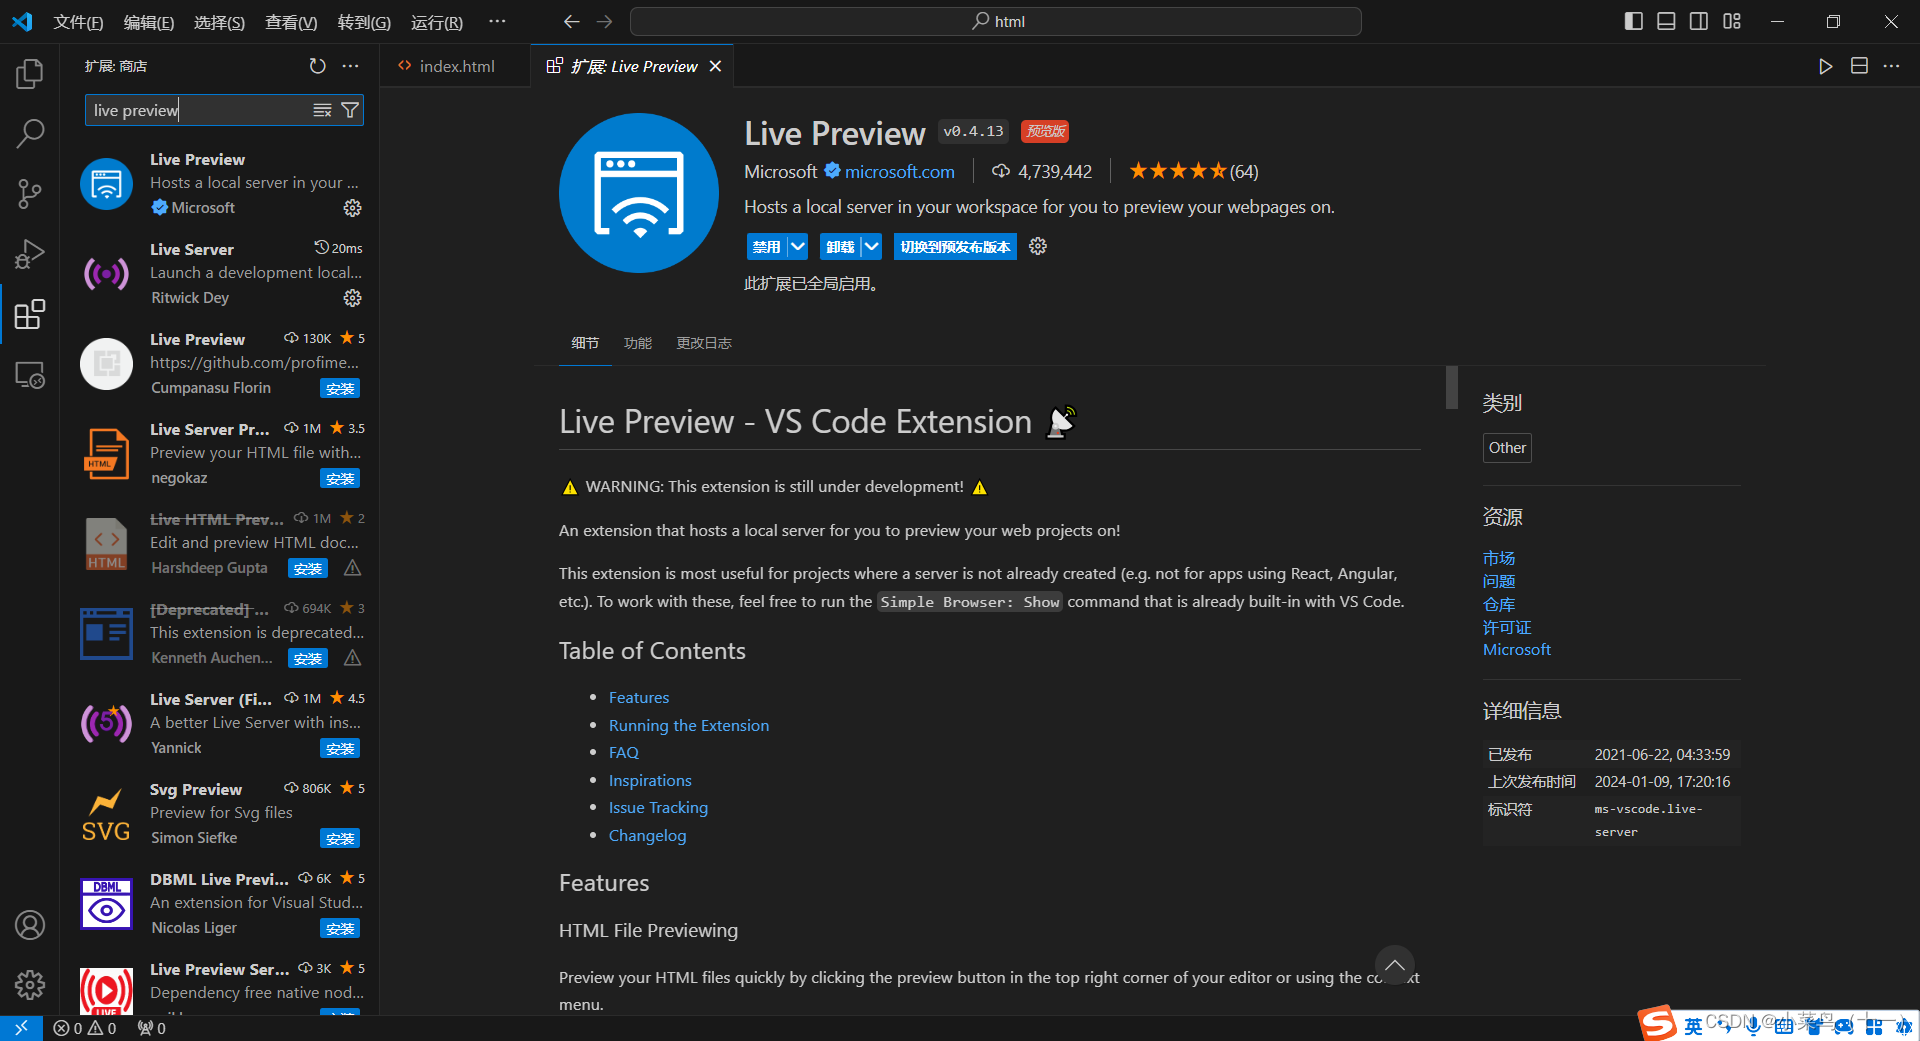
直接安装即可
右键点击index.html文件,然后选择显示预览
1.3、更改title元素中文本
更改第六行的title元素
<title>AI 博客</title>
然后ctrl + s保存
1.4、添加CDN(CSS)样式链接
在第七行添加css的链接
<link href="https://cdn.jsdelivr.net/npm/tailwindcss@2.2.19/dist/tailwind.min.css" rel="stylesheet">
1.5、nav标签
从第十一行开始为nav标签
    <nav >

    </nav>
在第一个nav标签中添加一个类
    <nav class="bg-blue-600 p-4 text-white flex justify-between">

    </nav>
在nav标签中添加div标签
<div>

            <h1 class="text-3xl font-bold">AI 博客生成器</h1>

        </div>
        <div>
            <a href="#" class="text-white hover:underline">注销</a>

        </div>
1.6、在body标签中添加类
<body class="flex flex-col min-h-scrren bg-gray-100 font-sans antialised">
1.7、nav下创建div标签
创建h2标签之前先要创建三对div标签,三十八行到四十五行
   <div>
        <div>
            <div>
                <h2>欢迎来到AI博客生成器</h2>
            </div>
        </div>
    </div>
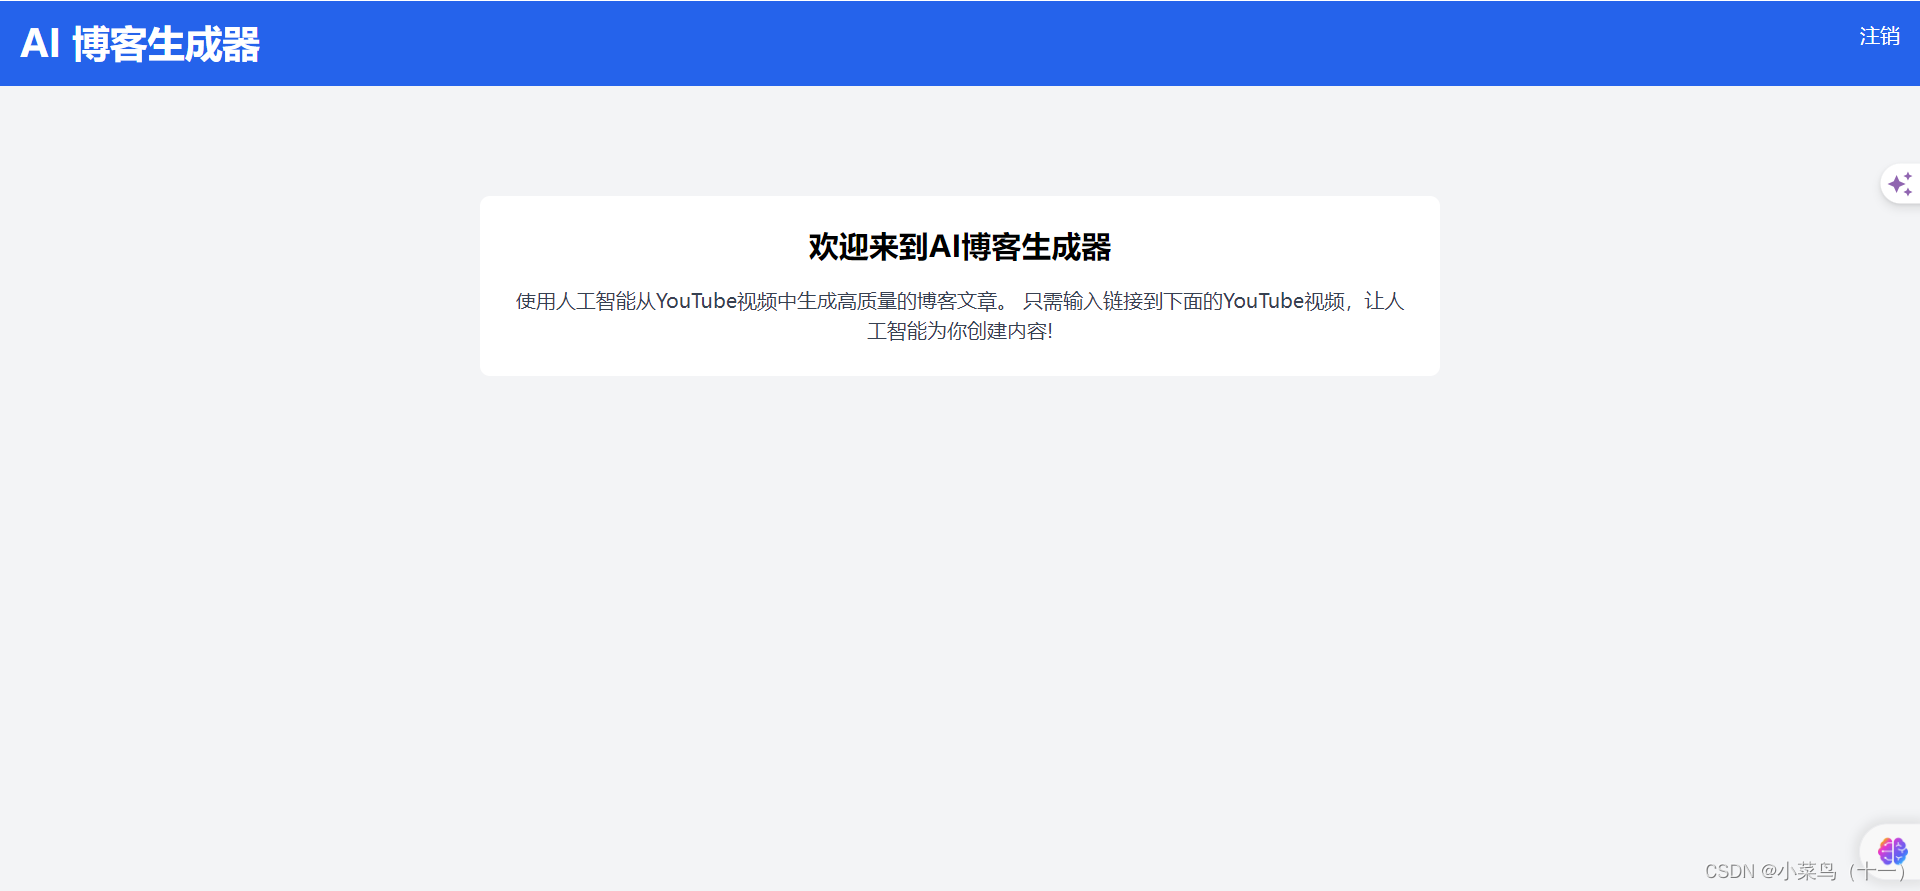
在最后一对div标签中创建h2和p标签
   <div>
        <div>

            <div class="text-center">

                <h2 class="text-2xl font-semibold mb-4">欢迎来到AI博客生成器</h2>

                <p class="text-gray-700">

                    使用人工智能从YouTube视频中生成高质量的博客文章。
                    只需输入链接到下面的YouTube视频,让人工智能为你创建内容!
                </p>
            </div>
        </div>
为前面两对div添加元素
   <div class="flex-grow container mx-auto mt-10 px-4 sm:px-0">


        <div class="max-w-3xl mx-auto bg-white p-6 rounded-lg">


            <div class="text-center">


                <h2 class="text-2xl font-semibold mb-4">欢迎来到AI博客生成器</h2>


                <p class="text-gray-700">


                    使用人工智能从YouTube视频中生成高质量的博客文章。
                    只需输入链接到下面的YouTube视频,让人工智能为你创建内容!
                </p>
            </div>
        </div>
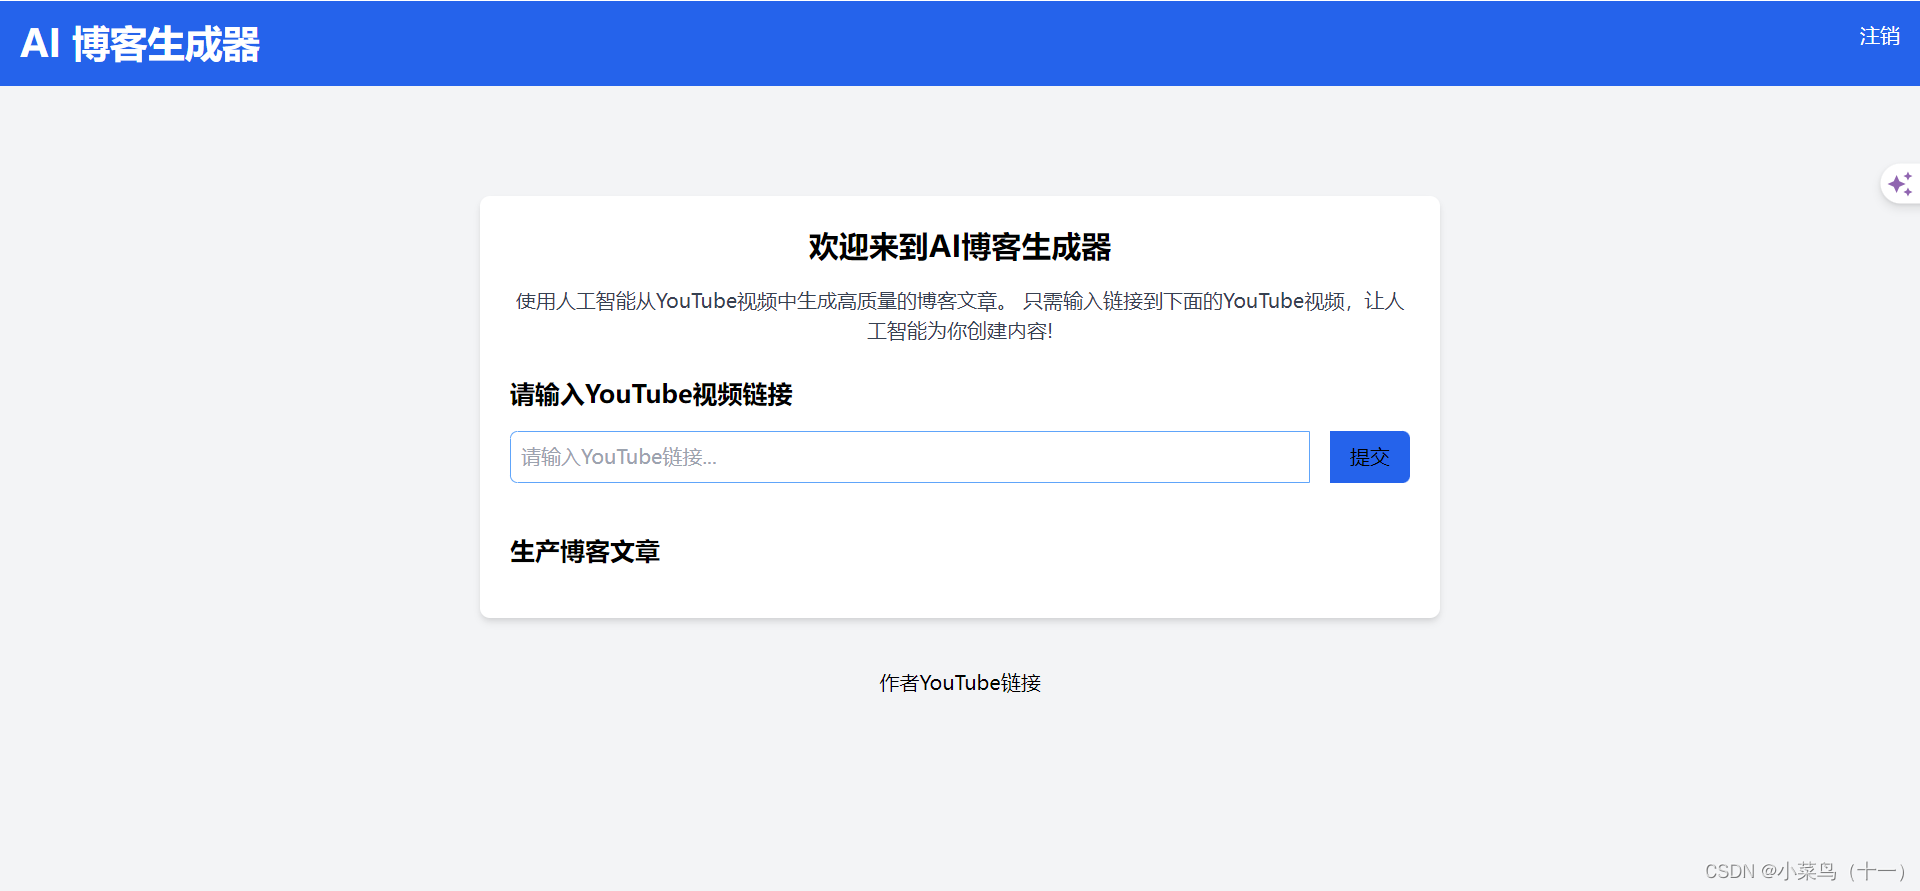
1.8、当前界面预览
在第二对div标签中添加内容
    <div class="flex-grow container mx-auto mt-10 px-4 sm:px-0">
        <div class="max-w-3xl mx-auto bg-white p-6 rounded-lg shadow-md transition-transform transform hover:scale-105 flex flex-col">
            <div class="text-center">
                <h2 class="text-2xl font-semibold mb-4">欢迎来到AI博客生成器</h2>
                <p class="text-gray-700">
                    使用人工智能从YouTube视频中生成高质量的博客文章。
                    只需输入链接到下面的YouTube视频,让人工智能为你创建内容!
                </p>
            </div>

            <br>

            <div>
                <h2 class="text-xl mb-4 font-semibold">请输入YouTube视频链接</h2>
                <div class="flex space-x-4">
                    <input id="youtubeLink" type="url" placeholder="请输入YouTube链接..." class="flex-grow p-2 border border-blue-400 rounded-l-md ">
                    <button id="generateBlogButton" class="bg-blue-600 text-blue px-4 py-2 rounded-r-md hover:gb-blue-700 transition-colors">提交</button>
                </div>
            </div>
        </div>

    </div>
添加section标签
    <div class="flex-grow container mx-auto mt-10 px-4 sm:px-0">
        <div class="max-w-3xl mx-auto bg-white p-6 rounded-lg shadow-md transition-transform transform hover:scale-105 flex flex-col">
            <div class="text-center">
                <h2 class="text-2xl font-semibold mb-4">欢迎来到AI博客生成器</h2>
                <p class="text-gray-700">
                    使用人工智能从YouTube视频中生成高质量的博客文章。
                    只需输入链接到下面的YouTube视频,让人工智能为你创建内容!
                </p>
            </div>

            <br>

            <div>
                <h2 class="text-xl mb-4 font-semibold">请输入YouTube视频链接</h2>
                <div class="flex space-x-4">
                    <input id="youtubeLink" type="url" placeholder="请输入YouTube链接..." class="flex-grow p-2 border border-blue-400 rounded-l-md ">
                    <button id="generateBlogButton" class="bg-blue-600 text-blue px-4 py-2 rounded-r-md hover:gb-blue-700 transition-colors">提交</button>
                </div>
            </div>

            <section class="mt-10 flex-grow">
                <h2 class="text-xl mb-4 font-semibold">生产博客文章</h2>
                <div id="blogContent" class="mt-2 text-gray-700 space-y-4">

                </div>
            </section>
        </div>

    </div>
1.9、在div标签后添加footer
    <footer class="text-center p-4 text-blacl mt-6">
        作者YouTube<a href="https://www.youtube.com/codewithtomi">链接</a>
    </footer>
1.10、完整代码
<!DOCTYPE html>
<html lang="en">
<head>
    <meta charset="UTF-8">
    <meta name="viewport" content="width=device-width, initial-scale=1.0">
    <title>AI 博客</title>
    <link href="https://cdn.jsdelivr.net/npm/tailwindcss@2.2.19/dist/tailwind.min.css" rel="stylesheet">
    <style>
        @keyframes rotate{
            from{
                transform: rotate(0deg);
            }
            to{
                transform: rotate(360deg);
            }
        }

        @-webkit-keyframes rotate{
            from{
                -webkit-transform: rotate(0deg);
            }
            to{
                -webkit-transform: rotate(360deg);
            }
        }

        .load{
            width: 100px;
            height: 100px;
            margin: 110px auto 0;
            border: solid 10px #8822aa;
            border-radius: 50%;
            border-right-color: transparent;
            border-bottom-color: transparent ;
             -webkit-transform: all 0.5s ease-in;
            -webkit-animation-name: rotate;
            -webkit-animation-duration: 1.0s;
            -webkit-animation-iteration-count: infinite;
            -webkit-animation-timing-function: linear;

                transition: all 0.5s ease-in;
                animation-name: rotate;
                animation-iteration-count: infinite;
                animation-timing-function: linear;
        }
    </style>

</head>
<body class="flex flex-col min-h-scrren bg-gray-100 font-sans antialised">
    <nav class="bg-blue-600 p-4 text-white flex justify-between">
        <div>
            <h1 class="text-3xl font-bold">AI 博客生成器</h1>
        </div>
        <div>
            <a href="#" class="text-white hover:underline">注销</a>
        </div>
    </nav>
    <br>
    <br>
    <div class="flex-grow container mx-auto mt-10 px-4 sm:px-0">
        <div class="max-w-3xl mx-auto bg-white p-6 rounded-lg shadow-md transition-transform transform hover:scale-105 flex flex-col">
            <div class="text-center">
                <h2 class="text-2xl font-semibold mb-4">欢迎来到AI博客生成器</h2>
                <p class="text-gray-700">
                    使用人工智能从YouTube视频中生成高质量的博客文章。
                    只需输入链接到下面的YouTube视频,让人工智能为你创建内容!
                </p>
            </div>

            <br>

            <div>
                <h2 class="text-xl mb-4 font-semibold">请输入YouTube视频链接</h2>
                <div class="flex space-x-4">
                    <input id="youtubeLink" type="url" placeholder="请输入YouTube链接..." class="flex-grow p-2 border border-blue-400 rounded-l-md ">
                    <button id="generateBlogButton" class="bg-blue-600 text-blue px-4 py-2 rounded-r-md hover:gb-blue-700 transition-colors">提交</button>
                </div>
            </div>
            <div style="display: none;" id="loading-circle" class="load"></div>

            <section class="mt-10 flex-grow">
                <h2 class="text-xl mb-4 font-semibold">生产博客文章</h2>
                <div id="blogContent" class="mt-2 text-gray-700 space-y-4">

                </div>
            </section>
        </div>

    </div>

    <footer class="text-center p-4 text-blacl mt-6">
        作者YouTube<a href="https://www.youtube.com/codewithtomi">链接</a>
    </footer>
    <script>

    </script>
</body>
</html>
2、编写前端代码(登录注册界面)
2.1、创建html框架并添加cdn样式表
<!DOCTYPE html>
<html lang="en">
<head>
    <meta charset="UTF-8">
    <meta name="viewport" content="width=device-width, initial-scale=1.0">
    <title>AI博客-登录</title>
    <link href="https://cdn.jsdelivr.net/npm/tailwindcss@2.2.19/dist/tailwind.min.css" rel="stylesheet">
</head>
<body>

</body>
</html>
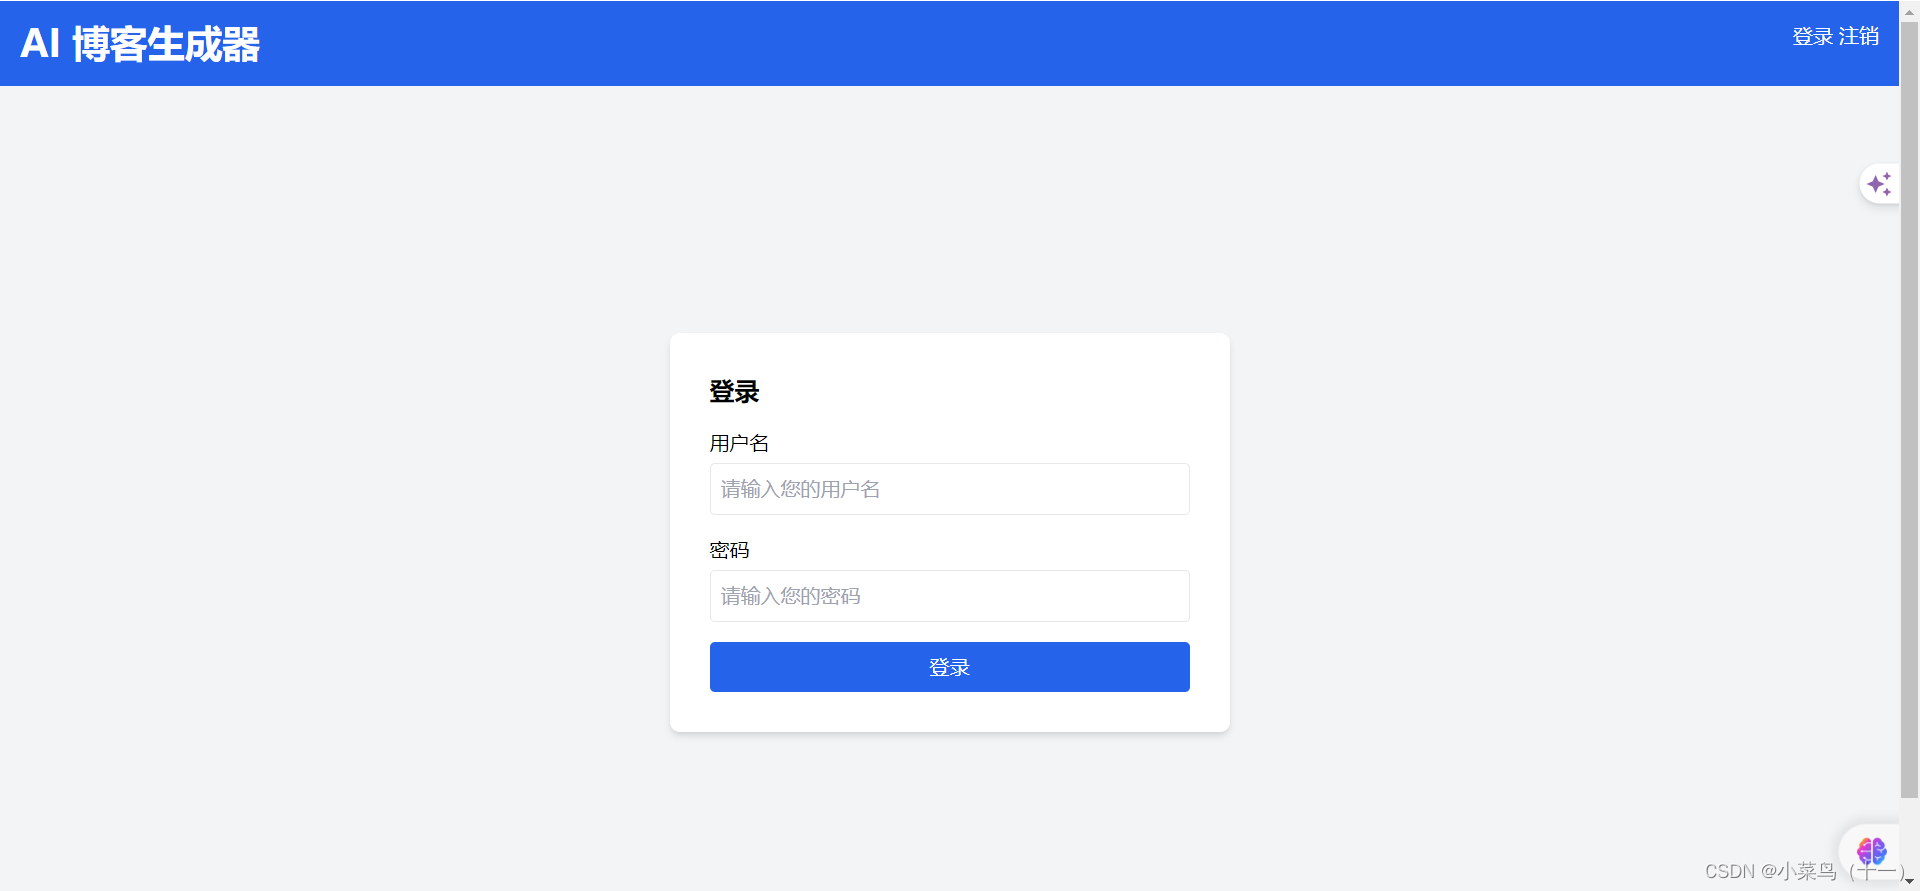
2.2、创建密码登录框(完整代码)
<!DOCTYPE html>
<html lang="en">
<head>
    <meta charset="UTF-8">
    <meta name="viewport" content="width=device-width, initial-scale=1.0">
    <title>AI博客-登录</title>
    <link href="https://cdn.jsdelivr.net/npm/tailwindcss@2.2.19/dist/tailwind.min.css" rel="stylesheet">
</head>
<body class="bg-gray-100 font-sans antialiased">
    <nav class="bg-blue-600 p-4 text-white flex justify-between">
        <div>
            <h1 class="text-3xl font-bold">AI 博客生成器</h1>
        </div>
        <div>
            <a href="#" class="text-white hover:underline">登录</a>
            <a href="#" class="text-white hover:underline">注销</a>
        </div>
    </nav>

    <div class="flex items-center justify-center h-screen">
        <div class="bg-white p-8 shadow-md rounded-lg max-w-md w-full">
            <form class="space-y-4">
                <h2 class="text-xl font-semibold">登录</h2>
                <div>
                    <label for="username" class="block mb-1 font-medium">用户名</label>
                    <input type="text" id="username" name="username" placeholder="请输入您的用户名" class="w-full p-2 border rounded">
                </div>
                <div>
                    <label for="password" class="block mb-1 font-medium">密码</label>
                    <input type="password" id="password" name="password" placeholder="请输入您的密码" class="w-full p-2 border rounded">
                </div>
                <button type="submit" class="w-full bg-blue-600 text-white p-2 rounded hover:bg-blue-700">登录</button>
            </form>
        </div>
    </div>

</body>
</html>
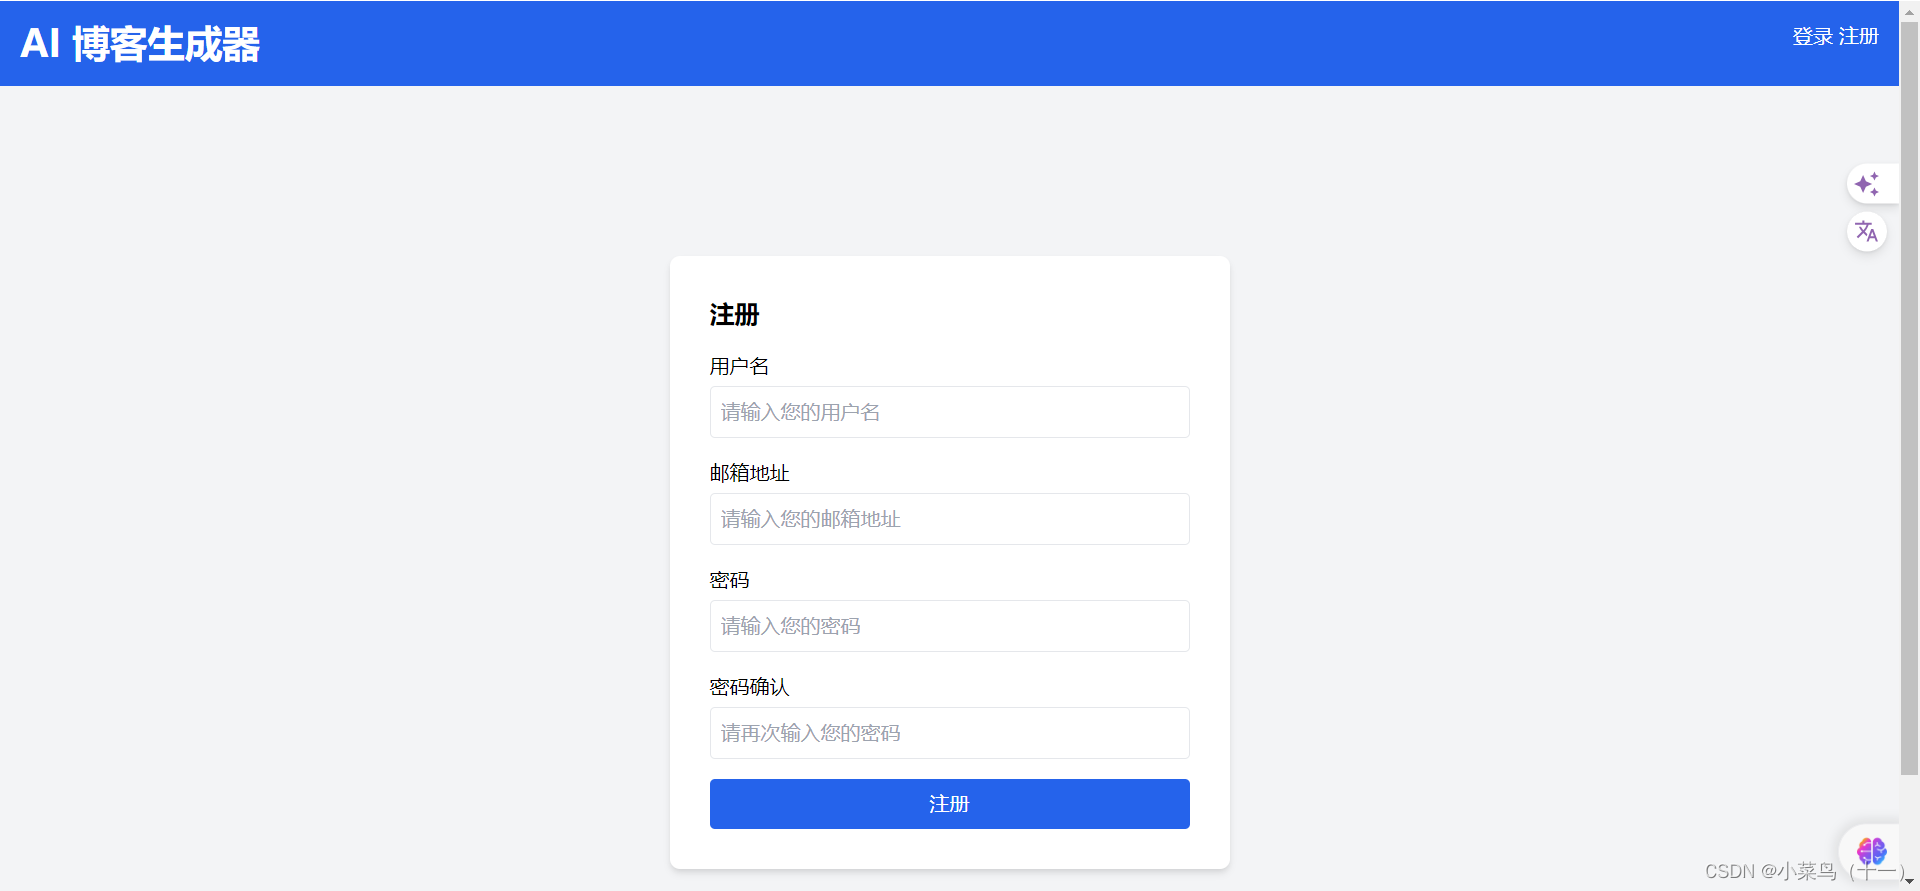
3、编写前端代码(注册页面)
3.1、完整代码
<!DOCTYPE html>
<html lang="en">
<head>
    <meta charset="UTF-8">
    <meta name="viewport" content="width=device-width, initial-scale=1.0">
    <title>AI博客-注册</title>
    <link href="https://cdn.jsdelivr.net/npm/tailwindcss@2.2.19/dist/tailwind.min.css" rel="stylesheet">
</head>
<body class="bg-gray-100 font-sans antialiased">
    <nav class="bg-blue-600 p-4 text-white flex justify-between">
        <div>
            <h1 class="text-3xl font-bold">AI 博客生成器</h1>
        </div>
        <div>
            <a href="#" class="text-white hover:underline">登录</a>
            <a href="#" class="text-white hover:underline">注册</a>
        </div>
    </nav>
    <br>

    <div class="flex items-center justify-center h-screen">
        <div class="bg-white p-8 shadow-md rounded-lg max-w-md w-full">
            <form class="space-y-4">
                <h2 class="text-xl font-semibold">注册</h2>
                <div>
                    <label for="username" class="block mb-1 font-medium">用户名</label>
                    <input type="text" id="username" name="username" placeholder="请输入您的用户名" class="w-full p-2 border rounded">
                </div>
                <div>
                    <label for="email" class="block mb-1 font-medium">邮箱地址</label>
                    <input type="email" id="email" name="email" placeholder="请输入您的邮箱地址" class="w-full p-2 border rounded">
                </div>
                <div>
                    <label for="password" class="block mb-1 font-medium">密码</label>
                    <input type="password" id="password" name="password" placeholder="请输入您的密码" class="w-full p-2 border rounded">
                </div>
                <div>
                    <label for="repeatPassword" class="block mb-1 font-medium">密码确认</label>
                    <input type="password" id="repeatPassword" name="repeatPassword" placeholder="请再次输入您的密码" class="w-full p-2 border rounded">
                </div>
                <button type="submit" class="w-full bg-blue-600 text-white p-2 rounded hover:bg-blue-700">注册</button>
            </form>
        </div>
    </div>

</body>
</html>
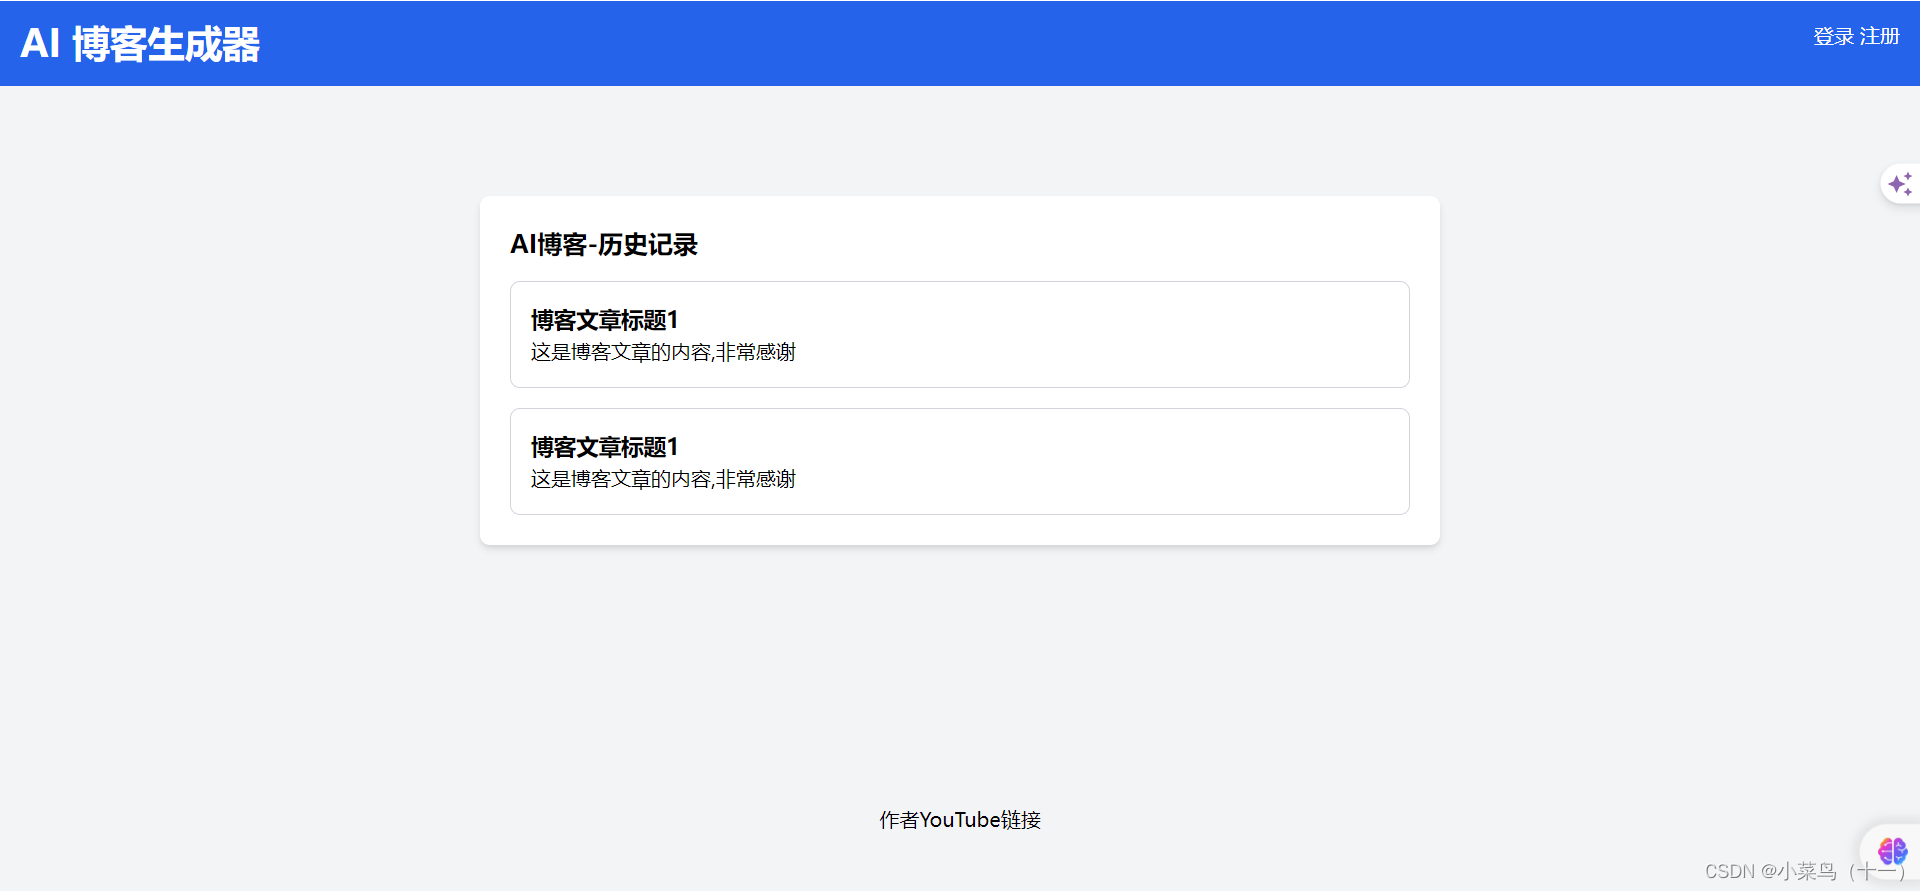
4、编写前端代码(文章保存记录)
4.1、完整代码
<!DOCTYPE html>
<html lang="en">
<head>
    <meta charset="UTF-8">
    <meta name="viewport" content="width=device-width, initial-scale=1.0">
    <title>AI博客-历史记录</title>
    <link href="https://cdn.jsdelivr.net/npm/tailwindcss@2.2.19/dist/tailwind.min.css" rel="stylesheet">
</head>
<body class="bg-gray-100 font-sans antialiased">
    <nav class="bg-blue-600 p-4 text-white flex justify-between">
        <div>
            <h1 class="text-3xl font-bold">AI 博客生成器</h1>
        </div>
        <div>
            <a href="#" class="text-white hover:underline">登录</a>
            <a href="#" class="text-white hover:underline">注册</a>
        </div>
    </nav>
    <br>
    <br>
    <div class="container mx-auto mt-10 px-4 sm:px-0">
        <div class="max-w-3xl mx-auto bg-white p-6 rounded-lg shadow-md">
            <section>
                <h2 class="text-xl mb-4 font-semibold">AI博客-历史记录</h2>
                <div class="space-y-4">
                    <div class="border border-gray-300 p-4 rounded-lg">
                        <h3 class="text-lg font-semibold">博客文章标题1</h3>
                        <p>这是博客文章的内容,非常感谢</p>
                    </div>
                    <div class="border border-gray-300 p-4 rounded-lg">
                        <h3 class="text-lg font-semibold">博客文章标题1</h3>
                        <p>这是博客文章的内容,非常感谢</p>
                    </div>
                </div>
            </section>
        </div>
    </div>

    <br>
    <br>
    <br>
    <br>
    <br>
    <br>
    <br>
    <footer class="text-center p-4 text-black mt-6">
        <a href="https://www.youtube.com/codewithtomi">作者YouTube链接</a>
    </footer>
</body>
</html>
5、编写前端代码(文章页面)
5.1、完整代码
<!DOCTYPE html>
<html lang="en">
<head>
    <meta charset="UTF-8">
    <meta name="viewport" content="width=device-width, initial-scale=1.0">
    <title>博客文章</title>
    <link href="https://cdn.jsdelivr.net/npm/tailwindcss@2.2.19/dist/tailwind.min.css" rel="stylesheet">
</head>
<body class="bg-gray-100 font-sans antialiased">
    <nav class="bg-blue-600 p-4 text-white flex justify-between">
        <div>
            <h1 class="text-3xl font-bold">AI 博客生成器</h1>
        </div>
        <div>
            <a href="#" class="text-white hover:underline">登录</a>
            <a href="#" class="text-white hover:underline">注册</a>
        </div>
    </nav>
    <div class="container mx-auto mt-10 px-4 sm:px-0">
        <div class="max-w-3xl mx-auto bg-white p-6 rounded-lg shadow-md">
            <section>
                <h2 class="text-xl mb-4 font-semibold">博客文章详情</h2>
                <div class="border border-gray-300 p-4 rounded-lg">
                    <h3 class="text-lg font-semibold">博客文章标题</h3>
                    <p class="text-gray-700">博客文章内容</p>
                    <hr class="my-4 border-gray-300">
                    <h4 class="text-lg font-semibold">YouTube标题</h4>
                    <p class="text-gray-700">YouTube视频标签</p>
                    <h4 class="text-lg font-semibold mt-4">YouTube链接</h4>
                    <a href="#" class="text-blue-600 hover:underline">https://www.youtube.com</a>
                </div>
            </section>
        </div>
    </div>
    <br>
    <br>
    <br>
    <br>
    <br>
    <br>
    <br>
    <footer class="text-center p-4 text-black mt-6">
        <a href="https://www.youtube.com/codewithtomi">作者YouTube链接</a>
    </footer>

</body>
</html>
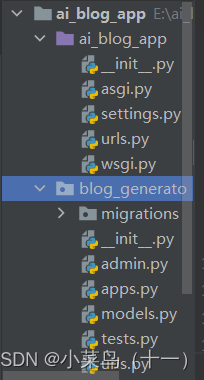
三、Django代码(后端)
1、添加app功能
ai_blog_app是生成django模版时随着django生成的

INSTALLED_APPS = [
    'django.contrib.admin',
    'django.contrib.auth',
    'django.contrib.contenttypes',
    'django.contrib.sessions',
    'django.contrib.messages',
    'django.contrib.staticfiles',
    'blog_generato'
]
然后将ai_blog_app中的urls.py复制到blog_generato中
在blog_generato下的urls.py中添加url
from  . import views
from django.urls import path

urlpatterns = [
    path('', views.index,name="index"),
]
2、blog_generato添加index视图(views.py)
首先在ai_blog_app的urls.py文件中添加url路径
from django.contrib import admin
from django.urls import path,include

urlpatterns = [
    path('admin/', admin.site.urls),
    path('',include('blog_generato.urls'))
]
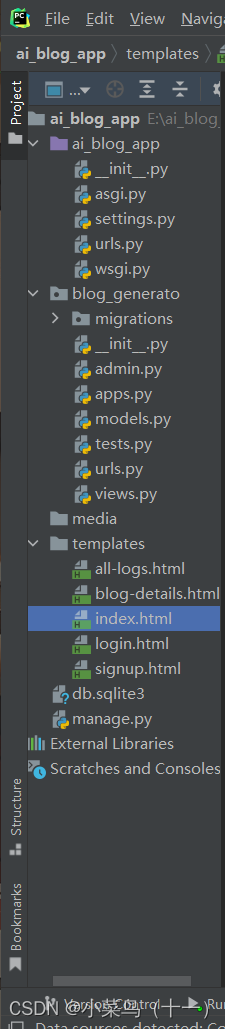
创建一个templates文件夹用来存放html前端代码,然后在ai_blog_app的settings.py问价中添加BASE_DIR , ‘templates’
TEMPLATES = [
    {
        'BACKEND': 'django.template.backends.django.DjangoTemplates',
        'DIRS': [BASE_DIR , 'templates']
        ,
        'APP_DIRS': True,
        'OPTIONS': {
            'context_processors': [
                'django.template.context_processors.debug',
                'django.template.context_processors.request',
                'django.contrib.auth.context_processors.auth',
                'django.contrib.messages.context_processors.messages',
            ],
        },
    },
]
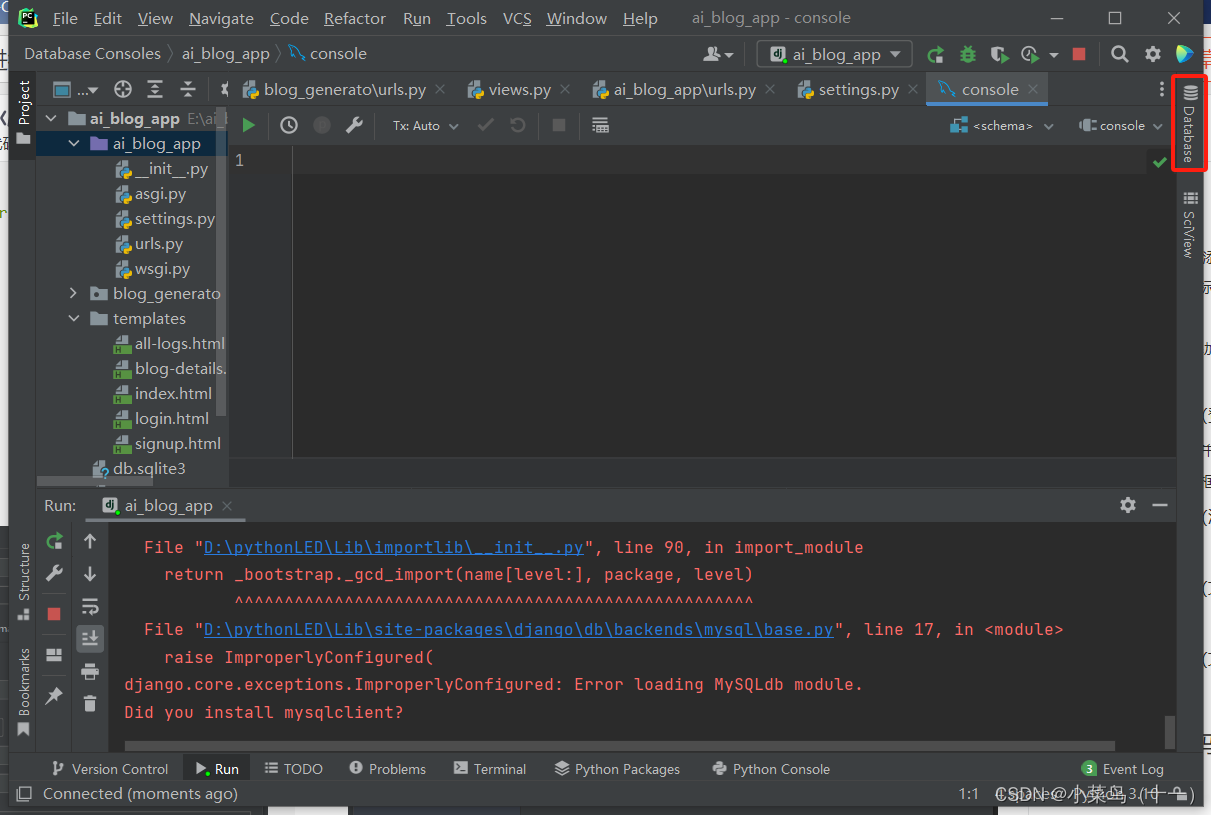
3、添加数据库
首先连接mysql数据库

根据自己使用的数据库来选择
注意:记得pip instal pymysql来安装mysql,然后在ai_blog_app下的_init_.py中添加代码,且已经创建好了django中需要使用的mysql环境
import pymysql

pymysql.install_as_MySQLdb()
然后更改ai_blog_app下settings.py中的mysql配置
DATABASES = {
    'default': {
        'ENGINE': 'django.db.backends.mysql',
        'NAME': 'ai_blog_app',
        'USER': 'root',
        'PASSWORD': 'yuan3128..',
        'HOST': 'localhost',
        'PORT': '3306',
    }
最后进行数据库迁移
PS E:\ai_blog_app> python manage.py makemigrations
PS E:\ai_blog_app> python manage.py migrate
4、创建管理员用户
PS E:\ai_blog_app> python manage.py createsuperuser
Username (leave blank to use 'yuanl'): (用户名)
Email address: (邮箱)
Password: (密码)
Password (again):(再次输入密码)
Superuser created successfully.
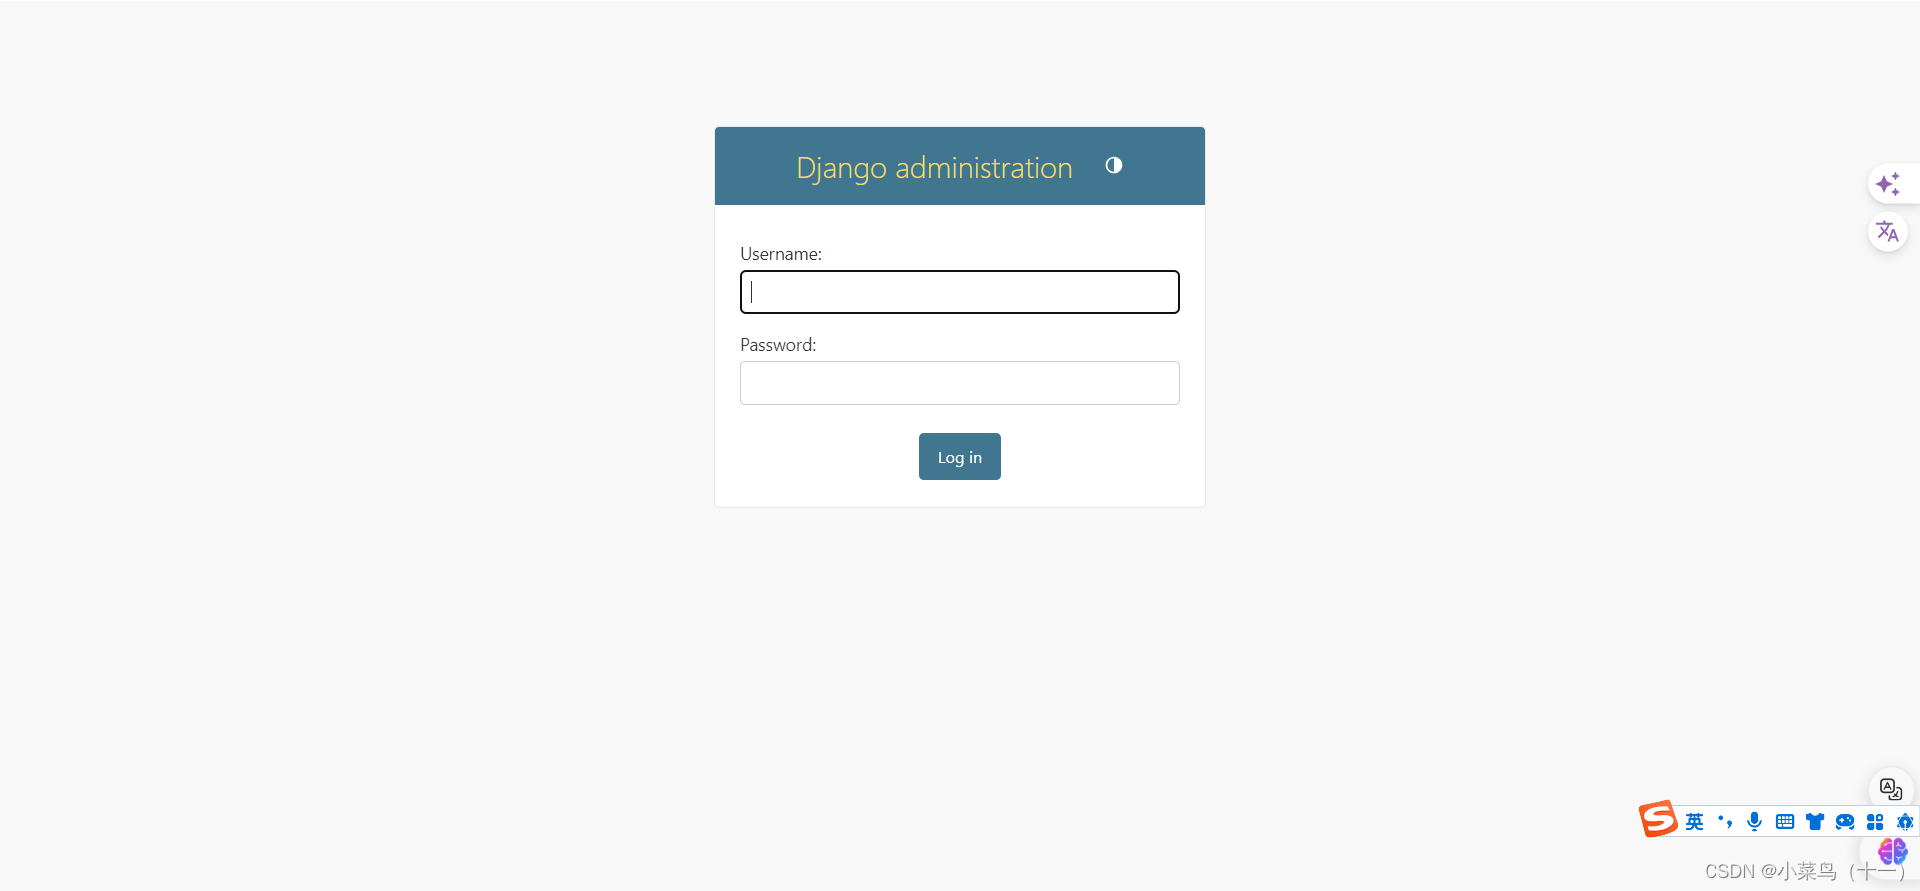
然后运行django项目,在浏览器中输入http://127.0.0.1:8000/admin进入后台管理页面
4.1、后台中文化
在seetings.py文件中将配置项LANGUAGE_CODE的值设置为“zh-Hans” ,TIME_ZONE的值设置为"Asia/Shanghai"
在seetings.py文件中配置项MIDDLEWARE(中间件)中添加本地化中间件
“django.middleware.locale.LocaleMiddleware”
LANGUAGE_CODE = 'zh-Hans'

TIME_ZONE = 'UTC'

USE_I18N = True

USE_TZ = True
4.2、在blog_generato下的urls.py中添加url
urlpatterns = [
    path('', views.index,name="index"),
    path('login', views.login, name="login"),
    path('signup', views.signup, name="signup"),
    path('logout', views.logout, name="logout"),
]
4.3、将注册登录html页面添加到views中
from django.shortcuts import render

# Create your views here.
def index(request):
    return render(request,'index.html')

def user_login(request):
    return render(request,'login.html')

def user_signup(request):
    return render(request,'signup.html')
修改signup.html中的代码
 <div>
            <a href="login" class="text-white hover:underline">登录</a>
            <a href="signup" class="text-white hover:underline">注册</a>
        </div>
修改login.html中的代码
 <div>
            <a href="login" class="text-white hover:underline">登录</a>
            <a href="signup" class="text-white hover:underline">注册</a>
        </div>
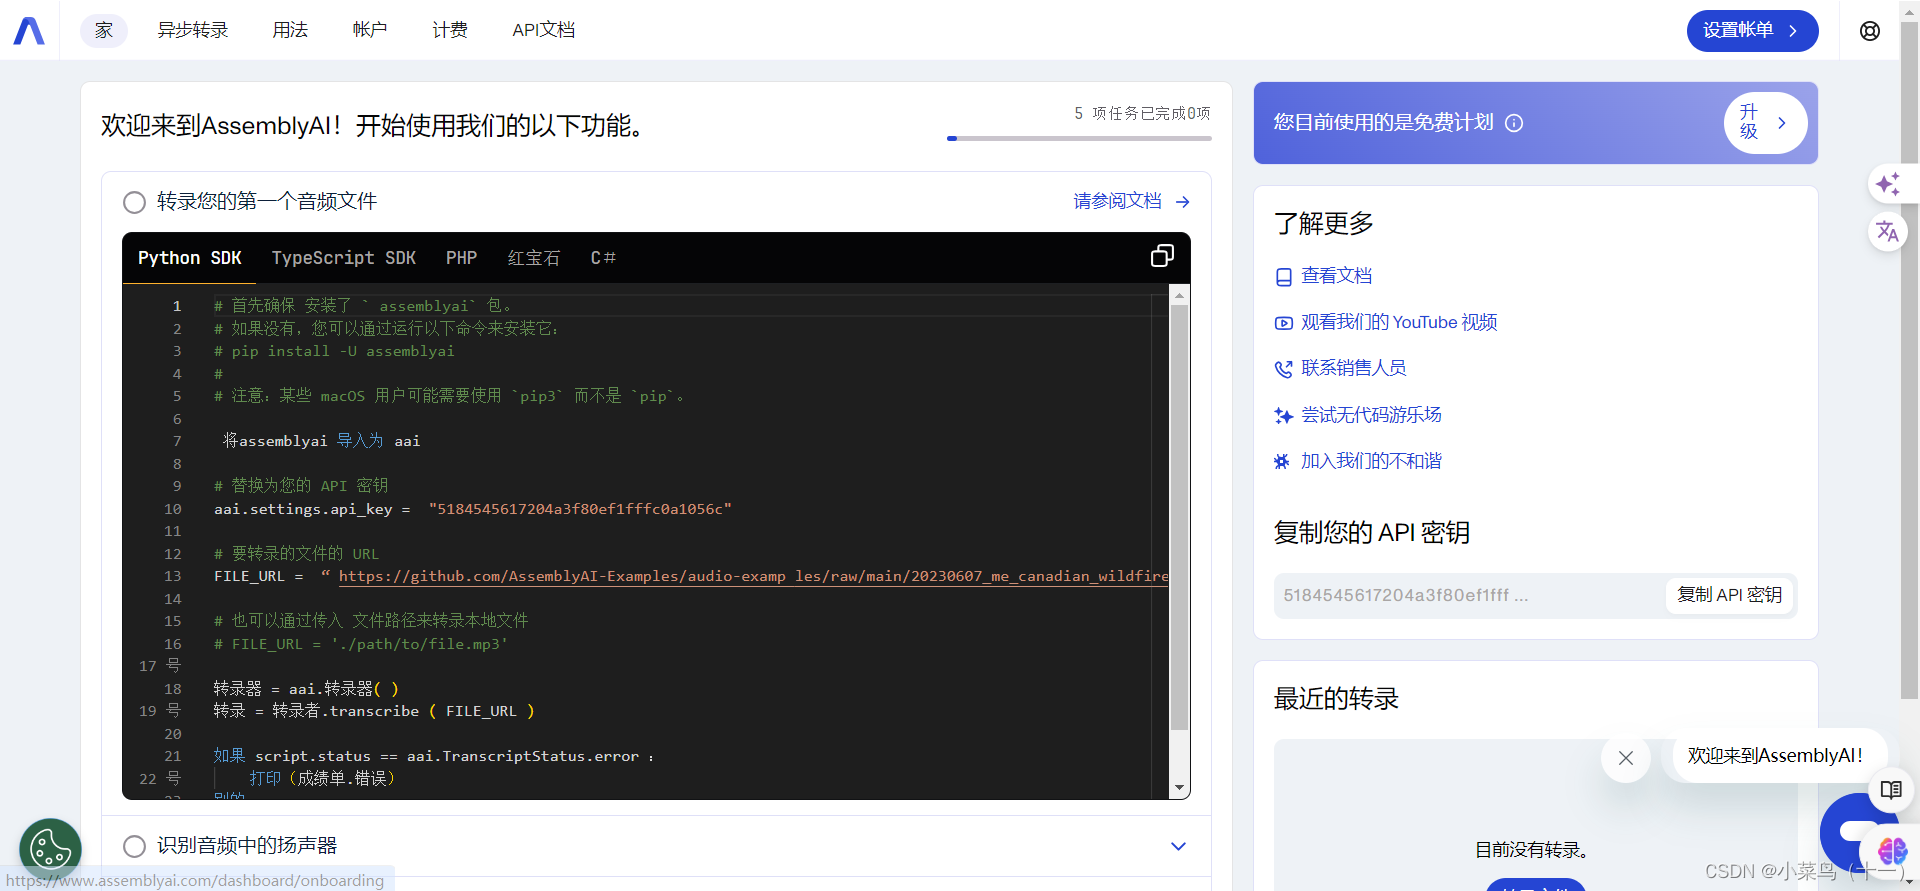
5、获取ai转换
地址:https://www.assemblyai.com/
注意:assemblyai库和websockets版本在10.0到11.0之间(根据自己的版本进行安装)
修改ai_blog_app中settings.py文件,并创建一个media文件夹
"""
Django settings for ai_blog_app project.

Generated by 'django-admin startproject' using Django 5.0.

For more information on this file, see
https://docs.djangoproject.com/en/5.0/topics/settings/

For the full list of settings and their values, see
https://docs.djangoproject.com/en/5.0/ref/settings/
"""
import os.path
from pathlib import Path
import os

# Build paths inside the project like this: BASE_DIR / 'subdir'.
BASE_DIR = Path(__file__).resolve().parent.parent


# Quick-start development settings - unsuitable for production
# See https://docs.djangoproject.com/en/5.0/howto/deployment/checklist/

# SECURITY WARNING: keep the secret key used in production secret!
SECRET_KEY = 'django-insecure-am#drmftow4qax@!l4v%_jg%pcr5)!@ibi*%@g(%he%!-i88#8'

# SECURITY WARNING: don't run with debug turned on in production!
DEBUG = True

ALLOWED_HOSTS = []


# Application definition

INSTALLED_APPS = [
    'django.contrib.admin',
    'django.contrib.auth',
    'django.contrib.contenttypes',
    'django.contrib.sessions',
    'django.contrib.messages',
    'django.contrib.staticfiles',
    'blog_generato',
]

MIDDLEWARE = [
    'django.middleware.security.SecurityMiddleware',
    'django.contrib.sessions.middleware.SessionMiddleware',
    'django.middleware.common.CommonMiddleware',
    'django.middleware.csrf.CsrfViewMiddleware',
    'django.contrib.auth.middleware.AuthenticationMiddleware',
    'django.contrib.messages.middleware.MessageMiddleware',
    'django.middleware.clickjacking.XFrameOptionsMiddleware',
]

ROOT_URLCONF = 'ai_blog_app.urls'

TEMPLATES = [
    {
        'BACKEND': 'django.template.backends.django.DjangoTemplates',
        'DIRS': [BASE_DIR , 'templates']
        ,
        'APP_DIRS': True,
        'OPTIONS': {
            'context_processors': [
                'django.template.context_processors.debug',
                'django.template.context_processors.request',
                'django.contrib.auth.context_processors.auth',
                'django.contrib.messages.context_processors.messages',
            ],
        },
    },
]

WSGI_APPLICATION = 'ai_blog_app.wsgi.application'


# Database
# https://docs.djangoproject.com/en/5.0/ref/settings/#databases

# DATABASES = {
#     'default': {
#         'ENGINE': 'django.db.backends.sqlite3',
#         'NAME': BASE_DIR / 'db.sqlite3',
#     }
# }
DATABASES = {
    'default': {
        'ENGINE': 'django.db.backends.mysql',
        'NAME': 'ai_blog_app',
        'USER': 'root',
        'PASSWORD': 'yuan3128..',
        'HOST': '127.0.0.1',
        'PORT': '3306',
    }
}


# Password validation
# https://docs.djangoproject.com/en/5.0/ref/settings/#auth-password-validators

AUTH_PASSWORD_VALIDATORS = [
    {
        'NAME': 'django.contrib.auth.password_validation.UserAttributeSimilarityValidator',
    },
    {
        'NAME': 'django.contrib.auth.password_validation.MinimumLengthValidator',
    },
    {
        'NAME': 'django.contrib.auth.password_validation.CommonPasswordValidator',
    },
    {
        'NAME': 'django.contrib.auth.password_validation.NumericPasswordValidator',
    },
]


# Internationalization
# https://docs.djangoproject.com/en/5.0/topics/i18n/

LANGUAGE_CODE = 'zh-Hans'

TIME_ZONE = 'UTC'

USE_I18N = True

USE_TZ = True


# Static files (CSS, JavaScript, Images)
# https://docs.djangoproject.com/en/5.0/howto/static-files/

STATIC_URL = 'static/'

# Default primary key field type
# https://docs.djangoproject.com/en/5.0/ref/settings/#default-auto-field

DEFAULT_AUTO_FIELD = 'django.db.models.BigAutoField'

MEDIA_URL = '/media/'
MEDIA_ROOT = os.path.join(BASE_DIR,'media')

LOGIN_URL = 'login'
6、获取openai秘钥
地址:https://platform.openai.com/
因为地区原因无法注册
所以转文字功能无法使用
四、修改后的完整代码(前后端)
1、 ai_blog_app–> settings.py
import os.path
from pathlib import Path
import os

# Build paths inside the project like this: BASE_DIR / 'subdir'.
BASE_DIR = Path(__file__).resolve().parent.parent


# Quick-start development settings - unsuitable for production
# See https://docs.djangoproject.com/en/5.0/howto/deployment/checklist/

# SECURITY WARNING: keep the secret key used in production secret!
SECRET_KEY = 'django-insecure-am#drmftow4qax@!l4v%_jg%pcr5)!@ibi*%@g(%he%!-i88#8'

# SECURITY WARNING: don't run with debug turned on in production!
DEBUG = True

ALLOWED_HOSTS = []


# Application definition

INSTALLED_APPS = [
    'django.contrib.admin',
    'django.contrib.auth',
    'django.contrib.contenttypes',
    'django.contrib.sessions',
    'django.contrib.messages',
    'django.contrib.staticfiles',
    'blog_generato',
]

MIDDLEWARE = [
    'django.middleware.security.SecurityMiddleware',
    'django.contrib.sessions.middleware.SessionMiddleware',
    'django.middleware.common.CommonMiddleware',
    'django.middleware.csrf.CsrfViewMiddleware',
    'django.contrib.auth.middleware.AuthenticationMiddleware',
    'django.contrib.messages.middleware.MessageMiddleware',
    'django.middleware.clickjacking.XFrameOptionsMiddleware',
]

ROOT_URLCONF = 'ai_blog_app.urls'

TEMPLATES = [
    {
        'BACKEND': 'django.template.backends.django.DjangoTemplates',
        'DIRS': [BASE_DIR , 'templates']
        ,
        'APP_DIRS': True,
        'OPTIONS': {
            'context_processors': [
                'django.template.context_processors.debug',
                'django.template.context_processors.request',
                'django.contrib.auth.context_processors.auth',
                'django.contrib.messages.context_processors.messages',
            ],
        },
    },
]

WSGI_APPLICATION = 'ai_blog_app.wsgi.application'


# Database
# https://docs.djangoproject.com/en/5.0/ref/settings/#databases

# DATABASES = {
#     'default': {
#         'ENGINE': 'django.db.backends.sqlite3',
#         'NAME': BASE_DIR / 'db.sqlite3',
#     }
# }
DATABASES = {
    'default': {
        'ENGINE': 'django.db.backends.mysql',
        'NAME': 'ai_blog_app',
        'USER': 'root',
        'PASSWORD': 'yuan3128..',
        'HOST': '127.0.0.1',
        'PORT': '3306',
    }
}


# Password validation
# https://docs.djangoproject.com/en/5.0/ref/settings/#auth-password-validators

AUTH_PASSWORD_VALIDATORS = [
    {
        'NAME': 'django.contrib.auth.password_validation.UserAttributeSimilarityValidator',
    },
    {
        'NAME': 'django.contrib.auth.password_validation.MinimumLengthValidator',
    },
    {
        'NAME': 'django.contrib.auth.password_validation.CommonPasswordValidator',
    },
    {
        'NAME': 'django.contrib.auth.password_validation.NumericPasswordValidator',
    },
]


# Internationalization
# https://docs.djangoproject.com/en/5.0/topics/i18n/

LANGUAGE_CODE = 'zh-Hans'

TIME_ZONE = 'UTC'

USE_I18N = True

USE_TZ = True


# Static files (CSS, JavaScript, Images)
# https://docs.djangoproject.com/en/5.0/howto/static-files/

STATIC_URL = 'static/'

# Default primary key field type
# https://docs.djangoproject.com/en/5.0/ref/settings/#default-auto-field

DEFAULT_AUTO_FIELD = 'django.db.models.BigAutoField'

MEDIA_URL = '/media/'
MEDIA_ROOT = os.path.join(BASE_DIR,'media')

LOGIN_URL = 'login'
2、ai_blog_app–> urls.py
from django.contrib import admin
from django.urls import path,include
from django.conf import settings
from django.conf.urls.static import static

urlpatterns = [
    path('admin/', admin.site.urls),
    path('',include('blog_generato.urls'))
]
urlpatterns =urlpatterns+static(settings.MEDIA_URL,document_root=settings.MEDIA_ROOT)
3、ai_blog_app --> init.py
import pymysql

pymysql.install_as_MySQLdb()
4、blog_generato --> admin.py
from django.contrib import admin
from .models import BlogPost

# Register your models here.
admin.site.register(BlogPost)
5、blog_generato --> models.py
from django.db import models
from django.contrib.auth.models import User
# Create your models here.
class BlogPost(models.Model):
    user = models.ForeignKey(User,on_delete=models.CASCADE)
    youtube_title = models.CharField(max_length=3000)
    youtube_link = models.URLField()
    generated_content = models.TextField()
    created_at = models.DateTimeField(auto_now_add=True)

    def __str__(self):
        return  self.youtube_title
blog_generato --> urls.py
from . import views
from django.urls import path

urlpatterns = [
    path('', views.index, name="index"),
    path('login', views.user_login, name="login"),
    path('signup', views.user_signup, name="signup"),
    path('logout', views.user_logout, name="logout"),
    path('generate', views.generate_blog, name="generate"),
    path('blog-list', views.blog_list, name="blog-list"),
    path('blog-details/<int:pk>/', views.blog_details, name="blog-details"),
]
7、 blog_generato --> viwes.py
import json
import os.path
import os
from django.contrib.auth.models import User
from django.contrib.auth import authenticate,login,logout
from django.shortcuts import render,redirect
from django.contrib.auth.decorators import login_required
from django.views.decorators.csrf import csrf_exempt
from django.http import JsonResponse
from pytube import YouTube
from django.conf import settings
import assemblyai as aai
# (无法注册)import openai
from .models import BlogPost

# Create your views here.
@login_required
def index(request):
    return render(request,'index.html')

@csrf_exempt
def generate_blog(request):
    if request.method == 'POST':
        try:
            data = json.loads(request.body)
            yt_link = data['link']
            return JsonResponse({'content':yt_link})
        except(KeyError,json.JSONDecodeError):
            return JsonResponse({'error':'无效的链接'},status=304)
        title = yt_title(yt_link)
        transcription = get_transcription(yt_link)
        if not transcription:
            return JsonResponse({'error':'未能获得转录'},status=500)
        blog_content = generate_blog_from_transcription(transcription)
        if not blog_content:
            return JsonResponse({'error': '未能获得转录'}, status=500)
        new_blog_article = BlogPost.objects.create(
            user= request.user,
            youtube_title=title,
            youtube_link=yt_link,
            generated_content=blog_content,
        )
        new_blog_article.save()
        return JsonResponse({'content':blog_content})


    else:
        return JsonResponse({'error':'无效的请求'},status=404)

def yt_title(link):
    yt = YouTube(link)
    title = yt.title
    return title

def download_audio(link):
    yt = YouTube(link)
    video = yt.streams.filter(only_audio=True).first()
    out_file = video.download(output_path=settings.MEDIA_ROOT)
    base,ext = os.path.splitext(out_file)
    new_file = base + '.mp3'
    os.rename(out_file,new_file)
    return new_file

def get_transcription(link):
    audio_file = download_audio(link)
    aai.settings.api_key = '5184545617204a3f80ef1fffc0a1056c'
    transcriber = aai.Transcriber
    transcriber = transcriber.transcriber(audio_file)

    return transcriber.text

def generate_blog_from_transcription(transcription):
    openai.api_key =" "
    prompt = f"Base on the following transcript from a YouTuBe vido,write a comprehensive blog article,write it based on the transcript,but dont make it look like a youtube video,make it look like a proper blog article:\n\n{transcription}\n\nArticle:"
    response = openai.Completion.create(
        model = "text-davinci-003",
        prompt = prompt,
        max_tokens = 1000
    )

    generated_content = response.choices[0].text.strip()
    return generated_content


def blog_list(request):
    blog_articles = BlogPost.objects.filter(user=request.user)
    return render(request,"all-logs.html",{'blog_articles':blog_articles})

def blog_details(request,pk):
    blog_article_detail = BlogPost.objects.get(id=pk)
    if request.user == blog_article_detail.user:
        return  render(request,'blog-details.html',{'blog_article_detail':blog_article_detail})
    else:
        return redirect('/')

def user_login(request):
    if request.method == 'POST':
        username = request.POST['username']
        password = request.POST['password']

        user = authenticate(request,username=username,password=password)
        if user is not None:
            login(request,user)
            return redirect('/')
        else:
            error_message='没有该用户或密码错误'
            return render(request,'login.html',{'error_message':error_message})
    return render(request,'login.html')

def user_signup(request):
    if request.method == 'POST':
        username = request.POST['username']
        email = request.POST['email']
        password = request.POST['password']
        repeatPassword = request.POST['repeatPassword']
        if password == repeatPassword:
            try:
                user = User.objects.create_user(username,email,password)
                user.save()
                login(request,user)
                return redirect('/')
            except:
                error_message='创建账号失败'
                return render(request, 'signup.html', {'errot_message': error_message})
        else:
            error_message = '密码输入错误'
            return  render(request,'signup.html', {'errot_message':error_message})

    return render(request,'signup.html')


def user_logout(request):
    logout(request)
    return redirect('/')
8、templates --> all-logs.html(修改后)
<!DOCTYPE html>
<html lang="en">
<head>
    <meta charset="UTF-8">
    <meta name="viewport" content="width=device-width, initial-scale=1.0">
    <title>AI博客-历史记录</title>
    <link href="https://cdn.jsdelivr.net/npm/tailwindcss@2.2.19/dist/tailwind.min.css" rel="stylesheet">
</head>
<body class="bg-gray-100 font-sans antialiased">
    <nav class="bg-blue-600 p-4 text-white flex justify-between">
        <div>
            <h1 class="text-3xl font-bold">AI 博客生成器</h1>
        </div>
        <div>
            <a href="#" class="text-white hover:underline mx-4">欢迎{{ user.username }}</a>
            <a herf="/blog-list" class="text-white hover:underline mx-4">保存文章</a>
            <a href="#" class="text-white hover:underline">注销</a>
        </div>
    </nav>
    <br>
    <br>
    <div class="container mx-auto mt-10 px-4 sm:px-0">
        <div class="max-w-3xl mx-auto bg-white p-6 rounded-lg shadow-md">
            <section>
                <h2 class="text-xl mb-4 font-semibold">AI博客-历史记录</h2>
                <div class="space-y-4">
                    {% for article in blog_articles reversed %}
                    <a href="blog-details/{{ article.id }}">
                        <div class="border border-gray-300 p-4 rounded-lg">
                            <h3 class="text-lg font-semibold">{{ article.youtube_title }}</h3>
                            <p>{{ article.generated_content | truncatechars:200 }}</p>
                        </div>
                    </a>
                    {% endfor %}
                </div>
            </section>
        </div>
    </div>

    <br>
    <br>
    <br>
    <br>
    <br>
    <br>
    <br>
    <footer class="text-center p-4 text-black mt-6">
        <a href="https://www.youtube.com/codewithtomi">作者YouTube链接</a>
    </footer>
</body>
</html>
9、templates -->blog-details.html(修改后)
<!DOCTYPE html>
<html lang="en">
<head>
    <meta charset="UTF-8">
    <meta name="viewport" content="width=device-width, initial-scale=1.0">
    <title>博客文章</title>
    <link href="https://cdn.jsdelivr.net/npm/tailwindcss@2.2.19/dist/tailwind.min.css" rel="stylesheet">
</head>
<body class="bg-gray-100 font-sans antialiased">
    <nav class="bg-blue-600 p-4 text-white flex justify-between">
        <div>
            <h1 class="text-3xl font-bold">AI 博客生成器</h1>
        </div>
        <div>
            <a href="#" class="text-white hover:underline mx-4">欢迎{{ user.username }}</a>
            <a herf="/blog-list" class="text-white hover:underline mx-4">保存文章</a>
            <a href="#" class="text-white hover:underline">注销</a>
        </div>
    </nav>
    <div class="container mx-auto mt-10 px-4 sm:px-0">
        <div class="max-w-3xl mx-auto bg-white p-6 rounded-lg shadow-md">
            <section>
                <h2 class="text-xl mb-4 font-semibold">博客文章详情</h2>
                <div class="border border-gray-300 p-4 rounded-lg">
                    <h3 class="text-lg font-semibold">{{ blog_article_detail.youtube_title }}</h3>
                    <p class="text-gray-700">{{ blog_article_detail.generated_content }}</p>
                    <hr class="my-4 border-gray-300">
                    <h4 class="text-lg font-semibold">YouTube标题</h4>
                    <p class="text-gray-700">{{ blog_article_detail.youtube_title }}</p>
                    <h4 class="text-lg font-semibold mt-4">YouTube链接</h4>
                    <a href="{{ blog_article_detail.youtube_link }}" class="text-blue-600 hover:underline">{{ blog_article_detail.youtube_link }}</a>
                </div>
            </section>
        </div>
    </div>
    <br>
    <br>
    <br>
    <br>
    <br>
    <br>
    <br>
    <footer class="text-center p-4 text-black mt-6">
        <a href="https://www.youtube.com/codewithtomi">作者YouTube链接</a>
    </footer>

</body>
</html>
10、templates -->index.html(修改后)
<!DOCTYPE html>
<html lang="en">

<head>
    <meta charset="UTF-8">
    <meta name="viewport" content="width=device-width, initial-scale=1.0">
    <title>AI 博客</title>
    <link href="https://cdn.jsdelivr.net/npm/tailwindcss@2.2.19/dist/tailwind.min.css" rel="stylesheet">
    <style>
        @keyframes rotate {
            from {
                transform: rotate(0deg);
            }

            to {
                transform: rotate(360deg);
            }
        }

        @-webkit-keyframes rotate {
            from {
                -webkit-transform: rotate(0deg);
            }

            to {
                -webkit-transform: rotate(360deg);
            }
        }

        .load {
            width: 100px;
            height: 100px;
            margin: 110px auto 0;
            border: solid 10px #8822aa;
            border-radius: 50%;
            border-right-color: transparent;
            border-bottom-color: transparent;
            -webkit-transform: all 0.5s ease-in;
            -webkit-animation-name: rotate;
            -webkit-animation-duration: 1.0s;
            -webkit-animation-iteration-count: infinite;
            -webkit-animation-timing-function: linear;

            transition: all 0.5s ease-in;
            animation-name: rotate;
            animation-iteration-count: infinite;
            animation-timing-function: linear;
        }
    </style>

</head>

<body class="flex flex-col min-h-screen bg-gray-100 font-sans antialised">
    <nav class="bg-blue-600 p-4 text-white flex justify-between">
        <div>
            <h1 class="text-3xl font-bold">AI 博客生成器</h1>
        </div>
<div>
            <a href="#" class="text-white hover:underline mx-4">欢迎{{ user.username }}</a>
            <a herf="/blog-list" class="text-white hover:underline mx-4">保存文章</a>
            <a href="#" class="text-white hover:underline">注销</a>
        </div>
    </nav>
    <br>
    <br>
    <div class="flex-grow container mx-auto mt-10 px-4 sm:px-0">
        <div
            class="max-w-3xl mx-auto bg-white p-6 rounded-lg shadow-md transition-transform transform hover:scale-105 flex flex-col">
            <div class="text-center">
                <h2 class="text-2xl font-semibold mb-4">欢迎来到AI博客生成器</h2>
                <p class="text-gray-700">
                    使用人工智能从YouTube视频中生成高质量的博客文章。
                    只需输入链接到下面的YouTube视频,让人工智能为你创建内容!
                </p>
            </div>

            <br>

            <div>
                <h2 class="text-xl mb-4 font-semibold">请输入YouTube视频链接</h2>
                <div class="flex space-x-4">
                    <input id="youtubeLink" type="url" placeholder="请输入YouTube链接..."
                        class="flex-grow p-2 border border-blue-400 rounded-l-md ">
                    <button id="generateBlogButton"
                        class="bg-blue-600 text-blue px-4 py-2 rounded-r-md hover:bg-blue-700 transition-colors">提交</button>
                </div>
            </div>
            <div style="display: none;" id="loading-circle" class="load"></div>

            <section class="mt-10 flex-grow">
                <h2 class="text-xl mb-4 font-semibold">生产博客文章</h2>
                <div id="blogContent" class="mt-2 text-gray-700 space-y-4">

                </div>
            </section>
        </div>

    </div>

    <footer class="text-center p-4 text-black mt-6">
        <a href="https://www.youtube.com/codewithtomi">作者YouTube链接</a>
    </footer>
    <script>
        document.getElementById('generateBlogButton').addEventListener('click',async () => {
            const youtubeLink = document.getElementById('youtubeLink').value;
            const blogContent = document.getElementById('blogContent');

            if(youtubeLink){
                document.getElementById('loading-circle').style.display = 'block';
                loadingIndicator.classList.remove('hidden');
                blogContent.innerHTML = '';

                const endpointUrl = '/generate';

                try {
                    const response = await fetch(endpointUrl,{
                        method:'POST',
                        headers:{
                            'Content-Type':'application/json',
                        },
                        body:JSON.stringify({link:youtubeLink})
                    });

                    const data = await response.json();

                    blogContent.innerHTML = data.youtubeLink;


                } catch (error) {
                    console.error("Error occurred:",error);
                    alert("Something went wrong. Please try again later.");

                }
                document.getElementById('loading-circle').style.display = 'none';
            } else {
                alert("Please enter a YouTube link.");
            }
        });
    </script>
</body>

</html>
11、templates -->login.html(修改后)
<!DOCTYPE html>
<html lang="en">
<head>
    <meta charset="UTF-8">
    <meta name="viewport" content="width=device-width, initial-scale=1.0">
    <title>AI博客-登录</title>
    <link href="https://cdn.jsdelivr.net/npm/tailwindcss@2.2.19/dist/tailwind.min.css" rel="stylesheet">
</head>
<body class="bg-gray-100 font-sans antialiased">
    <nav class="bg-blue-600 p-4 text-white flex justify-between">
        <div>
            <h1 class="text-3xl font-bold">AI 博客生成器</h1>
        </div>
        <div>
            <a href="login" class="text-white hover:underline">登录</a>
            <a href="signup" class="text-white hover:underline">注册</a>
        </div>
    </nav>

    <div class="flex items-center justify-center h-screen">
        <div class="bg-white p-8 shadow-md rounded-lg max-w-md w-full">
            <form class="space-y-4" action="" method="POST">
                 {% csrf_token %}

                {% if error_message %}
                    <div align="center" style="color: red;">
                        <h2>
                            {{ 登录失败 }}登录失败或密码错误
                        </h2>
                    </div>
                {% endif %}
                <h2 class="text-xl font-semibold">登录</h2>
                <div>
                    <label for="username" class="block mb-1 font-medium">用户名</label>
                    <input type="text" id="username" name="username" placeholder="请输入您的用户名" class="w-full p-2 border rounded">
                </div>
                <div>
                    <label for="password" class="block mb-1 font-medium">密码</label>
                    <input type="password" id="password" name="password" placeholder="请输入您的密码" class="w-full p-2 border rounded">
                </div>
                <button type="submit" class="w-full bg-blue-600 text-white p-2 rounded hover:bg-blue-700">登录</button>
            </form>
        </div>
    </div>

</body>
</html>
12、templates -->signup.html(修改后)
<!DOCTYPE html>
<html lang="en">
<head>
    <meta charset="UTF-8">
    <meta name="viewport" content="width=device-width, initial-scale=1.0">
    <title>AI博客-注册</title>
    <link href="https://cdn.jsdelivr.net/npm/tailwindcss@2.2.19/dist/tailwind.min.css" rel="stylesheet">
</head>
<body class="bg-gray-100 font-sans antialiased">
    <nav class="bg-blue-600 p-4 text-white flex justify-between">
        <div>
            <h1 class="text-3xl font-bold">AI 博客生成器</h1>
        </div>
        <div>
            <a href="login" class="text-white hover:underline">登录</a>
            <a href="signup" class="text-white hover:underline">注册</a>
        </div>
    </nav>
    <br>

    <div class="flex items-center justify-center h-screen">
        <div class="bg-white p-8 shadow-md rounded-lg max-w-md w-full">
            <form class="space-y-4" action="" method="POST">
                {% csrf_token %}

                {% if error_message %}
                    <div align="center" style="color: red;">
                        <h2>
                            {{ 注册失败 }}注册失败
                        </h2>
                    </div>
                {% endif %}
                <h2 class="text-xl font-semibold">注册</h2>
                <div>
                    <label for="username" class="block mb-1 font-medium">用户名</label>
                    <input type="text" id="username" name="username" placeholder="请输入您的用户名" class="w-full p-2 border rounded">
                </div>
                <div>
                    <label for="email" class="block mb-1 font-medium">邮箱地址</label>
                    <input type="email" id="email" name="email" placeholder="请输入您的邮箱地址" class="w-full p-2 border rounded">
                </div>
                <div>
                    <label for="password" class="block mb-1 font-medium">密码</label>
                    <input type="password" id="password" name="password" placeholder="请输入您的密码" class="w-full p-2 border rounded">
                </div>
                <div>
                    <label for="repeatPassword" class="block mb-1 font-medium">密码确认</label>
                    <input type="password" id="repeatPassword" name="repeatPassword" placeholder="请再次输入您的密码" class="w-full p-2 border rounded">
                </div>
                <button type="submit" class="w-full bg-blue-600 text-white p-2 rounded hover:bg-blue-700">注册</button>
            </form>
        </div>
    </div>

</body>
</html>
本篇文章是从YouTube上学的,地址:www.youtube.com/@CodeWithTomi