目录
1. 整理目录文件:
a. app.vue文件如下:
b. Login.vue文件如下:
c. router/index.js文件如下:
d. 删除components中的文件:
e. 最终项目目录整理如下:
2. 集成ElementUI编写登录页面
a. 安装ElementUI:
b. 在main.js中写入以下内容:
c. 在src/assets中加入一张背景图片
d. 修改Login.vue文件如下
1. 整理目录文件:
a. app.vue文件如下:
<template>
 <div id="app">
 <router-view/>
 </div>
</template>
<style>
b. Login.vue文件如下:
<template>
 <div class="about">
 <h1>这是登录界面</h1>
 </div>
</template>
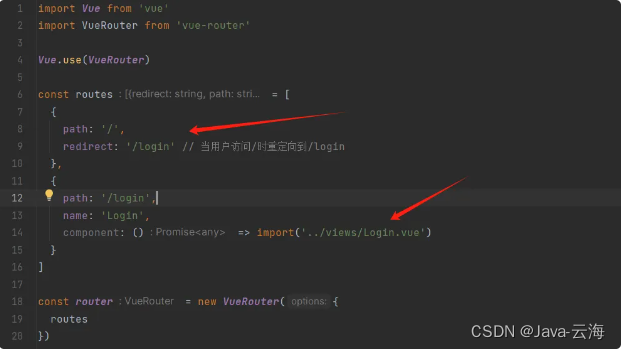
c. router/index.js文件如下:
d. 删除components中的文件:
e. 最终项目目录整理如下:

2. 集成ElementUI编写登录页面
a. 安装ElementUI:
npm i element-ui -Sb. 在main.js中写入以下内容:
import ElementUI from 'element-ui'
import 'element-ui/lib/theme-chalk/index.css'

Vue.use(ElementUI)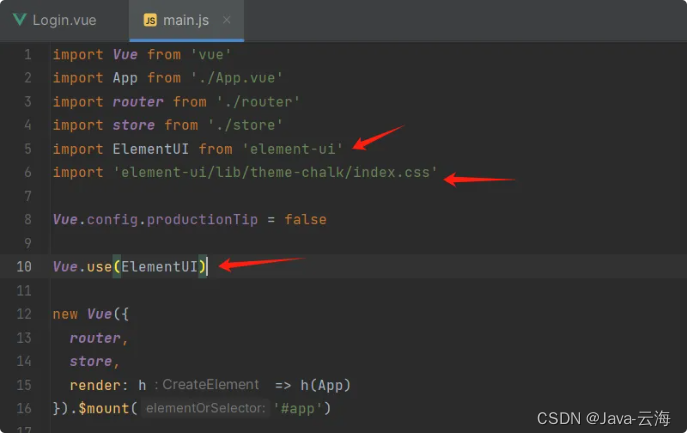
c. 在src/assets中加入一张背景图片

d. 修改Login.vue文件如下:
<template>
  <div class="login-container">
    <el-card class="login-card">
      <h2 class="login-title">仓库管理系统</h2>
      <el-form :model="loginForm" :rules="rules" ref="loginForm" label-width="20">
        <el-form-item label="用户名" prop="username">
          <el-input v-model="loginForm.username" placeholder="请输入用户名"></el-input>
        </el-form-item>
        <el-form-item label="密码" prop="password">
          <el-input type="password" v-model="loginForm.password" placeholder="请输入密码"></el-input>
        </el-form-item>
        <el-form-item>
          <el-button type="primary" @click="submitForm">登录</el-button>
        </el-form-item>
      </el-form>
    </el-card>
  </div>
</template>

<script>
export default {
  data () {
    return {
      loginForm: {
        username: '',
        password: ''
      },
      rules: {
        username: [
          { required: true, message: '请输入用户名!', trigger: 'blur' }
        ],
        password: [
          { required: true, message: '请输入密码!', trigger: 'blur' }
        ]
      }
    }
  },
  methods: {
    submitForm () {
      this.$refs.loginForm.validate((valid) => {
        if (valid) {
          console.log('submit!', this.loginForm)
          // 在这里添加你的登录逻辑
          alert('Login Successful!')
        } else {
          console.log('error submit!')
          return false
        }
      })
    }
  }
}
</script>

<style>
.login-container {
  display: flex;
  justify-content: center;
  align-items: center;
  height: 100vh;
  background-image: url('../assets/background.jpg');
}
.login-card {
  width: 400px;
}
.login-title {
  text-align: center;
  margin-bottom: 20px;
}
</style>
再次启动项目npm run serve
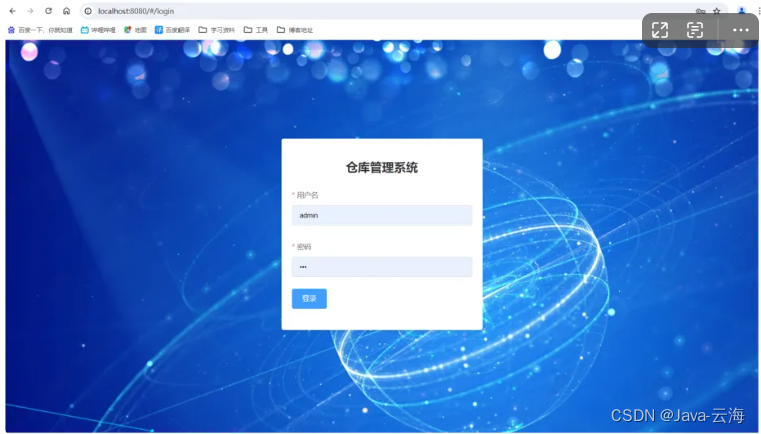
到此,登录页面编写完成。

