前言
最近写了好多篇 Chrome 浏览器插件相关的文章,有十几二十篇,就想着构建个博客,用来放置相应的文章。
正好前段时间看到 VitePress 1.0.0 发布了,而且是用 markdown 写文章,正好写插件文章的时候文章都是 md 格式,所有用下这个然后顺便写一篇使用教程。
Chrome 插件开发博客地址:https://18055975947.github.io/extension/
一、VitePress
VitePress 官网:VitePress 中文版
1. 什么是 VitePress
VitePress 是一个静态站点生成器 (SSG),专为构建快速、以内容为中心的站点而设计。简而言之,VitePress 获取用 Markdown 编写的内容,对其应用主题,并生成可以轻松部署到任何地方的静态 HTML 页面。
2. 性能
- 快速的初始加载
- 加载完成后可以快速切换
- 高效的交互
二、项目构建
1. 新建项目
NodeJS 版本需要 18 及以上版本
mkdir vitepress-demo
2. 配置项目
2.1. 项目初始化
pnpm init
2.2. 安装 VitePress
pnpm add -D vitepress
2.3. 初始化 VitePress
pnpm vitepress init
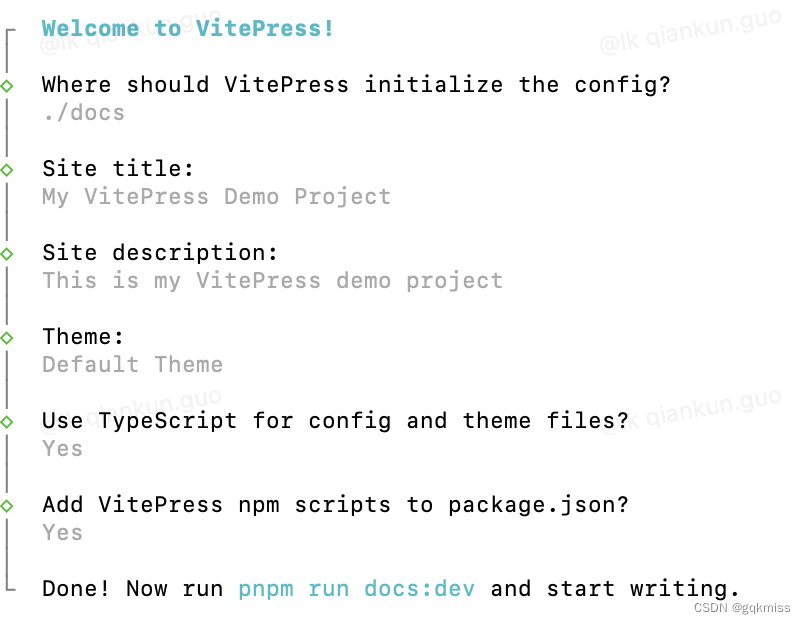
初始化之后,会有对应的项目问题需要进行填写,示例如下:
3. 项目目录
tree -a -I 'node_modules'
.
├── docs
│   ├── .vitepress
│   │   └── config.mts
│   ├── api-examples.md
│   ├── index.md
│   └── markdown-examples.md
├── package.json
└── pnpm-lock.yaml
在 docs 文件夹中创建 public 文件夹,用于存放项目图片
.
├── docs
│   ├── .vitepress
│   │   └── config.mts
│   ├── api-examples.md
│   ├── index.md
│   ├── markdown-examples.md
│   └── public # 增加 public 文件夹,存放项目开发使用的图片
├── package.json
└── pnpm-lock.yaml
4. 项目文件结构
docs文件夹:VitePress项目的根目录.vitepress:项目的配置文件、开发缓存、构建 dist 输出等config.mts:项目配置文件
index.md:首页入口文件**.md:其他页面public:资源存放文件夹
5. 运行项目
pnpm run docs:dev
浏览器打开:http://localhost:5174/
可以看出我们设置的 site title 和 site description 字段已经展示在页面中了
三、项目开发
1. 首页
一般是指 index.md 文件
1.1. Layout
指定页面的布局
VitePress 默认主题提供了一个首页布局,可以通过 frontmatter 指定 layout: home 在任何页面上使用它
1.1.1. 类型
doc | home | page
1.1.2. 数据值
doc:将默认文档样式应用于.md文件内容home:主页的特殊布局page:和doc类似,但不对内容应用任何样式
1.1.3. 示例
---
layout: home
---
1.1.4. 页面展示
home 展示

doc 展示
page 展示
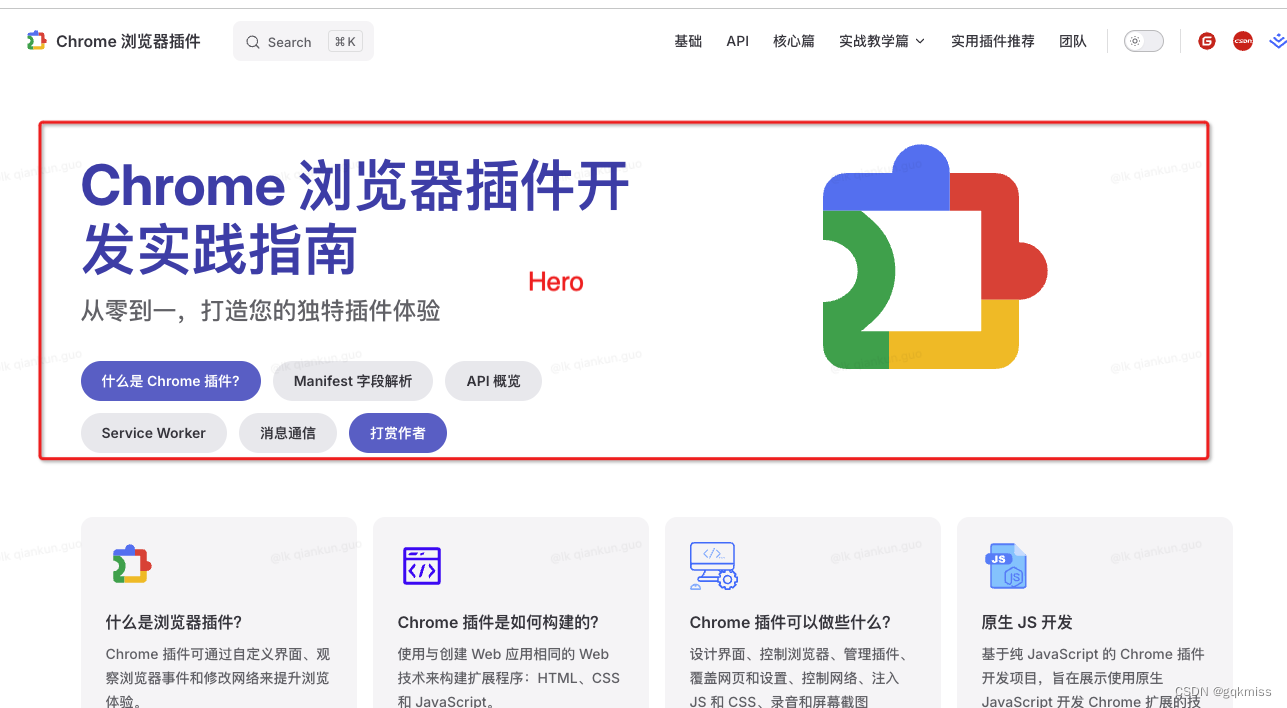
1.2. Hero
hero 部分位于主页顶部。
当 layout 设置为 home 时,hero 配置才会生效。
1.2.1. 类型
interface Hero {
  // `text` 上方的字符,带有品牌颜色
  // 预计简短,例如产品名称
  name?: string
  // hero 部分的主要文字,
  // 被定义为 `h1` 标签
  text: string
  // `text` 下方的标语
  tagline?: string
  // text 和 tagline 区域旁的图片
  image?: ThemeableImage
  // 主页 hero 部分的操作按钮
  actions?: HeroAction[]
}
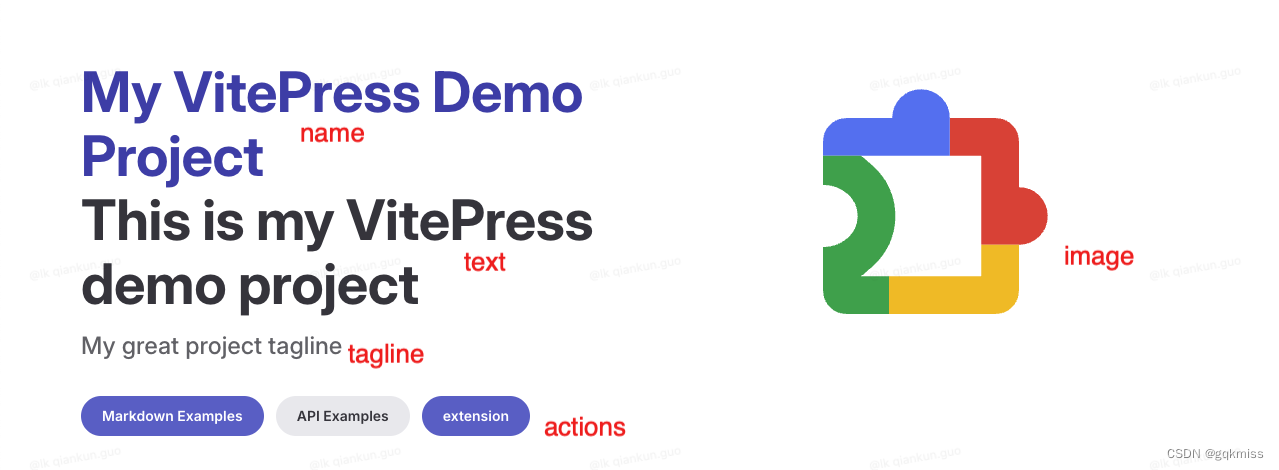
name:文档标题text:副标题/描述tagline:文档标语image:右侧图片actions:操作按钮theme:brand | alt按钮主题,只有这两种主题,默认为brandbrand:蓝色背景按钮alt:灰色背景按钮
text:按钮文案link:按钮的链接
1.2.2. 示例
找一张 ext.svg 图标放在 public 文件夹中
---
layout: home

hero:
  name: "My VitePress Demo Project"
  text: "This is my VitePress demo project"
  tagline: "My great project tagline"
  image:
    src: /ext.svg
    alt: Chrome 浏览器插件
  actions:
    - theme: brand
      text: Markdown Examples
      link: /markdown-examples
    - theme: alt
      text: API Examples
      link: /api-examples
    - theme: brand
      text: extension
      link: https://18055975947.github.io/extension/
      target: _blank
      rel: external
---
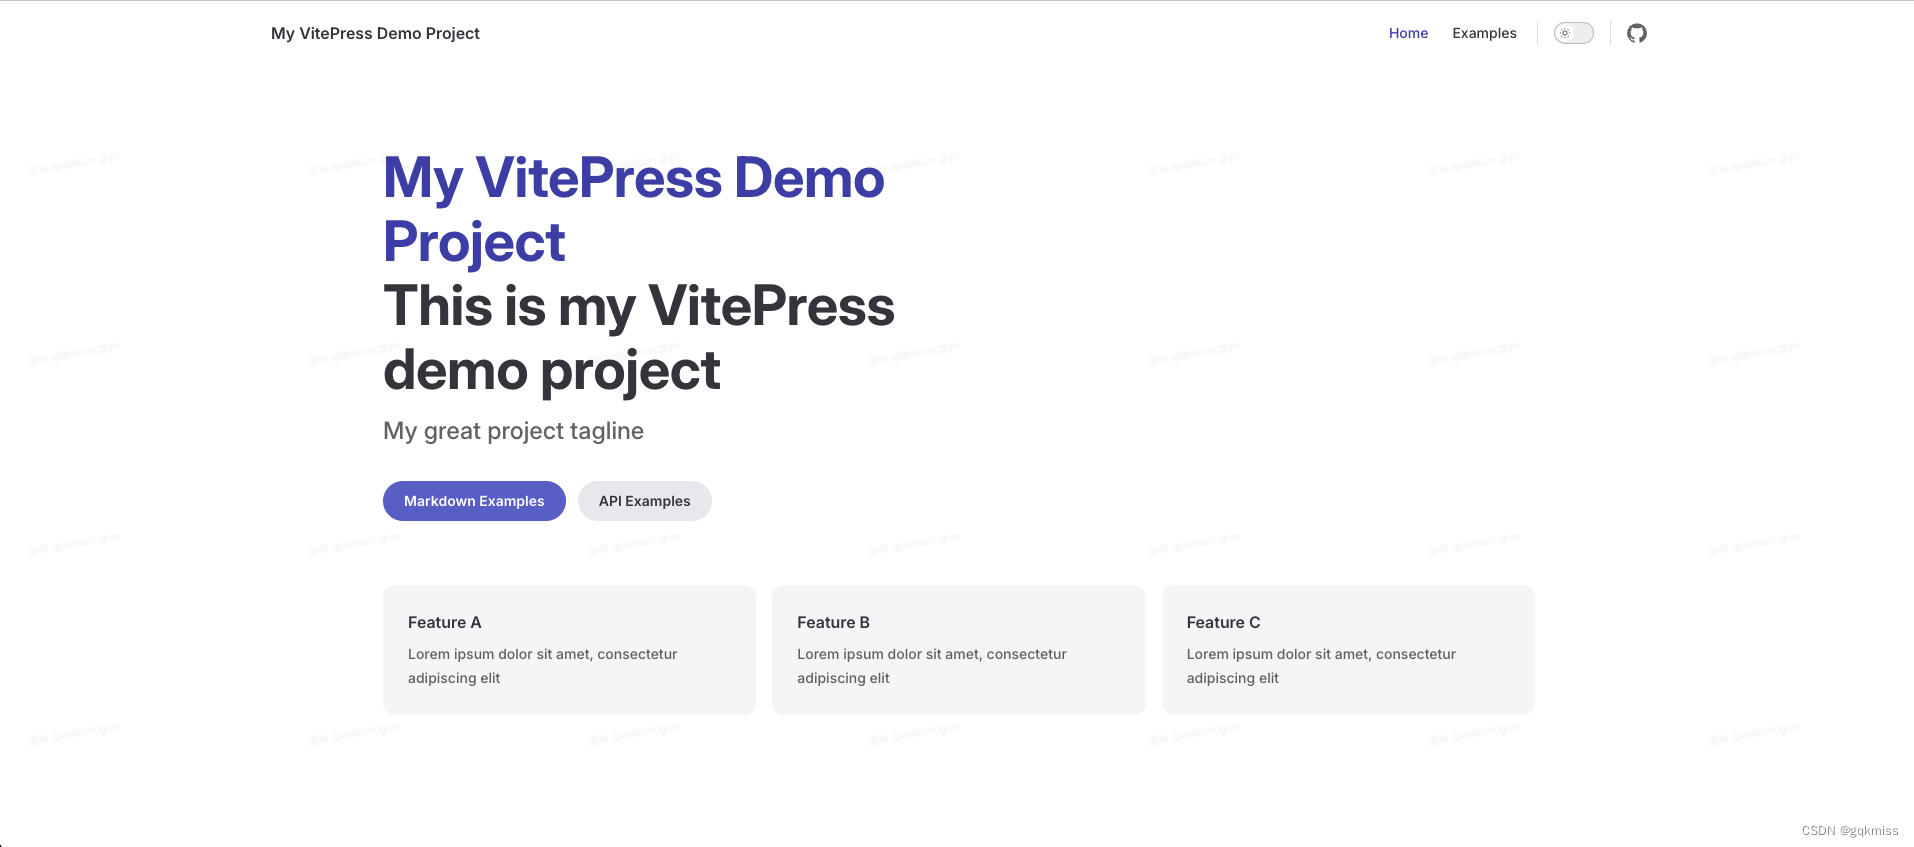
1.2.3. 页面展示
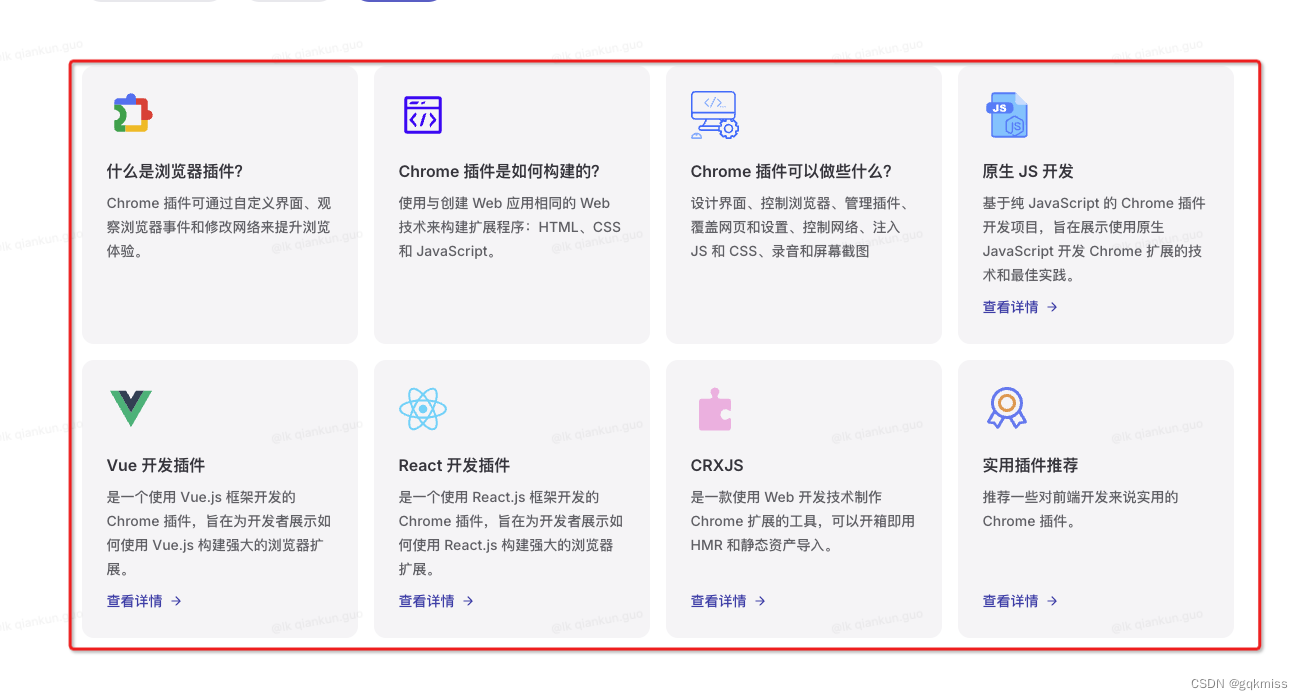
1.3. Features
可以在 Hero 部分之后列出任意数量的 Feature
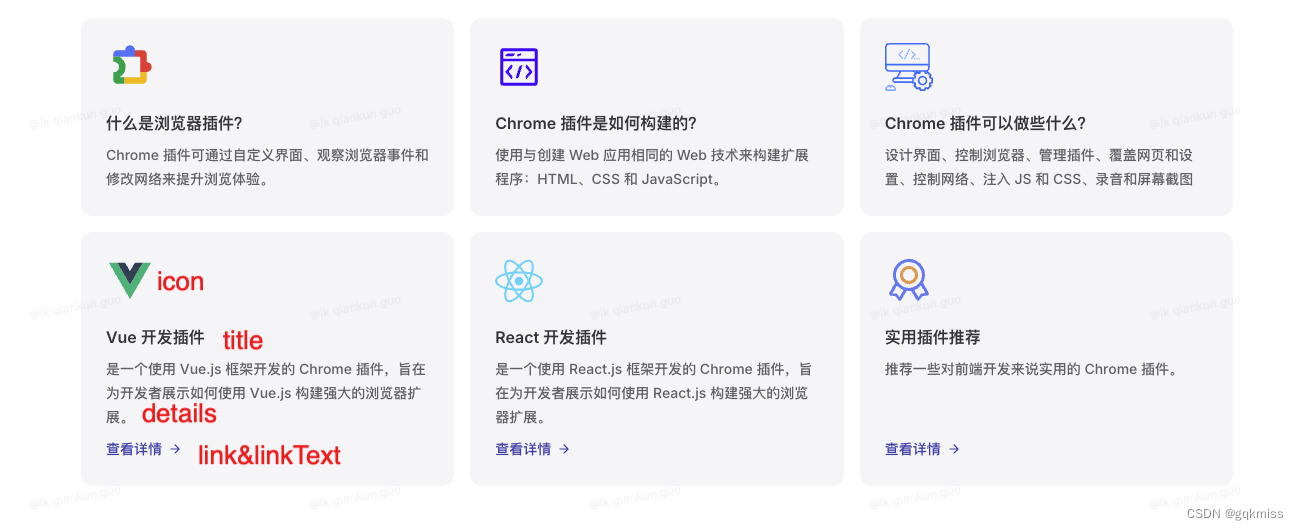
1.3.1. 类型
interface Feature {
  // 在每个 feature 框中显示图标
  icon?: FeatureIcon
  // feature 的标题
  title: string
  // feature 的详情
  details: string
  // 点击 feature 组件时的链接,可以是内部链接,也可以是外部链接。
  link?: string
  // feature 组件内显示的链接文本,最好与 `link` 选项一起使用
  linkText?: string
  // `link` 选项的链接 rel 属性
  rel?: string
  // `link` 选项的链接 target 属性
  target?: string
}
icon:图标title:标题details:描述link:跳转链接
1.3.2. 示例
找一些对应的图标放在 public 文件夹中
---
layout: home

features:
  - title: 什么是浏览器插件?
    icon:
      src: /ext.svg
    details: Chrome 插件可通过自定义界面、观察浏览器事件和修改网络来提升浏览体验。
  - title: Chrome 插件是如何构建的?
    icon:
      src: /develop.svg
    details: 使用与创建 Web 应用相同的 Web 技术来构建扩展程序:HTML、CSS 和 JavaScript。
  - title: Chrome 插件可以做些什么?
    icon:
      src: /ext-2.svg
    details: 设计界面、控制浏览器、管理插件、覆盖网页和设置、控制网络、注入 JS 和 CSS、录音和屏幕截图
  - title: Vue 开发插件
    icon:
      src: /vue.svg
    details: 是一个使用 Vue.js 框架开发的 Chrome 插件,旨在为开发者展示如何使用 Vue.js 构建强大的浏览器扩展。
    link: https://juejin.cn/post/7330227149177028617
    linkText: 查看详情
  - title: React 开发插件
    icon:
      src: /react.svg
    details: 是一个使用 React.js 框架开发的 Chrome 插件,旨在为开发者展示如何使用 React.js 构建强大的浏览器扩展。
    link: https://juejin.cn/post/7349936384512213027
    linkText: 查看详情
  - title: 实用插件推荐
    icon:
      src: /tj.svg
    details: 推荐一些对前端开发来说实用的 Chrome 插件。
    link: https://juejin.cn/post/7327893130572824611
    linkText: 查看详情
---
1.3.3 页面展示
1.4. 其他
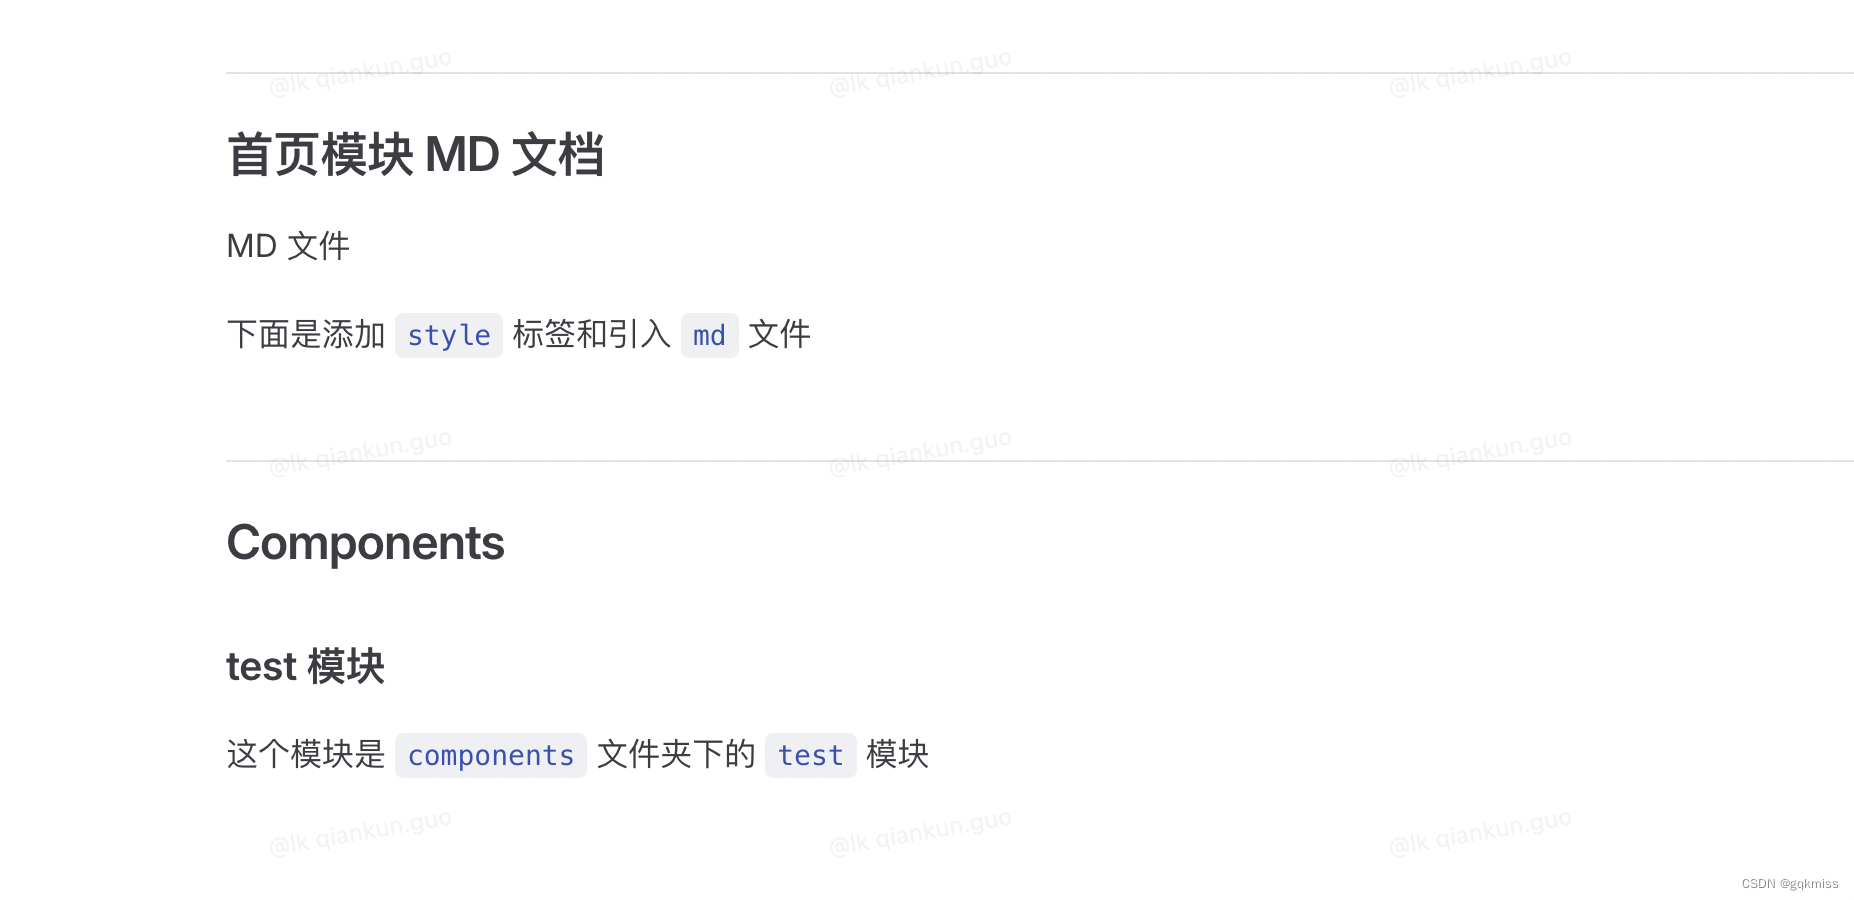
如果到这个时候你觉得在首页 md 文件中还没有满足你的其他需求,可以在分隔符下继续以 md 的格式开发新内容。
1.4.1. 添加 MD 内容
## 首页模块 MD 文档

MD 文件

1.4.2 引入 MD 文件
1.4.2.1. 新建 MD 文件
在 docs 文件夹下创建 components 文件夹并创建 test.md 文件,并写入以下内容
---
layout: page
---

## Components

### test 模块

这个模块是 `components` 文件夹下的 `test` 模块
.
docs/components
└── test.md
1.4.2.2. 在 index.md 文件引入
使用<!--@include: xxx.md--> 的格式引入
在 index.md 文件添加以下内容
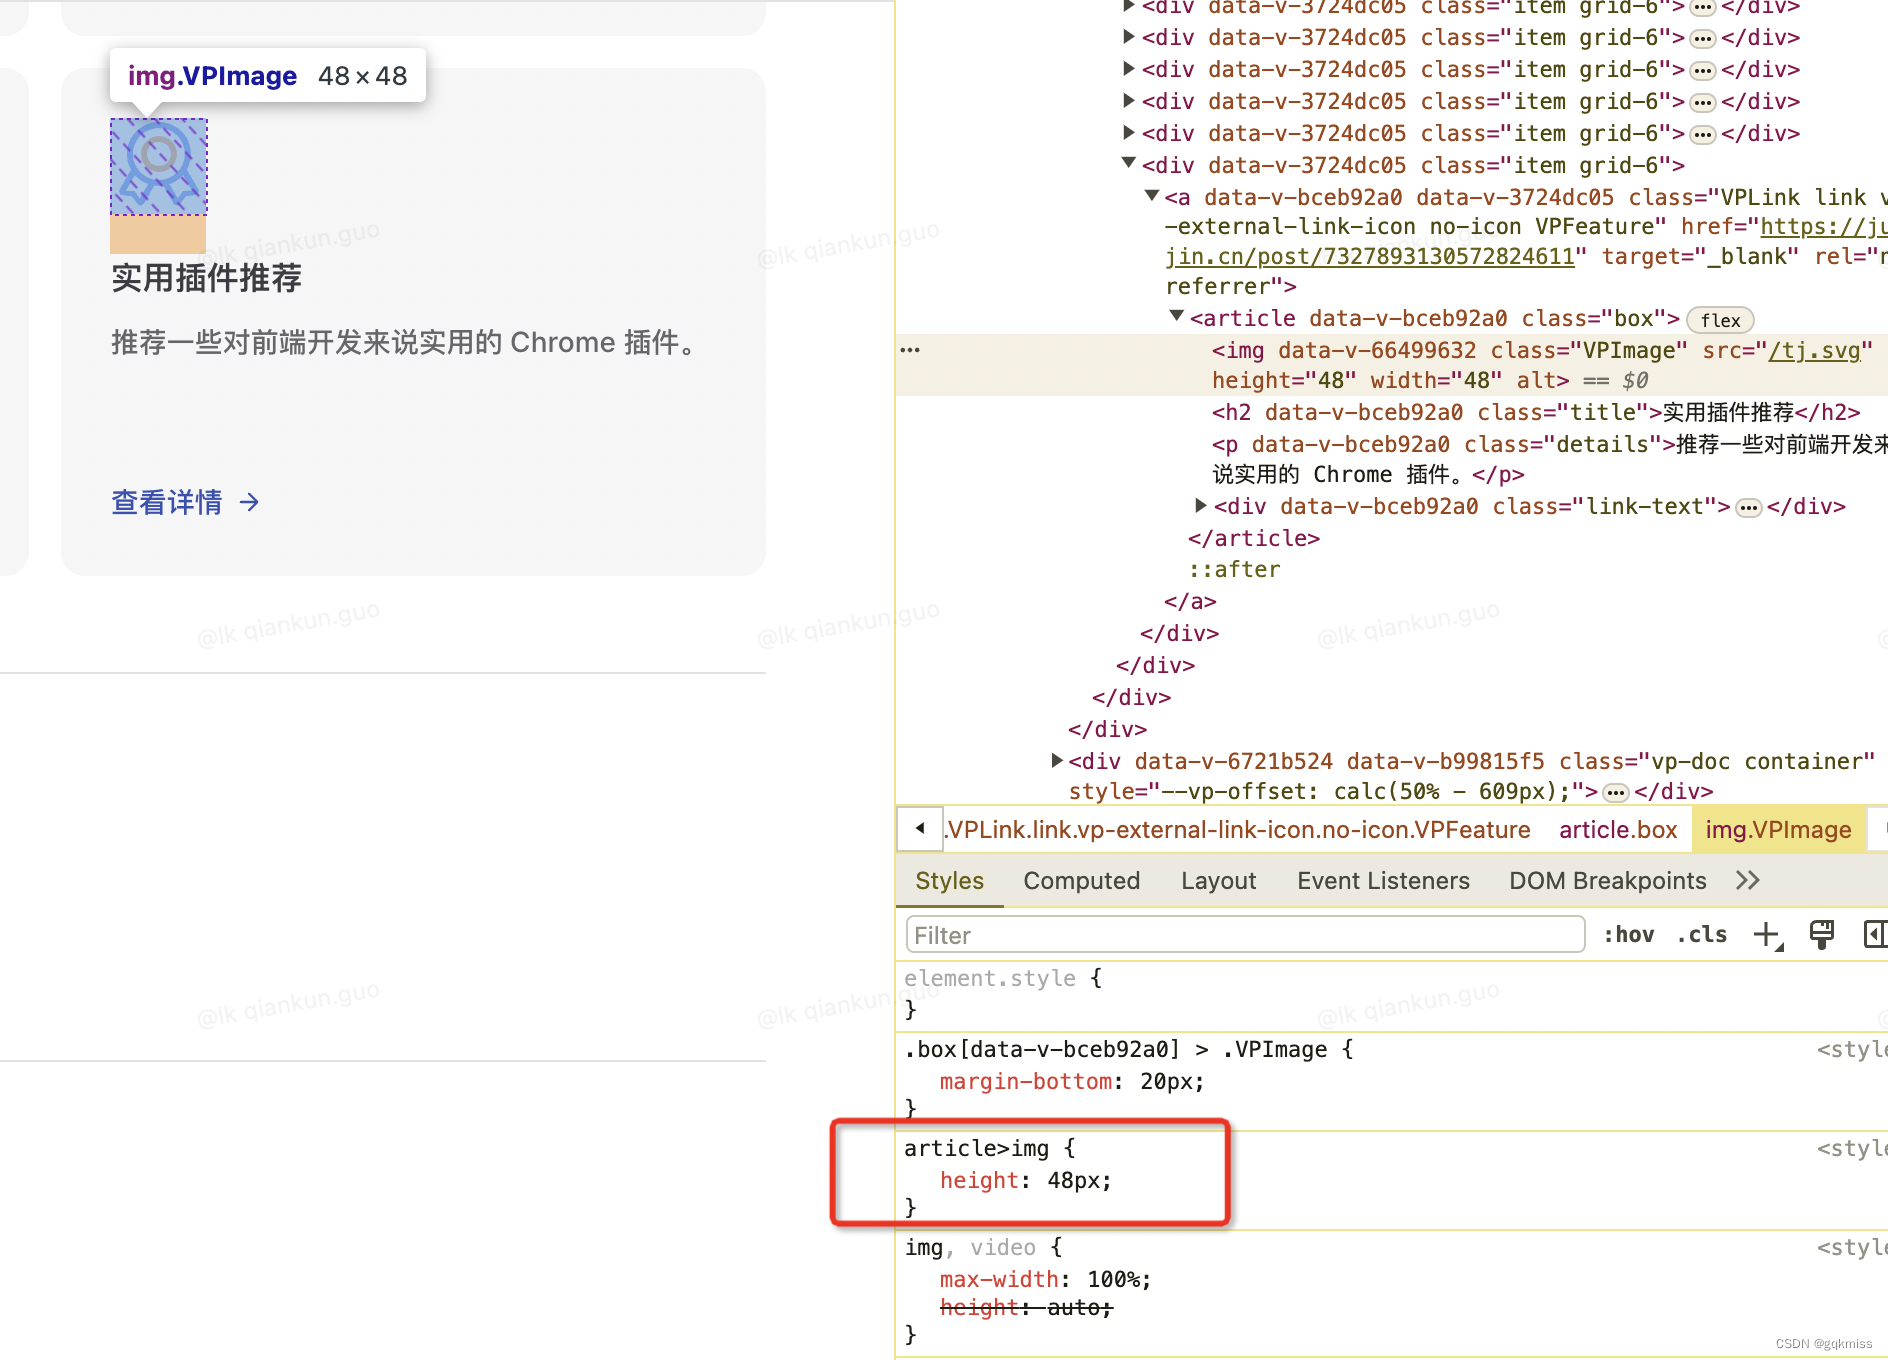
下面是添加 `style` 标签和引入 `md` 文件

<style module>
article>img{
  height: 48px;
}
</style>

<!--@include: ./components/test.md-->
1.4.2.3. 页面展示
- 引入
MD文件展示
Style标签样式展示
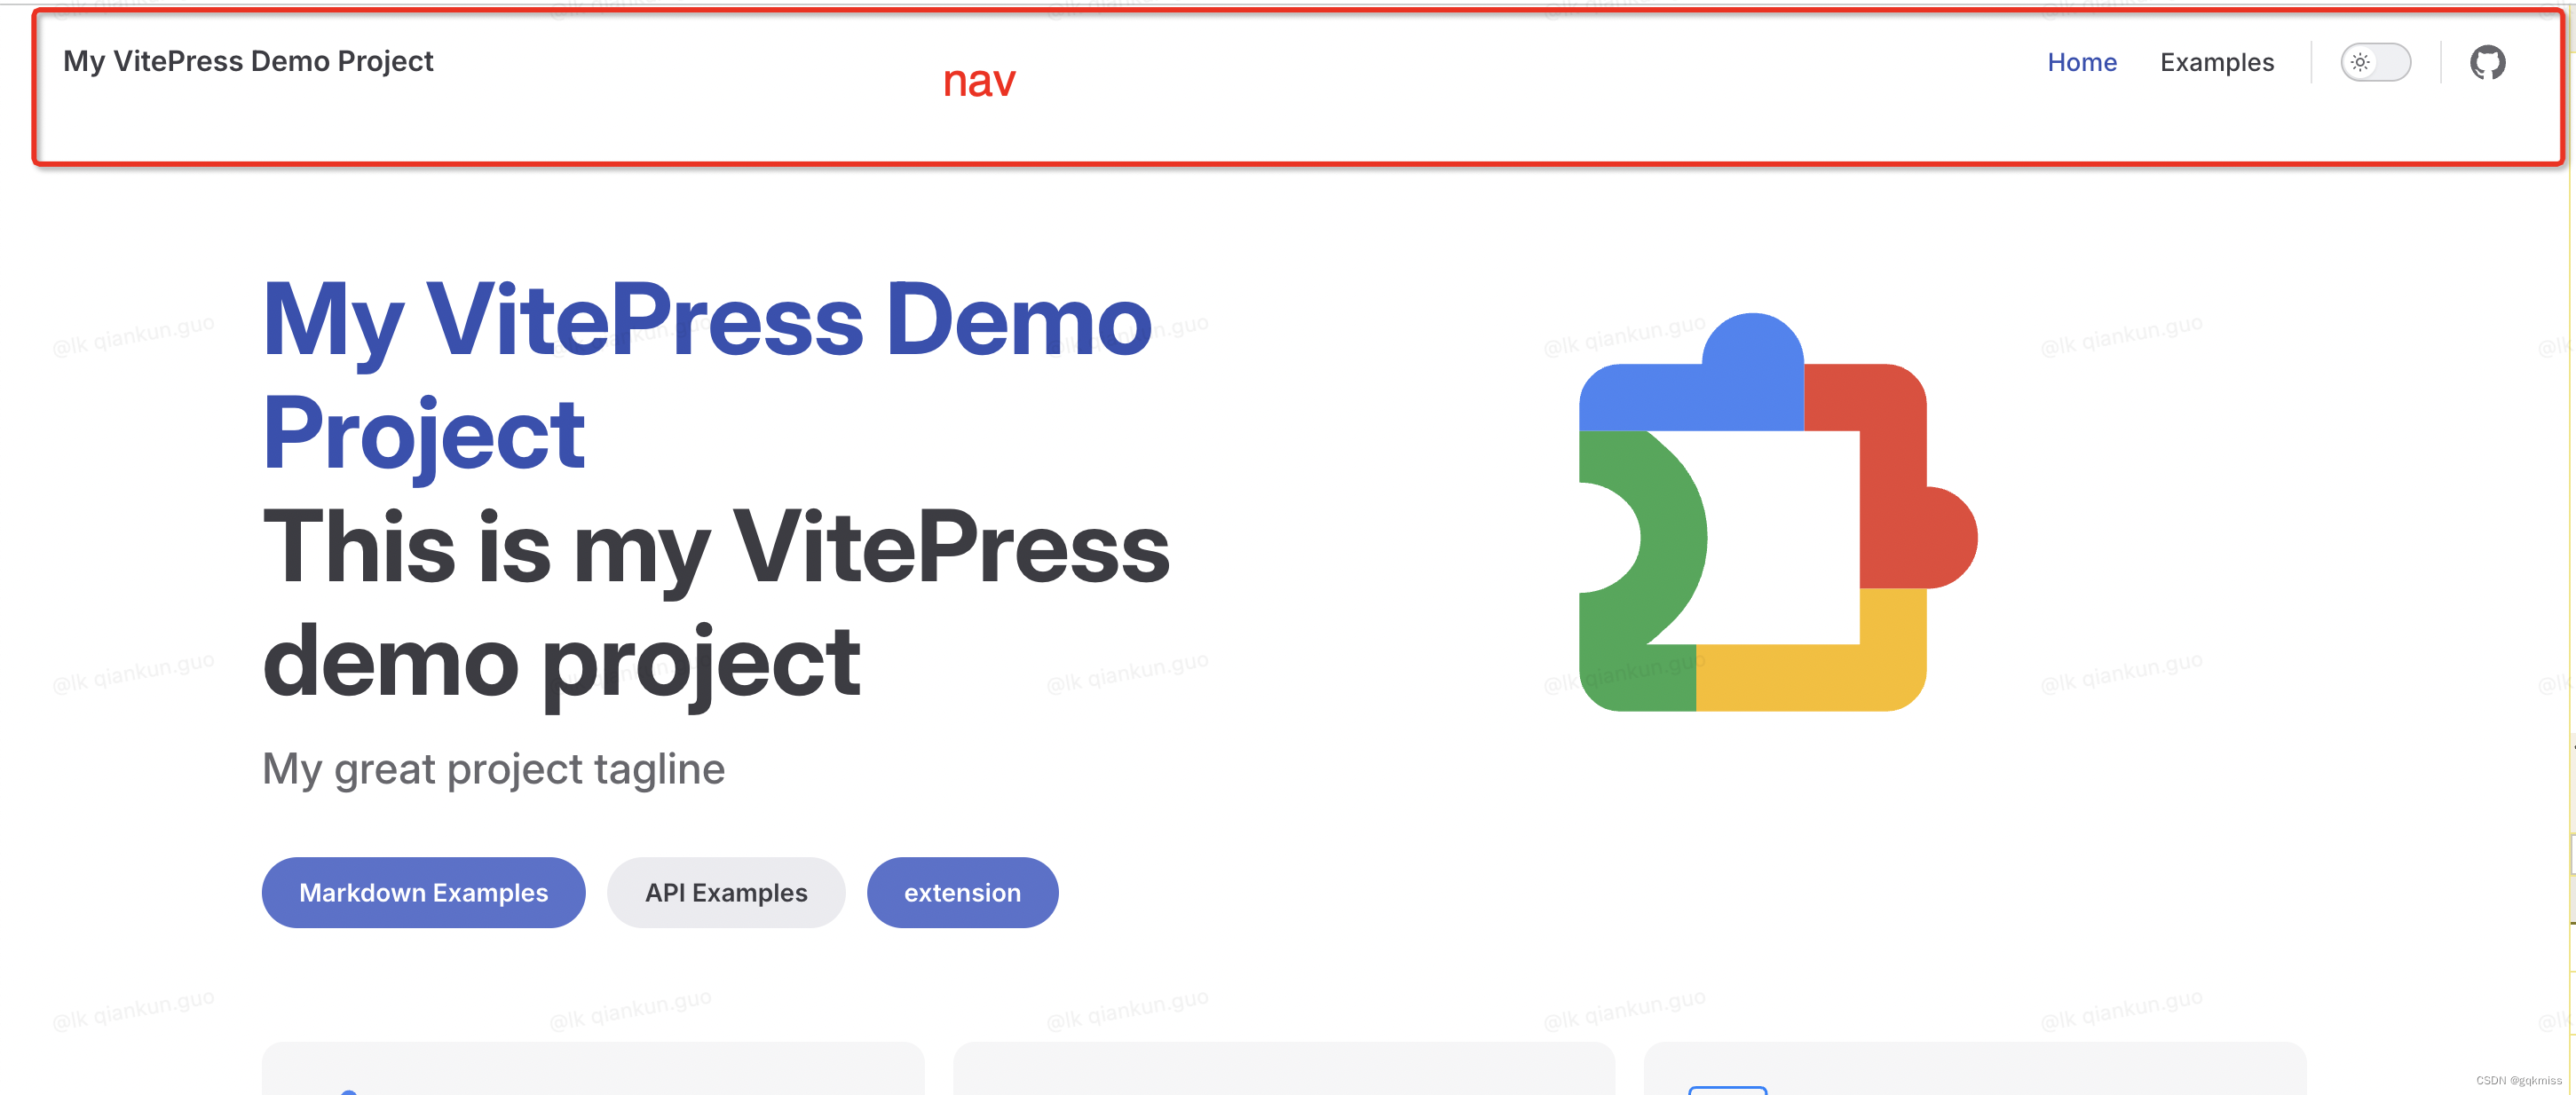
2. 导航栏
Nav 是显示在页面顶部的导航栏。它包含站点标题、全局菜单链接等。
导航栏模块的配置是通过 docs/.vitepress/config.mts 文件配置的
config.mts 文件内容
import { defineConfig } from 'vitepress'
export default defineConfig({
  title: "My VitePress Demo Project",
  description: "This is my VitePress demo project",
  themeConfig: {
    nav: [
      { text: 'Home', link: '/' },
      { text: 'Examples', link: '/markdown-examples' }
    ],
    sidebar: [
      {
        text: 'Examples',
        items: [
          { text: 'Markdown Examples', link: '/markdown-examples' },
          { text: 'Runtime API Examples', link: '/api-examples' }
        ]
      }
    ],
    socialLinks: [
      { icon: 'github', link: 'https://github.com/vuejs/vitepress' }
    ]
  }
})
2.1. 站点标题和图标:sitTitle、logo
2.1.1. 在 themeConfig 中添加 logo 和 siteTitle 字段
2.1.1.1. 类型
string:logo 和 siteTitle 都是 string 类型
2.1.1.2. themeConfig 配置示例
import { defineConfig } from 'vitepress'
export default defineConfig({
  title: "My VitePress Demo Project",
  description: "This is my VitePress demo project",
  themeConfig: {
    logo: '/ext.svg',
    siteTitle: 'Project SitTitle',
  }
})
2.1.2. 页面展示
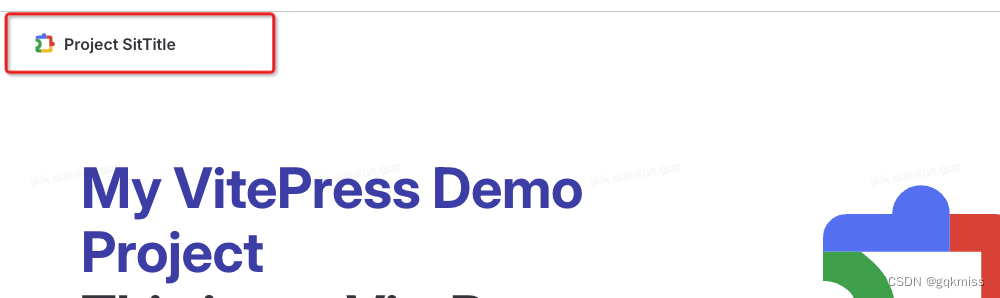
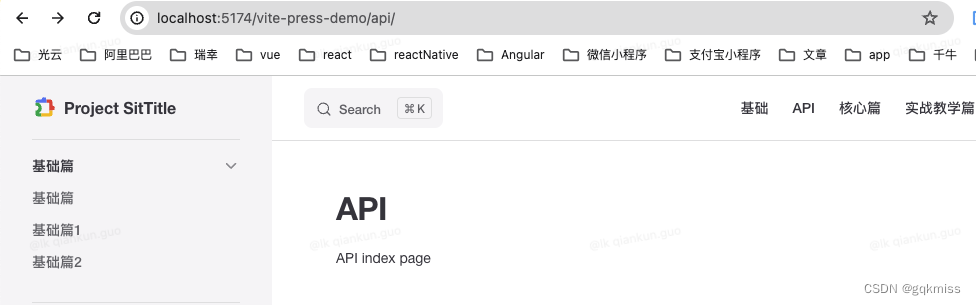
可以看出 logo 已经加上了,而且 sitTitle 字段覆盖了 title 字段
默认情况下,以 config.title 作为站点的标题,但是如果想更改标题,可以设置 themeConfig 中的 sitTitle 字段。
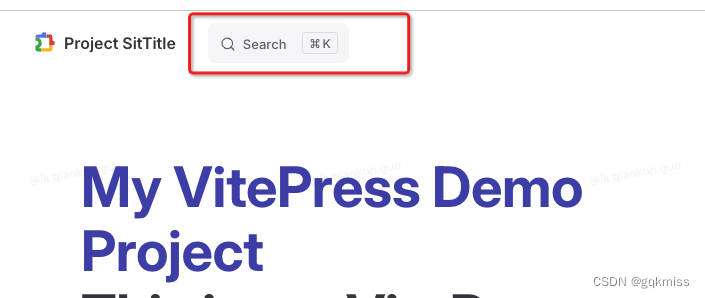
2.2. 搜索模块:search
VitePress 支持使用浏览器内索引进行模糊全文搜索。
2.2.1. 在 themeConfig 中添加 search 字段
2.2.1.1. search 字段数据类型
object
{ provider: 'local'; options?: LocalSearchOptions }
| { provider: 'algolia'; options: AlgoliaSearchOptions }
2.2.1.2. themeConfig 配置示例
import { defineConfig } from 'vitepress'
export default defineConfig({
  title: "My VitePress Demo Project",
  description: "This is my VitePress demo project",
  themeConfig: {
    logo: '/ext.svg',
    siteTitle: 'Project SitTitle',
    search: {
      provider: 'local'
    },
  }
})
2.2.2. 页面展示
2.2.3. 搜索效果展示

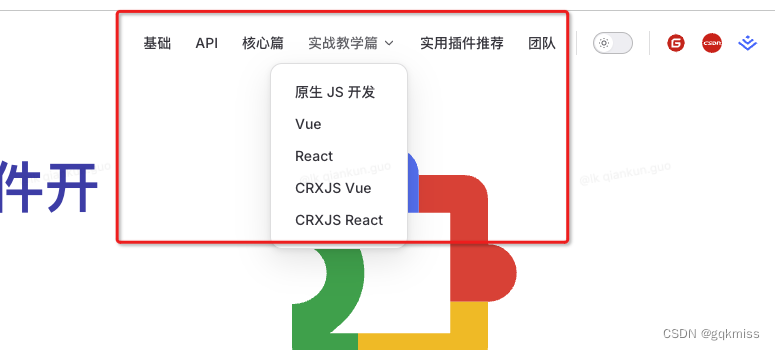
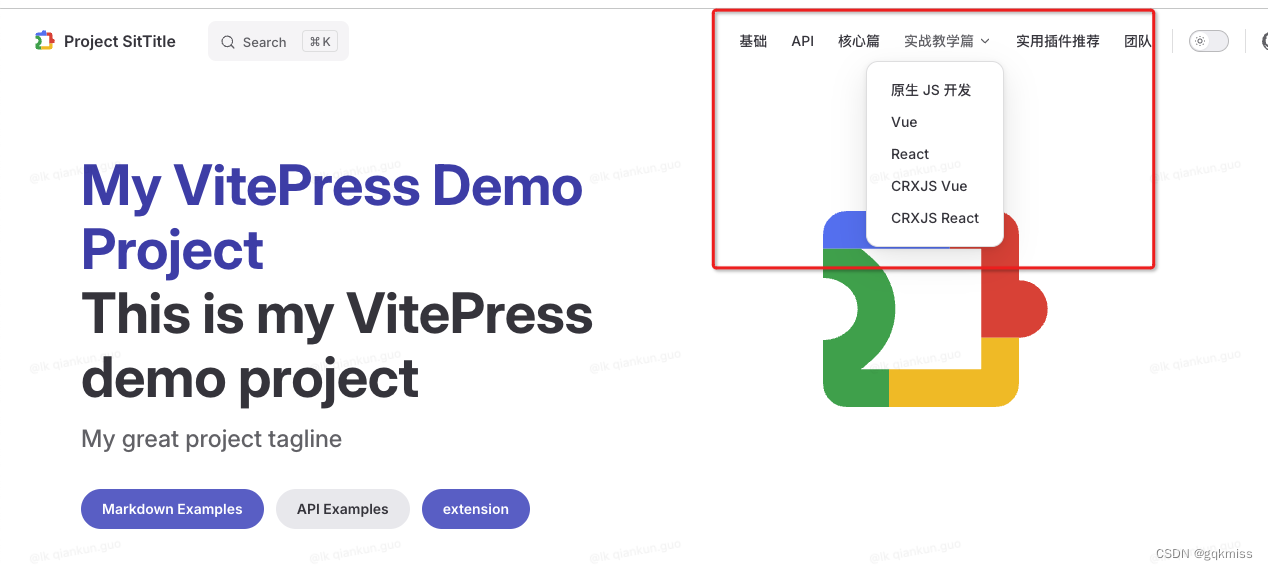
2.3. 导航链接:nav
可以定义 themeConfig.nav 选项以将链接添加到导航栏。
【Chrome 浏览器插件开发实践指南】 文档的 Nav 导航
可以看到,不仅可以配置单个链接,也可以配置下拉列表,我们就按照上面的配置来重新在我们现在的项目中配一遍
2.3.1 创建对应的文件夹和对应的 index.md 文件
创建 basic、api、core、summarize、teach、team 文件夹,并在其中创建 index.md 文件,如下:
.
├── docs
│   ├── api
│   │   └── index.md
│   ├── basic
│   │   └── index.md
│   ├── core
│   │   └── index.md
│   ├── index.md
│   ├── summarize
│   │   └── index.md
│   ├── teach
│   │   └── index.md
│   └── team
│       └── index.md
2.3.2. 在 themeConfig 中添加 nav 字段
2.3.2.1. nav 字段数据类型
数组:NavItem[]
type NavItem = NavItemWithLink | NavItemWithChildren
interface NavItemWithLink {
  text: string
  link: string
  activeMatch?: string
  target?: string
  rel?: string
  noIcon?: boolean
}
interface NavItemChildren {
  text?: string
  items: NavItemWithLink[]
}
interface NavItemWithChildren {
  text?: string
  items: (NavItemChildren | NavItemWithLink)[]
  activeMatch?: string
}
2.3.2.2. themeConfig 配置示例
import { defineConfig } from 'vitepress'
export default defineConfig({
  title: "My VitePress Demo Project",
  description: "This is my VitePress demo project",
  themeConfig: {
    logo: '/ext.svg',
    siteTitle: 'Project SitTitle',
    search: {
      provider: 'local'
    },
    nav: [
      {
        text: '基础',
        link: '/basic/index'
      },
      {
        text: 'API',
        link: '/api/index'
      },
      {
        text: '核心篇',
        link: '/core/index'
      },
      {
        text: '实战教学篇',
        items: [
          {
            text: '原生 JS 开发',
            link: '/teach/index'
          },
          {
            text: 'Vue',
            link: '/teach/index'
          },
          {
            text: 'React',
            link: '/teach/index'
          },
          {
            text: 'CRXJS Vue',
            link: '/teach/index'
          },
          {
            text: 'CRXJS React',
            link: '/teach/index'
          }
        ]
      },
      {
        text: '实用插件推荐',
        link: '/summarize/index'
      },
      {
        text: '团队',
        link: '/team/index'
      }
    ],
  }
})
2.3.3. 页面效果展示
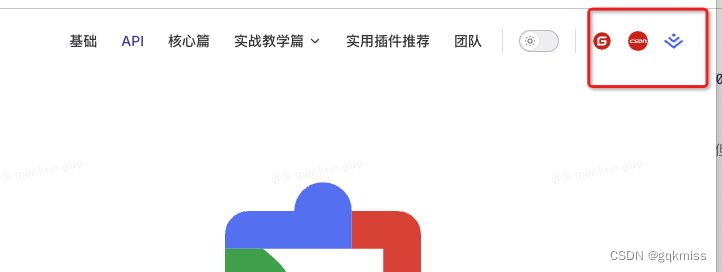
2.4. 社交账户链接:socialLinks
可以定义此选项以在导航栏中展示带有图标的社交帐户链接。
2.4.1. 在 themeConfig 中添加 socialLinks 字段
2.4.1.1. socialLinks 字段数据类型
数组:SocialLink[]
interface SocialLink {
  icon: SocialLinkIcon
  link: string
  ariaLabel?: string
}
2.4.1.2. themeConfig 配置示例
export default defineConfig({
  themeConfig: {
    ...,
    socialLinks: [
	  {
	    icon: {
	      svg: '<svg t="1713434729459" class="icon" viewBox="0 0 1024 1024" version="1.1" xmlns="http://www.w3.org/2000/svg" p-id="35275" width="64" height="64"><path d="M512 960c-246.4 0-448-201.6-448-448s201.6-448 448-448 448 201.6 448 448-201.6 448-448 448z" fill="#D81E06" p-id="35276"></path><path d="M721.664 467.968h-235.52a22.272 22.272 0 0 0-20.736 20.736v51.776c0 10.368 10.368 20.736 20.736 20.736H628.48c10.368 0 20.736 10.304 20.736 20.672v10.368c0 33.664-28.48 62.08-62.144 62.08H392.896a22.272 22.272 0 0 1-20.672-20.672V436.928c0-33.664 28.48-62.08 62.08-62.08h287.36a22.272 22.272 0 0 0 20.736-20.736v-51.84a22.272 22.272 0 0 0-20.736-20.672h-287.36A152.96 152.96 0 0 0 281.6 434.368v287.36c0 10.304 10.368 20.672 20.736 20.672h302.848c75.072 0 137.216-62.08 137.216-137.216v-116.48a22.272 22.272 0 0 0-20.736-20.736z" fill="#FFFFFF" p-id="35277"></path></svg>'
	    },
	    link: 'https://gitee.com/guoqiankun/my-vue3-plugin/tree/react_vite_chrome/'
	  },
	  {
	    icon: {
	      svg: '<svg t="1713408654979" class="icon" viewBox="0 0 1024 1024" version="1.1" xmlns="http://www.w3.org/2000/svg" p-id="6736" width="64" height="64"><path d="M512 1024C229.2224 1024 0 794.7776 0 512 0 229.2224 229.2224 0 512 0c282.7776 0 512 229.2224 512 512 0 282.7776-229.2224 512-512 512z m17.066667-413.525333c34.850133 4.352 68.778667 5.12 102.741333 2.0992 23.04-2.048 44.817067-8.362667 64.170667-21.9136 38.212267-26.794667 49.783467-85.1968 24.251733-123.050667-14.626133-21.7088-36.8128-30.344533-60.757333-35.498667-35.054933-7.543467-70.4512-5.751467-105.847467-3.413333-5.666133 0.3584-6.7584 3.072-7.236267 8.209067-3.072 32.682667-6.536533 65.314133-9.813333 97.962666-2.5088 24.814933-4.932267 49.629867-7.509333 75.605334z m53.4016-33.928534c1.962667-20.906667 3.6352-39.338667 5.4272-57.770666 1.553067-15.906133 3.413333-31.778133 4.727466-47.701334 0.3584-4.283733 1.553067-6.656 5.956267-6.382933 15.616 1.041067 31.709867 0.034133 46.728533 3.652267 36.488533 8.823467 48.725333 54.306133 23.3472 83.029333-15.8208 17.902933-36.7616 23.586133-59.255466 25.088-8.465067 0.546133-17.015467 0.085333-26.9312 0.085333zM512 434.295467c-2.184533-0.648533-3.5328-1.1776-4.932267-1.4336-37.717333-6.877867-75.690667-8.328533-113.646933-2.816-20.974933 3.037867-41.0112 9.489067-57.480533 23.330133-22.9888 19.319467-21.640533 46.848 4.4032 62.0032 13.056 7.594667 28.023467 12.509867 42.5984 17.288533 14.08 4.608 28.996267 6.826667 43.144533 11.264 12.5952 3.925333 14.011733 14.318933 3.584 22.306134-3.345067 2.56-7.441067 5.085867-11.537067 5.751466-11.195733 1.826133-22.698667 4.386133-33.826133 3.566934-24.098133-1.774933-48.042667-5.461333-72.5504-8.430934-1.365333 10.615467-2.935467 23.0912-4.5568 35.9424 4.181333 1.365333 7.68 2.730667 11.264 3.618134 33.9456 8.4992 68.386133 9.608533 102.912 5.12 20.087467-2.6112 39.4752-7.901867 56.695467-19.029334 28.603733-18.4832 36.693333-57.1904-4.676267-75.383466-14.506667-6.382933-30.190933-10.410667-45.482667-15.086934-11.4176-3.4816-23.313067-5.614933-34.525866-9.5232-9.7792-3.413333-11.144533-12.202667-3.037867-18.397866 4.6592-3.549867 10.717867-6.997333 16.384-7.3728a480.853333 480.853333 0 0 1 53.384533-0.853334c15.377067 0.699733 30.651733 3.549867 46.4896 5.5296L512 434.295467z m257.143467 2.048L750.933333 614.2976h54.152534c4.778667-45.636267 9.710933-90.7264 14.062933-135.8848 0.6144-6.365867 2.3552-8.840533 8.686933-9.0112 11.434667-0.273067 22.8864-1.979733 34.286934-1.570133 23.722667 0.853333 42.3936 9.728 38.4 43.264-2.901333 24.2688-5.597867 48.571733-8.2432 72.874666-1.092267 10.069333-1.826133 20.189867-2.730667 30.4128h55.330133c3.584-35.259733 7.9872-70.058667 10.496-104.994133 3.413333-47.4624-17.7664-73.3184-64.682666-80.213333-40.96-6.007467-81.339733-0.341333-121.5488 7.133866z m-483.498667 134.6048c-8.738133 1.297067-16.384 2.798933-24.098133 3.4816-25.6512 2.235733-51.319467 3.9424-76.305067-4.266667-13.909333-4.590933-24.6784-12.578133-29.7984-25.9584-7.901867-20.701867 0.887467-47.104 19.831467-60.3136 17.373867-12.117333 37.717333-15.9232 58.453333-15.9232 22.545067-0.017067 45.090133 2.423467 68.232533 3.84L307.2 432.298667c-15.069867-1.723733-29.4912-3.925333-43.997867-4.9152-41.0112-2.798933-80.64 2.6112-117.469866 20.462933-30.020267 14.557867-52.053333 36.010667-58.6752 68.130133-7.850667 38.144 11.537067 69.495467 51.7632 85.845334 19.1488 7.765333 39.287467 12.509867 60.0064 12.5952 24.746667 0.1024 49.493333-1.570133 74.205866-2.952534 3.106133-0.170667 8.311467-2.901333 8.669867-5.034666 1.979733-11.554133 2.730667-23.278933 3.9424-35.464534z" fill="#DD1700" p-id="6737"></path></svg>'
	    },
	    link: 'https://guoqiankun.blog.csdn.net/?type=blog'
	  },
	  {
	    icon: {
	      svg: '<svg t="1713408687091" class="icon" viewBox="0 0 1316 1024" version="1.1" xmlns="http://www.w3.org/2000/svg" p-id="7801" width="64" height="64"><path d="M643.181714 247.698286l154.916572-123.172572L643.181714 0.256 643.072 0l-154.660571 124.269714 154.660571 123.245715 0.109714 0.182857z m0 388.461714h0.109715l399.579428-315.245714-108.361143-87.04-291.218285 229.888h-0.146286l-0.109714 0.146285L351.817143 234.093714l-108.251429 87.04 399.433143 315.136 0.146286-0.146285z m-0.146285 215.552l0.146285-0.146286 534.893715-422.034285 108.397714 87.04-243.309714 192L643.145143 1024 10.422857 525.056 0 516.754286l108.251429-86.893715L643.035429 851.748571z" fill="#1E80FF" p-id="7802"></path></svg>'
	    },
	    link: 'https://juejin.cn/user/2409752520033768/posts'
	  }
	]
  }
})
2.4.2. 页面效果展示
2.5. 明亮主题展示:appearance
appearance 配置不在 themeConfig 字段里面,而是和 themeConfig 同级
2.5.1. 数据类型
boolean | 'dark' | 'force-dark' |
默认值为 true
2.5.2. config 配置示例
export default defineConfig({
  ...,
  appearance: false,
  ...,
})
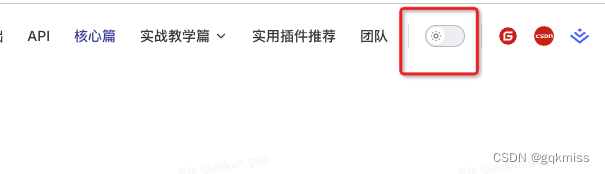
2.5.3. 页面效果展示

当我们设置为 false 的时候,就没有 switch 按钮了
3. 页脚
页脚面配置是 themeConfig.footer 字段
VitePress 将在全局页面底部显示页脚,当侧边栏可见时,不会显示页脚
3.1. footer 字段类型
object
export interface Footer {
  message?: string
  copyright?: string
}
3.2. themeConfig 配置示例
import { defineConfig } from 'vitepress'
export default defineConfig({
title: "My VitePress Demo Project",
description: "This is my VitePress demo project",
appearance: false,
themeConfig: {
...,
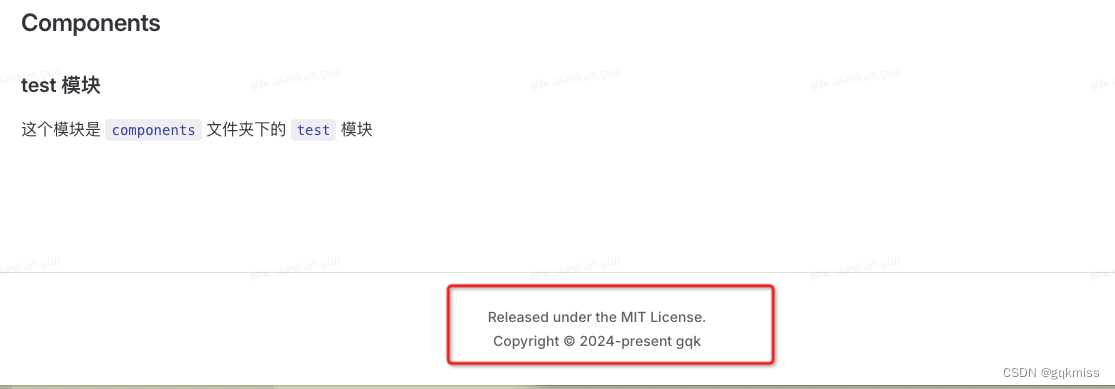
footer: {
message: 'Released under the MIT License.',
copyright: 'Copyright © 2024-present gqk'
}
}
})
3.3. 页面效果展示
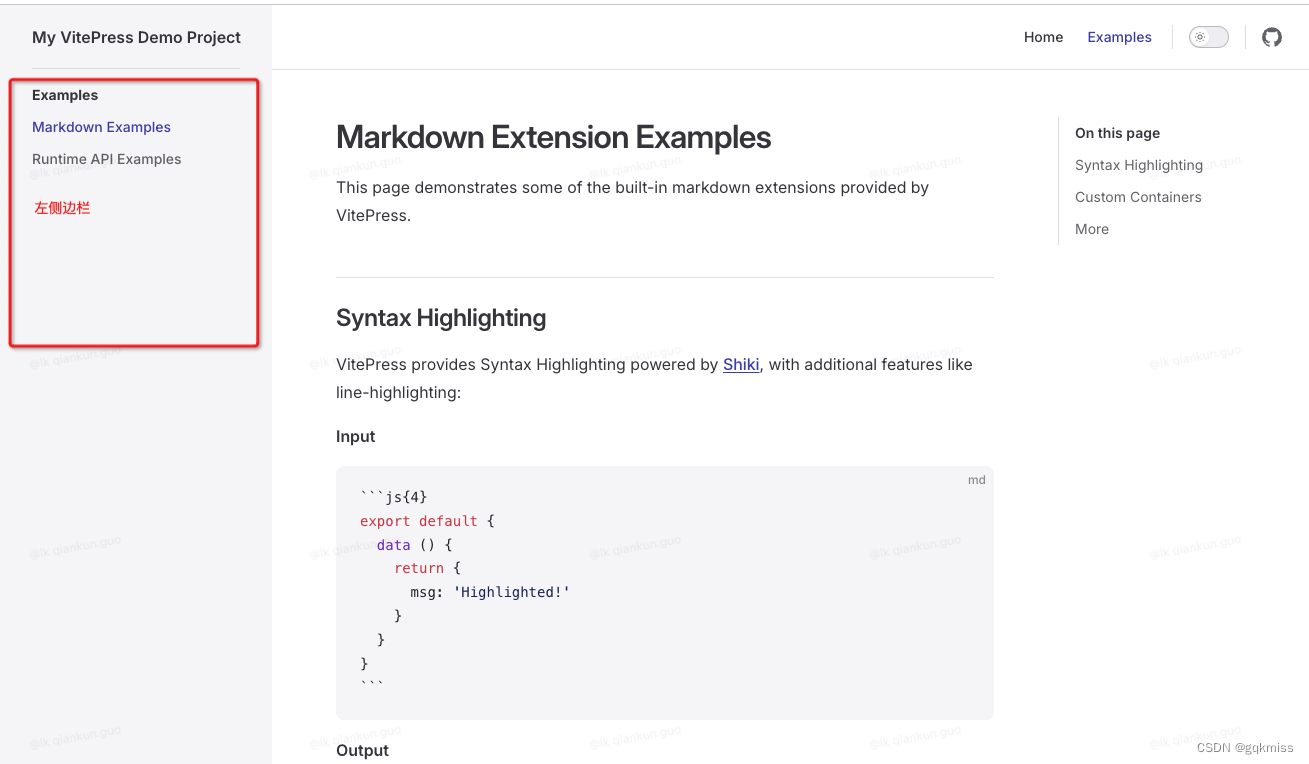
4. 左侧边栏
左侧边栏是文档的主要导航块。
在 themeConfig.sidebar 中配置左侧边栏菜单
4.1. 左侧边栏基础配置
4.1.1 创建 md 文件
把项目初始化的除了 index.md 之外的另两个 md 文件删除,再在之前创建的文件夹中创建对应的 xxx1.md 和 xxx2.md 文化,如下:
.
├── docs
│   ├── api
│   │   ├── api1.md
│   │   ├── api2.md
│   │   └── index.md
│   ├── basic
│   │   ├── basic1.md
│   │   ├── basic2.md
│   │   └── index.md
│   ├── core
│   │   ├── core1.md
│   │   ├── core2.md
│   │   └── index.md
│   ├── summarize
│   │   ├── index.md
│   │   ├── summarize1.md
│   │   └── summarize2.md
│   ├── teach
│   │   ├── index.md
│   │   ├── teach1.md
│   │   └── teach2.md
│   └── team
│       ├── index.md
│       ├── team1.md
│       └── team2.md
4.1.2. 在 themeConfig 中添加 sidebar 字段
import { defineConfig } from 'vitepress'
export default defineConfig({
  title: "My VitePress Demo Project",
  description: "This is my VitePress demo project",
  appearance: false,
  themeConfig: {
    ...,
    sidebar: [
      {
        text: '基础篇',
        items: [
          { text: '基础篇', link: '/basic/index' },
          { text: '基础篇1', link: '/basic/basic1' },
          { text: '基础篇2', link: '/basic/basic2' }
        ]
      },
      {
        text: 'API 篇',
        items: [
          { text: 'API篇', link: '/api/index' },
          { text: 'API篇1', link: '/api/api1' },
          { text: 'API篇2', link: '/api/api2' }
        ]
      },
      {
        text: '核心篇',
        items: [
          { text: '核心篇', link: '/core/index' },
          { text: '核心篇1', link: '/core/core1' },
          { text: '核心篇2', link: '/core/core2' }
        ]
      },
      {
        text: '教学篇',
        items: [
          { text: '教学篇', link: '/teach/index' },
          { text: '教学篇1', link: '/teach/teach1' },
          { text: '教学篇2', link: '/teach/teach2' }
        ]
      },
      {
        text: '总结篇',
        items: [
          { text: '总结篇', link: '/summarize/index' },
          { text: '总结篇', link: '/summarize/summarize1' },
          { text: '总结篇', link: '/summarize/summarize2' }
        ]
      },
      {
        text: '团队篇',
        items: [
          { text: '团队篇', link: '/team/index' },
          { text: '团队篇', link: '/team/team1' },
          { text: '团队篇', link: '/team/team2' }
        ]
      }
    ],
  }
})
4.1.3. 页面效果展示

4.1.4. 配置注意项
- 基本用法是传入一个数组,
text是侧边栏名词,link是链接 - 每个
link都是以/开头,而且不需要加/docs,直接以docs/index.md文件配置相对路径 - 不需要加
.md后缀 items可以嵌套,最多嵌入 6 级深度,超过将被忽略,且不会显示
4.2. 多左侧边栏
很多时候我们需要根据不同的路径显示不同的侧边栏
比如:我想把基础篇、API 篇、核心篇用同一个侧边栏,教学篇、总结篇、团队篇用同一个侧边栏
4.2.1. 新建 utils.ts 文件
在 config.mts 同级创建 utils.ts 文件
docs/.vitepress
├── config.mts
└── utils.ts
4.2.2. 写入一下代码
/**
 * @param {string} pathname pathname 值
 * @returns {SidebarItem[]} 侧边栏数组
 */
export const getSideBarList = (pathname: string) => {
  if (['/basic', '/core', '/api'].includes(pathname)) {
    return [
      {
        text: '基础篇',
        items: [
          { text: '基础篇', link: '/basic/index' },
          { text: '基础篇1', link: '/basic/basic1' },
          { text: '基础篇2', link: '/basic/basic2' }
        ]
      },
      {
        text: 'API 篇',
        items: [
          { text: 'API篇', link: '/api/index' },
          { text: 'API篇1', link: '/api/api1' },
          { text: 'API篇2', link: '/api/api2' }
        ]
      },
      {
        text: '核心篇',
        items: [
          { text: '核心篇', link: '/core/index' },
          { text: '核心篇1', link: '/core/core1' },
          { text: '核心篇2', link: '/core/core2' }
        ]
      }
    ]
  }
  return [
    {
      text: '教学篇',
      items: [
        { text: '教学篇', link: '/teach/index' },
        { text: '教学篇1', link: '/teach/teach1' },
        { text: '教学篇2', link: '/teach/teach2' }
      ]
    },
    {
      text: '总结篇',
      items: [
        { text: '总结篇', link: '/summarize/index' },
        { text: '总结篇1', link: '/summarize/summarize1' },
        { text: '总结篇2', link: '/summarize/summarize2' }
      ]
    },
    {
      text: '团队篇',
      items: [
        { text: '团队篇', link: '/team/index' },
        { text: '团队篇1', link: '/team/team1' },
        { text: '团队篇2', link: '/team/team2' }
      ]
    }
  ]
}
4.2.3. 在 config.mts 中引入
import { defineConfig } from 'vitepress'
import { getSideBarList } from './utils' // 引入 getSideBarList 方法
export default defineConfig({
  title: "My VitePress Demo Project",
  description: "This is my VitePress demo project",
  appearance: false,
  themeConfig: {
    ...,
    sidebar: {
      '/basic/': getSideBarList('/basic'),
      '/api/': getSideBarList('/api'),
      '/core/': getSideBarList('/core'),
      '/teach/': getSideBarList('/teach'),
      '/summarize/': getSideBarList('/summarize'),
      '/team/': getSideBarList('/team'),
    }
  }
})
4.2.4. 页面效果展示

4.2.5. 配置注意项
- 多侧边栏配置时,
sidebar为对象 key的值为/basic/、/basic、basic都可以,但是建议以/basic/为key
4.3. 可折叠侧边栏:collapsed
默认情况下,所有的侧边栏都是展开显示的,可以设置 collapsed 来控制展开和隐藏
4.3.1. sidebar 配置
[
  {
    text: '基础篇',
    collapsed: false,
    items: [
      { text: '基础篇', link: '/basic/index' },
      { text: '基础篇1', link: '/basic/basic1' },
      { text: '基础篇2', link: '/basic/basic2' }
    ]
  },
  {
    text: 'API 篇',
    collapsed: true,
    items: [
      { text: 'API篇', link: '/api/index' },
      { text: 'API篇1', link: '/api/api1' },
      { text: 'API篇2', link: '/api/api2' }
    ]
  },
  {
    text: '核心篇',
    collapsed: false,
    items: [
      { text: '核心篇', link: '/core/index' },
      { text: '核心篇1', link: '/core/core1' },
      { text: '核心篇2', link: '/core/core2' }
    ]
  }
]
4.3.2. 页面效果展示

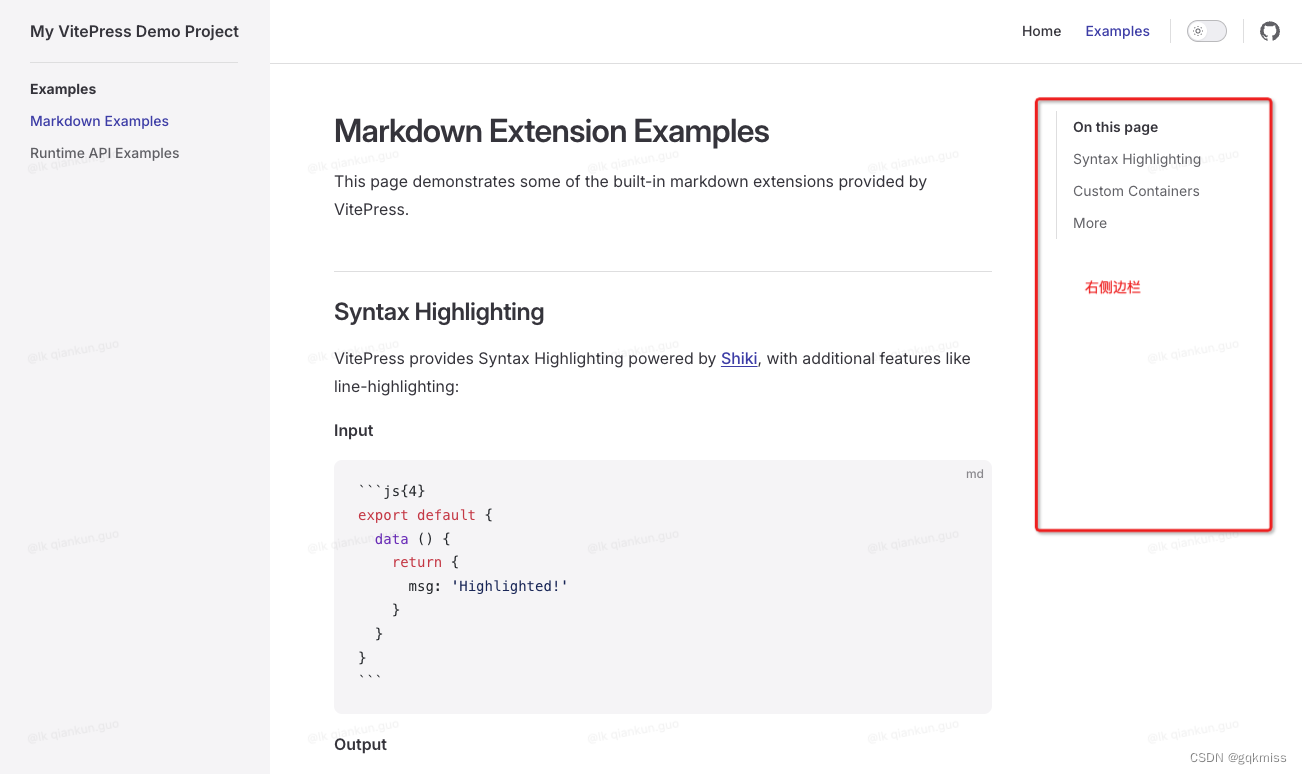
5. 右侧边栏
右侧边栏是大纲中显示的标题导航块
配置 outline 字段可以设置渲染大纲层级
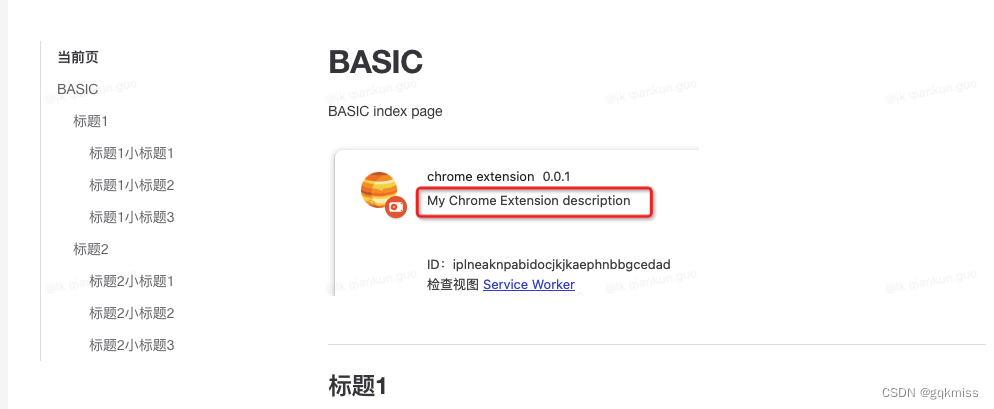
5.1. 在 basic 中的 index.md 写入以下内容
# BASIC

BASIC index page

## 标题1

标题1 描述

### 标题1小标题1
标题1小标题1 描述

#### 小小标题1
小小标题1 描述

##### 5级标题1
5级标题 描述

###### 6级标题1
6级标题 描述

###### 6级标题1
6级标题 描述

##### 5级标题2
5级标题 描述

###### 6级标题1
6级标题 描述

###### 6级标题1
6级标题 描述

#### 小小标题2
小小标题2 描述

### 标题1小标题2
标题1小标题2 描述

#### 小小标题1
小小标题1 描述

#### 小小标题2
小小标题2 描述

##### 5级标题1
5级标题 描述

###### 6级标题1
6级标题 描述

###### 6级标题1
6级标题 描述

##### 5级标题2
5级标题 描述

###### 6级标题1
6级标题 描述

###### 6级标题1
6级标题 描述

### 标题1小标题3
标题1小标题3 描述

#### 小小标题1
小小标题1 描述

#### 小小标题2
小小标题2 描述

## 标题2

标题2 描述

### 标题2小标题1
标题2小标题1 描述

### 标题2小标题2
标题2小标题2 描述

### 标题2小标题3
标题2小标题3 描述
右侧边栏效果展示
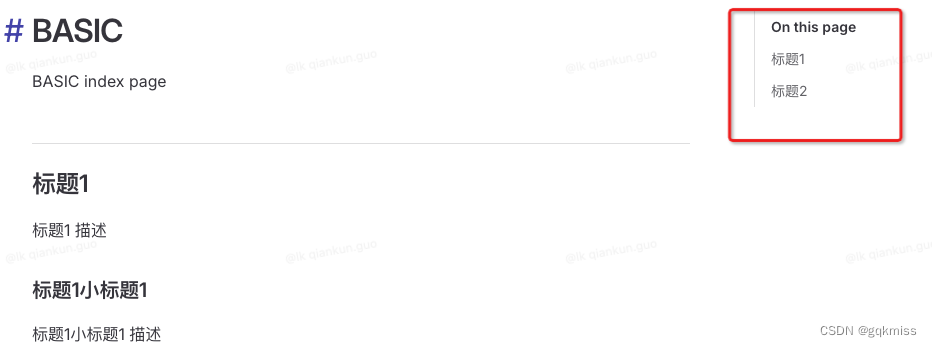
可以看出只展示了 h2 标题,outline 的默认值为 2
5.2. 在 themeConfig 中添加 outline 字段
5.2.1. false 值
没有 true 类型,只有 false,设置 false 时不展示右侧边栏
5.2.2. 单个数值
export default defineConfig({
  themeConfig: {
    ...,
    outline: 3,
  }
})
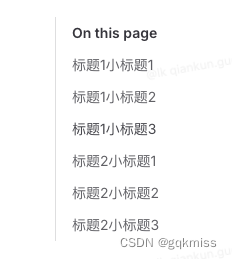
只展示 h3 标题
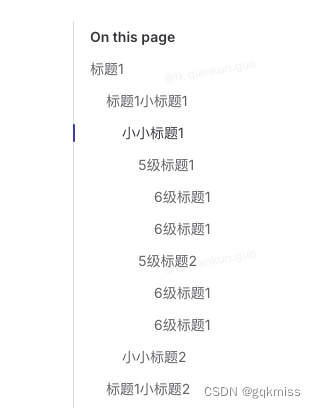
5.2.3. deep 字段
当为字符串时,只有 deep 一个字段,与 [2, 6] 相同,展示 h2~h6 所有标题
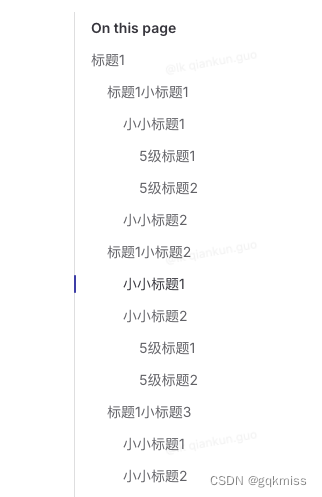
5.2.4. 数组形式
export default defineConfig({
  themeConfig: {
    ...,
    outline: [2,5],
  }
})
展示 h2~h5 的标题
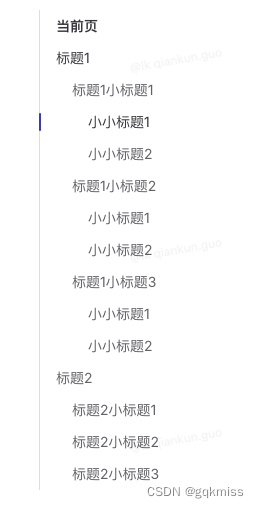
5.2.5. 对象形式
export default defineConfig({
  themeConfig: {
    ...,
    outline: {
      level: [2,4],
      label: '当前页'
    },
  }
})
当是对象形式的时候,有 level 和 label 两个字段
level:number | [number, number] | 'deep',是展示标题等级label:string,是outline的标题,替换On this page文案
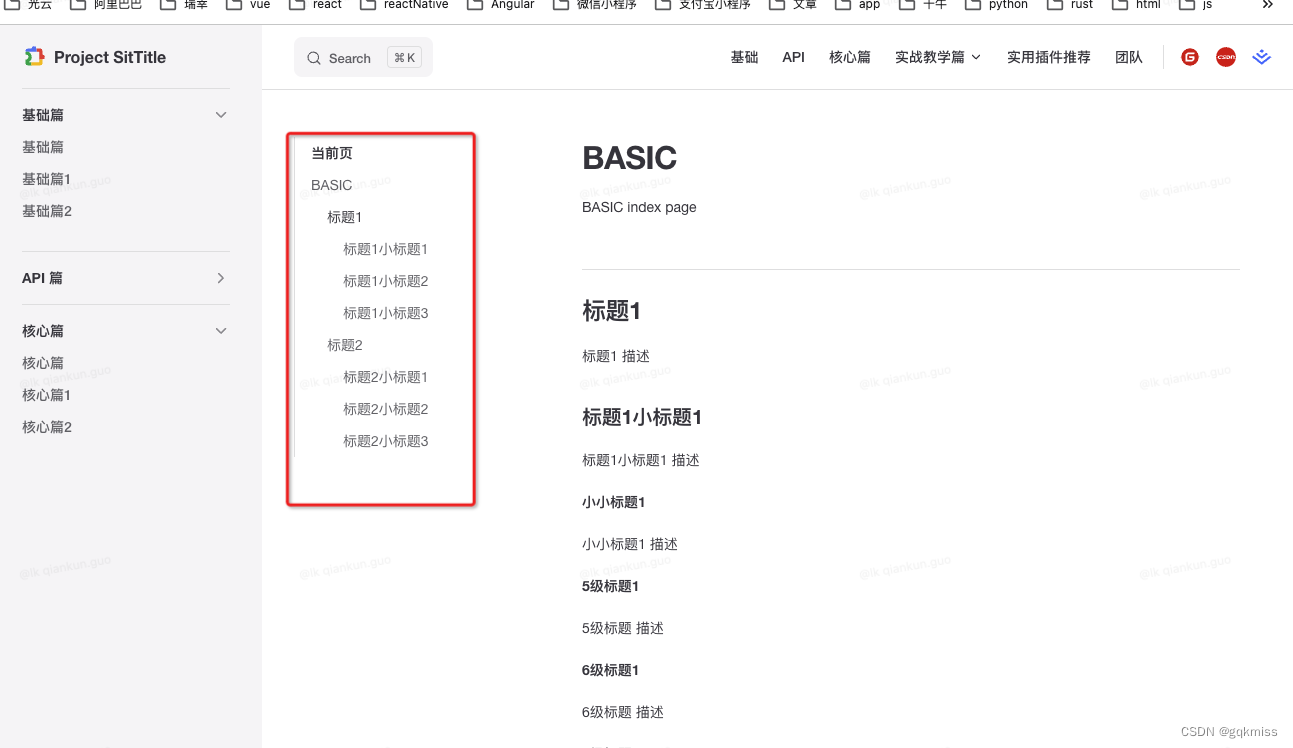
5.3. 在当前页面中覆盖 config.mts 中的配置
在 basic/index.md 文件顶部写入以下内容
---
outline: 'deep'
---
---
outline:
  level: [1,3]
---
在当前页面的 outline 中配置 label 不生效,还是会用到 config 中的配置或者默认值
5.4. 展示在页面内容左边
将 aside 设置为 left
---
outline:
  level: [1,3]
  label: 基础篇
aside: left
---
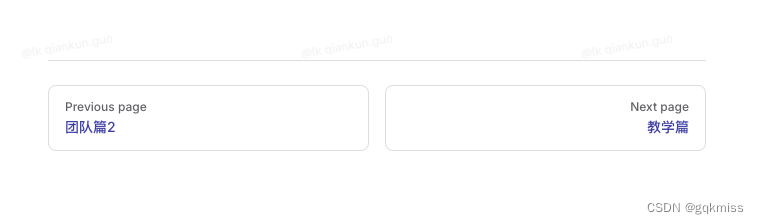
6. 上一页&下一页
可以自定义上一页和下一页的文本和链接
如果在 xx.md 文件中不指定上一页和下一页的话,vitePress 会从侧边栏配置中推断
6.1. 类型
string | false | { text?: string; link?: string }
6.2. 页面配置
在对应的 md 文件顶部添加以下内容
---
prev:
  text: '团队篇2'
  link: '/team/team2'
next:
  text: '教学篇'
  link: '/teach/index'
---
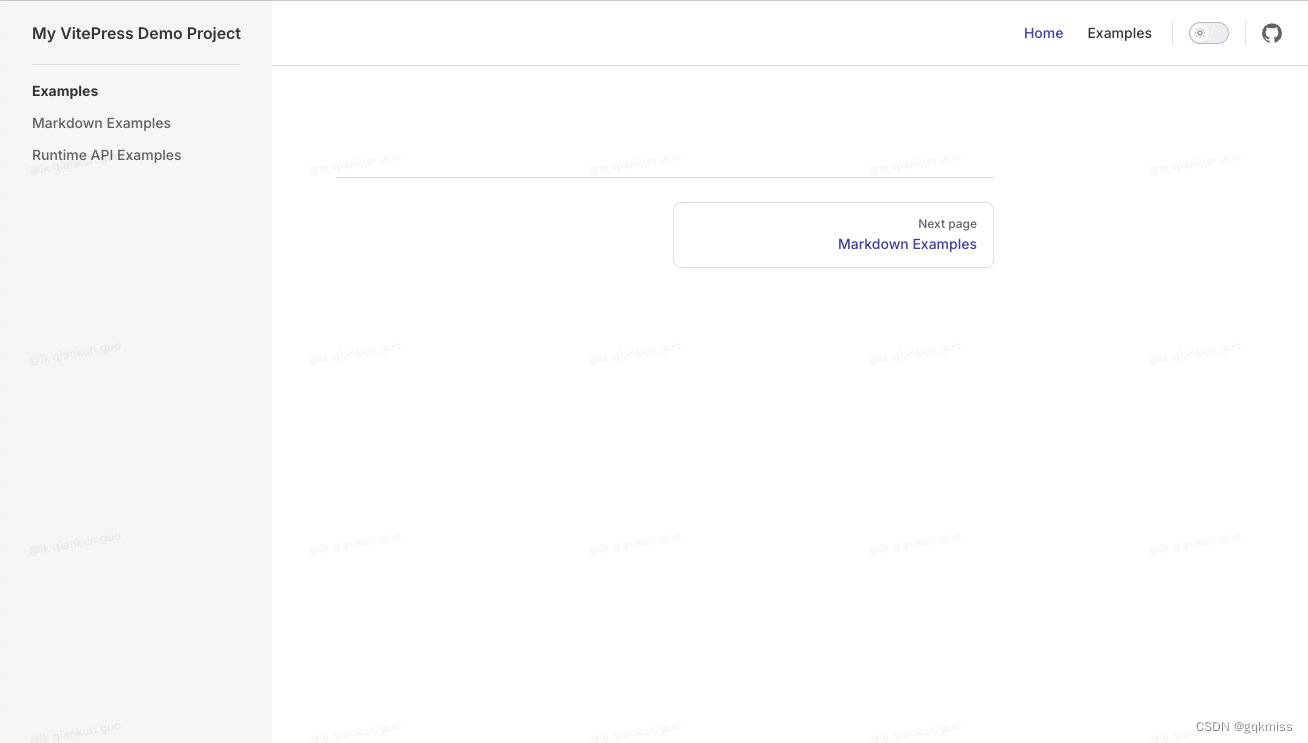
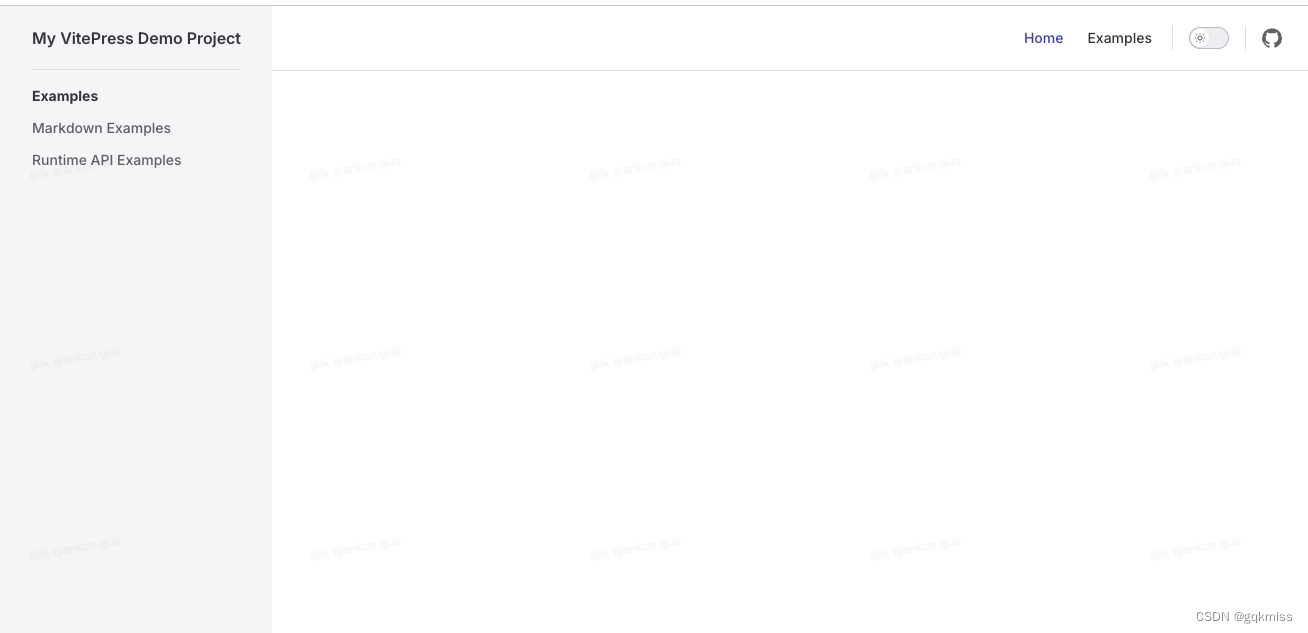
6.3. 页面效果展示
7. 配置项目 head
head 模块配置的内容会添加在项目的 head 标签中,在 config 中配置
7.1. 数据类型
type HeadConfig =
  | [string, Record<string, string>]
  | [string, Record<string, string>, string]
7.2. 添加 favicon
export default defineConfig({
  title: "My VitePress Demo Project",
  description: "This is my VitePress demo project",
  appearance: false,
  head: [
    ['link', { rel: 'icon', href: '/extension.ico'}]
  ],
  themeConfig: {
	...
  }
})

7.3. 添加字体
export default defineConfig({
  title: "My VitePress Demo Project",
  description: "This is my VitePress demo project",
  appearance: false,
  head: [
    ['link', { rel: 'icon', href: '/extension.ico'}],
    ['link', { rel: 'preconnect', href: 'https://fonts.googleapis.com' }]
  ],
  themeConfig: {
	...
  }
})
7.4. 添加 CSS 文件
export default defineConfig({
  title: "My VitePress Demo Project",
  description: "This is my VitePress demo project",
  appearance: false,
  head: [
    ['link', { rel: 'icon', href: '/extension.ico'}],
    ['link', { rel: 'preconnect', href: 'https://fonts.googleapis.com' }],
    ['link', { rel: 'stylesheet', href: 'https://xxx.com/static/layui/css/layui.css' }],
  ],
  themeConfig: {
	...
  }
})
7.5. 添加 JS 文件
export default defineConfig({
  title: "My VitePress Demo Project",
  description: "This is my VitePress demo project",
  appearance: false,
  head: [
    ['link', { rel: 'icon', href: '/extension.ico'}],
    ['link', { rel: 'preconnect', href: 'https://fonts.googleapis.com' }],
    ['link', { rel: 'stylesheet', href: 'https://xxx.com/static/layui/css/layui.css' }],
    ['script', { src: 'https://xxx.com/sdk.js'}]
  ],
  themeConfig: {
	...
  }
})
7.6. 添加 JS 代码
export default defineConfig({
  title: "My VitePress Demo Project",
  description: "This is my VitePress demo project",
  appearance: false,
  head: [
    ['link', { rel: 'icon', href: '/extension.ico'}],
    ['link', { rel: 'preconnect', href: 'https://fonts.googleapis.com' }],
    ['link', { rel: 'stylesheet', href: 'https://xxx.com/static/layui/css/layui.css' }],
    ['script', { src: 'https://xxx.com/sdk.js'}],
    ['script', {}, `
      console.log('window', window);
      console.log('document', document);
      `
    ]
  ],
  themeConfig: {
	...
  }
})

7.7. 最终渲染

8. 删除 URL 中的 .html 后缀
config 中配置 cleanUrls 为 true
类型:boolean
export default defineConfig({
  title: "My VitePress Demo Project",
  description: "This is my VitePress demo project",
  appearance: false,
  cleanUrls: true,
  ...
})
9. 图片资源
9.1. 图片直接放在 public 文件夹中
如果图片直接放在 public 文件夹中,在项目中使用的话,直接 /xxx.png 即可,VitePress 会自处理
9.2. 在 public 文件中创建对应模块的文件夹
有时候图片资源太多,想分类整理,那就在 public 中创建对应模块的文件夹,把当前模块的资源放在对应的文件夹中。
docs/public/basic
├── basic-desc.png
└── basic-popup.png
9.2.1. 开发引入图片 ❌

在开发的时候,你发现直接写图片名称也可以显示图片,这个时候你很高兴
9.2.2. build 项目
pnpm run docs:build
当你辛辛苦苦开发完成,build 项目时,发现报错了…
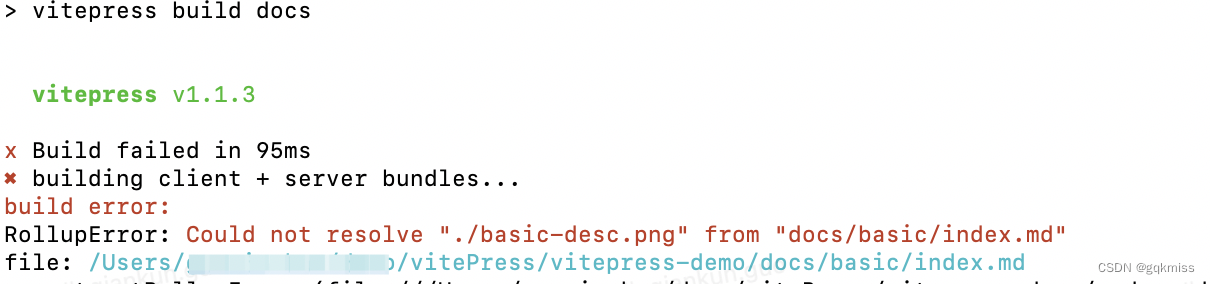
所以你不能直接写图片名称,哪怕它能正确显示
9.2.3. 正确引入图片✅
要把文件夹的名称加上

四、项目部署到 github
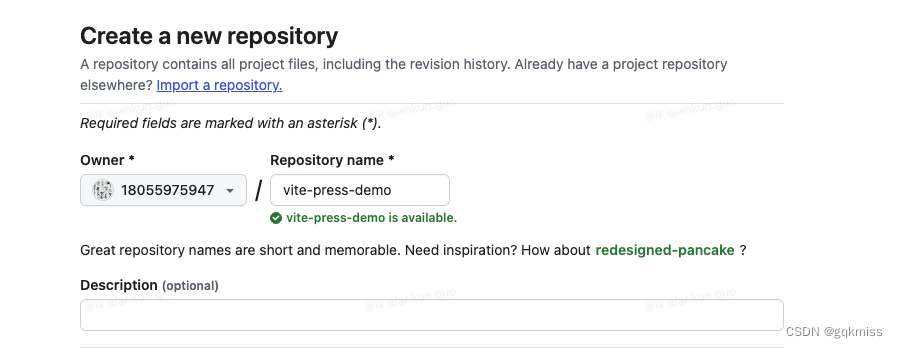
1. 新建 github 项目
2. 构建 VitePress 项目
2.1. 设置 config 中的 base
由于我们的项目名称为 vite-press-demo,所以我们把 base 设置为 /vite-press-demo/,需注意前后 /
export default defineConfig({
  base: '/vite-press-demo/',
  ...,
})
2.2. 页面显示异常
这个时候你发现本地页面显示异常
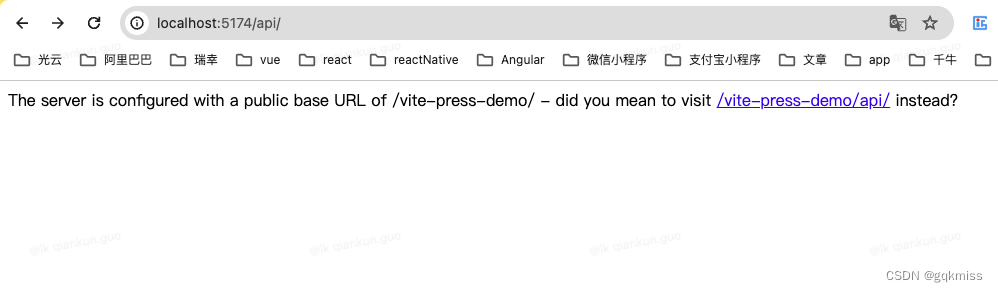
是因为配置了 base 之后,导致路径不正确,点击上面的链接即可
2.3. favicon 显示异常
配置好 base 之后,你发现其他页面都没问题,图片也都能正常显示,但是 favicon 不能正常显示。

只需要把 head 中配置的 icon 路径改下即可,加上 /vite-press-demo 前缀
head: [
    ['link', { rel: 'icon', href: '/vite-press-demo/extension.ico'}],
], // 加上 /vite-press-demo 前缀

2.4. 运行 pnpm run docs:build 进行项目构建
项目正常构建成功

3. 项目发布到 github 上
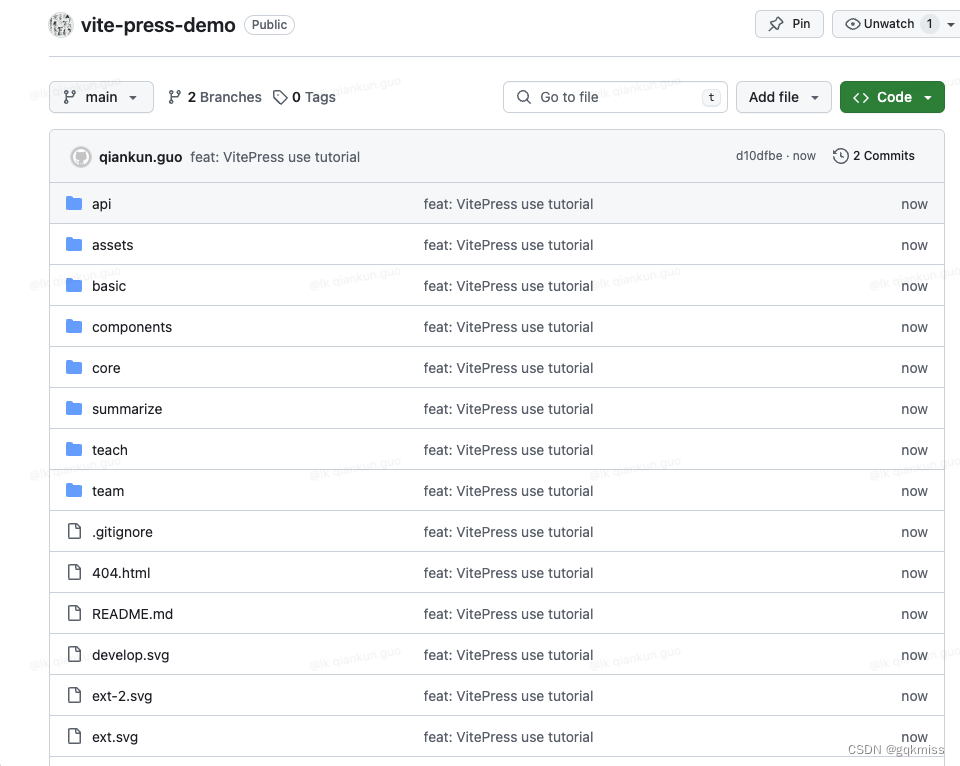
3.1. clone 项目,并把构建的内容发布到 main 分支
是构建之后 dist 文件夹中的内容,不包括 dist 文件夹
.
├── 404.html
├── README.md
├── api
├── assets
├── basic
├── components
├── core
├── develop.svg
├── ext-2.svg
├── ext.svg
├── extension.ico
├── hashmap.json
├── index.html
├── react.svg
├── summarize
├── teach
├── team
├── tj.svg
└── vue.svg
3.2. 部署到 github
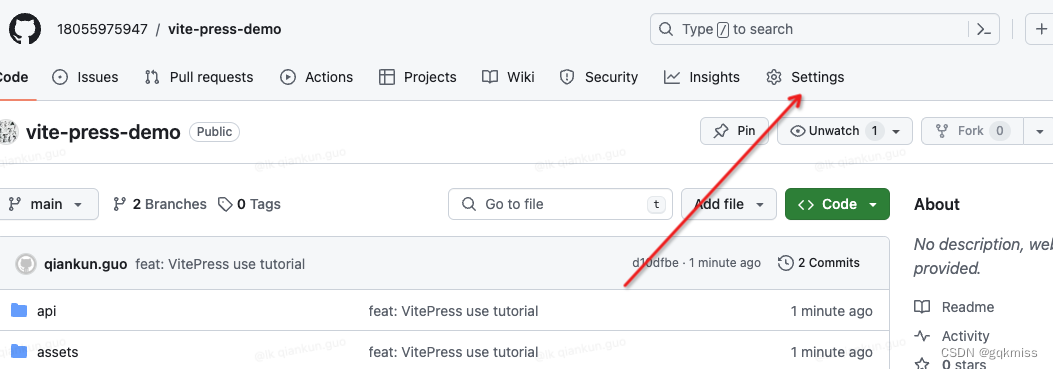
3.2.1. 点击 Setting 按钮
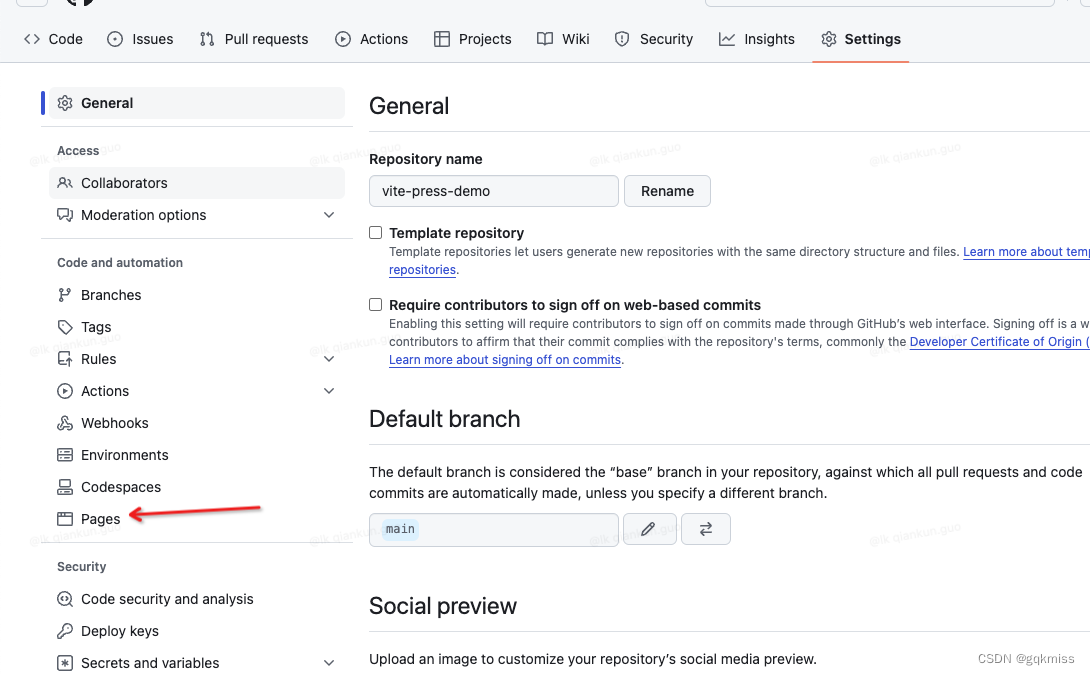
3.2.2. 点击 Pages 按钮
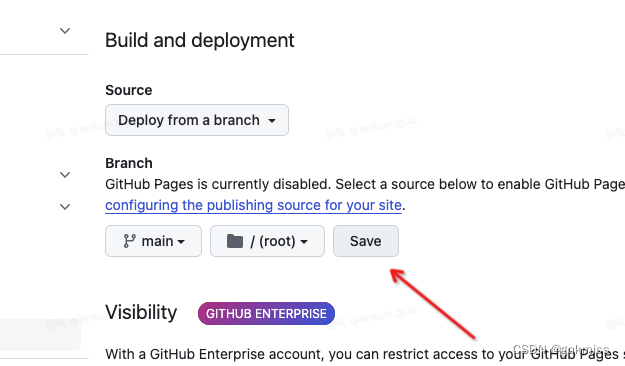
3.2.3. 找到 Branch,并下拉选择 main 分支
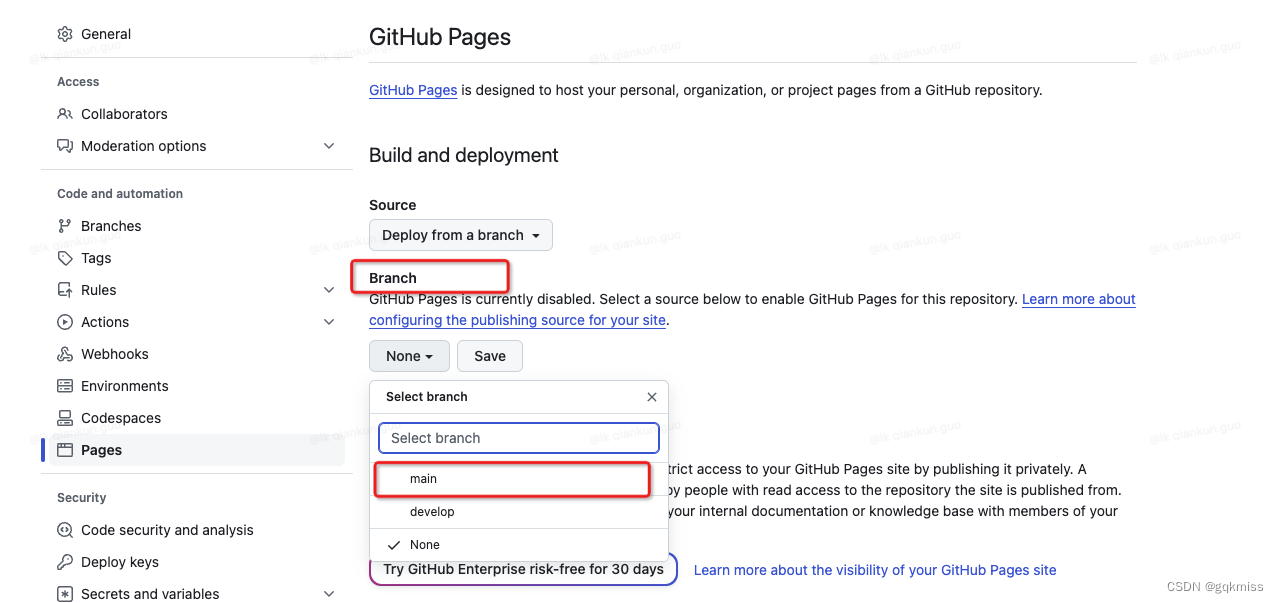
3.2.4. 点击 Save 保存
3.2.5. 等…
等几分钟,一般一分钟以内
不停的刷新当前页面也行
然后就会发现当前页面多了个 Visit site 模块
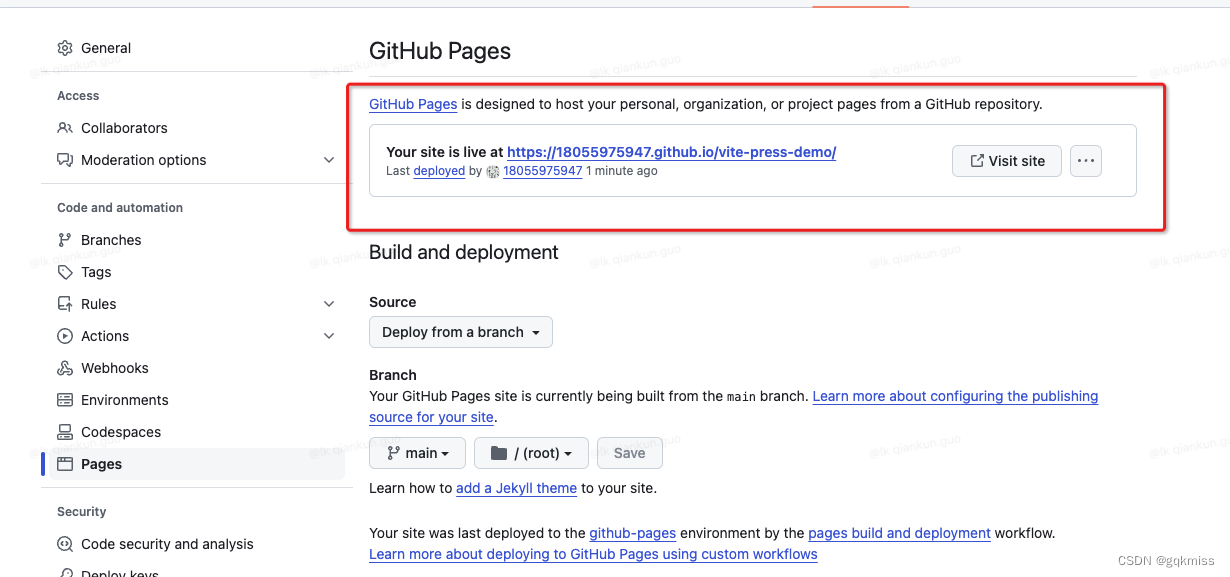
3.2.6. 点击 Visit site
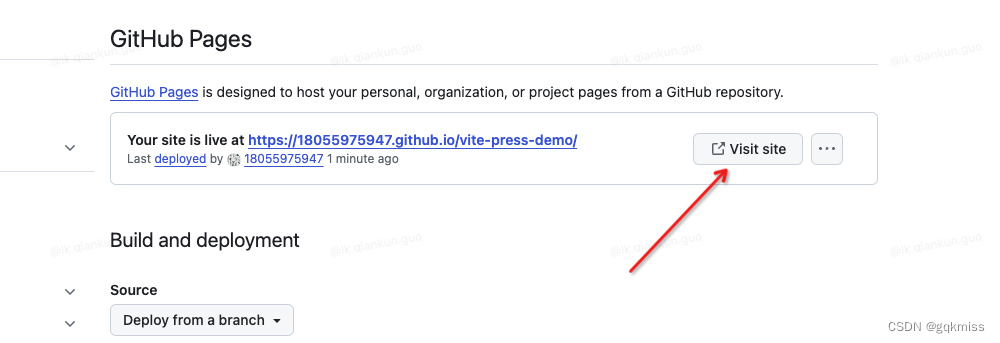
点击之后,就跳转到对应的网站链接啦…
我这边是这个:https://18055975947.github.io/vite-press-demo/

4. 更新项目
当文档内容需要更新的时候,在开发完成之后,重新构建完成,把 dist 文件夹中内容重新发布到 main 分支即可,剩下的就是等就行
也可以点击 Setting-> Pages 模块刷新页面
可以看到这下面有部署的时间点

五、总结
1. 项目目录
.
├── docs
│   ├── .vitepress
│   │   ├── config.mts
│   │   └── utils.ts
│   ├── api
│   │   ├── api1.md
│   │   ├── api2.md
│   │   └── index.md
│   ├── basic
│   │   ├── basic1.md
│   │   ├── basic2.md
│   │   └── index.md
│   ├── components
│   │   └── test.md
│   ├── core
│   │   ├── core1.md
│   │   ├── core2.md
│   │   └── index.md
│   ├── index.md
│   ├── public
│   │   ├── basic
│   │   │   ├── basic-desc.png
│   │   │   └── basic-popup.png
│   │   ├── develop.svg
│   │   ├── ext-2.svg
│   │   ├── ext.svg
│   │   ├── extension.ico
│   │   ├── react.svg
│   │   ├── tj.svg
│   │   └── vue.svg
│   ├── summarize
│   │   ├── index.md
│   │   ├── summarize1.md
│   │   └── summarize2.md
│   ├── teach
│   │   ├── index.md
│   │   ├── teach1.md
│   │   └── teach2.md
│   └── team
│       ├── index.md
│       ├── team1.md
│       └── team2.md
├── package.json
└── pnpm-lock.yaml
2. 项目代码
源码:【develop 分支】
Demo 预览:【demo 项目预览】
3. 结束语
- 到这整个
vitePress构建博客并部署到github就基本结束了 - 还差一些自定义主题的内容,这个后面有时间再说
- 如果有问题可以在掘金、
CSDN或者github上找我,看到都会回复 - 希望能帮助到大家
- 🎉🎉🎉
![达梦数据查询语句不带模式名称,报错无效的表或视图名[某某表]](https://img-blog.csdnimg.cn/direct/0d72efec789f4e7d916d5984e6464667.png)