Flutter概要
![]()
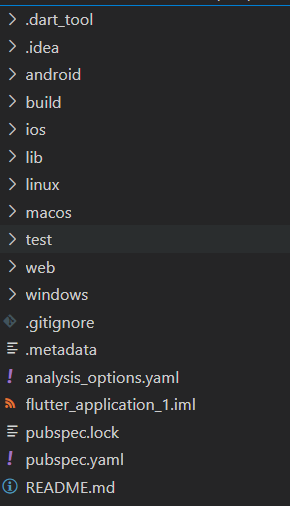
Flutter目录结构
| 文件夹 | 作用 |
| android | android 平台相关代码 |
| ios | ios平台相关代码 |
| lib | flutter相关代码,我们主要编写的代码就在这个文件夹中 |
| test | 用于存放测试的代码 |
| pubspec.yaml | 配置文件,一般存放一些第三方库的依赖 |
Flutter入口文件、入口方法
每一个 flutter 项目的 lib 目录里面都有一个 main.dart 这个文件就是 flutter 的入口文件。
main.dart里面
void main() {
  runApp(const MyApp());
}
其中的 main 方法是 dart 的入口方法。runApp 方法是 flutter 的入口方法。 MyApp 是自定义的一个组件。
单独的内容抽离成的一个组件
在 Flutter 中自定义组件其实就是一个类,这个类需要继承 StatelessWidget/StatefulWidget
前期我们都继承 StatelessWidget。
- StatelessWidget 是无状态组件,状态不可变的 widget
- StatefulWidget 是有状态组件,持有的状态可能在 widget 生命周期改变
MaterialApp和Scaffold装饰APP
MaterialApp 是一个方便的 Widget,它封装了应用程序实现 Material Design 所需要的
一些 Widget。一般作为顶层widget 使用。
常用的属性:
- home(主页)
- title(标题)
- color(颜色)
- theme(主题)
- routes(路由)
class MyApp extends StatelessWidget {
  const MyApp({super.key});

  // This widget is the root of your application.
  @override
  Widget build(BuildContext context) {
    return MaterialApp(
      title: 'Flutter Demo',
      theme: ThemeData(
        // This is the theme of your application.
        //
        // Try running your application with "flutter run". You'll see the
        // application has a blue toolbar. Then, without quitting the app, try
        // changing the primarySwatch below to Colors.green and then invoke
        // "hot reload" (press "r" in the console where you ran "flutter run",
        // or simply save your changes to "hot reload" in a Flutter IDE).
        // Notice that the counter didn't reset back to zero; the application
        // is not restarted.
        primarySwatch: Colors.red,
      ),
      home: const MyHomePage(title: 'Flutter Demo Home Page'),
    );
  }
}
Scaffold 是 Material Design 布局结构的基本实现。此类提供了用于显示 drawer、snackbar和底部 sheet 的API。
Scaffold 有下面几个主要属性:
- appBar - 显示在界面顶部的一个 AppBar。
- body - 当前界面所显示的主要内容 Widget。
- drawer - 抽屉菜单控件。
class _MyHomePageState extends State<MyHomePage> {
  int _counter = 0;

  void _incrementCounter() {
    setState(() {
      // This call to setState tells the Flutter framework that something has
      // changed in this State, which causes it to rerun the build method below
      // so that the display can reflect the updated values. If we changed
      // _counter without calling setState(), then the build method would not be
      // called again, and so nothing would appear to happen.
      _counter++;
    });
  }

  @override
  Widget build(BuildContext context) {
    // This method is rerun every time setState is called, for instance as done
    // by the _incrementCounter method above.
    //
    // The Flutter framework has been optimized to make rerunning build methods
    // fast, so that you can just rebuild anything that needs updating rather
    // than having to individually change instances of widgets.
    return Scaffold(
      appBar: AppBar(
        // Here we take the value from the MyHomePage object that was created by
        // the App.build method, and use it to set our appbar title.
        title: Text(widget.title),
      ),
      body: Center(
        // Center is a layout widget. It takes a single child and positions it
        // in the middle of the parent.
        child: Column(
          // Column is also a layout widget. It takes a list of children and
          // arranges them vertically. By default, it sizes itself to fit its
          // children horizontally, and tries to be as tall as its parent.
          //
          // Invoke "debug painting" (press "p" in the console, choose the
          // "Toggle Debug Paint" action from the Flutter Inspector in Android
          // Studio, or the "Toggle Debug Paint" command in Visual Studio Code)
          // to see the wireframe for each widget.
          //
          // Column has various properties to control how it sizes itself and
          // how it positions its children. Here we use mainAxisAlignment to
          // center the children vertically; the main axis here is the vertical
          // axis because Columns are vertical (the cross axis would be
          // horizontal).
          mainAxisAlignment: MainAxisAlignment.center,
          children: <Widget>[
            const Text(
              'You have pushed the button this many times:',
            ),
            Text(
              '$_counter',
              style: Theme.of(context).textTheme.headlineMedium,
            ),
          ],
        ),
      ),
      floatingActionButton: FloatingActionButton(
        onPressed: _incrementCounter,
        tooltip: 'Increment',
        child: const Icon(Icons.add),
      ), // This trailing comma makes auto-formatting nicer for build methods.
    );
  }
}
各类组件
Flutter Container 组件、Text组件
Flutter Container 组件
| 名称 | 功能 |
| alignment | topCenter:顶部居中对齐 topLeft:顶部左对齐 topRight:顶部右对齐 center:水平垂直居中对齐 centerLeft:垂直居中水平居左对齐 centerRight:垂直居中水平居右对齐 bottomCenter 底部居中对齐 bottomLeft:底部居左对齐 bottomRight:底部居右对齐 |
| decoration | decoration: BoxDecoration( color: Colors.blue, border: Border.all( color: Colors.red, width: 2.0, ), borderRadius: BorderRadius.all( Radius.circular(8.0) ) ) |
| margin | margin 属性是表示 Container 与外部其他 组件的距离。 EdgeInsets.all(20.0), |
| padding | padding 就是 Container 的内边距,指 Container 边缘与 Child 之间的距离 padding: EdgeInsets.all(10.0) |
| transform | 让 Container 容易进行一些旋转之类 transform: Matrix4.rotationZ(0.2) |
| height | 容器高度 |
| width | 容器宽度 |
| child | 容器子元素 |
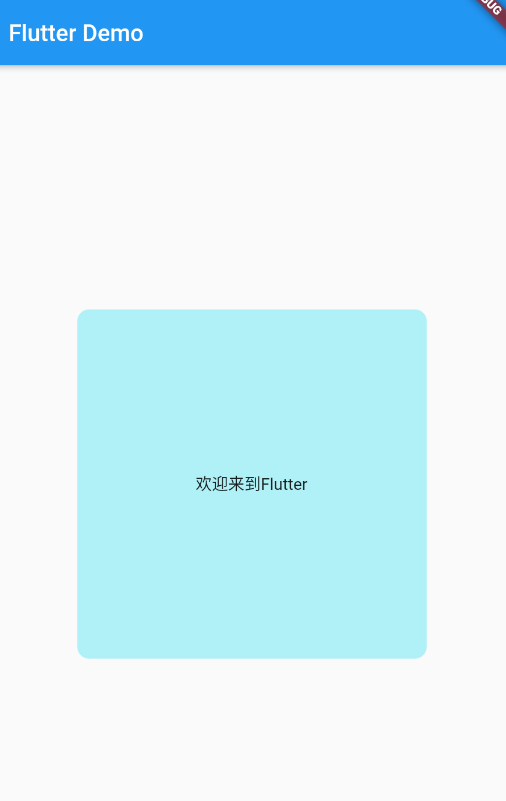
import'package:flutter/material.dart';

 void main(){
  runApp(MyApp());
  }

  // 自定义主键
  class MyApp extends StatelessWidget{
  @override
  Widget build(BuildContext context) {
    return MaterialApp(
      home: Scaffold(
        appBar: AppBar(
          title: Text("Flutter Demo"),
        ),
        body: BodyConent(),
      ),
    );
  }


  }

  // 内容组件
  class BodyConent extends StatelessWidget{
  @override
  Widget build(BuildContext context) {
    return Center(
      child: Container(
      //child 容器元素
      child:Text("欢迎来到Flutter"),
      // 装饰
      // 背景 颜色浅蓝色
      decoration: BoxDecoration(color: Color.fromRGBO(100, 233, 244, 0.5),
      // 圆角
      borderRadius: BorderRadius.all(Radius.circular(10.0))),
      // 对齐方式
      alignment: Alignment.center,
      width: 300.0 ,
      height: 300.0,
      ),
    );

  }

  }
Flutter Text 组件
| 名称 | 功能 |
| textAlign | 文本对齐方式(Center居中、left左对齐、right右对齐、justfy两端对齐) |
| textDirection | 文本方向(ltr从左至右、rtl从右到左) |
| overflow | 文字超出屏幕之后的处理方式(clip裁剪、fade渐隐、ellipsis省略) |
| textScaleFactor | 字体显示倍率 |
| maxLines | 文字显示最大行数 |
| style | 字体的样式设置 |
TextStyle的参数
| 名称 | 功能 |
| decoration | 文字装饰线(none 没有线,lineThrough 删 除线,overline 上划线,underline 下划线) |
| decorationColor | 文字装饰线颜色 |
| decorationStyle | 文字装饰线风格([dashed,dotted]虚线, double 两根线,solid 一根实线,wavy 波浪线) |
| wordSpacing | 单词间隙(如果是负值,会让单词变得更紧 凑 |
| letterSpacing | 字母间隙(如果是负值,会让字母变得更紧 凑) |
| fontStyle | 文字样式(italic 斜体,normal 正常体 |
| fontSize | 文字大小 |
| color | 文字颜色 |
| fontWeight | 字体粗细(bold 粗体,normal 正常体) |
import'package:flutter/material.dart';

 void main(){
  runApp(MyApp());
  }

  // 自定义主键
  class MyApp extends StatelessWidget{
  @override
  Widget build(BuildContext context) {
    return MaterialApp(
      home: Scaffold(
        appBar: AppBar(
          title: Text("Flutter Demo"),
        ),
        body: BodyConent(),
      ),
    );
  }


  }

  // 内容组件
  class BodyConent extends StatelessWidget{
  @override
  Widget build(BuildContext context) {
    var text = Text(
      "欢迎来到Flutter开发学习",
      // 对齐方式-居中
      textAlign: TextAlign.center,
      // 文字超出处理 ...
      overflow: TextOverflow.ellipsis,
      // 字体放大
      textScaleFactor: 2.0,
      // 具体样式
      style: TextStyle(
        // 下划线
        decoration:TextDecoration.underline,
        // 单词界限
        wordSpacing: 3.0,
        // 文字颜色
        color:Color.fromRGBO(255, 255, 255, 2) ,
         ),

    );
    return Center(
      child: Container(
      //child 容器元素
      child:text,
      // 装饰
      // 背景 颜色浅蓝色
      decoration: BoxDecoration(color: Color.fromRGBO(100, 233, 244, 0.5),
      // 圆角
      borderRadius: BorderRadius.all(Radius.circular(10.0))),
      // 对齐方式
      alignment: Alignment.center,
      width: 300.0 ,
      height: 300.0,
      ),
    );

  }

  }
图片组件
图片组件是显示图像的组件,Image 组件有很多构造函数。
Image.asset, 本地图片
Image.network 远程图片
| 名称 | 类型 | 说明 |
| alignment | Alignment | 图片对齐方式 |
| color | colorBlendMode | 设置图片的背景颜色,通常和 colorBlendMode 配合一起 使用,这样可以是图片颜色和背景色混合。上面的图片就 是进行了颜色的混合,绿色背景和图片红色的混合 | |
| fit | BoxFit | fit 属性用来控制图片的拉伸和挤压,这都是根据父容器来 的。 BoxFit.fill:全图显示,图片会被拉伸,并充满父容器。 BoxFit.contain:全图显示,显示原比例,可能会有空隙。 BoxFit.cover:显示可能拉伸,可能裁切,充满(图片要 充满整个容器,还不变形) BoxFit.fitWidth:宽度充满(横向充满),显示可能拉伸, 可能裁切。 BoxFit.fitHeight :高度充满(竖向充满),显示可能拉 伸,可能裁切。 BoxFit.scaleDown:效果和 contain 差不多,但是此属 性不允许显示超过源图片大小,可小不可大 |
| repeat | 平铺 | ImageRepeat.repeat: 横向和纵向都进行重复,直到铺满整 个画布。 ImageRepeat.repeatX: 横向重复,纵向不重复。 ImageRepeat.repeatY:纵向重复,横向不重复 |
| width | 宽度 一般结合 ClipOval 才能看到效果 | |
| height | 高度 一般结合 ClipOval 才能看到效果 |
import'package:flutter/material.dart';

 void main(){
  runApp(MyApp());
  }

  // 自定义组键
  class MyApp extends StatelessWidget{
  @override
  Widget build(BuildContext context) {
    return MaterialApp(
      home: Scaffold(
        appBar: AppBar(
          title: Text("Flutter Demo"),
        ),
        body: BodyConent(),
      ),
    );
  }


  }

  // 内容组件
  class BodyConent extends StatelessWidget{
  @override
  Widget build(BuildContext context) {
    return Center(
      child: Container(
      //child 容器元素
      // 装饰
      // 背景 颜色浅蓝色
      decoration: BoxDecoration(
        color: Color.fromRGBO(100, 233, 244, 0.5),
        // 图片组件-网络图片
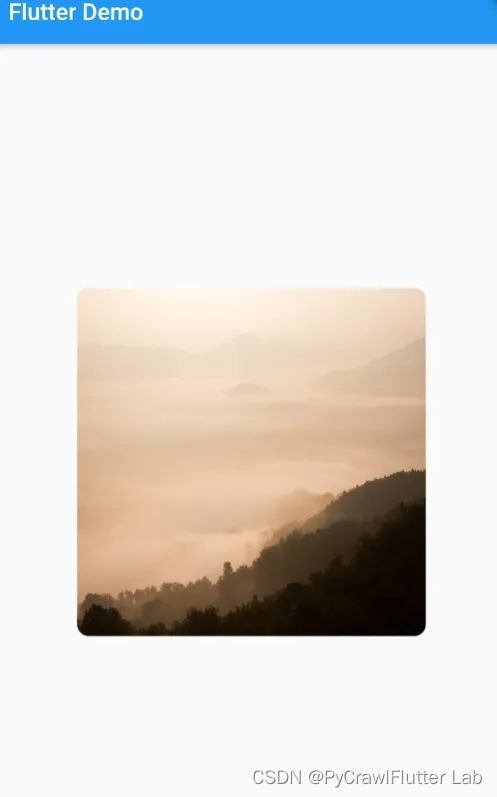
        image: DecorationImage(image: NetworkImage('https:\/\/www.logosc.cn\/uploads\/resources\/2023\/03\/17\/1679044779.jpg'),
        // 全图显示
        fit: BoxFit.fill),

      // 圆角
      borderRadius: BorderRadius.all(Radius.circular(10.0))),
      // 对齐方式
      alignment: Alignment.center,
      width: 300.0 ,
      height: 300.0,
      ),
    );

  }

  }
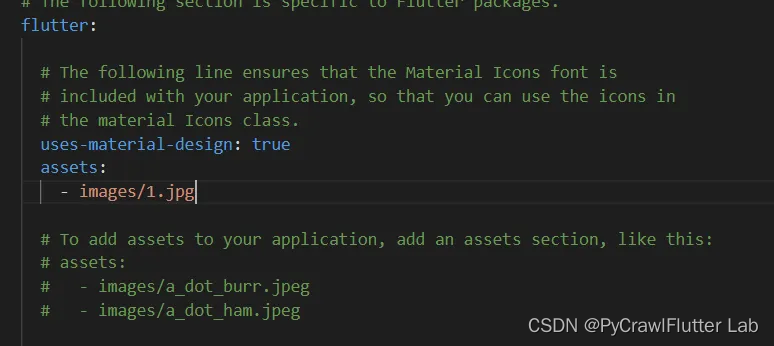
本地引入图片
1、根目录新建images文件夹
2、pubspec.yaml 配置路径
Flutter ListView 组件
列表布局是我们项目开发中最常用的一种布局方式。
Flutter 中我们可以通过 ListView 来定义 列表项,支持垂直和水平方向展示。
通过一个属性就可以控制列表的显示方向。
列表有以下分类:
- 垂直列表
- 垂直图文列表
- 水平列表
- 动态列表
- 矩阵式列表
| 名称 | 类型 | 说明 |
| scrollDirection | Axis | Axis.horizontal 水平列表 Axis.vertical 垂直列表 |
| padding | EdgeInsetsGeometry | 内边距 |
| resolve | bool | 组件反向排序 |
| children | List<Widget> | 列表元素 |
基本列表
class ListContent extends StatelessWidget{
  @override
  Widget build(BuildContext context) {

    return Container(
      child:ListView(children: [
          ListTile(
          leading: Icon(Icons.smart_button),
          title: Text("愿人平安幸福如意"),
        ),
        ListTile(
          leading: Icon(Icons.ac_unit_sharp),
          title: Text("生活如意,事事顺心"),
        ),
        ListTile(
          leading: Icon(Icons.ac_unit_sharp),
          title: Text("时来运转,好运连连"),
        ),
                ListTile(
          leading: Icon(Icons.access_time_sharp),
          title: Text("心想事成,梦想成真"),
        ),
                ListTile(
          leading: Icon(Icons.access_alarm_outlined),
          title: Text("世界和平,人心安宁"),
        ),
                ListTile(
          leading: Icon(Icons.access_alarm),
          title: Text("爱与和谐,家庭美满"),
        ),
                ListTile(
          leading: Icon(Icons.ac_unit_outlined),
          title: Text("健康长寿,幸福美好"),
        ),
      ],
      )
    );
  }

}
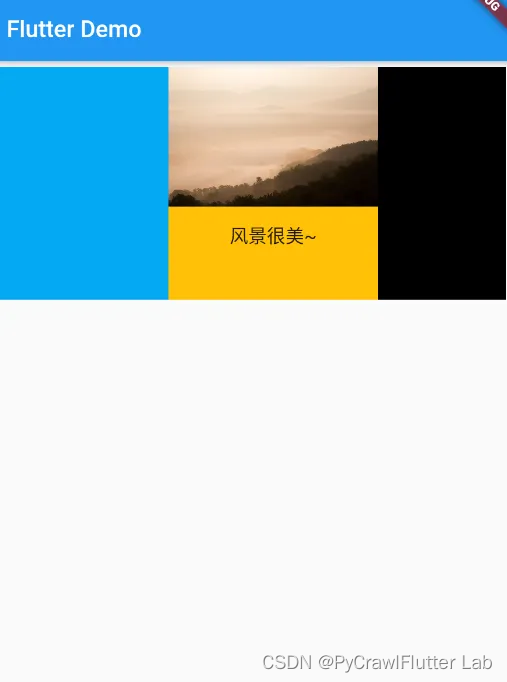
水平列表
class ListContent1 extends StatelessWidget{
  @override
  Widget build(BuildContext context) {

    return Container(
      height: 200.0,
      margin: EdgeInsets.all(5),
      child: ListView(
        // 水平列表
        scrollDirection: Axis.horizontal ,
        children:<Widget> [
          Container(
            width: 150.0,
            color: Colors.lightBlue,
          ),
          Container(
            width: 180.0,
            color: Colors.amber,
            child: ListView(
              children:  <Widget> [
                Image.network("https:\/\/www.logosc.cn\/uploads\/resources\/2023\/03\/17\/1679044779.jpg"),
                SizedBox(height:16.0),
                Text('风景很美~', textAlign:TextAlign.center, style:TextStyle( fontSize:16.0 ), )
              ],

            ),
          ),
          Container(
            width: 150.0,
            color: Colors.black,
          )

        ],

      ),

    );

  }

}
动态列表
// 列表-动态组件
class ListDynamic extends StatelessWidget{

  List content_list = [];
  ListDynamic({key}):super(key: key){
    for(var i=0; i<20; i++){
      content_list.add("这是第$i条数据");
    }
  }
  @override
  Widget build(BuildContext context) {
    return ListView.builder(
      itemCount: this.content_list.length,
      itemBuilder: (context, index){
        return ListTile(
          leading: Icon(Icons.ac_unit),
          title: Text("${content_list[index]}"),
        );
      },
    );


  }

}
Flutter GridView 组件
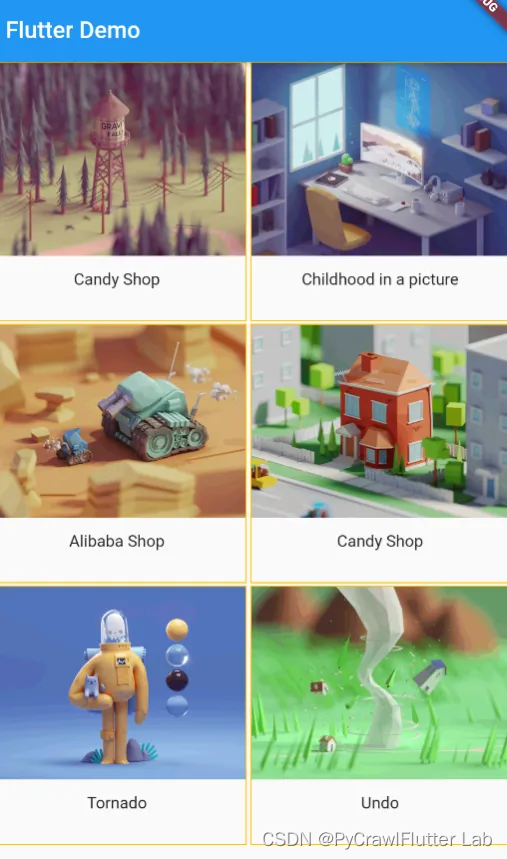
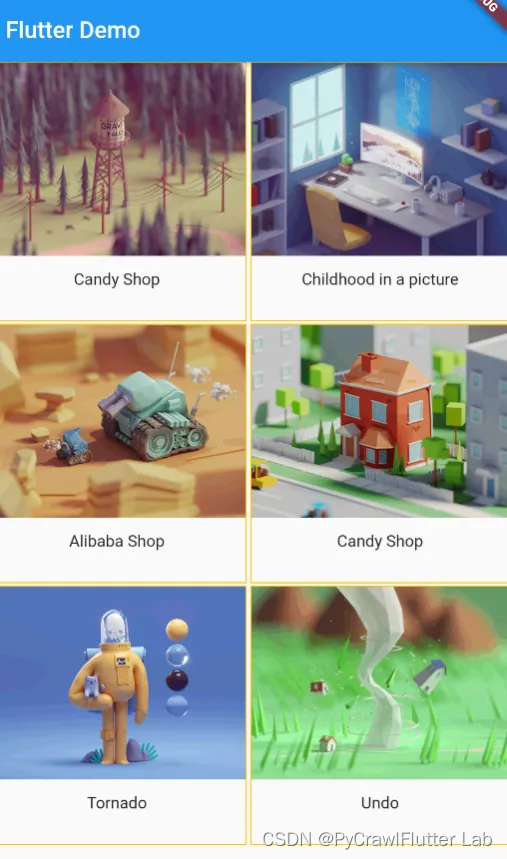
当数据量很大的时候用矩阵方式排列比较清晰。此时我们可以用网格列表组件 GridView 实现布局。
GridView 创建网格列表有多种方式,下面我们主要介绍两种。
1、可以通过 GridView.count 实现网格布局
2、通过 GridView.builder 实现网格布局
| 名称 | 类型 | 说明 |
| scrollDirection | Axis | 滚动方法 |
| padding | EdgeInsetsGeometry | 内边距 |
| resolve | bool | 组件反向排序 |
| crossAxisSpacing | double | 水平子Widget之间间距 |
| mainAxisSpacing | double | 垂直Widget之间间距 |
| crossAxisCount | int | 一行的Widget数量 |
| childAspectRatio | double | 子 Widget 宽高比例 |
| children | <Widget>[ ] | |
| gridDelegate | SliverGridDelegateWithFix edCrossAxisCount(常用) SliverGridDelegateWithMax CrossAxisExtent | 控制布局主要用在 GridView.builder 里面 |
FlutterGridView.count 实现网格布局
class LayoutContent extends StatelessWidget{

  // 定义返回数据列表
  List <Widget> _getListData(){
   var tempList = listData.map((value) {
    return Container(
      child: Column(
        children: <Widget>[
          Image.network(value["imageUrl"]),
          SizedBox(height: 12),
          Text(value["title"],
          textAlign: TextAlign.center,
          )
        ],
      ),
      decoration: BoxDecoration(border: Border.all(color: Colors.amber)),
    );

    });
    return tempList.toList();
  }


  @override
  Widget build(BuildContext context) {
    return GridView.count(
      // 列数3
      crossAxisCount:2,
      // 垂直间距
      mainAxisSpacing: 2.0 ,
      // 水平间距
      crossAxisSpacing: 3.0,
      children:this._getListData(),
    );

  }

}
FlutterGridView.builder 实现网格布局
class LayoutContent extends StatelessWidget{

  // 定义返回数据列表
  List <Widget> _getListData(){
   var tempList = listData.map((value) {
    return Container(
      child: Column(
        children: <Widget>[
          Image.network(value["imageUrl"]),
          SizedBox(height: 12),
          Text(value["title"],
          textAlign: TextAlign.center,
          )
        ],
      ),
      decoration: BoxDecoration(border: Border.all(color: Colors.amber)),
    );

    });
    return tempList.toList();
  }


  @override
  Widget build(BuildContext context) {
    return GridView.count(
      // 列数3
      crossAxisCount:2,
      // 垂直间距
      mainAxisSpacing: 2.0 ,
      // 水平间距
      crossAxisSpacing: 3.0,
      children:this._getListData(),
    );

  }

}
PaddiingRowColumn Expanded 页面布局
在 html 中常见的布局标签都有 padding 属性,但是 Flutter 中很多 Widget 是没有 padding 属 性。这个时候我们可以用 Padding 组件处理容器与子元素直接的间距。
class PaddingContent extends StatelessWidget{

  // 返回列表
  List <Widget> _getDate(){
    var tempList = listData.map((value){
      return Padding(
        padding: EdgeInsets.fromLTRB(0, 10, 10, 0),
        child: Image.network(value["imageUrl"],fit: BoxFit.cover),
      );
    });

    return tempList.toList();

  }

  @override
  Widget build(BuildContext context) {
    return GridView.count(
        // 两列显示
      crossAxisCount: 2,
      children: this._getDate(),
    );
  }

}
FlutterRow 布局组件
| 属性 | 说明 |
| mainAxiAlignment | 主轴的排序方式 |
| crossAxiAlignment | 次轴的排序方式 |
| children | 组件子元素 |
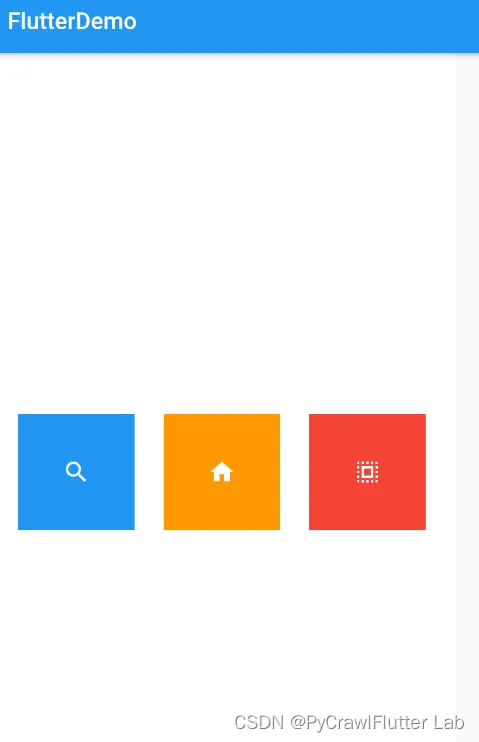
水平布局Row
class IconContainer extends StatelessWidget{

  double size;
  IconData icon;
  Color color;

  IconContainer(this.icon,{this.size=32.0, this.color=Colors.red});

  @override
  Widget build(BuildContext context) {

  return Container(
    width: this.size+60,
    height: this.size+60,
    color: this.color,
    child: Center(child: Icon(this.icon, color: this.color, size: this.size,)),
);
  }
}


class RowContent extends StatelessWidget{
  @override
  Widget build(BuildContext context) {
   return Container(
    height: 800,
    width: 600,
    color:  Colors.black26,
    child: Row(
      // 水平对齐方式-居中
      crossAxisAlignment: CrossAxisAlignment.center,
      mainAxisAlignment: MainAxisAlignment.spaceEvenly,
      children: <Widget>[
          IconContainer(Icons.home, color: Colors.red),
          IconContainer(Icons.search, color: Colors.blue),
          IconContainer(Icons.send, color: Colors.orange),
      ],
    ),
   );
  }

}
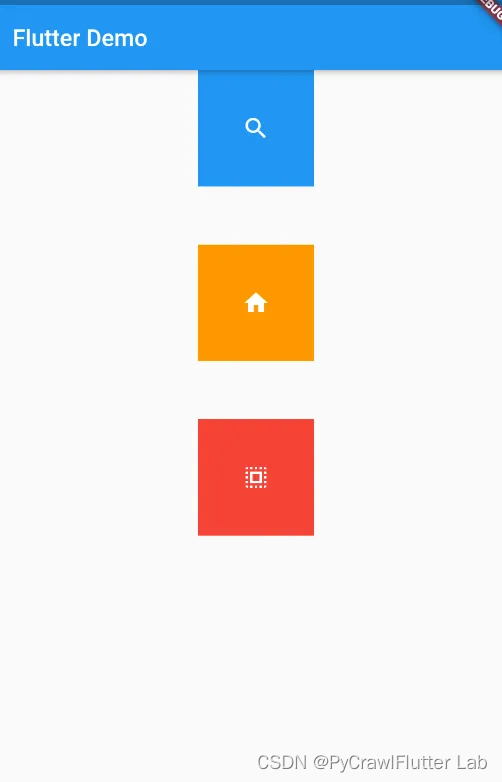
垂直布局Column
| 属性 | 说明 |
| mainAxisAlignment | 主轴的排序方式 |
| crossAxisAlignment | 次轴的排序方式 |
| children | 组件子元素 |
class IconContainer1 extends StatelessWidget{
  double size=32.0;
  Color color=Colors.red;
  IconData icon;
  IconContainer1(this.icon,{this.color,this.size});
  @override
  Widget build(BuildContext context) {
    // TODO: implement build
    return Container(
      height: 100.0,
      width: 100.0,
      color: this.color,
      child: Center(
        child: Icon(this.icon,size: this.size,color: Colors.white)
      ),
    );
  }
}

class CloumnContent extends StatelessWidget{
  @override
  Widget build(BuildContext context) {

    return Container(
      width: 500,
      height: 400,
      child: Column(
        // 垂直布局
        crossAxisAlignment: CrossAxisAlignment.center,
        mainAxisAlignment: MainAxisAlignment.spaceBetween,
        children:<Widget> [
          IconContainer1(Icons.search,color: Colors.blue),
          IconContainer1(Icons.home,color: Colors.orange),
          IconContainer1(Icons.select_all,color: Colors.red),
        ],
      ),
    );
  }

}
Row和Column结合
FlutterExpanded类似Web中的Flex 布局
Expanded 可以用在 Row 和 Column 布局中
| 属性 | 说明 |
| flex | 元素占整个父Row/Colum的比例 |
| child | 子元素 |
class LayoutContent extends StatelessWidget{
  @override
  Widget build(BuildContext context) {
    return Padding(
      padding: EdgeInsets.all(10),
      child: Row(mainAxisAlignment:MainAxisAlignment.center,
        children: <Widget>[
          Expanded(flex:2,child:IconContainer(Icons.home)),
          SizedBox(width:10),
          Expanded(flex:3,child:IconContainer(Icons.search)),
        ],

      ),
    );
  }

}

class IconContainer extends StatelessWidget {
  double size;
  IconData icon;
  Color color;

  IconContainer(this.icon, {this.size =32.0, this.color = Colors.blue});

  @override
  Widget build(BuildContext context) {
    // TODO: implement build
    return Container(
        width: this.size + 60,
        height: this.size + 60,
        color: this.color,
        child: Center(
            child: Icon(this.icon, color: Colors.white, size: this.size)));
  }
}
Flutter Stack 层叠组件
Stack 表示堆的意思,我们可以用 Stack 或者 Stack 结合 Align 或者 Stack 结合 Positiond 来实 现页面的定位布局。
| 属性 | 说明 |
| alignment | 配置所有子元素的显示位置 |
| children | 子组件 |
import 'package:flutter/material.dart';

void main(){
  runApp(MyApp());
}

class MyApp extends StatelessWidget{
  @override
  Widget build(BuildContext context) {
    return MaterialApp(
      home: Scaffold(
        appBar: AppBar(title :Text("Flutter Demo")),
        body: LayOutContent(),),
    );
  }

}

class LayOutContent extends StatelessWidget{
  @override
  Widget build(BuildContext context) {

    return Center(
      child: Stack(alignment: Alignment.center,
      children: <Widget>[
          Container(height: 400, width: 400, color: Colors.black),
          Text('我是一个文本',style: TextStyle(fontSize: 30, color: Colors.amber),)
      ],),
    );
  }

}
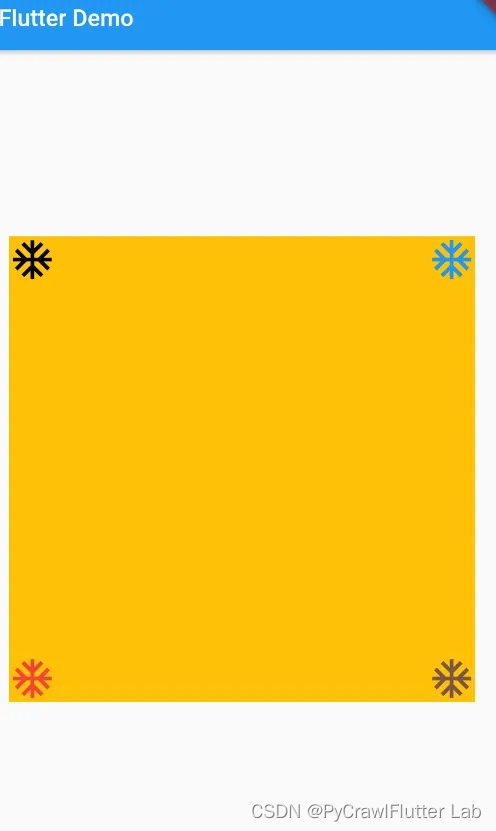
Stack 组件中结合 Align 组件可以控制每个子元素的显示位置
| 属性 | 说明 |
| alignment | 配置所有子元素的显示位置 |
| children | 子组件 |
class LayOutContent1 extends StatelessWidget{
  @override
  Widget build(BuildContext context) {

   return Center(
    child: Container(
      height: 400,
      width: 400,
      color: Colors.amber,
      child: Stack(children: <Widget>[
        Align(alignment: Alignment(1,-1), child: Icon(Icons.ac_unit, size: 40, color: Colors.blue)),
        Align(alignment: Alignment(1,1),child: Icon(Icons.ac_unit,size: 40, color: Colors.brown)),
        Align(alignment: Alignment(-1,1),child: Icon(Icons.ac_unit_sharp,size: 40, color: Colors.red)),
        Align(alignment: Alignment(-1,-1),child: Icon(Icons.ac_unit_sharp,size: 40, color: Colors.black)),

      ],),
    )
   );

  }

}
Stack 组件中结合 Positioned 组件也可以控制每个子元素的显示位置。
| 属性 | 说明 |
| top | 子元素距离顶部的距离 |
| bottom | 子元素距离底部的距离 |
| left | 子元素距离左侧的距离 |
| right | 子元素距离右侧的距离 |
| child | 子组件 |
class LayOutContent1 extends StatelessWidget{
  @override
  Widget build(BuildContext context) {

   return Center(
    child: Container(
      height: 400,
      width: 400,
      color: Colors.amber,
      child: Stack(children: <Widget>[
        Positioned(child: Icon(Icons.ac_unit, size: 40, color: Colors.blue),top: 10),
        Positioned(child: Icon(Icons.ac_unit, size: 40, color: Colors.brown),top: 60,),
        Positioned(child: Icon(Icons.ac_unit, size: 40, color: Colors.black),top: 110,),
        Positioned(child: Icon(Icons.ac_unit, size: 40, color: Colors.red),top: 160,),

      ],),
    )
   );

  }

}
Flutter AspectRatio组件
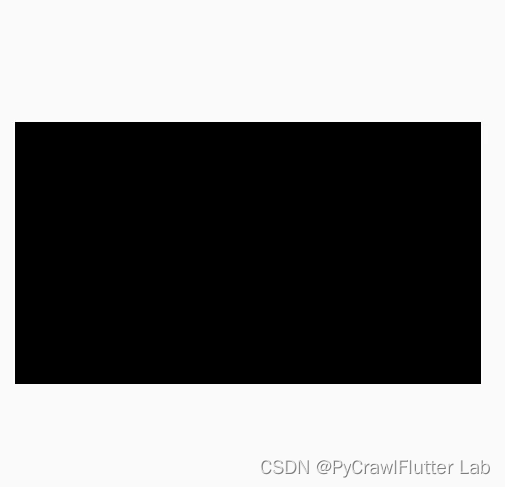
AspectRatio 的作用是根据设置调整子元素 child 的宽高比。
AspectRatio 首先会在布局限制条件允许的范围内尽可能的扩展,widget 的高度是由宽度和比率决定的,类似于 BoxFit 中的 contain,按照固定比率去尽量占满区域。
如果在满足所有限制条件过后无法找到一个可行的尺寸,AspectRatio 最终将会去优先 适应布局限制条件,而忽略所设置的比率。
| 属性 | 说明 |
| aspectRatio | 宽高比,最终可能不会根据这个值去布局, 具体则要看综合因素,外层是否允许按照这 种比率进行布局,这只是一个参考值 |
| child | 子组件 |
class LayOutdemo extends StatelessWidget{
  @override
  Widget build(BuildContext context) {

    return Center(
      child: Container(width: 400,
      child: AspectRatio(aspectRatio: 16.0/9.0,
      child: Container(color: Colors.black,),),),
    );
  }

}
Flutter Card 组件
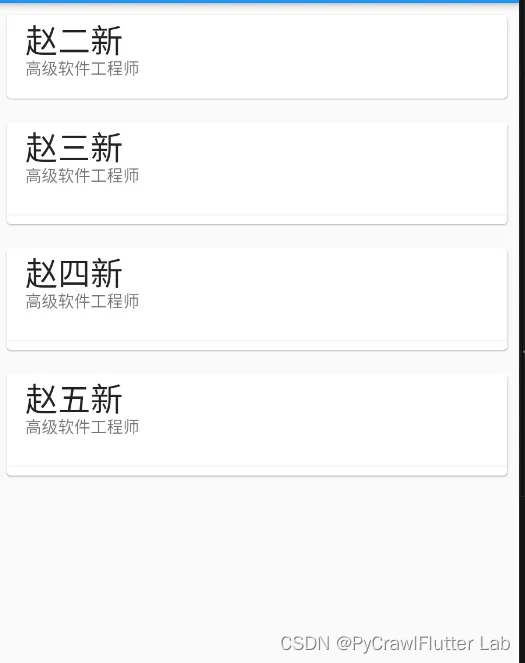
Card 是卡片组件块,内容可以由大多数类型的 Widget 构成,Card 具有圆角和阴影,这让它 看起来有立体感。
| 属性 | 说明 |
| margin | 外边距 |
| child | 子组件 |
| Shape | Card |
class LayOutDemoCard extends StatelessWidget {
  @override
  Widget build(BuildContext context) {
    return ListView(
      children: <Widget>[
        Card(
            margin: EdgeInsets.all(10),
            child: Column(
              children: <Widget>[
                ListTile(
                    title: Text("赵二新", style: TextStyle(fontSize: 28)),
                    subtitle: Text("高级软件工程师")),
              ],
            )),
        Card(
            margin: EdgeInsets.all(10),
            child: Column(
              children: <Widget>[
                ListTile(
                    title: Text("赵三新", style: TextStyle(fontSize: 28)),
                    subtitle: Text("高级软件工程师")),
                Divider(),
              ],
            )),
        Card(
            margin: EdgeInsets.all(10),
            child: Column(
              children: <Widget>[
                ListTile(
                    title: Text("赵四新", style: TextStyle(fontSize: 28)),
                    subtitle: Text("高级软件工程师")),
                Divider(),
              ],
            )),
        Card(
            margin: EdgeInsets.all(10),
            child: Column(
              children: <Widget>[
                ListTile(
                    title: Text("赵五新", style: TextStyle(fontSize: 28)),
                    subtitle: Text("高级软件工程师")),
                Divider(),
              ],
            )),
      ],
    );
  }
}
Flutter 页面布局 Wrap 组件
RaiseButton组件
Flutter 中通过 RaisedButton 定义一个按钮。RaisedButton 里面有很多的参数,这里只展示简单的例子。
class LayoutButton extends StatelessWidget {
  @override
  Widget build(BuildContext context) {
    // TODO: implement build
    return Container(
      child: RaisedButton(child: Text("点击"),textColor:Theme.of(context).accentColor,onPressed:(){}),
    );

  }
}
Wrap 组件
Wrap 可以实现流布局,单行的 Wrap 跟 Row 表现几乎一致,单列的 Wrap 则跟 Row 表 现几乎一致。但 Row 与 Column 都是单行单列的,Wrap 则突破了这个限制,mainAxis 上空 间不足时,则向 crossAxis 上去扩展显示。
| 属性 | 说明 |
| direction | 主轴说明,默认水平 |
| alignment | 主轴的对齐方向 |
| spacing | 主轴方向上的间距 |
| textDirection | 文本方向 |
| verticalDirection | 定义了 children 摆放顺序,默认是 down,见 Flex 相关属性介绍。 |
| runAlignment | run 的对齐方式。run 可以理解为新的行或者 列,如果是水平方向布局的话, run 可以理解 为新的一行 |
| runSpacing | run 的间距 |
class MyButton extends StatelessWidget{

  final String text;
  const MyButton(this.text,{key}):super(key: key);

  @override
  Widget build(BuildContext context) {
    return ElevatedButton(
      child: Text(this.text),
      onPressed: (){

      },
    );
  }

}


class LayoutButtonContent extends StatelessWidget{

  @override
  Widget build(BuildContext context) {
    return Wrap(
      spacing: 10,
      runSpacing: 10,
      alignment: WrapAlignment.spaceEvenly,
      children: <Widget>[
        MyButton("第一集"),
        MyButton("第二集"),
        MyButton("第三集"),
        MyButton("第四集"),
        MyButton("第五集"),
        MyButton("第六集"),
        MyButton("第七集"),
        MyButton("第八集"),
        MyButton("第九集"),
        MyButton("第十集"),
        MyButton("第十一集"),
      ],
    );
  }

}
Flutter StatefulWidget 组件
在 Flutter 中自定义组件其实就是一个类,这个类需要继承 StatelessWidget/StatefulWidget。
StatelessWidget 是无状态组件,状态不可变的 widget
StatefulWidget 是有状态组件,持有的状态可能在 widget 生命周期改变。
通俗的讲:如果我们想改变页面中的数据的话这个时候就需要用到 StatefulWidget
import 'package:flutter/material.dart';

void  main() {
  runApp( MyApp());
}


class MyApp extends StatelessWidget{
  @override
  Widget build(BuildContext context) {
    return MaterialApp(
      home:
      Scaffold(
        appBar: AppBar(title: Text("有状态的组件")),
        body: HomePage()),
    );
  }

}

class HomePage extends StatefulWidget{

  HomePage({Key key}):super(key: key);

  _HomePageState createState()=> _HomePageState();
}

class _HomePageState extends State<HomePage>{
  int count = 0;
  @override
  Widget build(BuildContext context) {

    return Container(
      child: Column(
        children: <Widget>[
          Chip(label: Text("${this.count}")),
          RaisedButton(child: Text("增加"), onPressed: (){
            setState(() {
              this.count++;
            });
          })
        ],
      ),
    );
  }

}

FlutterBottomNavigationBar
BottomNavigationBar 是底部导航条,可以让我们定义底部 Tab 切换,bottomNavigationBar 是 Scaffold 组件的参数。
| 属性 | 说明 |
| items | List<BottomNavigationBarItem> 底部导航 条按钮集合 |
| iconSize | icon |
| currentIndex | 默认选中第几个 |
| fixedColor | 选中的颜色 |
| type | BottomNavigationBarType.fixed BottomNavigationBarType.shifting |
class MyApp extends StatelessWidget{
  @override
  Widget build(BuildContext context) {
    return MaterialApp(
      home:
      Scaffold(
        appBar: AppBar(title: Text("有状态的组件")),
        body: HomePage(),
        bottomNavigationBar: BottomNavigationBar(items: [
          BottomNavigationBarItem(title: Text("首页"),icon: Icon(Icons.inbox)),
          BottomNavigationBarItem(title: Text("分类"),icon: Icon(Icons.search_off)),
          BottomNavigationBarItem(title: Text("设置"),icon: Icon(Icons.settings)),
        ],),
        ),
    );
  }

}
Flutter 中路由
普通路由、普通路由传值、 命名路由、命名路由传值
Flutter 中的路由通俗的讲就是页面跳转。
在 Flutter 中通过 Navigator 组件管理路由导航。 并提供了管理堆栈的方法。
如:Navigator.push 和 Navigator.pop
Flutter 中给我们提供了两种配置路由跳转的方式:1、基本路由 2、命名路由
基本路由
基本路由是一种简单的路由管理方式,通常用于小型应用或简单的导航需求。在基本路由中,您直接使用Navigator类来进行页面之间的切换,通常用Navigator.push来打开新页面,使用Navigator.pop来返回上一页。
import 'package:flutter/material.dart';

void main() => runApp(MyApp());

class MyApp extends StatelessWidget {
  @override
  Widget build(BuildContext context) {
    return MaterialApp(
      home: FirstScreen(),
    );
  }
}

class FirstScreen extends StatelessWidget {
  @override
  Widget build(BuildContext context) {
    return Scaffold(
      appBar: AppBar(title: Text('第一个屏幕')),
      body: Center(
        child: ElevatedButton(
          onPressed: () {
            Navigator.push(context, MaterialPageRoute(builder: (context) => SecondScreen()));
          },
          child: Text('打开第二个屏幕'),
        ),
      ),
    );
  }
}

class SecondScreen extends StatelessWidget {
  @override
  Widget build(BuildContext context) {
    return Scaffold(
      appBar: AppBar(title: Text('第二个屏幕')),
      body: Center(
        child: ElevatedButton(
          onPressed: () {
            Navigator.pop(context);
          },
          child: Text('返回第一个屏幕'),
        ),
      ),
    );
  }
}
命名路由
命名路由是一种更高级的路由管理方式,它允许您为每个页面分配一个唯一的名称,然后通过这些名称来导航到不同的页面。命名路由的优势在于它更适合大型应用,更易于维护和扩展。
import 'package:flutter/material.dart';

void main() => runApp(MyApp());

class MyApp extends StatelessWidget {
  @override
  Widget build(BuildContext context) {
    return MaterialApp(
      initialRoute: '/',
      routes: {
        '/': (context) => FirstScreen(),
        '/second': (context) => SecondScreen(),
      },
    );
  }
}

class FirstScreen extends StatelessWidget {
  @override
  Widget build(BuildContext context) {
    return Scaffold(
      appBar: AppBar(title: Text('第一个屏幕')),
      body: Center(
        child: ElevatedButton(
          onPressed: () {
            Navigator.pushNamed(context, '/second');
          },
          child: Text('打开第二个屏幕'),
        ),
      ),
    );
  }
}

class SecondScreen extends StatelessWidget {
  @override
  Widget build(BuildContext context) {
    return Scaffold(
      appBar: AppBar(title: Text('第二个屏幕')),
      body: Center(
        child: ElevatedButton(
          onPressed: () {
            Navigator.pop(context);
          },
          child: Text('返回第一个屏幕'),
        ),
      ),
    );
  }
}
Flutter AppBar 自定义顶部导航
| 属性 | 描述 |
| leading | 在标题前显示一个控件,在首页通常显示的Logo,在其他界面通常显示作为返回按钮 |
| title | 标题,通常显示为当前界面的标题文字,可以放组件 |
| actions | 通常使用IconButton来表示,可以放按钮 |
| bottom | 通常放tabBar,标题下面显示一个Tab导航栏 |
| backgroundColor | 导航背景颜色 |
| iconTheme | 图标样式 |
| textTheme | 文字样式 |
| CenterTitle | 标题是否居中显示 |
// 简单的顶部导航

import 'package:flutter/material.dart';

class AppBardemo extends StatelessWidget {
const AppBardemo({ Key key }) : super(key: key);

  @override
  Widget build(BuildContext context){
    return DefaultTabController(length: 2,
    child: Scaffold(appBar:  AppBar(title: Text("AppBarDemoPage"),
    centerTitle: true,
    bottom: TabBar(tabs: <Widget>[Tab(text: '热门'), Tab(text: '推荐',)],),

    ),
    body: TabBarView(children: <Widget>[
      ListView(
        children:<Widget> [
          ListTile(title: Text("第一个Tab")),
          ListTile(title: Text("第一个Tab")),
          ListTile(title: Text("第一个Tab")),

        ],
      ),
            ListView(
        children:<Widget> [
          ListTile(title: Text("第二个Tab")),
          ListTile(title: Text("第二个Tab")),
          ListTile(title: Text("第二个Tab")),

        ],
      ),

    ]),

    )


    );
  }
}
Flutter Drawer 侧边栏
在 Scaffold 组件里面传入 drawer 参数可以定义左侧边栏,传入 endDrawer 可以定义右侧边 栏。侧边栏默认是隐藏的,我们可以通过手指滑动显示侧边栏,也可以通过点击按钮显示侧 边栏。
Flutter DrawerHeader
| 属性 | 描述 |
| decoration | 设置顶部背景颜色 |
| child | 配置子元素 |
| padding | 内边距 |
| margin | 外边距 |
import 'package:flutter/material.dart';
import './tabs/Homepage.dart';
import './tabs/Categorypage.dart';
import './tabs/Settingspage.dart';

class Tabs extends StatefulWidget {
  const Tabs({Key key}) : super(key: key);

  @override
  _TabsState createState() => _TabsState();
}

class _TabsState extends State<Tabs> {
  int _currentIndex = 0;
  List _pageList = [Homepage(), Categorypage(), Settingspage()];
  @override
  Widget build(BuildContext context) {
    return Scaffold(
      appBar: AppBar(
        title: Text("Flutter Demo"),
      ),
      drawer: Drawer(child: Column(children: <Widget>[
        DrawerHeader(
          decoration: BoxDecoration(
          color: Colors.yellow,
          image: DecorationImage(
            image: NetworkImage("https://www.itying.com/images/flutter/1.png"),
            fit: BoxFit.cover
          ),
        ),
        child: ListView(
          children: <Widget>[
            Text('我是头部')
          ],
        ),
        ),
        ListTile(
          title: Text("个人中心"),
          leading: CircleAvatar(child: Icon(Icons.people),),
        ),
        Divider(),
        ListTile(
          title: Text("系统设置"),
          leading: CircleAvatar(child: Icon(Icons.settings),),
        )
      ],)),
      body: this._pageList[this._currentIndex],
      bottomNavigationBar: BottomNavigationBar(
        currentIndex: this._currentIndex,
        onTap: (int index) {
          setState(() {
            this._currentIndex = index;
          });
        },
        iconSize: 36.0,
        fixedColor: Colors.red,// 选中的颜色
        type: BottomNavigationBarType.fixed,
        items: [
            BottomNavigationBarItem(
              icon: Icon(Icons.home),
              title: Text("首页")
            ),
             BottomNavigationBarItem(
              icon: Icon(Icons.category),
              title: Text("分类")
            ),

             BottomNavigationBarItem(
              icon: Icon(Icons.settings),
              title: Text("设置")
            )
        ],
      ),
    );
  }
}

Flutter UserAccountsDraweHeader
| 属性 | 说明 |
| decoration | 设置顶部背景颜色 |
| accountName | 账户名称 |
| accountEmail | 账户邮箱 |
| currentAccountPicture | 用户头像 |
| otherAccountsPictures | 用来设置当前用户其它账户头像 |
import 'package:flutter/material.dart';
import './tabs/Homepage.dart';
import './tabs/Categorypage.dart';
import './tabs/Settingspage.dart';

class Tabs extends StatefulWidget {
  const Tabs({Key key}) : super(key: key);

  @override
  _TabsState createState() => _TabsState();
}

class _TabsState extends State<Tabs> {
  int _currentIndex = 0;
  List _pageList = [Homepage(), Categorypage(), Settingspage()];
  @override
  Widget build(BuildContext context) {
    return Scaffold(
      appBar: AppBar(
        title: Text("Flutter Demo"),
      ),
      endDrawer: Drawer(
          child: Column(
        children: <Widget>[
          UserAccountsDrawerHeader(
            accountName: Text("小王老师"),
            accountEmail: Text("6666@qq.com"),
            currentAccountPicture: CircleAvatar(
              backgroundImage:
                  NetworkImage("https://www.itying.com/images/flutter/1.png"),
            ),
            decoration: BoxDecoration(
                color: Colors.yellow,
                image: DecorationImage(
                    image: NetworkImage(
                        "https://www.itying.com/images/flutter/3.png"),fit: BoxFit.cover)),
          ),
          ListTile(title:  Text("个人中心")),
          Divider(),
          ListTile(title: Text("系统设置"),leading: CircleAvatar(child: Icon(Icons.settings)),),

        ],
      )),

      body: this._pageList[this._currentIndex],
      bottomNavigationBar: BottomNavigationBar(
        currentIndex: this._currentIndex,
        onTap: (int index) {
          setState(() {
            this._currentIndex = index;
          });
        },
        iconSize: 36.0,
        fixedColor: Colors.red, // 选中的颜色
        type: BottomNavigationBarType.fixed,
        items: [
          BottomNavigationBarItem(icon: Icon(Icons.home), title: Text("首页")),
          BottomNavigationBarItem(
              icon: Icon(Icons.category), title: Text("分类")),
          BottomNavigationBarItem(icon: Icon(Icons.settings), title: Text("设置"))
        ],
      ),
    );
  }
}


1、Flutter 和 Dart 的关系是什么?
Flutter 是一个由谷歌开发的开源UI工具包,用于从单一的代码库创建精美的、编译型的移动、Web和桌面应用程序。而 Dart 是由谷歌开发的客户端优化的编程语言,用于快速地提供交互式应用体验。Flutter 使用 Dart 作为其开发语言,Dart 为 Flutter 提供了高性能的运行时和编译器支持,使得 Flutter 应用能够快速运行。
2、Widget 和 element 和 RenderObject 之间的关系?
在 Flutter 中,这三个概念构成了其UI框架的核心。
- Widget:是 Flutter UI 开发的基础,它描述了UI元素的配置信息。Widget 是不可变的,这意味着它们是不可改变的对象,当它们的状态发生变化时,Flutter 会创建一个新的 Widget 树来替换旧的。
- Element:是 Widget 的一个实例,它在 Widget 树中保持稳定,即使 Widget 本身被重新构建。Element 对应于 Widget 树中的特定位置,它负责将 Widget 的配置应用到 RenderObject 上。
- RenderObject:负责实际的布局和绘制操作。每个 RenderObject 对应于一个 Element,并且它们构成了一个渲染树。RenderObject 负责计算布局大小和位置,以及绘制到屏幕上。
3、Flutter 中的 Widget、State、Context 的核心概念?是 为了解决什么问题?
- Widget:是 Flutter UI 的基本构建块。它描述了UI元素的配置信息,例如按钮、文本、图片等。Widget 是不可变的,这意味着它们是不可改变的对象,这使得 UI 的更新非常高效。
- State:对于一些需要动态变化的 UI,比如用户交互后的变化,就需要用到 State。State 包含了 Widget 的动态数据,它可以在 Widget 生命周期内发生变化。
- Context:是 Widget 在 Widget 树中的位置信息。它提供了访问祖先 Widget 的能力,例如获取主题颜色、字体大小等,也用于导航、获取依赖等。
这些概念的引入是为了解决构建现代UI应用程序的复杂性。通过将 UI 分割成小的、可复用的构建块(Widget),Flutter 使得 UI 的构建和更新变得非常灵活和高效。State 和 Context 的引入则使得 UI 能够响应用户的交互,同时保持代码的可维护性。
4、Widget 的两种类型是什么?
Widget 有两种类型:
- StatefulWidget:这种 Widget 是动态的,它拥有一个 State 对象,用于保存状态信息。当 State 对象改变时,Widget 会重新构建,从而更新 UI。
- StatelessWidget:这种 Widget 是静态的,它不保持任何状态信息。当父 Widget 通知它需要重建时,它会根据当前的配置信息重新构建。
5、什么是 Navigator? MaterialApp 做了什么?
-
Navigator:是 Flutter 中的路由管理器,它管理着一堆页面(Route),并提供了一系列方法来推动(push)和弹出(pop)页面,实现页面之间的跳转。
-
MaterialApp:是一个方便的 Widget,它封装了应用程序实现 Material Design 所需的多个 Widget。它提供了应用程序的根 Widget,包括主题(Theme)、路由(Routes)、导航(Navigation)等 Material Design 设计语言的必要支持。使用 MaterialApp 可以快速开始构建符合 Material Design 的应用程序。

