2024.4.26 Friday
目录
- 7.Web开发静态资源处理
- 7.1.Web开发探究
- 7.1.1.简介
- 7.1.2.使用SpringBoot的步骤:
- 7.1.2.1.创建一个SpringBoot应用,选择我们需要的模块,SpringBoot就会默认将我们的需要的模块自动配置好
- 7.1.2.2.手动在配置文件中配置部分配置项目就可以运行起来了
- 7.1.2.3.专注编写业务代码,不需要考虑以前那样一大堆的配置了。
- 7.2.静态资源处理
- 7.2.1.静态资源映射规则
- 7.2.1.1.新建springboot-03-web project
- 7.2.1.2.删除无关文件
- 7.2.1.3.新建HelloController.java
- 7.2.1.4.找到WebMvcAutoConfiguration(快捷键shift+shift)
- 7.2.2.什么是webjars呢?
- 7.2.2.1.第一种静态资源映射规则
- 7.2.2.2.第二种静态资源映射规则
- 7.2.2.3.自定义静态资源路径
- 7.2.3.总结
- 7.2.3.1.在springboot,我们可以使用一下方式处理静态资源
- 7.2.3.2.优先级:resources > static(默认) > public
- 7.3.首页处理
- 7.3.1.首页如何定制
- 7.3.1.1.进入WebMvcAutoConfiguration.java
- 7.3.1.2.修改图标
7.Web开发静态资源处理
7.1.Web开发探究
7.1.1.简介
接下来开始学习SpringBoot与Web开发,从这一章往后,就属于实战部分的内容了;
其实SpringBoot的东西用起来非常简单,因为SpringBoot最大的特点就是自动装配。
7.1.2.使用SpringBoot的步骤:
7.1.2.1.创建一个SpringBoot应用,选择我们需要的模块,SpringBoot就会默认将我们的需要的模块自动配置好
7.1.2.2.手动在配置文件中配置部分配置项目就可以运行起来了
7.1.2.3.专注编写业务代码,不需要考虑以前那样一大堆的配置了。
要熟悉掌握开发,之前学习的自动配置的原理一定要搞明白!
比如SpringBoot到底帮我们配置了什么?我们能不能修改?我们能修改哪些配置?我们能不能扩展?
- 向容器中自动配置组件 :*** Autoconfiguration
- 自动配置类,封装配置文件的内容:***Properties
没事就找找类,看看自动装配原理!
我们之后来进行一个单体项目的小项目测试,让大家能够快速上手开发!
7.2.静态资源处理
7.2.1.静态资源映射规则
- 写请求非常简单,那我们要引入我们前端资源,我们项目中有许多的静态资源,比如css,js等文件,这个SpringBoot怎么处理呢?
- 如果我们是一个web应用,我们的main下会有一个webapp,我们以前都是将所有的页面导在这里面的,对吧!但是我们现在的pom呢,打包方式是为jar的方式,那么这种方式SpringBoot能不能来给我们写页面呢?当然是可以的,但是SpringBoot对于静态资源放置的位置,是有规定的!
7.2.1.1.新建springboot-03-web project
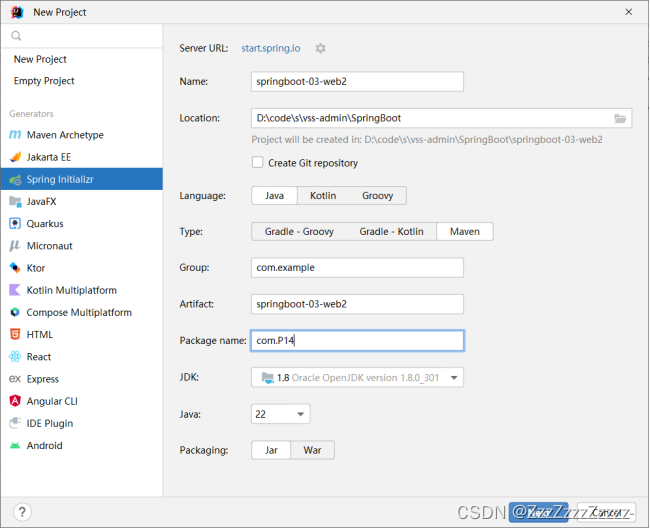
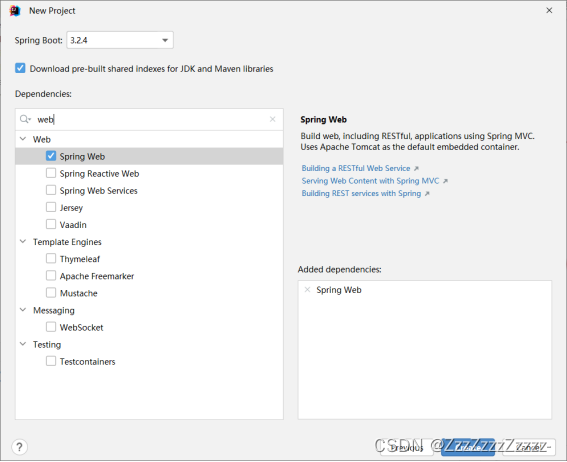
新建后会出现反常离奇的问题->删除再新建
添加maven支持(在Project Structure->Modules点击加号添加对应项目),
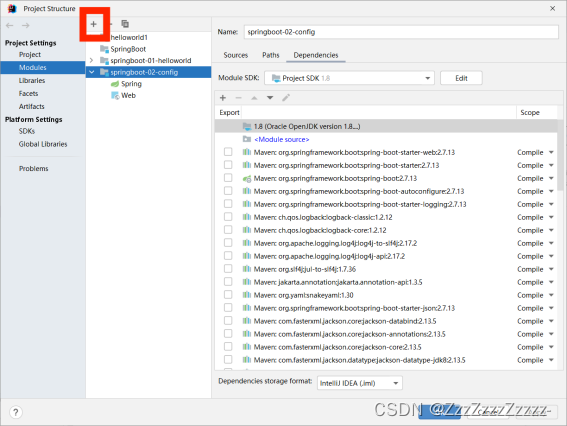

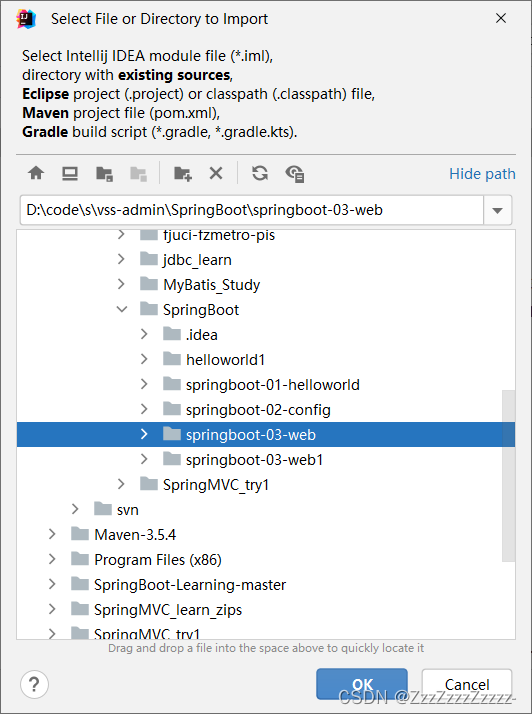
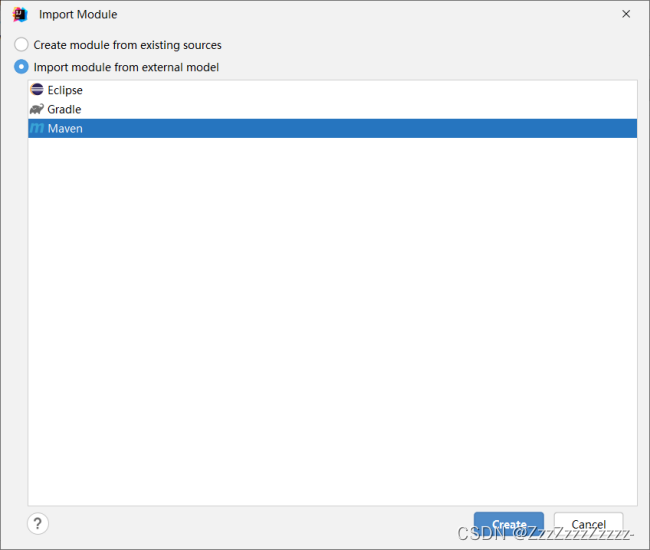
记得修改添加的名称为需要的名称
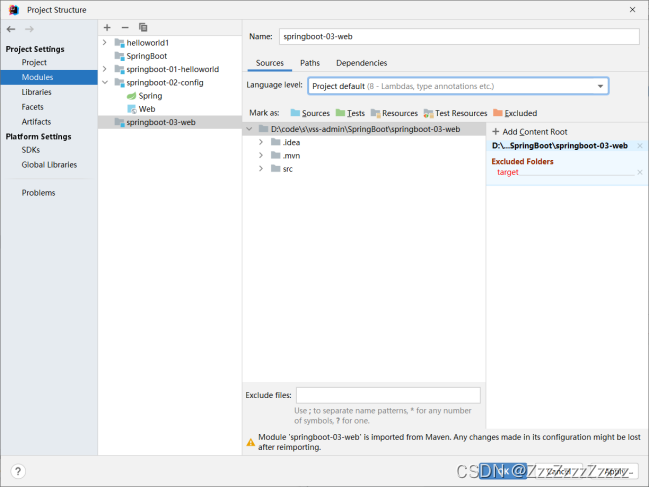
按照惯例修改settings中的maven,jdk和Java版本,Project Structure中的jdk和Java版本。重新加载Maven再运行。
7.2.1.2.删除无关文件

7.2.1.3.新建HelloController.java
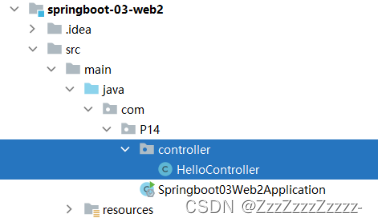
package com.P14.controller;

import org.springframework.web.bind.annotation.GetMapping;
import org.springframework.web.bind.annotation.RestController;

@RestController
public class HelloController {

    @GetMapping("/hello")
    public String hello(){
        return "hello world";
    }
}
测试一下
http://localhost:8080/hello

7.2.1.4.找到WebMvcAutoConfiguration(快捷键shift+shift)
SpringBoot中,SpringMVC的web配置都在 WebMvcAutoConfiguration 这个配置类里面
静态资源放在static文件夹下(还可以放哪得看源码)
WebMvcAutoConfigurationAdapter(line188)
找到addResourceHandlers(line333)添加资源处理器
public void addResourceHandlers(ResourceHandlerRegistry registry) {
   if (!this.resourceProperties.isAddMappings()) {
      logger.debug("Default resource handling disabled");
      return;
   }//如果被自定义了就直接return,怎么自定义?
   addResourceHandler(registry, "/webjars/**", "classpath:/META-INF/resources/webjars/");
   addResourceHandler(registry, this.mvcProperties.getStaticPathPattern(), (registration) -> {
      registration.addResourceLocations(this.resourceProperties.getStaticLocations());
      if (this.servletContext != null) {
         ServletContextResource resource = new ServletContextResource(this.servletContext, SERVLET_LOCATION);
         registration.addResourceLocations(resource);
      }
   });
}
怎么自定义:找到@EnableConfigurationProperties({ WebMvcProperties.class, WebProperties.class })(line186)中的WebMvcProperties,点击进入可以自己配置。
读一下源代码:比如所有的 /webjars/** , 都需要去 classpath:/META-INF/resources/webjars/ 找对应的资源。
7.2.2.什么是webjars呢?
Webjars本质就是以jar包的方式引入我们的静态资源 , 我们以前要导入一个静态资源文件,直接导入即可。
7.2.2.1.第一种静态资源映射规则
使用SpringBoot需要使用Webjars
https://www.webjars.org/
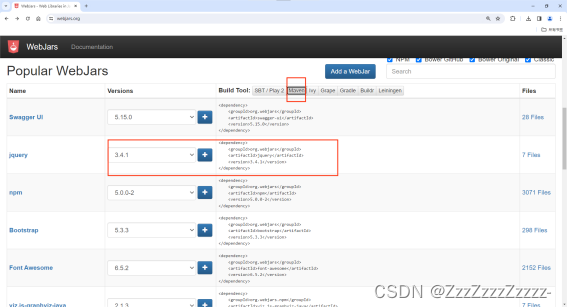
<dependency>
    <groupId>org.webjars</groupId>
    <artifactId>jquery</artifactId>
    <version>3.4.1</version>
</dependency>
将该段代码放入pom.xml文件中的dependencies部分内
<?xml version="1.0" encoding="UTF-8"?>
<project xmlns="http://maven.apache.org/POM/4.0.0" xmlns:xsi="http://www.w3.org/2001/XMLSchema-instance"
   xsi:schemaLocation="http://maven.apache.org/POM/4.0.0 https://maven.apache.org/xsd/maven-4.0.0.xsd">
   <modelVersion>4.0.0</modelVersion>
   <parent>
      <groupId>org.springframework.boot</groupId>
      <artifactId>spring-boot-starter-parent</artifactId>
      <version>2.7.13</version>
      <relativePath/> <!-- lookup parent from repository -->
   </parent>
   <groupId>com.example</groupId>
   <artifactId>springboot-03-web2</artifactId>
   <version>0.0.1-SNAPSHOT</version>
   <name>springboot-03-web2</name>
   <description>springboot-03-web2</description>
   <properties>
      <java.version>8</java.version>
   </properties>
   <dependencies>
      <dependency>
         <groupId>org.springframework.boot</groupId>
         <artifactId>spring-boot-starter-web</artifactId>
      </dependency>

      <dependency>
         <groupId>org.springframework.boot</groupId>
         <artifactId>spring-boot-starter-test</artifactId>
         <scope>test</scope>
      </dependency>

      <dependency>
         <groupId>org.webjars</groupId>
         <artifactId>jquery</artifactId>
         <version>3.4.1</version>
      </dependency>
   </dependencies>

   <build>
      <plugins>
         <plugin>
            <groupId>org.springframework.boot</groupId>
            <artifactId>spring-boot-maven-plugin</artifactId>
         </plugin>
      </plugins>
   </build>

</project>
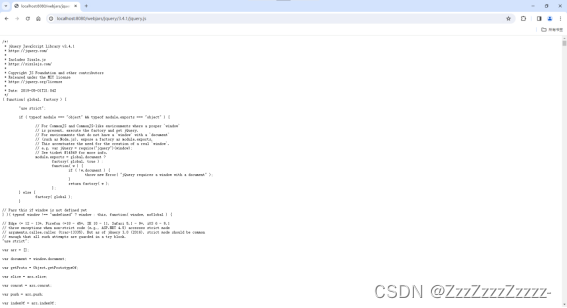
导入完毕,查看webjars目录结构,并访问Jquery.js文件!
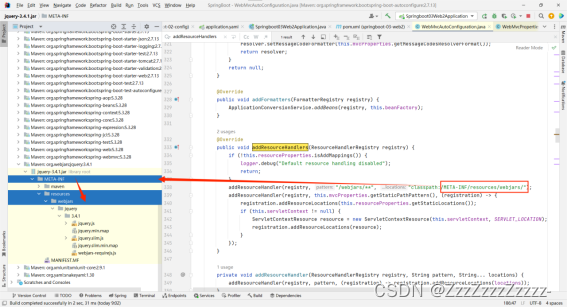
重启并访问:只要是静态资源,SpringBoot就会去对应的路径寻找资源,我们这里访问:
http://localhost:8080/webjars/jquery/3.4.1/jquery.js
7.2.2.2.第二种静态资源映射规则
那我们项目中要是使用自己的静态资源该怎么导入呢?我们看下一行代码;
7.2.2.2.1.WebMvcAutoConfiguration.java->getStaticPathPattern(line339)->WebMvcProperties.java中的getStaticPathPattern方法:点击staticPathPattern(line184)->private String staticPathPattern = “/**”;(line92)该语句的意思是在目录下的所有都可以识别
7.2.2.2.2.WebMvcAutoConfiguration.java中的WebMvcProperties(line186)->resourceProperties点进去看一下分析
关于看源码建议打开结构看比较清晰,alt+7快捷键
7.2.2.2.3.WebMvcProperties.java
private String[] staticLocations = CLASSPATH_RESOURCE_LOCATIONS;
(line95)
点击进入CLASSPATH_RESOURCE_LOCATIONS
private static final String[] CLASSPATH_RESOURCE_LOCATIONS = { "classpath:/META-INF/resources/",
      "classpath:/resources/", "classpath:/static/", "classpath:/public/" };
(line88)
ResourceProperties 可以设置和我们静态资源有关的参数;这里面指向了它会去寻找资源的文件夹,即上面数组的内容。
所以得出结论,以下四个目录存放的静态资源可以被我们识别:
"classpath:/META-INF/resources/",
"classpath:/resources/",
"classpath:/static/",
"classpath:/public/"
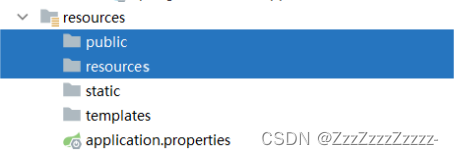
在以上子文件夹内创建的js文件都可以被访问
7.2.2.2.4.测试
新建3个1.js,分别位于public文件夹,resources文件夹和static文件夹内,内容分别写hello_public,hello_resources,hello_static,重启并访问
http://localhost:8080/1.js
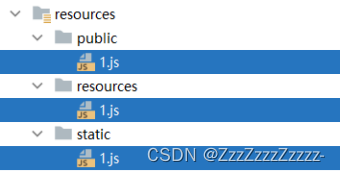
比较得出位于resources文件夹下的js文件优先级高于其他两个文件夹的

删除resources中的1.js文件,比较得出static文件夹下的优先级比public的高

7.2.2.3.自定义静态资源路径
我们也可以自己通过配置文件来指定一下,哪些文件夹是需要我们放静态资源文件的,在application.properties中配置
如:spring.resources.static-locations=classpath:/coding/,classpath:/kuang/
一旦自己定义了静态文件夹的路径,原来的自动配置就都会失效了!->非常不推荐
7.2.3.总结
7.2.3.1.在springboot,我们可以使用一下方式处理静态资源
- webjars
localhost:8080/webjars/ - public,static,/**,resources
localhost:8080/
7.2.3.2.优先级:resources > static(默认) > public
7.3.首页处理
7.3.1.首页如何定制
7.3.1.1.进入WebMvcAutoConfiguration.java
找到WelcomePageHandlerMapping欢迎页的处理映射方法(line439)
@Bean
public WelcomePageHandlerMapping welcomePageHandlerMapping(ApplicationContext applicationContext,
      FormattingConversionService mvcConversionService, ResourceUrlProvider mvcResourceUrlProvider) {
   return createWelcomePageHandlerMapping(applicationContext, mvcConversionService, mvcResourceUrlProvider,
         WelcomePageHandlerMapping::new);
}

@Bean
public WelcomePageNotAcceptableHandlerMapping welcomePageNotAcceptableHandlerMapping(
      ApplicationContext applicationContext, FormattingConversionService mvcConversionService,
      ResourceUrlProvider mvcResourceUrlProvider) {
   return createWelcomePageHandlerMapping(applicationContext, mvcConversionService, mvcResourceUrlProvider,
         WelcomePageNotAcceptableHandlerMapping::new);
}

private <T extends AbstractUrlHandlerMapping> T createWelcomePageHandlerMapping(
      ApplicationContext applicationContext, FormattingConversionService mvcConversionService,
      ResourceUrlProvider mvcResourceUrlProvider, WelcomePageHandlerMappingFactory<T> factory) {
   TemplateAvailabilityProviders templateAvailabilityProviders = new TemplateAvailabilityProviders(
         applicationContext);
   String staticPathPattern = this.mvcProperties.getStaticPathPattern();
   T handlerMapping = factory.create(templateAvailabilityProviders, applicationContext, getIndexHtmlResource(),
         staticPathPattern);
   handlerMapping.setInterceptors(getInterceptors(mvcConversionService, mvcResourceUrlProvider));
   handlerMapping.setCorsConfigurations(getCorsConfigurations());
   return handlerMapping;
}
其中line459的getIndexHtmlResource指向line492这段
private Resource getIndexHtmlResource() {
   for (String location : this.resourceProperties.getStaticLocations()) {
      Resource indexHtml = getIndexHtmlResource(location);
      if (indexHtml != null) {
         return indexHtml;
      }
   }
   ServletContext servletContext = getServletContext();
   if (servletContext != null) {
      return getIndexHtmlResource(new ServletContextResource(servletContext, SERVLET_LOCATION));
   }
   return null;
}
再向后可见
private Resource getIndexHtmlResource(String location) {
   return getIndexHtmlResource(this.resourceLoader.getResource(location));
}

private Resource getIndexHtmlResource(Resource location) {
   try {
      Resource resource = location.createRelative("index.html");
      if (resource.exists() && (resource.getURL() != null)) {
         return resource;
      }
   }
   catch (Exception ex) {
   }
   return null;
}
Resource resource = location.createRelative(“index.html”);说明index.html会被映射到首页。
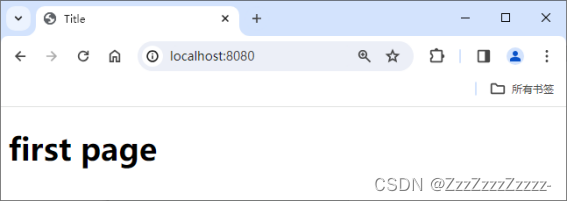
删除原有的所有1.js文件,新建index.html

<!DOCTYPE html>
<html lang="en">
<head>
    <meta charset="UTF-8">
    <title>Title</title>
</head>
<body>

<h1>first page</h1>

</body>
</html>
重启并访问
http://localhost:8080/
7.3.1.2.修改图标
选择图片导入IDEA,命名为favicon.ico
原理:与其他静态资源一样,Spring Boot在配置的静态内容位置中查找 favicon.ico。如果存在这样的文件,它将自动用作应用程序的favicon。

重启并访问(Chrome没加载出来,换成edge可以了)
http://localhost:8080/

也有可能需要关闭SpringBoot默认图标(我并没有修改这个就能刷新出图标了)
2.2.x之后的版本(如2.3.0)都不需要这步
#关闭默认图标
spring.mvc.favicon.enabled=false
