文章目录
- 1、Docker镜像命令
- 1.1 获取镜像
- 1.2 查看镜像
- 1.2.1、images命令列出镜像
- 1.2.2、tag命令添加镜像标签
- 1.2.3、inspect命令查看详细信息
- 1.2.4、history命令查看镜像历史
- 1.3 搜索镜像
- 1.4 删除和清理镜像
- 1.4.1、使用标签删除镜像
- 1.4.2、清理镜像
- 1.5 创建镜像
- 1.5.1、基于已有容器创建
- 1.5.2、基于本地模板导入
- 1.5.3、基于Dockerfile 创建
- 1.6 存出和载入镜像
- 1.6.1、存出镜像
- 1.6.2、载入镜像
- 1.7、上传镜像
- 2、Docker容器命令
- 2.1 创建和启动容器
- 2.1.1、新建容器
- 2.1.2、启动容器
- 2.1.3、新建并启动容器
- 2.1.4、守护态运行
- 2.1.5、查看容器输出
- 2.2、列出当前正在运行的容器
- 2.3、退出容器
- 2.4、停止容器
- 2.4.1、暂停容器
- 2.4.2、终止容器
- 2.5、进入容器
- 2.6、删除容器
- 2.7、导入和导出容器
- 2.7.1、导出容器
- 2.7.2、导入容器
- 2.8、查看容器
- 2.8.1、查看容器详情
- 2.8.2、查看容器内进程
- 2.8.3、查看统计信息
- 2.9、其他容器命令
- 2.9.1、复制文件
- 2.9.2、查看变更
- 2.9.3、查看端口映射
- 2.9.4、更新配置
- 2.9.5 docker system df
- 3、命令总结
1、Docker镜像命令
Docker运行容器前需要本地存在对应的镜像, 如果镜像不存在,Docker会尝试先从默认镜像仓库下载(默认使用Docker Hub公共注册服务器中的仓库),用户也可以通过配置,使用自定义的镜像仓库。
1.1 获取镜像
可以使用 docker [image] pull命令直接从 Docker Hub 镜像源来下载镜像。
命令格式: docker [image] pull NAME [: TAG]。
OPTIONS参数:
-a, --all-tags                Download all tagged images in the repository(是否获取仓库中的所有镜像,默认为否)
    --disable-content-trust   Skip image verification (default true)(取消镜像的内容校验, 默认为真。)
    --platform string         Set platform if server is multi-platform
                              capable
NAME是镜像仓库名称(用来区分镜像), TAG是镜像的标签(往往用来表示版本信息)。 通常情况下, 描述一个镜像需要包括 “名称+标签“ 信息。
docker pull 镜像名称 < = > <=> <=> docker pull 镜像名称:latest
对于Docker镜像来说,如果不显式指定TAG, 则默认会选择latest标签,这会下载仓库中最新版本的镜像。
#拉取ubuntu制定版本镜像
docker pull ubuntu:18.04
#拉取ubuntu最新版本镜像
docker pull ubuntu
使用镜像代理服务来加速Docker镜像获取过程,可以在Docker服务启动配置中增加–registry-mirror=proxy_URL来指定镜像代理服务地址,详细过程见2.核心概念与安装配置中阿里云镜像加速部分。
下载过程中可以看出,镜像文件一般由若干层(layer)组成,927a35006d93这样的串是层的唯一id,完整的id包括256比特,64个十六进制字符组成。使用docker pull命令下载中会获取并输出镜像的各层信息。当不同的镜像包括相同的层时,本地仅存储了层的一份内容,减小了存储空间。
[root@zyn01 ~]# docker pull redis
Using default tag: latest
latest: Pulling from library/redis
927a35006d93: Pull complete
6a72fe8b7ea0: Pull complete
cf790b96aa00: Pull complete
e663c38d6d61: Pull complete
ee5f15302d7a: Pull complete
eaef543b46f9: Pull complete
Digest: sha256:db485f2e245b5b3329fdc7eff4eb00f913e09d8feb9ca720788059fdc2ed8339
Status: Downloaded newer image for redis:latest
docker.io/library/redis:latest
在不同的镜像仓库服务器的情况下 ,可能会出现镜像重名的清况。严格地讲,镜像的仓库名称中还应该添加仓库地址 (即registry,注册服务器)作为前只是默认使用的是官方DockerHub服务,该前缀可以忽略。
docker pull ubuntu:18.04
#相当于
docker pull registry.hub.docker.com/ubuntu:18.04
#如果从非官方的仓库下载,则需要在仓库名称前指定完整的仓库地址。例如从网易蜂巢的镜像源来下载ubuntu:18.04镜像
docker pull hub.c.163.com/public/ubuntu:18.04
1.2 查看镜像
1.2.1、images命令列出镜像
docker images或docker image ls查看本地已有的镜像信息和管理镜像标签,列出本地主机上的镜像。
[root@zyn01 ~]# docker images
REPOSITORY   TAG       IMAGE ID       CREATED       SIZE
redis        latest    f16c30136ff3   2 years ago   107MB
ubuntu       latest    d5ca7a445605   2 years ago   65.6MB
redis        6.0.8     d4deb73856a2   3 years ago   98.5MB
[root@zyn01 ~]# docker image ls
REPOSITORY   TAG       IMAGE ID       CREATED       SIZE
redis        latest    f16c30136ff3   2 years ago   107MB
ubuntu       latest    d5ca7a445605   2 years ago   65.6MB
redis        6.0.8     d4deb73856a2   3 years ago   98.5MB
各个选项说明:
-
REPOSITORY:表示镜像的仓库源
-
TAG:镜像的标签版本号,用于标记来自同一个仓库的不同镜像。
-
IMAGE ID:唯一标识镜像,该ID的前若干个字符组成的可区分串来替代完整的ID。
-
IDCREATED:镜像创建时间
-
SIZE:镜像大小,实际上由于相同的镜像层本地只会存储一份, 物理上占用的存储空间会小于各镜像逻辑体积之和。
同一仓库源可以有多个 TAG版本,代表这个仓库源的不同个版本,我们使用 REPOSITORY:TAG 来定义不同的镜像。如果你不指定一个镜像的版本标签,例如你只使用 ubuntu,docker 将默认使用 ubuntu:latest 镜像
OPTIONS参数:
# 列出本地所有镜像(包含历史映像层)
docker images -a
# 只显示镜像ID
docker images -q

-a, --all= true|false: 列出所有(包括临时文件)镜像文件, 默认为否;
--digests=true|false: 列出镜像的数字摘要值, 默认为否;
-f, --filter=[] : 过滤列出的镜像,如 dangling=true只显示没有被使用的镜像;也可指定带有特定标注的镜像等;
--format="TEMPLATE" : 控制输出格式, 如.ID代表ID信息,.Repository
代表仓库信息等;
--no-trunc=true|false: 对输出结果中太长的部分是否进行截断, 如镜像的ID信息,默认为是;
-q, --quiet=true|false: 仅输出ID信息, 默认为否。
1.2.2、tag命令添加镜像标签
可以使用docker 七ag命令来为本地镜像任意添加新的标签。
$ docker tag ubuntu:latest myubuntu:latest
再次使用docker images列出本地主机上镜像信息, 可以看到多了一个myubuntu:latest 标签的镜像:
[root@zyn01 ~]# docker images
REPOSITORY   TAG       IMAGE ID       CREATED       SIZE
redis        latest    f16c30136ff3   2 years ago   107MB
myubuntu     latest    d5ca7a445605   2 years ago   65.6MB
ubuntu       latest    d5ca7a445605   2 years ago   65.6MB
redis        6.0.8     d4deb73856a2   3 years ago   98.5MB
myubuntu:latest镜像的ID跟ubuntu:latest是完全一致的,它们实际上指向了同一个镜像文件, 只是别名不同而已。docker tag命令添 加的标签实际上起到了类似链接的作用。
1.2.3、inspect命令查看详细信息
获取该镜像的详细信息, 包括制作者、适应架构、各层的数字摘要等。
$ docker [image] inspect ubuntu:18.04
# 返回的是一个JSON格式的消息, 如果我们只要其中一项内容时, 可以使用-f来指定, 例如,获取镜像的Architecture:
$ docker [image] inspect -f {{".Architecture"}} ubuntu:18.04
执行结果:
[root@zyn01 ~]# docker inspect ubuntu:latest
[
    {
        "Id": "sha256:d5ca7a4456053674d490803005766890dd19e3f7e789a48737c0d462da531f5d",
        "RepoTags": [
            "myubuntu:latest",
            "ubuntu:latest"
        ],
        "RepoDigests": [
            "ubuntu@sha256:626ffe58f6e7566e00254b638eb7e0f3b11d4da9675088f4781a50ae288f3322"
        ],
        "Parent": "",
        "Comment": "",
        "Created": "2021-10-16T01:47:45.87597179Z",
        "DockerVersion": "20.10.7",
        "Author": "",
        "Config": {
            "Hostname": "",
            "Domainname": "",
            "User": "",
            "AttachStdin": false,
            "AttachStdout": false,
            "AttachStderr": false,
            "Tty": false,
            "OpenStdin": false,
            "StdinOnce": false,
            "Env": [
                "PATH=/usr/local/sbin:/usr/local/bin:/usr/sbin:/usr/bin:/sbin:/bin"
            ],
            "Cmd": [
                "bash"
            ],
            "Image": "sha256:0d812b4a843eb3323c988e528edccf15f39c7150697f199bc2504abdbe346d33",
            "Volumes": null,
            "WorkingDir": "",
            "Entrypoint": null,
            "OnBuild": null,
            "Labels": null
        },
        "Architecture": "arm64",
        "Variant": "v8",
        "Os": "linux",
        "Size": 65593591,
        "GraphDriver": {
            "Data": {
                "MergedDir": "/var/lib/docker/overlay2/5fc1add816c08b9e0c66ffe053311af4f2402e38515b8009a4490e3af8916dde/merged",
                "UpperDir": "/var/lib/docker/overlay2/5fc1add816c08b9e0c66ffe053311af4f2402e38515b8009a4490e3af8916dde/diff",
                "WorkDir": "/var/lib/docker/overlay2/5fc1add816c08b9e0c66ffe053311af4f2402e38515b8009a4490e3af8916dde/work"
            },
            "Name": "overlay2"
        },
        "RootFS": {
            "Type": "layers",
            "Layers": [
                "sha256:350f36b271dee3d47478fbcd72b98fed5bbcc369632f2d115c3cb62d784edaec"
            ]
        },
        "Metadata": {
            "LastTagTime": "2024-04-14T08:20:18.503064027+08:00"
        }
    }
]
[root@zyn01 ~]# docker inspect -f {{".Architecture"}} ubuntu:latest
arm64
1.2.4、history命令查看镜像历史
镜像文件由多个层组成,history命令将列出各层的创建信息。
[root@zyn01 ~]# docker history ubuntu:latest
IMAGE          CREATED       CREATED BY                                      SIZE      COMMENT
d5ca7a445605   2 years ago   /bin/sh -c #(nop)  CMD ["bash"]                 0B
<missing>      2 years ago   /bin/sh -c #(nop) ADD file:ff4909f2124325dac…   65.6MB
1.3 搜索镜像
在远端仓库使用search命令进行搜索和过滤。该命令查询结果包包括 镜像名字、 描述、 收藏数(表示该镜像 的受欢迎程度)、 是否官方创建、 是否自动创建等。默认的输出结果将按照星级评价进行排序。
docker search [options] 镜像名称

Options:
-f, --filter filter   Filter output based on conditions provided(过滤输出内容;)
    --format string   Pretty-print search using a Go template(格式化输出内容;)
    --limit int       Max number of search results(限制输出结果个数, 默认为25个;)
    --no-trunc        Don't truncate output(不截断输出结果。)
内容说明:
- name:镜像名称
- description:镜像描述
- stars:点赞数
- official:是否为官方
- automated:是否为自动构建
#搜索官方提供的带 nginx关键字的镜像
[root@zyn01 ~]# docker search --filter=is-official=true nginx
NAME      DESCRIPTION                                     STARS     OFFICIAL
nginx     Official build of Nginx.                        19768     [OK]
unit      Official build of NGINX Unit: Universal Web …   26        [OK]
#搜索所有收藏数超过4的关键词包括tensorflow的镜像
[root@zyn01 ~]# docker search --filter=stars=4 tensorflow
NAME                             DESCRIPTION                                     STARS     OFFICIAL
tensorflow/tensorflow            Official Docker images for the machine learn…   2380
tensorflow/serving               Official images for TensorFlow Serving (http…   138
tensorflow/build                 Containers for building TensorFlow, provided…   8
bitnami/tensorflow-serving       Bitnami container image for TensorFlow Servi…   33
tensorflow/tfx                                                                   8
tensorflow/tf_grpc_test_server   Testing server for GRPC-based distributed ru…   4
tensorflow/magenta               Official Docker images for Magenta (https://…   19
tensorflow/tf_grpc_server        Server for TensorFlow GRPC Distributed Runti…   8
tensorflow/syntaxnet             Official docker images for running DRAGNN/Sy…   13
jupyter/tensorflow-notebook      Scientific Jupyter Notebook Python Stack w/ …   363
opensciencegrid/tensorflow-gpu   TensorFlow GPU set up for OSG                   12
rocker/tensorflow                Tensorflow & Keras libraries for machine lea…   4

# 只列出N个镜像,默认25个
docker search --limit 5 redis
1.4 删除和清理镜像
1.4.1、使用标签删除镜像
docker rmi 或docker image rm命令可以删除镜像。
docker image rm [OPTIONS] IMAGE [IMAGE...]

Remove one or more images

Aliases:
  docker image rm, docker image remove, docker rmi

Options:
  -f, --force      Force removal of the image(强制删除镜像, 即使有容器依赖它)
      --no-prune   Do not delete untagged parents(不要清理未带标签的父镜像)
删除镜像标签和镜像文件
# 删除单个
docker rmi -f 镜像ID
# 删除多个
docker rmi -f 镜像名1:TAG 镜像名2:TAG
# 删除全部
docker rmi -f $(docker images -qa)
删除正在运行容器对应的镜像,Docker会提示有容器正在运行(
docker ps接下来会介绍),无法删除。如果要想强行删除镜像, 可以使用-f参数。
通常并不推荐使用-f参数来强制删除一个存在容器依赖的镜像。 正确的做法是,先删除依赖该镜像的所有容器(docker rm接下来会介绍), 再来删除镜像。
执行结果:
[root@zyn01 ~]# docker images
REPOSITORY   TAG       IMAGE ID       CREATED       SIZE
redis        latest    f16c30136ff3   2 years ago   107MB
ubuntu       latest    d5ca7a445605   2 years ago   65.6MB
myubuntu     latest    d5ca7a445605   2 years ago   65.6MB
redis        6.0.8     d4deb73856a2   3 years ago   98.5MB
[root@zyn01 ~]# docker rmi myubuntu:latest
Untagged: myubuntu:latest
[root@zyn01 ~]# docker images
REPOSITORY   TAG       IMAGE ID       CREATED       SIZE
redis        latest    f16c30136ff3   2 years ago   107MB
ubuntu       latest    d5ca7a445605   2 years ago   65.6MB
redis        6.0.8     d4deb73856a2   3 years ago   98.5MB
当同一个镜像拥有多个标签的时候,docker rmi命令只是删除了该镜像多个标签中的指定标签而巳, 并不影响镜像文件。 因此上述操作相当于只是删除了镜像d5ca7a445605的一个标签副本而已。
当镜像只剩下一个标签的时候,使用docker rmi命令会彻底删除镜像。
1.4.2、清理镜像
使用 Docker一段时间后,系统中可能会遗留一些临时的镜像文件, 以及一些没有被使用的镜像, 可以通过docker image prune命令来进行清理。
[root@zyn01 ~]# docker image prune --help

Usage:  docker image prune [OPTIONS]

Remove unused images

Options:
  -a, --all             Remove all unused images, not just dangling ones(删除所有无用镜像, 不光是临时镜像;)
      --filter filter   Provide filter values (e.g. "until=<timestamp>")(只清理符合给定过滤器的镜像;)
  -f, --force           Do not prompt for confirmation(强制删除镜像, 而不进行提示确认。)
自动清理临时的遗留镜像文件层, 最后会提示释放的存储空间:
[root@zyn01 ~]# docker image prune -f
Total reclaimed space: 0B
1.5 创建镜像
1.5.1、基于已有容器创建
命令格式:docker [container] commit[OPTIONS] CONTAINER [REPOSITORY [:TAG]]
[root@zyn01 ~]# docker commit --help

Usage:  docker commit [OPTIONS] CONTAINER [REPOSITORY[:TAG]]

Create a new image from a container's changes

Aliases:
  docker container commit, docker commit

Options:
  -a, --author string    Author (e.g., "John Hannibal Smith<hannibal@a-team.com>")(--author="":作者信息)
  -c, --change list      Apply Dockerfile instruction to the created image(--change=[] :提交的时候执行 Dockerfile指令, 包括CMD|ENTRYPOINT|ENV|EXPOSE|LABEL|ONBUILD|USER|VOLUME|WORKDIR等;)
  -m, --message string   Commit message(--message="": 提交消息)
  -p, --pause            Pause container during commit (default true)(--pause=true:提交时暂停容器运行。)
测试:
-
启动一个镜像, 并在其中进行修改操作。 例如, 创建一个test文件,之后退出。
[root@zyn01 ~]# docker run -it ubuntu:latest /bin/bash root@9883a729f592:/# touch test root@9883a729f592:/# ls bin dev home media opt root sbin sys tmp var boot etc lib mnt proc run srv test usr [root@zyn01 ~]# docker ps CONTAINER ID IMAGE COMMAND CREATED STATUS PORTS NAMES 9883a729f592 ubuntu:latest "/bin/bash" About a minute ago Up About a minute brave_hellman -
该容器与原ubuntu:latest镜像相比, 已经发生了改变, 可以使用
docker [container] commit命令来提交为一个新的镜像。提交时可以使用ID或名称来指定容器。[root@zyn01 ~]# docker commit -m "Add a new file" -a "Docker Newbee" 9883a729f592 test:0.1 sha256:75809fa1a809a3182cbe26b7831c2ca6b1ecaeb5153850eb3c358d8f37f71f30 [root@zyn01 ~]# docker images REPOSITORY TAG IMAGE ID CREATED SIZE test 0.1 75809fa1a809 14 seconds ago 65.6MB redis latest f16c30136ff3 2 years ago 107MB ubuntu latest d5ca7a445605 2 years ago 65.6MB redis 6.0.8 d4deb73856a2 3 years ago 98.5MB
1.5.2、基于本地模板导入
用户也可以直接从一个操作系统模板文件导入一个镜像, 主要使用docker [container] import命令。
命令格式为docker [image] import [OPTIONS] file|URL|-[REPOSITORY [:TAG]]。
要直接导入一个镜像, 可以使用 OpenVZ 提供的模板来创建, 或者用其他已导出的镜像模板来创建。 OPENVZ 模板的下载地址为 http://openvz.org/Download/templates/precreated。
-
下载压缩包
[root@zyn01 ~]# wget http://download.openvz.org/template/precreated/ubuntu-12.04-x86-minimal.tar.gz -
使用以下命令导入
[root@zyn01 ~]# cat ubuntu-12.04-x86-minimal.tar.gz | docker import - ubuntu:12.04
sha256:6912314e84ad24a22cc7bf4517d01cda8ca37562ffee838fbabb72615145d0c9
[root@zyn01 ~]# docker images
REPOSITORY   TAG       IMAGE ID       CREATED          SIZE
ubuntu       12.04     6912314e84ad   9 seconds ago    146MB
test         0.1       75809fa1a809   11 minutes ago   65.6MB
redis        latest    f16c30136ff3   2 years ago      107MB
ubuntu       latest    d5ca7a445605   2 years ago      65.6MB
redis        6.0.8     d4deb73856a2   3 years ago      98.5MB
在容器命令章节介绍从容器导出为镜像的操作。
1.5.3、基于Dockerfile 创建
基于Dockerfile创建是最常见的方式。Dockerfile是一个文本文件,利用给定的指令描述基于某个父镜像创建新镜像的过程。
docker [image] build
基于debian:stretch-slim镜像安装Python 3环境,构成一个新的python:3 镜像:
-
创建Dockerfile文件
[root@zyn01 mydockerfile]# vim Dockerfile [root@zyn01 mydockerfile]# cat Dockerfile FROM debian:stretch-slim LABEL version="l.0" maintainer="docker user <docker_user@github>" #更新系统中的所有软件包。 #安装python3。 #清理缓存 RUN apt-get update \ apt-get install -y python3 && \ apt-get clean && \ rm -rf /var/lib/apt/lists/* -
构建
#docker build -t 新镜像名称:TAG
docker build -t ./ python3:0.1
⚠️ 这一步没跑通
1.6 存出和载入镜像
docker [image] save和docker [image] load命令来存出和载入镜像。
1.6.1、存出镜像
[root@zyn01 mydockerfile]# docker save --help

Usage:  docker save [OPTIONS] IMAGE [IMAGE...]

Save one or more images to a tar archive (streamed to STDOUT by default)

Aliases:
  docker image save, docker save

Options:
  -o, --output string   Write to a file, instead of STDOUT(导出镜像到 指定的文件中)
执行结果:
[root@zyn01 mydockerfile]# docker save -o ubuntu.tar ubuntu:latest
[root@zyn01 mydockerfile]# ls
Dockerfile  ubuntu.tar
1.6.2、载入镜像
docker [image] load将导出的tar 文件再导入到本地镜像库。
[root@zyn01 mydockerfile]# docker load --help

Usage:  docker load [OPTIONS]

Load an image from a tar archive or STDIN

Aliases:
  docker image load, docker load

Options:
  -i, --input string   Read from tar archive file, instead of STDIN(从指定文件中读入镜像内容)
  -q, --quiet          Suppress the load output
执行结果:
docker load -i ubuntu.tar

docker load < ubuntu.tar
这将导入镜像及其相关的元数据信息(包括标签等)。导人成功后, 可以使用 docker images 命令进行查看, 与原镜像一致。
1.7、上传镜像
docker [image] push命令上传镜像到仓库, 默认上传到 Docker Hub 官方仓库(需要登录)。
命令格式:
docker [image] push NAME [:TAG] | [REGISTRY_HOST [:REGISTRY_PORT] /]NAME[ :TAG]
用户user上传本地的test:latest镜像,可以先添加新的标签 user/test:latest, 然后用 docker [image] push 命令上传镜像:
docker tag test:latest username/test:latest

docker login

docker push username/test:latest
💡 第一次上传时, 会提示输入登录信息或进行注册, 之后登录信息会记录到本地~/.docker目录下。
💡Username替换为自己的dockerhub账户名称。
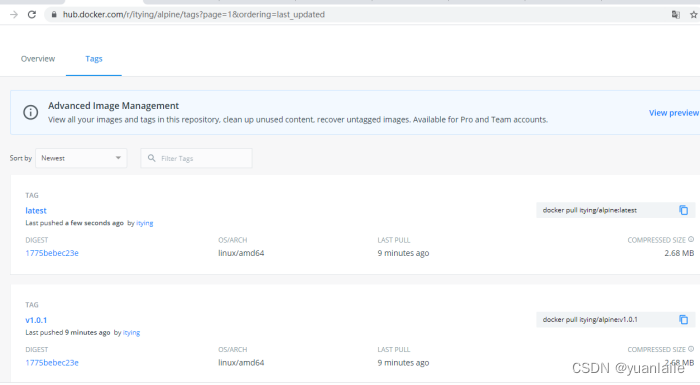
在dockerhub的账户下查看的确上传成功了。
❓面试题:什么是虚悬镜像?
仓库名和标签都为none的镜像。
2、Docker容器命令
容器是镜像的一个运行实例。 所不同的是, 镜像是静态的只读文件, 而容器带有运行时需要的可写文件层。同时, 容器中的应用进程处于运行状态。
如果认为虚拟机是模拟运行的一整套操作系统(包括内核、 应用运行态环境和其他系统环境)和跑在上面的应用。 那么 Docker 容器就是独立运行的一个(或一组)应用, 以及它们必需的运行环境。
2.1 创建和启动容器
2.1.1、新建容器
docker [container] create命令新建一个容器。
[root@zyn01 mydockerfile]# docker images
REPOSITORY   TAG       IMAGE ID       CREATED       SIZE
redis        latest    f16c30136ff3   2 years ago   107MB
ubuntu       latest    d5ca7a445605   2 years ago   65.6MB
redis        6.0.8     d4deb73856a2   3 years ago   98.5MB
[root@zyn01 mydockerfile]# docker create ubuntu:latest
bb2b9fbabb69f48b4bec7ac5dbba1aef6365bd222c506e5eb18e058e09bd69cc
[root@zyn01 mydockerfile]# docker ps
CONTAINER ID   IMAGE     COMMAND   CREATED   STATUS    PORTS     NAMES
[root@zyn01 mydockerfile]# docker ps -a
CONTAINER ID   IMAGE           COMMAND       CREATED         STATUS                      PORTS     NAMES
bb2b9fbabb69   ubuntu:latest   "bash"        8 seconds ago   Created                               laughing_booth
[root@zyn01 mydockerfile]# docker ps -al
CONTAINER ID   IMAGE           COMMAND   CREATED          STATUS    PORTS     NAMES
bb2b9fbabb69   ubuntu:latest   "bash"    12 seconds ago   Created             laughing_booth
使用docker [container] create命令新建的容器处于停止状态, 可以使用docker [container] start命令来启动它。
docker [container] create命令详解:
[root@zyn01 mydockerfile]# docker create --help

Usage:  docker create [OPTIONS] IMAGE [COMMAND] [ARG...]

Create a new container

Aliases:
  docker container create, docker create

Options:
      --add-host list                    Add a custom host-to-IP mapping
                                         (host:ip)
      --annotation map                   Add an annotation to the
                                         container (passed through to the
                                         OCI runtime) (default map[])
  -a, --attach list                      Attach to STDIN, STDOUT or STDERR
      --blkio-weight uint16              Block IO (relative weight),
                                         between 10 and 1000, or 0 to
                                         disable (default 0)
      --blkio-weight-device list         Block IO weight (relative device
                                         weight) (default [])
      --cap-add list                     Add Linux capabilities
      --cap-drop list                    Drop Linux capabilities
      --cgroup-parent string             Optional parent cgroup for the
                                         container
      --cgroupns string                  Cgroup namespace to use
                                         (host|private)
                                         'host':    Run the container in
                                         the Docker host's cgroup
                                         namespace
                                         'private': Run the container in
                                         its own private cgroup namespace
                                         '':        Use the cgroup
                                         namespace as configured by the
                                                    default-cgroupns-mode
                                         option on the daemon (default)
      --cidfile string                   Write the container ID to the file
      --cpu-period int                   Limit CPU CFS (Completely Fair
                                         Scheduler) period
      --cpu-quota int                    Limit CPU CFS (Completely Fair
                                         Scheduler) quota
      --cpu-rt-period int                Limit CPU real-time period in
                                         microseconds
      --cpu-rt-runtime int               Limit CPU real-time runtime in
                                         microseconds
  -c, --cpu-shares int                   CPU shares (relative weight)
      --cpus decimal                     Number of CPUs
      --cpuset-cpus string               CPUs in which to allow execution
                                         (0-3, 0,1)
      --cpuset-mems string               MEMs in which to allow execution
                                         (0-3, 0,1)
      --device list                      Add a host device to the container
      --device-cgroup-rule list          Add a rule to the cgroup allowed
                                         devices list
      --device-read-bps list             Limit read rate (bytes per
                                         second) from a device (default [])
      --device-read-iops list            Limit read rate (IO per second)
                                         from a device (default [])
      --device-write-bps list            Limit write rate (bytes per
                                         second) to a device (default [])
      --device-write-iops list           Limit write rate (IO per second)
                                         to a device (default [])
      --disable-content-trust            Skip image verification (default
                                         true)
      --dns list                         Set custom DNS servers
      --dns-option list                  Set DNS options
      --dns-search list                  Set custom DNS search domains
      --domainname string                Container NIS domain name
      --entrypoint string                Overwrite the default ENTRYPOINT
                                         of the image
  -e, --env list                         Set environment variables
      --env-file list                    Read in a file of environment
                                         variables
      --expose list                      Expose a port or a range of ports
      --gpus gpu-request                 GPU devices to add to the
                                         container ('all' to pass all GPUs)
      --group-add list                   Add additional groups to join
      --health-cmd string                Command to run to check health
      --health-interval duration         Time between running the check
                                         (ms|s|m|h) (default 0s)
      --health-retries int               Consecutive failures needed to
                                         report unhealthy
      --health-start-interval duration   Time between running the check
                                         during the start period
                                         (ms|s|m|h) (default 0s)
      --health-start-period duration     Start period for the container
                                         to initialize before starting
                                         health-retries countdown
                                         (ms|s|m|h) (default 0s)
      --health-timeout duration          Maximum time to allow one check
                                         to run (ms|s|m|h) (default 0s)
      --help                             Print usage
  -h, --hostname string                  Container host name
      --init                             Run an init inside the container
                                         that forwards signals and reaps
                                         processes
  -i, --interactive                      Keep STDIN open even if not attached
      --ip string                        IPv4 address (e.g., 172.30.100.104)
      --ip6 string                       IPv6 address (e.g., 2001:db8::33)
      --ipc string                       IPC mode to use
      --isolation string                 Container isolation technology
      --kernel-memory bytes              Kernel memory limit
  -l, --label list                       Set meta data on a container(--label=[]: 以键值对方式指定容器的标签信息)
      --label-file list                  Read in a line delimited file of
                                         labels(-label-file=[] :从文件中读取标签信息。)
      --link list                        Add link to another container
      --link-local-ip list               Container IPv4/IPv6 link-local
                                         addresses
      --log-driver string                Logging driver for the container
      --log-opt list                     Log driver options
      --mac-address string               Container MAC address (e.g.,
                                         92:d0:c6:0a:29:33)
  -m, --memory bytes                     Memory limit
      --memory-reservation bytes         Memory soft limit
      --memory-swap bytes                Swap limit equal to memory plus
                                         swap: '-1' to enable unlimited swap
      --memory-swappiness int            Tune container memory swappiness
                                         (0 to 100) (default -1)
      --mount mount                      Attach a filesystem mount to the
                                         container
      --name string                      Assign a name to the container
      --network network                  Connect a container to a network
      --network-alias list               Add network-scoped alias for the
                                         container
      --no-healthcheck                   Disable any container-specified
                                         HEALTHCHECK
      --oom-kill-disable                 Disable OOM Killer
      --oom-score-adj int                Tune host's OOM preferences
                                         (-1000 to 1000)
      --pid string                       PID namespace to use
      --pids-limit int                   Tune container pids limit (set
                                         -1 for unlimited)
      --platform string                  Set platform if server is
                                         multi-platform capable
      --privileged                       Give extended privileges to this
                                         container
  -p, --publish list                     Publish a container's port(s) to
                                         the host
  -P, --publish-all                      Publish all exposed ports to
                                         random ports
      --pull string                      Pull image before creating
                                         ("always", "|missing", "never")
                                         (default "missing")
  -q, --quiet                            Suppress the pull output
      --read-only                        Mount the container's root
                                         filesystem as read only
      --restart string                   Restart policy to apply when a
                                         container exits (default "no")
      --rm                               Automatically remove the
                                         container when it exits
      --runtime string                   Runtime to use for this container
      --security-opt list                Security Options
      --shm-size bytes                   Size of /dev/shm
      --stop-signal string               Signal to stop the container
      --stop-timeout int                 Timeout (in seconds) to stop a
                                         container
      --storage-opt list                 Storage driver options for the
                                         container
      --sysctl map                       Sysctl options (default map[])
      --tmpfs list                       Mount a tmpfs directory
  -t, --tty                              Allocate a pseudo-TTY
      --ulimit ulimit                    Ulimit options (default [])
  -u, --user string                      Username or UID (format:
                                         <name|uid>[:<group|gid>])
      --userns string                    User namespace to use
      --uts string                       UTS namespace to use
  -v, --volume list                      Bind mount a volume
      --volume-driver string             Optional volume driver for the
                                         container
      --volumes-from list                Mount volumes from the specified
                                         container(s)
  -w, --workdir string                   Working directory inside the
                                         container


2.1.2、启动容器
docker [container] start命令来启动已经创建或启动已停止运行的容器。
docker start 容器ID或者容器名称
[root@zyn01 mydockerfile]# docker create -it ubuntu
c710151b1b07fa46f81ebde4ce080d9b34ea8d9749e5630f047d961788ec1d54
[root@zyn01 mydockerfile]# docker ps -al
CONTAINER ID   IMAGE     COMMAND   CREATED         STATUS    PORTS     NAMES
c710151b1b07   ubuntu    "bash"    4 seconds ago   Created             intelligent_clarke
[root@zyn01 mydockerfile]# docker start c710151b1b07
c710151b1b07
[root@zyn01 mydockerfile]# docker ps -al
CONTAINER ID   IMAGE     COMMAND   CREATED          STATUS         PORTS     NAMES
c710151b1b07   ubuntu    "bash"    19 seconds ago   Up 2 seconds             intelligent_clarke
2.1.3、新建并启动容器
docker [container] run 等价于先执行docker [container] create命令,再执行docker [container] start命令。
docker run [OPTIONS] IMAGE [COMMAND] [ARGS]

OPTIONS说明(常用):有些是一个减号,有些是两个减号
--name="容器新名字"       为容器指定一个名称;
-d: 后台运行容器并返回容器ID,也即启动守护式容器(后台运行);

-i(interaction):以交互模式运行容器,通常与 -t 同时使用;让容器的标准输入保持打开。
-t(tty):为容器重新分配一个伪输入终端,通常与 -i 同时使用;让Docker分配一个伪终端(pseudo-tty)并绑定到容器的标准输入上。
也即启动交互式容器(前台有伪终端,等待交互);

-P: 随机端口映射,大写P
-p: 指定端口映射,小写p

#使用镜像ubuntu:latest以交互模式启动一个容器,在容器内执行/bin/bash命令
docker run -it ubuntu /bin/bash

参数说明:
-i: 交互式操作。
-t: 终端。
ubuntu : ubuntu 镜像。
/bin/bash:放在镜像名后的是命令,这里我们希望有个交互式 Shell,因此用的是 /bin/bash。
要退出终端,直接输入 exit:
当利用docker [container] run来创建并启动容器时,Docker在后台运行的标准操作包括:
- 检查本地是否存在指定的镜像, 不存在就从公有仓库下载;
- 利用镜像创建一个容器,并启动该容器;
- 分配一个文件系统给容器,并在只读的镜像层外面挂载一层可读写层;
- 从宿主主机配置的网桥接口中桥接一个虚拟接口到容器中去;
- 从网桥的地址池配置一个IP地址给容器;
- 执行用户指定的应用程序;
- 执行完毕后容器被自动终止。
docker run命令常见运行错误代码:
- 125:Docker daemon执行出错, 例如指定了不支持的Docker命令参数
- 126:所指定命令无法执行, 例如权限出错;
- 127:容器内命令无法找到。
2.1.4、守护态运行
守护态运行:让Docker容器在后台以守护态(Daernonized)形式运行。
docker run -d ubuntu /bin/sh -c "while true; do echo hello world; sleep 1; done"
容器启动后会返回一个唯一的id, 也可以通过docker ps或docker container ls命令来查看容器信息。
redis前后台启动:
#前台交互式启动
docker run -it redis:6.0.8
#后台守护式启动
docker run -d redis:6.0.8
2.1.5、查看容器输出
获取容器的输出信息, 可以通过docker [container] logs CONTAINER命令。
[root@zyn01 mydockerfile]# docker logs --help

Usage:  docker logs [OPTIONS] CONTAINER

Fetch the logs of a container

Aliases:
  docker container logs, docker logs

Options:
      --details        Show extra details provided to logs(打印详细信息;)
  -f, --follow         Follow log output(持续保持输出;)
      --since string   Show logs since timestamp (e.g.
                       "2013-01-02T13:23:37Z") or relative (e.g. "42m"
                       for 42 minutes)(输出从某个时间开始的日志;)
  -n, --tail string    Number of lines to show from the end of the logs
                       (default "all")(输出最近的若干日志;)
  -t, --timestamps     Show timestamps(显示时间戳信息;)
      --until string   Show logs before a timestamp (e.g.
                       "2013-01-02T13:23:37Z") or relative (e.g. "42m"
                       for 42 minutes)(输出某个时间之前的日志。)
2.2、列出当前正在运行的容器
docker ps [OPTIONS]
OPTIONS说明(常用)
-a :列出当前所有正在运行的容器+历史上运行过的
-l :显示最近创建的容器。
-n:显示最近n个创建的容器。
-q :静默模式,只显示容器编号。
不同参数执行命令:
#查看正在运行的容器
docker ps
#启动一个制定名称的容器再次查看
docker run -it --name="ubuntu_zyn" ubuntu /bin/bash
docker ps
#查看历史运行过的容器
docker ps -a
#查看最近创建的容器
docker ps -l
#查看最近n个容器
docker ps -n 3
#查看正在运行容器编号
docker ps -q

2.3、退出容器
两种退出方式:
-
exit:退出并停止容器,
-
ctrl+p+q:退出但不停止容器
可以使用
docker container wait CONTAINER [CONTAINER...]子命令来等待容器退出,并打印退出返回结果。
2.4、停止容器
#启动停止的容器
docker start 容器ID或容器名称
#重启容器
docker restart 容器ID或容器名称
#停止容器
docker stop 容器ID或容器名称
#强制停止容器
docker kill 容器ID或容器名称
2.4.1、暂停容器
docker [container] pause CONTAINER [CONTAINER...]命令来暂运行中的容器。
[root@zyn01 mydockerfile]# docker run --name test --rm -it ubuntu /bin/bash
root@605728f0eb1c:/# [root@zyn01 mydockerfile]#
[root@zyn01 mydockerfile]#
[root@zyn01 mydockerfile]# docker ps -l
CONTAINER ID   IMAGE     COMMAND       CREATED          STATUS          PORTS     NAMES
605728f0eb1c   ubuntu    "/bin/bash"   13 seconds ago   Up 12 seconds             test
[root@zyn01 mydockerfile]# docker ps -a
CONTAINER ID   IMAGE           COMMAND       CREATED          STATUS                      PORTS     NAMES
605728f0eb1c   ubuntu          "/bin/bash"   30 seconds ago   Up 30 seconds                         test
c710151b1b07   ubuntu          "bash"        25 minutes ago   Up 24 minutes                         intelligent_clarke
[root@zyn01 mydockerfile]# docker pause test
test
[root@zyn01 mydockerfile]# docker ps
CONTAINER ID   IMAGE     COMMAND       CREATED              STATUS                       PORTS     NAMES
605728f0eb1c   ubuntu    "/bin/bash"   About a minute ago   Up About a minute (Paused)             test
c710151b1b07   ubuntu    "bash"        25 minutes ago       Up 25 minutes                          intelligent_clarke
处于paused状态的容器, 可以使用docker [container] unpause CONTAINER [CONTAINER...]命令来恢复到运行状态。
[root@zyn01 mydockerfile]# docker unpause test
test
[root@zyn01 mydockerfile]# docker ps
CONTAINER ID   IMAGE     COMMAND       CREATED          STATUS          PORTS     NAMES
605728f0eb1c   ubuntu    "/bin/bash"   3 minutes ago    Up 3 minutes              test
c710151b1b07   ubuntu    "bash"        27 minutes ago   Up 27 minutes             intelligent_clarke
2.4.2、终止容器
docker [container] stop CONTAINER [CONTAINER...]命令来终止运行中的容器。
docker [container] stop[-t | --time [=10)] [CONTAINER... ]会首先向容器发送SIGTERM信号, 等待一段超时时间后(默认为 10 秒), 再发送SIGKILL信号来终止容器。
- 执行
docker container prune命令, 会自动清除掉所有处于停止状态的容器; - 还可以通过
docker [container] kill直接发送SIGKILL信号来强行终止。
2.5、进入容器
在使用-d参数时, 容器启动后会进入后台, 用户无法看到容器中的信息,也无法进行操作。使用官方的attach或exec命令可以进入容器进行操作。
-
attach
命令格式:
docker [container] attach [--detach-keys[=[]] [--no-stdin) [--sig-proxy [=true]][root@zyn01 mydockerfile]# docker attach --help Usage: docker attach [OPTIONS] CONTAINER Attach local standard input, output, and error streams to a running container Aliases: docker container attach, docker attach Options: --detach-keys string Override the key sequence for detaching a container(--detach-keys[=[]]:指定退出attach模式的快捷键序列, 默认是CTRL-p CTRL-q;) --no-stdin Do not attach STDIN(--no-stdin=true|false:是否关闭标准输入,默认是保持打开;) --sig-proxy Proxy all received signals to the process (default true)(--sig-proxy=true|false:是否代理收到的系统信号给应用进程,默认为true。)执行结果:
[root@zyn01 mydockerfile]# docker ps CONTAINER ID IMAGE COMMAND CREATED STATUS PORTS NAMES c710151b1b07 ubuntu "bash" 45 minutes ago Up 44 minutes intelligent_clarke [root@zyn01 mydockerfile]# docker attach c710151b1b07 root@c710151b1b07:/# -
exec命令
可以在运行中容器内直接执行任意命令。
命令格式:
docker [container) exec [-d|--detach) [--detach-keys[=[]]] [-i|--interactive][ --privileged] [-t |--tty) [-u|--user[=USER]] CONTAINER COMMAND [ARG...][root@zyn01 mydockerfile]# docker exec --help Usage: docker exec [OPTIONS] CONTAINER COMMAND [ARG...] Execute a command in a running container Aliases: docker container exec, docker exec Options: -d, --detach Detached mode: run command in the background(在容器中后台执行命令;) --detach-keys string Override the key sequence for detaching a container(指定将容器切回后台的按键;) -e, --env list Set environment variables(--env=[]:指定环境变量列表;) --env-file list Read in a file of environment variables -i, --interactive Keep STDIN open even if not attached(--interactive=true|false :打开标准输入接受用户输入命令,默认值为false;) --privileged Give extended privileges to the command(--privileged=true|false:是否给执行命令以高权限,默认值为false;) -t, --tty Allocate a pseudo-TTY(--tty=true|false:分配伪终端,默认值为false) -u, --user string Username or UID (format:"<name|uid>[:<group|gid>]")(--user="":执行命令的用户名或ID。) -w, --workdir string Working directory inside the container使用attach命令有时候并不方便。 当多个窗口同时attach到同一个容器的时候, 所有窗口都会同步显示;当某个窗口因命令阻塞时, 其他窗口也无法执行操作。
attach和exec的区别:
- attach直接进入容器启动命令的终端,不能启动新的进程;用exit退出会导致容器的停止。
- exec是在容器中打开新的终端,并且可以启动新的进程;用exit退出不会导致容器的停止。
2.6、删除容器
docker [container] rm命令来删除处于终止或退出状态的容器。
命令格式:docker [container] rm [-f --force] (-1|--link] [-v|--volumes] CONTAINER [CONTAINER...]。
[root@zyn01 mydockerfile]# docker rm --help

Usage:  docker rm [OPTIONS] CONTAINER [CONTAINER...]

Remove one or more containers

Aliases:
  docker container rm, docker container remove, docker rm

Options:
  -f, --force     Force the removal of a running container (uses SIGKILL)(--force=false:是否强行终止并删除一个运行中的容器;)
  -l, --link      Remove the specified link(--link=false:删除容器的连接,但保留容器;)
  -v, --volumes   Remove anonymous volumes associated with the container(--volumes=false:删除容器挂载的数据卷。)
一次性删除多个容器实例
docker rm -f $(docker ps -q)
docker ps -a -q | xargs docker rm
2.7、导入和导出容器
将容器从一个系统迁移到另外一个系统, 此时可以使用Docker 的导入和导出功能。
2.7.1、导出容器
export导出容器作为一个tar归档文件。
docker [container) export [-o | --output [=""] CONTAINER
通过-o选项来指定导出的tar文件名, 也可以直接通过重定向来实现。
$ docker export -o test_for_run.tar ce5
$ ls
test_for_run.tar
$ docker export e81 > test_.for_stop.tar
$ ls
test_for_run.tar test_.for_stop.tar
docker export 容器ID >abc.tar.gz
2.7.2、导入容器
将导出的tar 文件传输到其他机器上, 然后再通过导入命令导入到系统中, 实现容器的迁移。
import从tar包中的内容创建一个新的文件系统再导入为镜像。
docke import [-c|--change [=[]] [-m|--message [=MESSAGE]] file|URLI| - [REPOSITORY][:TAG]]
可以通过-c, --change=[] 选项在导入的同时执行对容器进行修改的 Dockerfile 指令。
$ docker import test_for_run.tar - test/ubuntu:vl.O
$ docker images
$ cat abc.tar.gz | docker import - zyn/ubuntu:2.1
使用
docker load命令来导入一个镜像文件, 与docker [container] import命令十分类似。实际上, 既可以使用
docker load命令来导入镜像存储文件到本地镜像库, 也可以使用docker [container] import命令来导入一个容器快照到本地镜像库。这两者的区别在于:容器快照文件将丢弃所有的历史记录和元数据信息(即仅保存容器当时的快照状态),而镜像存储文件将保存完整记录,体积更大。此外, 从容器快照文件导入时可以重新指定标签等元数据信息。
2.8、查看容器
2.8.1、查看容器详情
查看某容器的具体信息, 会以json 格式返回包括容器 Id、创建时间、 路径、 状 态、 镜像、 配置等在内的各项信息。
docker container inspect [OPTIONS] CONTAINER [CONTAINER...]
[root@zyn01 mydockerfile]# docker run -it -d ubuntu
06c9d8e93f594e7caa34de5d8053b356d0d46aeef30c5b9932b3fe686d0fc4e6
[root@zyn01 mydockerfile]# docker ps
CONTAINER ID   IMAGE     COMMAND   CREATED         STATUS         PORTS     NAMES
06c9d8e93f59   ubuntu    "bash"    2 seconds ago   Up 2 seconds             objective_perlman
[root@zyn01 mydockerfile]# docker inspect 06c9d8e93f59
[
    {
        "Id": "06c9d8e93f594e7caa34de5d8053b356d0d46aeef30c5b9932b3fe686d0fc4e6",
        "Created": "2024-04-14T10:31:18.189006008Z",
        "Path": "bash",
        "Args": [],
        "State": {
            "Status": "running",
            "Running": true,
            "Paused": false,
            "Restarting": false,
            "OOMKilled": false,
            "Dead": false,
            "Pid": 567,
            "ExitCode": 0,
            "Error": "",
            "StartedAt": "2024-04-14T10:31:18.458977425Z",
            "FinishedAt": "0001-01-01T00:00:00Z"
        },
        "Image": "sha256:d5ca7a4456053674d490803005766890dd19e3f7e789a48737c0d462da531f5d",
        "ResolvConfPath": "/var/lib/docker/containers/06c9d8e93f594e7caa34de5d8053b356d0d46aeef30c5b9932b3fe686d0fc4e6/resolv.conf",
        "HostnamePath": "/var/lib/docker/containers/06c9d8e93f594e7caa34de5d8053b356d0d46aeef30c5b9932b3fe686d0fc4e6/hostname",
        "HostsPath": "/var/lib/docker/containers/06c9d8e93f594e7caa34de5d8053b356d0d46aeef30c5b9932b3fe686d0fc4e6/hosts",
        "LogPath": "/var/lib/docker/containers/06c9d8e93f594e7caa34de5d8053b356d0d46aeef30c5b9932b3fe686d0fc4e6/06c9d8e93f594e7caa34de5d8053b356d0d46aeef30c5b9932b3fe686d0fc4e6-json.log",
        "Name": "/objective_perlman",
        "RestartCount": 0,
        "Driver": "overlay2",
        "Platform": "linux",
        ...
]
2.8.2、查看容器内进程
类似于Linux系统中的top命令,会打印出容器内的进程信息, 包括PID、用户、 时间、命令等。
命令格式:docker [container] top [OPTIONS] CONTAINER [CONTAINER...]
[root@zyn01 mydockerfile]# docker top 06c9d8e93f59
UID                 PID                 PPID                C                   STIME               TTY                 TIME                CMD
root                567                 546                 0                   18:31               pts/0               00:00:00            bash
2.8.3、查看统计信息
显示CPU、内存、 存储、网络等使用情况的统计信息。
命令格式:docker [container] stats [OPTIONS] [CONTAINER... ]
2.9、其他容器命令
2.9.1、复制文件
container cp命令支持在容器和主机之间复制文件。
命令格式:docker [container] cp [OPTIONS] CONTAINER:SRC_PATH DEST_PATH |-
[root@zyn01 mydockerfile]# docker cp --help

Usage:  docker cp [OPTIONS] CONTAINER:SRC_PATH DEST_PATH|-
        docker cp [OPTIONS] SRC_PATH|- CONTAINER:DEST_PATH

Copy files/folders between a container and the local filesystem

Use '-' as the source to read a tar archive from stdin
and extract it to a directory destination in a container.
Use '-' as the destination to stream a tar archive of a
container source to stdout.

Aliases:
  docker container cp, docker cp

Options:
  -a, --archive       Archive mode (copy all uid/gid information)(打包模式, 复制文件会带有原始的uid/gid信息;)
  -L, --follow-link   Always follow symbol link in SRC_PATH(跟随软连接。当原路径为软连接时,默认只复制链接信息,使用该选项会复制链接的目标内容。)
  -q, --quiet         Suppress progress output during copy. Progress
                      output is automatically suppressed if no terminal
                      is attached
#将本地的路径data复制到test容器的/tmp路径下
$ docker [container] cp data test:/tmp/
#从容器拷贝文件到主机
docker cp 容器ID:容器内路径 目的主机路径
2.9.2、查看变更
container diff查看容器内文件系统的变更。
命令格式:docker [container] diff CONTAINER。
#查看七est容器内的数据修改:
$ docker container diff test
C /root
A /root/.bash_history
C /tmp
A /tmp/Dockerfile
A /tmp/etcd-test
2.9.3、查看端口映射
命令格式:docker container port CONTAINER [PRIVATE_PORT [/PROTO]]
#查看test容器的端口映射情况
$ docker container port test
9000/tcp -> 0.0.0.0:9000
2.9.4、更新配置
container update命令可以更新容器的一些运行时配置, 主要是一些资源限制份额。
命令格式:docker [container] update [OPTIONS] CONTAINER [CONTAINER... ]

#限制总配额为1秒,容器test所占用时间为10%
$ docker update --cpu-quota 1000000 test
test
$ docker update --cpu-period 100000 test
test
2.9.5 docker system df
查看镜像/容器/数据卷所占的空间
3、命令总结

attach    Attach to a running container                 # 当前 shell 下 attach 连接指定运行镜像

build     Build an image from a Dockerfile              # 通过 Dockerfile 定制镜像

commit    Create a new image from a container changes   # 提交当前容器为新的镜像

cp        Copy files/folders from the containers filesystem to the host path   #从容器中拷贝指定文件或者目录到宿主机中

create    Create a new container                        # 创建一个新的容器,同 run,但不启动容器

diff      Inspect changes on a container's filesystem   # 查看 docker 容器变化

events    Get real time events from the server          # 从 docker 服务获取容器实时事件

exec      Run a command in an existing container        # 在已存在的容器上运行命令

export    Stream the contents of a container as a tar archive   # 导出容器的内容流作为一个 tar 归档文件[对应 import ]

history   Show the history of an image                  # 展示一个镜像形成历史

images    List images                                   # 列出系统当前镜像

import    Create a new filesystem image from the contents of a tarball # 从tar包中的内容创建一个新的文件系统映像[对应export]

info      Display system-wide information               # 显示系统相关信息

inspect   Return low-level information on a container   # 查看容器详细信息

kill      Kill a running container                      # kill 指定 docker 容器

load      Load an image from a tar archive              # 从一个 tar 包中加载一个镜像[对应 save]

login     Register or Login to the docker registry server    # 注册或者登陆一个 docker 源服务器

logout    Log out from a Docker registry server          # 从当前 Docker registry 退出

logs      Fetch the logs of a container                 # 输出当前容器日志信息

port      Lookup the public-facing port which is NAT-ed to PRIVATE_PORT    # 查看映射端口对应的容器内部源端口

pause     Pause all processes within a container        # 暂停容器

ps        List containers                               # 列出容器列表

pull      Pull an image or a repository from the docker registry server   # 从docker镜像源服务器拉取指定镜像或者库镜像

push      Push an image or a repository to the docker registry server    # 推送指定镜像或者库镜像至docker源服务器

restart   Restart a running container                   # 重启运行的容器

rm        Remove one or more containers                 # 移除一个或者多个容器

rmi       Remove one or more images       # 移除一个或多个镜像[无容器使用该镜像才可删除,否则需删除相关容器才可继续或 -f 强制删除]

run       Run a command in a new container              # 创建一个新的容器并运行一个命令

save      Save an image to a tar archive                # 保存一个镜像为一个 tar 包[对应 load]

search    Search for an image on the Docker Hub         # 在 docker hub 中搜索镜像

start     Start a stopped containers                    # 启动容器

stop      Stop a running containers                     # 停止容器

tag       Tag an image into a repository                # 给源中镜像打标签

top       Lookup the running processes of a container   # 查看容器中运行的进程信息

unpause   Unpause a paused container                    # 取消暂停容器

version   Show the docker version information           # 查看 docker 版本号

wait      Block until a container stops, then print its exit code   # 截取容器停止时的退出状态值
