文章目录
- 自定义列表
- $tab对象
- 打开页签
- 关闭页签
- 刷新页签
- $modal对象
- 提供成功、警告和错误等反馈信息(无需点击确认)
- 提供成功、警告和错误等提示信息(类似于alert,需要点确认)
- 提供成功、警告和错误等提示信息(从右上角通知,无需确认)
- 提供确认窗体信息
- 提供遮罩层信息
- $auth对象
- 验证用户权限
- 验证用户角色
- $cache对象
- 若依中的示例
- $download对象
- 根据名称下载download路径下的文件
- 根据名称下载upload路径下的文件
- 根据请求地址下载zip包
- 更多文件下载操作
- 若依中的示例
自定义列表
可以查看src/plugins 文件夹index.js文件
import tab from './tab'
import auth from './auth'
import cache from './cache'
import modal from './modal'
import download from './download'

export default {
  install(Vue) {
    // 页签操作
    Vue.prototype.$tab = tab
    // 认证对象
    Vue.prototype.$auth = auth
    // 缓存对象
    Vue.prototype.$cache = cache
    // 模态框对象
    Vue.prototype.$modal = modal
    // 下载文件
    Vue.prototype.$download = download
  }
}
$tab对象
$tab对象用于做页签操作、刷新页签、关闭页签、打开页签、修改页签等,它定义在plugins/tab.js文件中,
在src\views\tool\gen\index.vue有示例:
/** 修改按钮操作 */
    handleEditTable(row) {
      const tableId = row.tableId || this.ids[0];
      const tableName = row.tableName || this.tableNames[0];
      const params = { pageNum: this.queryParams.pageNum };
      this.$tab.openPage("修改[" + tableName + "]生成配置", '/tool/gen-edit/index/' + tableId, params);
    },
它有如下方法:
打开页签
this.$tab.openPage("用户管理", "/system/user");

this.$tab.openPage("用户管理", "/system/user").then(() => {
  // 执行结束的逻辑
})
关闭页签
// 关闭当前tab页签,打开新页签
const obj = { path: "/system/user" };
this.$tab.closeOpenPage(obj);

// 关闭当前页签,回到首页
this.$tab.closePage();

// 关闭指定页签
const obj = { path: "/system/user", name: "User" };
this.$tab.closePage(obj);

this.$tab.closePage(obj).then(() => {
  // 执行结束的逻辑
})
刷新页签
// 刷新当前页签
this.$tab.refreshPage();

// 刷新指定页签
const obj = { path: "/system/user", name: "User" };
this.$tab.refreshPage(obj);

this.$tab.refreshPage(obj).then(() => {
  // 执行结束的逻辑
})
$modal对象
$modal对象用于做消息提示、通知提示、对话框提醒、二次确认、遮罩等,它定义在plugins/modal.js文件中,它有如下方法:
提供成功、警告和错误等反馈信息(无需点击确认)
this.$modal.msg("默认反馈");
this.$modal.msgError("错误反馈");
this.$modal.msgSuccess("成功反馈");
this.$modal.msgWarning("警告反馈");
源码使用的是element的Message
// 消息提示
  msg(content) {
    Message.info(content)
  },
  // 错误消息
  msgError(content) {
    Message.error(content)
  },
  // 成功消息
  msgSuccess(content) {
    Message.success(content)
  },
  // 警告消息
  msgWarning(content) {
    Message.warning(content)
  },
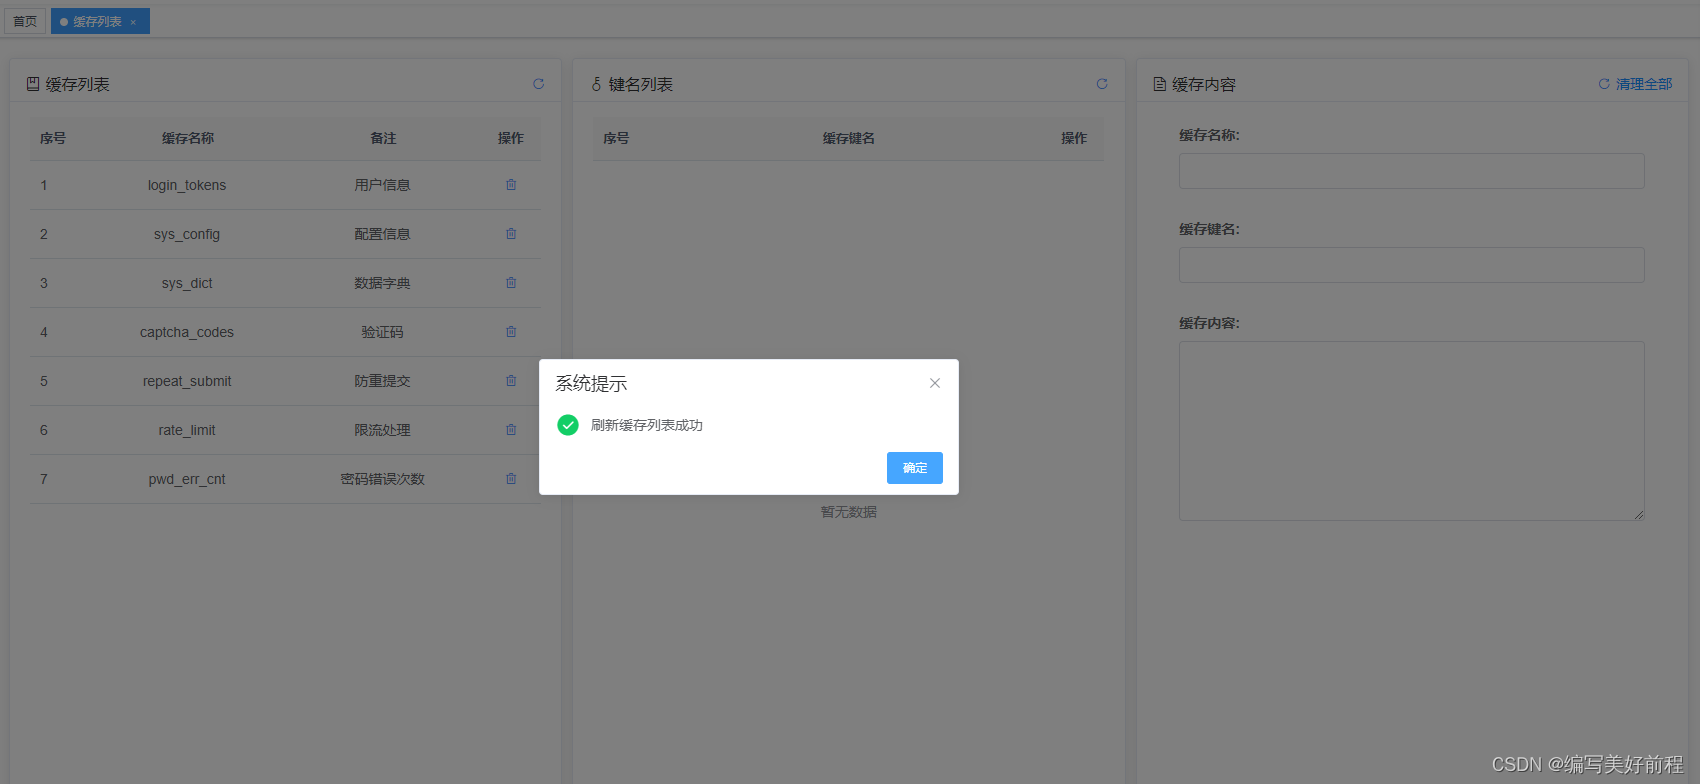
提供成功、警告和错误等提示信息(类似于alert,需要点确认)
this.$modal.alert("默认提示");
this.$modal.alertError("错误提示");
this.$modal.alertSuccess("成功提示");
this.$modal.alertWarning("警告提示");
源码使用的是element的MessageBox
  // 弹出提示
  alert(content) {
    MessageBox.alert(content, "系统提示")
  },
  // 错误提示
  alertError(content) {
    MessageBox.alert(content, "系统提示", { type: 'error' })
  },
  // 成功提示
  alertSuccess(content) {
    MessageBox.alert(content, "系统提示", { type: 'success' })
  },
  // 警告提示
  alertWarning(content) {
    MessageBox.alert(content, "系统提示", { type: 'warning' })
  },
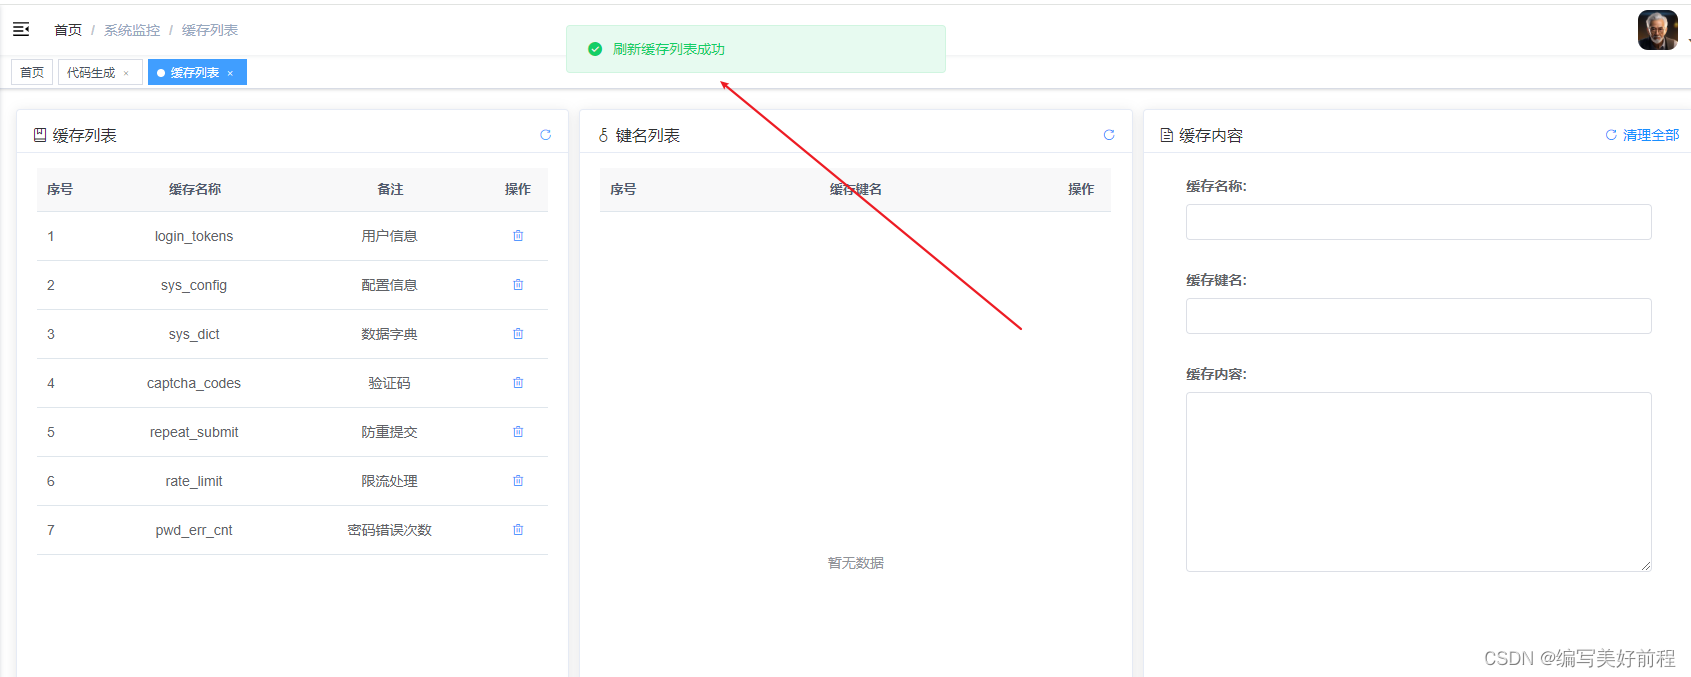
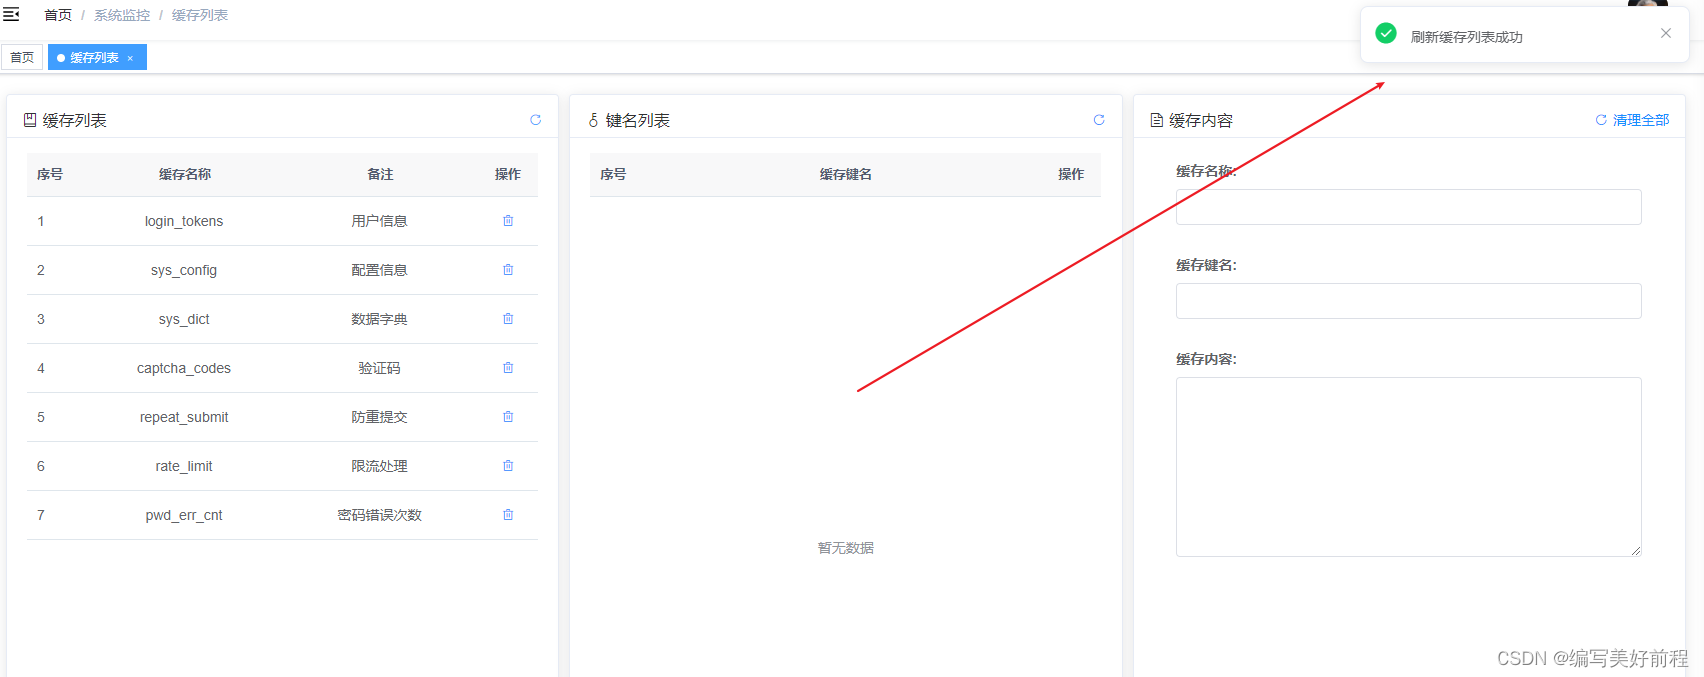
提供成功、警告和错误等提示信息(从右上角通知,无需确认)
this.$modal.notify("默认通知");
this.$modal.notifyError("错误通知");
this.$modal.notifySuccess("成功通知");
this.$modal.notifyWarning("警告通知");
源码使用的是element ui的Notification
  // 通知提示
  notify(content) {
    Notification.info(content)
  },
  // 错误通知
  notifyError(content) {
    Notification.error(content);
  },
  // 成功通知
  notifySuccess(content) {
    Notification.success(content)
  },
  // 警告通知
  notifyWarning(content) {
    Notification.warning(content)
  },
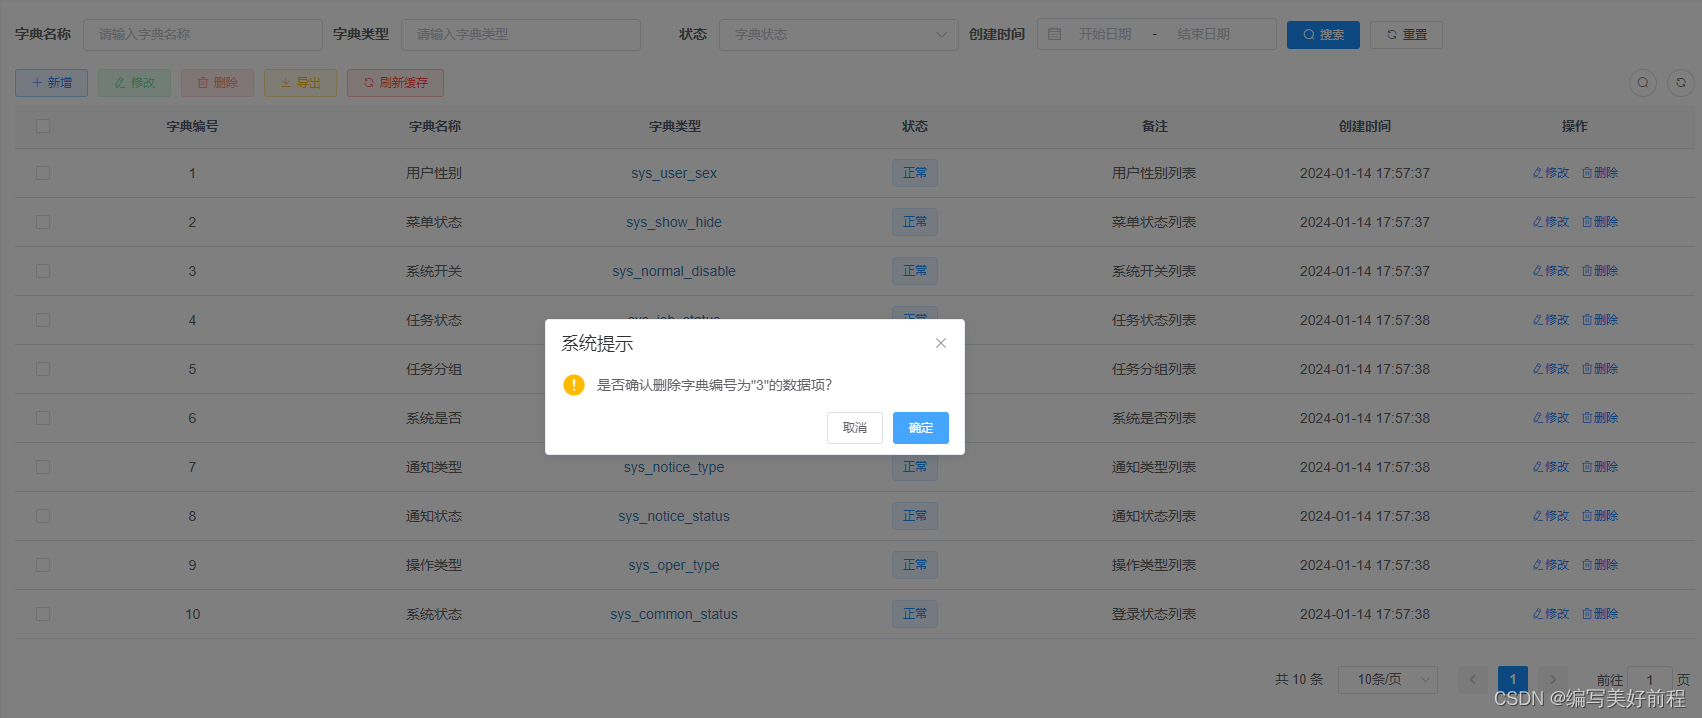
提供确认窗体信息
示例代码:src\views\system\dept\index.vue
/** 删除按钮操作 */
    handleDelete(row) {
      this.$modal.confirm('是否确认删除名称为"' + row.deptName + '"的数据项?').then(function() {
        return delDept(row.deptId);
      }).then(() => {
        this.getList();
        this.$modal.msgSuccess("删除成功");
      }).catch(() => {});
    }
源码用的是element的message box
// 确认窗体
  confirm(content) {
    return MessageBox.confirm(content, "系统提示", {
      confirmButtonText: '确定',
      cancelButtonText: '取消',
      type: "warning",
    })
  },
提供遮罩层信息
// 打开遮罩层
this.$modal.loading("正在导出数据,请稍后...");

// 关闭遮罩层
this.$modal.closeLoading();
源码使用的是element的loading
// 打开遮罩层
  loading(content) {
    loadingInstance = Loading.service({
      lock: true,
      text: content,
      spinner: "el-icon-loading",
      background: "rgba(0, 0, 0, 0.7)",
    })
  },
  // 关闭遮罩层
  closeLoading() {
    loadingInstance.close();
  }
$auth对象
$auth对象用于验证用户是否拥有某些权限或角色,它定义在plugins/auth.js文件中,它有如下方法
验证用户权限
// 验证用户是否具备某权限
this.$auth.hasPermi("system:user:add");
// 验证用户是否含有指定权限,只需包含其中一个
this.$auth.hasPermiOr(["system:user:add", "system:user:update"]);
// 验证用户是否含有指定权限,必须全部拥有
this.$auth.hasPermiAnd(["system:user:add", "system:user:update"]);
验证用户角色
// 验证用户是否具备某角色
this.$auth.hasRole("admin");
// 验证用户是否含有指定角色,只需包含其中一个
this.$auth.hasRoleOr(["admin", "common"]);
// 验证用户是否含有指定角色,必须全部拥有
this.$auth.hasRoleAnd(["admin", "common"]);
$cache对象
cache对象用于处理缓存。我们并不建议您直接使用sessionStorage或localStorage,因为项目的缓存策略可能发生变化,通过cache对象做一层调用代理则是一个不错的选择。$cache提供session和local两种级别的缓存,如下:
// local 普通值
this.$cache.local.set('key', 'local value')
console.log(this.$cache.local.get('key')) // 输出'local value'

// session 普通值
this.$cache.session.set('key', 'session value')
console.log(this.$cache.session.get('key')) // 输出'session value'

// local JSON值
this.$cache.local.setJSON('jsonKey', { localProp: 1 })
console.log(this.$cache.local.getJSON('jsonKey')) // 输出'{localProp: 1}'

// session JSON值
this.$cache.session.setJSON('jsonKey', { sessionProp: 1 })
console.log(this.$cache.session.getJSON('jsonKey')) // 输出'{sessionProp: 1}'

// 删除值
this.$cache.local.remove('key')
this.$cache.session.remove('key')
若依中的示例
src\layout\components\Settings\index.vue
saveSetting() {
      this.$modal.loading("正在保存到本地,请稍候...");
      this.$cache.local.set(
        "layout-setting",
        `{
            "topNav":${this.topNav},
            "tagsView":${this.tagsView},
            "fixedHeader":${this.fixedHeader},
            "sidebarLogo":${this.sidebarLogo},
            "dynamicTitle":${this.dynamicTitle},
            "sideTheme":"${this.sideTheme}",
            "theme":"${this.theme}"
          }`
      );
      setTimeout(this.$modal.closeLoading(), 1000)
    },
$download对象
$download对象用于文件下载,它定义在plugins/download.js文件中,它有如下方法
根据名称下载download路径下的文件
const name = "be756b96-c8b5-46c4-ab67-02e988973090.xlsx";
const isDelete = true;

// 默认下载方法
this.$download.name(name);

// 下载完成后是否删除文件
this.$download.name(name, isDelete);
根据名称下载upload路径下的文件
const resource = "/profile/upload/2021/09/27/be756b96-c8b5-46c4-ab67-02e988973090.png";

// 默认方法
this.$download.resource(resource);
根据请求地址下载zip包
const url = "/tool/gen/batchGenCode?tables=" + tableNames;
const name = "ruoyi";

// 默认方法
this.$download.zip(url, name);
更多文件下载操作
// 自定义文本保存
var blob = new Blob(["Hello, world!"], {type: "text/plain;charset=utf-8"});
this.$download.saveAs(blob, "hello world.txt");

// 自定义文件保存
var file = new File(["Hello, world!"], "hello world.txt", {type: "text/plain;charset=utf-8"});
this.$download.saveAs(file);

// 自定义data数据保存
const blob = new Blob([data], { type: 'text/plain;charset=utf-8' })
this.$download.saveAs(blob, name)

// 根据地址保存文件
this.$download.saveAs("https://ruoyi.vip/images/logo.png", "logo.jpg");
若依中的示例
src\views\tool\gen\index.vue
/** 生成代码操作 */
    handleGenTable(row) {
      const tableNames = row.tableName || this.tableNames;
      if (tableNames == "") {
        this.$modal.msgError("请选择要生成的数据");
        return;
      }
      if(row.genType === "1") {
        genCode(row.tableName).then(response => {
          this.$modal.msgSuccess("成功生成到自定义路径:" + row.genPath);
        });
      } else {
        this.$download.zip("/tool/gen/batchGenCode?tables=" + tableNames, "ruoyi.zip");
      }
    },
src\views\tool\build\index.vue
execDownload(data) {
      const codeStr = this.generateCode()
      const blob = new Blob([codeStr], { type: 'text/plain;charset=utf-8' })
      this.$download.saveAs(blob, data.fileName)
    },