01.idea中创建一个maven管理的空项目
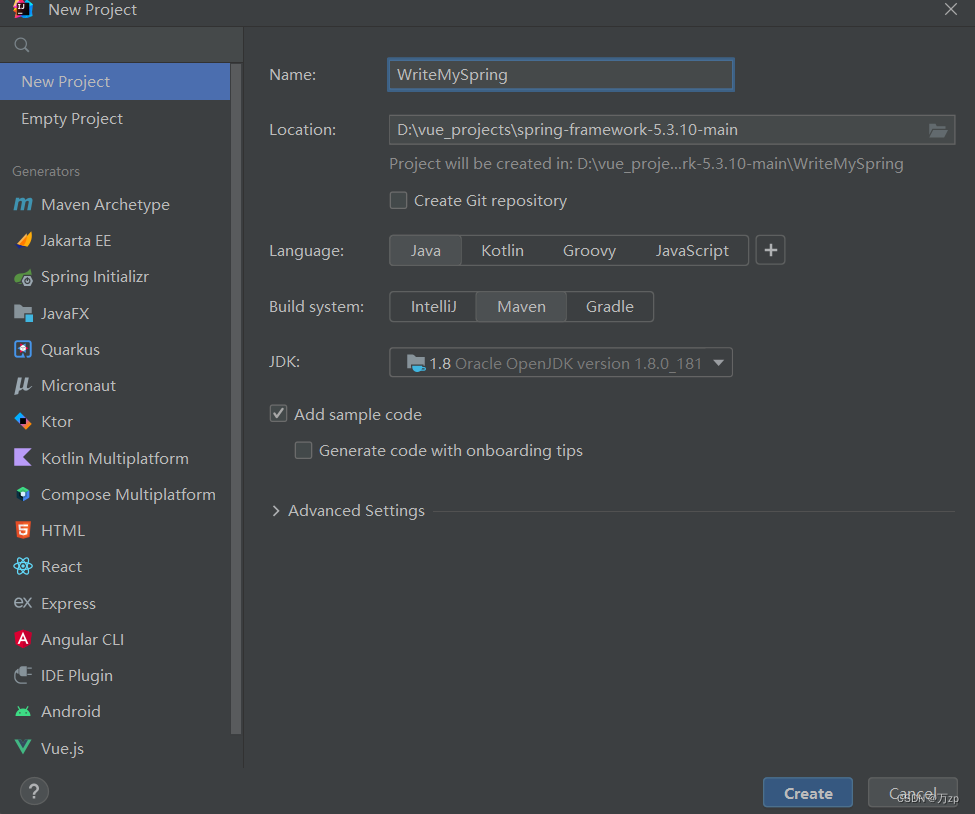
02.模拟创建出spring容器类,这里叫wzpApplicationContext,创建的时候会自动加载配置类的数据:
这里wzpApplicationContext对标的是AnnotationConfigApplicationContext
public class wzpApplicationContext {
    private Class configClass;

    public wzpApplicationContext(Class configClass) {
        this.configClass = configClass;
    }
}
模拟出容器类要扫描的配置类Appconfig
public class Appconfig {
}
在test中去测试这些创建的类
public class Mytest {
 public static void main(String[] args) {
    wzpApplicationContext wzpApplicationContext=new wzpApplicationContext(Appconfig.class);
}
}
03.在wzpApplicationContext 添加getbean函数,获取spring容器中的bean
  public Object getBean(String beanName) {
        return null;
    }
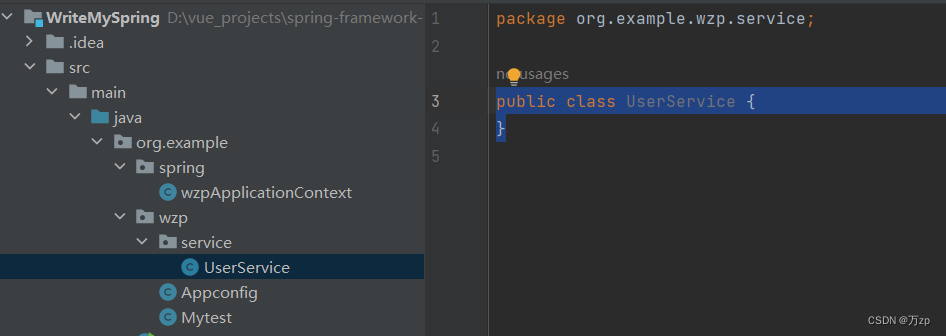
创建服务类UserService
public class UserService {
}
在测试test中运行getbean方法
public class Mytest {
 public static void main(String[] args) {
    wzpApplicationContext wzpApplicationContext=new wzpApplicationContext(Appconfig.class);

    UserService userService=   (UserService)wzpApplicationContext.getBean("UserService");
}
}
04.在服务类中写一些方法,等会看一下是不是可以运行
public class UserService {
    public void test(){
        System.out.println("test");
    }
}
此时在test中:
public class Mytest {
    public static void main(String[] args) {
        wzpApplicationContext wzpApplicationContext=new wzpApplicationContext(Appconfig.class);

        UserService userService=   (UserService)wzpApplicationContext.getBean("UserService");

        userService.test();
    }

}
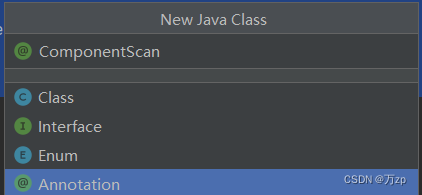
05.写几个自定义的注解
比如说,spring容器中的扫描,需要注解@ComponentScan
@Retention(RetentionPolicy.RUNTIME)
@Target(ElementType.TYPE)
public @interface ComponentScan {

    String value() default "";
}
解释一下:
Target 注解是说,这个注解主要用在哪一个区域,TYPE表示类,FIELD表示属性,METHOD表示方法。
Rentention 注解是说,这个注解在那个阶段使用,RUNTIME是在类加载阶段使用
然后模仿spring去用:
@ComponentScan("org.example.wzp.service")
public class Appconfig {

}
再创建一个注解:@Component
@Retention(RetentionPolicy.RUNTIME)
@Target(ElementType.TYPE)
public @interface Component {
    String value() default "";
}
在服务类中去使用:
@Component
public class UserService {
    public void test(){
        System.out.println("test");
    }
}
06.实现扫描的功能
现在只是写了几个注解,具体的功能代码还没有写,接下来就是扫描的代码
回想spring框架,是创建spring容器的时候,就会自动创建bean
所以,扫描的具体实现代码就应该在构造函数中写
        //判断类上是不是有注解ComponentScan

        if(configClass.isAnnotationPresent(ComponentScan.class)){

            //获取注解对象

            ComponentScan componentScan = (ComponentScan)configClass.getAnnotation(ComponentScan.class);

            //获取注解对象上的value,这里也就是path
            String path = componentScan.value();

            //文件的路径是/,而获取到的是带有.的包名

            path=path.replace(".","/");

            //获取当前的类加载器
            ClassLoader classLoader = wzpApplicationContext.class.getClassLoader();
            //根据类加载器获取编译完成的target的class文件夹的路径

            URL resource = classLoader.getResource(path);
            //根据路径,获取文件

            File file=new File(resource.getFile());
            //因为扫描的是包,所以大概率是一个目录

            if (file.isDirectory()){
                //获取目录中的文件集合

                for (File f:file.listFiles()){
                    //获取文件的绝对路径
                    String absolutePath = f.getAbsolutePath();
                    //截取从org到class
                    String org = absolutePath.substring(absolutePath.indexOf("org"), absolutePath.indexOf(".class"));
                    //由于是文件路径,要转换回来,把\变成 . 包名,好让类加载器加载得到类的对象
                    String classpath = org.replace("\\", ".");
                    //加载器加载后,得到一个类对象
                    Class<?> aClass = classLoader.loadClass(classpath);
                    //判断是不是类上存在Component注解
                    if(aClass.isAnnotationPresent(Component.class)){

                    //判断是不是单例模式,要看自定义的注解Scope
                        if (aClass.isAnnotationPresent(Scope.class)){
                            Scope scopeAnnotation = aClass.getAnnotation(Scope.class);

                            String value = scopeAnnotation.value();

                            if (value.equals("singleton")){
                                //创建单例模式的bean
                            }
                            else{
                                //多例模式
                            }

                        }
                    }

                }
            }

        }
    }
创建一个注解 Scope
@Retention(RetentionPolicy.RUNTIME)
@Target(ElementType.TYPE)
public @interface Scope {
    String value() default "";
}
在服务类上使用,如果是单例,就写singleton,如果是多例,就写prototype
例如:服务类UserService ,这里声明是单例模式
@Component("UserService")
@Scope("singleton")
public class UserService {
    public void test(){
        System.out.println("test");
    }
}
07.优化设计,把类上注解的许多信息都放入到一个对象中的话,直接去读取这个类的属性就好了
创建一个BeanDefinition
public class BeanDefinition {

     private Class type;
     private String scope;
     private Boolean isLazy;

     public Class getType() {
          return type;
     }

     public void setType(Class type) {
          this.type = type;
     }

     public String getScope() {
          return scope;
     }

     public void setScope(String scope) {
          this.scope = scope;
     }

     public Boolean getLazy() {
          return isLazy;
     }

     public void setLazy(Boolean lazy) {
          isLazy = lazy;
     }

}
再次优化扫描
 //判断是不是类上存在Component注解
                    if(aClass.isAnnotationPresent(Component.class)){

                        Component componentAnnotation = aClass.getAnnotation(Component.class);

                        String name = componentAnnotation.value();


                        BeanDefinition beanDefinition=new BeanDefinition();

                        beanDefinition.setType(aClass);
                    //判断是不是单例模式,要看自定义的注解Scope
                        if (aClass.isAnnotationPresent(Scope.class)){
                            Scope scopeAnnotation = aClass.getAnnotation(Scope.class);

                            String value = scopeAnnotation.value();

                            beanDefinition.setScope(value);

                            if (value.equals("singleton")){
                                //创建单例模式的bean
                                beanDefinition.setScope("singleton");
                            }
                            else{
                                //多例模式
                            }

                        }
                    }
在wzpApplicationContext 中添加一个属性,map集合
public class wzpApplicationContext {
//配置类
    private Class configClass;
//存放BeanDefinition
    private Map<String,BeanDefinition> BeanDefinitionMap =new HashMap<>();
    }
把刚刚创建的BeanDefinition放入到map集合中:
if(aClass.isAnnotationPresent(Component.class)){

                        Component componentAnnotation = aClass.getAnnotation(Component.class);

                        String name = componentAnnotation.value();

                        BeanDefinition beanDefinition=new BeanDefinition();

                        beanDefinition.setType(aClass);
                    //判断是不是单例模式,要看自定义的注解Scope
                        if (aClass.isAnnotationPresent(Scope.class)){
                            Scope scopeAnnotation = aClass.getAnnotation(Scope.class);

                            String value = scopeAnnotation.value();

                            beanDefinition.setScope(value);

                            if (value.equals("singleton")){
                                //创建单例模式的bean
                                beanDefinition.setScope("singleton");
                            }
                            else{
                                //多例模式
                            }
                            BeanDefinitionMap.put(name,beanDefinition);

                        }
                    }
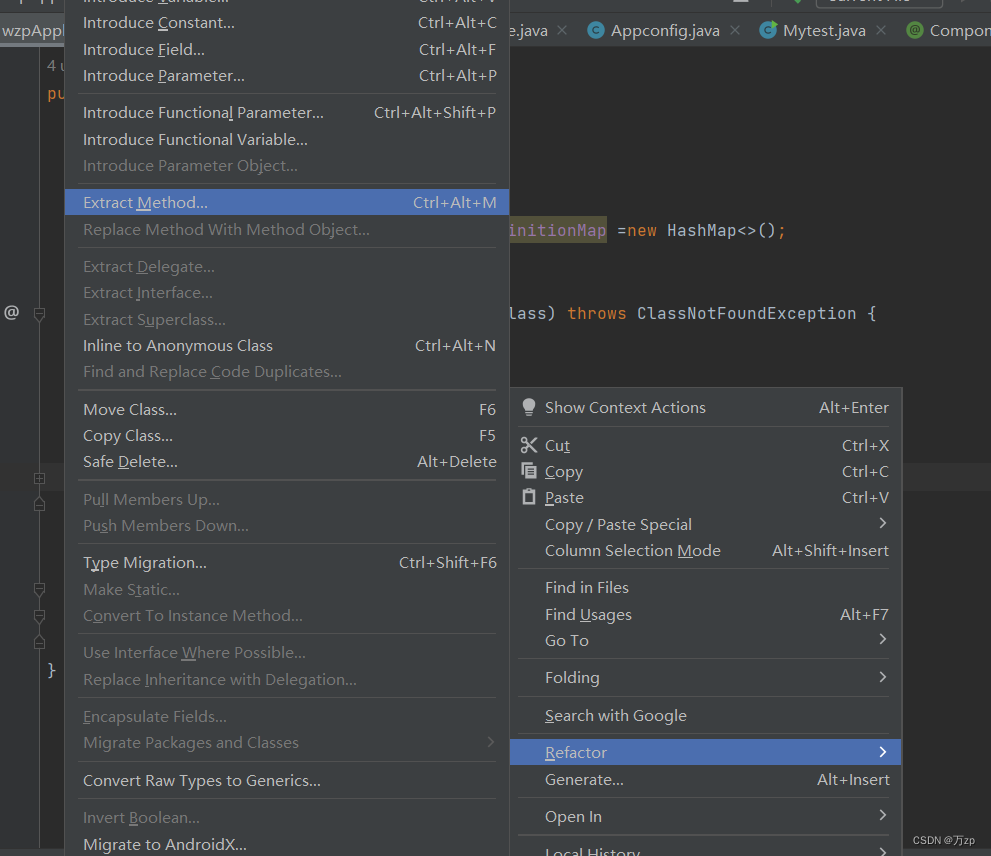
最后总的代码抽象此外一个方法:
   public wzpApplicationContext(Class configClass) throws ClassNotFoundException {
        this.configClass = configClass;


        //判断类上是不是有注解ComponentScan

        scan(configClass);
    }

   private void scan(Class configClass) throws ClassNotFoundException {
        if(configClass.isAnnotationPresent(ComponentScan.class)){

            //获取注解对象

            ComponentScan componentScan = (ComponentScan) configClass.getAnnotation(ComponentScan.class);

            //获取注解对象上的value,这里也就是path
            String path = componentScan.value();

            //文件的路径是/,而获取到的是带有.的包名

            path.replace(".","/");

            //获取当前的类加载器
            ClassLoader classLoader = wzpApplicationContext.class.getClassLoader();
            //根据类加载器获取编译完成的target的class文件夹的路径

            URL resource = classLoader.getResource(path);
            //根据路径,获取文件

            File file=new File(resource.getFile());
            //因为扫描的是包,所以大概率是一个目录

            if (file.isDirectory()){
                //获取目录中的文件集合

                for (File f:file.listFiles()){
                    //获取文件的绝对路径
                    String absolutePath = f.getAbsolutePath();
                    //截取从org到class
                    String org = absolutePath.substring(absolutePath.indexOf("org"), absolutePath.indexOf(".class"));
                    //由于是文件路径,要转换回来,把\变成 . 包名,好让类加载器加载得到类的对象
                    String classpath = org.replace("\\", ".");
                    //加载器加载后,得到一个类对象
                    Class<?> aClass = classLoader.loadClass(classpath);
                    //判断是不是类上存在Component注解
                    if(aClass.isAnnotationPresent(Component.class)){

                        Component componentAnnotation = aClass.getAnnotation(Component.class);

                        String name = componentAnnotation.value();

                        BeanDefinition beanDefinition=new BeanDefinition();

                        beanDefinition.setType(aClass);
                    //判断是不是单例模式,要看自定义的注解Scope
                        if (aClass.isAnnotationPresent(Scope.class)){
                            Scope scopeAnnotation = aClass.getAnnotation(Scope.class);

                            String value = scopeAnnotation.value();

                            beanDefinition.setScope(value);

                            if (value.equals("singleton")){
                                //创建单例模式的bean
                                beanDefinition.setScope("singleton");
                            }
                            else{
                                //多例模式
                            }
                            BeanDefinitionMap.put(name,beanDefinition);

                        }
                    }

                }
            }

        }
    }
08.扫描完了,开始写createbean方法了
在扫描之后调用:
用for循环
public class wzpApplicationContext {
    private Class configClass;

    private Map<String,BeanDefinition> BeanDefinitionMap =new HashMap<>();

    public wzpApplicationContext(Class configClass) throws ClassNotFoundException {
        this.configClass = configClass;


        //判断类上是不是有注解ComponentScan

        scan(configClass);
		for (Map.Entry<String, BeanDefinition> entry : BeanDefinitionMap.entrySet()){
            BeanDefinition beanDefinition = entry.getValue();
            String beanName = entry.getKey();
            if (beanDefinition.getScope().equals("singleton"))
            {
            //在这里调用createbean,创建单例
              Object bean=  createBean(beanName,beanDefinition);

            }
        }
}
09.在wzpApplicationContext 创建createBean
  private Object createBean(String beanName, BeanDefinition beanDefinition) {
        return null;
    }
10.创建的bean要保存到容器
在wzpApplicationContext 创建一个属性 Map<String,Object> singletonObjectsMap,这个用来保存创建的单例bean
  //保存单例的地方,Map集合
    private Map<String,Object> singletonObjectsMap =new HashMap<>();
此时的for循环
 for (Map.Entry<String, BeanDefinition> entry : BeanDefinitionMap.entrySet()){
            BeanDefinition beanDefinition = entry.getValue();
            String beanName = entry.getKey();
            if (beanDefinition.getScope().equals("singleton"))
            {
            //创建单例
              Object  bean=  createBean(beanName,beanDefinition);
             //保存单例到容器中
              singletonObjectsMap.put(beanName,bean);
            }
        }
11.什么时候调用这个getbean方法
先从BeanDefinitionMap获取已经扫描完了beanDefinition,如果有的话,那表示在扫描的包中,有这个类,再判断是不是单例模式,如果没有的话,那就说明没有这样的类,抛出异常。
  public Object getBean(String beanName) throws Exception {

        if (!BeanDefinitionMap.containsKey(beanName)){
            throw new NullPointerException();
        }

        BeanDefinition beanDefinition = BeanDefinitionMap.get(beanName);

        if (beanDefinition.getScope().equals("singleton"))
        {
            //单例

        }else{
            //原型
        }

        return null;
    }
这里是获取bean,单例从容器中获取
singletonObjectsMap.get(beanName)
原型(多例)就马上创建一个bean
createBean(beanName, beanDefinition);
这个时候的getBean方法
    public Object getBean(String beanName) throws Exception {

        if (!BeanDefinitionMap.containsKey(beanName)){
            throw new NullPointerException();
        }

        BeanDefinition beanDefinition = BeanDefinitionMap.get(beanName);

        if (beanDefinition.getScope().equals("singleton"))
        {
            //单例
            return     singletonObjectsMap.get(beanName);
        }else{
            //原型
            Object bean = createBean(beanName, beanDefinition);
            return bean;

        }


    }
12.如何创建bean呢,用反射 newInstance()
   private Object createBean(String beanName, BeanDefinition beanDefinition) throws NoSuchMethodException, InvocationTargetException, InstantiationException, IllegalAccessException {
        Class clazz = beanDefinition.getType();
        Object o = clazz.getConstructor().newInstance();

        return o;
    }
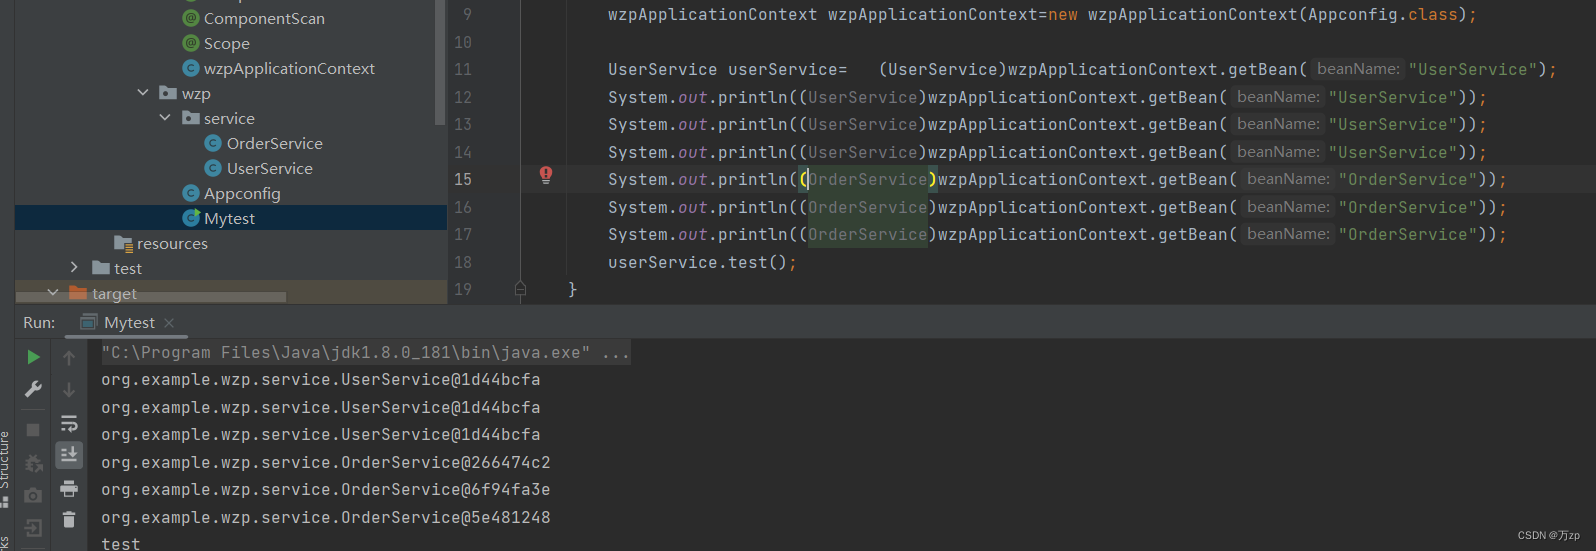
13.测试

14.创建一个多例
@Component("OrderService")
@Scope("prototype")
public class OrderService
{
}
public class Mytest {
    public static void main(String[] args) throws Exception {
        wzpApplicationContext wzpApplicationContext=new wzpApplicationContext(Appconfig.class);

        UserService userService=   (UserService)wzpApplicationContext.getBean("UserService");
        System.out.println((UserService)wzpApplicationContext.getBean("UserService"));
        System.out.println((UserService)wzpApplicationContext.getBean("UserService"));
        System.out.println((UserService)wzpApplicationContext.getBean("UserService"));
        System.out.println((OrderService)wzpApplicationContext.getBean("OrderService"));
        System.out.println((OrderService)wzpApplicationContext.getBean("OrderService"));
        System.out.println((OrderService)wzpApplicationContext.getBean("OrderService"));
        userService.test();
    }

}
15.实现依赖注入:也就是@AutoWired注解
@Retention(RetentionPolicy.RUNTIME)
@Target(ElementType.FIELD)
public @interface AutoWired {
}
在服务类UserService中使用这个自定义的注解:
@Component("UserService")
@Scope("singleton")
public class UserService {

    @AutoWired
    private OrderService orderService;
    public void test(){
        System.out.println("test");
    }
}
16.测试
结果是null
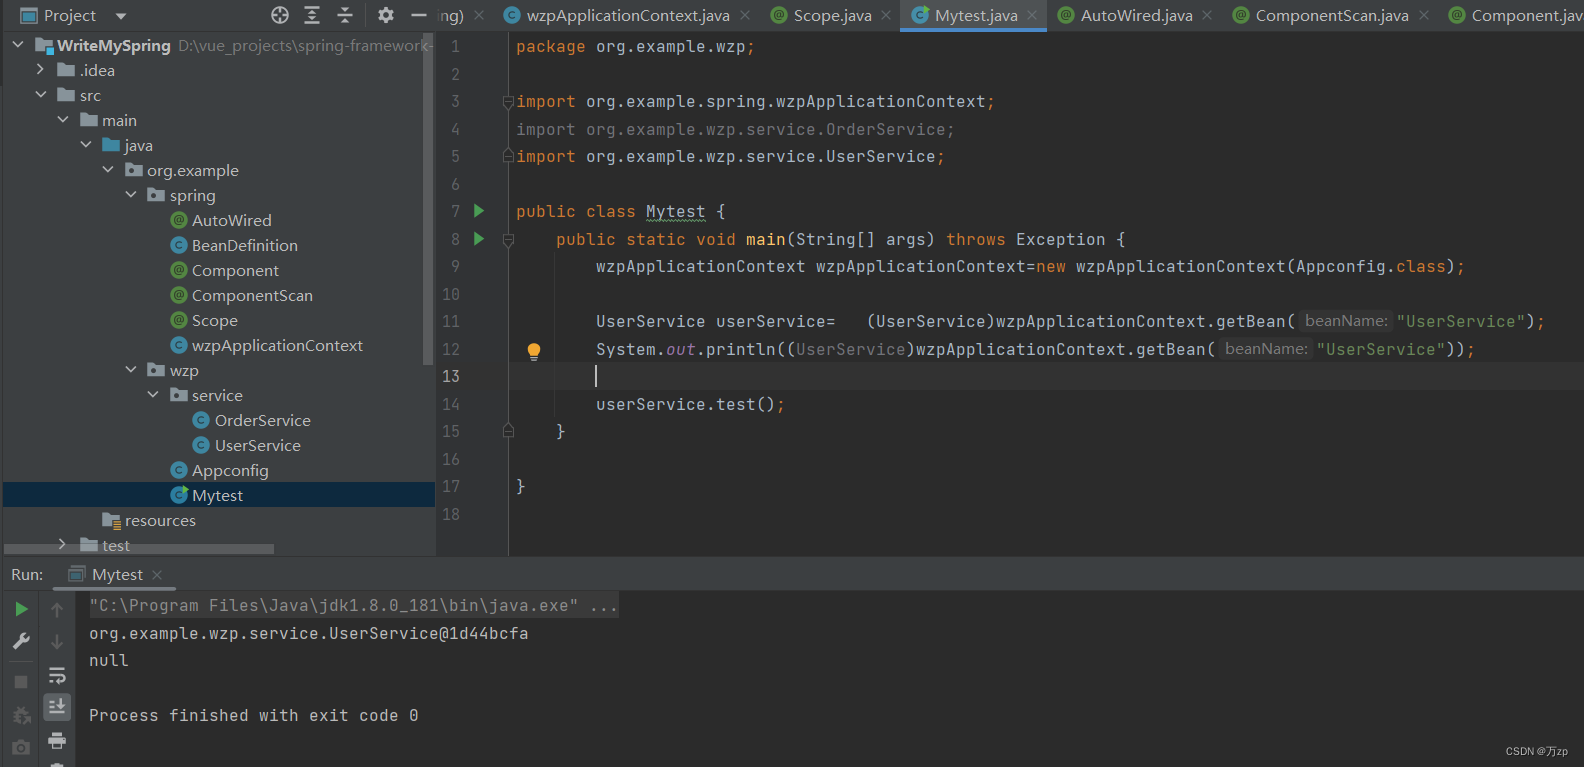
17.实现依赖注入
在createBean方法中去写:
private Object createBean(String beanName, BeanDefinition beanDefinition) throws Exception {
        Class clazz = beanDefinition.getType();
        Object o = clazz.getConstructor().newInstance();


        for (Field field : clazz.getDeclaredFields())
        {
            if (field.isAnnotationPresent(AutoWired.class))
            {
                //将该对象的可访问标志设置为指定的布尔值。值为true表示当使用该反射对象时应该抑制Java语言访问检查。
                //实际上setAccessible是启用和禁用访问安全检查的开关
                //由于JDK的安全检查耗时较多.所以通过setAccessible(true)的方式关闭安全检查就可以达到提升反射速度的目的
                field.setAccessible(true);
                //Field.set()方法的语法:
                //   set(Object obj, Object value)
                //      此时的Field对象表示已经是这个对象的一个属性了  为Field对象属于的变量的属性设置新值(Field代表的属性的新的值)

                field.set(o,getBean(field.getName()));
            }
        }


        return o;
    }
18.存在一个问题,实现依赖注入的时候,万一那个对象还没有被创建呢,也就是在容器中还没有来得及创建这个类型的bean,要修改getbean方法
public Object getBean(String beanName) throws Exception {

        if (!BeanDefinitionMap.containsKey(beanName)){
            throw new NullPointerException();
        }

        BeanDefinition beanDefinition = BeanDefinitionMap.get(beanName);

        if (beanDefinition.getScope().equals("singleton"))
        {
          Object singletOnobjectBean=  singletonObjectsMap.get(beanName);
            //单例
            if (singletOnobjectBean==null){
                singletonObjectsMap.put(beanName, createBean(beanName,beanDefinition)) ;
            }
            return     singletOnobjectBean;
        }else{
            //原型
            Object protoTypeBean = createBean(beanName, beanDefinition);

            return protoTypeBean;

        }


    }
19.实现初始化:
要写一个接口:InitializingBean
public interface InitializingBean {
     void afterPropertiesSet();
}
20.服务类UserService来实现接口:
@Component("UserService")
@Scope("singleton")
public class UserService implements InitializingBean {

    @AutoWired
    private OrderService orderService;
    public void test(){
        System.out.println(orderService);
    }

    @Override
    public void afterPropertiesSet() {
         System.out.println("初始化");
    }
}
21.初始化要在创建bean方法中去做啊,所以还是要修改createbean方法:
 private Object createBean(String beanName, BeanDefinition beanDefinition) throws Exception {
        Class clazz = beanDefinition.getType();
        Object o = clazz.getConstructor().newInstance();


        for (Field field : clazz.getDeclaredFields())
        {
            if (field.isAnnotationPresent(AutoWired.class))
            {
                //将该对象的可访问标志设置为指定的布尔值。值为true表示当使用该反射对象时应该抑制Java语言访问检查。
                //实际上setAccessible是启用和禁用访问安全检查的开关
                //由于JDK的安全检查耗时较多.所以通过setAccessible(true)的方式关闭安全检查就可以达到提升反射速度的目的
                field.setAccessible(true);
                //Field.set()方法的语法:
                //   set(Object obj, Object value)
                //      此时的Field对象表示已经是这个对象的一个属性了  为Field对象属于的变量的属性设置新值(Field代表的属性的新的值)

                field.set(o,getBean(field.getName()));
            }
        }
        //初始化
        if (o instanceof InitializingBean){
            ((InitializingBean) o).afterPropertiesSet();
        }

        return o;
    }
22.要实现AOP,也就要实现BeanPostProcessor,这个也是一个接口
package org.example.spring;

public interface BeanPostProcessor {


    default Object postProcessBeforeInitialization(Object bean, String beanName) {
        return bean;
    }

    default Object postProcessAfterInitialization(Object bean, String beanName)  {
        return bean;
    }
}
23.写这个接口的实现类,因为要在bean中用,所以加上@Component,表示这个也是一个bean
package org.example.spring;
@Component("wzpBeanPostProcessor")
public class wzpBeanPostProcessor  implements  BeanPostProcessor{
    @Override
    public Object postProcessBeforeInitialization(Object bean, String beanName) {
        return null;
    }

    @Override
    public Object postProcessAfterInitialization(Object bean, String beanName) {
        return null;
    }
}
24.由于这个bean是用于AOP的,比较特殊,所以在扫描的时候创建比较好
,要修改扫描函数,主要是在扫描类中是否有@Component注解修饰的时候这一部分来写比较好
  private void scan(Class configClass) throws ClassNotFoundException, NoSuchMethodException, InvocationTargetException, InstantiationException, IllegalAccessException {
        if(configClass.isAnnotationPresent(ComponentScan.class)){

            //获取注解对象

            ComponentScan componentScan = (ComponentScan) configClass.getAnnotation(ComponentScan.class);

            //获取注解对象上的value,这里也就是path
            String path = componentScan.value();

            //文件的路径是/,而获取到的是带有.的包名

            path= path.replace(".","/");

            //获取当前的类加载器
            ClassLoader classLoader = wzpApplicationContext.class.getClassLoader();
            //根据类加载器获取编译完成的target的class文件夹的路径

            URL resource = classLoader.getResource(path);
            //根据路径,获取文件

            File file=new File(resource.getFile());
            //因为扫描的是包,所以大概率是一个目录

            if (file.isDirectory()){
                //获取目录中的文件集合

                for (File f:file.listFiles()){
                    //获取文件的绝对路径
                    String absolutePath = f.getAbsolutePath();
                    //截取从org到class
                    String org = absolutePath.substring(absolutePath.indexOf("org"), absolutePath.indexOf(".class"));
                    //由于是文件路径,要转换回来,把\变成 . 包名,好让类加载器加载得到类的对象
                    String classpath = org.replace("\\", ".");
                    //加载器加载后,得到一个类对象
                    Class<?> aClass = classLoader.loadClass(classpath);
                    //判断是不是类上存在Component注解
                    if(aClass.isAnnotationPresent(Component.class)){

                         if (BeanPostProcessor.class.isAssignableFrom(aClass)){

                            BeanPostProcessor BeanPostProcessornewInstance = (BeanPostProcessor)aClass.getConstructor().newInstance();

                            BeanPostProcessorList.add(BeanPostProcessornewInstance);
                        }

                        Component componentAnnotation = aClass.getAnnotation(Component.class);

                        String name = componentAnnotation.value();

                        BeanDefinition beanDefinition=new BeanDefinition();

                        beanDefinition.setType(aClass);
                    //判断是不是单例模式,要看自定义的注解Scope
                        if (aClass.isAnnotationPresent(Scope.class)){
                            Scope scopeAnnotation = aClass.getAnnotation(Scope.class);

                            String value = scopeAnnotation.value();

                            beanDefinition.setScope(value);

                            if (value.equals("singleton")){
                                //创建单例模式的bean
                                beanDefinition.setScope("singleton");
                            }
                            else{
                                //多例模式
                            }
                            BeanDefinitionMap.put(name,beanDefinition);

                        }
                    }

                }
            }

        }
    }
private List<BeanPostProcessor> BeanPostProcessorList=new ArrayList<>();
25.要用这个wzpBeanPostProcessor,主要还是在createbean,这里是初始化后的操作,下面还有一个初始化前的操作
 private Object createBean(String beanName, BeanDefinition beanDefinition) throws Exception {
        Class clazz = beanDefinition.getType();
        Object o = clazz.getConstructor().newInstance();


        for (Field field : clazz.getDeclaredFields())
        {
            if (field.isAnnotationPresent(AutoWired.class))
            {
                //将该对象的可访问标志设置为指定的布尔值。值为true表示当使用该反射对象时应该抑制Java语言访问检查。
                //实际上setAccessible是启用和禁用访问安全检查的开关
                //由于JDK的安全检查耗时较多.所以通过setAccessible(true)的方式关闭安全检查就可以达到提升反射速度的目的
                field.setAccessible(true);
                //Field.set()方法的语法:
                //   set(Object obj, Object value)
                //      此时的Field对象表示已经是这个对象的一个属性了  为Field对象属于的变量的属性设置新值(Field代表的属性的新的值)

                field.set(o,getBean(field.getName()));
            }
        }
        //初始化
        if (o instanceof InitializingBean){
            ((InitializingBean) o).afterPropertiesSet();
        }

        //AOP
        for (BeanPostProcessor b: BeanPostProcessorList){
            //初始化后的操作
            b.postProcessAfterInitialization(o,beanName);

        }
        return o;
    }
在ceatebean方法
初始化前,初始化,初始化后
   //初始化后
        for (BeanPostProcessor b: BeanPostProcessorList){

            b.postProcessBeforeInitialization(o,beanName);

        }
        //初始化
        if (o instanceof InitializingBean){
            ((InitializingBean) o).afterPropertiesSet();
        }

        //初始化后
        for (BeanPostProcessor b: BeanPostProcessorList){

            b.postProcessAfterInitialization(o,beanName);

        }
26.wzpBeanPostProcessor的主要功能是AOP,怎么AOP呢,这里用的是动态代理,还要创建一个接口UserInterface
package org.example.spring;

public interface UserInterface {
    void test();
}
服务类再去实现这个接口
@Component("UserService")
@Scope("singleton")
public class UserService implements InitializingBean , UserInterface {

    @AutoWired
    private OrderService orderService;

    public void test(){
        System.out.println("hello AOP");
    }

    @Override
    public void afterPropertiesSet() {
        System.out.println("初始化");
    }
}
27.在wzpBeanPostProcessor中去完成AOP,比如说初始化后的postProcessAfterInitialization方法中,做AOP,要针对哪个bean,用if判断:
package org.example.spring;

import java.lang.reflect.InvocationHandler;
import java.lang.reflect.Method;
import java.lang.reflect.Proxy;

@Component("wzpBeanPostProcessor")
public class wzpBeanPostProcessor  implements  BeanPostProcessor{
    @Override
    public Object postProcessBeforeInitialization(Object bean, String beanName) {
        return null;
    }

    @Override
    public Object postProcessAfterInitialization(Object bean, String beanName) {

        if (beanName.equals("UserService")) {
            Object proxyInstance = Proxy.newProxyInstance(wzpBeanPostProcessor.class.getClassLoader(), bean.getClass().getInterfaces(), new InvocationHandler() {
                @Override
                public Object invoke(Object proxy, Method method, Object[] args) throws Throwable {

                    //执行AOP的逻辑
                    System.out.println("hello  AOP逻辑在此");

                    //执行完了AOP的操作,执行原来的切点方法
                    return method.invoke(bean,args);
                }
            });
            return proxyInstance;
        }
        return bean;
    }
}
在createbean方法中也要修改,因为要接收代理对象
      //初始化后
        for (BeanPostProcessor b: BeanPostProcessorList){

          o=  b.postProcessBeforeInitialization(o,beanName);

        }
        //初始化
        if (o instanceof InitializingBean){
            ((InitializingBean) o).afterPropertiesSet();
        }

        //初始化后
        for (BeanPostProcessor b: BeanPostProcessorList){

           o= b.postProcessAfterInitialization(o,beanName);

        }
28.实现Aware接口
在 Spring 中,BeanNameAware 接口是一个回调接口,它提供了一个用于设置 Bean 名称的方法。当一个 Bean 实现了 BeanNameAware 接口时,在该 Bean 实例被实例化后,Spring 容器会调用 setBeanName 方法,并将该 Bean 在 Spring 容器中的名称作为参数传递进去。
创建一个BeanNameAware接口:
public interface BeanNameAware {

    void setBeanName(String name);
}
在服务类中实现接口:
package org.example.wzp.service;

import org.example.spring.*;

@Component("UserService")
@Scope("singleton")
public class UserService implements InitializingBean , UserInterface ,BeanNameAware {

    @AutoWired
    private OrderService orderService;
    public void test(){
        System.out.println("hello AOP");
    }

    @Override
    public void afterPropertiesSet() {
        System.out.println("初始化");
    }

    private String beanName;

    @Override
    public void setBeanName(String name) {
        this.beanName=name;
    }
}
在createbean函数中:在初始化之前
  //Aware接口
        if (o instanceof BeanNameAware){

            ((BeanNameAware) o).setBeanName(beanName);
        }
        //初始化前
        for (BeanPostProcessor b: BeanPostProcessorList){

          o=  b.postProcessBeforeInitialization(o,beanName);

        }
        //初始化
        if (o instanceof InitializingBean){
            ((InitializingBean) o).afterPropertiesSet();
        }

        //初始化后
        for (BeanPostProcessor b: BeanPostProcessorList){

           o= b.postProcessAfterInitialization(o,beanName);

        }