本文为此系列的第四篇Controllable GAN,上一篇为Conditional GAN。文中使用训练好的模型和优化噪声向量来操纵生成图像的特定属性,若有不懂的无监督知识点可以看本系列第一篇。
原理
本文主要讲什么是控制生成,以及如何做到控制生成。
-
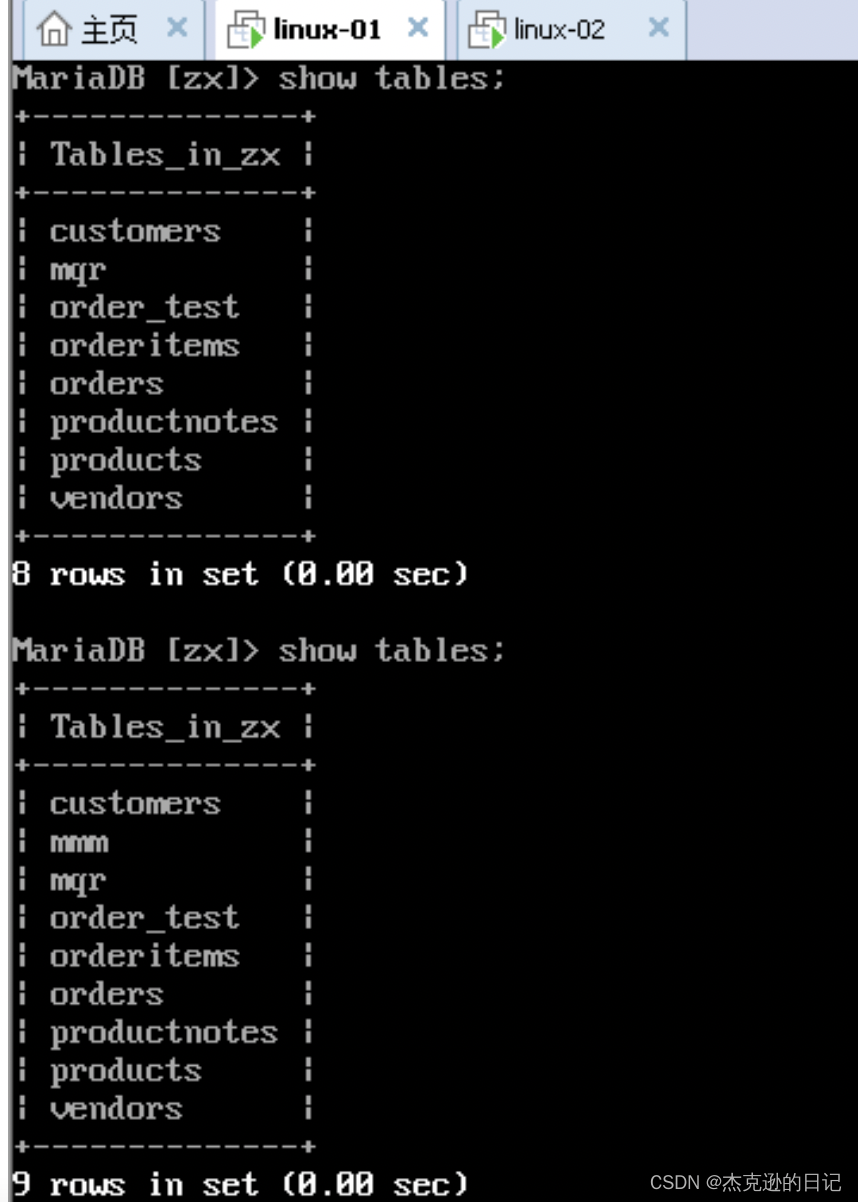
什么是控制生成

如图,比如控制生成的人脸的年龄、是否佩戴眼镜、性别、姿势等。 -
可控生成与条件生成
有时候可控生成就相当于条件生成,比如是否戴眼镜、性别可以作为单独的类别进行训练作为条件生成,也可以作为某个类中的不同特征来直接控制生成;
但对于连续变量,比如年龄、头发长度等,使用条件生成的话就不好标注标签。可控生成就能很好的适用,更多的是查找所需要的特征的方向。

-
如何控制生成

通过改变随机向量的某个或者某些值来改变生成的特征(生成器是已经训练好的)。

- 假设噪声向量只有两个维度(便于画图理解)

假设这个线性方向为d,g(v2) = g(v1+d),可以看到噪声v1输入生成器生成的图像到v2输入进去生成的图像之间的渐变图像。
我们的目标就是为了找到所想要的特征的方向d,只要找到d,就能实现控制生成。

比如我们如果找到控制头发颜色的方向d,就能实现改变发色。 - 可控生成也有一些困难和挑战,很难控制单一特征的改变。
①不同特征在训练集中有很强的关联性时,很难在不修改其他所有的特征的情况下来控制单一特征。

例如胡子与性别、年龄、阳刚程度有关,所以很难在一个年轻女性的脸上添加胡子。
②z-space entanglement
在某个方向的移动可能会同时影响输出中的多个特征,即使这些特征在训练集中不一定具有相关性。

例如,修改年龄时也会改变头发或者眼睛。
出现这种情况可能是因为 d i m e n s i o n z < n u m f e a t u r e dimension_z < num_{feature} dimensionz<numfeature ,即噪声的维度想于特征数量所导致的,无法一对一的进行映射。 - 使用训练好的分类器的梯度来找到方向d

使用分类信息来修改噪声z,这个过程不会修改生成器的权重,所以生成器要被冻结。
一直重复这个过程,直到生成的图像出现想要的特征。比如一直到生成戴眼镜的人为止。
当然,缺点就是得现有个训练好的分类器,若没有,还得找这个特征对应的数据集自己进行训练。 - 通过解耦z-space(disentangled z-space )来控制单一特征的变化

要求 d i m e n s i o n z > n u m f e a t u r e dimension_z > num_{feature} dimensionz>numfeature ,比如第一维度是控制头发颜色的,那么沿着z1方向则是控制头发颜色这一特征的方向d。

解耦后的噪声向量在特定维度控制特定特征。
解耦的方法:
①标注数据嵌入class vector进噪声中,类似条件生成的过程。但是对于连续的特征类不适用,比如头发长度等。
②添加正则项到所选的loss函数(BCE、W-loss等)中,促进噪声向量z中的每个索引关联起来。使用无监督的方式进行操作,即不用进行标注标签。

代码
model.py
from torch import nn
import torch

class Generator(nn.Module):
    def __init__(self, z_dim=10, im_chan=3, hidden_dim=64):
        super(Generator, self).__init__()
        self.z_dim = z_dim
        # Build the neural network
        self.gen = nn.Sequential(
            self.make_gen_block(z_dim, hidden_dim * 8),
            self.make_gen_block(hidden_dim * 8, hidden_dim * 4),
            self.make_gen_block(hidden_dim * 4, hidden_dim * 2),
            self.make_gen_block(hidden_dim * 2, hidden_dim),
            self.make_gen_block(hidden_dim, im_chan, kernel_size=4, final_layer=True),
        )

    def make_gen_block(self, input_channels, output_channels, kernel_size=3, stride=2, final_layer=False):
        if not final_layer:
            return nn.Sequential(
                nn.ConvTranspose2d(input_channels, output_channels, kernel_size, stride),
                nn.BatchNorm2d(output_channels),
                nn.ReLU(inplace=True),
            )
        else:
            return nn.Sequential(
                nn.ConvTranspose2d(input_channels, output_channels, kernel_size, stride),
                nn.Tanh(),
            )

    def forward(self, noise):
        x = noise.view(len(noise), self.z_dim, 1, 1)
        return self.gen(x)

class Classifier(nn.Module):
    def __init__(self, im_chan=3, n_classes=2, hidden_dim=64):
        super(Classifier, self).__init__()
        self.classifier = nn.Sequential(
            self.make_classifier_block(im_chan, hidden_dim),
            self.make_classifier_block(hidden_dim, hidden_dim * 2),
            self.make_classifier_block(hidden_dim * 2, hidden_dim * 4, stride=3),
            self.make_classifier_block(hidden_dim * 4, n_classes, final_layer=True),
        )

    def make_classifier_block(self, input_channels, output_channels, kernel_size=4, stride=2, final_layer=False):
        if final_layer:
            return nn.Sequential(
                nn.Conv2d(input_channels, output_channels, kernel_size, stride),
            )
        else:
            return nn.Sequential(
                nn.Conv2d(input_channels, output_channels, kernel_size, stride),
                nn.BatchNorm2d(output_channels),
                nn.LeakyReLU(0.2, inplace=True),
            )

    def forward(self, image):
        class_pred = self.classifier(image)
        return class_pred.view(len(class_pred), -1)
test.py
import torch
from torch import nn
from tqdm.auto import tqdm
from torchvision import transforms
from torchvision.utils import make_grid
from torchvision.datasets import CelebA
from torch.utils.data import DataLoader
import matplotlib.pyplot as plt
from model import *
torch.manual_seed(0) # Set for our testing purposes, please do not change!

def show_tensor_images(image_tensor, num_images=16, size=(3, 64, 64), nrow=3):
    image_tensor = (image_tensor + 1) / 2
    image_unflat = image_tensor.detach().cpu()
    image_grid = make_grid(image_unflat[:num_images], nrow=nrow)
    plt.imshow(image_grid.permute(1, 2, 0).squeeze())
    plt.show()

def get_noise(n_samples, z_dim, device='cpu'):
    return torch.randn(n_samples, z_dim, device=device)

z_dim = 64
batch_size = 128
device = 'cuda'

import torch
gen = Generator(z_dim).to(device)
gen_dict = torch.load("pretrained_celeba.pth", map_location=torch.device(device))["gen"]
gen.load_state_dict(gen_dict)
gen.eval()

n_classes = 40
classifier = Classifier(n_classes=n_classes).to(device)
class_dict = torch.load("pretrained_classifier.pth", map_location=torch.device(device))["classifier"]
classifier.load_state_dict(class_dict)
classifier.eval()
print("Loaded the models!")

opt = torch.optim.Adam(classifier.parameters(), lr=0.01)

def calculate_updated_noise(noise, weight):
    new_noise = noise + ( noise.grad * weight)
    return new_noise

n_images = 8
fake_image_history = []
grad_steps = 10 # Number of gradient steps to take
skip = 2 # Number of gradient steps to skip in the visualization

feature_names = ["5oClockShadow", "ArchedEyebrows", "Attractive", "BagsUnderEyes", "Bald", "Bangs",
"BigLips", "BigNose", "BlackHair", "BlondHair", "Blurry", "BrownHair", "BushyEyebrows", "Chubby",
"DoubleChin", "Eyeglasses", "Goatee", "GrayHair", "HeavyMakeup", "HighCheekbones", "Male",
"MouthSlightlyOpen", "Mustache", "NarrowEyes", "NoBeard", "OvalFace", "PaleSkin", "PointyNose",
"RecedingHairline", "RosyCheeks", "Sideburn", "Smiling", "StraightHair", "WavyHair", "WearingEarrings",
"WearingHat", "WearingLipstick", "WearingNecklace", "WearingNecktie", "Young"]

### Change me! ###
target_indices = feature_names.index("Smiling") # Feel free to change this value to any string from feature_names!

noise = get_noise(n_images, z_dim).to(device).requires_grad_()
for i in range(grad_steps):
    opt.zero_grad()
    fake = gen(noise)
    fake_image_history += [fake]
    fake_classes_score = classifier(fake)[:, target_indices].mean()
    fake_classes_score.backward()
    noise.data = calculate_updated_noise(noise, 1 / grad_steps)

plt.rcParams['figure.figsize'] = [n_images * 2, grad_steps * 2]
show_tensor_images(torch.cat(fake_image_history[::skip], dim=2), num_images=n_images, nrow=n_images)

def get_score(current_classifications, original_classifications, target_indices, other_indices, penalty_weight):
    other_distances = current_classifications[:,other_indices] - original_classifications[:,other_indices]
    # Calculate the norm (magnitude) of changes per example and multiply by penalty weight
    other_class_penalty = -torch.norm(other_distances, dim=1).mean() * penalty_weight
    # Take the mean of the current classifications for the target feature
    target_score = current_classifications[:, target_indices].mean()
    return target_score + other_class_penalty

fake_image_history = []
### Change me! ###
target_indices = feature_names.index("Smiling") # Feel free to change this value to any string from feature_names from earlier!
other_indices = [cur_idx != target_indices for cur_idx, _ in enumerate(feature_names)]
noise = get_noise(n_images, z_dim).to(device).requires_grad_()
original_classifications = classifier(gen(noise)).detach()
for i in range(grad_steps):
    opt.zero_grad()
    fake = gen(noise)
    fake_image_history += [fake]
    fake_score = get_score(
        classifier(fake),
        original_classifications,
        target_indices,
        other_indices,
        penalty_weight=0.1
    )
    fake_score.backward()
    noise.data = calculate_updated_noise(noise, 1 / grad_steps)

plt.rcParams['figure.figsize'] = [n_images * 2, grad_steps * 2]
show_tensor_images(torch.cat(fake_image_history[::skip], dim=2), num_images=n_images, nrow=n_images)


这里我省略了模型的训练代码,跟之前的差不多,也可以直接下载训练好的。只不过这次使用的数据集是CelebA,使用torchvision.datasets加载代码如下:
dataloader = DataLoader(
        CelebA(".", split='train', download=True, transform=transform),
        batch_size=batch_size,
        shuffle=True)
但是我有时候也会下载失败,所以有时候就手动下载:
点击上面的超链接进入官网,下载2016年版本的数据集,使用谷歌网盘(比百度网盘快得多),然后下载如下图对应的文件在celeba目录中,解压zip压缩包。

代码解析
网络模型以及模型训练部分都和前面类似,不同的是这次数据集使用rgb通道的celeba,所以channel为3而不再是黑白图像的1。所以本章节省略网络模型以及模型训练部分的解析,只讲解如何控制训练好的模型生成想要的特征部分的代码。
- 具有梯度的噪声向量
noise = get_noise(n_images, z_dim).to(device).requires_grad_()
这里生成的噪声后面加上.requires_grad_()目的是为了改变requires_grad的属性,让False变为True(但是只开不关,如果原本为True使用.requires_grad_()后仍为True),可以将一个tensor标记为需要梯度计算。
PyTorch会跟踪对它的所有操作,可以通过不断优化这个噪声直到生成具有特定想要的属性的图像。
- 使用分类器循环多次梯度更新逐步优化噪声向量
for i in range(grad_steps):
    opt.zero_grad()
    fake = gen(noise)
    fake_image_history += [fake]
    fake_classes_score = classifier(fake)[:, target_indices].mean()
    fake_classes_score.backward()
    noise.data = calculate_updated_noise(noise, 1 / grad_steps)
每个梯度更新步骤的执行过程如下:
- 生成器使用当前的噪声向量生成图像。
- 将生成的图像输入到分类器中,以获取目标特征的得分。
- 计算目标特征得分相对于噪声向量的梯度。
- 使用梯度上升规则更新噪声向量。
①首先通过opt = torch.optim.Adam(classifier.parameters(), lr=0.01)可知opt为分类器的优化器,但我们主要是在更新噪声向量而非更新分类器的模型参数,这里为什么要进行分类器的梯度清零呢?
在PyTorch中,调用.backward()方法计算梯度时启动自动微分(Autograd)机制。PyTorch的Autograd是一种自动计算导数的功能,它允许在tensor上执行的操作被跟踪,并构建一个计算图,用于在后续的反向传播中计算梯度。这意味着在优化过程中,梯度的计算不仅仅涉及到了噪声向量,还涉及到了分类器模型的参数。
具体来说,我们在fake_classes_score.backward()中计算了目标特征得分相对于噪声向量的梯度。然而,PyTorch会自动追踪计算图中的所有依赖项,这意味着分类器模型的参数也会被追踪,并且会影响到梯度的计算。
所以在每次迭代中,我们都需要调用opt.zero_grad()来清零分类器模型的参数的梯度,以确保这些梯度不会在下一次迭代中累积影响噪声向量的梯度计算。
②当调用fake_classes_score.backward()方法时,PyTorch会从fake_classes_score出发,通过计算图向后传播梯度,计算fake_classes_score对生成图像中每个需要梯度的tensor的梯度 。这些梯度将被累积到各个tensor的.grad属性中。
在计算过程中根据链式法则,将梯度从fake_classes_score传播到生成图像的噪声向量。在完成梯度计算后,我们可以访问noise.grad来更新噪声向量,使其生成的图像在目标特征上得分更高,这事我们最终想要达到的目的。
③更新噪声向量我们使用到梯度上升
def calculate_updated_noise(noise, weight):
    new_noise = noise + ( noise.grad * weight)
    return new_noise
通常优化器使用随机梯度下降来查找局部最小值从而更新网络模型的梯度,以达到预测值与真实值的误差最小化(loss.backward());而我们是要使用随机梯度上升来查找局部最大值,从而让生成的图像在目标特征上得分最大化(score.backward())。
公式为:new = old + (∇old * weight)。这里∇old为噪声的梯度即noise.grad,在第②点中所提到的使用fake_classes_score.backward()方法计算得到。
这里weight的传入的参数为1 / grad_steps,充当学习率,也起到归一化的作用,避免了更新步长过大或过小的情况。
noise.data = calculate_updated_noise(noise, 1 / grad_steps)
在这里我们使用了noise.data来接收更新的噪声向量而非noise,因为noise是一个PyTorch的tensor对象,它不仅包含了数据(即噪声向量),还包含了梯度信息以及其他一些属性;而noise.data是noise tensor的底层数据,它是一个纯粹的tensor,不包含梯度信息或其他属性。我们可以分别打印出来看看:


在进行梯度更新时,我们只对噪声向量进行操作,而改变其他的属性。
- z-space Entanglement和正则化解耦z-space
这两部分的代码的差异只是更新噪声向量的方式不同。
def get_score(current_classifications, original_classifications, target_indices, other_indices, penalty_weight):
    other_distances = current_classifications[:,other_indices] - original_classifications[:,other_indices]
    # Calculate the norm (magnitude) of changes per example and multiply by penalty weight
    other_class_penalty = -torch.norm(other_distances, dim=1).mean() * penalty_weight
    # Take the mean of the current classifications for the target feature
    target_score = current_classifications[:, target_indices].mean()
    return target_score + other_class_penalty

fake_image_history = []
### Change me! ###
target_indices = feature_names.index("Smiling") # Feel free to change this value to any string from feature_names from earlier!
other_indices = [cur_idx != target_indices for cur_idx, _ in enumerate(feature_names)]
noise = get_noise(n_images, z_dim).to(device).requires_grad_()
original_classifications = classifier(gen(noise)).detach()
for i in range(grad_steps):
    opt.zero_grad()
    fake = gen(noise)
    fake_image_history += [fake]
    fake_score = get_score(
        classifier(fake),
        original_classifications,
        target_indices,
        other_indices,
        penalty_weight=0.1
    )
    fake_score.backward()
    noise.data = calculate_updated_noise(noise, 1 / grad_steps)
有时不仅仅是目标特征发生变化,其他的特征也会随之发生变化,这是因为某些特征是相关联、纠缠(z-space Entanglement)在一起的。可以通过保持目标特征之外的其他特征尽量不变来进一步隔离目标特征来解决此问题。
实现此目的的一种方法是使用L2正则化来惩罚与原始类的差异。L2正则化将使用L2范数对这种差异进行惩罚,这只是损失函数的附加项。
other_distances = current_classifications[:, other_indices] - original_classifications[:, other_indices]
对于每个非目标特征,计算当前噪声和旧噪声之间的差异。该值越大,目标之外的特征发生变化就越大。
other_class_penalty = -torch.norm(other_distances, dim=1).mean() * penalty_weight
将计算变化的幅度取平均值(所有样本的 L2 范数的平均值),然后对其求反,因为我们想要减小变化量从而鼓励生成的图像在其他特征上保持稳定。
target_score + other_class_penalty
最后,将此惩罚添加到目标分数中,目标分数是当前噪声中目标特征的平均值。
在这里必须实现分数函数越高越好。分数是通过将目标分数和惩罚相加计算得出的,惩罚是为了降低分数。


