咱们前面讲了一下如何创建REST API
假期别闲着:REST API实战演练之创建Rest API-CSDN博客
又讲了java客户端如何使用REST API
假期别闲着:REST API实战演练之客户端使用Rest API-CSDN博客
接下来咱们看看JavaScript怎么使用REST API。
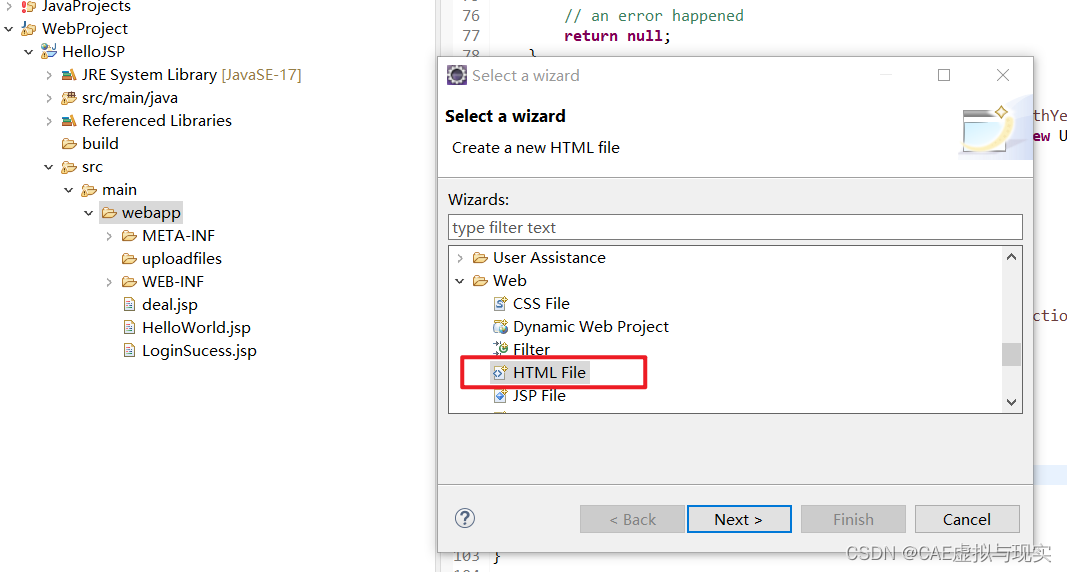
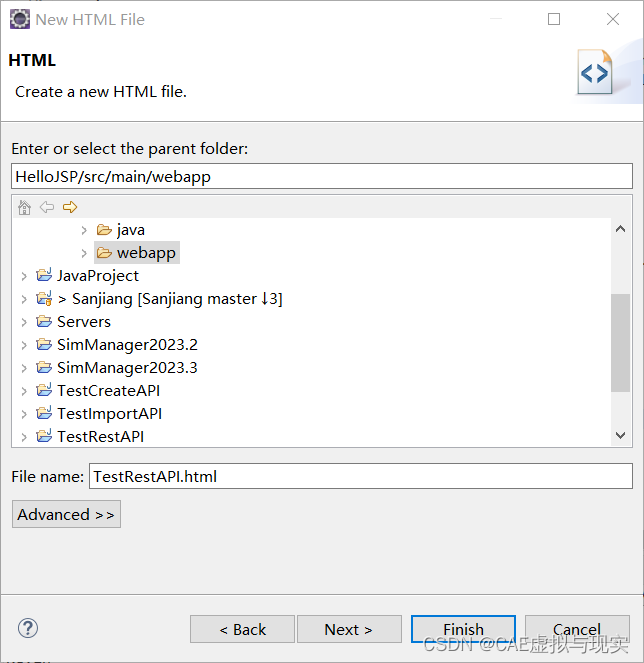
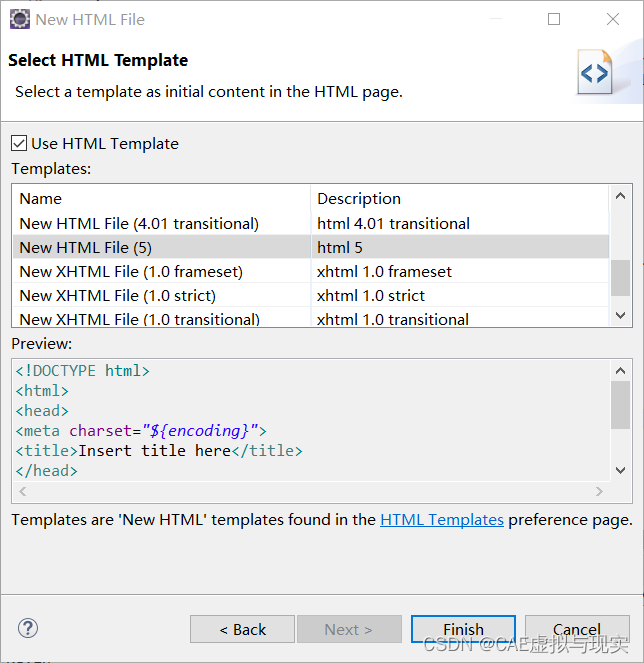
一、新建一个HTML文件
二、添加几个控件元素
<body>
	<h1>PIJON</h1>
		<p>(Person Info in JavaScript Object Notation)</p>
		<p><input type="text" value="Ada" id="name"><button type="button" onclick="getPersonInfo()">Get</button></p>
		<p>Birth year:</p>
		<input type="text" id="birthYear">
		<p>About:</p>
		<textarea id="about"></textarea>
		<p><button type="button" onclick="setPersonInfo()">Save</button></p>
</body>
三、添加一段JavaScript代码
<head>
<meta charset="UTF-8">
<title>PIJON</title>
		<script>
			function getPersonInfo(){
				var name = document.getElementById('name').value;

				var ajaxRequest = new XMLHttpRequest();
				ajaxRequest.onreadystatechange = function(){
					if(ajaxRequest.readyState == 4){
						if(ajaxRequest.status == 200){
							var person = JSON.parse(ajaxRequest.responseText);
							document.getElementById('birthYear').value = person.birthYear;
							document.getElementById('about').value = person.about;
						}
					}
				}
				ajaxRequest.open('GET', 'http://localhost:8080/HelloJSP/people/' + name);
				ajaxRequest.send();
			}

			function setPersonInfo(){
				var name = document.getElementById('name').value;
				var about = document.getElementById('about').value;
				var birthYear = document.getElementById('birthYear').value;

				var postData = 'name=' + name;
				postData += '&about=' + encodeURIComponent(about);
				postData += '&birthYear=' + birthYear;

				var ajaxRequest = new XMLHttpRequest();
				ajaxRequest.open('POST', 'http://localhost:8080/HelloJSP/people/' + name);
				ajaxRequest.setRequestHeader("Content-type", "application/x-www-form-urlencoded");
				ajaxRequest.send(postData);
			}
		</script>
</head>
修改后完整代码如下:
<!DOCTYPE html>
<html>
<head>
<meta charset="UTF-8">
<title>PIJON</title>
		<script>
			function getPersonInfo(){
				var name = document.getElementById('name').value;

				var ajaxRequest = new XMLHttpRequest();
				ajaxRequest.onreadystatechange = function(){
					if(ajaxRequest.readyState == 4){
						if(ajaxRequest.status == 200){
							var person = JSON.parse(ajaxRequest.responseText);
							document.getElementById('birthYear').value = person.birthYear;
							document.getElementById('about').value = person.about;
						}
					}
				}
				ajaxRequest.open('GET', 'http://localhost:8080/HelloJSP/people/' + name);
				ajaxRequest.send();
			}

			function setPersonInfo(){
				var name = document.getElementById('name').value;
				var about = document.getElementById('about').value;
				var birthYear = document.getElementById('birthYear').value;

				var postData = 'name=' + name;
				postData += '&about=' + encodeURIComponent(about);
				postData += '&birthYear=' + birthYear;

				var ajaxRequest = new XMLHttpRequest();
				ajaxRequest.open('POST', 'http://localhost:8080/HelloJSP/people/' + name);
				ajaxRequest.setRequestHeader("Content-type", "application/x-www-form-urlencoded");
				ajaxRequest.send(postData);
			}
		</script>
</head>
<body>
	<h1>PIJON</h1>
		<p>(Person Info in JavaScript Object Notation)</p>
		<p><input type="text" value="Ada" id="name"><button type="button" onclick="getPersonInfo()">Get</button></p>
		<p>Birth year:</p>
		<input type="text" id="birthYear">
		<p>About:</p>
		<textarea id="about"></textarea>
		<p><button type="button" onclick="setPersonInfo()">Save</button></p>
</body>
</html>
四、启动Server确保服务端开启
五、浏览器输入访问地址
浏览器输入如下地址:
浏览器输入如下地址:http://localhost:8080/HelloJSP/TestRestAPI.html
显示如下:
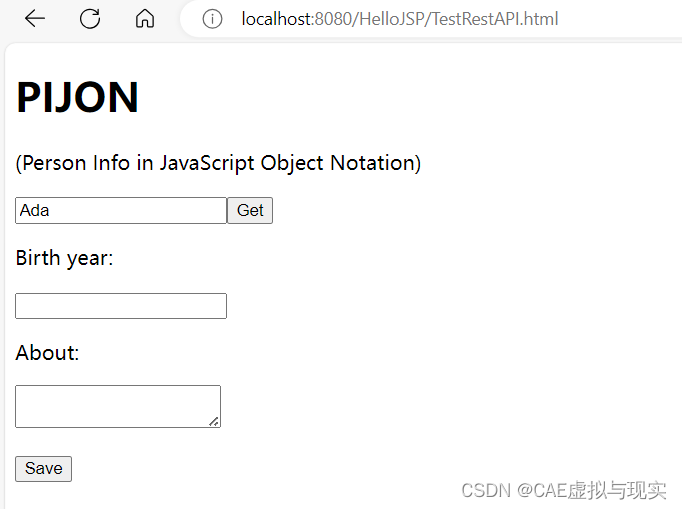
六、测试rest api
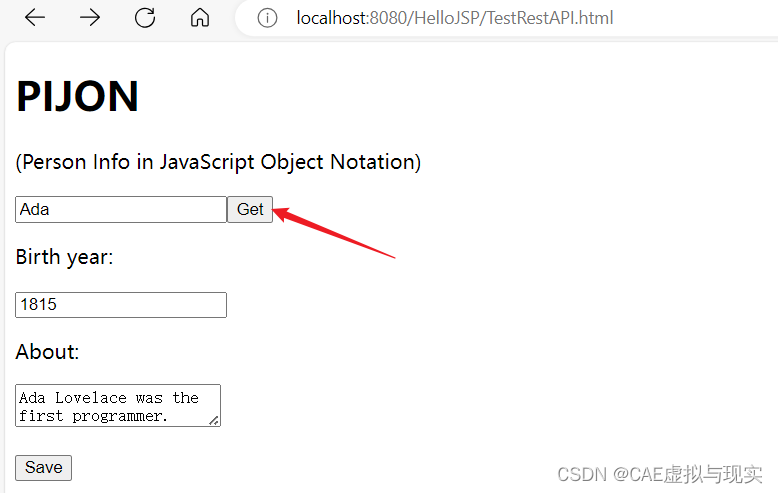
点击get,获取输入人员的信息,显示如下:
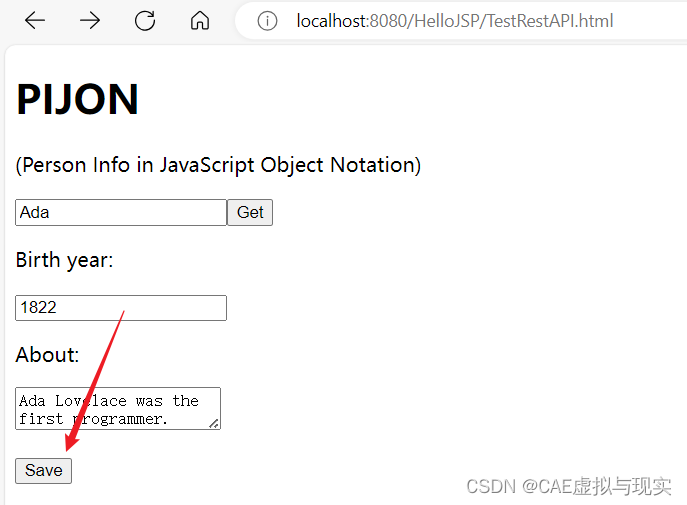
我们修改一下birth year,然后点击save按钮。
保存后刷新页面,再次点击get按钮显示如下:

小结:关于XMLHttpRequest
XMLHttpRequest只是一个JavaScript对象,是一个构造函数。它一点也不神秘,它的特殊之处只在于它是由客户端(即浏览器)提供的(而不是JavaScript原生的)API
[所有现代浏览器 (IE7+、Firefox、Chrome、Safari 以及 Opera) 都内建了 XMLHttpRequest 对象]
XML对象是不断被扩展的。目前XML有两个级别:第一级提供了XMLHttpRequest对象的实现细节,第二级则进一步发展了该对象,额外添加了一些方法和属性。
1、XMLHttpRequest属性
- responseText:包含响应主体返回的文本
- responseXML:如果响应内容类型为 text/xml 或 application/xml 时,该属性将保存包含着响应数据的XML DOM文档
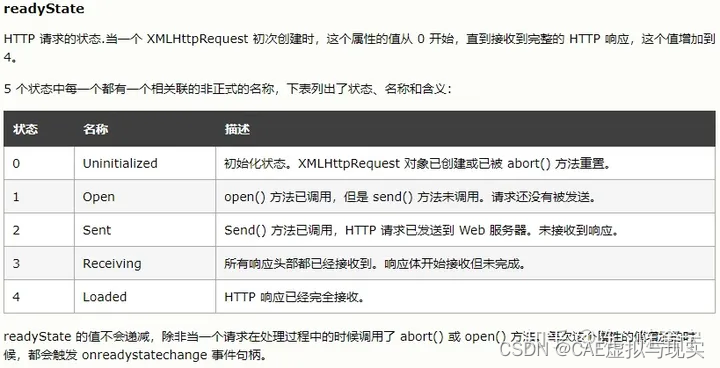
- readyState:表示在「请求/响应」过程中当前的活动阶段(这个属性的值从 0 开始,直到接收到完整的 HTTP 响应,这个值增加到 4)
- status:响应的HTTP状态(2xx - 5xx)
- statusText:HTTP 服务器返回的响应状态,与status不同的是,它包含完整的响应状态文本(例如,"
200 OK")
2、XMLHttpRequest方法
- open():用于准备启动一个AJAX请求;
- setRequestHeader():用于设置请求头部信息
- send():用于发送AJAX请求
- abort():用于取消异步请求
另外,浏览器还为XMLHttpRequest对象提供了一个 onreadystatechange 的监听事件,每当XMLHttpRequest实例的 readyState 属性变化时,就会触发该事件。
参考资料:
https://blog.csdn.net/allway2/article/details/123375541
https://zhuanlan.zhihu.com/p/349658121?utm_id=0
https://happycoding.io/tutorials/java-server/rest-api





![ORA-00600: internal error code, arguments: [krbcbp_9]](https://img-blog.csdnimg.cn/direct/676a4272d38943c0aae0d42cba8a3567.png)
