🌈个人主页:前端青山
🔖人终将被年少不可得之物困其一生
依旧青山,本期给大家带来Vue3+Ts+AntDesign-Vue组件+天地图组件的封装
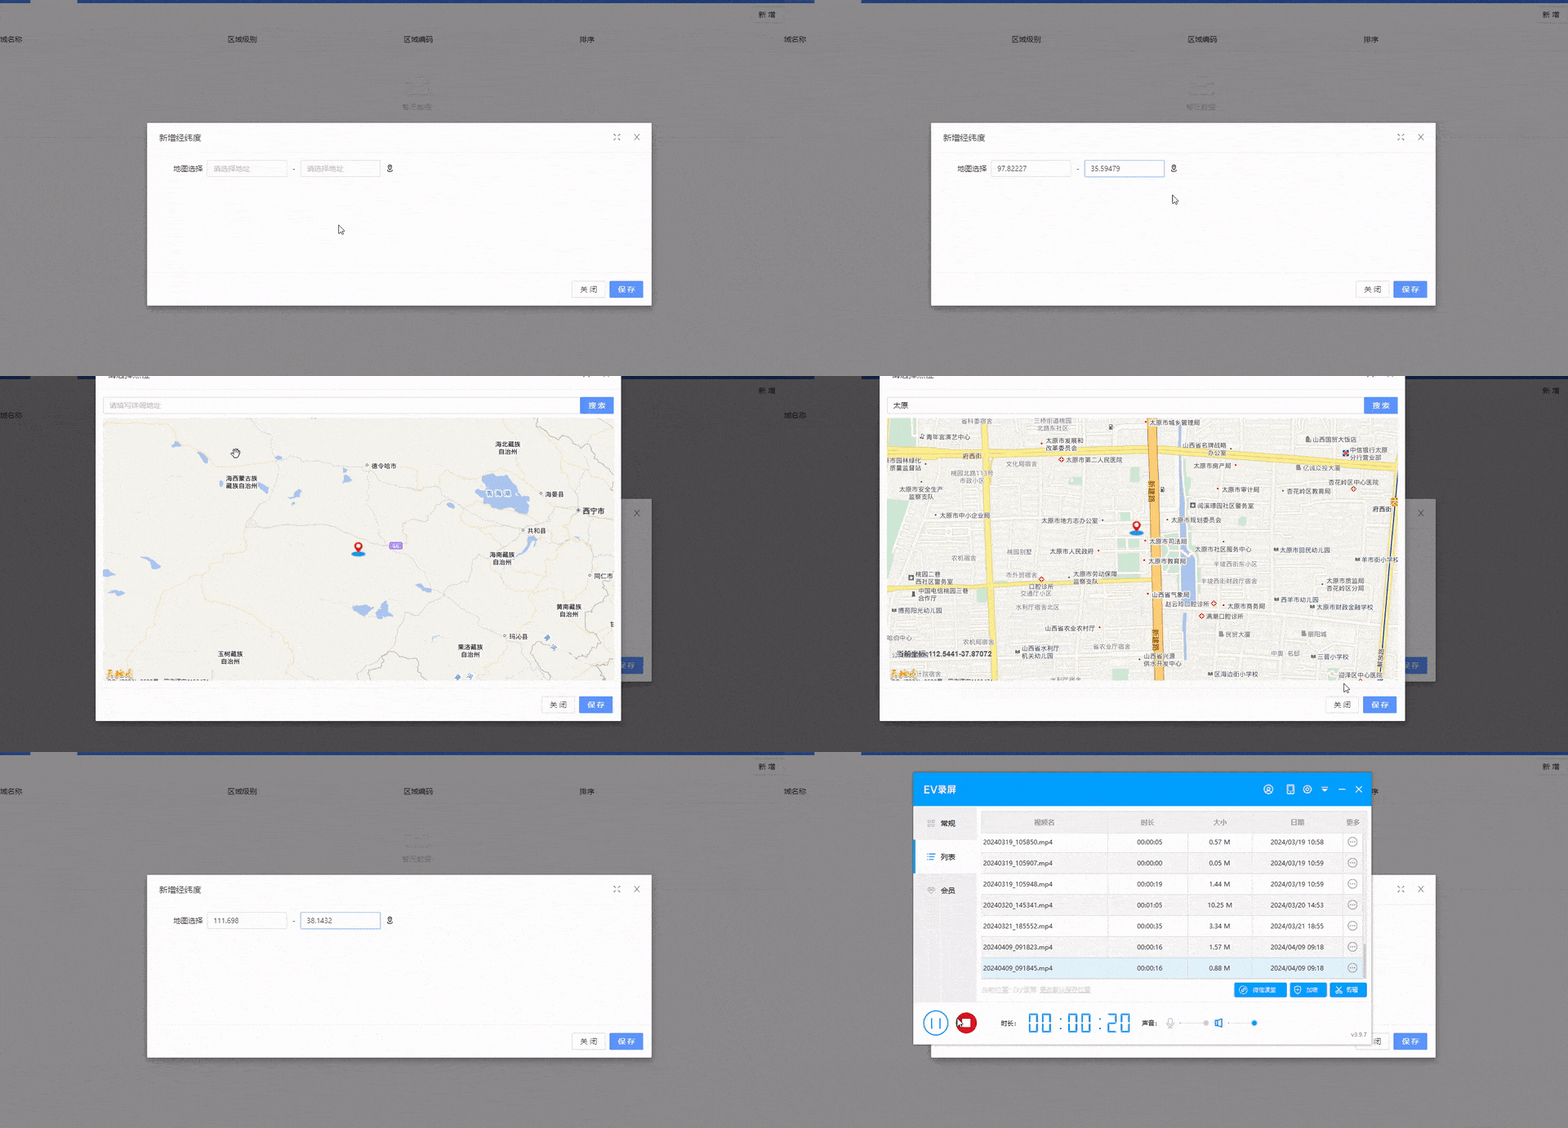
示例图
首先,在index.html引入天地图资源,vue3选择v4版本
<script src="http://api.tianditu.gov.cn/api?v=4.0&tk=你的秘钥" type="text/javascript"></script>
- 使用
<BasicModal>组件作为模态框基础样式,并通过@register、@ok、@cancel等事件来注册、提交和取消选择点位操作。 - 组件内部使用天地图(Tianditu)进行地图展示和操作,包括初始化地图、点击地图获取坐标、根据地址搜索坐标等。
- 组件提供了一个搜索框,用户可以输入地址,通过点击搜索按钮来搜索对应的坐标,并在地图上标记。
- 组件可以接收初始的经纬度信息(通过
initialLongitude和initialLatitude两个props传递),并在地图上标记该位置。 - 组件内部使用了一些变量和函数来保存和操作地图、标记等信息,例如
mapInstance、currentMaker、longitude、latitude等。 - 组件提供了
success和cancel两个自定义事件,用于在选择点位成功或取消时通知父组件。

地图弹框示例代码
<template>
  <div style="width: 100%" @click="show">
    <slot></slot>
    <!-- 弹框组件 -->
    <BasicModal
      width="1000px"
      @register="registerModal"
      @ok="submit"
      @cancel="handleCancel"
      destroy-on-close
      :title="'请选择点位'"
    >
      <div class="mb-2">
        <Input id="tipinput" v-model:value="searchValue" :placeholder="'请填写详细地址'"/>
        <a-button type="primary" @click="search">搜索</a-button>
      </div>
      <!-- 使用天地图容器 -->
      <div id="mapDiv" ref="wrapRef" style="width: 100%; height: 500px">
        <div id="Tip" v-if="showCurrent">当前坐标:{{longitude}}-{{latitude}}</div>
      </div>
    </BasicModal>
  </div>
</template>

<script setup lang="ts">
 import { onMounted, ref ,nextTick,toRefs } from 'vue';
  import { BasicModal, useModal } from '/@/components/Modal';
  import { Input, message } from 'ant-design-vue';
  import GpsIcon from '/@/assets/images/gps.png';
  const emits = defineEmits(['success', 'cancel']);

  // 天地图相关数据绑定
  const mapInstance = ref(null as any);
  // 搜索区域内容
  const searchValue = ref('');
  // 变量保存Maker实例
  const currentMaker = ref(null as any);
  // 经度
  const longitude = ref('');
  // 纬度
  const latitude = ref('');
  // 判断当前坐标是否显示
  const showCurrent = ref(false);
// 在setup函数顶部声明缓存位置信息的ref
const lastSelectedLocation = ref({ longitude: '', latitude: '' });
  // 地理编码服务相关的变量
  let geocoder: any = null;
  const siteInfo = ref({
    longitude: '',
    address: '',
    latitude: ''
  });
  const props = defineProps({
  // 添加初始经纬度props
  initialLongitude: {
    type: String,
    default: '',
  },
  initialLatitude: {
    type: String,
    default: '',
  },
  // ... 其他props不变 ...
});
const { initialLongitude, initialLatitude } = toRefs(props);

  const [registerModal, { closeModal, openModal }] = useModal();

  declare global {
    interface Window {
      T: any;
      TMAP_VECTOR_MAP: any;
    }
  }
var T = window.T;
  // 初始化天地图

<style scoped>
  #mapDiv {
    width: 100%;
    height: 100vh;
  }
  .mb-2 {
    display: flex;
  }
  #Tip {
    position: absolute;
    color: #424B5A;
    font-weight: bold;
    font-size: 14px;
    bottom: 40px;
    left: 18px;
    z-index: 999;
  }
</style>
这段代码是Vue组件中的一部分,主要功能是实现了天地图的初始化和地图功能的绑定。
-
首先,通过
ref函数定义了一些变量,用于保存地图实例、搜索区域内容、Maker实例、经度、纬度、当前坐标是否显示等。 -
然后,通过
defineProps定义了组件接收的props,包括初始经度和纬度等。 -
使用
useModal函数定义了一个模态框的实例。 -
在全局声明了一个
Window接口,增加了T和TMAP_VECTOR_MAP属性。 -
最后,定义了一个
initTiandituMap异步函数,用于初始化天地图。该函数会创建一个天地图实例,并根据传入的初始经纬度进行定位,并添加一个标记到地图上。-
首先,根据
initialLongitude和initialLatitude的值进行地图中心点的设置和缩放级别设定,并添加一个新的标记到地图上。 -
如果没有传入初始经纬度,则将地图中心点设置为默认值(97.53662, 35.36499)。
-
  const initTiandituMap = async () => {
  var map: any = null;
  var T = window.T;
  map = new T.Map("mapDiv");
  map.setMapType(window.TMAP_VECTOR_MAP);
  // 根据传入的初始经纬度进行定位
  if (initialLongitude.value && initialLatitude.value) {
    map.centerAndZoom(new T.LngLat(Number(initialLongitude.value) ,Number(initialLatitude.value) ), 7);
    const newMarker = createNewMarker(new T.LngLat(initialLongitude.value, initialLatitude.value));
    map.addOverLay(newMarker);
    currentMaker.value = newMarker;
  } else {
    map.centerAndZoom(new T.LngLat(97.53662, 35.36499), 7);
  }
  mapInstance.value = map;
  map.addEventListener('click', (val: any) => {
    handleMapClick(val);
  });
};
  const handleMapClick = (val: any) => {
    if (currentMaker.value) {
      console.log(currentMaker.value,'有之前点位信息');
      mapInstance.value.removeOverLay(currentMaker.value);
    }
    siteInfo.value.longitude = val.lnglat.lng;
    siteInfo.value.latitude = val.lnglat.lat;
    longitude.value = val.lnglat.lng;
    latitude.value = val.lnglat.lat;
    showCurrent.value = true;
    const icon = new T.Icon({
      iconUrl: GpsIcon,
      iconSize: new T.Point(30, 30),
      iconAnchor: new T.Point(15, 15),
    });
    const newMarker = new T.Marker(val.lnglat);
    newMarker.setIcon(icon);
    mapInstance.value.addOverLay(newMarker);
    currentMaker.value = newMarker;
  };
  onMounted(() => {
    geocoder = new window.T.Geocoder();
    initTiandituMap();
  });
  function show() {
    openModal();
    // 确保在模态框打开且DOM更新后初始化或重新初始化地图
    nextTick(() => {
      initTiandituMap(); // 直接调用 initTiandituMap
      searchValue.value= '';
      longitude.value = '';
      latitude.value = '';
      showCurrent.value = false; // 默认不显示当前坐标
    });
  }
  const search =  () => {
    console.log(searchValue.value,'search');
    const map:any = mapInstance.value;
    if (!geocoder || !searchValue.value) return;
    // 清除地图上覆盖物
    if (currentMaker.value) {
      mapInstance.value.removeOverLay(currentMaker.value);
    }
    geocoder.getPoint(searchValue.value, function(result) {
      if (result) {
        if (result.status == 0) {
          map.panTo(result.getLocationPoint(), 16);
          const newMarker = createNewMarker(result.getLocationPoint());
          map.addOverLay(newMarker);
          map.clearOverLays();
          updateCoordinates(newMarker.getPosition());
        } else {
          message.error(`搜索失败: ${result.getMsg()}`);
        }
      }
    });
  };
  function createNewMarker(position: any) {
    const icon = new T.Icon({
      iconUrl: GpsIcon,
      iconSize: new T.Point(30, 30),
      iconAnchor: new T.Point(15, 15),
    });
    const marker = new T.Marker(position);
    marker.setIcon(icon);
    return marker;
  }
  function updateCoordinates(position: any) {
    longitude.value = position.lng;
    latitude.value = position.lat;
    showCurrent.value = true;
    siteInfo.value.longitude = position.lng;
    siteInfo.value.latitude = position.lat;
  }
 // 在submit函数中更新缓存的位置信息
function submit() {
  lastSelectedLocation.value = { longitude: siteInfo.value.longitude, latitude: siteInfo.value.latitude };
  emits('success', {
    latitude: siteInfo.value.latitude.toString(),
    longitude: siteInfo.value.longitude.toString(),
  });
  closeModal();
}
  function handleCancel() {
    emits('cancel');
    closeModal();
  }
</script>- 首先,将地图实例赋值给
mapInstance,然后给地图添加点击事件监听器,当点击地图时,会调用handleMapClick函数。 handleMapClick函数根据点击的坐标点信息,移除之前添加的标记(如果有),更新当前位置信息,并添加一个新的标记到地图上。onMounted生命周期函数用于在组件挂载后执行初始化地图的操作。show函数用于打开模态框并初始化或重新初始化地图。search函数用于根据输入的搜索值进行地点搜索,清除之前添加的标记,将搜索结果标记在地图上,并更新当前位置信息。createNewMarker函数用于创建一个新的标记,并设置标记的样式。updateCoordinates函数用于更新当前位置信息。submit函数用于在提交表单时更新缓存的位置信息,并触发success事件。handleCancel函数用于在取消操作时触发cancel事件,并关闭模态框。
表单封装

把我们封装好的地图弹框引入给于事件传参
表单组件示例代码
  <div>
    <FormItemRest>
      <MapModal v-model:value="location" @success="handleSuccess"
      :initial-longitude="location.longitude"
      :initial-latitude="location.latitude"
      >
      <div calss="map" style="display:flex">
        <div><a-input
          readonly
          :disabled="disabled"
          :placeholder="placeholder"
          v-model:value="location.longitude"
          :size="size"
          :bordered="bordered"
          @blur="emit('blur')"
          style="min-width: 150px"

        >
        </a-input></div>
        <div style="margin:5px 10px">
          -
        </div>
        <div> <a-input
          readonly
          :disabled="disabled"
          :placeholder="placeholder"
          v-model:value="location.latitude"
          :size="size"
          :bordered="bordered"
          @blur="emit('blur')"
          style="min-width: 150px"
        >
        </a-input></div>
        <div style="margin:5px 10px;">
            <Icon icon='mdi:map-marker-radius-outline' />
          </div>
      </div>

      </MapModal>
    </FormItemRest>
  </div>


<style scoped>
.map{
  display: flex;
}
</style>
这段代码是Vue的一个模板,用于渲染一个包含地图模态框和两个输入框的表单项。其中:
<FormItemRest>是一个表单项容器组件;<MapModal>是一个地图模态框组件,通过v-model:value绑定到location属性,表示地图选择的地理位置,@success事件在选择成功时触发,:initial-longitude和:initial-latitude分别绑定到location.longitude和location.latitude,表示地图的初始经度和纬度;<a-input>是一个输入框组件,通过v-model:value绑定到location.longitude和location.latitude,表示经度和纬度的值,readonly和:disabled表示输入框为只读且不可用状态,:placeholder表示占位符,:size和:bordered分别表示输入框的大小和边框样式,@blur表示输入框失去焦点时触发的事件;<Icon>是一个图标组件,显示一个地图标记的图标。
<script>
  import { Form } from 'ant-design-vue';
  import { MapModal } from '/@/components/Map/index';
  import { watch, ref, inject } from 'vue';
  import { Icon } from '/@/components/Icon';

  import { camelCaseString } from '/@/utils/event/design';
  // 用于包裹弹窗的form组件 因为一个FormItem 只能收集一个表单组件  所以弹窗的form 必须排除
  const FormItemRest = Form.ItemRest;

  const props = defineProps({
    value: String,
    prefix: String,
    suffix: String,
    placeholder: String,
    readonly: Boolean,
    disabled: Boolean,
    size: String,
    bordered: {
      type: Boolean,
      default: true,
    },
    latitude: String,
    latiAndLong: String,
    index: Number,
    mainKey: String,
    longitude:String,
  });
  const location:any = ref<{ latitude: string; longitude: string }>({ latitude: '', longitude: '' });//对象形式接收经度维度
  const emit = defineEmits(['update:value', 'change', 'blur']);
  const formModel = inject<any>('formModel', null); // 注入表单数据
  const isCustomForm = inject<boolean>('isCustomForm', false);

  watch(
    () => props.value,
    () => {
      location.value.longitude = props.longitude,
      location.value.latitude = props.value
      console.log('props.value', props);
      if (!props.value) {
        //预览页面 重置
        location.value = { latitude: '', longitude: '' };
      }
    },
    {
      immediate: true,
    },
  );

  function handleSuccess(v) {
    location.value = { latitude: v.latitude, longitude: v.longitude };
    console.log('MAP handleSuccess ', v);
    changeFieldData(v);
    emit('update:value', location.value.latitude,location.value.longitude);
    emit('change',location.value.latitude,location.value.longitude);
  }
  function changeFieldData(v) {
    if (!formModel) return;
    if (props.latitude) {
      const latitudeField: any = isCustomForm ? props.latitude : camelCaseString(props.latitude);
      if (props.mainKey && props.index !== undefined && props.index !== null) {
        formModel[props.mainKey][props.index][latitudeField] = v.latitude;
      } else {
        formModel[latitudeField] = v.latitude;

      }
    }
    if (props.latiAndLong) {
      const latiAndLong: any = isCustomForm
        ? props.latiAndLong
        : camelCaseString(props.latiAndLong);
      if (props.mainKey && props.index != undefined && props.index !== null) {
        formModel[props.mainKey][props.index][latiAndLong] = v.lnglat.join(',');
      } else {
        formModel[latiAndLong] = v.lnglat.join(',');
      }
    }
  }
</script>- 引入Ant Design Vue的
Form组件和自定义的MapModal组件。 - 引入Vue 3的
watch、ref、inject等函数。 - 定义组件的props,包括输入框的值、前缀、后缀、占位符、只读、禁用、大小、是否带边框、经度、纬度等。
- 使用
ref定义一个location的响应式对象,用来保存经度和纬度数据。 - 使用
defineEmits定义组件可以发出的事件,包括update:value、change和blur。 - 使用
inject来注入表单数据的formModel和是否为自定义表单的isCustomForm。 - 使用
watch来监听props.value的变化,并更新location的值。如果props.value为空,则重置location。 - 定义
handleSuccess函数,用来处理地图弹窗成功获取到数据的情况。将数据更新到location,并调用changeFieldData函数更新表单数据,最后通过emit发出事件。
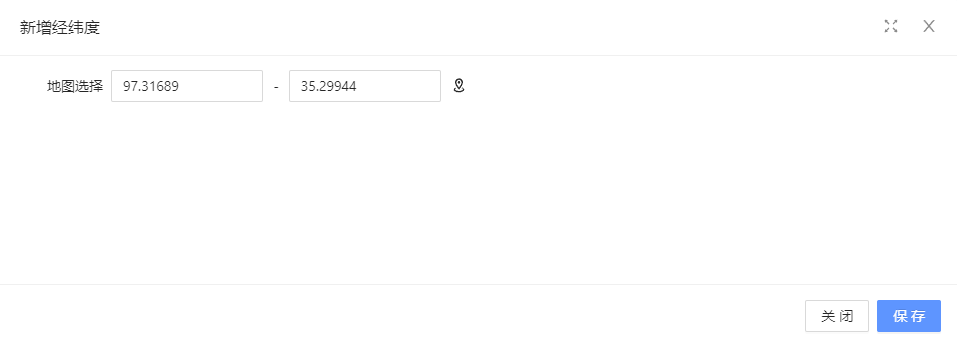
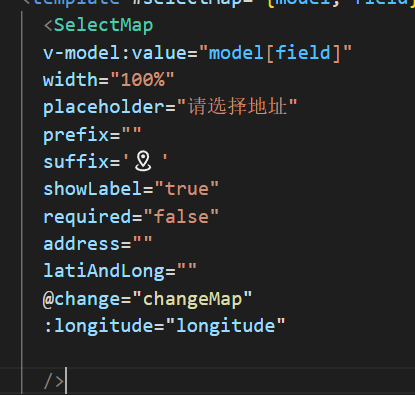
最后我们在页面进行组件引入即可
创作不易,点个关注不迷路~~~





![P1731 [NOI1999] 生日蛋糕——典型的回溯和剪枝题目,值得一看](https://img-blog.csdnimg.cn/direct/d8522bdb1079464c9f4ed6de75d273e5.png#pic_center)

