点击下方卡片,关注“小白玩转Python”公众号
本文探讨使用 BeeWare 套件通过 Python 构建应用程序的基础知识,详细介绍其功能、优点以及与其他流行框架的比较。
由于 Python 语言的简单性和多功能性,用它构建应用程序变得越来越流行。在 Python 开发人员可用的各种框架和工具中,BeeWare 脱颖而出,成为独特而强大的选择。本文探讨使用 BeeWare 套件通过 Python 构建应用程序的基础知识,详细介绍其功能、优点以及与其他流行框架的比较。
BeeWare 简介
BeeWare是一个用于用 Python 构建本机应用程序的开源工具和库集合。
它允许开发人员用 Python 编写应用程序,然后使用原生用户界面将其部署在多个平台上,包括 Windows、macOS、Linux、iOS 和 Android。
这种跨平台兼容性是一个显著的优势,节省了为每个操作系统开发单独的应用程序所花费的时间和资源。
BeeWare 的主要功能
原生用户界面:与某些模仿原生组件的框架不同,BeeWare 使用每个平台的原生用户界面元素,确保应用程序的外观和感觉就像属于该平台。
无处不在的 Python: BeeWare 应用程序完全用 Python 编写,允许开发人员利用他们现有的 Python 技能和库。
Toga: BeeWare 的一个关键组件,Toga 是一个 Python 原生、操作系统原生的 GUI 工具包。它是一个开源库,为特定平台的原生 GUI 元素提供通用接口。
Briefcase: BeeWare 套件中的另一个重要工具,Briefcase 用于将 Python 项目打包为各种平台上的独立本机应用程序。
使用 BeeWare 的优势
跨平台开发:只需编写一次代码即可将其部署到多个平台上,无需进行重大更改。
原生外观和感觉:使用 BeeWare 构建的应用程序与每个平台的原生生态系统无缝融合。
Pythonic 开发:完全访问 Python 庞大的库和工具生态系统。
将 BeeWare 与其他框架进行比较
虽然Kivy或PyQt等框架也提供跨平台功能,但 BeeWare 的独特卖点是它使用本机小部件。这意味着使用 BeeWare 开发的应用程序与使用其他 Python 框架的应用程序相比通常具有更好的性能和更原生的外观和感觉。
挑战与限制
尽管有这些优势,BeeWare 仍在不断发展,并且可能没有像更成熟的框架那样拥有广泛的小部件或那么多的社区支持。此外,需要高度专业化的本机功能的复杂应用程序可能会遇到限制。
使用 BeeWare 构建每日报价应用程序
这将是我们在本教程中创建的最终应用程序:
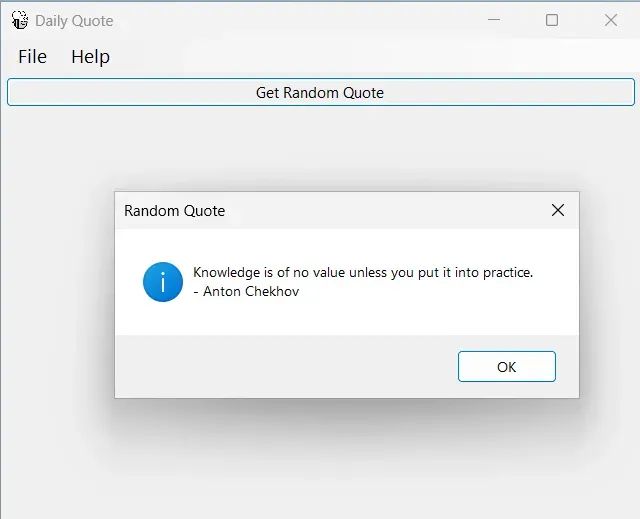 正在运行的 BeeWare 应用程序
要构建此应用程序,唯一的要求(除了 BeeWare)是安装 Python。在本教程中,将使用 v3.11。首先要创建一个新项目并激活虚拟环境,以使 BeeWare 库与系统库分开(推荐)。如何做到这一点超出了本教程的范围,可以在此处找到示例。现在让我们开始用 Python 构建我们的全新 GUI 应用程序:
安装 BeeWare
Beware 的安装与其他 Python 包类似,但推荐的安装方式是执行:
python-m pip使用python -m pip而不是非常重要pip。这种方法是必要的,因为 Briefcase 必须验证它是否与pip和的最新版本兼容setuptools。单独简单调用pip无法更新自身。
启动 BeeWare 项目
要启动 BeeWare 项目,请执行以下命令:
briefcase new我们需要填写几个有关我们的项目的问题,这是我填写的示例信息:
First, we need a formal name for your application. This is the name that will
be displayed to humans whenever the name of the application is displayed. It
can have spaces and punctuation if you like, and any capitalization will be
used as you type it.


Formal Name [Hello World]: Daily Quote


Next, we need a name that can serve as a machine-readable Python package name
for your application. This name must be PEP508-compliant - that means the name
may only contain letters, numbers, hyphens and underscores; it can't contain
spaces or punctuation, and it can't start with a hyphen or underscore.


Based on your formal name, we suggest an app name of 'dailyquote',
but you can use another name if you want.


App Name [dailyquote]: dailyquote


Now we need a bundle identifier for your application. App stores need to
protect against having multiple applications with the same name; the bundle
identifier is the namespace they use to identify applications that come from
you. The bundle identifier is usually the domain name of your company or
project, in reverse order.


For example, if you are writing an application for Example Corp, whose website
is example.com, your bundle would be ``com.example``. The bundle will be
combined with your application's machine readable name to form a complete
application identifier (e.g., com.example.dailyquote).


Bundle Identifier [com.example]: blog.developer-service


Briefcase can manage projects that contain multiple applications, so we need a
Project name. If you're only planning to have one application in this
project, you can use the formal name as the project name.


Project Name [Daily Quote]: Daily Quote


Now, we need a one line description for your application.


Description [My first application]: Daily Quote application


Who do you want to be credited as the author of this application? This could be
your own name, or the name of your company you work for.


Author [Jane Developer]: Nuno Bispo


What email address should people use to contact the developers of this
application? This might be your own email address, or a generic contact address
you set up specifically for this application.


Author's Email [nuno@developer-service.blog]: developer@developer-service.io


What is the website URL for this application? If you don't have a website set
up yet, you can put in a dummy URL.


Application URL [https://developer-service.blog/dailyquote]: https://developer-service.blog


What license do you want to use for this project's code?


Select one of the following:


    [1] BSD license
    [2] MIT license
    [3] Apache Software License
    [4] GNU General Public License v2 (GPLv2)
    [5] GNU General Public License v2 or later (GPLv2+)
    [6] GNU General Public License v3 (GPLv3)
    [7] GNU General Public License v3 or later (GPLv3+)
    [8] Proprietary
    [9] Other


Project License [1]: 1


What GUI toolkit do you want to use for this project?


Select one of the following:


    [1] Toga
    [2] PySide2 (does not support iOS/Android deployment)
    [3] PySide6 (does not support iOS/Android deployment)
    [4] PursuedPyBear (does not support iOS/Android deployment)
    [5] Pygame (does not support iOS/Android deployment)
    [6] None


GUI Framework [1]: 1


Generating a new application 'Daily Quote'
Using app template: https://github.com/beeware/briefcase-template, branch v0.3.16
Using existing template (sha f6a23f4b5608307891bdc3487c39e7b3c046f185, updated Fri Nov  3 15:30:43 2023)


Application 'Daily Quote' has been generated. To run your application, type:


    cd dailyquote
    briefcase dev
随意填写我们想要的信息,唯一要记住的一点是选择TogaGUI 工具包。
运行应用程序(开发者模式)
要运行该应用程序(在开发人员模式下),我们需要执行的是前面输出中提到的命令:
cd dailyquote
briefcase dev
请记住,我们需要根据之前提供的信息在此命令中输入正确的文件夹名称。我们应该有一个类似于以下内容的正在运行的应用程序:
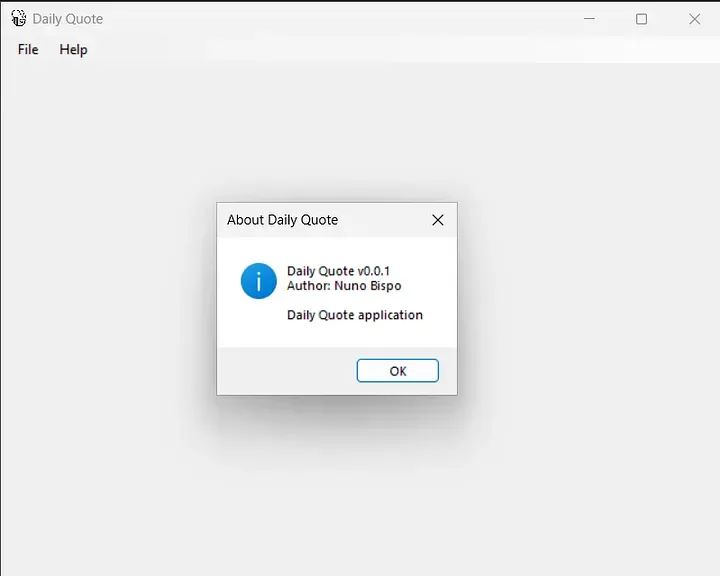 正在运行的 BeeWare 应用程序
默认情况下,BeeWare 包含一个带有默认选项的默认菜单,例如此“关于”信息。
生成的应用程序代码
这段代码是如何生成的?它通过样板执行完成briefcase new:
# dailyquote/src/dailyquote/app.py


"""
Daily Quote application
"""
import toga
from toga.style import Pack
from toga.style.pack import COLUMN, ROW


class DailyQuote(toga.App):
    def startup(self):
        """
        Construct and show the Toga application.
        Usually, you would add your application to a main content box.
        We then create a main window (with a name matching the app), and
        show the main window.
        """
        main_box = toga.Box()
        self.main_window = toga.MainWindow(title=self.formal_name)
        self.main_window.content = main_box
        self.main_window.show()


def main():
    return DailyQuote()
让我们分解一下代码的关键组件:
DailyQuote 类别:
此类DailyQuote继承自toga.App,使其成为主应用程序类。
该类中有一个方法startup(self)被父类重写。应用程序启动时会调用此方法。
启动方法:
该startup方法定义了应用程序 GUI 的初始设置。
main_box = toga.Box():此行创建一个新的框布局,可用于排列其他 GUI 元素。当前代码中未向此框添加任何小部件。
self.main_window = toga.MainWindow(title=self.formal_name):这将创建应用程序的主窗口,其标题是应用程序的正式名称。
self.main_window.content = main_box:将主窗口的内容设置为main_box之前创建的布局。
self.main_window.show():屏幕上显示主窗口。
向主窗口添加按钮
为了获取随机每日报价并将其显示在应用程序窗口中,我们需要添加小部件,在本例中为按钮。我们可以通过添加一个按钮来开始:
# dailyquote/src/dailyquote/app.py


"""
Daily Quote application
"""
import toga
from toga.style import Pack
from toga.style.pack import COLUMN, ROW


class DailyQuote(toga.App):
    def startup(self):
        """
        Construct and show the Toga application.
        Usually, you would add your application to a main content box.
        We then create a main window (with a name matching the app), and
        show the main window.
        """
        main_box = toga.Box(style=Pack(direction=COLUMN))
        button = toga.Button(
            "Get Random Quote",
            on_press=self.get_random_quote,
            style=Pack(padding=5)
        )
        main_box.add(button)
        self.main_window = toga.MainWindow(title=self.formal_name)
        self.main_window.content = main_box
        self.main_window.show()
    def get_random_quote(self, widget):
        """
        Get a random quote from the API
        """
        pass


def main():
    return DailyQuote()
让我们分解一下新的和更改的代码:
布局main_box已更新为具有列方向
添加了一个新button内容,其中包含标题、按下按钮时调用的函数以及带有一些填充的样式
添加了一个get_random_quote函数作为即将发生的逻辑的占位符
获取并显示随机引文
要下载随机报价,我们将使用Quotable的免费 API 。无需 API 密钥,它提供了一种返回随机报价的方法。调用 API 就像使用requests库一样简单:
# dailyquote/src/dailyquote/app.py


(... previous code...)
    def get_random_quote(self, widget):
        """
        Get a random quote from the API
        """
        response = requests.get("https://api.quotable.io/quotes/random?limit=1")
        if response.status_code == 200:
            json_response = response.json()[0]
            quote = json_response["content"]
            author = json_response["author"]
            self.main_window.info_dialog(
                "Random Quote",
                f"{quote} \n- {author}"
            )
让我们分解一下代码:
response = requests.get("https://api.quotable.io/quotes/random?limit=1"):
此行向 quotable.io API 发送 HTTP GET 请求以获取随机引语。该limit=1参数表明它仅请求一条引语。该方法检查响应的状态代码是否为200,这表示 HTTP 请求成功。
如果请求成功,json_response = response.json()[0]则解析 JSON 响应并访问第一个元素(API 返回引号列表)。引用文本(quote)和作者姓名(author)是从 JSON 响应中提取的。
self.main_window.info_dialog("Random Quote", f"{quote} \n- {author}"):
此行显示一个标题为“随机报价”的信息对话框。
打包和分发应用程序
在测试和调试时以开发人员模式运行应用程序很有用,但不适合分发给最终用户。
为此,我们需要打包该应用程序,以便随后分发它。
包装
首次打包 BeeWare 应用程序时,我们需要几个配置文件。幸运的是,有一个命令可以帮助我们搭建它们:
briefcase create该命令执行:
应用程序模板生成:Briefcase 创建一个应用程序模板,其中包括构建本机安装程序所必需的大量文件和配置。
支持包下载和安装:Briefcase 采用直接的打包方法,在其构建的每个应用程序中都包含一个完整、独立的 Python 解释器。
安装应用程序要求:此过程包括安装运行时所需的任何第三方模块。这些依赖项通过 pip 直接安装到应用程序的安装程序中。
应用程序代码安装:我们的应用程序的唯一代码和资源(如运行时图像)被复制到安装程序中。
附加资源安装:最后,该过程涉及添加安装程序所需的额外资源,例如应用程序图标和启动画面图像。
构建和运行
现在我们可以构建应用程序,即使用以下命令创建二进制文件:
briefcase build现在我们应该在目录中有一个 Windows 可执行文件
build\dailyquote\windows\app\src\Daily Quote.exe。
或者,我们也可以使用以下方式运行本机应用程序:
briefcase run但我们可能会遇到这样的错误:
[dailyquote] Starting app...
===========================================================================
Log started: 2023-11-16 11:36:10Z
PreInitializing Python runtime...
PythonHome: D:\GitHub\PythonBeeWare\dailyquote\build\dailyquote\windows\app\src
PYTHONPATH:
- D:\GitHub\PythonBeeWare\dailyquote\build\dailyquote\windows\app\src\python311.zip
- D:\GitHub\PythonBeeWare\dailyquote\build\dailyquote\windows\app\src
- D:\GitHub\PythonBeeWare\dailyquote\build\dailyquote\windows\app\src\app_packages
- D:\GitHub\PythonBeeWare\dailyquote\build\dailyquote\windows\app\src\app
Configure argc/argv...
Initializing Python runtime...
Running app module: dailyquote
---------------------------------------------------------------------------
Application quit abnormally (Exit code -6)!
Traceback (most recent call last):
  File "<frozen runpy>", line 198, in _run_module_as_main
  File "<frozen runpy>", line 88, in _run_code
  File "D:\GitHub\PythonBeeWare\dailyquote\build\dailyquote\windows\app\src\app\dailyquote\__main__.py", line 1, in <module>
    from dailyquote.app import main
  File "D:\GitHub\PythonBeeWare\dailyquote\build\dailyquote\windows\app\src\app\dailyquote\app.py", line 4, in <module>
    import requests
    from dailyquote.app import main
  File "\app\dailyquote\app.py", line 4, in <module>
    import requests
ModuleNotFoundError: No module named 'requests'
由于我们使用的是第三方库,在这种情况下requests,我们需要将这些外部依赖项添加到名为的配置文件中pyproject.toml:
# pyproject.toml


...
requires = [
    "requests"
]
...
要重新读取此配置或如果我们已更新源代码,则需要在重建应用程序之前运行此命令:
briefcase update -r额外参数-r表示重新加载需求。现在我们可以像以前一样构建并运行:
briefcase build
briefcase run
它运行本机应用程序,因此我们应该看到类似这样的内容:
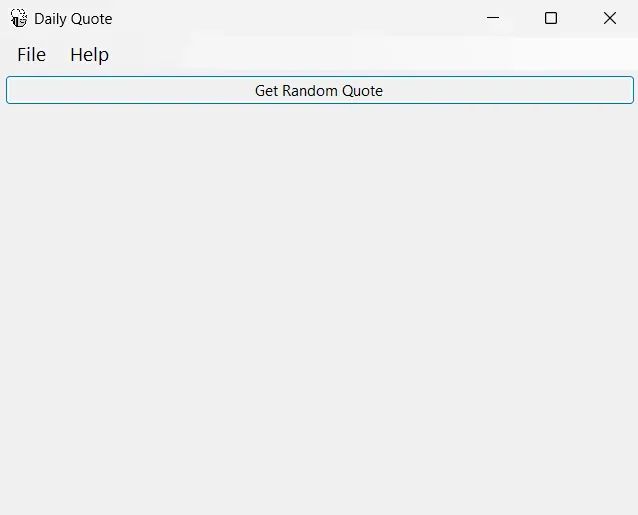 本机应用程序正在运行
安装程序
我们现在可以将.exe文件发送给最终用户,他们就可以正常运行该应用程序,但提供安装程序会显得更专业。为此,我们可以运行:
briefcase package输出内容如下:
*************************************************************************
** WARNING: No signing identity provided                               **
*************************************************************************


Briefcase will not sign the app. To provide a signing identity,
    use the `--identity` option; or, to explicitly disable signing,
    use `--adhoc-sign`.
*************************************************************************
[dailyquote] Building MSI...
Compiling application manifest...
Compiling... done
Compiling application installer...
dailyquote.wxs
dailyquote-manifest.wxs
Compiling... done
Linking application installer...
Linking... done

[dailyquote] Packaged dist\Daily Quote-0.0.1.msi
暂时忽略有关签名的警告,这是一个额外的步骤,并不总是需要向最终用户提供应用程序。我们现在可以向最终用户提供安装程序文件dist\Daily Quote-0.0.1.msi,他们将看到熟悉的 Windows 安装向导。恭喜,我们刚刚创建、构建并分发了我们的第一个 BeeWare 应用程序。
当然,我们可以构建更复杂的应用程序,但这种结构为我们提供了所有应用程序的构建块。
结论
BeeWare 与 Python 结合,为跨多个平台开发本机应用程序提供了一个有吸引力的框架。
它的 Pythonic 方法简化了开发过程,使其成为初学者和经验丰富的开发人员的绝佳选择。
虽然存在一些限制,但使用 BeeWare 的好处(尤其是对于跨平台开发而言)是显著的。
随着社区的壮大和工具集的演变,BeeWare 有望成为应用程序开发领域更强大的工具。
· END ·
HAPPY LIFE

本文仅供学习交流使用,如有侵权请联系作者删除

