Android平台配置CPU类型
一般勾选armeabi-v7a跟arm64-v8a就好了

- armeabi-v7a 第7代及以上的ARM处理器(ARM32位),市面上大多数手机使用此CPU类型。
- arm64-v8a 第8代、64位ARM处理器(ARM64位),最近两年新发的设备使用此CPU类型,可以兼容使用armeabi-v7a的so库。
- x86 少部分平板使用x86,AS模拟器中选了intel x86时使用x86处理器,以及其它常用三方模拟器通常使用x86
您的应用目前的目标 API 级别为 29,但其目标 API 级别必须最低为 30,这样才能确保应用基于最新 API 而构建
应用配置文件,加 targetSdkVersion:"30"
文档地址:uni-app官网
文档地址:uni-app官网
IOS隐私信息访问的许可描述
Appstore审核要求App在调用如下涉及隐私的API时必须说明调用原因

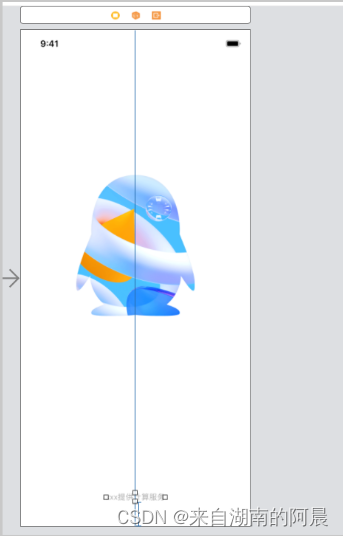
IOS自定义开屏启动界面
官网示例:uni-app官网
直接使用uniapp模板文件(点击下载)中提供的相对常用的 storyboard 模板,可在这个文件的基础上进行自定义图片,已经一些文本内容
应用版本名称跟应用版本号
在ios跟谷歌中上架,版本号需要不停的加一,不然无法上传到市场中
app国际化默认语言设置
一定要在这里设置

let i18nConfig = {
	locale:  uni.getLocale(),
	messages
}
pages.json中设置 tabBar list中的国际化
"tabBar": {
		"height": "50rpx",
		// 配置选中颜色
		"selectedColor": "#42dfbf",
		"color": "#b0b3bf", // 设置为与背景颜色相同
		"backgroundColor": "white", // 设置为透明
		// list 每一项
		"list": [{
				"iconPath": "./static/img/tabbar/new.png",
				"selectedIconPath": "./static/img/tabbar/new_sel.png",
				"pagePath": "pages/message/message",
				"text": "%nav.1%"
			}
		]
	}
安卓跟ios下拉刷新效果
pages.json
{
    "pages": [
        {
        	"path": "pages/index/index",
        	"style": {
        		"navigationBarTitleText": "下拉刷新",
        		"enablePullDownRefresh": true
        	}
        }
    ]
}
index.vue
export default {
	data() {
		return {
			text: '下拉刷新'
		}
	},
	onLoad: function (options) {
        //开始下拉刷新,调用后触发下拉刷新动画,效果与用户手动下拉刷新一致
		uni.startPullDownRefresh();
	},
	onPullDownRefresh() {
       //一秒后停止刷新动画
		setTimeout(function () {
			uni.stopPullDownRefresh();
		}, 1000);
	}
}
iOS 取消底部的空白区域
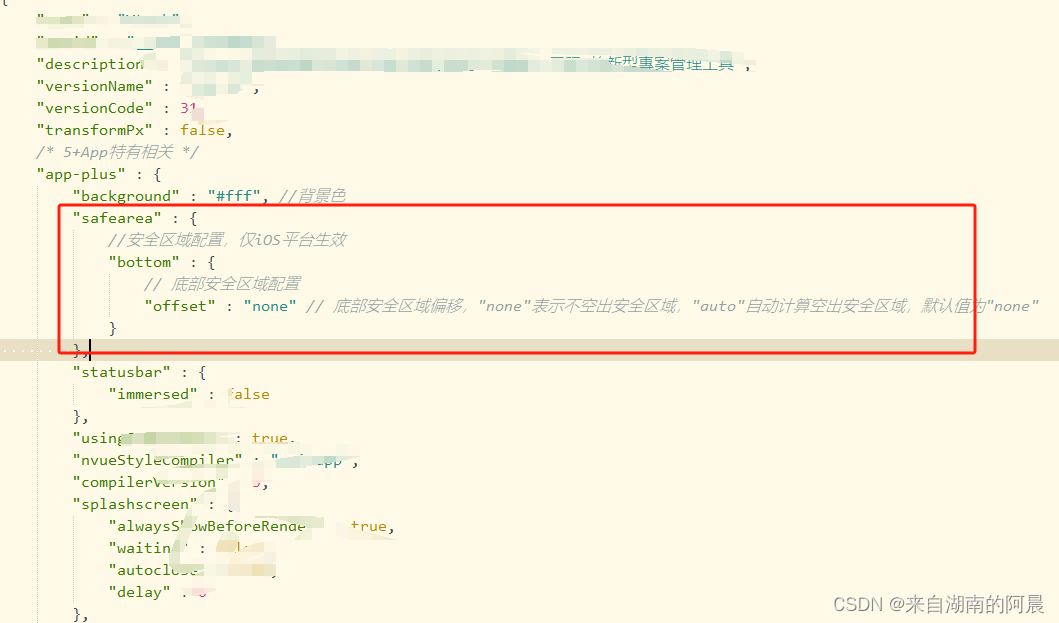
"safearea" : {
            //安全区域配置,仅iOS平台生效
            "bottom" : {
                // 底部安全区域配置
                "offset" : "none" // 底部安全区域偏移,"none"表示不空出安全区域,"auto"自动计算空出安全区域,默认值为"none"
            }
        }
app蓝牙开锁
官网相关文档:uni-app官网
先初始化蓝牙,然后开始搜寻蓝牙,开始搜寻后设置一个延时,超过一定时间取消搜寻 然后提示连接失败。如果找到了对应的设备,获取到设备信息,也关闭蓝牙搜寻。然后正式连接设备,连接成功设置uni.setBLEMTU 蓝牙最大传输单元,避免命令行太长无法传输到设备中。
最后获取蓝牙设备所有服务,然后获取蓝牙设备某个服务中所有特征值,然后就可以写入命令了,一般是要将字符串转为二进制数据,也就是字节数据,我在这个踩了很久,附上我转换成功的代码
function hexStringToArrayBuffer(str) {
				if (!str) {
					return new ArrayBuffer(0);
				}
				var buffer = new ArrayBuffer(str.length);
				let dataView = new DataView(buffer)
				for (let i = 0; i < str.length; i++) {
					// console.log('str.charAt(i).charCodeAt()', str.charAt(i).charCodeAt())
					dataView.setUint8(i, str.charAt(i).charCodeAt()) // 必须是Unicode 编码
				}
				return buffer;
			}

const inputString = `(${state.DeviceID},x,xxx,xxxx,xxxxx)`;
const bytes = hexStringToArrayBuffer(inputString);
完整代码:
uni.openBluetoothAdapter({ //首先初始化蓝牙
							success(res) {
						        console.log('1')
								uni.startBluetoothDevicesDiscovery({ //这里是开启蓝牙搜寻
									success: (res) => {
										console.log('2')
										setTimeout(() => {
											unlockingTimeout.push(setInterval(()=>{
												exceptionPrompt('未搜尋到藍牙鎖,可嘗試重新打開藍牙')
												claerUnlockingTimeout()
												uni.stopBluetoothDevicesDiscovery({ //当找到匹配的蓝牙后就关掉蓝牙搜寻
													success(res) {
													}
												})
											}, 25000))
				                            state.progressSta = true
											drawCircle(item, index)
										}, 100)
										uni.onBluetoothDeviceFound((res) => { //这一步是监听返回的蓝牙设备
										    uni.getBluetoothDevices({
										    	success: res => {
										    		console.log('2.5',res.devices)
										    		res.devices.forEach(device => { //这一步就是去筛选找到的蓝牙中
										    			if (device.name == item.imei) {
										    				uni.stopBluetoothDevicesDiscovery({ //当找到匹配的蓝牙后就关掉蓝牙搜寻
										    					success(res) {
										    					}
										    				})
										    				console.log('3',device.deviceId)
										    				state.DeviceID = device.deviceId
										    				state.deviceName = item.imei
										    				uni.createBLEConnection({ //连接低功耗蓝牙设备
										    					deviceId: state.DeviceID, //传入刚刚获取的uuid
										    					success(res) {
										    						console.log('4',state.DeviceID)
										    						setTimeout(function() {
										    							uni.setBLEMTU({
										    								deviceId: state.DeviceID,
										    								mtu: 300,
										    								success(res) {
										    									console.log('设置成功', res)
										    								},
										    								fail(err) {
										    									console.log('设置失败', err)
										    								}
										    							})
										    						}, 300)
										    						setTimeout(function() {
										    							uni.getBLEDeviceServices({ //获取蓝牙设备所有服务
										    								deviceId: state.DeviceID,
										    								success(res) {
										    									console.log('5',res)
										    									if (uni.getSystemInfoSync().platform == "ios") {
										    										state.servicesList = res.services[0].uuid
										    									}else{
										    										state.servicesList = res.services[2].uuid
										    									}
										    									uni.getBLEDeviceCharacteristics({ //获取蓝牙设备某个服务中所有特征值
										    										deviceId: state.DeviceID,
										    										serviceId: state.servicesList,
										    										success(res) {
										    											console.log('6')
										    											state.characteristicList = res.characteristics
										    											uni.notifyBLECharacteristicValueChange({
										    												state: true,
										    												deviceId: state.DeviceID,
										    												serviceId: state.servicesList,
										    												characteristicId: state.characteristicList[2].uuid,
										    												success(res) {
										    													console.log('连接成功', res)
										    													uni.onBLECharacteristicValueChange((res) => {
										    														console.log(`characteristic ${JSON.stringify(res)} has changed`)
										    														let hhh = ab2hex(res.value)
										    														console.log("监听成功", hexCharCodeToStr(hhh))
										    													})
										    													setTimeout(() => {
										    														sendInstruction(item)
										    													}, 500)
										    												},
										    												fail(res) {
										    													exceptionPrompt()
										    													console.log(JSON.stringify(res))
										    												}
										    											})
										    										},
										    										fail(res) {
										    											if (uni.getSystemInfoSync().platform == "ios") {
										    												if(res.code == '10012'){
										    													state.defeated = false
										    													state.progressSta = false
										    													state.progress = 0
										    													state.lockhead = true
										    													state.textSta = instance.proxy.$t('bluetooth.8')
										    												    messagePopup.value.showMessage('warn', '未找到設備,請重試')
										    												}
										    											}
										    											console.log(JSON.stringify(res))
										    										}
										    									})
										    								},
										    								fail(res) {
										    									exceptionPrompt()
										    									console.log(JSON.stringify(res))
										    								}
										    							})
										    						}, 1500)
										    				    },
										    					fail(res) {
										    						if(res.code == '10012'){
										    							state.defeated = false
										    							state.progressSta = false
										    							state.progress = 0
										    							state.lockhead = true
										    							state.textSta = instance.proxy.$t('bluetooth.8')
										    						    messagePopup.value.showMessage('warn', '連接超時,請重試')
										    						}
										    						console.log(res)
										    					}
										    				})
										    			}
										    		})
										    	},
										    	fail: e => {
										    		console.log(e)
										    	}
										    });
										})
									}
								})
							},
							fail(res) {
								if (res.code == 10001) {
									messagePopup.value.showMessage('warn', "藍牙是否打開")
								} else {
									messagePopup.value.showMessage('warn', res.errMsg)
								}
							}
						})
其他蓝牙开锁文章:uni-app蓝牙开锁篇 - DCloud问答
uni-app使用蓝牙 - 伟衙内 - 博客园 (cnblogs.com)
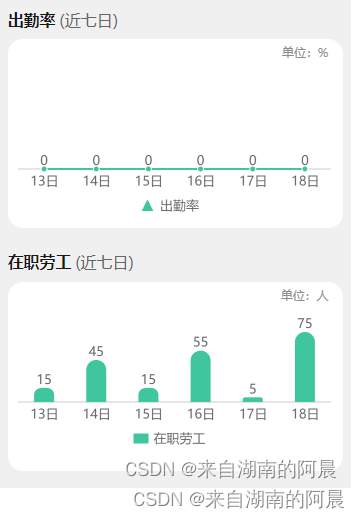
app中绘制图表
uChar插件文档地址:uCharts官网 - 秋云uCharts跨平台图表库
app实现国际化功能
使用uni-hello-i18n,官方有示例
示例地址:hello-i18n 示例工程 - DCloud 插件市场
官方文档:uni-app官网
补充,国际化的繁体、简体跟英文一定要设置为 zh-Hant、zh-Hans、en 因为uniapp的内置插件会根据这个也进行国际化的切换
import en from './en.json'
import zhHans from './zh-Hans.json'
import zhHant from './zh-Hant.json'
export default {
	en,
	'zh-Hans': zhHans,
	'zh-Hant': zhHant
}
app二维码
插件地址:uQRCode 全端二维码生成插件 支持nvue 支持nodejs服务端 - DCloud 插件市场
<uqrcode ref="uqrcode" canvas-id="qrcode" :value="qrcodeData" :options="{ margin: 10 }"></uqrcode>


<script>
	import {
		reactive,
		ref,
		toRefs,
		getCurrentInstance,
		onMounted
	} from 'vue';

	export default {
		setup() {
			let qrcodeData = ref('')
			let uqrcode = ref(null)

			function saveQRCode() {
				uqrcode.value.save({
					success: () => {
						messagePopup.value.showMessage('success', instance.proxy.$t('otherMy.9'))
					}
				})
			}
			return {
				...toRefs(state),
				qrcodeData,
				saveQRCode,
				uqrcode
			};
		}
	};
</script>
未完待续... ...









![[Python学习篇] Python创建项目](https://img-blog.csdnimg.cn/direct/02e2e4270dd94da18937f6b4d0746b16.png)