记Kubernetes(k8s)初始化报错:"Error getting node" err="node \"k8s-master\" not found"
- 1、报错详情
- 2、问题排查
- 3、尝试问题解决
|
💖The Begin💖点点关注,收藏不迷路💖
|
1、报错详情
"Error getting node" err="node \"k8s-master\" not found"
查看日志报错:
[root@k8s-master ~]# journalctl -u kubelet
Apr 01 21:39:47 k8s-master kubelet[9638]: E0401 21:39:47.267736    9638 kubelet.go:2419] "Error getting node" err="node \"k8s-master\" not found"
Apr 01 21:39:47 k8s-master kubelet[9638]: E0401 21:39:47.368592    9638 kubelet.go:2419] "Error getting node" err="node \"k8s-master\" not found"
Apr 01 21:39:47 k8s-master kubelet[9638]: E0401 21:39:47.469741    9638 kubelet.go:2419] "Error getting node" err="node \"k8s-master\" not found"
Apr 01 21:39:47 k8s-master kubelet[9638]: E0401 21:39:47.571557    9638 kubelet.go:2419] "Error getting node" err="node \"k8s-master\" not found"
Apr 01 21:39:47 k8s-master kubelet[9638]: E0401 21:39:47.671768    9638 kubelet.go:2419] "Error getting node" err="node \"k8s-master\" not found"
Apr 01 21:39:47 k8s-master kubelet[9638]: E0401 21:39:47.772126    9638 kubelet.go:2419] "Error getting node" err="node \"k8s-master\" not found"
Apr 01 21:39:47 k8s-master kubelet[9638]: E0401 21:39:47.872910    9638 kubelet.go:2419] "Error getting node" err="node \"k8s-master\" not found"
Apr 01 21:39:47 k8s-master kubelet[9638]: E0401 21:39:47.973850    9638 kubelet.go:2419] "Error getting node" err="node \"k8s-master\" not found"
2、问题排查
1、操作系统centos7.9,不知道是不是centos的原因,用redhat安装没报这个错。
[root@k8s-master ~]# cat /etc/centos-release
CentOS Linux release 7.9.2009 (Core)
[root@k8s-master ~]#
2、docker 版本检查
[root@k8s-master ~]# docker -v
Docker version 24.0.5, build ced0996
[root@k8s-master ~]#
3、kubelet 版本检查
[root@k8s-master ~]# kubelet --version
Kubernetes v1.24.1
[root@k8s-master ~]#
查找资料:
Kubernetes在v1.24版本之后正式放弃了对Docker的支持。这意味着Kubernetes的官方支持不再包括Docker作为容器运行时。相反,官方现在推荐使用Containerd或CRI-O作为容器运行时。
3、尝试问题解决
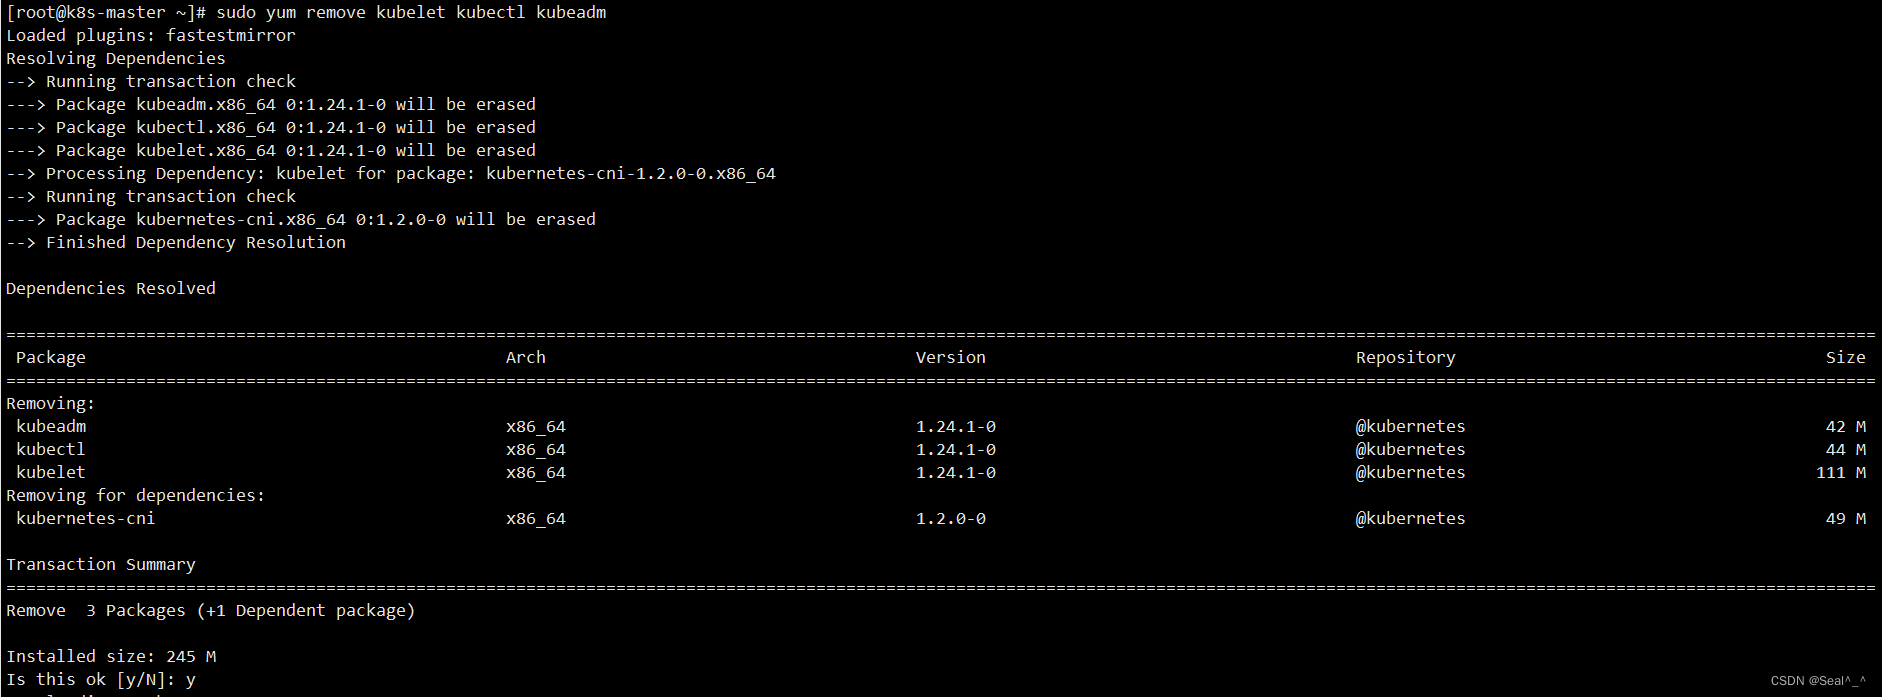
1、降级到Kubernetes的v1.23.6版本。需要卸载所有当前安装的1.24版本的kubelet、kubectl和kubeadm。
sudo yum remove kubelet kubectl kubeadm
2、下载并安装Kubernetes v1.23.6版本的kubelet、kubectl和kubeadm。
sudo yum install -y kubelet-1.23.6 kubeadm-1.23.6 kubectl-1.23.6 --disableexcludes=kubernetes
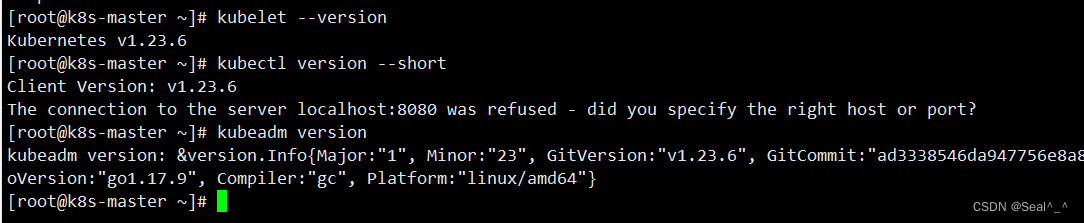
3、验证安装是否成功,可以运行以下命令:
kubelet --version
kubectl version --short
kubeadm version
4、重置本地机器上的Kubernetes集群状态
重置本地机器上的Kubernetes集群状态。将本地机器上的Kubernetes相关配置、数据和状态恢复到初始状态。
删除etcd中的所有数据。
删除所有由kubeadm创建的配置文件和系统单元文件。
恢复iptables和ipvs等网络配置。
删除CNI插件配置。
kubeadm reset
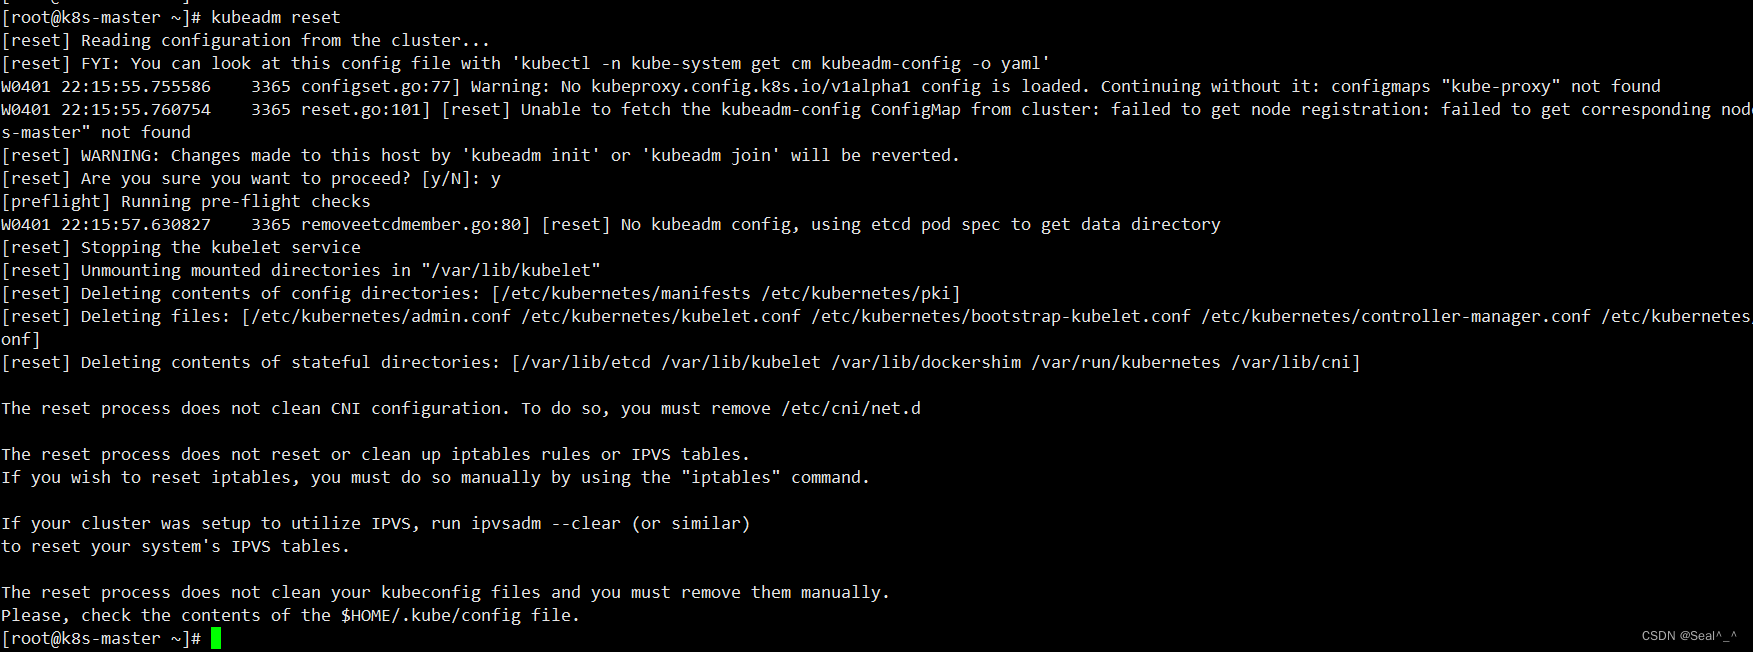
这个命令通常在需要清理Kubernetes集群环境、重新初始化集群或者彻底卸载Kubernetes时使用。执行kubeadm reset命令后,可以重新初始化一个全新的Kubernetes集群。
要不会报错:
[init] Using Kubernetes version: v1.23.6
[preflight] Running pre-flight checks
error execution phase preflight: [preflight] Some fatal errors occurred:
	[ERROR Port-6443]: Port 6443 is in use
	[ERROR Port-10259]: Port 10259 is in use
	[ERROR Port-10257]: Port 10257 is in use
	[ERROR FileAvailable--etc-kubernetes-manifests-kube-apiserver.yaml]: /etc/kubernetes/manifests/kube-apiserver.yaml already exists
	[ERROR FileAvailable--etc-kubernetes-manifests-kube-controller-manager.yaml]: /etc/kubernetes/manifests/kube-controller-manager.yaml already exists
	[ERROR FileAvailable--etc-kubernetes-manifests-kube-scheduler.yaml]: /etc/kubernetes/manifests/kube-scheduler.yaml already exists
	[ERROR FileAvailable--etc-kubernetes-manifests-etcd.yaml]: /etc/kubernetes/manifests/etcd.yaml already exists
	[ERROR Port-10250]: Port 10250 is in use
	[ERROR Port-2379]: Port 2379 is in use
	[ERROR Port-2380]: Port 2380 is in use
	[ERROR DirAvailable--var-lib-etcd]: /var/lib/etcd is not empty
[preflight] If you know what you are doing, you can make a check non-fatal with `--ignore-preflight-errors=...`
To see the stack trace of this error execute with --v=5 or higher
5、再次初始化,指定Kubernetes的版本为v1.23.6。重新初始化一个全新的Kubernetes集群。
kubeadm init \
  --apiserver-advertise-address=192.168.234.20 \
  --control-plane-endpoint=k8s-master \
  --image-repository registry.aliyuncs.com/google_containers \
  --kubernetes-version v1.23.6 \
  --service-cidr=10.11.0.0/16 \
  --pod-network-cidr=172.30.0.0/16 \
  --cri-socket unix:///var/run/cri-dockerd.sock

————————————问题解决,初始化成功——————————
[root@k8s-master ~]# kubeadm init \
>   --apiserver-advertise-address=192.168.234.20 \
>   --control-plane-endpoint=k8s-master \
>   --image-repository registry.aliyuncs.com/google_containers \
>   --kubernetes-version v1.23.6 \
>   --service-cidr=10.11.0.0/16 \
>   --pod-network-cidr=172.30.0.0/16 \
>   --cri-socket unix:///var/run/cri-dockerd.sock
[init] Using Kubernetes version: v1.23.6
[preflight] Running pre-flight checks
[preflight] Pulling images required for setting up a Kubernetes cluster
[preflight] This might take a minute or two, depending on the speed of your internet connection
[preflight] You can also perform this action in beforehand using 'kubeadm config images pull'
[certs] Using certificateDir folder "/etc/kubernetes/pki"
[certs] Generating "ca" certificate and key
[certs] Generating "apiserver" certificate and key
[certs] apiserver serving cert is signed for DNS names [k8s-master kubernetes kubernetes.default kubernetes.default.svc kubernetes.default.svc.cluster.local] and IPs [10.11.0.1 192.168.234.20]
[certs] Generating "apiserver-kubelet-client" certificate and key
[certs] Generating "front-proxy-ca" certificate and key
[certs] Generating "front-proxy-client" certificate and key
[certs] Generating "etcd/ca" certificate and key
[certs] Generating "etcd/server" certificate and key
[certs] etcd/server serving cert is signed for DNS names [k8s-master localhost] and IPs [192.168.234.20 127.0.0.1 ::1]
[certs] Generating "etcd/peer" certificate and key
[certs] etcd/peer serving cert is signed for DNS names [k8s-master localhost] and IPs [192.168.234.20 127.0.0.1 ::1]
[certs] Generating "etcd/healthcheck-client" certificate and key
[certs] Generating "apiserver-etcd-client" certificate and key
[certs] Generating "sa" key and public key
[kubeconfig] Using kubeconfig folder "/etc/kubernetes"
[kubeconfig] Writing "admin.conf" kubeconfig file
[kubeconfig] Writing "kubelet.conf" kubeconfig file
[kubeconfig] Writing "controller-manager.conf" kubeconfig file
[kubeconfig] Writing "scheduler.conf" kubeconfig file
[kubelet-start] Writing kubelet environment file with flags to file "/var/lib/kubelet/kubeadm-flags.env"
[kubelet-start] Writing kubelet configuration to file "/var/lib/kubelet/config.yaml"
[kubelet-start] Starting the kubelet
[control-plane] Using manifest folder "/etc/kubernetes/manifests"
[control-plane] Creating static Pod manifest for "kube-apiserver"
[control-plane] Creating static Pod manifest for "kube-controller-manager"
[control-plane] Creating static Pod manifest for "kube-scheduler"
[etcd] Creating static Pod manifest for local etcd in "/etc/kubernetes/manifests"
[wait-control-plane] Waiting for the kubelet to boot up the control plane as static Pods from directory "/etc/kubernetes/manifests". This can take up to 4m0s
[apiclient] All control plane components are healthy after 5.003345 seconds
[upload-config] Storing the configuration used in ConfigMap "kubeadm-config" in the "kube-system" Namespace
[kubelet] Creating a ConfigMap "kubelet-config-1.23" in namespace kube-system with the configuration for the kubelets in the cluster
NOTE: The "kubelet-config-1.23" naming of the kubelet ConfigMap is deprecated. Once the UnversionedKubeletConfigMap feature gate graduates to Beta the default name will become just "kubelet-config". Kubeadm upgrade will handle this transition transparently.
[upload-certs] Skipping phase. Please see --upload-certs
[mark-control-plane] Marking the node k8s-master as control-plane by adding the labels: [node-role.kubernetes.io/master(deprecated) node-role.kubernetes.io/control-plane node.kubernetes.io/exclude-from-external-load-balancers]
[mark-control-plane] Marking the node k8s-master as control-plane by adding the taints [node-role.kubernetes.io/master:NoSchedule]
[bootstrap-token] Using token: lad5yi.ib6gterchvmkw2xd
[bootstrap-token] Configuring bootstrap tokens, cluster-info ConfigMap, RBAC Roles
[bootstrap-token] configured RBAC rules to allow Node Bootstrap tokens to get nodes
[bootstrap-token] configured RBAC rules to allow Node Bootstrap tokens to post CSRs in order for nodes to get long term certificate credentials
[bootstrap-token] configured RBAC rules to allow the csrapprover controller automatically approve CSRs from a Node Bootstrap Token
[bootstrap-token] configured RBAC rules to allow certificate rotation for all node client certificates in the cluster
[bootstrap-token] Creating the "cluster-info" ConfigMap in the "kube-public" namespace
[kubelet-finalize] Updating "/etc/kubernetes/kubelet.conf" to point to a rotatable kubelet client certificate and key
[addons] Applied essential addon: CoreDNS
[addons] Applied essential addon: kube-proxy

Your Kubernetes control-plane has initialized successfully!

To start using your cluster, you need to run the following as a regular user:

  mkdir -p $HOME/.kube
  sudo cp -i /etc/kubernetes/admin.conf $HOME/.kube/config
  sudo chown $(id -u):$(id -g) $HOME/.kube/config

Alternatively, if you are the root user, you can run:

  export KUBECONFIG=/etc/kubernetes/admin.conf

You should now deploy a pod network to the cluster.
Run "kubectl apply -f [podnetwork].yaml" with one of the options listed at:
  https://kubernetes.io/docs/concepts/cluster-administration/addons/

You can now join any number of control-plane nodes by copying certificate authorities
and service account keys on each node and then running the following as root:

  kubeadm join k8s-master:6443 --token lad5yi.ib6gterchvmkw2xd \
	--discovery-token-ca-cert-hash sha256:eb567a446cd6a0d79da694f4ab23b5c7bf2be4df86f4aecfadef07716fbabd2b \
	--control-plane

Then you can join any number of worker nodes by running the following on each as root:

kubeadm join k8s-master:6443 --token lad5yi.ib6gterchvmkw2xd \
	--discovery-token-ca-cert-hash sha256:eb567a446cd6a0d79da694f4ab23b5c7bf2be4df86f4aecfadef07716fbabd2b
[root@k8s-master ~]#

|
💖The End💖点点关注,收藏不迷路💖
|